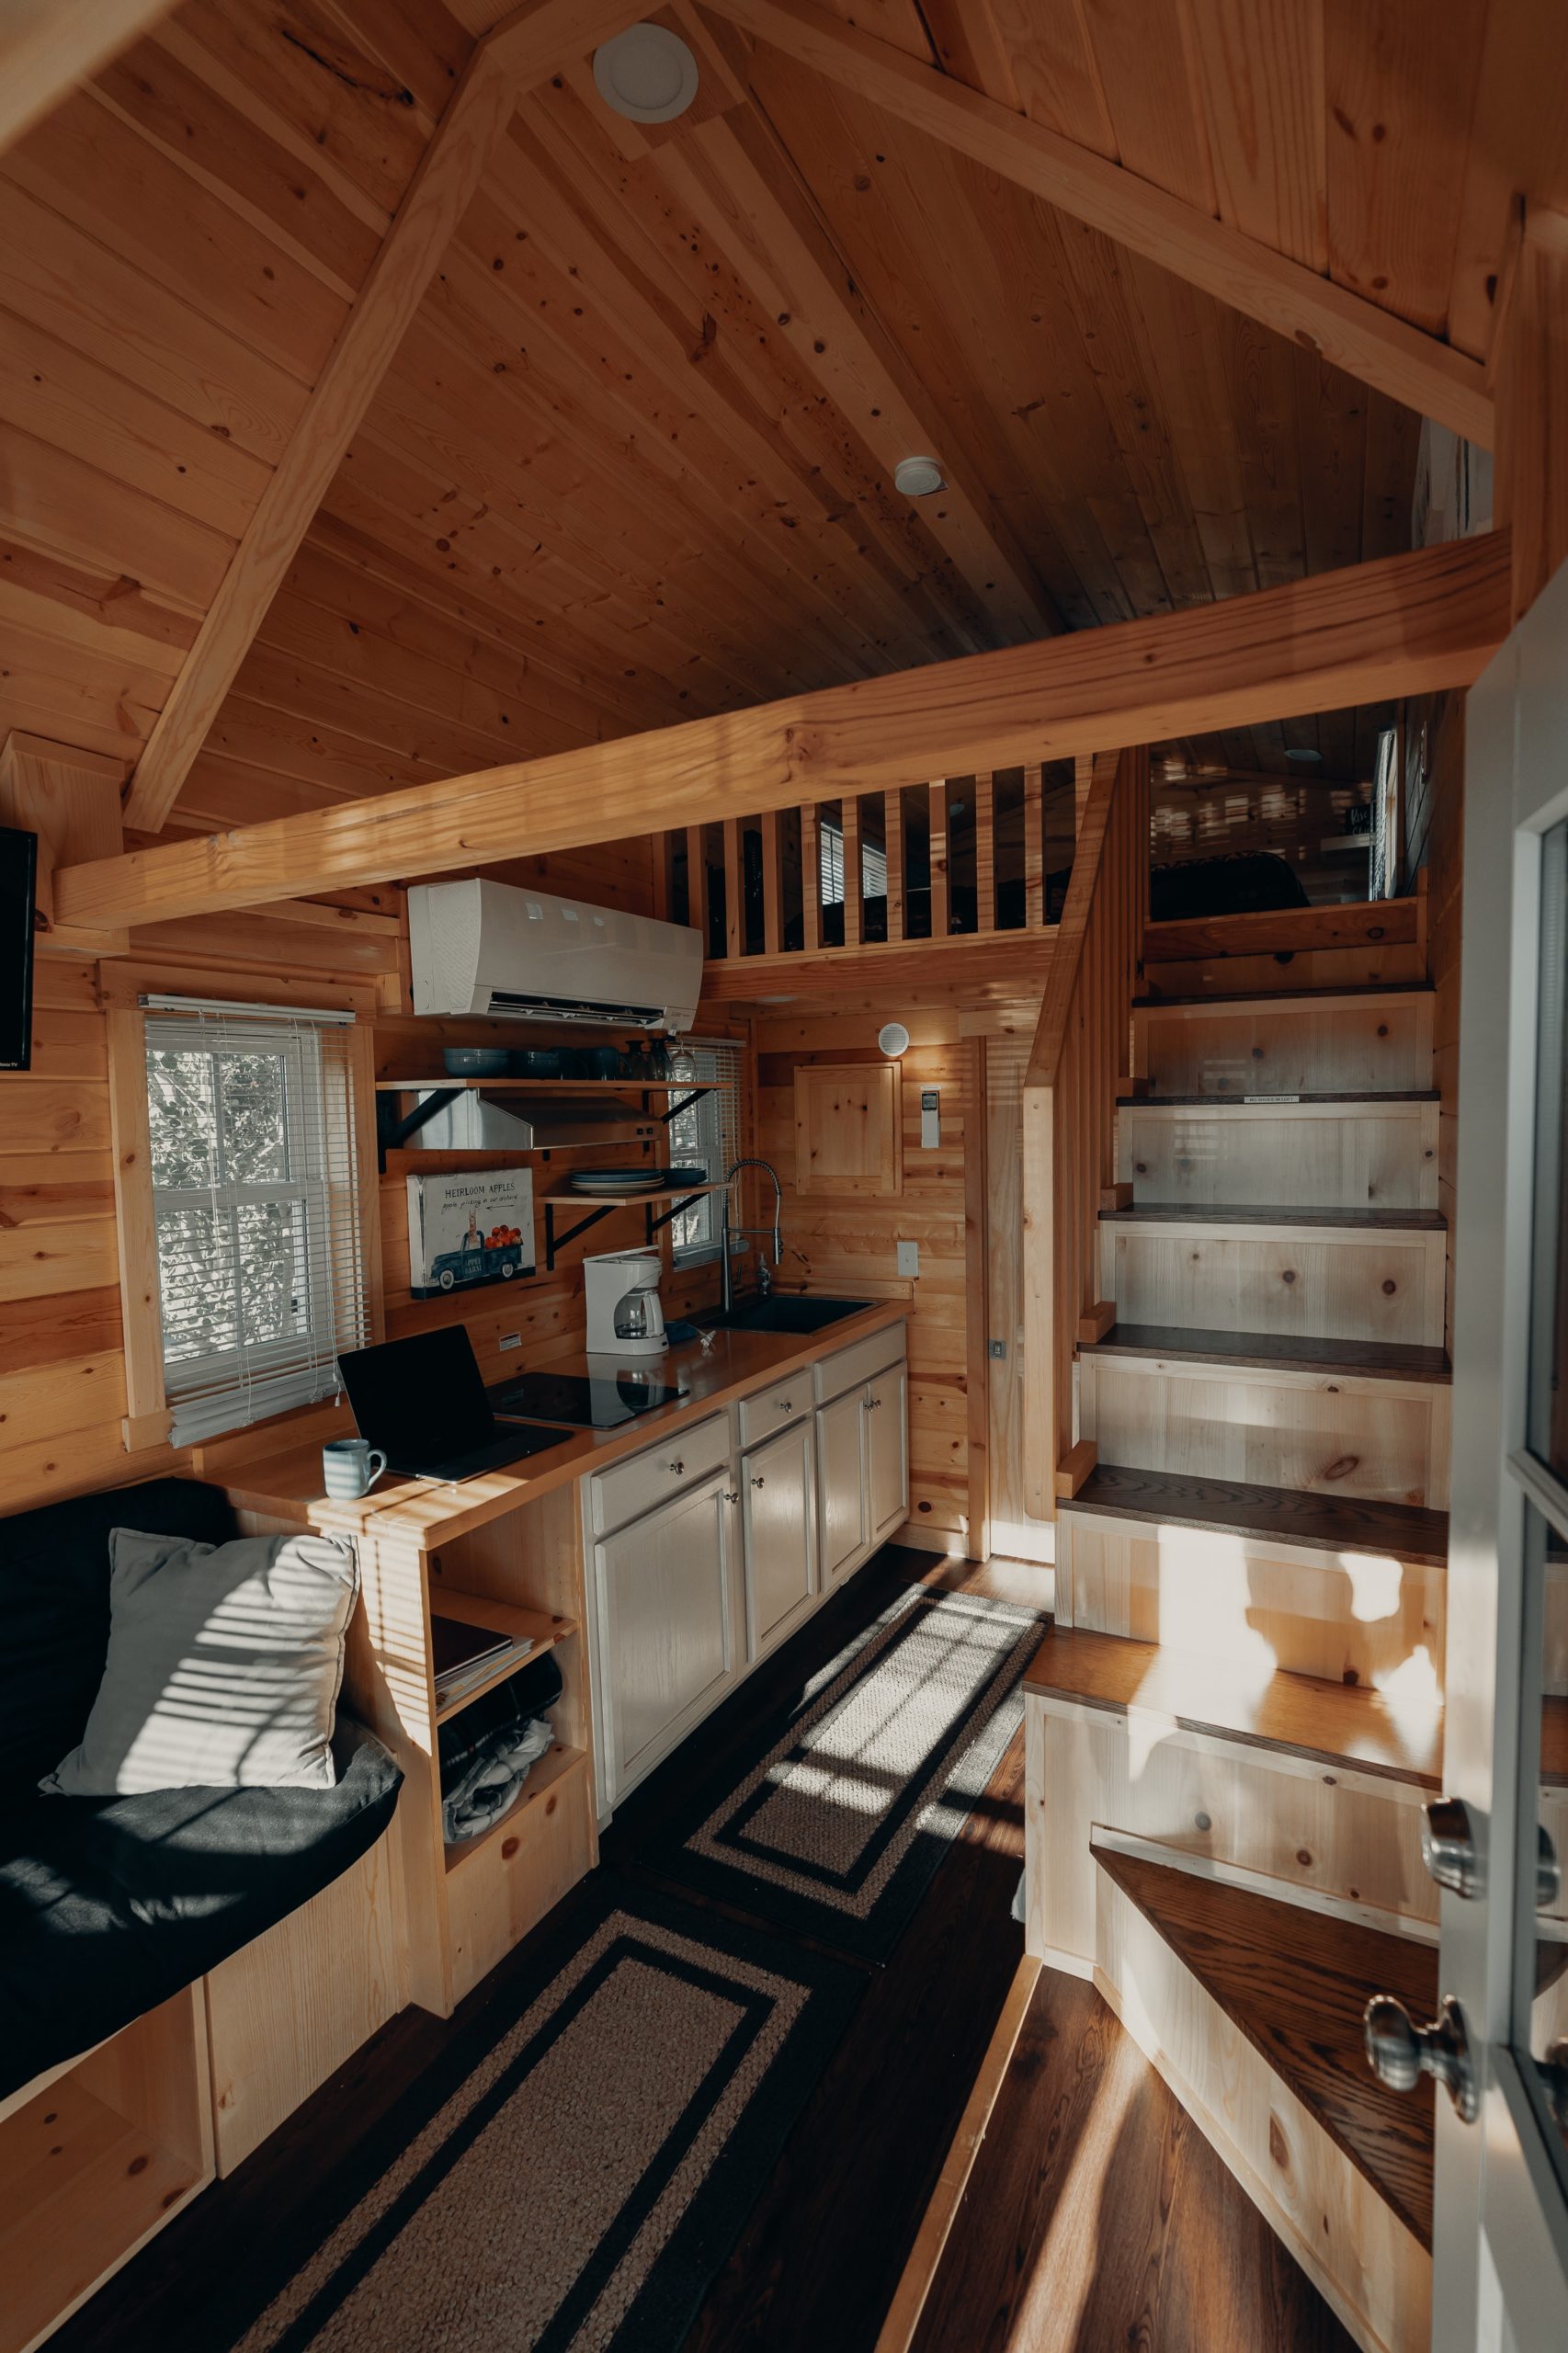
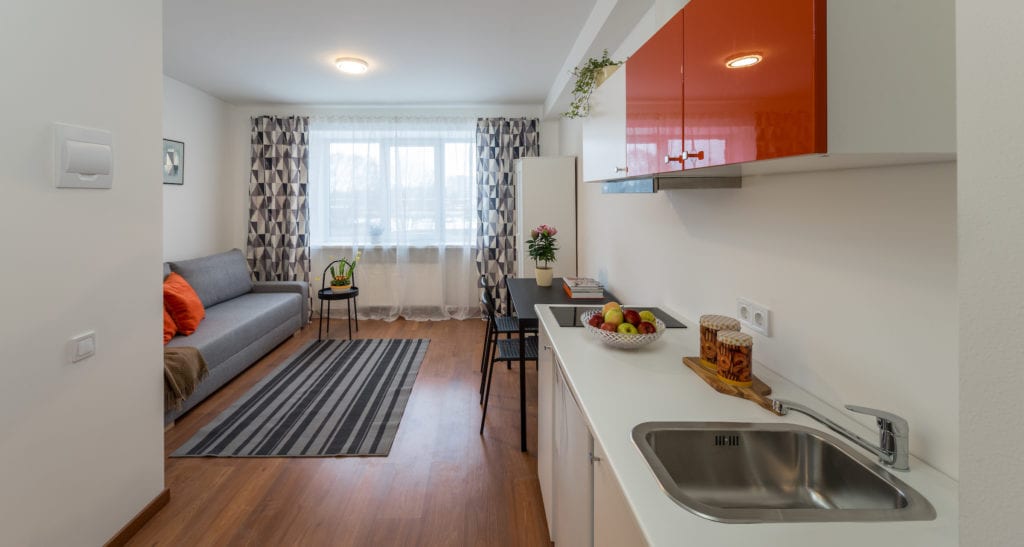
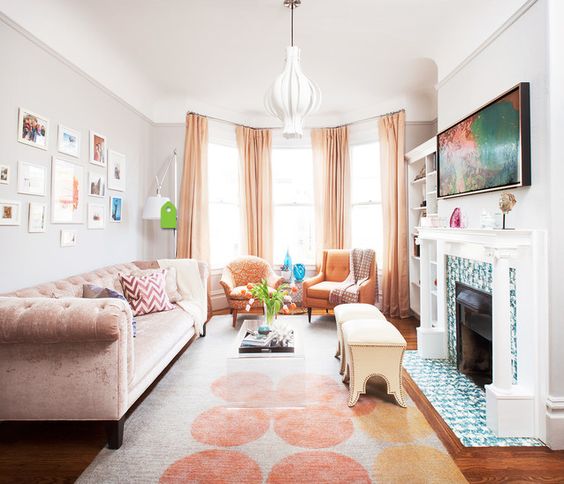
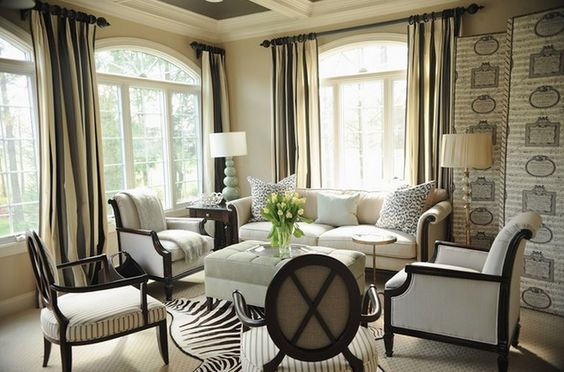
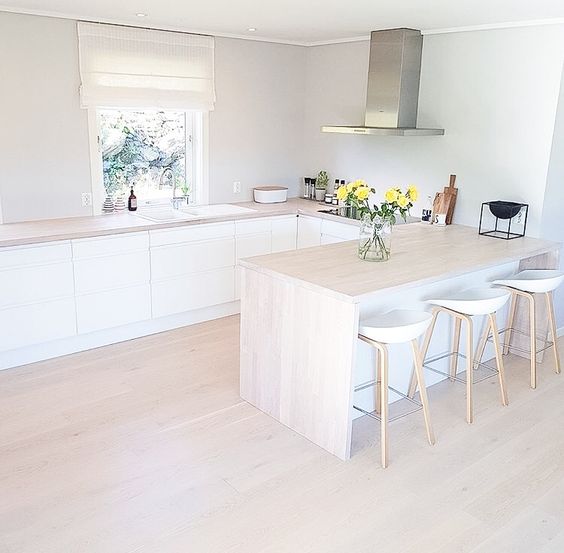
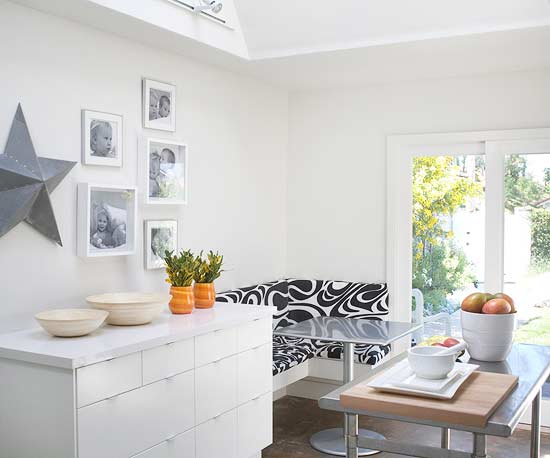
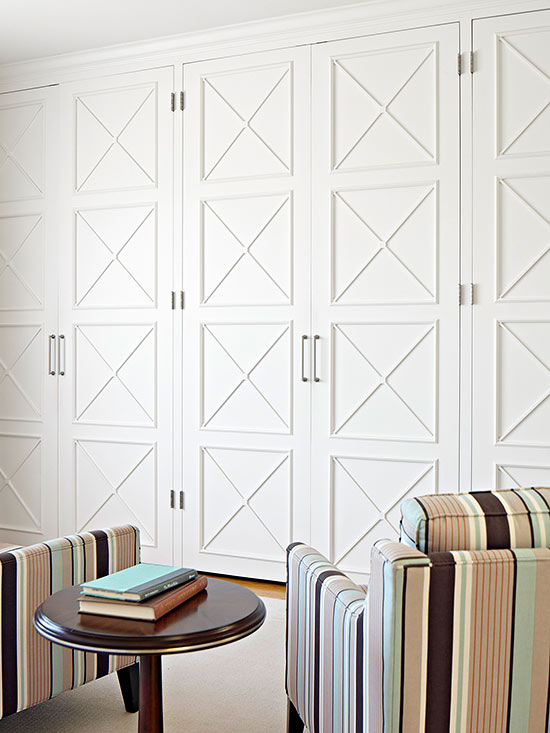
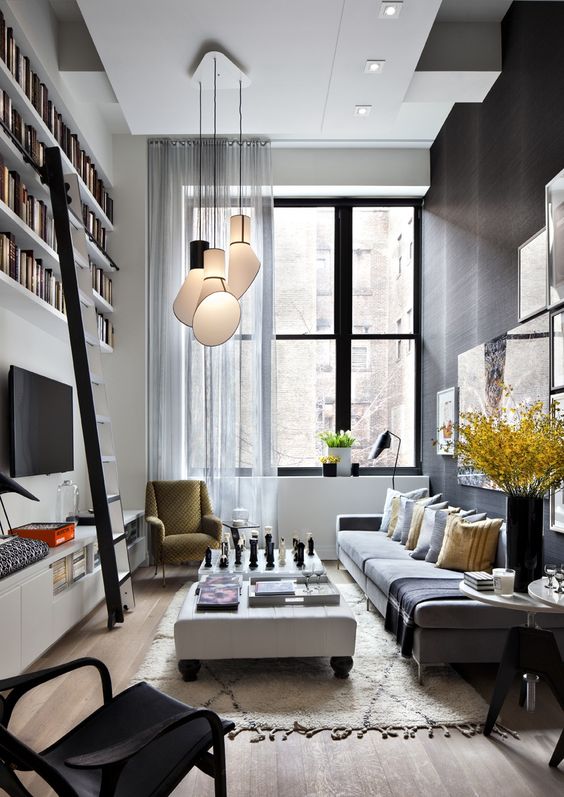
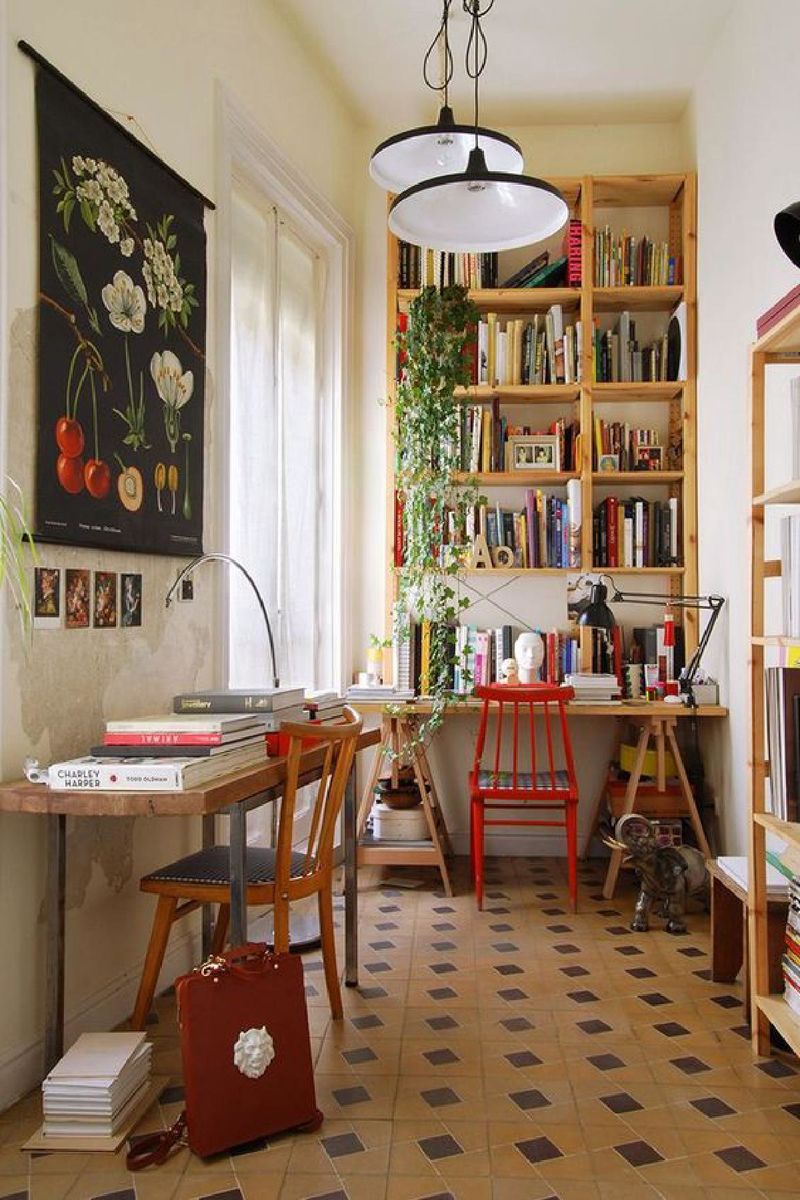
These small house decor ideas will spark smart property owner imaginations
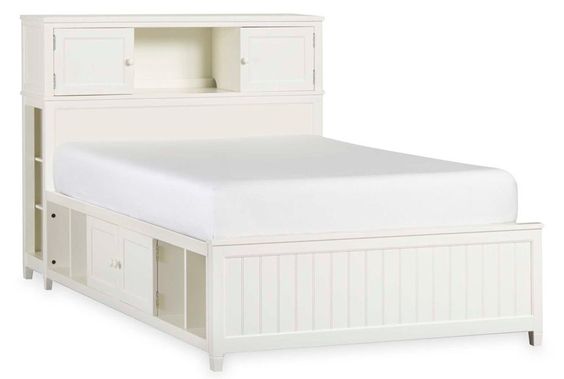
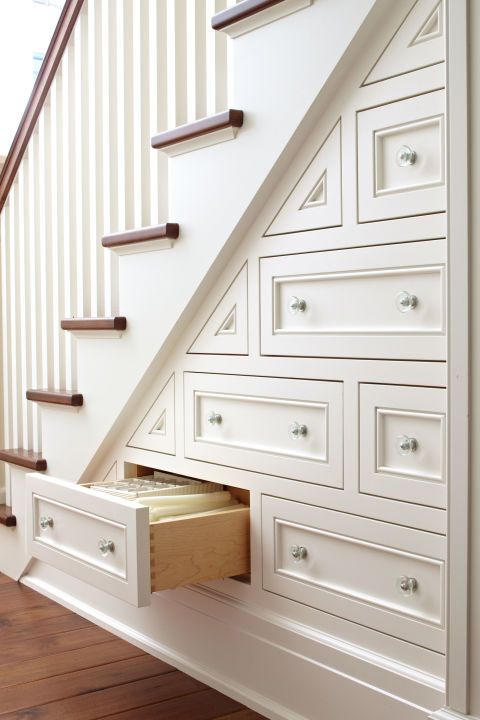
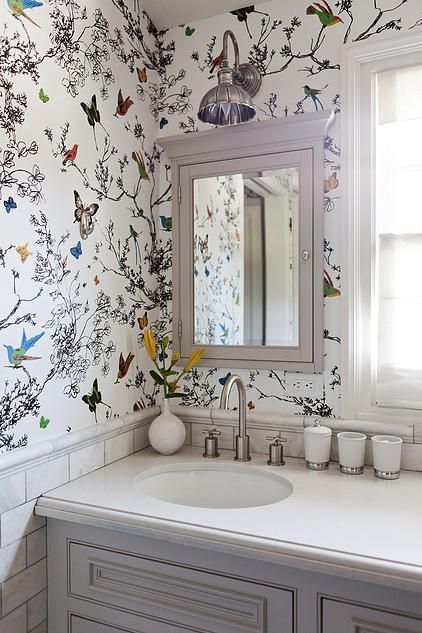
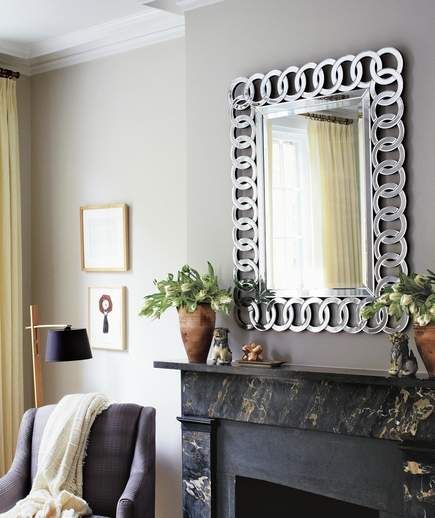
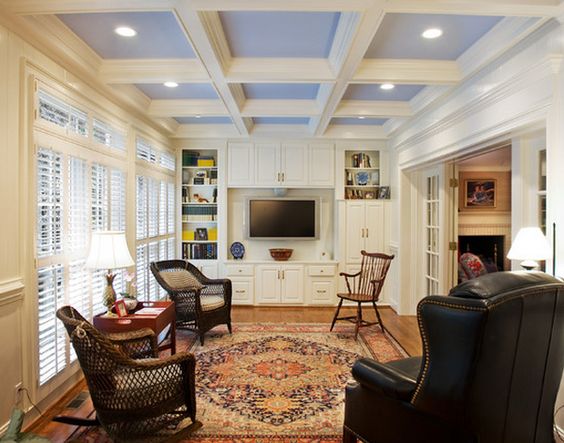
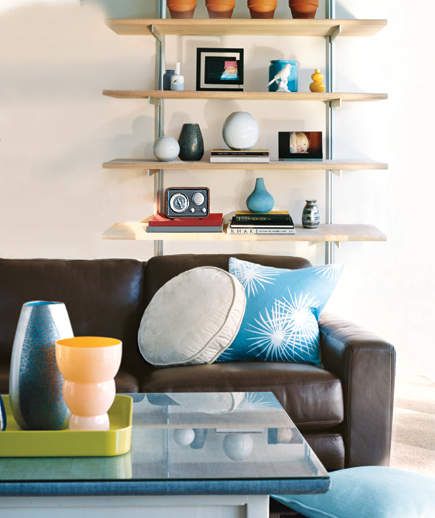
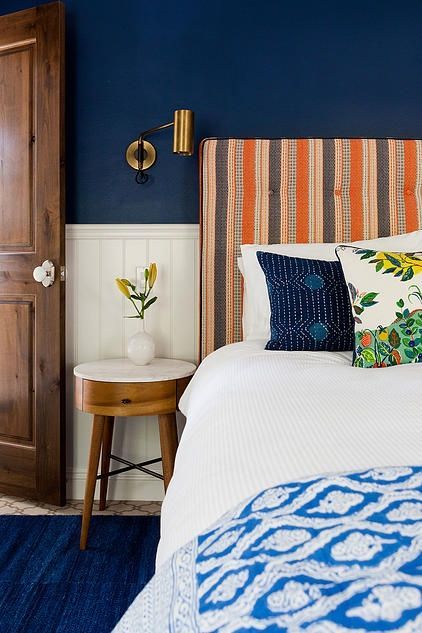
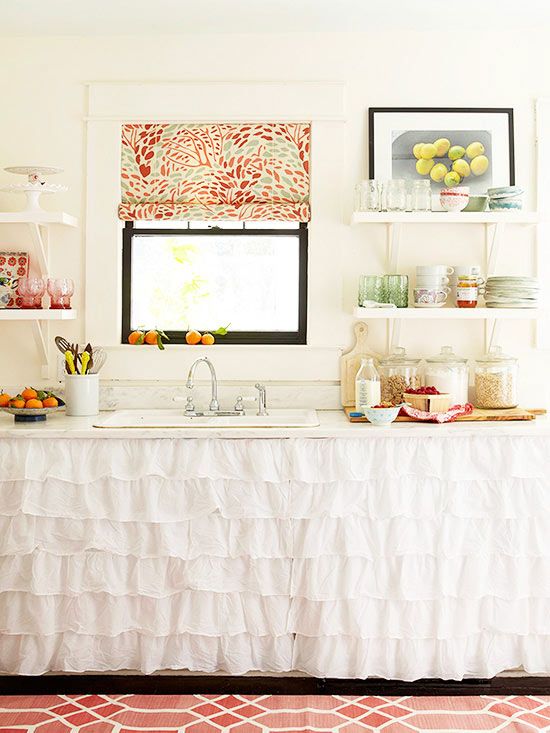
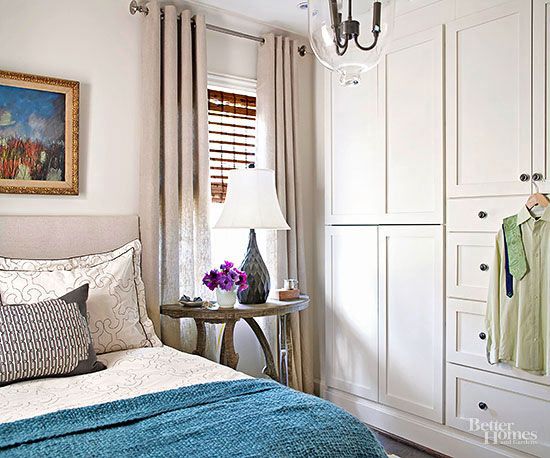
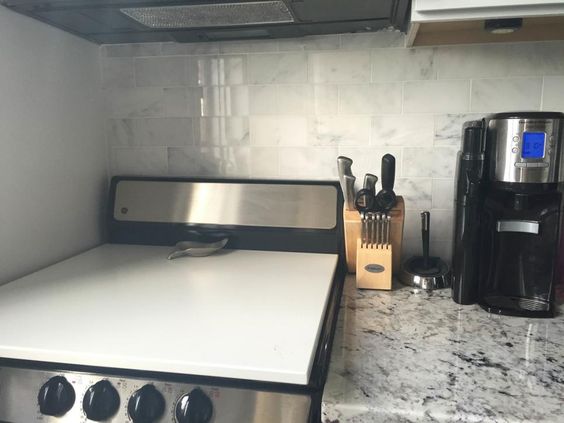
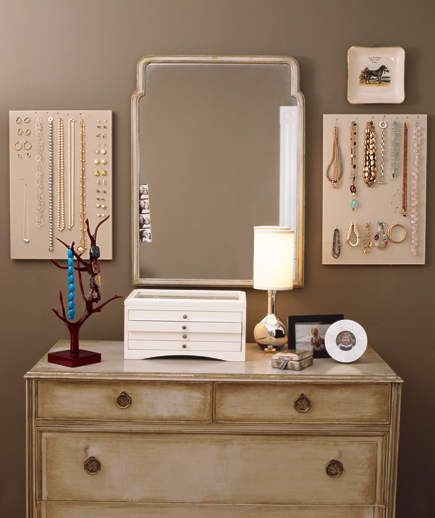
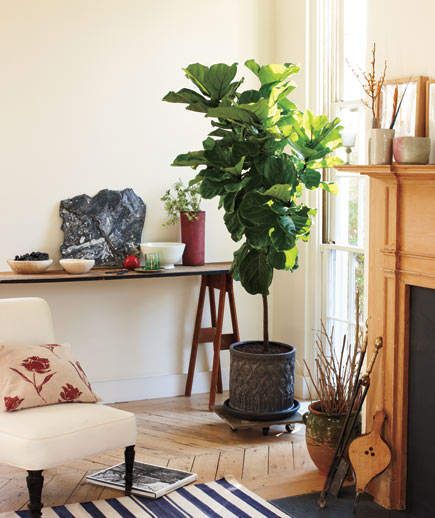
1 00:00:05,460 --> 00:00:08,740 Finding more than 20 small house decor ideas is easy. 2 00:00:08,740 --> 00:00:10,780 The turning point is usually your own preference 3 00:00:10,780 --> 00:00:12,660 to jumble in everything to fit the limited 4 00:00:12,660 --> 00:00:14,140 space. 5 00:00:14,140 --> 00:00:16,280 Instead of having an impression of a bigger space, 6 00:00:16,280 --> 00:00:18,280 you will end up with a total messed 7 00:00:18,280 --> 00:00:19,539 up area 8 00:00:19,540 --> 00:00:23,080 and this priority of good to best decorating ideas 9 00:00:23,080 --> 00:00:25,080 might help you out. 10 00:00:25,620 --> 00:00:29,180 This is 20 Small House Decor Ideas by Allena Rosa. 11 00:00:31,820 --> 00:00:33,240 20. 12 00:00:33,240 --> 00:00:34,900 Set Some Green Plants 13 00:00:34,900 --> 00:00:37,380 Easiest trick you could do is by putting a 14 00:00:37,380 --> 00:00:39,140 green plant in the room. 15 00:00:39,140 --> 00:00:41,300 Probably the reason for your cramped space 16 00:00:41,300 --> 00:00:43,170 is the lack of natural elements. 17 00:00:43,170 --> 00:00:45,580 The most common place for a plant is 18 00:00:45,580 --> 00:00:46,760 right on the floor. 19 00:00:46,760 --> 00:00:48,500 Install some wheels on a board 20 00:00:48,500 --> 00:00:49,880 to serve as the bottom. 21 00:00:49,880 --> 00:00:51,780 During daily cleaning, you can always put 22 00:00:51,780 --> 00:00:53,920 it away and vacuum the floor. 23 00:00:53,920 --> 00:00:56,140 Hanging plants are also adorable. 24 00:00:56,140 --> 00:00:58,520 It could add the room height, but be careful 25 00:00:58,520 --> 00:01:00,520 with the falling leaves. 26 00:01:00,660 --> 00:01:02,090 19. 27 00:01:02,090 --> 00:01:03,660 Show Off Your Collection 28 00:01:03,660 --> 00:01:05,920 Small jewelries surprisingly take quite a 29 00:01:05,920 --> 00:01:08,259 lot space inside the drawer. 30 00:01:08,260 --> 00:01:10,180 It even gives you headache when some items 31 00:01:10,180 --> 00:01:11,630 are lost or tangled. 32 00:01:11,630 --> 00:01:14,280 Cut your suffer by managing the precious collection 33 00:01:14,280 --> 00:01:15,240 on the wall. 34 00:01:15,240 --> 00:01:17,980 You can use peg board for instant application 35 00:01:17,980 --> 00:01:19,980 or make your own DIY project. 36 00:01:20,480 --> 00:01:22,900 The idea is opening some space up in the drawer 37 00:01:22,900 --> 00:01:25,120 to store more fragile items and give your 38 00:01:25,120 --> 00:01:28,470 collections a proper place for display. 39 00:01:28,470 --> 00:01:31,020 In a rush, you will be thankful for this arrangement. 40 00:01:32,060 --> 00:01:33,200 18. 41 00:01:33,900 --> 00:01:35,880 Some small rooms have literally more limited 42 00:01:35,880 --> 00:01:37,390 area than the others. 43 00:01:37,390 --> 00:01:39,680 However, it usually doesn’t stop guests 44 00:01:39,680 --> 00:01:41,300 from stopping by 45 00:01:41,300 --> 00:01:42,360 That is when it hits you: 46 00:01:42,360 --> 00:01:44,360 there should be some places cozy enough 47 00:01:44,360 --> 00:01:45,160 for afternoon tea 48 00:01:45,160 --> 00:01:47,310 and comfortable for work. 49 00:01:47,310 --> 00:01:50,220 When main heavy desk will gobble up all the spaces, 50 00:01:50,220 --> 00:01:52,780 you can choose shelf desk instead. 51 00:01:52,780 --> 00:01:55,120 Pick a medium table from flea market 52 00:01:55,120 --> 00:01:56,440 and mount it on the wall. 53 00:01:56,440 --> 00:01:59,580 Provide backless chairs to serve your guest’s tea 54 00:02:01,100 --> 00:02:02,400 17. 55 00:02:02,840 --> 00:02:04,020 Apply Beige Tone 56 00:02:04,440 --> 00:02:06,420 Another simple eye trick requires one tone 57 00:02:06,420 --> 00:02:09,960 furniture; sofa, carpet, cushion 58 00:02:09,960 --> 00:02:11,960 and the standing lamp decoration. 59 00:02:11,980 --> 00:02:15,480 The main focus is playing with reflection and shadows. 60 00:02:15,480 --> 00:02:18,040 Make sure the room you are working with is well-lit. 61 00:02:18,040 --> 00:02:20,220 Natural windows are preferable over the 62 00:02:20,220 --> 00:02:21,240 electrical lighting. 63 00:02:21,280 --> 00:02:23,900 By applying beige color, the furniture could appear 64 00:02:23,900 --> 00:02:25,700 as if it blends with the wall. 65 00:02:25,700 --> 00:02:28,940 The shadows moreover, creates instant relaxing mood 66 00:02:28,940 --> 00:02:30,870 and represents a fashion that will not 67 00:02:30,870 --> 00:02:32,160 die. 68 00:02:32,170 --> 00:02:36,650 Skip this idea if you prefer pattern and bright colors. 69 00:02:36,650 --> 00:02:38,310 16. 70 00:02:38,310 --> 00:02:39,840 Hang Drapes. 71 00:02:39,840 --> 00:02:42,240 This idea works for any small space with high 72 00:02:42,240 --> 00:02:43,480 ceiling. 73 00:02:43,480 --> 00:02:45,440 Create a focal point in the middle and drag eyes’ 74 00:02:45,440 --> 00:02:47,440 attention to the ceiling. 75 00:02:47,470 --> 00:02:50,800 The simplest way is by installing drapes. 76 00:02:50,800 --> 00:02:53,319 Find one that could fit the height from ceiling to floor. 77 00:02:53,320 --> 00:02:56,240 Also, fill the empty wall with either small 78 00:02:56,240 --> 00:02:58,440 to medium artwork or tall cupboard. 79 00:02:58,480 --> 00:03:00,500 This arrangement will distract your eyes 80 00:03:00,500 --> 00:03:02,260 from the real size of the room, while letting them 81 00:03:02,260 --> 00:03:04,980 to explore the floor up to the ceiling. 82 00:03:05,880 --> 00:03:07,680 15. 83 00:03:07,680 --> 00:03:08,840 Cover the Stove. 84 00:03:08,840 --> 00:03:11,080 In kitchen area, big preparations and cooking 85 00:03:11,080 --> 00:03:12,280 activities happen. 86 00:03:12,280 --> 00:03:14,620 It also usually the coziest place to hang 87 00:03:14,620 --> 00:03:16,500 around and chat together. 88 00:03:16,500 --> 00:03:19,320 Thus, you have to find a way to extend the counter top, 89 00:03:19,320 --> 00:03:20,940 so the dishes could have proper 90 00:03:20,940 --> 00:03:21,940 place. 91 00:03:21,940 --> 00:03:24,140 In some cases, the counter is even served 92 00:03:24,140 --> 00:03:25,569 as dinner table! 93 00:03:25,569 --> 00:03:28,780 The solution is to cover your stove with proper boards. 94 00:03:28,780 --> 00:03:31,620 It should not be too heavy, since stove is delicate 95 00:03:31,620 --> 00:03:33,580 and important house equipment. 96 00:03:33,580 --> 00:03:36,520 Being non-heat resistant is also bad: sometimes 97 00:03:36,520 --> 00:03:38,920 you need to put the cover as soon as you done 98 00:03:38,920 --> 00:03:40,160 cooking. 99 00:03:40,460 --> 00:03:41,400 14. 100 00:03:41,460 --> 00:03:43,080 Built Vertical Dresser 101 00:03:43,080 --> 00:03:45,520 Instead of buying a big dresser with awkward 102 00:03:45,520 --> 00:03:48,260 space from the ceiling, you can always install 103 00:03:48,260 --> 00:03:49,300 a vertical dresser. 104 00:03:49,300 --> 00:03:51,700 It helps to maximize the storage for clothes and 105 00:03:51,700 --> 00:03:53,660 other materials. 106 00:03:53,660 --> 00:03:55,700 Slipping some open spaces is also an option, 107 00:03:55,700 --> 00:03:58,100 so you could have small working station next 108 00:03:58,100 --> 00:03:59,380 to your bed. 109 00:03:59,720 --> 00:04:01,140 13. 110 00:04:01,140 --> 00:04:02,380 Cover It Beautifully 111 00:04:02,600 --> 00:04:04,880 The best and multi-functional item is open 112 00:04:04,880 --> 00:04:06,760 shelves. 113 00:04:06,769 --> 00:04:09,390 It could be used both as storage and display. 114 00:04:09,390 --> 00:04:11,880 This rule applies only when things could be arranged 115 00:04:11,880 --> 00:04:13,709 neatly and the items could stand 116 00:04:13,709 --> 00:04:14,980 the dust. 117 00:04:14,980 --> 00:04:16,760 Some items, however, should be covered. 118 00:04:16,760 --> 00:04:18,980 Otherwise, it will break easily. 119 00:04:18,980 --> 00:04:21,530 One thing you could do is to cover the shelves. 120 00:04:21,530 --> 00:04:24,000 Pick some pretty pattern or frilly cloth 121 00:04:24,000 --> 00:04:25,900 to replace the display shelves. 122 00:04:25,900 --> 00:04:28,380 You can always roll this curtain up when you need 123 00:04:28,380 --> 00:04:30,380 to take the items. 124 00:04:30,380 --> 00:04:31,820 12. 125 00:04:31,820 --> 00:04:33,840 Mix Pattern in One Place Only 126 00:04:33,840 --> 00:04:35,760 People have been told that putting patterns 127 00:04:35,760 --> 00:04:37,140 together will not be pretty. 128 00:04:37,140 --> 00:04:39,740 Especially for small room, it could create 129 00:04:39,740 --> 00:04:41,500 the worst nightmare ever. 130 00:04:41,510 --> 00:04:43,560 Want something outside of the rules? 131 00:04:43,560 --> 00:04:45,200 Let your imagination go free 132 00:04:45,200 --> 00:04:46,820 to mix and match some patterns. 133 00:04:46,820 --> 00:04:49,320 However, you need to pick one spot only, 134 00:04:49,320 --> 00:04:51,440 which will be the focal point of the room. 135 00:04:51,440 --> 00:04:54,220 Bedroom provides the perfect place to start: 136 00:04:54,220 --> 00:04:56,380 bedding cover, blanket, pillow and bolster 137 00:04:56,400 --> 00:04:57,760 cover. 138 00:04:57,760 --> 00:04:59,840 Better news: you can change them weekly 139 00:04:59,840 --> 00:05:01,540 with smaller budget. 140 00:05:01,540 --> 00:05:02,970 11. 141 00:05:02,970 --> 00:05:04,880 Put Floating Shelves 142 00:05:04,880 --> 00:05:06,440 This is not actually a decoration, but it 143 00:05:06,450 --> 00:05:09,020 does help to expand your storage space. 144 00:05:09,020 --> 00:05:11,820 Your Knick knack could be arranged on this shelf 145 00:05:11,820 --> 00:05:13,410 if you install it in the living room. 146 00:05:13,410 --> 00:05:16,200 For more elegant look, you could combine the metallic 147 00:05:16,200 --> 00:05:18,280 tubes and light colored wooden board. 148 00:05:18,280 --> 00:05:20,760 When installing, make sure that you give some space 149 00:05:20,760 --> 00:05:22,160 for head rest. 150 00:05:22,160 --> 00:05:23,800 Putting it right above the sofa might not 151 00:05:23,800 --> 00:05:25,160 be the best idea. 152 00:05:25,160 --> 00:05:27,860 The guests might bump into it unintentionally. 153 00:05:28,620 --> 00:05:29,460 10. 154 00:05:29,840 --> 00:05:31,620 Use Lightweight Furniture 155 00:05:31,620 --> 00:05:34,040 Combining sofas and thin framed decorations 156 00:05:34,040 --> 00:05:36,680 could be an option for your limited space. 157 00:05:36,690 --> 00:05:39,340 For example, metal trellis on the window. 158 00:05:39,340 --> 00:05:42,060 Install the one with simple lines instead 159 00:05:42,060 --> 00:05:43,500 of the decorative one. 160 00:05:43,500 --> 00:05:45,540 The table coffee in front of the television 161 00:05:45,540 --> 00:05:47,800 could have glass top, allowing the guest to 162 00:05:47,810 --> 00:05:48,960 see through it. 163 00:05:48,960 --> 00:05:51,280 Solid top will block the area. 164 00:05:51,280 --> 00:05:54,130 The tables and chairs’ legs should be the thin kind. 165 00:05:54,130 --> 00:05:56,460 The ability to see what is behind or below the furniture 166 00:05:56,460 --> 00:05:58,460 will make the room looks bigger. 167 00:05:59,080 --> 00:06:00,820 9. 168 00:06:00,820 --> 00:06:01,860 Install Mirrors. 169 00:06:01,860 --> 00:06:04,380 Especially in a bedroom, a mirror is the must-have 170 00:06:04,380 --> 00:06:05,320 option. 171 00:06:05,840 --> 00:06:07,780 It helps with preparation before work. 172 00:06:07,780 --> 00:06:09,480 But give more functions to it: 173 00:06:09,480 --> 00:06:11,700 Decoration and room magnifying glass. 174 00:06:11,870 --> 00:06:13,320 Put it on the opposite side of the window. 175 00:06:13,320 --> 00:06:15,840 The reflection of the morning light to every corner 176 00:06:15,840 --> 00:06:17,760 makes your room look bigger. 177 00:06:17,760 --> 00:06:20,940 Pick medium to large size mirror for better result. 178 00:06:20,940 --> 00:06:22,080 If you love something fancy, 179 00:06:22,080 --> 00:06:24,080 then take one with decorative frame. 180 00:06:24,560 --> 00:06:27,080 It doesn't always have to be wall mirror. 181 00:06:27,080 --> 00:06:30,220 Standing mirror do just fine as well. 182 00:06:30,680 --> 00:06:31,720 8. 183 00:06:31,720 --> 00:06:33,200 Make Everything Gather 184 00:06:33,200 --> 00:06:35,640 The luxury of having open space is the ability 185 00:06:35,640 --> 00:06:38,700 to give each item its own personal board. 186 00:06:38,700 --> 00:06:40,980 Since this right doesn’t belong to the owner of 187 00:06:40,980 --> 00:06:41,800 small house, 188 00:06:41,800 --> 00:06:42,880 you need to think smart about 189 00:06:42,880 --> 00:06:43,940 the storage. 190 00:06:43,940 --> 00:06:45,960 When you know there is only small wall shelves 191 00:06:45,960 --> 00:06:46,620 on the wall, 192 00:06:46,620 --> 00:06:48,210 forget the plan of showing your 193 00:06:48,210 --> 00:06:49,260 collection. 194 00:06:49,270 --> 00:06:51,300 Take out some of your favorites instead. 195 00:06:51,300 --> 00:06:54,490 It also applies to your toys and vase collections. 196 00:06:54,490 --> 00:06:56,480 Find the most artistic way to make 197 00:06:56,480 --> 00:06:58,820 the small corner shelf looks like a painting. 198 00:06:59,860 --> 00:07:01,250 7. 199 00:07:01,250 --> 00:07:03,100 Get Small Size Furniture. 200 00:07:03,100 --> 00:07:04,810 Give the room something that could complement 201 00:07:04,810 --> 00:07:06,140 its appearance. 202 00:07:06,150 --> 00:07:09,430 People might love wooden table set with tall back. 203 00:07:09,430 --> 00:07:11,500 Putting this kind of furniture in your small room 204 00:07:11,500 --> 00:07:13,600 will strangle the space, as well as eliminating 205 00:07:13,600 --> 00:07:15,840 comfortable requirement. 206 00:07:15,840 --> 00:07:18,300 While purchasing for your small home, 207 00:07:18,300 --> 00:07:19,440 find something small to medium. 208 00:07:19,440 --> 00:07:22,880 If possible, take the one with no arms and back. 209 00:07:22,880 --> 00:07:24,940 The best recommendation for personal space 210 00:07:24,940 --> 00:07:25,820 is loveseat, 211 00:07:25,820 --> 00:07:27,610 or a coffee table with four simple 212 00:07:27,610 --> 00:07:29,960 chairs for the social butterfly. 213 00:07:29,960 --> 00:07:32,460 You can slip the chairs below the table 214 00:07:32,460 --> 00:07:34,180 when they are not in used. 215 00:07:34,180 --> 00:07:35,340 6. 216 00:07:35,340 --> 00:07:37,180 Install Wallpaper. 217 00:07:37,180 --> 00:07:39,180 There is a bad relation between pattern and 218 00:07:39,220 --> 00:07:40,440 small space. 219 00:07:40,440 --> 00:07:42,380 Many people think that the pattern will create 220 00:07:42,380 --> 00:07:44,240 the illusion of cramped place. 221 00:07:44,240 --> 00:07:46,500 Well, it is exactly the opposite, 222 00:07:46,500 --> 00:07:48,500 as long as you choose the proper wallpaper and install 223 00:07:48,500 --> 00:07:50,480 it correctly. 224 00:07:50,480 --> 00:07:52,720 Pick a wallpaper with similar tone to your 225 00:07:52,720 --> 00:07:54,180 paint on the wall. 226 00:07:54,180 --> 00:07:56,770 Find the one that show clearly the background color. 227 00:07:56,770 --> 00:07:59,460 Then install it from the tile to the ceiling. 228 00:07:59,460 --> 00:08:01,820 Your guests will automatically follow the pattern up, 229 00:08:01,820 --> 00:08:03,630 and naturally distract them from 230 00:08:03,630 --> 00:08:05,140 the real room size. 231 00:08:06,920 --> 00:08:08,260 5. 232 00:08:08,260 --> 00:08:10,200 Use Area under the Stairs. 233 00:08:10,200 --> 00:08:12,200 Having a small space forces you to utilize 234 00:08:12,220 --> 00:08:14,360 every corner of the home. 235 00:08:14,360 --> 00:08:16,920 The area under the stairs is usually overlooked, 236 00:08:16,920 --> 00:08:19,000 due to its awkward and unsymmetrical shape. 237 00:08:19,200 --> 00:08:21,020 But as long as it can store something, 238 00:08:21,020 --> 00:08:23,020 there really must be a way to create something for it . 239 00:08:23,940 --> 00:08:25,700 Find some professional help to build 240 00:08:25,700 --> 00:08:27,480 drawers under the stairs. 241 00:08:27,480 --> 00:08:30,130 If you want something bigger, ask for a wardrobe. 242 00:08:30,130 --> 00:08:32,460 You could put boxes of seasonal clothes in there, 243 00:08:32,460 --> 00:08:34,460 freeing up spaces in the bedroom. 244 00:08:35,920 --> 00:08:36,970 4. 245 00:08:36,970 --> 00:08:38,340 Stack Several Layers. 246 00:08:38,340 --> 00:08:40,760 Monotone color is the simplest way to get 247 00:08:40,760 --> 00:08:43,060 an impression of bigger space. 248 00:08:43,060 --> 00:08:45,360 However, layering could do similar trick 249 00:08:45,360 --> 00:08:47,180 with elegant twist. 250 00:08:47,180 --> 00:08:49,300 Play with some contrasting color and patterns, 251 00:08:49,300 --> 00:08:51,480 providing some depth in your room. 252 00:08:51,480 --> 00:08:53,240 Pick some spots first, 253 00:08:53,240 --> 00:08:55,240 for example sofa and table. 254 00:08:55,520 --> 00:08:57,560 Cover the seat with patterned blanket, 255 00:08:57,560 --> 00:09:00,440 and double the cushion alternating from dark to light 256 00:09:01,080 --> 00:09:03,460 This principal also applies for the table. 257 00:09:03,460 --> 00:09:06,000 Go with your own experiment to match the contour, 258 00:09:06,000 --> 00:09:08,000 color and pattern. 259 00:09:08,350 --> 00:09:09,700 3. 260 00:09:09,700 --> 00:09:11,160 Sneak Some Curves 261 00:09:11,160 --> 00:09:13,840 Boxes in a limited space would be boring. 262 00:09:13,840 --> 00:09:15,420 To spice things up, 263 00:09:15,420 --> 00:09:17,420 give some options of curvy furniture. 264 00:09:17,680 --> 00:09:21,150 It will give new look and great accent to the room. 265 00:09:21,150 --> 00:09:22,320 Not only the furniture, 266 00:09:22,320 --> 00:09:25,680 you could also buy curvy vases, mirror, chair, 267 00:09:25,680 --> 00:09:26,970 and other interior 268 00:09:26,970 --> 00:09:28,800 decoration accessories. 269 00:09:28,800 --> 00:09:30,820 If you love standing lamp in the corner, 270 00:09:30,820 --> 00:09:32,810 pick the one with rounded head. 271 00:09:32,810 --> 00:09:35,200 Let the rectangle carpet laid on the floor 272 00:09:35,200 --> 00:09:37,200 served as the boundary for your room. 273 00:09:38,240 --> 00:09:39,890 2. 274 00:09:39,890 --> 00:09:41,040 Divide the Area. 275 00:09:41,040 --> 00:09:43,520 Small will be even smaller when the things 276 00:09:43,520 --> 00:09:45,760 inside are not organized well. 277 00:09:45,760 --> 00:09:48,240 Decide the purpose for each corner of the home. 278 00:09:48,240 --> 00:09:50,740 You can go to the store to purchase room divider 279 00:09:50,740 --> 00:09:52,590 screen if you want something aesthetic and 280 00:09:52,590 --> 00:09:53,580 classic. 281 00:09:53,590 --> 00:09:56,740 Another option is to put the furniture as the divider. 282 00:09:56,740 --> 00:09:59,820 For example: putting sofa facing the television, 283 00:09:59,820 --> 00:10:01,680 separating it from working table just in front 284 00:10:01,680 --> 00:10:02,680 of it. 285 00:10:02,680 --> 00:10:04,680 Probably your wardrobe could help you sleep better 286 00:10:04,680 --> 00:10:06,390 without being noticed by your guests 287 00:10:06,390 --> 00:10:09,600 who are watching football on TV. 288 00:10:09,610 --> 00:10:11,440 And the last, 289 00:10:11,440 --> 00:10:13,300 Use Multipurpose Furniture. 290 00:10:13,660 --> 00:10:16,220 When things are limited, you cannot bound 291 00:10:16,220 --> 00:10:17,810 the function of any items. 292 00:10:17,810 --> 00:10:19,560 The storage spaces must be plenty 293 00:10:19,560 --> 00:10:20,700 for numerous purpose. 294 00:10:20,700 --> 00:10:23,310 Thus, choose your furniture carefully. 295 00:10:23,310 --> 00:10:25,920 Make sure it could handle at least three purposes. 296 00:10:25,920 --> 00:10:29,020 For example, pick a bed with a drawer underneath or 297 00:10:29,020 --> 00:10:31,020 Leave under the bed empty, 298 00:10:31,020 --> 00:10:32,480 so you could push in some baskets. 299 00:10:32,880 --> 00:10:34,440 If you are a couch potato, 300 00:10:34,440 --> 00:10:37,120 find a bed that could also serve as sofa or bunk bed. 301 00:10:37,360 --> 00:10:39,840 It will be extremely useful when having a sleepover. 302 00:10:39,840 --> 00:10:41,160 That’s it. 303 00:10:41,160 --> 00:10:45,320 Before you check one or view pasted links inside description area, 304 00:10:45,320 --> 00:10:49,770 Press like or share button under this video to spread our video to more people. 305 00:10:49,770 --> 00:10:53,280 Comment it, to express your thought or love, and lastly, 306 00:10:53,280 --> 00:10:56,540 press subscribe button if our channel is new to you. 307 00:10:56,540 --> 00:10:57,120 Thanks for watching
For those vintage lovers. I have something special for you
1 00:00:01,599 --> 00:00:03,899 Vintage décor is still hot these days. 2 00:00:03,899 --> 00:00:08,740 It’s unique, inexpensive, innovative, and, of course, chic. 3 00:00:08,740 --> 00:00:13,270 Moreover, vintage home décor is a fun an easy affair. 4 00:00:13,270 --> 00:00:16,600 So, are you geared to provide or try a vintage twist 5 00:00:16,600 --> 00:00:18,740 to your home on a shoestring budget? 6 00:00:18,740 --> 00:00:22,600 If you don’t know where to start, I have got your back covered. 7 00:00:22,600 --> 00:00:26,240 These 20 vintage décor ideas will appeal to one to all 8 00:00:26,240 --> 00:00:29,100 because you will certainly find something worthy enough 9 00:00:29,100 --> 00:00:31,640 to invade your home in a vintage style. 10 00:00:31,640 --> 00:00:36,280 So, let’s get started oh, and as always, this idea is brought to you 11 00:00:36,280 --> 00:00:38,280 by simphome.com 12 00:00:41,060 --> 00:00:44,340 20. Creative Globe Recycling 13 00:00:44,580 --> 00:00:46,780 Don't retire your old globe yet 14 00:00:46,780 --> 00:00:50,240 because you can give it a vintage look within a matter of few hours 15 00:00:50,240 --> 00:00:53,420 even if you are someone with dinosaur dated skills. 16 00:00:53,420 --> 00:00:55,880 It's a brilliant and inexpensive way 17 00:00:55,880 --> 00:00:59,100 to add an extra spark to the desk where the globe currently rests. 18 00:00:59,300 --> 00:01:02,360 All you need is some paint and regular markers 19 00:01:02,360 --> 00:01:07,420 to make a conventional globe into a wonder-struck item in the middle of an ordinary day. 20 00:01:07,740 --> 00:01:08,980 Not your cup of tea? 21 00:01:08,980 --> 00:01:10,240 Don’t fret yet! 22 00:01:10,240 --> 00:01:14,619 Just pull out your black marker from the shelf to outline the continents on the globe. 23 00:01:14,620 --> 00:01:18,400 Then, apply a few coats of black paint on the ocean area. 24 00:01:18,400 --> 00:01:21,580 Once the paint dries off, fill the continents with teal colour, 25 00:01:21,580 --> 00:01:23,980 and allow it to dry for a couple of hours. 26 00:01:24,140 --> 00:01:27,740 Spray paint the stand with any colour of your choice. 27 00:01:27,740 --> 00:01:32,930 Finally, add some sort of sayings to the shaded black area of the globe and that’s it! 28 00:01:32,930 --> 00:01:35,500 For a few hours’ worth of time and effort, 29 00:01:35,500 --> 00:01:40,240 you will end up with a fantastic self-creation that will really stand out at your desk. 30 00:01:41,520 --> 00:01:45,120 19.Homesick Map Art 31 00:01:45,120 --> 00:01:47,280 If you have an empty wall to fill, 32 00:01:47,280 --> 00:01:50,040 this homesick map art should be on your radar. 33 00:01:50,060 --> 00:01:52,440 Not only will it prove to be a talking point, 34 00:01:52,440 --> 00:01:55,180 but it will also help you beat homesick blues. 35 00:01:55,240 --> 00:01:58,580 If done well, it won’t look one bit handmade. 36 00:01:58,580 --> 00:02:03,060 All you need is a matted frame, cardstock paper (to fit inside the frame), 37 00:02:03,060 --> 00:02:09,100 and preferred material (sand, dirt, grass) as the main ingredient for this DIY project. 38 00:02:09,100 --> 00:02:13,040 For example, you can use sand to depict California, 39 00:02:13,040 --> 00:02:15,400 grass for Montana, and so on. 40 00:02:15,600 --> 00:02:20,700 First, begin by drawing the shape of the map on a cardstock paper with a glue. 41 00:02:20,700 --> 00:02:26,120 Then, sprinkle the dirt, grass, or sand on the glue drawing and wait for it to dry. 42 00:02:26,620 --> 00:02:30,120 Next, shake off the excess dirt, grass, etc, 43 00:02:30,120 --> 00:02:33,080 so that you are left with your desired shape of the map. 44 00:02:33,300 --> 00:02:36,180 Finally, plant the paper in the mitted frame. 45 00:02:36,380 --> 00:02:37,400 That’s it! 46 00:02:37,400 --> 00:02:41,960 It’s time for the homesick map art proves its capacity as a people-pleaser. 47 00:02:49,560 --> 00:02:53,160 18. Personalized Photo Map Wall Board 48 00:02:53,740 --> 00:02:57,600 Let’s stick to the map theme because this one is a killer. 49 00:02:57,600 --> 00:02:58,860 Truthfully speaking, 50 00:02:58,860 --> 00:03:01,800 I think It’s hard to find any other DIY idea 51 00:03:01,800 --> 00:03:05,420 that can rival this one to track and cherish your travel memories. 52 00:03:05,920 --> 00:03:09,000 All yous literally need to do is cut photos from your trips 53 00:03:09,000 --> 00:03:12,220 and paste them on the map area that you already visited. 54 00:03:12,220 --> 00:03:13,920 Easy as pie, isn’t it? 55 00:03:14,040 --> 00:03:15,620 As a common-sense tip, 56 00:03:15,620 --> 00:03:18,900 remember to cut your pictures in the shape of the states/countries 57 00:03:18,900 --> 00:03:21,620 from the map of the country or world you want to do. 58 00:03:21,620 --> 00:03:25,620 Frankly speaking, it’s a highly rewarding and fulfilling experience 59 00:03:25,620 --> 00:03:29,000 to witness the map fill up with life-altering travel pictures. 60 00:03:29,160 --> 00:03:32,300 What better way to recall the special days of your life? 61 00:03:33,080 --> 00:03:36,880 17.World Map Tagging Wall Art 62 00:03:36,880 --> 00:03:40,060 Let’s not put an end to the map saga for a little while 63 00:03:40,060 --> 00:03:42,940 because of its user-friendly and budget-friendly nature. 64 00:03:43,220 --> 00:03:46,320 The world map tagging wall art we are about to discuss now 65 00:03:46,320 --> 00:03:49,560 can be an amazing conversation starter in your living room. 66 00:03:49,980 --> 00:03:53,380 At its core, it’s just a world map with push pins on it 67 00:03:53,380 --> 00:03:56,820 that you can use to highlight all places you visited so far. 68 00:03:56,860 --> 00:04:00,860 Each pin has strings attached to it and that’s pretty much all about. 69 00:04:01,240 --> 00:04:02,460 Personally speaking, 70 00:04:02,460 --> 00:04:05,360 I found the wall art to be the best means to put myself 71 00:04:05,360 --> 00:04:08,360 on the world map in my own unique style. 72 00:04:08,440 --> 00:04:12,000 It’s also been an inspiration for me to travel more. 73 00:04:12,000 --> 00:04:15,700 I often imagine where I will be traveling next. 74 00:04:15,700 --> 00:04:19,540 By the way, framed or unframed, both will work great. 75 00:04:19,540 --> 00:04:22,140 Of course, if you decide to frame the map, 76 00:04:22,140 --> 00:04:26,440 keep in mind that it will prove to be the most expensive part of this DIY project. 77 00:04:26,760 --> 00:04:30,180 That said, it will look so much cooler in a frame. 78 00:04:30,760 --> 00:04:34,640 16. Personalized DIY Map Magnets 79 00:04:35,180 --> 00:04:38,220 If you are someone who loves map related things, 80 00:04:38,220 --> 00:04:41,420 here’s another DIY project along the same lines. 81 00:04:41,640 --> 00:04:45,920 These personalized miniature map magnets are simple and fun to create. 82 00:04:45,920 --> 00:04:49,640 Even an eight-year-old will be able to knock this out of the park. 83 00:04:49,640 --> 00:04:54,300 After all, how hard is it to cut parts of a map and plant them to a magnet? 84 00:04:54,300 --> 00:04:58,420 My budget for this little DIY project is nothing more than a few dollars. 85 00:04:58,640 --> 00:05:01,560 First, make sure to get strong enough magnets 86 00:05:01,560 --> 00:05:04,440 that can sustain the weight of the glass rocks and the paper. 87 00:05:04,660 --> 00:05:08,560 You can purchase the round glass rocks from a floral section of the dollar store. 88 00:05:08,560 --> 00:05:11,880 Once you acquire them all, stick the map cut out on them. 89 00:05:12,020 --> 00:05:15,240 Then, add another layer of glue to the back side of the glass rock 90 00:05:15,240 --> 00:05:16,620 to stick them to the magnet. 91 00:05:16,860 --> 00:05:18,400 For a few minutes of work, 92 00:05:18,400 --> 00:05:21,080 you’ll end up with these adorable little jewels. 93 00:05:21,840 --> 00:05:26,180 15. H&M HACK: Wall Hanging DIY 94 00:05:26,600 --> 00:05:30,860 If you are excited to see how your first wall hanging décor will turn out, 95 00:05:30,860 --> 00:05:34,220 then you should definitely give this home decor a try. 96 00:05:34,320 --> 00:05:38,560 This beautiful wall hanging décor can freshen up any space on a budget. 97 00:05:38,560 --> 00:05:42,420 It’s made from cotton table runner, pins, sewing machine, 98 00:05:42,420 --> 00:05:47,320 white thread, chunky wool, white pom poms, gold beads, and glue. 99 00:05:47,660 --> 00:05:49,520 To put the words into action, 100 00:05:49,520 --> 00:05:52,900 you will need to get a cotton table runner that catches your eye, 101 00:05:52,900 --> 00:05:56,920 put your sewing machine to work, and end up with display-worthy results. 102 00:05:57,140 --> 00:06:01,620 The best part is that you can get the job done within a few hours “estimated” 103 00:06:01,620 --> 00:06:03,400 without knowing how to weave. 104 00:06:03,480 --> 00:06:07,860 No hardcore measurements, markings, or talent needed at all. 105 00:06:07,860 --> 00:06:10,980 And, you will still be able to nail this thing! 106 00:06:11,640 --> 00:06:15,440 14. DIY Geometric Lamp Decor 107 00:06:15,440 --> 00:06:19,940 At first glance, this might seem like a complex science project. 108 00:06:19,940 --> 00:06:24,600 But, you won’t believe how easily you can create a highly adorable 109 00:06:24,600 --> 00:06:26,980 and functional geometric lamp decor. 110 00:06:27,240 --> 00:06:30,200 The only major effort from your part would be a visit 111 00:06:30,200 --> 00:06:34,380 to the hardware store to procure four thin and hollow metal tubes. 112 00:06:34,400 --> 00:06:35,920 Once those are acquired, 113 00:06:35,920 --> 00:06:38,100 you need to simply twist them into many folds 114 00:06:38,100 --> 00:06:40,460 to create a unique shape around the bulb. 115 00:06:40,460 --> 00:06:44,160 Of course, don’t forget to tie the tube ends to ensure 116 00:06:44,160 --> 00:06:46,600 that the structure stays in place at all times. 117 00:06:46,700 --> 00:06:48,100 Once this is done, 118 00:06:48,100 --> 00:06:51,220 place the light bulb into the cage-like created structure. 119 00:06:51,380 --> 00:06:55,980 Right off the bat, you will notice that the lampshade has a mixed vintage look to it, 120 00:06:55,980 --> 00:07:00,500 which will garner a lot of eyeballs and compliments from onlookers. 121 00:07:00,960 --> 00:07:04,940 13. DIY Minimal Floor Mirror Project 122 00:07:05,300 --> 00:07:08,220 If you are a fan of minimalistic home décor, 123 00:07:08,220 --> 00:07:11,560 then this DIY floor mirror should be right up your alley. 124 00:07:11,560 --> 00:07:16,210 It’s a semi-gigantic floor mirror without the gigantic store price. 125 00:07:16,210 --> 00:07:19,520 This DIY project can be completed in one afternoon 126 00:07:19,520 --> 00:07:21,920 at a fraction of the cost of a store-bought mirror. 127 00:07:21,920 --> 00:07:25,960 And, you would need only a few basic tools to get this thing done. 128 00:07:26,340 --> 00:07:29,380 First up, think of a board to attach the mirror. 129 00:07:29,380 --> 00:07:32,360 You will need 12″ x 12″ pieces of wood. 130 00:07:32,360 --> 00:07:34,770 Measure and cut the wood to fit the mirror. 131 00:07:34,770 --> 00:07:39,900 Also, sand the edges (if needed) to create a sturdy home for this bad boy. 132 00:07:39,900 --> 00:07:42,400 Once done, slide the mirror in the place. 133 00:07:42,400 --> 00:07:45,500 Apply glue on the back of the mirror while placing it on 134 00:07:45,500 --> 00:07:49,260 the wooden structure so that the mirror stays in place at all times. 135 00:07:49,500 --> 00:07:54,120 Try it out; this mirror DIY project should supplies you a lot of fun! 136 00:07:54,660 --> 00:07:59,800 12. Double Basic Table to Rolling Beverage Cart DIY 137 00:08:00,160 --> 00:08:03,740 Serve your drinks in vintage style by turning two regular tables 138 00:08:03,740 --> 00:08:05,540 into a rolling beverage cart 139 00:08:05,540 --> 00:08:09,560 that will be good enough to provoke guests to admire your DIY skills. 140 00:08:09,680 --> 00:08:11,600 For this amazing creation, 141 00:08:11,600 --> 00:08:14,300 you will have to build the top and bottom frames 142 00:08:14,300 --> 00:08:17,280 by planting one table over the other with the screws 143 00:08:17,280 --> 00:08:20,660 and hooks so that the final product looks like the video above. 144 00:08:21,180 --> 00:08:25,800 The visible top surface can be covered with any attractive material of your choice. 145 00:08:25,800 --> 00:08:30,580 Of course, don’t forget to add a towel bar as per the installation instructions. 146 00:08:30,580 --> 00:08:33,539 Add casters as well by using your nail gun. 147 00:08:33,540 --> 00:08:36,260 Including the hardware and everything and finish. 148 00:08:36,260 --> 00:08:38,780 This homemade beverage cart will cost you less 149 00:08:38,780 --> 00:08:41,040 than what you would have to pay for it in a furniture store. 150 00:08:41,200 --> 00:08:44,180 Lastly, it will leave you memories that you can recall 151 00:08:44,180 --> 00:08:46,900 and share with your new guests in the future. 152 00:08:48,100 --> 00:08:51,420 11. DIY Beverage Cart 153 00:08:51,780 --> 00:08:55,820 Be prepared to raise the bar to make a glamorous mocktail station 154 00:08:55,820 --> 00:09:00,420 that will inspire you to wheel your entire mix drinks to the expecting company. 155 00:09:01,000 --> 00:09:03,300 To make this industrial-inspired beverage cart, 156 00:09:03,300 --> 00:09:06,880 you will have to essentially cut and prep the lumber for the handles, 157 00:09:06,880 --> 00:09:09,120 trays, and crosspieces with a saw. 158 00:09:09,120 --> 00:09:12,560 The beautiful angle iron will look great for the legs. 159 00:09:12,560 --> 00:09:16,459 The casters on the bottom will help you move the cart around like a breeze. 160 00:09:16,460 --> 00:09:20,180 The finished product will turn out to be a satisfaction bomb. 161 00:09:20,180 --> 00:09:22,220 As you can see from the image above, 162 00:09:22,220 --> 00:09:24,960 the cart can hold quite a lot of beverages. 163 00:09:24,960 --> 00:09:28,040 So, load all the refreshments, sip a drink, 164 00:09:28,040 --> 00:09:30,780 and pat your back for the fabulous job! 165 00:09:31,640 --> 00:09:35,560 10. DIY Dip Dye Candleholder 166 00:09:35,860 --> 00:09:40,540 No one will ever know how little you spent to create this masterpiece. 167 00:09:40,540 --> 00:09:45,740 It’s a simple DIY project that you can do with things lying around in your house. 168 00:09:45,740 --> 00:09:48,560 For the wooden frame, use some leftover Balsa woods 169 00:09:48,560 --> 00:09:52,200 (can be easily store-bought) that are probably sitting idle 170 00:09:52,200 --> 00:09:54,200 in your attic for a few years already. 171 00:09:54,200 --> 00:09:56,040 Next, cut them. 172 00:09:56,040 --> 00:10:00,670 A 2.55 mm thick Balsa wood is enough to do the trick. 173 00:10:00,670 --> 00:10:03,300 Paint the wood according to your liking. 174 00:10:03,300 --> 00:10:06,500 Once the wood is cut and painted in the desired shape and colour, 175 00:10:06,500 --> 00:10:10,880 Place the tealights in the jars and then populate the wooden candle holders. 176 00:10:10,880 --> 00:10:14,880 Trust me: you will witness your space light up like never before! 177 00:10:15,340 --> 00:10:18,700 9. Hoop Shelf DIY! 178 00:10:18,780 --> 00:10:23,960 Enhance any wall within an hour with this amazing and budget-friendly hoop shelf. 179 00:10:23,960 --> 00:10:27,040 This hoop shelf has a touch of vintage style to it, 180 00:10:27,040 --> 00:10:30,520 and it provides more storage room without taking any extra space. 181 00:10:30,660 --> 00:10:34,380 To begin with, you will have to create a sturdy circle out of a wood 182 00:10:34,380 --> 00:10:37,100 to support whatever objects are going to be placed on it. 183 00:10:37,660 --> 00:10:41,160 Position a piece of wood at the centre of the round shelf. 184 00:10:41,160 --> 00:10:45,399 Also, insert two wooden ledges inside the circle and stick them with hot glue. 185 00:10:45,399 --> 00:10:51,050 Press them well to make sure that they are secure or put a screw or nail on the wall. 186 00:10:51,050 --> 00:10:53,480 If you want, you can paint the outside of the shelf, 187 00:10:53,480 --> 00:10:55,820 or you can go with the natural look of the wood. 188 00:10:55,920 --> 00:10:59,260 In either case, you will be highly pleased with the end result. 189 00:10:59,260 --> 00:11:01,040 From books to flower pots, 190 00:11:01,040 --> 00:11:04,680 you can display a lot of things in this wonderful creation of yours! 191 00:11:05,600 --> 00:11:09,360 8.DIY Leather Magazine Holder 192 00:11:09,660 --> 00:11:14,620 Organize your magazines with this stylish DIY leather magazine holder. 193 00:11:14,640 --> 00:11:17,240 This DIY project makes use of leather straps, 194 00:11:17,240 --> 00:11:19,340 which can be easily ordered online. 195 00:11:19,480 --> 00:11:23,520 Fold the strap into half and punch two small holes at the opposite ends 196 00:11:23,520 --> 00:11:27,020 so that you canhammer a nail through them to secure them to the wall. 197 00:11:27,160 --> 00:11:31,220 Then, slip the magazines to display them in a stylish manner. 198 00:11:31,220 --> 00:11:35,839 If you read a lot, now you can have ample storage space for loads of them. 199 00:11:35,839 --> 00:11:38,730 Don’t let the ultra-simple work fool you. 200 00:11:38,730 --> 00:11:40,420 This magazine holder looks cool 201 00:11:40,420 --> 00:11:43,740 and elegant in almost every home décor you can think about. 202 00:11:44,620 --> 00:11:47,580 7. DIY Wall Clock 203 00:11:47,700 --> 00:11:49,050 Guess what time it is? 204 00:11:49,050 --> 00:11:51,920 It’s time to get creative and build a customized clock 205 00:11:51,920 --> 00:11:54,440 with personality from the comforts of your home. 206 00:11:54,620 --> 00:11:58,839 The wooden clock in question is easy to build with just a few supplies. 207 00:11:58,839 --> 00:12:02,660 You can start by drilling a hole at the centre of the round wooden board. 208 00:12:02,660 --> 00:12:07,000 Then, cut the wooden board from behind to fix the clock mechanism. 209 00:12:07,000 --> 00:12:09,640 Thread the clock movement piece through the centre hole 210 00:12:09,640 --> 00:12:13,700 and follow the basic instructions you received to put together the hands of the clock. 211 00:12:13,740 --> 00:12:17,000 To attach the clock, you can make use of an old belt. 212 00:12:17,000 --> 00:12:20,860 Finally, hang it and admire your work with opride. 213 00:12:21,440 --> 00:12:25,440 6. DIY: Matt’s Woven Leather Stool 214 00:12:26,280 --> 00:12:27,860 As you can tell from the image, 215 00:12:27,860 --> 00:12:30,000 this timeless stool looks so cool 216 00:12:30,000 --> 00:12:32,880 that you can never tell whether it’s store-bought or not. 217 00:12:33,120 --> 00:12:37,740 The frame by itself is a rectangular bench that is made from wooden boards. 218 00:12:37,740 --> 00:12:40,879 The boards are sanded for a smooth furniture-grade finish. 219 00:12:40,879 --> 00:12:45,000 And, the leg pieces are attached with regular screws and hammer. 220 00:12:45,000 --> 00:12:49,739 Finally, the leather straps are wrapped completely around the frame to prepare the seat. 221 00:12:49,740 --> 00:12:53,120 You can use the stool for holding books or as a breakfast tray. 222 00:12:53,120 --> 00:12:57,320 As a pro tip- don’t forget to maintain some gap between the leather straps. 223 00:12:57,320 --> 00:13:00,440 So, there you have it a designer quality stool 224 00:13:00,440 --> 00:13:02,740 without casting a blind eye to your wallet. 225 00:13:03,560 --> 00:13:07,800 5. DIY Mid Century Modern Coffee Table 226 00:13:08,140 --> 00:13:12,520 Are you keen on enjoying a cup of coffee on a self-made coffee table? 227 00:13:12,620 --> 00:13:16,720 The supplies required are minimal and it shouldn’t cost you more than fifty dollars. 228 00:13:16,720 --> 00:13:22,300 Yes, fifty dollars and a few hours of labour for a forever beautiful coffee table. 229 00:13:22,300 --> 00:13:23,980 Not a bad trade, isn’t it? 230 00:13:24,180 --> 00:13:26,080 To create a circular coffee table, 231 00:13:26,080 --> 00:13:29,320 begin by drawing a circle on a thick MDF sheet. 232 00:13:29,380 --> 00:13:31,380 Cut the shape with a jigsaw. 233 00:13:31,389 --> 00:13:34,429 Of course, sand the edges to take care of the weird curves. 234 00:13:34,429 --> 00:13:38,740 Then, drill holes at the bottom surface so that you can attach the legs. 235 00:13:38,900 --> 00:13:42,860 Once the legs are attached, wrap them up so that you can paint the top. 236 00:13:42,860 --> 00:13:47,000 Allow the paint to dry to enjoy a cup of coffee on the gorgeous table. 237 00:13:47,880 --> 00:13:53,200 4.DIY Blush Pink Mid-Century Side Chair Makeover 238 00:13:53,460 --> 00:13:57,000 Who knew that a spray paint could completely transform a dull chair 239 00:13:57,000 --> 00:13:59,500 into a vibrant one without any fuss? 240 00:13:59,800 --> 00:14:03,060 You can start off this project by tidying up the used-chair 241 00:14:03,060 --> 00:14:05,240 with some alcohol-based cleaning solution. 242 00:14:05,620 --> 00:14:08,740 Then mask the plastic portion of the chair using a tape 243 00:14:08,740 --> 00:14:11,460 so that you can spray the metal portion with gold paint. 244 00:14:11,460 --> 00:14:14,519 Once done, allow it to dry overnight. 245 00:14:14,520 --> 00:14:18,460 Next, mask the metal portion (newly painted) of the chair 246 00:14:18,460 --> 00:14:21,620 so that you can spray paint the plastic area of the chair with pink 247 00:14:21,620 --> 00:14:23,900 or any other colour of your choice. 248 00:14:23,980 --> 00:14:27,580 Once done, allow the paint to completely dry for a day 249 00:14:27,580 --> 00:14:30,320 so that you can enjoy your new throne to the fullest. 250 00:14:30,620 --> 00:14:33,340 As you can tell, all it took is some paint coating 251 00:14:33,340 --> 00:14:37,080 to completely transform an old chair into a vibrant beauty. 252 00:14:37,600 --> 00:14:40,699 3. Nail Polish Marbling 253 00:14:40,699 --> 00:14:42,000 I love this! 254 00:14:42,000 --> 00:14:45,180 It’s a no-brainer DIY project that requires nail polish, 255 00:14:45,180 --> 00:14:49,580 water, and a container that’s large enough to accommodate the marbling object. 256 00:14:50,160 --> 00:14:53,000 Since nail polish doesn’t cost an arm and a leg, 257 00:14:53,000 --> 00:14:55,640 use a new one for a nice smooth finish. 258 00:14:55,740 --> 00:14:58,860 Add enough water in the container to submerge the object 259 00:14:58,860 --> 00:15:00,860 and begin dropping the nail polish. 260 00:15:01,020 --> 00:15:04,200 Swirl the nail polish with a stick, wait for a few seconds, 261 00:15:04,200 --> 00:15:07,220 and dip the object across the nail polish on the water. 262 00:15:07,220 --> 00:15:12,480 Once the object picks up the colour, place it on a piece of paper and allow it to dry. 263 00:15:12,480 --> 00:15:14,949 The nail polish sticks really well. 264 00:15:14,949 --> 00:15:17,980 If you notice gaps in colour, re-dip the object. 265 00:15:17,980 --> 00:15:21,870 To remove any smudges, if any, you can make use of a cotton ball. 266 00:15:21,870 --> 00:15:25,800 The final product will look like a beautiful, expensive-looking investment. 267 00:15:25,800 --> 00:15:29,620 Anyone out there can totally pull this off like a pro! 268 00:15:30,220 --> 00:15:33,640 2.Tiered Macrame Plant Hanger 269 00:15:33,920 --> 00:15:37,600 Show your plants some love with this tiered Macrame plant hanger. 270 00:15:37,600 --> 00:15:40,489 It will grace your space like nobody’s business. 271 00:15:40,489 --> 00:15:44,799 This tiered plant hanger uses square and half knots to create the design. 272 00:15:44,800 --> 00:15:48,340 So, you won’t have to fry your brain over this DIY. 273 00:15:48,340 --> 00:15:52,200 It hangs at two levels, and you should be able to handle this one easily. 274 00:15:52,200 --> 00:15:55,280 Keep in mind that plant hanger is made of cotton rope, 275 00:15:55,280 --> 00:15:57,160 which makes it flexible by nature. 276 00:15:57,160 --> 00:16:01,220 So, you can easily fit flower pots of different shapes and sizes. 277 00:16:01,220 --> 00:16:02,800 Just look for a lovely window, 278 00:16:02,800 --> 00:16:05,360 where you can hang it from the ceiling to showcase your craft. 279 00:16:05,560 --> 00:16:09,080 Make it once and love it for several years and beyond. 280 00:16:09,080 --> 00:16:12,840 Trust me it’s a satisfying craft! 281 00:16:28,520 --> 00:16:29,880 Before we get to number 1, 282 00:16:29,880 --> 00:16:35,340 I suggest you to press subscribe button if my channel is new you and bell icon beside it. 283 00:16:35,340 --> 00:16:39,720 This way you'll get a new notification every time I published them 284 00:16:40,320 --> 00:16:45,180 1. Multi-Purpose Vintage Phone-Charging Lamp DIY 285 00:16:45,500 --> 00:16:46,620 At first glance, 286 00:16:46,620 --> 00:16:49,880 it might seem that you will need an engineering degree to pull this thing off. 287 00:16:49,960 --> 00:16:52,380 But, this notion is far from the truth. 288 00:16:52,580 --> 00:16:56,160 There are only three steps to this intimidating project. 289 00:16:56,160 --> 00:16:58,760 All you have to do is assemble the outside part, 290 00:16:58,760 --> 00:17:01,879 which essentially involves you to screw things together. 291 00:17:01,879 --> 00:17:05,089 Then, comes the wiring part, which is painless. 292 00:17:05,089 --> 00:17:09,500 Finally, the cakewalk part-you decorate it the way you like. 293 00:17:09,500 --> 00:17:11,829 Beyond this, you don’t have to do anything. 294 00:17:11,829 --> 00:17:16,279 You don’t have to cut wood, drill a hole, or do anything else along the same lines. 295 00:17:16,280 --> 00:17:19,460 Plus, you can easily get all the parts for the project 296 00:17:19,460 --> 00:17:22,220 from a local hardware store lightbulb, 297 00:17:22,220 --> 00:17:26,440 USB wall charger, power cord, light socket, outer plate, 298 00:17:26,440 --> 00:17:30,140 box, light cord, nipple, locknut, and washer. 299 00:17:30,440 --> 00:17:32,200 Once everything is put together, 300 00:17:32,200 --> 00:17:35,820 it will light up the bulb and invite a bright smile on your face! 301 00:17:36,240 --> 00:17:38,730 That’s it my fellow YouTube lovers. 302 00:17:38,730 --> 00:17:41,720 I hope you enjoyed my countdown through this list. 303 00:17:41,720 --> 00:17:42,640 Before you go, 304 00:17:42,640 --> 00:17:47,100 like this video or share it with anyone close to you in your social media account. 305 00:17:47,429 --> 00:17:51,080 Come back again next time with more organizing and décor videos, 306 00:17:51,080 --> 00:17:54,160 And lastly, Until next time, Thanks for watching !
This idea will try to cure your boredom and at the same time little bit entertaining you.
1 00:00:05,820 --> 00:00:09,020 Our Environment Affects Us On A Daily Basis - 2 00:00:09,280 --> 00:00:10,880 Far More Than We Might Think. 3 00:00:11,100 --> 00:00:15,040 Living In A Dull Space Could Make Us Feel Empty Or Unenthusiastic. 4 00:00:15,680 --> 00:00:17,800 Luckily, With Some Simple DIY Projects 5 00:00:17,800 --> 00:00:19,600 That Anyone Can Do On Their Own, 6 00:00:19,940 --> 00:00:23,120 Everyone’s Living Space Can Become An Eye Candy In No Time. 7 00:00:23,820 --> 00:00:26,460 Here Comes The List Of 20 Do-It-Yourself Projects 8 00:00:26,680 --> 00:00:30,200 That Will Transform Anyone’s Boring Space Into A Fun Living Area 9 00:00:30,200 --> 00:00:31,780 By Simphome.Com: 10 00:00:33,080 --> 00:00:36,080 20. DIY OUTDOOR WATER WALL 11 00:00:37,240 --> 00:00:38,540 With An Outdoor Water Wall, 12 00:00:38,540 --> 00:00:41,320 Your Garden Or Patio Will Become The Best Part Of Your Home. 13 00:00:41,840 --> 00:00:44,120 Moreover, The Sound Of Water Will Relax You 14 00:00:44,120 --> 00:00:46,120 And Take You To Far Away Places. 15 00:00:46,660 --> 00:00:49,560 Even Though These Water Walls Look Very Fancy And Expensive, 16 00:00:49,920 --> 00:00:51,420 They Don’t Have To Cost A Fortune - 17 00:00:51,500 --> 00:00:54,280 In Fact, You Can Make One For Under $300. 18 00:00:54,860 --> 00:00:58,740 The Size Of An Outdoor Water Wall Will Depend On The Size Of The Tempered Glass Panels; 19 00:00:59,120 --> 00:01:00,500 So, You Should Have That In Mind 20 00:01:00,500 --> 00:01:01,980 When You Start Shopping Supplies. 21 00:01:02,480 --> 00:01:05,560 Also, While Most Of The Work Can Be Completed By One Person, 22 00:01:05,880 --> 00:01:08,280 Some Steps Will Require An Additional Pair Of Hands. 23 00:01:08,880 --> 00:01:11,100 Once Completed, An Outdoor Water Wall 24 00:01:11,100 --> 00:01:13,100 Will Make The Most Of Any Garden During The Day. 25 00:01:13,660 --> 00:01:17,720 Moreover, Adding Some Lighting Will Make It Look Fabulous At Nighttime Too. 26 00:01:18,940 --> 00:01:21,940 19. OPENWORK CUBE PENDANT LIGHT 27 00:01:23,200 --> 00:01:24,920 When It Comes To Interior Design, 28 00:01:24,920 --> 00:01:27,260 One Statement Piece Can Make All The Difference. 29 00:01:27,600 --> 00:01:29,840 That’s Exactly The Case With This Pendant Light. 30 00:01:30,260 --> 00:01:32,400 Install One In Your Living Room Or Bedroom, 31 00:01:32,600 --> 00:01:34,740 And Everyone Will Start Asking Where You Got It. 32 00:01:35,280 --> 00:01:37,820 Creating This Modern, Unique Cube Pendant Light 33 00:01:37,820 --> 00:01:39,980 Is Far Easier Than One Might Have Thought. 34 00:01:40,600 --> 00:01:42,600 To Make The Cube, You’ll Need Square Dowels, 35 00:01:42,600 --> 00:01:44,200 Which You Can Get At Home Depot. 36 00:01:44,740 --> 00:01:46,020 When It Comes To The Pendant Light, 37 00:01:46,020 --> 00:01:48,020 You Can Choose Whichever Model You Like. 38 00:01:48,400 --> 00:01:50,400 Installation Can Be A Bit Tricky, 39 00:01:50,400 --> 00:01:52,520 Especially If You’re A Stranger To Electrical Work. 40 00:01:52,920 --> 00:01:56,880 However, Countless Youtube Videos Will Help You Finish The Job In No Time. 41 00:01:58,180 --> 00:02:01,000 18. REVERSIBLE WOODEN DOOR MAT 42 00:02:02,380 --> 00:02:03,660 Why Settle For A Plain One 43 00:02:03,660 --> 00:02:05,960 When You Can Have A Reversible Wooden Doormat? 44 00:02:06,620 --> 00:02:08,620 This One-Of-A-Kind Mat Is Straightforward, 45 00:02:08,620 --> 00:02:11,620 And It Should Be On The List Of Your Next Do-It-Yourself Projects. 46 00:02:12,260 --> 00:02:12,960 To Make This Mat, 47 00:02:12,960 --> 00:02:15,920 You’ll Need Square End Balusters And Natural Sisal Ropes. 48 00:02:16,380 --> 00:02:19,560 Some Paint, Sealer, Stain, And Electrical Tape Aren’t Necessary, 49 00:02:19,560 --> 00:02:21,560 But It Won’t Hurt To Have Those Too. 50 00:02:22,060 --> 00:02:24,480 When It Comes To Tools, The List Is A Bit Longer: 51 00:02:25,040 --> 00:02:30,980 A Circular Saw, Scissors, Drill, ⅜’’ Drill Bit, Clamps, Pencils, Tape Measure, 52 00:02:30,980 --> 00:02:34,240 Scrap Wood, Sandpaper, And Safety Gear Are Required. 53 00:02:35,320 --> 00:02:37,680 Cutting And Drilling Are The Most Important Steps. 54 00:02:38,240 --> 00:02:39,120 Once You’re Done With Those, 55 00:02:39,120 --> 00:02:41,120 Adding Ropes Will Look Like A Piece Of Cake. 56 00:02:41,640 --> 00:02:44,200 Also, The Final Painting Is A Lot Of Fun. 57 00:02:46,600 --> 00:02:50,080 17. FRENCH-INSPIRED PIANO BENCH MAKEOVER 58 00:02:51,180 --> 00:02:52,880 Although Many People Overlook Them, 59 00:02:53,040 --> 00:02:55,280 Benches Are Amazing Pieces Of Furniture. 60 00:02:55,720 --> 00:02:59,680 They Work Well In Entryways, Hallways, Bedrooms, Living Rooms, Etc. 61 00:03:00,120 --> 00:03:02,240 Basically, You Can Put Them Wherever You Want. 62 00:03:02,680 --> 00:03:04,900 Furthermore, They Are Convenient, And They Look Good. 63 00:03:05,800 --> 00:03:06,840 To Restore An Old Bench, 64 00:03:06,840 --> 00:03:08,840 It’s A Good Idea To Get Rid Of The Veneer, 65 00:03:08,840 --> 00:03:10,320 Since Good Wood Resides Under It. 66 00:03:10,880 --> 00:03:12,300 Then, To Make The Surface Smooth, 67 00:03:12,300 --> 00:03:14,300 You Should Use A Damp Cloth And An Iron - 68 00:03:14,300 --> 00:03:15,460 That Will Do The Trick. 69 00:03:16,020 --> 00:03:17,380 The Next Step Is Sanding, 70 00:03:17,380 --> 00:03:19,420 And A Plain Piece Of Sandpaper Will Do. 71 00:03:19,880 --> 00:03:20,800 Once You’re Done With That, 72 00:03:20,800 --> 00:03:22,800 All You Have To Do Is Paint The Bench - 73 00:03:22,800 --> 00:03:23,440 And That’s It! 74 00:03:24,760 --> 00:03:27,440 16. STYLISH RUBBER BAND LAMP 75 00:03:28,620 --> 00:03:31,880 Lamps Can Make Even The Most Boring Space Bright And Stylish. 76 00:03:32,280 --> 00:03:35,560 However, Many Unique Lamp Models Come With A Hefty Price Tag. 77 00:03:36,180 --> 00:03:39,160 Luckily, Making A Stylish Rubber Band Lamp Is A Snap; 78 00:03:39,160 --> 00:03:41,160 In Fact, You’ll Enjoy Doing It. 79 00:03:41,560 --> 00:03:45,300 Take Five Thin Wooden Boards (Three Long Ones And Two Shorter Ones) 80 00:03:45,300 --> 00:03:47,040 And Glue Them To Make A Cuboid. 81 00:03:47,440 --> 00:03:48,680 One Side Should Be Left Open, 82 00:03:48,680 --> 00:03:51,300 And The Remaining Three Should Have Vertical Openings In Them. 83 00:03:51,860 --> 00:03:54,180 Drill At The Bottom And Add A Socket Base And A Bulb. 84 00:03:54,760 --> 00:03:57,320 Finally, Add Multiple Rubber Bands All Over The Cuboid, 85 00:03:57,320 --> 00:03:59,920 And That’s It - The Lamp Is Complete! 86 00:04:01,820 --> 00:04:04,500 15. AN END TABLE INTO A DESK 87 00:04:05,760 --> 00:04:07,760 Old Wooden Tables Can Be Great To Work With. 88 00:04:08,160 --> 00:04:10,160 With A Few Simple, Yet Effective Tricks, 89 00:04:10,420 --> 00:04:13,140 Old End Tables Can Easily Become Modern Desks. 90 00:04:13,820 --> 00:04:15,640 It’s Best To Take The End Table Apart 91 00:04:15,640 --> 00:04:17,320 And Start Making A Desk From Scratch. 92 00:04:17,800 --> 00:04:20,220 Adding A Piece Of Plywood Will Give Us A Box-Like Structure 93 00:04:20,220 --> 00:04:21,740 That Will Be The Base Of The Desk. 94 00:04:22,500 --> 00:04:23,580 To Complete The Desk Top, 95 00:04:23,580 --> 00:04:25,080 Use Some Glue And Wood Boards. 96 00:04:25,520 --> 00:04:27,520 Then, Glue The Legs, And You Are All Done! 97 00:04:27,960 --> 00:04:29,500 Enjoy Your Brand New Desk. 98 00:04:30,960 --> 00:04:34,760 14. DIY UPPER AND LOWER CABINET LIGHTING 99 00:04:35,880 --> 00:04:38,220 With Some Amazing Upper And Lower Cabinet Lighting, 100 00:04:38,220 --> 00:04:40,220 Every Kitchen Will Start Looking Its Best. 101 00:04:40,620 --> 00:04:42,200 This Project May Seem Intimidating, 102 00:04:42,200 --> 00:04:43,380 But It Actually Isn’t. 103 00:04:43,900 --> 00:04:45,460 Tiny Lights That Come With A Sticky Back 104 00:04:45,460 --> 00:04:46,960 Are The Best For This Project. 105 00:04:47,560 --> 00:04:49,040 Also, In Order To Use These, 106 00:04:49,040 --> 00:04:51,940 We’ll Need A Power Adapter For Both Upper And Lower Cabinets, 107 00:04:51,940 --> 00:04:53,500 As Well As Cord Hiders. 108 00:04:54,060 --> 00:04:56,220 All We Have To Do Is Peel The Paper Off The Lights 109 00:04:56,220 --> 00:04:57,540 And Stick Them To The Surface. 110 00:04:57,900 --> 00:04:58,980 It’s Very Straightforward. 111 00:04:59,620 --> 00:05:02,760 These LED Lights Will Make Every Kitchen Glow For A Long Time. 112 00:05:05,100 --> 00:05:08,060 13. A DIY DOWNDRAFT TABLE 113 00:05:09,160 --> 00:05:11,820 Eliminating Dust Has Never Been Easier - Or Cheaper. 114 00:05:12,460 --> 00:05:14,920 With This Efficient And Easy-To-Make Downdraft Table, 115 00:05:14,920 --> 00:05:17,700 You Can Say Goodbye To Dust Once And For All. 116 00:05:18,140 --> 00:05:20,140 What’s More, Your Lungs Will Thank You. 117 00:05:20,580 --> 00:05:22,580 Woodworking Projects Are A Lot Of Fun, 118 00:05:22,780 --> 00:05:24,300 But Sanding Is A Nightmare. 119 00:05:24,680 --> 00:05:30,360 Luckily, With Some Plywood, Scrap Cutoffs Of ½’’ MDF, ¼’’ Pegboard, And A Dust Fitting, 120 00:05:30,360 --> 00:05:32,700 We Can Solve All Of Our Dust-Related Problems. 121 00:05:33,280 --> 00:05:35,980 Add A Dust Port, Some Tape, And Glue, And That’s It. 122 00:05:36,700 --> 00:05:39,680 When It Comes To Tools, A Brad Nailer, 18V Jigsaw, 123 00:05:39,680 --> 00:05:43,040 Table Saw, Miter Saw, And A Cordless Drill Will Do The Job. 124 00:05:44,300 --> 00:05:47,960 12. DIY ADJUSTABLE SHOE STORAGE BENCH 125 00:05:49,140 --> 00:05:51,140 Having Shoes All Over The House Isn’t Appealing - 126 00:05:51,140 --> 00:05:52,220 That’s For Sure. 127 00:05:52,660 --> 00:05:54,960 Besides Looking Bad, It Is Also Unpractical. 128 00:05:55,620 --> 00:05:57,120 There’s No Need To Despair, Though. 129 00:05:57,580 --> 00:06:01,560 An Adjustable Shoe Storage Bench Will Make Every Home Tidier And More Convenient. 130 00:06:02,100 --> 00:06:03,300 Apart From Storing Shoes, 131 00:06:03,300 --> 00:06:05,980 This Bench Is Comfortable To Sit On While Putting The Shoes On. 132 00:06:06,480 --> 00:06:07,940 Making The Bench Is Easy; 133 00:06:08,460 --> 00:06:14,820 Some ¾’’ Plywood, Poplar Boards, Cove Molding, Screws, Paint, And Polyurethane Blend Is All It Takes. 134 00:06:15,380 --> 00:06:17,980 Also, Anyone Who Has Some Basic Tools In Their Garage 135 00:06:17,980 --> 00:06:20,100 Will Find Them Sufficient To Complete The Job. 136 00:06:21,460 --> 00:06:23,820 11. STYLISH PIPE GARDEN 137 00:06:25,260 --> 00:06:28,160 Stylish Pipe Gardens Aren’t Only For Fancy Gardens And Restaurants - 138 00:06:28,160 --> 00:06:30,380 They Can Make Every Garden Shine. 139 00:06:30,820 --> 00:06:34,120 What’s More, These Are Incredibly Easy And Fun To Make. 140 00:06:34,540 --> 00:06:38,860 To Complete This Project, All You’ll Need Are PVC Pipes, Elbows, And Crosses, 141 00:06:39,160 --> 00:06:41,660 As Well As Some Super Glue, Spray Paint, And Some Herbs. 142 00:06:42,380 --> 00:06:44,780 Once You Have Assembled Your Design And Secured It With Glue, 143 00:06:45,080 --> 00:06:46,700 You Should Paint It In Your Favorite Color 144 00:06:46,700 --> 00:06:48,940 And Hang It On The Wall. That’s How Easy It Is. 145 00:06:54,660 --> 00:06:58,140 10. PATIO CHAIR SET SPRAY PAINTED MAKEOVER 146 00:06:59,280 --> 00:07:01,660 Patio Chairs May Look Nasty After A While; 147 00:07:02,000 --> 00:07:04,120 However, That Doesn’t Mean They Belong In The Trash. 148 00:07:04,980 --> 00:07:06,980 The Wicker May Look As Good As New 149 00:07:06,980 --> 00:07:08,220 After A Simple Paint Makeover. 150 00:07:08,620 --> 00:07:10,620 Old Cushions Can Also Get Their Shine Back - 151 00:07:11,420 --> 00:07:13,960 Rustoleum Spray Paint Is All It Takes To Restore Them 152 00:07:13,960 --> 00:07:15,600 And Make Them Vivid Once Again. 153 00:07:16,040 --> 00:07:17,700 In Fact, Spray Paint Is All It Takes, 154 00:07:17,700 --> 00:07:19,700 For Both The Chairs And The Cushions. 155 00:07:20,020 --> 00:07:22,820 This DIY Project Is Straightforward And Fun To Do. 156 00:07:23,280 --> 00:07:25,420 Moreover, The Results Are Long-Lasting. 157 00:07:27,360 --> 00:07:31,580 9. SALT WATER ETCHING – PERSONALIZE YOUR METAL WATER BOTTLE 158 00:07:32,900 --> 00:07:35,180 Water Bottles Are Useful, But They All Look The Same. 159 00:07:35,640 --> 00:07:37,920 Also, Mixing Up Your Bottle With Someone Else’s Happens 160 00:07:37,920 --> 00:07:39,560 More Often Than It Should. 161 00:07:39,900 --> 00:07:42,080 So, Why Not Personalize Your Water Bottle 162 00:07:42,080 --> 00:07:44,140 And Prevent Such Situations From Happening? 163 00:07:44,600 --> 00:07:46,600 Moreover, You’ll Have A Unique Bottle. 164 00:07:47,220 --> 00:07:50,480 Use Simple Household Ingredients To Etch A Design On Your Bottle. 165 00:07:50,900 --> 00:07:53,140 You Won’t Need Any Special Equipment For This Project. 166 00:07:53,860 --> 00:07:58,160 By Using A Battery, Create A Chemical Reaction Between The Metal, Salt, And Water. 167 00:07:58,760 --> 00:08:02,240 Whatever The Design You Choose, Your Bottle Will Look Unique And Fancy. 168 00:08:04,880 --> 00:08:07,160 8. JELLY BEAN DISPENSER 169 00:08:08,220 --> 00:08:10,220 Jelly Beans Are Everyone’s Favorite! 170 00:08:10,740 --> 00:08:15,180 Making A Cool Jelly Bean Dispenser Will Make People Love These Amazing Sweets Even More. 171 00:08:15,780 --> 00:08:20,020 For This Project, You’ll Need Multiple Pieces Of Wood, Dowels, A Jar And Cover, 172 00:08:20,280 --> 00:08:25,740 Small Nails, Wood Glue, Drill Bit, Table Saw, Tape Measure, Hammer, Square, 173 00:08:25,740 --> 00:08:30,060 Needle Nose Pliers, Paint/Varnish, And, Of Course, Jelly Beans! 174 00:08:30,760 --> 00:08:34,500 It’s Important To Mix Up A Mineral Oil And Beeswax Concoction For The Finish. 175 00:08:34,840 --> 00:08:37,340 That Will Prevent The Jelly Beans From Picking Up The Wood Flavor. 176 00:08:37,800 --> 00:08:40,160 Moreover, It Will Make The Dispenser Safe For Children. 177 00:08:42,700 --> 00:08:46,820 7. WIND SPINNERS: IDEAL FOR A GARDEN OR A YARD 178 00:08:48,040 --> 00:08:50,200 Wind Spinners Are Both Fun To Watch And Build. 179 00:08:50,680 --> 00:08:52,680 Moreover, They Come With Clear Instruction – 180 00:08:52,680 --> 00:08:54,860 An Estimated Hour Or Two Is All It Takes. 181 00:08:55,520 --> 00:09:05,320 Here Is What You’ll Need: 65 – 3/4″ X 1/4″ X 7″ Wood Pieces, One ¼’’ Steel Rod 36’’ Long, 182 00:09:05,900 --> 00:09:09,340 Two Nuts, Nylon Cord/Fishing Line, And A Drill Or A Circular Saw. 183 00:09:09,540 --> 00:09:12,920 Make This Project A Fun Activity For The Whole Family Over The Weekend. 184 00:09:13,240 --> 00:09:14,380 Once It Has Been Completed, 185 00:09:14,380 --> 00:09:17,100 Your Wind Spinner Will Be Fun To Observe For Hours. 186 00:09:18,940 --> 00:09:21,960 6. DEDICATED SLIM COMIC BOOKCASE 187 00:09:23,160 --> 00:09:26,020 Storing Comics Can Prove To Be Tricky When There Isn’t Enough Space. 188 00:09:26,460 --> 00:09:29,280 Also, Storing Them In The Open May Not Be The Best Idea, 189 00:09:29,580 --> 00:09:32,580 As Dust Tends To Fall On Them, And That Requires Regular Dusting. 190 00:09:33,260 --> 00:09:35,520 Moreover, Comics Are Smaller Than Most Books, 191 00:09:35,820 --> 00:09:37,920 So It’s Hard To Find An Appropriate Shelf For Them. 192 00:09:38,500 --> 00:09:41,420 Luckily, We Can Make Our Own Slim Comic Bookcase 193 00:09:41,580 --> 00:09:43,820 And Enjoy All The Extra Space For Our Comics! 194 00:09:44,460 --> 00:09:46,720 All We Need For This Slim Bookcase Are Perforated Boards, 195 00:09:46,720 --> 00:09:48,720 Which We Will Attach To A Magnet. 196 00:09:49,280 --> 00:09:51,280 The Whole Bookcase Won’t Take Up Much Space, 197 00:09:51,280 --> 00:09:53,900 But It Will Provide Ample Space Inside For The Comics. 198 00:09:56,160 --> 00:09:59,240 5. DIY PHOTO TRANSFER TO WOOD 199 00:10:00,560 --> 00:10:03,400 Hanging Pictures Is Fun, But When You Transfer Them To Wood, 200 00:10:03,400 --> 00:10:06,640 That Has A Special Feel That Will Last For A Long Time. 201 00:10:07,180 --> 00:10:10,140 To Master This Method, You Will Need A Matte-Finish Mod Podge, 202 00:10:10,600 --> 00:10:14,980 Photo Transfer Gel, Wood, Wood Stain, Sandpaper, Foam Brushes, 203 00:10:14,980 --> 00:10:17,480 And A Laser Printed Picture On Regular Paper. 204 00:10:17,980 --> 00:10:21,180 The Key Is To Paint A Thin Layer Of The Gel Onto The Wood Board, 205 00:10:21,740 --> 00:10:25,300 Carefully Place The Image, Squish All Of The Air Out, And Let It Dry Overnight. 206 00:10:26,100 --> 00:10:28,900 Then, Wipe Off The Paper By Wetting The Board Under Water - 207 00:10:29,240 --> 00:10:30,440 This Requires Patience. 208 00:10:30,980 --> 00:10:34,060 Lastly, Cover The Wood With Mod Podge To Seal The Picture 209 00:10:34,060 --> 00:10:37,120 And Enjoy The Amazing Piece Of Art You Created! 210 00:10:39,000 --> 00:10:42,360 4. DIY WALL PLANTER WITH SUCCULENTS 211 00:10:43,440 --> 00:10:46,480 Succulents Are Very Cute And Fairly Easy To Maintain - 212 00:10:46,980 --> 00:10:48,980 It’s No Wonder That So Many People Love Them. 213 00:10:49,680 --> 00:10:54,020 To Add A Twist To Your Home, Follow This Idea And Make Your Succulents Even More Special. 214 00:10:54,540 --> 00:10:56,700 These Wall Planters Are Cost Around $10. 215 00:10:57,580 --> 00:11:00,500 Some Wood Boards, Drilling, Nails, Glue, And Wood Paint 216 00:11:00,500 --> 00:11:02,500 Is All It Takes To Make This Unique Planter. 217 00:11:02,960 --> 00:11:06,420 You Can Be Sure That All Of Your Friends Will Be Asking About It Once You Hang It! 218 00:11:07,000 --> 00:11:10,040 Moreover, Your Home Will Look Amazing And Original. 219 00:11:12,180 --> 00:11:16,900 3. INDUSTRIAL FARMHOUSE LOOK COMBINED WITH A DOLLAR STORE STORAGE DRAWERS 220 00:11:18,060 --> 00:11:20,520 The Industrial Farmhouse Style Is Many People’s Favorite - 221 00:11:20,520 --> 00:11:21,860 And That’s No Surprise. 222 00:11:22,540 --> 00:11:25,060 This Style Complements All Homes And Offices, 223 00:11:25,060 --> 00:11:27,740 And It’s Easy To Combine With Other Styles. 224 00:11:28,740 --> 00:11:30,860 In Combination With These Convenient Storage Drawers, 225 00:11:30,940 --> 00:11:33,320 You Get Both The Looks And The Functionality. 226 00:11:33,980 --> 00:11:36,860 To Make The Best Of Both World, You’ll Need The Drawers, Of Course, 227 00:11:37,200 --> 00:11:41,440 Some Spray Paint, Scrapbook Metal Labels, Sandpaper, Antique Fasteners, 228 00:11:41,740 --> 00:11:47,980 Balsa Wood, Wood Furniture Buttons, Wood Stain, Wood Adhesive, A Drill And A 3/22 Drill Bit. 229 00:11:48,580 --> 00:11:52,280 Simply Pull The Drawers Out And Lightly Sand The Structure Before Spray-Painting It. 230 00:11:52,620 --> 00:11:54,780 Then, Place The Labels On The Drawers, 231 00:11:54,780 --> 00:11:57,440 And Stained Wood On The Sides For A More Expensive Look. 232 00:11:58,060 --> 00:12:01,420 That’s It! Enjoy Your New Industrial Farmhouse Drawers. 233 00:12:03,280 --> 00:12:06,660 2. DIY GROW LIGHT FOR STARTING SEEDS 234 00:12:07,860 --> 00:12:11,300 If Your Home Is Rather Boring, Think About Adding Some Homemade Seeds, 235 00:12:11,300 --> 00:12:14,500 Which Will Turn Into Beautiful Decorations Once They Start To Bloom. 236 00:12:15,180 --> 00:12:19,020 Making A Simple Frame That Holds Fluorescent Lights Is Both Easy And Cheap. 237 00:12:19,980 --> 00:12:22,380 A 48’’ Light Can Fit Two Flats Under The Lamp, 238 00:12:22,500 --> 00:12:25,440 Which Is More Than Enough To Make Your Home A Bit More Interesting. 239 00:12:25,940 --> 00:12:28,560 Moreover, By Using Button Caps To Hide Screw Holes, 240 00:12:28,740 --> 00:12:31,620 You Can Easily Disassemble The Frame And Store It After Spring. 241 00:12:32,100 --> 00:12:33,700 If You Are Fairly Skilled And Equipped, 242 00:12:33,700 --> 00:12:36,920 The Project Shouldn’t Take More Than One Or Two Hours Of Your Time. 243 00:12:37,440 --> 00:12:39,960 Before We Get To Number 1, I Request You To Press Subscribe Button 244 00:12:39,960 --> 00:12:42,980 If This Channel Is New To You And Bell Icon Beside It. 245 00:12:43,580 --> 00:12:46,600 This Way You'll Be Notified Of Our New Videos Every Time I Published Them. 246 00:12:47,220 --> 00:12:50,040 1. OPTICAL ILLUSION PHOTO FRAME 247 00:12:51,220 --> 00:12:54,200 Have You Ever Had Two Amazing Photos That You Wanted To Frame, 248 00:12:54,200 --> 00:12:55,520 But Only One Frame? 249 00:12:55,860 --> 00:12:59,620 With This Fun-To-Make Optical Illusion Photo Frame, That Shouldn’t Be A Problem. 250 00:13:00,260 --> 00:13:06,260 Take 16 Flat Wood Pieces (1-Inch X 11 Inches) And Glue Them By The Edges, Making A Wavy Structure. 251 00:13:06,820 --> 00:13:13,420 Then, Take The Two Photos (11 Inches And 8 Inches) And Cut Them In Vertical Strips (1 Strip = 1 Inch). 252 00:13:14,000 --> 00:13:16,340 Start Gluing The Strips On The Wavy Wooden Structure, 253 00:13:16,520 --> 00:13:18,780 Gluing Each Strip On Every Second Wood Piece. 254 00:13:19,480 --> 00:13:22,800 Then, Use The Second Picture And Glue It On The Remaining Wood Pieces. 255 00:13:24,940 --> 00:13:26,940 Glue Everything On A Piece Of Card Stock, 256 00:13:26,940 --> 00:13:31,080 Hang It On The Wall And Enjoy One Picture From The Left And The Other From The Right! 257 00:13:31,620 --> 00:13:34,560 This Unique Photo Frame Will Make Every Home An Interesting One! 258 00:13:35,760 --> 00:13:39,240 That’s It For Now, Since You’re Still Watching, Like This Video Before It Ends 259 00:13:39,440 --> 00:13:42,300 Or Share It With Anyone Close To You In Your Social Circle. 260 00:13:42,720 --> 00:13:46,220 See You Again Later In A Near Future With “Hopefully” Better Videos, 261 00:13:46,220 --> 00:13:47,520 And Thanks For Watching.
Unused toys can be part of unique decorating pieces
1 00:00:17,100 --> 00:00:19,380 They’re not going to need that bottle forever. 2 00:00:19,380 --> 00:00:23,950 (Even if it sometimes feels that way.) This is 25 Clever Ways 3 00:00:23,950 --> 00:00:27,870 to Repurpose Kids’ Stuff by Alanna Okun 4 00:00:27,870 --> 00:00:31,390 1. Use Lego people to organize your cables. 5 00:00:31,390 --> 00:00:35,469 2. Legos can also help you make sure you never forget your keys again. 6 00:00:35,469 --> 00:00:37,999 I couldn’t bring myself to drill through a Lego piece (!) 7 00:00:37,999 --> 00:00:40,359 but after raiding my sons Lego box 8 00:00:40,359 --> 00:00:42,260 I found the perfect bit to attach the key to 9 00:00:42,260 --> 00:00:45,149 (Lego part number 3176). 10 00:00:46,000 --> 00:00:49,429 3. Turn an unneeded crib into a desk. Direction; 11 00:00:49,429 --> 00:00:54,269 1. Cut two sheets of thick mdf to fit snugly into the mattress base 12 00:00:54,269 --> 00:00:58,359 to provide a table top. 2. Chose thick strong board to strengthen 13 00:00:58,359 --> 00:01:02,679 the desk should any small people climb, sit or stand on it. 14 00:01:02,679 --> 00:01:06,410 And paint the boards with blackboard paint to create a chalkboard table top. 15 00:01:06,410 --> 00:01:07,970 More info under this video. 16 00:01:08,100 --> 00:01:12,620 4. A fold-down stroller can be used for way more than just baby transport. 17 00:01:12,620 --> 00:01:14,940 Although you should ~probably~ remove your baby 18 00:01:14,940 --> 00:01:16,750 from said stroller first. 19 00:01:16,750 --> 00:01:18,880 5. Upcycled Fire Truck Lamp. 20 00:01:18,880 --> 00:01:24,590 I took an old pre-loved fire truck toy, masked, sprayed and wired it to become a new 21 00:01:24,590 --> 00:01:27,860 and slightly different table lamp. The ladder part of the truck moves 22 00:01:27,860 --> 00:01:30,560 from left to right by a control lever on the truck, 23 00:01:30,560 --> 00:01:34,610 making this a great desk or reading lamp, as the bulb can swing across to 24 00:01:34,610 --> 00:01:38,180 where you would like it. I have used an energy saving globe lightbulb 25 00:01:38,180 --> 00:01:40,740 to hang off the ladder and over the truck. 26 00:01:40,740 --> 00:01:45,670 6. Turn a wagon into a portable planter. Find out more at This Old House. 27 00:01:45,670 --> 00:01:49,150 7. Protect your phone or iPod with a Rainbow Loom case. 28 00:01:49,150 --> 00:01:53,170 There are plenty of video tutorials you can send the Loomer in your life. 29 00:01:53,170 --> 00:01:57,570 (Or make it yourself — that is addictive.) 30 00:01:57,570 --> 00:01:59,600 Or Frame your Mirror like this 31 00:02:00,200 --> 00:02:03,860 8. Store bedding around a pool noodle to prevent creases. 32 00:02:03,860 --> 00:02:06,659 9. Make a pool noodle beverage float. 33 00:02:06,659 --> 00:02:10,979 10. Or turn a pool noodle into a card holder. Sometimes parents 34 00:02:10,979 --> 00:02:13,890 just have to stay up waaaaay later. 35 00:02:13,890 --> 00:02:17,850 11. Use a Lego to make a capo in a pinch. 36 00:02:17,850 --> 00:02:22,440 12. An unused diaper makes secure beachside storage. 37 00:02:22,440 --> 00:02:25,460 Emphasis on “unused.” 38 00:02:26,000 --> 00:02:30,480 13. Crayons can help disguise scuffs on leather. One thing you may not know 39 00:02:30,480 --> 00:02:33,800 about me is I'm thrifty. Maybe even cheap 40 00:02:33,800 --> 00:02:35,910 {God knew what he was doing when he matched me 41 00:02:35,910 --> 00:02:37,350 with the most generous man on the planet}. 42 00:02:37,350 --> 00:02:40,630 I grew up in a family of 11 kids, on a missionary budget, 43 00:02:40,630 --> 00:02:44,510 so I come from frugal stock. I remember my mom using this trick 44 00:02:44,510 --> 00:02:48,260 on a tiny pair of red shoes to make them last through multiple kids. 45 00:02:48,260 --> 00:02:50,020 At my house I have a lot more crayons 46 00:02:50,020 --> 00:02:53,130 than shoe-shine materials so this is my go-to fix-it. 47 00:02:54,100 --> 00:02:55,640 {sharpies work too!} 48 00:02:55,640 --> 00:03:00,160 14. Reuse baby bottles as spice jars or other small storage. 49 00:03:00,160 --> 00:03:06,290 15. Same goes for baby food jars. 16. Repurpose toy planters or buy it at etsy 50 00:03:10,000 --> 00:03:13,209 17. Turn an old toy into a birdhouse. 51 00:03:13,209 --> 00:03:16,640 18. Old toys can also make great wall planters… 52 00:03:16,640 --> 00:03:18,069 or new cabinet knobs 53 00:03:19,000 --> 00:03:22,380 19. Or lamps. Chances are any plastic toy you find 54 00:03:22,380 --> 00:03:27,050 will most likely be hollow, so just cut it in half (RIP) 55 00:03:27,050 --> 00:03:30,130 and cut a smaller hole for the cord/drainage hole. 56 00:03:30,130 --> 00:03:34,640 20. Craft Toyland Lamp If you have a bunch of toys all over, 57 00:03:34,640 --> 00:03:39,209 maybe some that are broken or not working anymore so this is something that might fit. 58 00:03:39,209 --> 00:03:43,270 With a simple table lamp base and glue gun, you can easily create something similar, 59 00:03:43,270 --> 00:03:44,530 and then spray paint. 60 00:03:44,530 --> 00:03:48,349 A beautiful art you can make with $2.99 Goodwill lamp 61 00:03:48,349 --> 00:03:53,050 and $8.56 in toys. First: To make assembly easier 62 00:03:53,050 --> 00:03:55,660 a few of my little plastic friends had to lose their tails 63 00:03:55,660 --> 00:03:58,970 (poor things) and several had to lose the little plastic 64 00:03:58,970 --> 00:04:01,129 bases that help them stand up. 65 00:04:01,129 --> 00:04:04,750 The glue I used is Loctite Super Glue Gel Control 66 00:04:04,750 --> 00:04:09,180 (4 bottles)... Here is the pre-prime red structure of it. 67 00:04:09,180 --> 00:04:12,330 This really isn't a hard project, just a little time consuming. 68 00:04:12,330 --> 00:04:17,299 I spent 3 or 4 hours chopping up pieces, trying out arrangements and gluing. 69 00:04:17,299 --> 00:04:18,900 Another side shot... 70 00:04:18,900 --> 00:04:21,190 After giving it a little while for the glue to fully set 71 00:04:21,190 --> 00:04:24,740 (it recommends at least 5 minutes) I took it out to the garage 72 00:04:24,740 --> 00:04:26,000 and hit it with the primer. 73 00:04:27,000 --> 00:04:27,900 A few Close ups 74 00:04:34,100 --> 00:04:36,570 and This is final result after 75 00:04:36,570 --> 00:04:39,330 some final spray paint and dry brushing. 76 00:04:39,330 --> 00:04:44,760 21. Just remember: some kids’ stuff just isn’t for grownups. 77 00:04:44,760 --> 00:04:48,630 22. Repurpose Mason jars with old plastic toy animals 78 00:04:49,600 --> 00:04:53,669 23. Make a wall-mountable jewelry. A fun and unique way to display your jewelry 79 00:04:53,669 --> 00:04:55,400 collection, which replaces a messy tangle 80 00:04:55,400 --> 00:04:57,620 in a humdrum jewelry box. 81 00:04:57,620 --> 00:05:00,620 24. Repurpose Rubber Toys Instruction: 82 00:05:00,620 --> 00:05:04,139 1. Mark where the plant opening should be and carefully cut 83 00:05:04,139 --> 00:05:08,260 the shape out with box cutters. 2. Use a Dremel with a sanding tip 84 00:05:08,260 --> 00:05:12,479 to clean up the open area (do this in a well ventilated area) 85 00:05:12,479 --> 00:05:17,290 3. Paint the toy (optional) 4. Fill the cavity with soil 86 00:05:17,290 --> 00:05:18,889 and add your plant. 87 00:05:18,889 --> 00:05:21,889 Special for this; No need to cut into this toy, 88 00:05:21,889 --> 00:05:23,949 just cover the hole For the faucet opening and 89 00:05:23,949 --> 00:05:25,070 drill a hole to hang on a wall 90 00:05:25,500 --> 00:05:28,810 And, 25. Craft Instant Hallway Hooks 91 00:05:28,810 --> 00:05:29,850 Made from Blocks 92 00:05:29,850 --> 00:05:33,090 Step 1: You will need a set of wooden Toy Blocks 93 00:05:33,090 --> 00:05:38,340 ($15.95 via Amazon), a drill, screws, paint, and masking tape, 94 00:05:38,340 --> 00:05:40,850 which can all be found at your local hardware store. 95 00:05:40,850 --> 00:05:44,110 Step 2: Leave the blocks in natural wood or paint 96 00:05:44,110 --> 00:05:47,780 in a preferred color. Drill a hole into the back of the block, 97 00:05:47,780 --> 00:05:50,280 insert the screw, and attach to the wall. 98 00:05:50,280 --> 00:05:54,570 Above: A close-up of the surprisingly sophisticated-looking hallway block system 99 00:05:55,000 --> 00:05:58,259 That’s it, Come back next week for more decorating ideas 100 00:05:58,259 --> 00:06:01,500 Meanwhile, like this video or share it with your followers 101 00:06:01,500 --> 00:06:05,090 or everyone you use to hang out with. I hope they’ll like it too. 102 00:06:05,090 --> 00:06:08,479 Press subscribe button under this video if you never seen this channel before 103 00:06:08,479 --> 00:06:09,559 And thanks for watching
Here's more than dozens decor ideas you can try
1 00:00:15,879 --> 00:00:18,000 More money, more problems, am I rite? 2 00:00:18,500 --> 00:00:20,000 This is 30 Cheap And Brilliant 3 00:00:20,500 --> 00:00:22,000 Dollar Store Hacks 4 00:00:22,000 --> 00:00:23,000 by Natalie brown 5 00:00:24,000 --> 00:00:27,489 1. Pencil grips make crochet hooks more comfortable. Instruction: 6 00:00:27,489 --> 00:00:30,509 Wrap the bottom of your crochet hook with masking tape 7 00:00:30,509 --> 00:00:32,200 until it's about the width of a pencil. 8 00:00:32,200 --> 00:00:34,200 Slide two pencil grips onto hook. 9 00:00:34,760 --> 00:00:37,940 2. Turn pool noodles into waterproof garlands. 10 00:00:37,940 --> 00:00:42,500 Instruction: 1. Slice pool noodle into about 1/2 thick pieces. 11 00:00:42,720 --> 00:00:46,500 2.Thread string/twine etc through the longest 12 00:00:46,500 --> 00:00:47,739 needle you can find. 13 00:00:47,739 --> 00:00:50,949 3.String each slice of pool noodle. and 14 00:00:50,949 --> 00:00:52,900 4.Hang your garland! 15 00:00:52,900 --> 00:00:56,100 3. S-hooks and binder clips as pot storage. 16 00:00:56,100 --> 00:00:58,100 Not THAT kind. 17 00:00:58,500 --> 00:01:01,949 4. Use some picture frames to make a terrarium. Directions. 18 00:01:01,949 --> 00:01:04,760 1. Remove the backs and glass from eight frames. 19 00:01:04,760 --> 00:01:07,460 2. Drill one hole near top and one near the bottom, 20 00:01:07,460 --> 00:01:09,150 through the larger frame and halfway into 21 00:01:09,150 --> 00:01:11,080 the smaller; Screw together. 22 00:01:11,080 --> 00:01:14,000 3. Arrange the two L's you've created as shown. 23 00:01:14,000 --> 00:01:17,040 4. Align a 2" mending plate at each end of 24 00:01:17,040 --> 00:01:18,540 the frames, as shown. 25 00:01:18,540 --> 00:01:21,100 Drill pilot holes and secure with screws 26 00:01:21,100 --> 00:01:24,640 5. Align the two sets of 5" x 7" frames as shown. 27 00:01:24,640 --> 00:01:27,840 6. Line the resulting roof up with the base, as shown. 28 00:01:27,840 --> 00:01:30,640 7. Trace the inside of an eave on paper. 29 00:01:30,640 --> 00:01:34,540 8. Fit the cut wood into each end of the roof. 30 00:01:34,540 --> 00:01:37,580 9. Smooth wood filler over the terrarium's exterior, 31 00:01:37,580 --> 00:01:38,680 filling in the joints 32 00:01:38,680 --> 00:01:39,820 and covering the screw holes. 33 00:01:39,820 --> 00:01:40,880 Let dry 34 00:01:40,880 --> 00:01:42,820 10. Paint the piece white. 35 00:01:42,820 --> 00:01:45,080 11. Replace the glass from the bottom up. 36 00:01:45,100 --> 00:01:47,560 Place hot glue in the corners of each frame 37 00:01:47,560 --> 00:01:49,600 12. Lift the terrarium's lid 38 00:01:49,600 --> 00:01:51,420 to fit your favorite plants inside. 39 00:01:51,420 --> 00:01:54,560 Set by a sunny window and admire how your mini garden grows. 40 00:01:54,900 --> 00:01:58,000 5. Organize crayons by color with Popsicle trays. 41 00:01:58,000 --> 00:02:00,480 For those of you with kiddos or regressive tendencies. 42 00:02:00,480 --> 00:02:02,920 You’ll never have to wait for an orange again. 43 00:02:03,220 --> 00:02:07,020 6. Manila folders + chopsticks = modern lamp. 44 00:02:07,020 --> 00:02:09,400 Can you guess what this stylish light fixture is made of? 45 00:02:09,620 --> 00:02:10,560 Give up? 46 00:02:10,560 --> 00:02:12,900 Manila folders and bamboo skewers! 47 00:02:12,900 --> 00:02:14,280 OK, the lightbulb kit may 48 00:02:14,280 --> 00:02:16,480 require a visit to the hardware store. 49 00:02:16,480 --> 00:02:18,819 Supplies Needed: Manila Folders, bamboo skewers 50 00:02:18,820 --> 00:02:21,040 Tissue paper, Glue, Scissors 51 00:02:21,040 --> 00:02:23,820 Trim Manila Folders for large and small lamp pieces 52 00:02:23,830 --> 00:02:27,170 Glue Folders together overlapping to form open cubes 53 00:02:27,170 --> 00:02:29,580 Mark out Holes for skewer light-bulb support grid 54 00:02:29,800 --> 00:02:33,060 Decoupage tissue to folders and trim closely 55 00:02:33,060 --> 00:02:36,500 Add skewers supports glue with strong craft glue 56 00:02:36,500 --> 00:02:40,260 A Pendant lamp kit buy at IKEA for $5 or less 57 00:02:40,260 --> 00:02:42,480 Install pendant light in skewer grid 58 00:02:42,480 --> 00:02:42,990 Done ! 59 00:02:43,200 --> 00:02:45,280 7. Pick your favorite plastic animal 60 00:02:45,280 --> 00:02:46,730 and turn him into a bookend. 61 00:02:47,180 --> 00:02:49,500 You don’t even have to cut them in half this time. 62 00:02:49,500 --> 00:02:52,700 8. Sponges can be ergonomic keyboard things. 63 00:02:52,700 --> 00:02:53,730 You could cover them in fabric 64 00:02:53,730 --> 00:02:55,520 if you don’t dig the kitchen look. 65 00:02:55,520 --> 00:02:58,600 9. Picture frames work as dry erase boards. 66 00:02:58,600 --> 00:03:00,740 Drop plain white paper in there 67 00:03:00,780 --> 00:03:02,920 if you’re not into the scrapbooky look. 68 00:03:02,920 --> 00:03:05,460 10. Drop-cloths can be curtains, too. 69 00:03:05,460 --> 00:03:07,390 Yup, you got it right: 70 00:03:07,390 --> 00:03:09,280 Canvas drop cloths! 71 00:03:09,400 --> 00:03:12,820 11. These wire easels want to keep your laptop cool. 72 00:03:12,820 --> 00:03:15,880 You'll need two twisted gauge display easel from a dollar store 73 00:03:16,040 --> 00:03:18,560 $1 each and Rubber bands 74 00:03:18,560 --> 00:03:19,320 Direction! 75 00:03:19,320 --> 00:03:21,550 Put the two unfolded stands next to each other, 76 00:03:21,550 --> 00:03:23,860 then use the elastic bands to attach the anti slip foam 77 00:03:23,860 --> 00:03:25,760 to the top and bottom of the stand 78 00:03:25,760 --> 00:03:27,370 for a quicker and easier solution, 79 00:03:27,370 --> 00:03:29,160 pick up a cooling rack for cookies 80 00:03:29,160 --> 00:03:32,720 12. Turn cooling racks and lasagna pans into juicy steaks. 81 00:03:32,720 --> 00:03:34,860 Run to a Dollar Tree and pick up cooling racks 82 00:03:34,860 --> 00:03:35,880 and lasagna pans. 83 00:03:35,880 --> 00:03:37,840 The racks and pans were both 2 for $1. 84 00:03:37,840 --> 00:03:38,350 Direction: 85 00:03:38,350 --> 00:03:39,940 Assemble and Done. 86 00:03:40,120 --> 00:03:41,740 Grilling is ready 87 00:03:41,800 --> 00:03:45,180 13. Cover oddly shaped kitchen items with shower caps. 88 00:03:45,180 --> 00:03:48,900 14. Spray-paint and patience can turn beads into a chandelier. 89 00:03:48,900 --> 00:03:51,730 Pinterest-ers will be familiar with this one. 90 00:03:51,730 --> 00:03:55,050 15. Get crafty with two colors of paint and some vases. 91 00:03:55,050 --> 00:03:56,440 Recommended to use 92 00:03:56,440 --> 00:03:58,660 Martha Stewart brand high-gloss acrylic paint 93 00:03:58,670 --> 00:04:00,780 for a perfect glass work. 94 00:04:00,780 --> 00:04:03,720 16. Mercury-ize any sort of glassware 95 00:04:03,720 --> 00:04:04,770 you happen to find. 96 00:04:04,770 --> 00:04:06,420 Main supplies you need are: Glass candlestick 97 00:04:06,420 --> 00:04:07,840 and Glass bowl you can get 98 00:04:07,840 --> 00:04:09,480 at dollar store for $2. 99 00:04:09,480 --> 00:04:10,380 Direction: 100 00:04:10,380 --> 00:04:12,780 1. Run a bead of E-6000 Glue 101 00:04:12,780 --> 00:04:14,900 around the top rim of the candlestick. 102 00:04:14,900 --> 00:04:17,760 Set bowl centered on top and allow to dry 24 hours. 103 00:04:17,980 --> 00:04:19,460 2. On a covered work area, 104 00:04:19,460 --> 00:04:21,540 invert pedestal bowl and spray 105 00:04:21,540 --> 00:04:23,880 with a light coat of Krylon Looking Glass. 106 00:04:23,880 --> 00:04:26,280 Immediately spray with water or vinegar solution. 107 00:04:26,280 --> 00:04:28,900 Dab lightly with a lint-free cloth to distress. 108 00:04:28,900 --> 00:04:30,100 Allow to dry 109 00:04:30,100 --> 00:04:31,380 (the paint dries quickly). 110 00:04:31,460 --> 00:04:34,560 17. Dino butts can help your phone stand up. 111 00:04:34,560 --> 00:04:35,680 You just have to ignore 112 00:04:35,680 --> 00:04:38,480 the plastic Dino's screams of anguish as you cut it in half. 113 00:04:38,480 --> 00:04:40,340 This image is pretty self-explanatory 114 00:04:40,340 --> 00:04:41,540 I believe. 115 00:04:42,100 --> 00:04:43,580 18. Aww.... 116 00:04:43,580 --> 00:04:45,860 Make a little magnet board with a burner cover. 117 00:04:45,860 --> 00:04:47,020 Well, this thing have 118 00:04:47,020 --> 00:04:49,600 eight directions waiting you in another site. 119 00:04:49,600 --> 00:04:52,400 19. Cups can be custom modular storage. 120 00:04:52,400 --> 00:04:53,300 You’ll need a toolbox. 121 00:04:53,300 --> 00:04:55,910 Filled with •3 packs of 8 small round bolt and nuts 122 00:04:55,910 --> 00:04:57,180 •7 plastic drink tumblers 123 00:04:57,180 --> 00:04:58,160 •Marker 124 00:04:58,160 --> 00:04:58,740 •Drill 125 00:04:58,740 --> 00:04:59,340 •Yarn 126 00:04:59,340 --> 00:05:00,200 •Scissors 127 00:05:00,200 --> 00:05:01,360 •Awl or nail 128 00:05:01,360 --> 00:05:02,220 and Wire 129 00:05:02,220 --> 00:05:04,500 Check info to get complete tutorial 130 00:05:04,920 --> 00:05:07,660 20. Use contact paper as a laptop skin. 131 00:05:07,660 --> 00:05:09,340 A simple tutorial for turning your scratched 132 00:05:09,340 --> 00:05:12,740 and dented laptop into a fun and unique statement! 133 00:05:12,740 --> 00:05:14,680 Supplies: Wood-Grain Contact paper 134 00:05:14,680 --> 00:05:16,270 (found at most dollar stores), 135 00:05:16,270 --> 00:05:19,760 x-acto knife, scissors, and tracing paper. 136 00:05:19,760 --> 00:05:21,400 21. Mirrors become little boxes. 137 00:05:21,400 --> 00:05:23,030 With just a little help from your good old 138 00:05:23,030 --> 00:05:24,940 friend, "The hot glue gun". 139 00:05:24,950 --> 00:05:25,990 Here's how you do it. .. 140 00:05:25,990 --> 00:05:27,920 Oh! And, if you’re looking to set up 141 00:05:27,920 --> 00:05:28,840 the majority of the hours 142 00:05:28,840 --> 00:05:31,370 in a day while also making yourself crazy, 143 00:05:31,370 --> 00:05:34,000 try taking multiple pictures of a mirrored box. 144 00:05:34,000 --> 00:05:35,080 Classic... 145 00:05:35,440 --> 00:05:38,040 22. You too can have a spa-like bathroom 146 00:05:38,040 --> 00:05:39,680 for only like $5. 147 00:05:39,800 --> 00:05:42,780 I smooshed down the glue then arranged the rocks. 148 00:05:42,780 --> 00:05:43,940 Not hard at all. 149 00:05:43,940 --> 00:05:45,980 In retrospect I think it would have been better 150 00:05:45,990 --> 00:05:48,300 to start in the center and work my way out. 151 00:05:48,310 --> 00:05:50,210 It's also probably best to let the glue set 152 00:05:50,210 --> 00:05:52,900 for a good 24 hours before walking on it. 153 00:05:52,900 --> 00:05:55,400 23. Never ever misplace your keys again… 154 00:05:55,400 --> 00:05:56,410 …as long as you remember 155 00:05:56,410 --> 00:05:57,980 to hang them in the teeny frame. 156 00:05:57,980 --> 00:05:58,700 A simple solution 157 00:05:58,700 --> 00:06:01,230 for "sometimes" a messy situation. 158 00:06:01,230 --> 00:06:04,730 24. Keep your cold drink at hand all summer long. 159 00:06:04,730 --> 00:06:06,480 Gotta be a little handy for this. 160 00:06:06,480 --> 00:06:07,800 Step 1: Gather materials 161 00:06:07,800 --> 00:06:09,360 Step 2: Bend the Crook 162 00:06:09,360 --> 00:06:11,360 Step 3: Sharpen the Base 163 00:06:11,360 --> 00:06:15,020 Step 4: Attach the Cup using epoxy if you have to 164 00:06:15,020 --> 00:06:15,960 and 165 00:06:16,340 --> 00:06:18,700 last step: stick it on the ground 166 00:06:18,700 --> 00:06:21,580 25. Fancy pants topiaries 167 00:06:21,580 --> 00:06:23,280 (assuming you can find moss). 168 00:06:23,280 --> 00:06:25,000 These will depend on your dollar store. 169 00:06:25,000 --> 00:06:27,340 5 DIY instruction available for you 170 00:06:27,340 --> 00:06:30,180 after you click a pasted link under this video. 171 00:06:30,200 --> 00:06:32,500 26. Highlighters = glow water. 172 00:06:32,940 --> 00:06:34,000 WHAT. 173 00:06:34,000 --> 00:06:34,800 So, I’m no toddler 174 00:06:34,800 --> 00:06:36,200 but I’m going to do this anyway. 175 00:06:36,200 --> 00:06:37,400 MAKE SURE THE HIGHLIGHTERS 176 00:06:37,400 --> 00:06:39,560 SPECIFICALLY SAY “NONTOXIC.” 177 00:06:39,560 --> 00:06:40,790 If using highlighter water 178 00:06:40,790 --> 00:06:42,480 in the bath makes you uncomfortable 179 00:06:42,480 --> 00:06:44,320 you can also substitute tonic water 180 00:06:44,320 --> 00:06:46,560 to give you a COOL BLUE glow. 181 00:06:46,560 --> 00:06:48,860 Tonic is 100% edible, safe for kids, 182 00:06:48,860 --> 00:06:50,600 and even meant for ingestion. 183 00:06:50,700 --> 00:06:54,020 One two liter will give you insanely bright water. 184 00:06:54,020 --> 00:06:54,620 Also, 185 00:06:54,620 --> 00:06:57,490 You can make RAINBOW glow water using non-toxic paint 186 00:06:57,490 --> 00:07:00,139 if you visit pasted link inside info. 187 00:07:00,139 --> 00:07:04,290 27. Turn paint can lids into a pretty outdoor mirror. 188 00:07:04,290 --> 00:07:05,669 Also an Anthro hack. 189 00:07:05,669 --> 00:07:09,260 28. Find a microfiber towel and sew it into a Swiffer cover. 190 00:07:09,260 --> 00:07:12,850 29. Turn a laundry basket into a pretty striped basket. 191 00:07:12,850 --> 00:07:14,000 from this.. 192 00:07:14,000 --> 00:07:15,350 to this 193 00:07:15,600 --> 00:07:17,480 by "Iheartorganizing.com". 194 00:07:17,800 --> 00:07:18,800 And, 195 00:07:18,800 --> 00:07:21,340 30. Binder clips that can hold your cables. 196 00:07:21,340 --> 00:07:23,540 The tutorial is in Dutch, 197 00:07:23,540 --> 00:07:24,780 but this transcends language. 198 00:07:24,780 --> 00:07:27,200 The easiest dollar store hack in this list. 199 00:07:27,200 --> 00:07:28,630 estimated you wont need a minute 200 00:07:28,630 --> 00:07:29,780 to get the job done. 201 00:07:29,790 --> 00:07:32,070 Before you leave Like or share this video with anyone you know. 202 00:07:32,070 --> 00:07:34,290 or comment it, if you want to add something new. 203 00:07:34,290 --> 00:07:36,800 And last, press subscribe button, if you never visit 204 00:07:36,800 --> 00:07:38,250 this channel before 205 00:07:38,250 --> 00:07:40,250 Thanks for watching.
51 Decorating ideas for small apartment owners
1 00:00:02,919 --> 00:00:05,500 No matter how tiny that studio apartment is, 2 00:00:05,500 --> 00:00:07,800 nothing beats having your own space. 3 00:00:07,800 --> 00:00:12,460 Here are some actually feasible ideas that don’t involve remodeling or a completely 4 00:00:12,460 --> 00:00:18,090 unrealistic warehouse loft. This is 51 Brilliant ways to make small apartment 5 00:00:18,090 --> 00:00:21,110 more livable. by peggy wang. 6 00:00:21,110 --> 00:00:24,090 1. Place a curtain around the bed. 7 00:00:24,090 --> 00:00:28,590 it’ll give your sleeping space some tranquility and a nook-like feel. 8 00:00:28,590 --> 00:00:34,680 2. If your workspace only consists of a laptop, just use a bookshelf instead of taking up 9 00:00:34,680 --> 00:00:36,370 space with a desk. 10 00:00:36,370 --> 00:00:41,010 3. The curtain separator works for a kitchen too. 11 00:00:41,010 --> 00:00:47,359 4. Use a piece of plywood to build a makeshift wall that you can place a desk against. 12 00:00:47,359 --> 00:00:50,129 5. Or a pull-down screen. 13 00:00:50,129 --> 00:00:53,190 Doubles as a surface to project movies on! 14 00:00:53,190 --> 00:00:56,699 6. Put the bedroom under a gigantic canopy. 15 00:00:56,699 --> 00:01:00,079 It’ll give the illusion of a private fort. 16 00:01:00,079 --> 00:01:06,049 7. Use your TV to mentally separate your sleeping space from your entertainment space. 17 00:01:06,049 --> 00:01:09,659 Also, love the accent wall in the “bedroom.” 18 00:01:09,659 --> 00:01:14,060 8. Opt for sliding doors for closets and bathrooms. 19 00:01:14,060 --> 00:01:17,609 They require less space than swing-out doors. 20 00:01:17,609 --> 00:01:20,990 9. Re purpose an old window for kitchen separation 21 00:01:21,500 --> 00:01:27,800 Also, a kitchen island on wheelies can provide some much-needed counter and storage space. 22 00:01:28,400 --> 00:01:33,999 10. A chest doubles as a coffee table and as storage. 23 00:01:33,999 --> 00:01:38,899 11.Set your bed up against a wall so you can prop pillows up when you need to use it as 24 00:01:38,899 --> 00:01:41,820 a couch. Or hanging it for a new fun. 25 00:01:41,820 --> 00:01:45,600 it's not too hard for DIYers to recreate. 26 00:01:45,600 --> 00:01:47,300 and you have the link under the video you 27 00:01:47,300 --> 00:01:50,000 can visit later after you finish the video. 28 00:01:50,399 --> 00:01:54,000 12. Make a couch that swivels into a bed. 29 00:01:54,000 --> 00:01:56,000 How do you live in a small apartment, and 30 00:01:56,009 --> 00:02:00,560 still have the opportunity of having a bed, a nice big couch, and even the possibility 31 00:02:00,560 --> 00:02:02,249 of having friends over ? 32 00:02:02,249 --> 00:02:06,630 Put legs on the mattresses with hooks to keep it all together during the night. and 33 00:02:06,630 --> 00:02:10,170 have the bedlinen in a basket next to the couch/bed. 34 00:02:10,170 --> 00:02:14,860 The top mattresses are the thin type, and have made covers for them, so it is easy 35 00:02:14,860 --> 00:02:18,280 to make the bed in the evening. More info: 36 00:02:18,280 --> 00:02:25,500 The back cushions contains a foam mattress in the size 90 cm X 90 cm. 9 cm thick. 37 00:02:25,500 --> 00:02:30,370 It is folded and hold together with a strap. When you have friend over two of these on 38 00:02:30,370 --> 00:02:34,870 the floor makes it out for one bed. The foam sort of makes the mattress stick 39 00:02:34,870 --> 00:02:38,489 to the floor so it doesn't slide apart during the night. 40 00:02:38,489 --> 00:02:42,239 You can make the bed in the extra room, for a little privacy. 41 00:02:42,239 --> 00:02:44,959 Finally, You can get that dreamy sectional you’ve 42 00:02:44,959 --> 00:02:47,319 always wanted. 43 00:02:47,319 --> 00:02:53,530 13. Use seating as an opportunity to store as much stuff as possible. 44 00:02:53,530 --> 00:02:58,519 Instead of plain old chairs, opt for seating that serves double duty, like storage ottomans 45 00:02:58,519 --> 00:03:00,769 and storage couches. 46 00:03:00,769 --> 00:03:05,299 14. Make use of a ladder in dead space behind a door. 47 00:03:05,299 --> 00:03:09,700 You can hang things off of it, like a throw or a winter jacket. 48 00:03:09,700 --> 00:03:15,459 15. Use your window as a projector screen. If you’re not the type to watch television 49 00:03:15,459 --> 00:03:18,659 but still want the option to screen movies in your apartment, 50 00:03:18,659 --> 00:03:22,500 buy a white screen for your windows that double as blinds. 51 00:03:24,000 --> 00:03:28,579 16. Place your sofa against the bed. 52 00:03:28,579 --> 00:03:33,450 17. Chaise lounges are a good alternative to regular-sized couches. 53 00:03:33,450 --> 00:03:38,300 They’re generally shorter than full-sized couches and are more versatile than a loveseat. 54 00:03:38,300 --> 00:03:43,590 And if you get two of them, you can sandwich them together into a makeshift bed. 55 00:03:43,590 --> 00:03:48,849 18. Turn your bed into a movie pit with a heavy dresser or console. 56 00:03:48,849 --> 00:03:54,209 Imagine this. You walk in, take off your jacket, drop your bag on the chair and walk over to 57 00:03:54,209 --> 00:03:57,500 the drawer. You pull out your phone, plug it to the speakers 58 00:03:57,500 --> 00:04:03,730 and your favorite music starts playing. You continue: to cook, exercise, study, and when 59 00:04:03,730 --> 00:04:06,849 the night's calling - you change to your pajamas and head to the 60 00:04:06,849 --> 00:04:12,000 bed area and sleep or relax or watch a movie. Here's a floor plan for this image: 61 00:04:12,540 --> 00:04:18,530 19. A ceiling-hanging clothing rack takes advantage of your vertical space. 62 00:04:18,530 --> 00:04:21,700 The one shown here doesn’t look bulky or monstrous, 63 00:04:21,700 --> 00:04:26,420 and you have enough vertical space to stack things like shoes or books underneath. 64 00:04:27,000 --> 00:04:32,500 20. Don’t have space for a couch? Giant pillows on the floor can be laid out when 65 00:04:32,500 --> 00:04:35,690 you have guests over. And then put away when you need the floor 66 00:04:35,690 --> 00:04:38,580 space. SO COZY. 67 00:04:38,580 --> 00:04:44,060 21. Build a super simple foldout table that’s mounted to the wall. 68 00:04:44,060 --> 00:04:48,500 If you have basic carpentry skills, you can make an incredibly simple kitchen table that 69 00:04:48,500 --> 00:04:52,820 folds back up onto a wall with some wood and some hinges. 70 00:04:52,820 --> 00:04:54,100 Move to the ceiling. 71 00:04:54,100 --> 00:04:56,940 And, Reset your light and lighting system like 72 00:04:56,940 --> 00:04:57,700 this. 73 00:04:59,800 --> 00:05:05,160 22. Put your bed on lockable casters. This way, you can easily wheel it to be used 74 00:05:05,160 --> 00:05:08,800 as extra seating in the living room, or against a wall when you need some floor 75 00:05:08,800 --> 00:05:14,150 space to do an impromptu yoga routine or gymnastics flip without the bed don't end up half way 76 00:05:14,150 --> 00:05:17,200 across the room. Thanks to a $250 77 00:05:17,200 --> 00:05:24,830 Hamilton S-7010-PR-4SL-IB Pneumatic Casters from drillspot. 78 00:05:25,300 --> 00:05:31,500 23. The Unhampered Collapsible Laundry Basket. Folds up into a shred of nothing. 79 00:05:31,500 --> 00:05:36,030 Entertainment purpose only. Out of stock in Amazon. 80 00:05:36,030 --> 00:05:39,650 24. Get Slide-in Spice Rack. 81 00:05:39,650 --> 00:05:42,680 You can have your marjoram and eat it, too. 82 00:05:42,680 --> 00:05:47,500 Or do it the DIY way: Make this brilliant in-cabinet spice rack yourself. 83 00:05:47,500 --> 00:05:54,000 The materials will cost you less than $10. and you only need 2 steps to get the job done. 84 00:05:54,730 --> 00:06:01,430 25. Craft Over-the-Fridge Snack Caddy. You can either call up PBteen and beg them 85 00:06:01,430 --> 00:06:05,520 to re-release this product, or you could easily sew one together or create 86 00:06:05,520 --> 00:06:09,500 one by cutting up a shoe organizer. by pbteen.com 87 00:06:11,140 --> 00:06:16,240 26. Install Grundtal Towel Holder for Ties and Belts. 88 00:06:16,240 --> 00:06:21,000 Or use it to put together tomorrow’s outfit. When not in use, it lies against the wall 89 00:06:21,000 --> 00:06:25,000 to save space. $14.99 from IKEA. 90 00:06:26,000 --> 00:06:32,260 27. Set up An All-in-One Cabinet that Swivels. It’s a mirror! It’s a bulletin board! 91 00:06:32,260 --> 00:06:37,500 It’s a coat rack! Finally, a piece of furniture that is all things to all people. 92 00:06:37,500 --> 00:06:43,640 Available for $249 from Solutions. With so many functional built-ins, this handsome 93 00:06:43,640 --> 00:06:49,500 swivel cabinet tidies up clutter in the kitchen, home office, TV room, laundry room, and 94 00:06:49,500 --> 00:06:53,280 craft room. Anywhere you need organized storage. 95 00:06:53,280 --> 00:06:57,310 Detail: - Space-saving bookshelf, storage bin, coat 96 00:06:57,310 --> 00:07:02,690 rack, photo display, message center and more all in one spinning cabinet. 97 00:07:02,690 --> 00:07:09,310 - 10 storage cubbies/shelves, 3 hooks, a mirror, chalkboard, dry-erase board and 98 00:07:09,310 --> 00:07:13,150 6 photo slots - With so many functional built-ins, it tidies 99 00:07:13,150 --> 00:07:18,670 up clutter in the kitchen, home office, TV room, laundry room, and craft room. 100 00:07:18,670 --> 00:07:24,240 Anywhere you could use organized storage. - It's space efficient and tucks nicely to a corner 101 00:07:24,240 --> 00:07:28,900 - Makes it easy to create a mini office in a bedroom or studio apartment 102 00:07:31,000 --> 00:07:35,940 28. Set Under-Cabinet Knife Drawer. Can these drawers just come standard with 103 00:07:35,940 --> 00:07:41,090 every kitchen from here on out? Check link inside info on how to DIY this 104 00:07:41,090 --> 00:07:43,060 space-saving drawer. 105 00:07:43,060 --> 00:07:48,830 29. Get A Hot Iron Holster. 100% essential for anyone with a pedestal sink. 106 00:07:49,000 --> 00:07:54,330 Get it for $34.99. Affordable, space safe, secure you from unwanted 107 00:07:54,330 --> 00:07:58,000 accident, and available in 10 colors. 108 00:07:58,950 --> 00:08:05,000 30. Add Couch Arm Wrap. It spells the E-N-D for your end table. 109 00:08:05,000 --> 00:08:08,830 (Available) from Etsy. No metal hardware - just professional and 110 00:08:08,830 --> 00:08:15,550 strong cabinetmaker - grade joinery techniques, formaldehyde-free adhesives, and a zero-VOC 111 00:08:15,550 --> 00:08:20,170 finish that's silky to the touch and 100% food-safe to boot. 112 00:08:20,170 --> 00:08:22,000 Safe for Children too. 113 00:08:22,670 --> 00:08:27,300 31.Corner Dish Rack. For those with achingly precious counter 114 00:08:27,300 --> 00:08:29,000 real estate. 115 00:08:30,200 --> 00:08:35,579 32. Keep a Folding Ottoman Bed. This ottoman goes so beyond its call of duty. 116 00:08:35,579 --> 00:08:40,110 By day, it functions as a foot rest, extra seating or even a coffee table. 117 00:08:40,110 --> 00:08:44,629 Then, when family or friends spend the night, it becomes an instant bed! 118 00:08:44,629 --> 00:08:47,900 Three thick foam cushions provide comfortable sleep support 119 00:08:49,500 --> 00:08:55,410 33. Install Sliding Shelves for Cabinets. They ain’t pretty, but you’ll get so much 120 00:08:55,410 --> 00:08:57,399 more use out of those awkward spaces 121 00:08:58,400 --> 00:09:04,589 34. Get Cord Balls or Great balls of wire. They’re like little hungry munchkins that 122 00:09:04,589 --> 00:09:09,250 will “eat” up to five feet of cable to keep your media centers and office spaces 123 00:09:09,250 --> 00:09:11,000 free of clutter. 124 00:09:11,990 --> 00:09:18,240 35. Install An Over-the-Faucet Shelf for Toiletries. Your tiny sink will look at you and wonder 125 00:09:18,240 --> 00:09:22,500 how you never thought of this before. $15.19 from Wallmart. 126 00:09:23,970 --> 00:09:30,250 36. IKEA-Hacked Wall-Hung Lamp. Using a corded lamp and a wall shelf bracket 127 00:09:30,250 --> 00:09:36,000 from IKEA, you can make a wall-hung lamp that doesn’t take up any floor or table space. 128 00:09:37,079 --> 00:09:43,990 37. Add A Slide-Out Pantry in 6” of Space. If you’ve ever yearned for the vast pantries 129 00:09:43,990 --> 00:09:48,420 of suburban homes, you can finally own a little sliver of that dream. 130 00:09:48,420 --> 00:09:52,029 10 step instructions wait you on the other site. 131 00:09:52,500 --> 00:09:58,759 38. Pixelete your wall. Find a new masterpiece attach on your wall. 132 00:09:58,759 --> 00:10:02,079 if painting is one of your all time favorite things to do. 133 00:10:02,079 --> 00:10:05,100 This idea will challenge your creativity to your limit. 134 00:10:05,100 --> 00:10:09,029 it's time consuming no doubt and to help you with that, we have pasted a link that will 135 00:10:09,029 --> 00:10:12,000 lead you to girls who already get the job done. 136 00:10:12,959 --> 00:10:16,819 39. Get a Cabinet Door Wastebasket. 137 00:10:16,819 --> 00:10:21,500 You can’t call yourself a minimalist and keep your trash out IN PLAIN SIGHT. 138 00:10:21,500 --> 00:10:23,819 Buy it $13. 139 00:10:24,300 --> 00:10:30,319 40. Install a Ceiling-Hung Garment Rack. So much better than one of those janky free-standing 140 00:10:30,319 --> 00:10:32,220 garment racks. 141 00:10:32,220 --> 00:10:38,310 41. Buy Shower Rod Hooks. This almost stupidly simple concept will make 142 00:10:38,310 --> 00:10:40,660 you wonder how you never even thought of this before 143 00:10:42,000 --> 00:10:47,920 42. Add a Shower Curtain with POCKETS. Buy this as a passive-aggressive gesture toward 144 00:10:47,920 --> 00:10:53,000 your roommate who keeps her 13 different shampoos all around the rim of the bathtub. 145 00:10:53,000 --> 00:10:55,300 $14 from Casa 146 00:10:56,300 --> 00:11:01,970 43. Install an Upholstered Storage Headboard. If you are an adult, it’s time to get that 147 00:11:01,970 --> 00:11:06,220 bed off the floor and invest in an awesome headboard. 148 00:11:06,220 --> 00:11:09,920 44. Craft a Hidden Jewelry Holder Behind a Painting 149 00:11:09,920 --> 00:11:15,660 Behold, the magical power of hinges. If you have lack of dresser space, a surplus 150 00:11:15,660 --> 00:11:20,600 of jewels, and a desire to keep your space looking stylish and neat all at the same time, 151 00:11:20,600 --> 00:11:24,379 Try this one. This hidden wood holder started from this 152 00:11:24,379 --> 00:11:30,350 sketch and a link we pasted inside info. Material, Hardware, total cost, and completed 153 00:11:30,350 --> 00:11:32,000 instructions are covered. 154 00:11:33,500 --> 00:11:40,449 45. Bring a Laundry Pod home. At ~$100, this tiny workhorse is much cheaper 155 00:11:40,449 --> 00:11:44,500 than a washing machine and can fit 5–10 garments at once. 156 00:11:45,360 --> 00:11:51,170 46. Get or DIY a Shoe Ottoman. For those of us who can’t help but have 157 00:11:51,170 --> 00:11:55,879 a chronic case of shoe overflow. You can make this or you can buy similar item 158 00:11:55,879 --> 00:11:57,970 at overstock. 159 00:11:58,500 --> 00:12:02,990 47. Give your kitchen Nesting Bowls with Measuring Cups. 160 00:12:02,990 --> 00:12:07,720 Not only is it super functional and space-saving, but it looks like a cross-section of the world’s 161 00:12:07,720 --> 00:12:10,689 most beautiful Gobstopper. Price $30. 162 00:12:10,900 --> 00:12:16,149 7 piece food preparation nesting bowl set. Allows individual elements to stack neatly 163 00:12:16,149 --> 00:12:19,689 together. Mixing bowls have large non-slip bases and 164 00:12:19,689 --> 00:12:21,749 wide handles. 165 00:12:22,700 --> 00:12:25,749 48. The Hook-On Balcony Desk. 166 00:12:25,749 --> 00:12:29,360 Just tell your boss you’ll be working from home FOR THE REST OF YOUR LIFE. 167 00:12:29,360 --> 00:12:32,000 Check the link (inside info) for alternative idea. 168 00:12:32,879 --> 00:12:37,470 49. Invite this An All-in-One Over-the-Sink Cutting Board. 169 00:12:37,470 --> 00:12:42,189 It even doubles as a produce-washing station. You will never look at a cutting board the 170 00:12:42,189 --> 00:12:46,430 same way ever again Price $45. 171 00:12:46,430 --> 00:12:50,399 Efficiently chop and wash fruits and veggies with this all-in-one prep board. 172 00:12:50,399 --> 00:12:56,839 Integrated 2.5 oz green silicone colander collapses to store flat and removes for cleaning; 173 00:12:56,839 --> 00:12:58,900 Heat-resistant to 500 degrees. 174 00:13:00,379 --> 00:13:07,000 50. Add Magnetic Stickers to your wall. It Keeps your everyday grooming tools in arm’s reach. 175 00:13:07,000 --> 00:13:11,889 $15 for a set of three. Colorful magnetic stickers for the kitchen, 176 00:13:11,889 --> 00:13:14,930 shower, study or anywhere else in the house or office. 177 00:13:14,930 --> 00:13:19,500 Three Stickers in a pack. 3.5 cm in diameter. 178 00:13:21,000 --> 00:13:26,400 51. Attach this Mirror/Ironing Board. Possibly the most well-designed ironing board 179 00:13:26,400 --> 00:13:27,980 ever created. 180 00:13:27,980 --> 00:13:32,360 That's it. if you still watching, continue to press like 181 00:13:32,360 --> 00:13:37,199 or share button under this video. Comment it if you have something to say and 182 00:13:37,199 --> 00:13:41,720 don't go before you hit the subscribe button. Thanks for watching and see you later.