Our environment affects us on a daily basis – far more than we might think. Living in a dull space could make us feel empty or unenthusiastic. Luckily, with some simple DIY projects that anyone can do on their own, everyone’s living space can become an eye candy in no time.
Here comes the list of 20 do-it-yourself projects that will transform anyone’s boring space into a fun living area. It contains not only images but also a video that you can enjoy or share with anyone you constantly contact in social media. Tik tok is included if it is still a thing today when you read this post
🔊20 DIY Projects for Anyone Living in a Boring Space Video:
List Entries:
10 Ideas on How to Turn Neutral Bedrooms Less Boring
10 Wall Decor Ideas for Boring Walls
How to refresh a Boring Little Bistro Chair
20. DIY Outdoor Water Wall
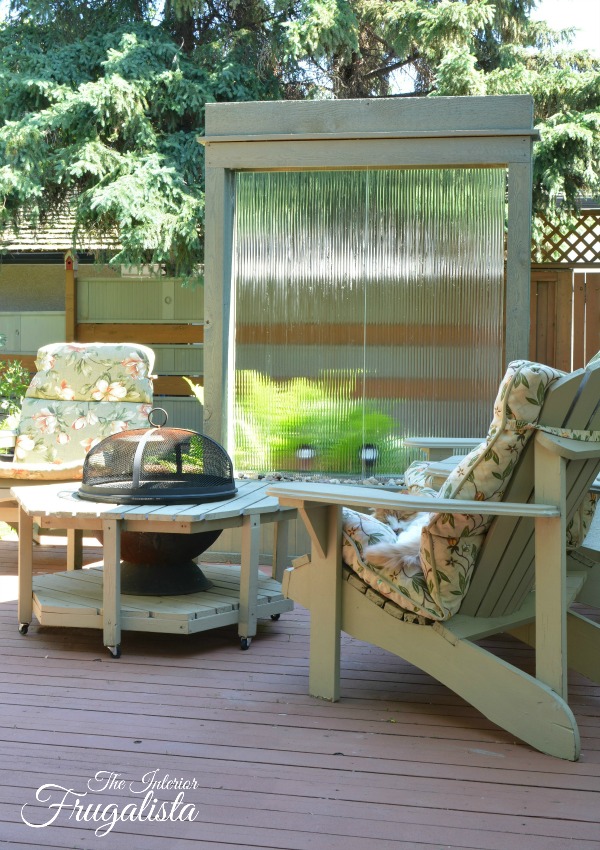 With an outdoor water wall, your garden or patio will become the best part of your home. Moreover, the sound of water will relax you and take you to far away places. Even though these water walls look very fancy and expensive, they don’t have to cost a fortune – in fact, you can make one for under $300.
The size of an outdoor water wall will depend on the size of the tempered glass panels; so, you should have that in mind when you start shopping for supplies. Also, while most of the work can be completed by one person, some steps will require an additional pair of hands.
Once completed, an outdoor water wall will make the most of any garden during the day. Moreover, adding some lighting will make it look fabulous at nighttime too.
19. Openwork Cube Pendant Light
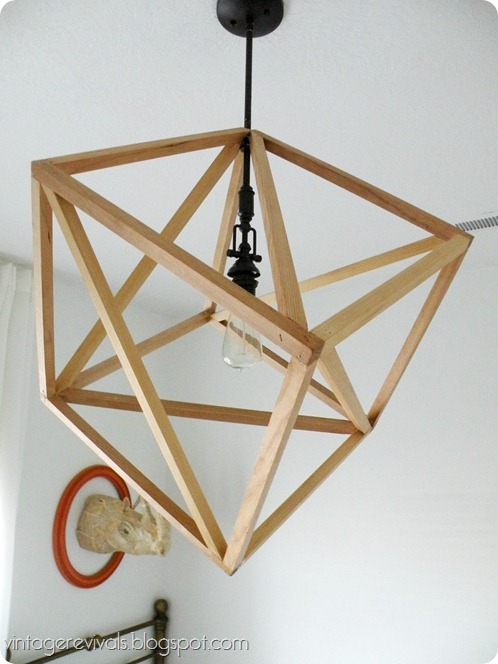 When it comes to interior design, one statement piece can make all the difference. That’s exactly the case with this pendant light. Install one in your living room or bedroom, and everyone will start asking where you got it. Creating this modern, unique cube pendant light is far easier than one might have thought.
To make the cube, you’ll need square dowels, which you can get at Home Depot. When it comes to the pendant light, you can choose whichever model you like. Installation can be a bit tricky, especially if you’re a stranger to electrical work. However, countless YouTube videos will help you finish the job in no time.
18. Reversible Wooden Door Mat
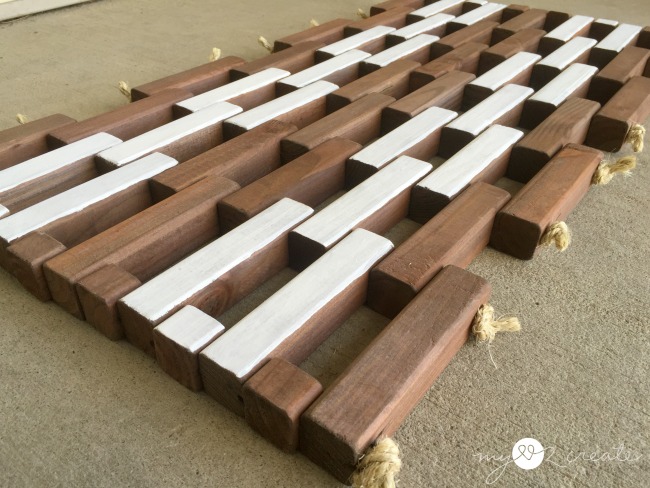 Why settle for a plain one when you can have a reversible wooden doormat? This one-of-a-kind mat is simple to make, and it should be on the list of your next do-it-yourself projects.
To make this mat, you’ll need square end balusters and natural sisal ropes. Some paint, sealer, stain, and electrical tape aren’t necessary, but it won’t hurt to have those too. When it comes to tools, the list is a bit longer: a circular saw, scissors, drill, ⅜’’ drill bit, clamps, pencils, tape measure, scrap wood, sandpaper, and safety gear are required.
Cutting and drilling are the most important steps. Once you’re done with those, adding ropes will look like a piece of cake. Also, the final painting is a lot of fun.
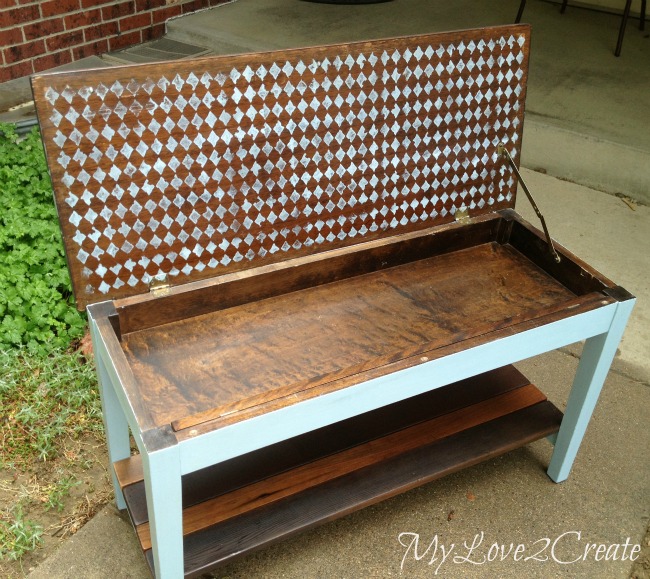
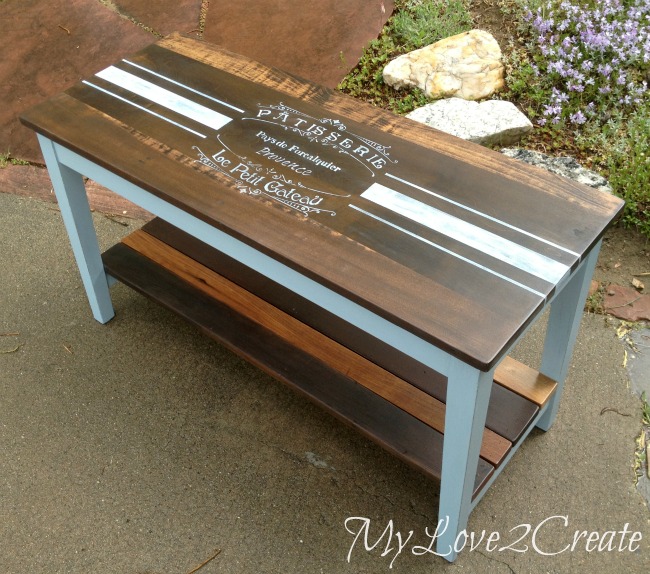
17. French-Inspired Piano Bench Makeover
Although many people overlook them, benches are amazing pieces of furniture. They work well in entryways, hallways, bedrooms, living rooms, small kitchens, etc. Basically, you can put them wherever you want. Furthermore, they are convenient, and they look good.
To restore an old bench, it’s a good idea to get rid of the veneer, since good wood resides under it. Then, to make the surface smooth, you should use a damp cloth and an iron – that will do the trick. The next step is sanding, and a plain piece of sandpaper will do. Once you’re done with that, all you have to do is paint the bench – and that’s it!
16. Stylish Rubber Band Lamp
Lamps can make even the most boring space bright and interesting. However, many unique lamp models come with a hefty price tag. Luckily, making a stylish rubber band lamp is a piece of cake; in fact, you’ll enjoy doing it.
Take five thin wooden boards (three long ones and two shorter ones) and glue them to make a cuboid. One side should be left open, and the remaining three should have vertical openings in them. Drill at the bottom and add a socket base and a bulb. Finally, add multiple rubber bands all over the cuboid, and that’s it – the lamp is complete!
(Play video on the bottom to view this topic)
15. An End Table into a Desk
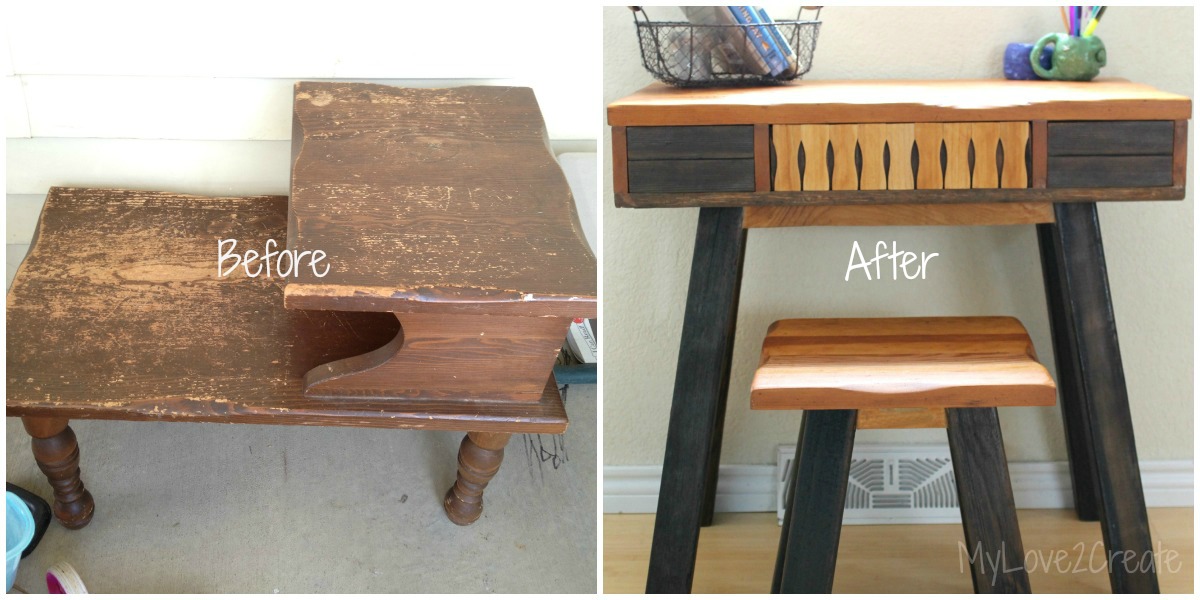 Old wooden tables can be great to work with. With a few simple, yet effective tricks, old end tables can easily become modern desks. It’s best to take the end table apart and start making a desk from scratch. Adding a piece of plywood will give us a box-like structure that will be the base of the desk. To complete the desk top, use some glue and wood boards. Then, glue the legs, and you are all done! Enjoy your brand new desk.
14. DIY Upper and Lower Cabinet Lighting
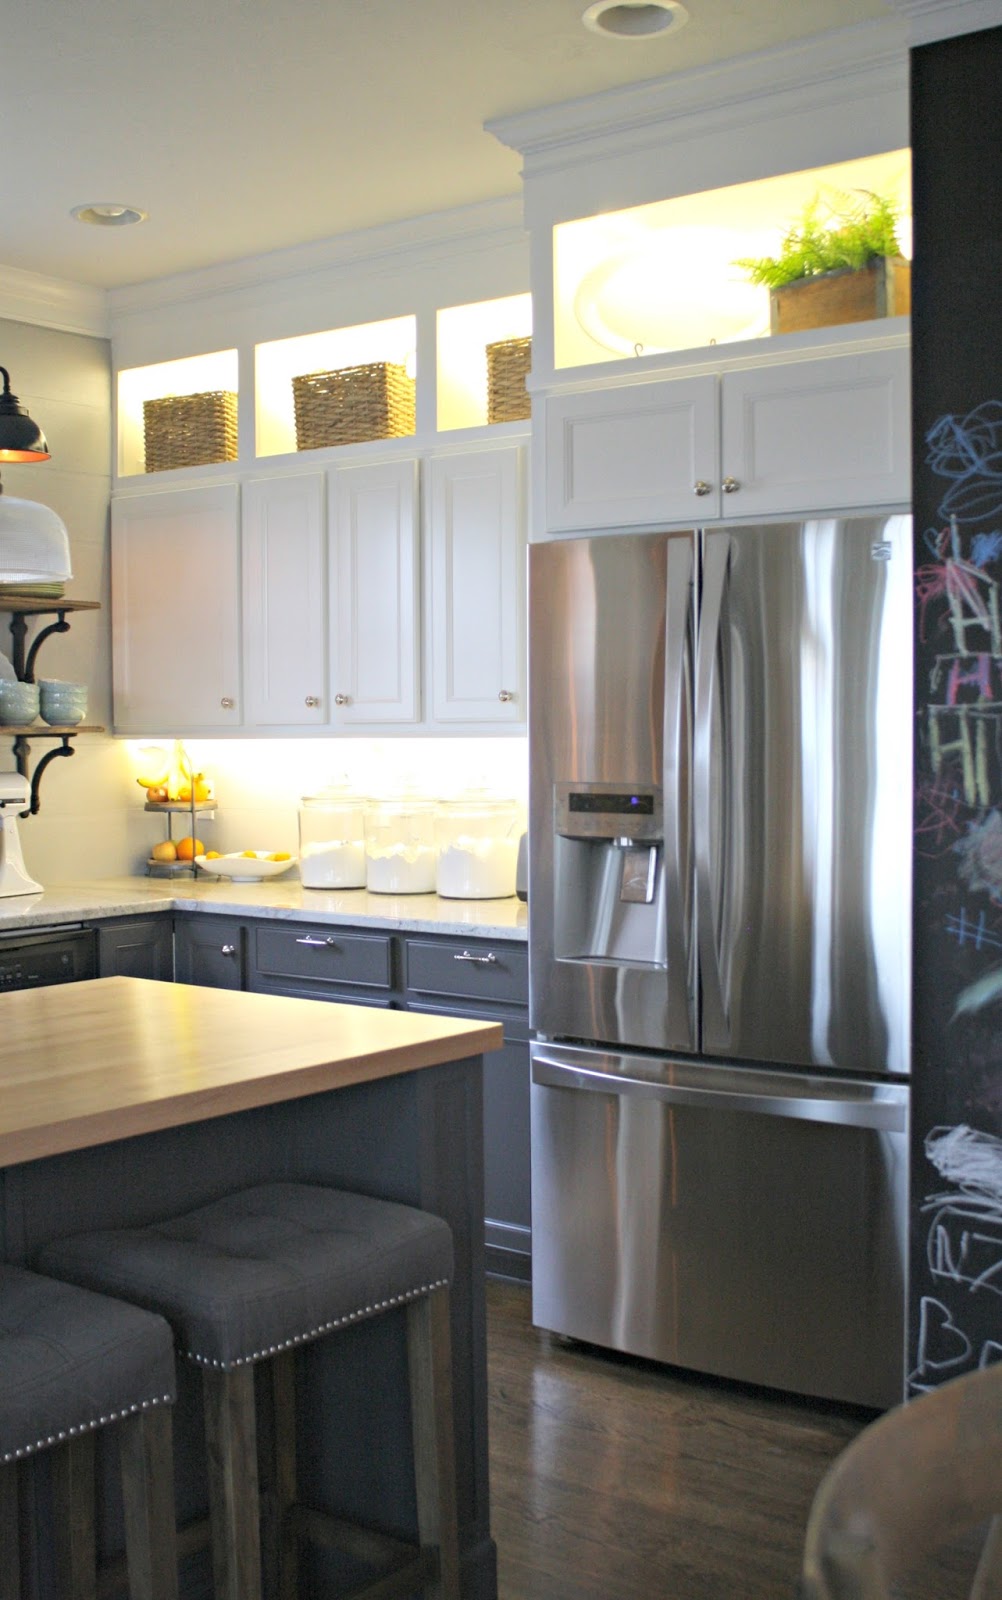 With some amazing upper and lower cabinet lighting, every kitchen will start looking its best. This project may seem intimidating, but it actually isn’t. Tiny lights that come with a sticky back are the best for this project. Also, in order to use these, we’ll need a power adapter for both upper and lower cabinets, as well as cord hiders.
All we have to do is peel the paper off the lights and stick them to the surface. It’s straightforward. These LED lights will make every kitchen glow for a long time. (Another source)
13. A DIY Downdraft Table
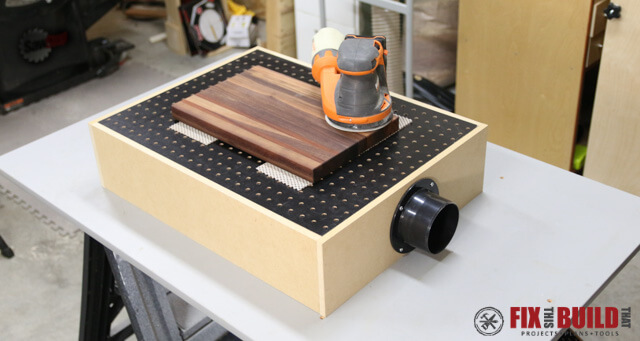 Eliminating dust has never been easier – or cheaper. With this efficient and easy-to-make downdraft table, you can say goodbye to dust once and for all. What’s more, your lungs will thank you.
Woodworking projects are a lot of fun, but sanding is a nightmare. Luckily, with some plywood, scrap cutoffs of ½’’ MDF, ¼’’ pegboard, and a dust fitting, we can solve all of our dust-related problems. Add a dust port, some tape, and glue, and that’s it. When it comes to tools, a brad nailer, 18V jigsaw, table saw, miter saw, and a cordless drill will do the job.
12. DIY Adjustable Shoe Storage Bench
Having shoes all over the house isn’t appealing – that’s for sure. Besides looking bad, it is also unpractical. There’s no need to despair, though. An adjustable shoe storage bench will make every home tidier and more convenient. Apart from storing shoes, this bench is comfortable to sit on while putting the shoes on.
Making the bench is easy; some ¾’’ plywood, poplar boards, cove molding, screws, paint, and polyurethane blend is all it takes. Also, anyone who has some basic tools in their garage will find them sufficient to complete the job.
11. Stylish Pipe Garden
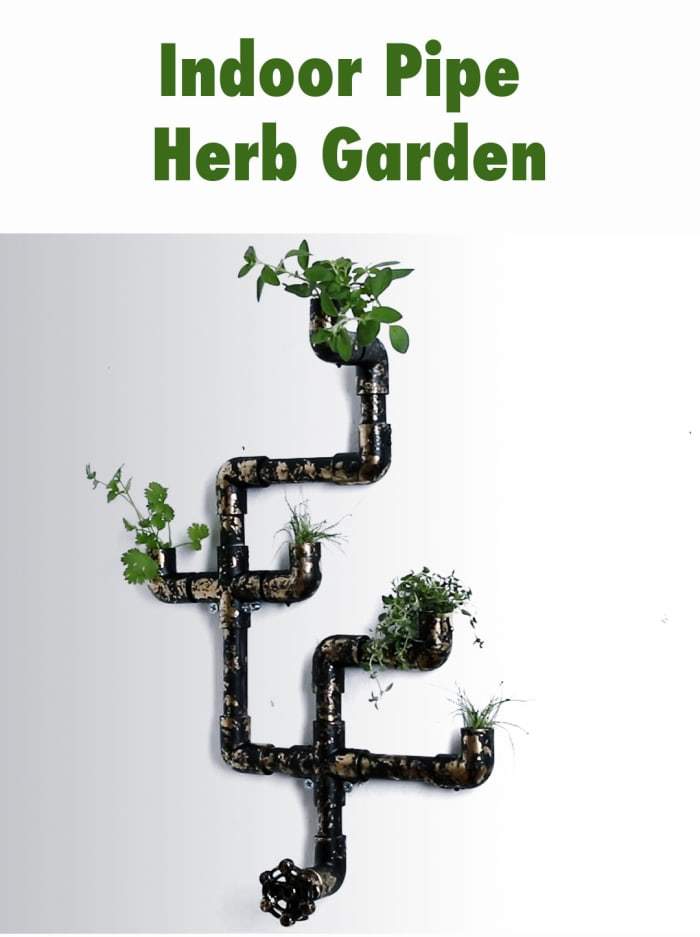
Stylish pipe gardens aren’t only for fancy gardens and restaurants – they can make every garden shine. What’s more, these are incredibly easy and fun to make. To complete this project, all you’ll need are PVC pipes, elbows, and crosses, as well as some super glue, spray paint, and some herbs. Once you have assembled our design and secured it with glue, you should paint it with your favorite color and hang it on the wall. That’s how easy it is.
10. Patio Chair Set Spray Painted Makeover
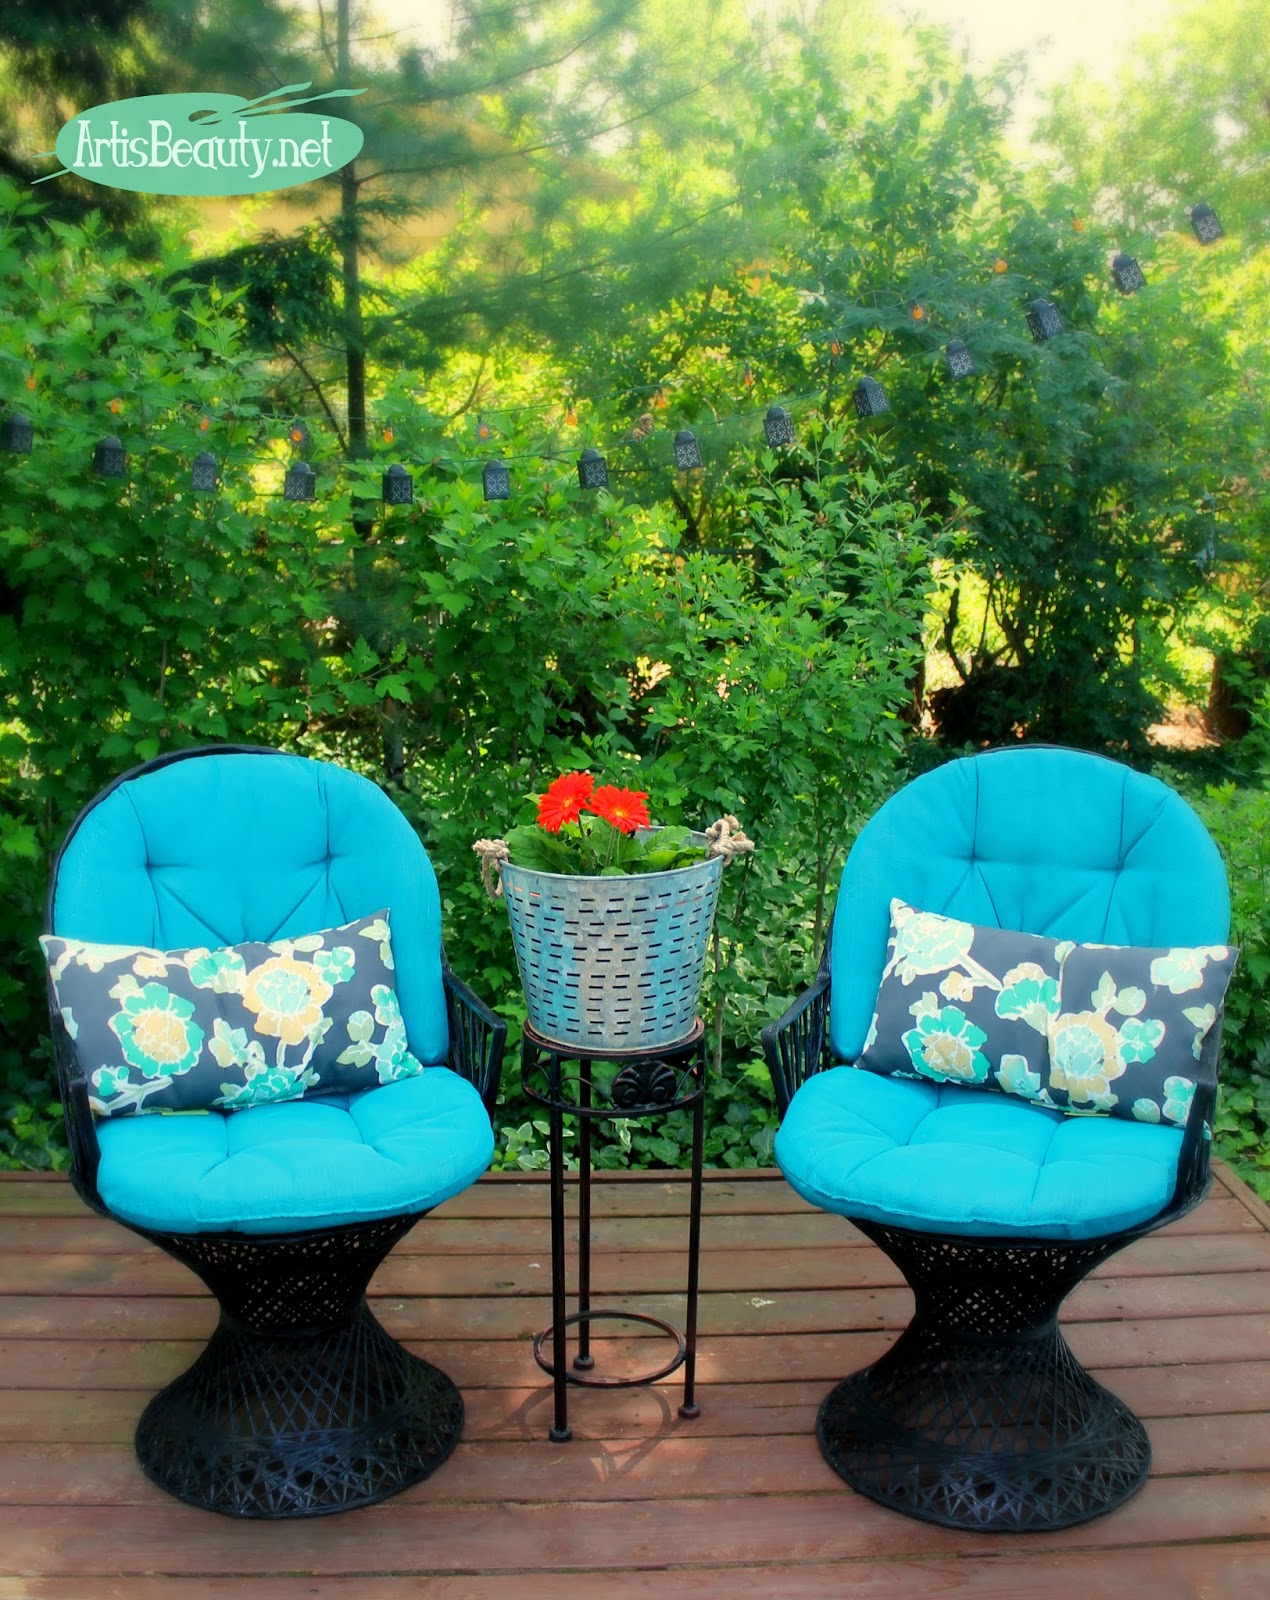 Patio chairs may look nasty after a while; however, that doesn’t mean they belong in the trash. The wicker may look as good as new after a simple paint makeover. Old cushions can also get their shine back – Rustoleum spray paint is all it takes to restore them and make them vivid once again.
In fact, spray paint is all it takes, for both the chairs and the cushions. This DIY project is extremely easy and fun to do. Moreover, the results are long-lasting.
9. Geek Out – Salt Water Etching – Personalize Your Metal Water Bottle
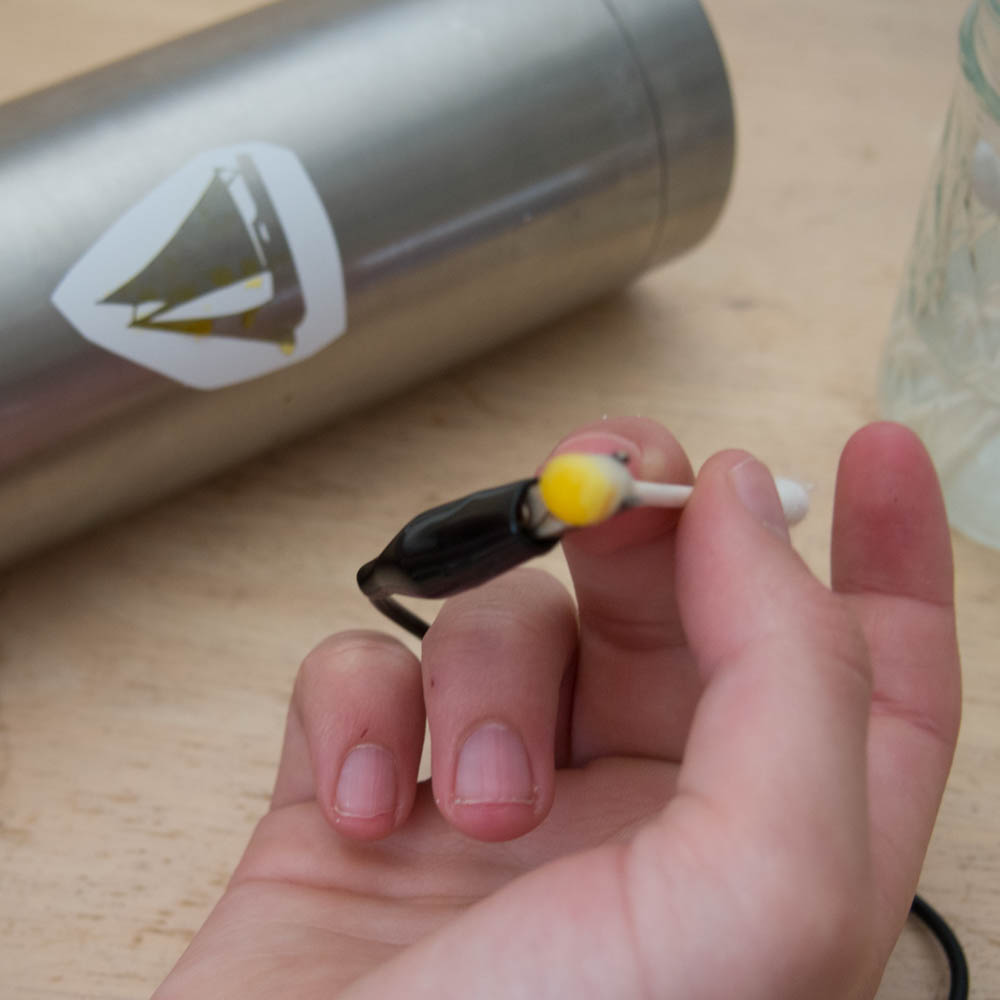
Water bottles are useful, but they all look the same. Also, mixing up your bottle with someone else’s happens more often than it should. So, why not personalize your water bottle and prevent such situations from happening? Moreover, you’ll have a unique bottle.
Use simple household ingredients to etch a design on your bottle. You won’t need any special equipment for this project. By using a battery, create a chemical reaction between the metal, salt, and water. Whatever the design you choose, your bottle will look unique and fancy.
8. Jelly Bean Dispenser
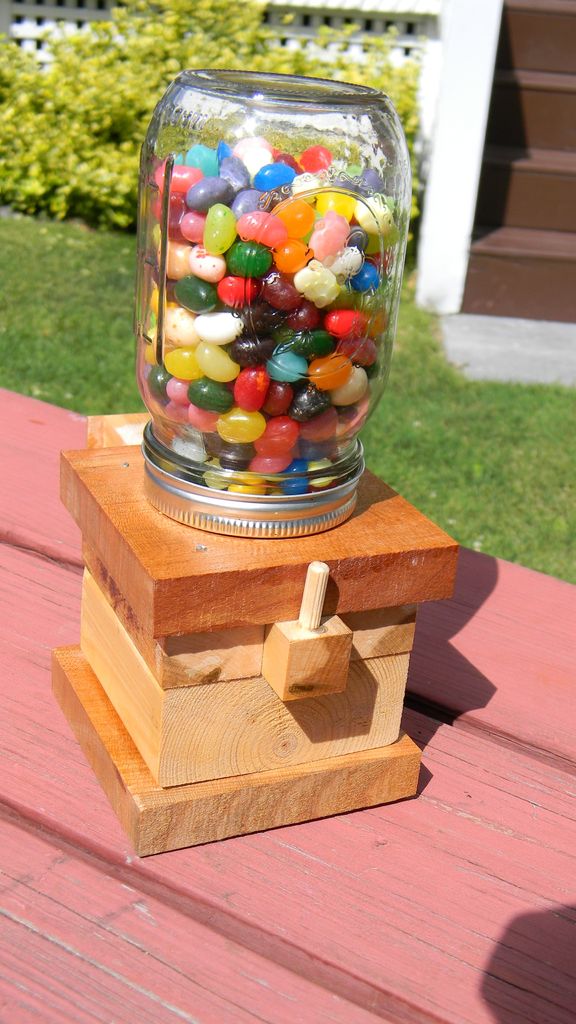
Jelly beans are everyone’s favorite! Making a cool Jelly Bean dispenser will make people love these amazing sweets even more. For this project, you’ll need multiple pieces of wood, dowels, a jar and cover, small nails, wood glue, drill bit, table saw, tape measure, hammer, square, needle nose pliers, paint/varnish, and, of course, Jelly Beans!
It’s important to mix up a mineral oil and beeswax concoction for the finish. That will prevent the Jelly Beans from picking up the wood flavor. Moreover, it will make the dispenser safe for children.
7. Wind Spinners: Ideal for a Garden or a Yard
Wind spinners are both fun to watch and build. Moreover, they are easy to make – an estimated hour or two is all it takes. Here is what you’ll need: 65 – 3/4″ x 1/4″ x 7″ wood pieces, one ¼’’ steel rod 36’’ long, two nuts, nylon cord/fishing line, and a drill or a circular saw.
Make this project a fun activity for the whole family over the weekend. Once it has been completed, your wind spinner will be fun to observe for hours.
6. Dedicated Slim Comic Bookcase
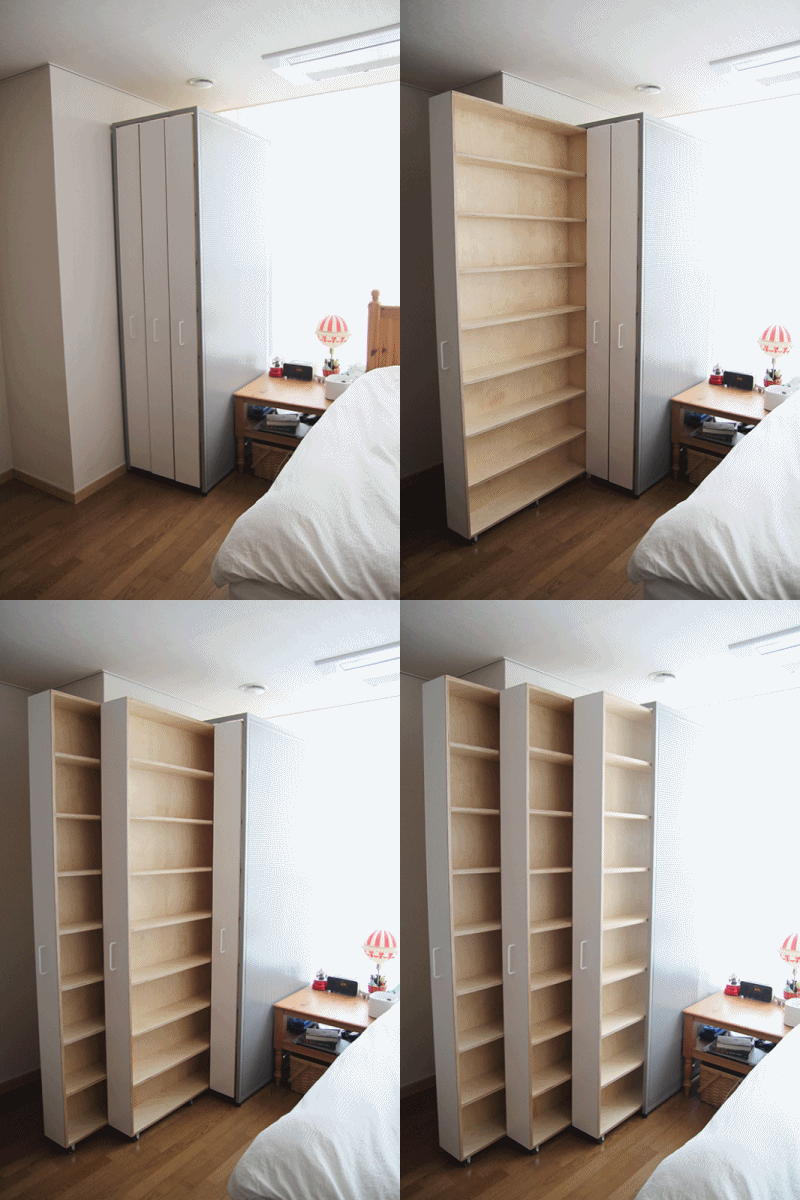 Storing comics can prove to be tricky when there isn’t enough space. Also, storing them in the open may not be the best idea, as dust tends to fall on them, and that requires regular dusting. Moreover, comics are smaller than most books, so it’s hard to find an appropriate shelf for them.
Luckily, we can make our own slim comic bookcase and enjoy all the extra space for our comics! All we need for this slim bookcase are perforated boards, which we will attach to a magnet. The whole bookcase won’t take up much space, but it will provide ample space inside for the comics. (1,2)
5. DIY Photo Transfer to Wood
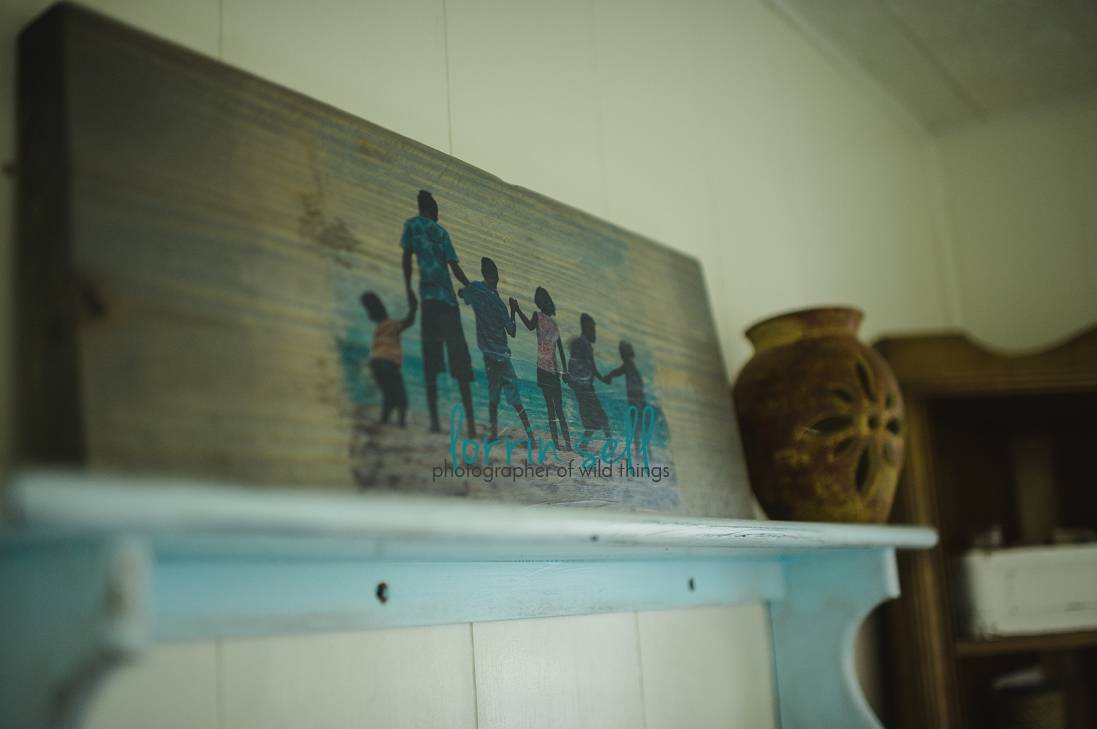 Hanging pictures is fun, but when you transfer them to wood, that has a special feel that will last for a long time. To master this method, you will need a matte-finish mod podge, photo transfer gel, wood, wood stain, sandpaper, foam brushes, and a laser printed picture on regular paper.
The key is to paint a thin layer of the gel onto the wood board, carefully place the image, squish all of the air out, and let it dry overnight. Then, wipe off the paper by wetting the board under water – this requires patience. Lastly, cover the wood with mod podge to seal the picture and enjoy the amazing piece of art you created!
4. DIY Wall Planter With Succulents
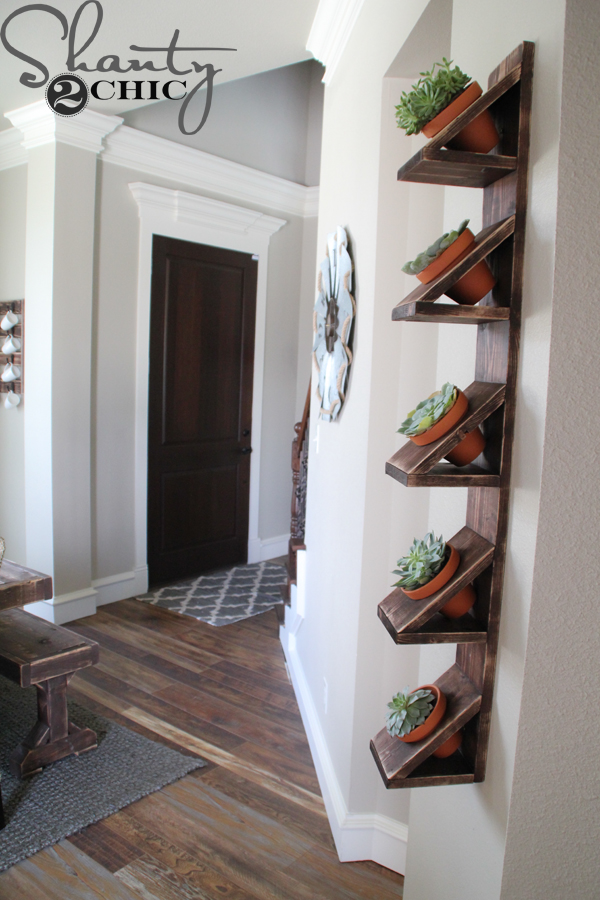 Succulents are very cute and fairly easy to maintain – it’s no wonder that so many people love them. To add a twist to your home, follow this idea and make your succulents even more special. These wall planters are cost around $10.
Some wood boards, drilling, nails, glue, and wood paint is all it takes to make this unique planter. You can be sure that all of your friends will be asking about it once you hang it! Moreover, your home will look amazing and original.
3. Industrial Farmhouse Look Combined with a Dollar Store Storage Drawers
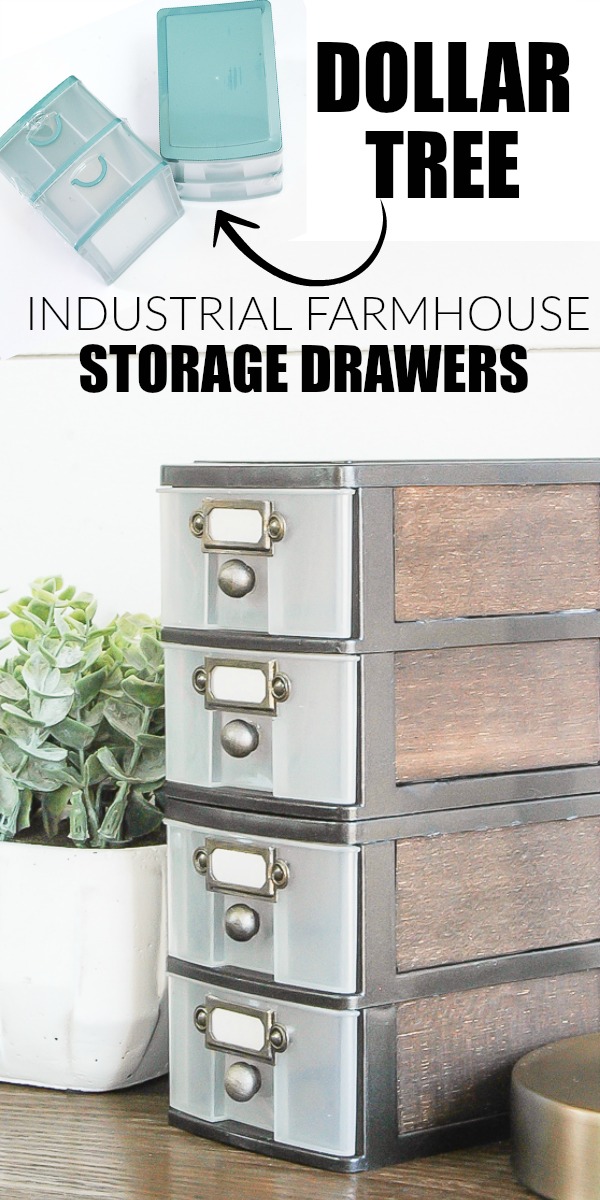 The industrial farmhouse style is many people’s favorite – and that’s no surprise. This style complements all homes and offices, and it’s easy to combine with other styles. In combination with these convenient storage drawers, you get both the looks and the functionality.
To make the best of both world, you’ll need the drawers, of course, some spray paint, scrapbook metal labels, sandpaper, antique fasteners, balsa wood, wood furniture buttons, wood stain, wood adhesive, a drill and a 3/22 drill bit.
Simply pull the drawers out and lightly sand the structure before spray-painting it. Then, place the labels on the drawers, and stained wood on the sides for a more expensive look. That’s it! Enjoy your new industrial farmhouse drawers.
2. DIY Grow Light for Starting Seeds
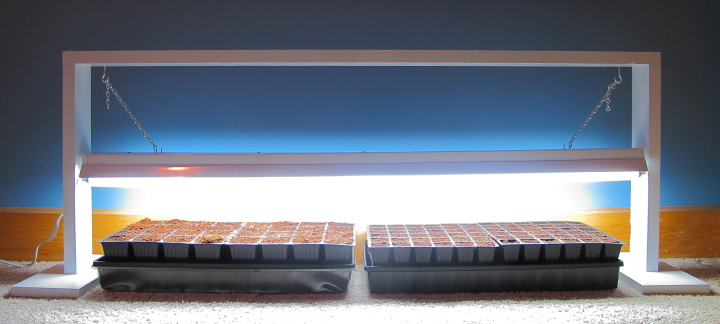 If your home is rather boring, think about adding some homemade seeds, which will turn into beautiful decorations once they start to bloom. Making a simple frame that holds fluorescent lights is both easy and cheap. A 48’’ light can fit two flats under the lamp, which is more than enough to make your home a bit more interesting.
Moreover, by using button caps to hide screw holes, you can easily disassemble the frame and store it after spring. If you are fairly skilled and equipped, the project shouldn’t take more than one or two hours of your time.
1. Optical Illusion Photo Frame
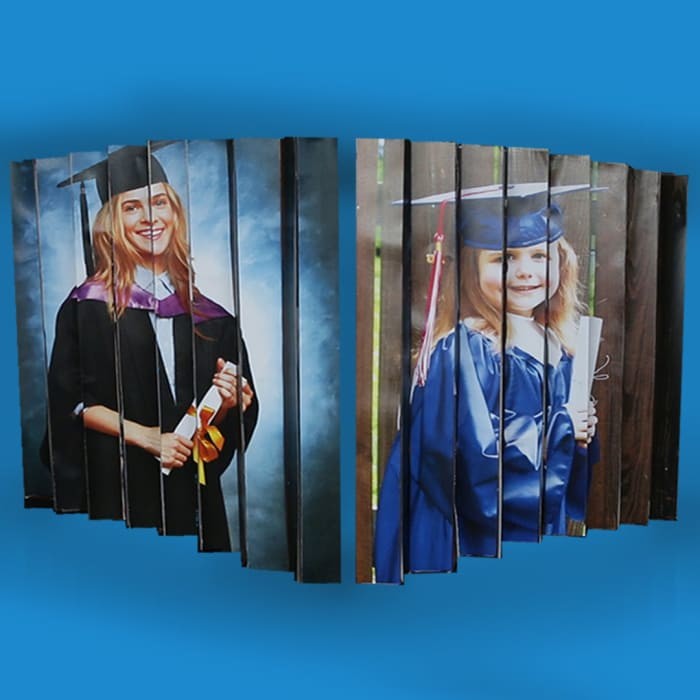
Have you ever had two amazing photos that you wanted to frame, but only one frame? With this fun-to-make optical illusion photo frame, that shouldn’t be a problem. Take 16 flat wood pieces (1-inch x 11 inches) and glue them by the edges, making a wavy structure. Then, take the two photos (11 inches and 8 inches) and cut them in vertical strips (1 strip = 1 inch).
Start gluing the strips on the wavy wooden structure, gluing each strip on every second wood piece. Then, use the second picture and glue it on the remaining wood pieces. Glue everything on a piece of card stock, hang it on the wall and enjoy one picture from the left and the other from the right!
This unique photo frame will make every home an interesting one!
