Ever wondered how to maximize space and achieve perfect organization in a petite or box bedroom? Stay tuned as we delve into the art of unboxing hidden potential in small spaces. We’ll explore tried-and-tested methods, learn from others’ experiments and mishaps, and reveal secrets to transform your box bedroom into a haven of efficiency and style.
Get ready to unlock a world of possibilities, all within the cozy confines of your box bedroom. Join us on this journey to reimagine and revolutionize your personal space!
20. A Practical Loft for the Box Bedroom
Amber Van Der Veen has ingeniously crafted a loft bed that masterfully encapsulates both form and function, perfect for those with box bedrooms. At the heart of this creation is a selection of IKEA’s Kallax cabinets, amounting to €410, which form the bed’s foundational storage elements. Amber enhanced the middle section with an acoustic wall panel, adding both aesthetic appeal and a dash of practicality.
Curious admirers keen on replicating her design have been captivated by the bed’s pull-out drawers, which Amber revealed are constructed from wooden plates set on wheels for smooth movement, and finished with a wooden wall panel front to elevate the look.
While the Kallax cabinets are the sole items from IKEA, Amber sourced the remaining components—like slatted bases, beam frames, wheels, and hardware such as levers and buttons—from various other stores, piecing them together into a coherent and functional design. This bed isn’t just a space-saver but also a statement piece that reflects Amber’s creativity and handiwork.
19. Get your box’s bed lack of shelves this Lack hack
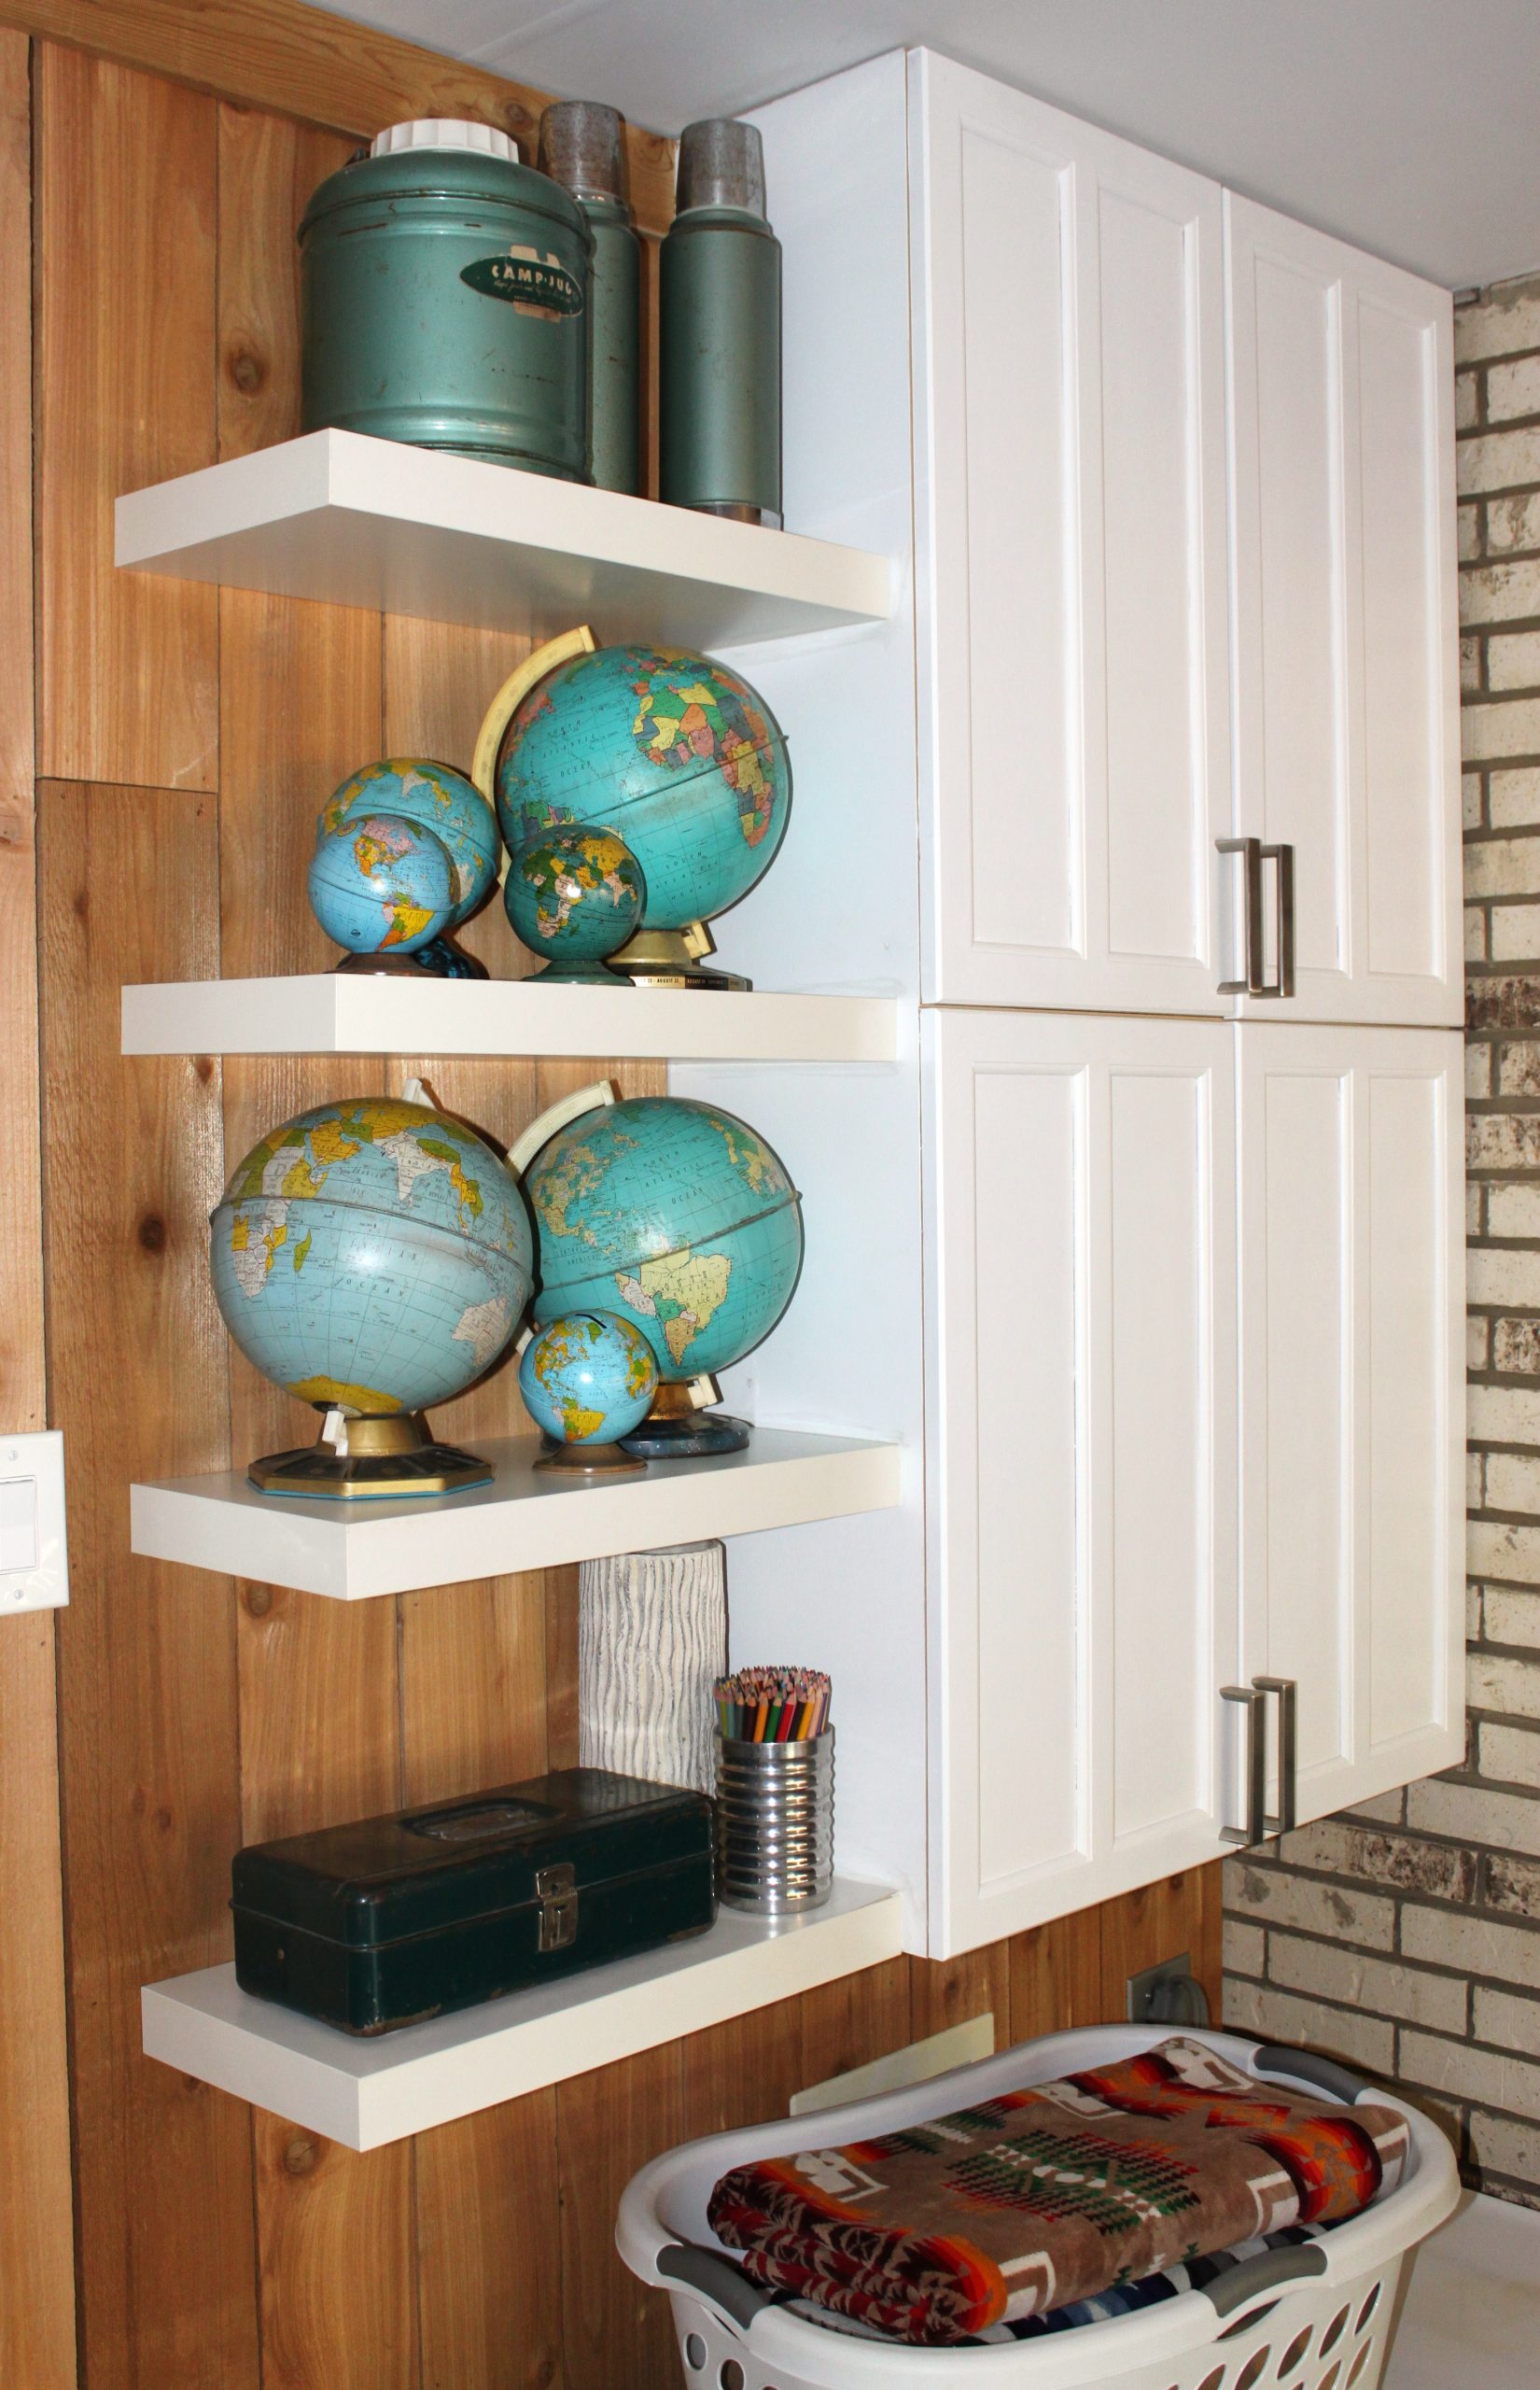
So, you’ve got some Lack shelves from Ikea, right? They’re sleek, sure, but with size options so limited and a weight capacity of only 25 pounds, they’re practically begging for a hack. Here’s how to make them work harder for you in that box bedroom of yours.
Let’s dive into the DIY magic.
First, snatch up a 43-inch Lack shelf. At $15 a pop, one shelf cleverly becomes two when you slice it down the middle. Now you’ve got two roughly 21 1/2-inch shelves—almost a perfect fit for those awkward nooks.
Inside each Lack, you’ll find a metal bracket—this is key for mounting. Sawing the bracket in half might test your patience, but keep at it. The result? Custom supports for your bespoke shelving.
Here’s a glimpse of what’s inside a Lack shelf: a honeycomb of cardboard sandwiched between laminate. But it’s the strip of fiberboard at the top and bottom that’ll come in handy later, so take note.
- You’ll need a drill, a screw bit, a sturdy box of drywall screws, a level, and some 2-inch painter’s tape for marking your wall. Why 2 inches? Because that’s the shelf thickness, and details matter.
- Mark the wall with the tape, space the shelves 12 inches apart, and let the level be your guide. Attach the half-bracket to the wall, aiming for the studs—usually 16 inches apart. Load up on screws for a firm hold.
Here’s the trick: to hide the cut edges, install two brackets (and thus shelves) upside down. It’s a minor detail but crucial for that clean look.
- Slide the shelf onto the bracket. If it’s level, you’re golden. For extra security, drive a few drywall screws from the inside of the cabinet into the shelf. Aim for the fiberboard, not the cardboard, to give it that extra oomph in weight capacity.
- Hang all four shelves, and voilà! Use a swipe of white bathroom caulk to camouflage any seams for a seamless finish.
- Remember those “Birch” cabinets from your old kitchen? A coat of primer and white semi-gloss paint will have them dazzling in their new home.
And there you have it. The whole set-up, with cabinet doors and snazzy new handles, looks like a million bucks. Pat yourself on the back—you’ve just turned a standard shelf into a sturdy storage marvel.
You can customize the size of your shelves to fit your space, but keep it practical—too small and you’ll miss the studs, compromising on support.
For now, you might toss anything on there just for show, but don’t be surprised if the “decorative vs. functional” debate kicks off in your household. Whatever the verdict, you’ve transformed your box bedroom with a Lack shelf that truly lacks nothing.
18. How to Nail Twin Murphy Beds with DIY that won’t Breaking the Bank
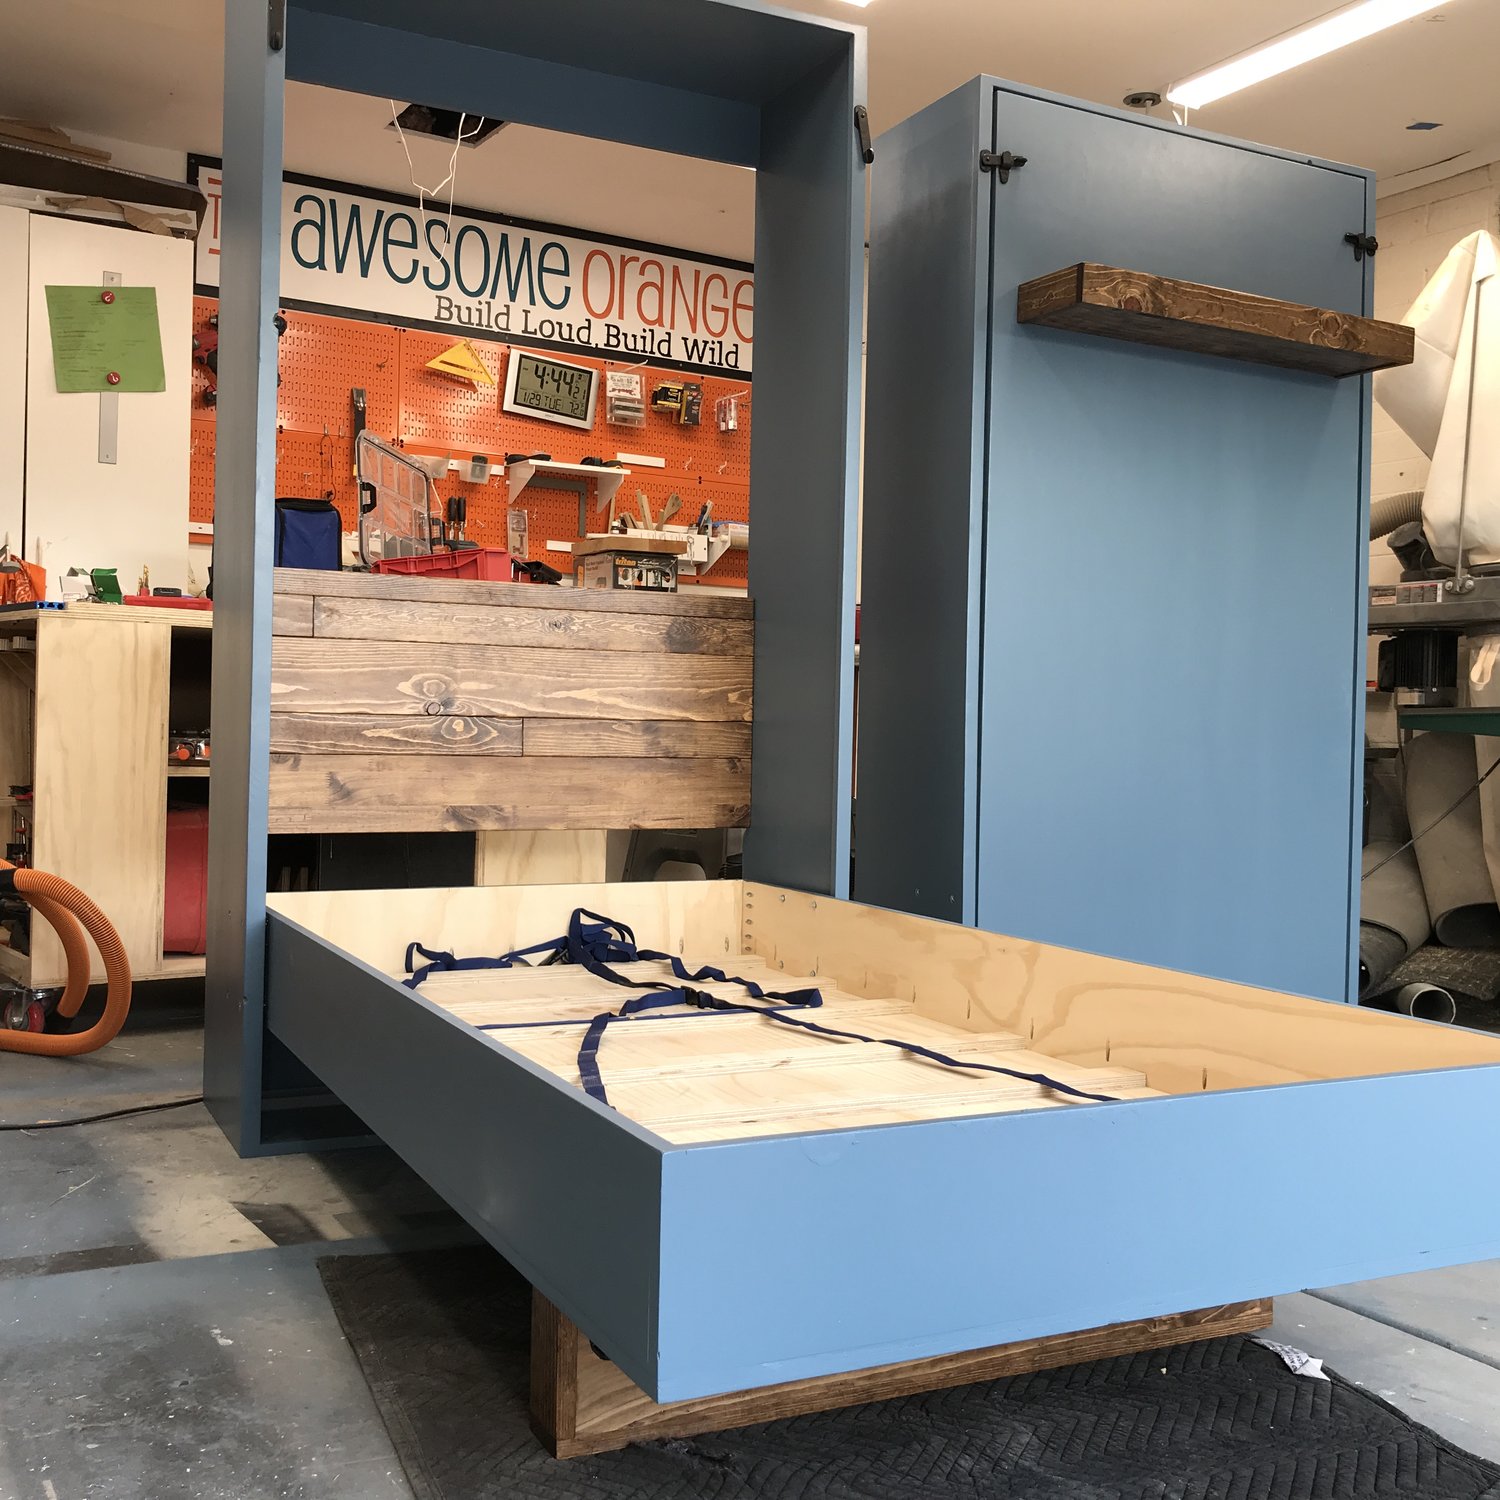
Alright, DIYer, brace yourself for the journey of creating Twin Murphy Beds without splashing out on pricey hardware. You’ve got your plans, you’ve run through the build in your head—now, it’s time to make it happen.
Plywood can be a beast, prone to warping despite your best efforts. To keep it in check, be generous with pocket holes—every 4-6 inches should do the trick—and keep those clamps and squares close for wrangling those unwieldy big pieces into submission.
Here’s a pro tip: Don’t veer off your blueprint mid-build, especially with something as complex as Murphy beds. Case in point, adjusting shelf depth might sound harmless but can throw off your entire project. Trust the process and the plan.
- Moving weighty parts solo? Think again. Two hands are good, four are better. Trying to shuffle bulky components alone is a fast track to frustration (and potentially damaged wood). Save your back and your build; enlist a buddy.
- Mistakes will happen. Maybe that mattress box won’t fit after a rogue adjustment—take a beat, consult your plans, and recalibrate. It’s a learning curve, not a dead end.
- Patience isn’t just a virtue; it’s a necessity. Connecting the mattress box to the frame is a fiddly task. Tiny washers and nuts can test your sanity, but with a magnet and some clever tape tricks, you’ll master this game of ‘Operation.’ And grab extra hardware—you’ll thank me when those pesky pieces inevitably take a dive.
- After all the cutting, clamping, and cursing, you’ll emerge with not just a set of Murphy beds but a treasure trove of experience. Celebrate the mistakes, they’re your stepping stones to success.
And because sharing is caring, our author has distilled all his hard-won knowledge into a step-by-step plan—complete with shopping and tool lists, precise dimensions, and 3D diagrams. It’s a 15-page digital guide waiting for you to SHOP. Grab it, and you’re all set to dodge the pitfalls our author has snagged.
17. A Birch Plywood Idea for A Basic Woodworker
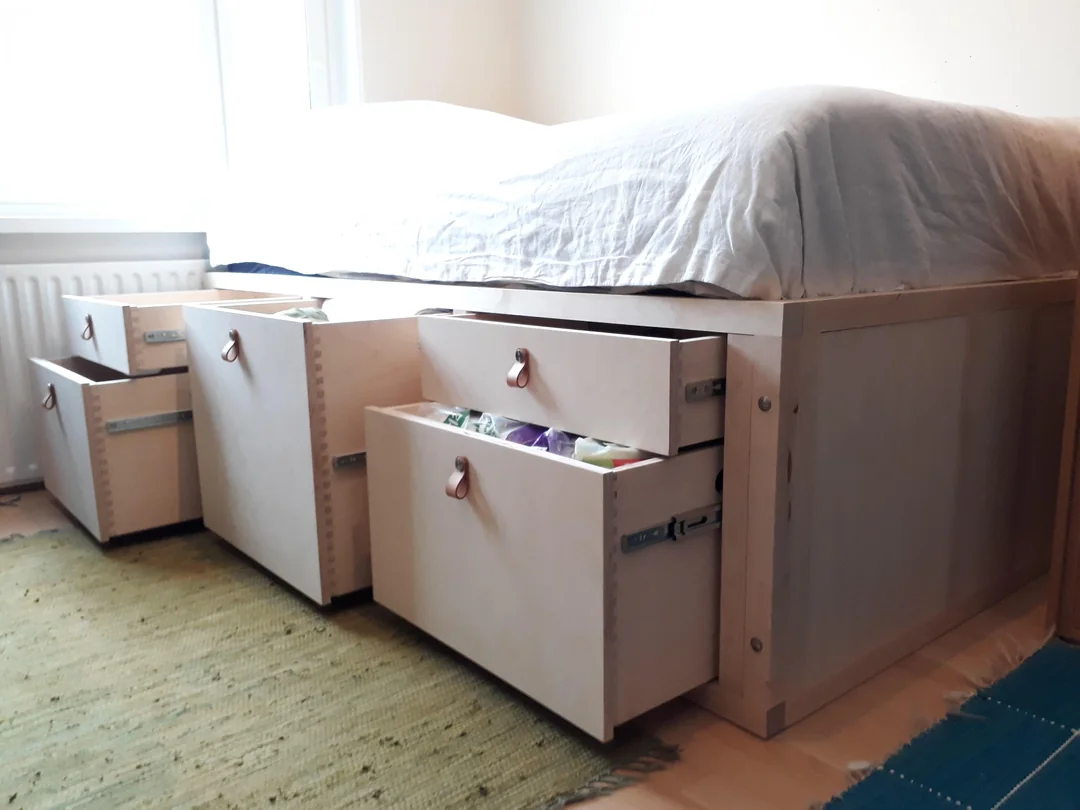
To make a bed like this, you can follow the next basic steps:
- Design: Start by sketching a design, including measurements that will fit your space and meet your storage needs. Consider the size of the mattress, the height of the bed, and the number of drawers.
- Material Selection: Choose quality wood, like solid birch for the frame and birch plywood for the drawer boxes, ensuring that the materials are suitable for the weight they will bear.
- Cutting and Assembling: Cut the wood according to your design. Assemble the frame first, which will support the mattress. Use appropriate hardware and joinery techniques to ensure a solid construction.
- Building Drawers: Construct the drawers separately, making sure they are square and fit neatly into the spaces allotted for them in the bed frame.
- Finishing: Sand the wood smooth and finish with a sealant, paint, or stain to protect the wood and give it a finished appearance. Hardware like drawer pulls can be added for functionality and style.
- Installation: Place the mattress on the bed frame and ensure that the drawers open and close smoothly.