16.The Kallax hack to complete the box bed @do.it.yourself.mum
Transforming a Kallax unit into a storage bench is a brilliant way to give a new lease of life to your Ikea furniture, while also providing functional flair to your space. This project, idea number 17 in your DIY repertoire, is not just a crafty endeavor, but a step towards sustainable living by repurposing what you already own.
- Begin by giving your Kallax unit a thorough clean to remove any dust or grime that might interfere with the paint job.
- Once it’s spotless, grab your sandpaper and give the unit a good sanding. This will help to remove any glossy finish and ensure the new coat of paint adheres properly. Make sure to sand down all the nooks and crannies—this attention to detail will pay off in the final look.
Now, it’s time to get colorful.
- For this project, we’re using ‘Funky Dora’ from the Frenchie paint line—a bold choice that will make your storage bench stand out.
- Apply the paint evenly, and don’t rush; a few well-applied coats are better than a single rushed one.
- Let it dry completely before proceeding to the next step.
Next, take your chosen moulding—this is where you can get creative with the design.
- Cut it to the exact specifications of your Kallax unit.
- Once cut, apply a strong adhesive to the back of the moulding and press it firmly onto the unit.
- For a seamless look, use caulk around the edges of the moulding, filling in any gaps, then paint over it to match.
For the seating,
- Select two sturdy pieces of wood for the top and bottom.
- After cutting them to the perfect size to fit your Kallax unit, it’s time to give them character with a browning wax stain. Staining not only enhances the wood grain but also provides a durable finish.
- Once stained, attach the top piece with hinges. This allows for easy access to the storage inside the bench and adds a functional elegance to the piece.
- The bottom piece can either be fixed into place or left removable, depending on your preference and the functionality you desire. If you choose to attach it, ensure it’s done so in a manner that complements the bench’s overall design.
Throughout this process, remember to measure twice and cut once, ensuring all pieces fit together like a glove. The result is a bespoke storage bench that exudes both style and utility, transforming a simple Kallax unit into a conversation piece that also solves storage dilemmas. With this upgraded furniture piece, you not only get a cozy nook to sit but also a creative solution to keep your living space organized and chic.
15. From Bissa to a built-in look shoe storage unit
Ready to give your boxy bed and platform an upgrade? Let’s dive into a fun, space-optimizing project that’ll transform your hallway with a built-in look storage unit. Say goodbye to clutter and hello to chic organization!
First, it’s off to Ikea for three Bissa shoe cabinets. Once you’ve got them home, it’s time to make some magic. Start by notching out the back of the cabinets to snugly fit against your wall, giving them that seamless, built-in appearance.
Grab some strong adhesive, line up those Bissa units, and clamp them together. Now, screw them into the wall to ensure they’re firmly anchored – no wobbles here!
Next, take MDF boards and tailor them to fit the bottom of your cabinets. This step is all about precision – measure and scribe to ensure everything aligns perfectly where the cabinets meet.
Now, it’s time to get a little dusty. Give those MDF pieces a good scuff sanding, followed by a coat of primer. This preps your surface for the real showstopper: a custom paint job.
But wait, there’s more! Grab a large scaffolding board – this will be your new top piece. Cut it to the right length (keep those measurements handy), then sand it until it feels like silk under your fingertips. Attach this board on top of your Bissa units. It’s not just functional; it’s about to become a statement piece.
Mixing two silk paint colors, concoct a gorgeous light sage hue for the cabinets. This color choice? Chef’s kiss! For the top board, a swipe of brown wax adds a rustic, time-worn charm, while a touch of gilding wax on the handles brings a hint of old-world elegance.
Finally, the pièce de résistance: style those cabinets with your favorite home decor items. Tuck your shoes away in their new chic abode. Step back and admire your work. Your box bedroom’s wall just got a major style upgrade, all thanks to creative expression of @the flipped-piece and some savvy DIY skills.
14. Kallax and Besta Hack Options for the Box Room @Riarra_xcyy
Ready to give your box bedroom space an economical facelift instead of only as a sleeping quarter? First from Riarra Xcyy .This project is perfect for those who love a good mix of organization and DIY flair. First, meet your new best friend, the Brother PT-P710BT Label Maker, priced at $99. This nifty gadget will be your go-to for labeling everything, keeping your new office space neat and sorted.
Now, let’s talk materials of our second more challenging one.
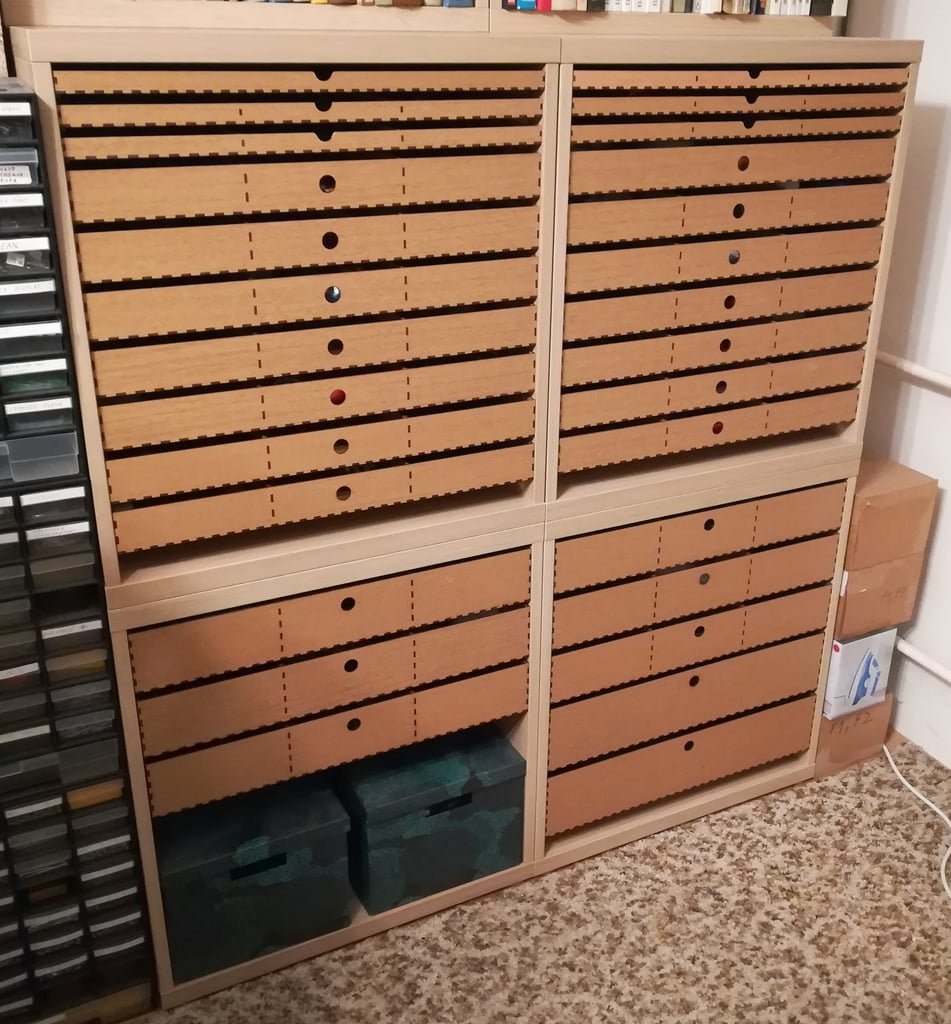
For this hack, you’ll be transforming an IKEA BESTA shelf frame (product code: 102.473.79) into a set of sleek drawers. This isn’t just any upgrade; it’s about maximizing every inch of space in your new office. The first two shallow drawers are perfect for stashing all your small tools and electronic gadgets.
Here’s what you need:
- 3 mm HDF measuring 58 x 39 cm, ideal for crafting the drawers.
- 4 mm plywood, cut to 34 x 39 cm, which will serve as the rails.
When constructing the drawer, keep these dimensions in mind: a width of 562 mm, a depth of 374 mm, and a height of 53.5 mm. Use 3 mm thick HDF for a sturdy build, and remember to cut the tabs with an offset of 0.05 mm for a perfect fit.
Now, the fun part – assembling your drawers. You’ll need a few files:
- ‘drawers_562 x 374 x -0.5.dxf’ for the drawer design.
- ‘manufacturing data’ containing all the nitty-gritty details for construction.
- ‘design.dxf’ for various dimension adjustments and tolerances.
- ‘calculations.ods’, a spreadsheet for all your design and dimension calculations.
Upgrade from the first model to ensure you’re using the full depth of the shelf. Leave a small space at the front of each drawer for a cardboard cover plate, which can be fitted before wrapping and moving.
For added organization, the drawer is divided into three compartments. If you prefer a single large space, simply skip cutting the sockets – but remember, empty sockets can weaken the drawer’s structure.
This entire project was designed in LibreCAD (Download for free), giving you the precision and flexibility to customize as needed.