Dive into the world of creative transformation with our list of 20 ingenious IKEA Malm hacks! The IKEA Malm series is renowned for its simplicity and versatility, offering a sleek and practical foundation for boundless customization. Whether you’re a seasoned DIY enthusiast or a newcomer eager to dip your toes into the revitalizing realm of personalization, these Malm hacks will unveil a spectrum of possibilities, allowing you to reinvent your space with innovative flair.
From stylish bedroom revamps to functional, space-saving marvels, get ready to be inspired and see the Malm series in a whole new light!
20. IKEA HACK: Transform Your MALM Dressers Into a Built-In Wardrobe!

Ever lived in a house that felt like it was straight out of the 1890s? We’re talking one-closet vibes. Yep, it’s tough. But what if you could turn that teeny 8′ x 12′ bedroom from “Where’s my sock?” to “Whoa, where did you get that?”. It’s time for an IKEA hack: transforming MALM dressers into a sleek built-in wardrobe. Here’s your fun-filled guide!
Before You Start:
- Scope It Out: Picture two dressers and one massive wardrobe. Feels like you’re playing furniture Tetris, right?
The Magic Steps:
- Lose The Lame: Say bye to that ancient “crown molding.” Trust us; it’s not royal.
- Wall Glow-Up: Give that wall a fresh, snazzy gray. Why? ‘Cause it’s gonna peek through your new wardrobe!
- Build That Base: Grab some 2×6 boards! They’ll boost your dressers and sneakily give room for pesky heat registers.
- Party with Paint: Swipe on some Behr Satin Interior on those pieces beforehand. Because who likes to paint in corners?
- Oops, Plywood Blunder: Thought that plywood was perfect? If it’s more wavy than straight, think again.
- MDF to The Rescue: MDF doesn’t play games. It’s straight-up straight. Use it for sturdiness and style.
- Touch-Up Time: Get artsy and blend everything with some caulk. Then, let those dressers rock that gray!
- Nearly There: You can stash your stuff, but we’re not done making it pretty!
- Trims Are Terrific: Adding trim around the shelves? Instant chic.
- Smooth Moves with Caulk: Caulk is your secret weapon. It hides flaws and gives a sleek finish. Pro-tip: a wet rag can help you perfect it.
- Final Paint Fiesta: One last painting round, and voila! You’ve got yourself an IKEA masterpiece.
Here’s your game plan:
1. Measure Up! Ensure your room comfortably fits the MALM dressers – think about that 6″ clearance!
2. Get the Goods:
- IKEA Malm 6-drawer chest and dresser
- Glass Tops for the Malm pieces
- Behr Satin Interior Paint & Primer/Sealer
- Plywood or MDF (your call, but MDF’s flatter!)
- 2 x 6 boards for a sturdy base
- Caulk, Lattice strips for trim, and Closet rod essentials
3. Lay Foundations: Start with an 8′ x 12′ space. Paint your wall first, especially if your built-in will be open-backed.
4. Build the Base: Using the 2×6 boards, lay out the foundation for your dressers. This also helps in navigating tricky spots like heat registers.
5. Prep & Paint: Paint the dressers (and the other pieces) in your desired shade before assembling. A pro-tip? Using a primer first can help paint stick to laminate surfaces.
6. Assembly Time: Fix the dressers, add in the MDF, and make sure everything’s solid.
7. Finishing Touches: Add trim around the wardrobe and crown molding in the room. Caulking seals the deal – it’s a lifesaver for giving a seamless look!
- The Skinny on Costs: Expect to spend around $611 on materials (your mileage may vary). And, if you’re watching your budget, watch Craigslist for dressers!
- Time Check: This could be your winter project from February to April. Give or take 60 to 100 hours.
- Skill Level: It’s a fun challenge! So, whip out those power tools, but play it safe.
What do you think? Ready to give your bedroom an IKEA glow-up?
19. IKEA Malm hack White Oak Table idea
Obsessed with the White Oak sofa table?
Turn that passion into a unique sofa table without breaking the bank!
Step-by-Step DIY Sofa Table:
1. Choose Your Base: Instead of building from scratch, Annie (our source from Champagnechaos) repurposed five IKEA white oak nightstands. Remove the drawers and deal with the “lip” on top. To attach them together seamlessly, use screen molding between each nightstand and screw from both the top and bottom.
2. Achieve a Unified Look: Slap on some white oak peel and stick the veneer over the top. Ensure you apply hard pressure for the adhesive to stick. Let the veneer cure for three days before sealing.
3. The Sides: Double up with two 3/4″ plywood pieces. Mistakenly routered too much? Use Bondo to fill in the visible groove, sand it down, and apply veneer and iron-on edge banding.
4. All About Details: Cover any evidence of construction for that cohesive look. Use 1 1/2″ edge banding on the sides and where nightstands meet. The top edge of nightstands gets a 2″ banding, folded underneath with an iron.
5. The Centerpiece: Merge two white oak plywood pieces for a sturdy middle bracket. Seal the entire furniture piece with General Finishes High-Performance Flat sealant. Spotted bubbles on your veneer? Prick with a needle, release the air, and smooth out.
6. Perfecting the Top: For a robust look, Annie opted for two 3/4″ plywood pieces for the top, attached using 1 1/2″ edge banding. Sand lightly, apply the General Finishes sealant, and repeat for up to four coats.
7. Finish with Flair: Complete the look by adding a strip of oak plywood at the bottom. Ensure this doesn’t obstruct the drawers.
Budget Breakdown:
- Nightstands: $450 (5 at $90 each)
- White Oak Plywood: $350
- Peel and Stick Veneer: $100
- Edge Banding: $60
Total: $960
Remember, white oak furniture doesn’t come cheap, but with a little ingenuity, you can create a stunning piece for under $1000. This DIY piece isn’t just a beauty—it’s functional and ideal for storing toys or work essentials. Enjoy your new, stylish storage! Apartmenttherapy | Instagram
18. A DIY Sofa Bed from MALM Cabinets – A Cozy Nook with a View!
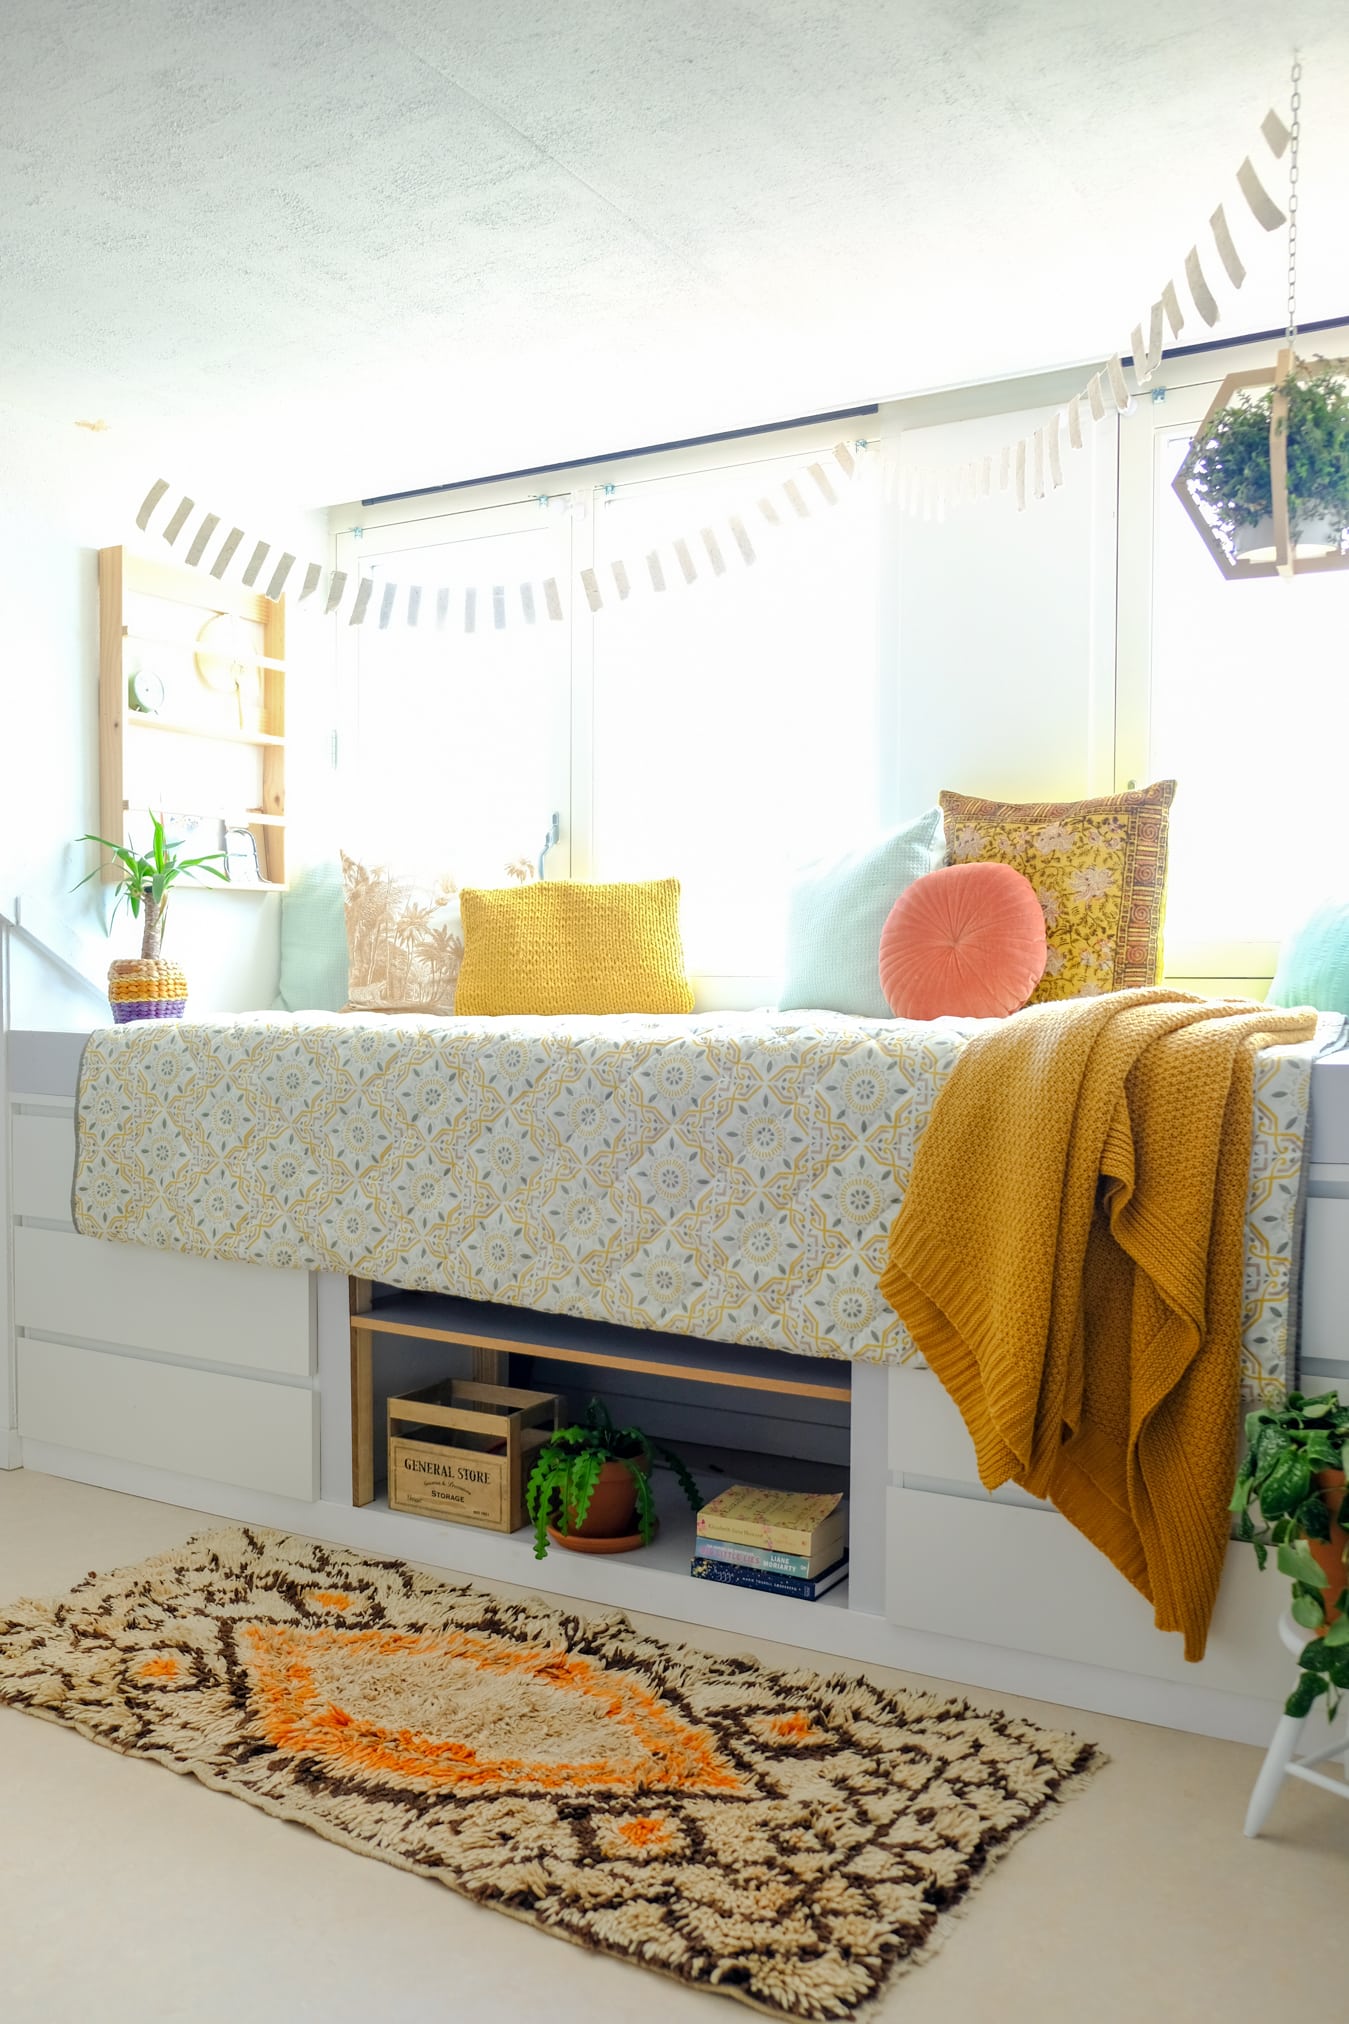
Dreaming of a snug sitting spot with a garden view? Here’s how to craft your personalized sofa bed using IKEA’s MALM cabinets. First, sketch a blueprint of your space so you know exactly how your seating will fit.
For this project, our source, Mirjam Hart, chose three white MALM cabinets with drawers, spacing them out to keep a central open niche. This hack provides easy access to the area behind and adds a decorative touch!
Steps to Your Stylish Sofa Bed:
- Gather Your Supplies: Wood is key! Wooden slats and planks, which Mirjam already had on hand, are crucial. She had some custom-cut, while others were DIY-ed. Remember: your specific measurements will vary based on your space.
- Assemble and Position: Start by assembling the IKEA MALM cabinets. Mirjam set them up, leaving an opening in the middle for aesthetics and functionality. TIP: Pre-order your items online at IKEA for an effortless pickup.
- Construct Your Framework: Designing around the assembled cabinets is a challenge. Precision is crucial; make sure everything aligns perfectly.
- Accessorize: Turn the nook behind the seating into a fun secret space for kids. It’s an awesome hideout for play!
- Final Touches: Top your seating with a mattress, decorative cushions, and a comfy bedspread. Our author used items from Kwantum, Karwei, Dutchbone, Zalando, NaDesign, and Return to Sender to achieve our look.
What’s brilliant about this IKEA MALM hack is its adaptability. Depending on the available MALM drawer sizes and colors, you can tailor this hack for any cozy corner of your house, be it a bay window or a quiet reading spot. And, the bonus? Loads of storage!
Later, here are potential improvements you can consider. First, you can paint all the white wood or add tiles atop the wooden sides.
17. Elevate Your MALM: A DIY Headboard Hack with Leather Straps
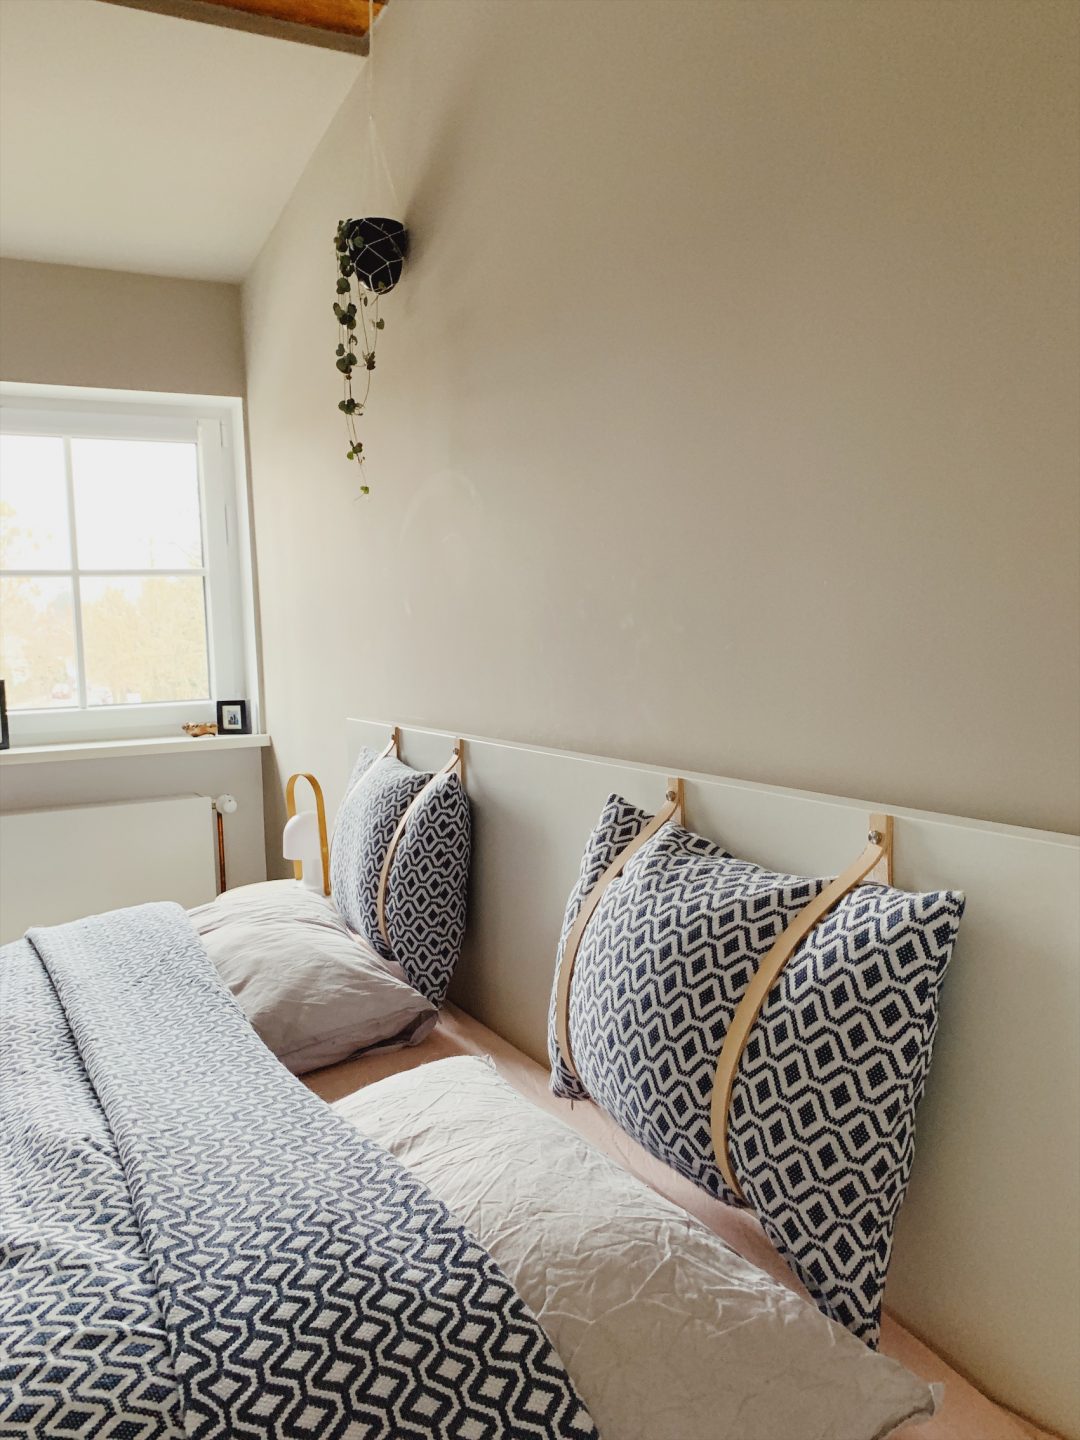
Craving a revamped look for your MALM bed?
Here’s a sassy yet practical trick for you! In just an hour, transform that ordinary headboard into an inviting, cozy backdrop using leather straps. It’s not just chic; it’s functional too. The straps ensure your cushions stay put – whether you’re reading or just chilling.
Materials You’ll Need:
- 2 leather straps (2m each)
- 4 decorative screws
- 2 elongated pillows
- Hole punch or hole pliers
- A sturdy cordless screwdriver
- Measuring tape and pencil
Step-by-Step Guide:
1. Position & Mark: Place your pillows on the headboard to figure out their desired position. Mark the headboard’s center for even pillow spacing. For reference, the holes were 30 cm apart at the sides and 2 cm from the top edge. Depending on your pillow size, the space between the two straps might be around 35cm.
2. Prep the Headboard: Drill four holes using your screwdriver once marked. You could also manually screw in and out to create the hole.
3. Leather Strap Prep: Cut those leather straps to 80 cm. Punch holes at both ends, 2 cm from the edge. Ensure the hole fits the screw but isn’t too wide.
4. Assemble: Fix the leather straps to the headboard with screws. Slide in those decorative caps, loop your cushions through, and voila! A revamped MALM headboard!
A golden nugget about this DIY? It’s all about customization!
Swap pillows, change leather colors, or even adapt this hack to any headboard or wall. Thinking of cozying up a kiddo’s room corner? This might be the game-changer. Flex that creative muscle and you have the sky as the limit.
16. IKEA Malm Dresser Hack with fancy Pull and Knobs
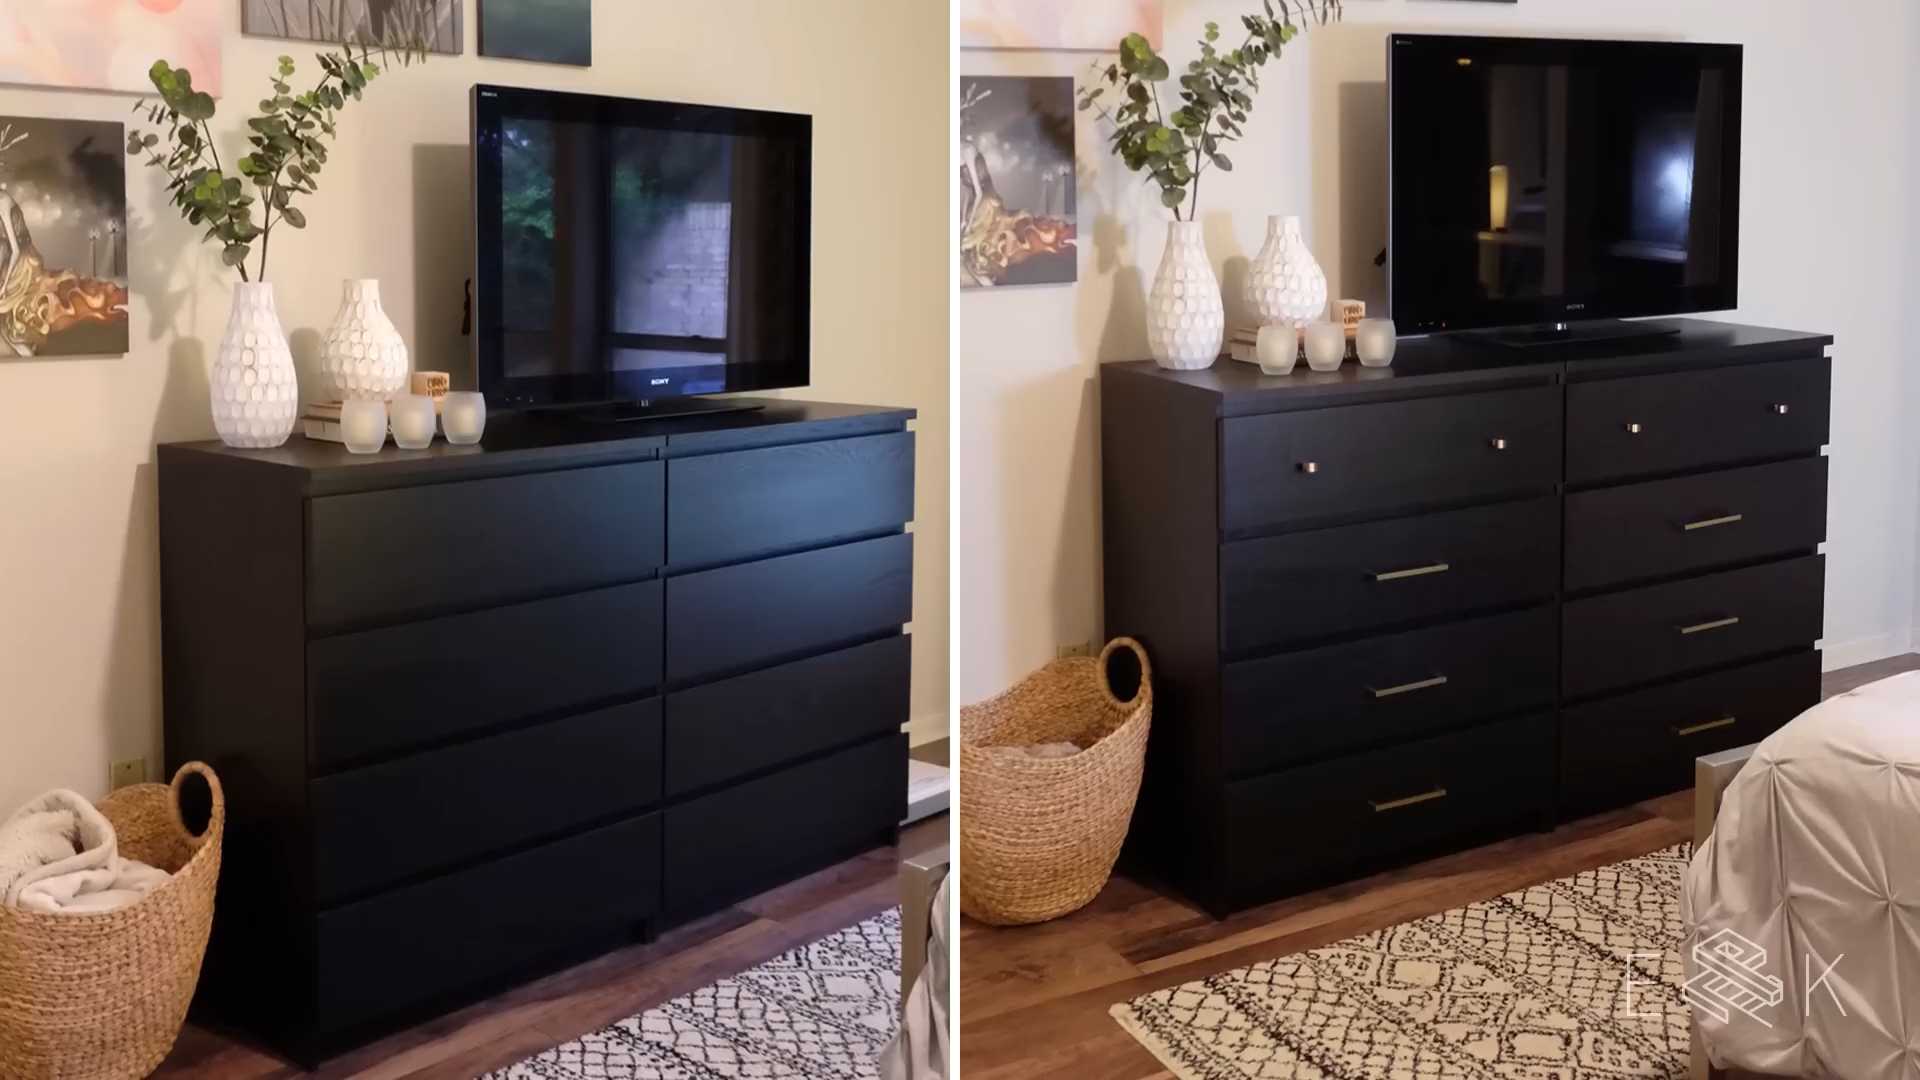
Ready to give your IKEA Malm dresser a mature, stylish twist without breaking the bank?
Let’s dive in!
Start by emptying your drawers. Measure the width and height of your drawer front to precisely place your hardware.
For pulls, note the distance between the screw holes. Our sample, here, for instance, is 6.75 inches wide but has holes 6.25 inches apart. To position, subtract this from the drawer width and divide by two. Mark these, centered vertically.
Knobs? In our current case, we go for 7 inches in from each side. Grab your drill; pick a bit slightly bigger than your hardware screws. Found neither of your provided screws fit? Hack it! Put a nut on the too-long screw, trim it down with bolt cutters, and use the nut to re-thread. Now, simply screw in your chic hardware, reassemble, and admire! For roughly $35, you’ve elevated our MALM dresser, saving heaps.