15. IKEA Malm Drawer Hack with More Modern Color touches
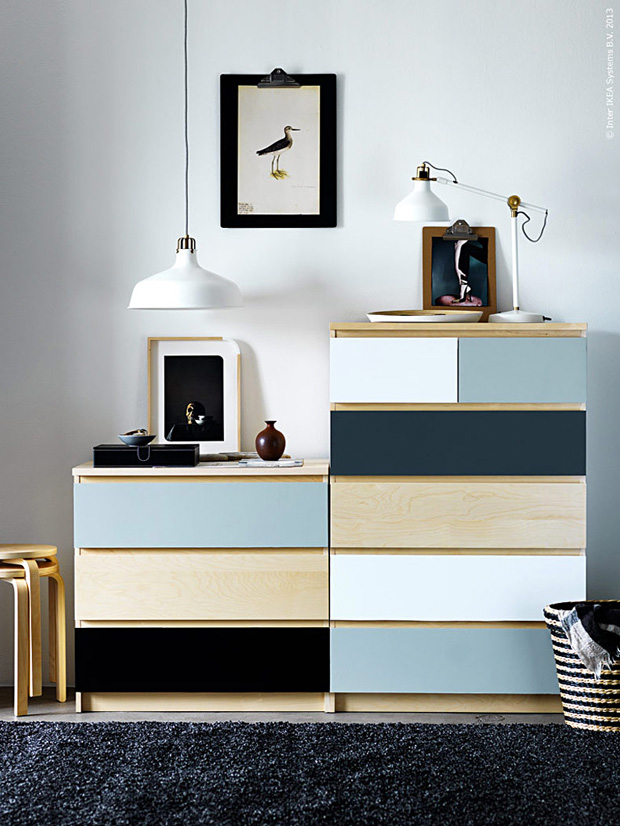
Want to jazz up your Malm Ikea chest of drawers? Take the picture as your inspiration and feel good about it because, with just a few steps, you can elevate its look to fit your room’s vibe to a brand new level. Here’s how:
- Gather Supplies: Secure some melamine and laminate paint, a lacquer roller, and masking adhesive.
- Prep Work: Before diving in, clean the drawers. Use a cloth dampened with methylated spirits or Denatured alcohol to wipe away any residue or grime.
- Get Painting: Dive into the colors! Whether you’re thinking of a single hue or multiple shades, paint the drawers to reflect your style. Use the lacquer roller for a smooth finish.
Further Inspiration: Need more ideas? Explore other DIYs like revamping melamine units with colored paint for the interior or transforming your dresser with a fresh blue. For in-depth guidance, check out tutorials like ‘A two-tone Melamine Chest of Drawers‘ or ‘A Chest of Drawers Before/after‘.
Remember, your Malm’s chest doesn’t have to be conventional.
You can Make it uniquely yours and make IKEA happy simultaneously!
14. How can a conventional Malm bed frame be converted to a stylish four-poster bed?
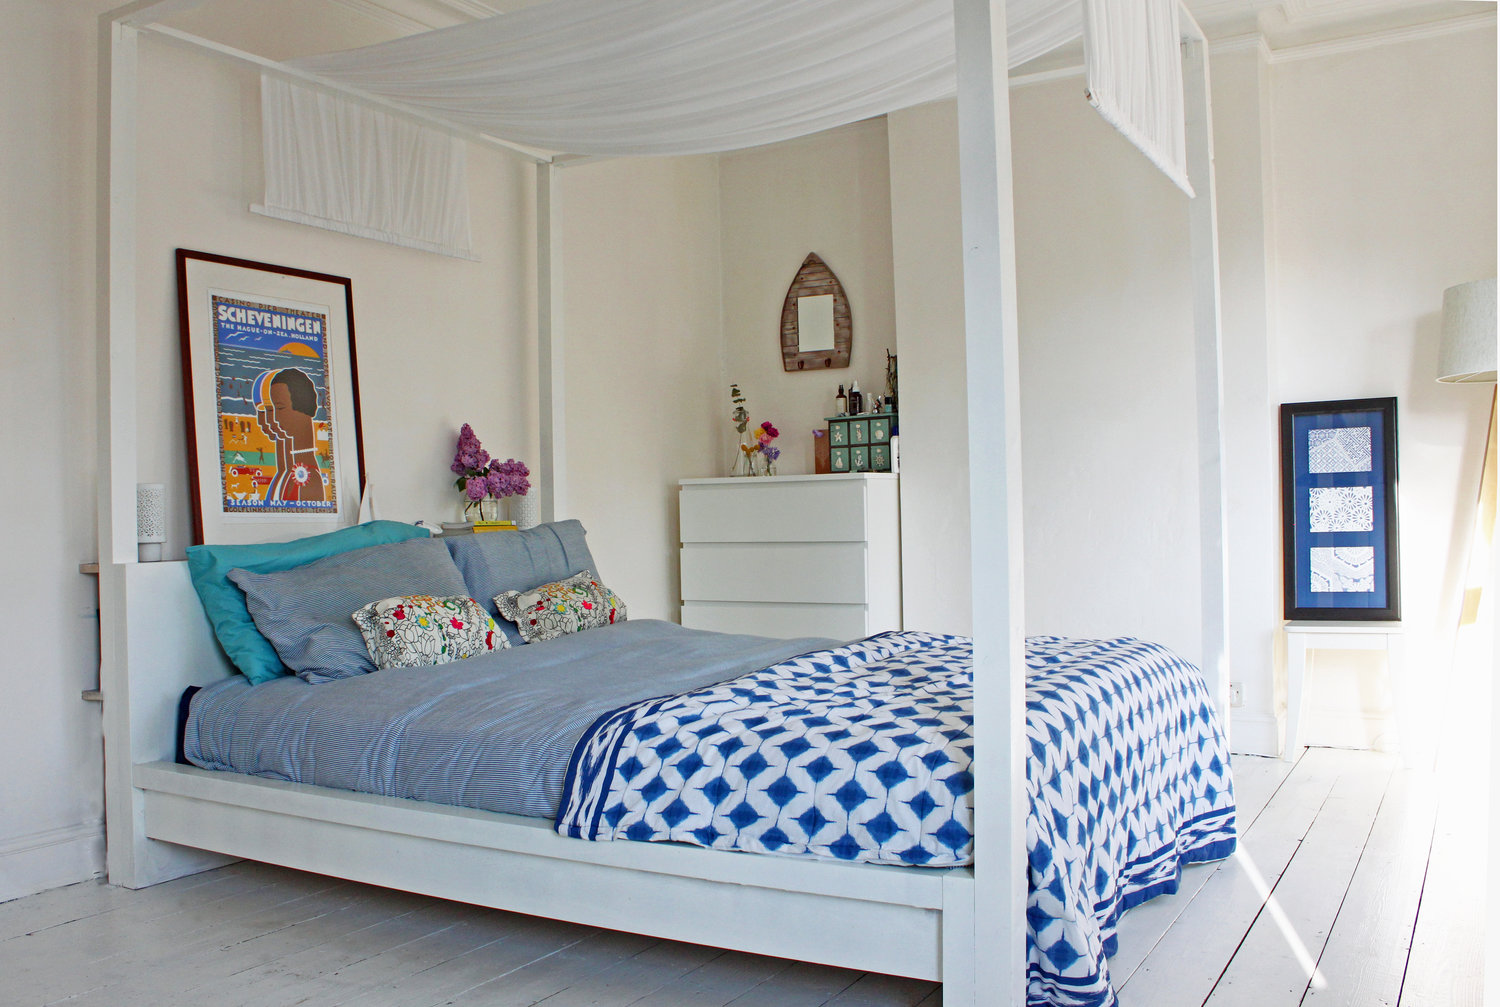
Hey there, DIY enthusiast! Fancy turning that regular Achia Morn bed into a stylish four-poster? Well, grab your tools, and let’s jump right in! First, add back posts to both sides of your bed. Craft a bookshelf at the head using reclaimed timber for a chic touch. Carve out a square for a snug fit around the beam and secure it using large corner brackets.
Got magazines or a laptop? Add an extra plank for storage! For the front, secure beams with long screws and bridge them with thin timber. Ensure it’s the same width as the beams for a sleek finish. Once all’s set, glam it up with a few coats of white glossy paint. And with a day’s work and some timber, you’ve breathed new life into an old bed!
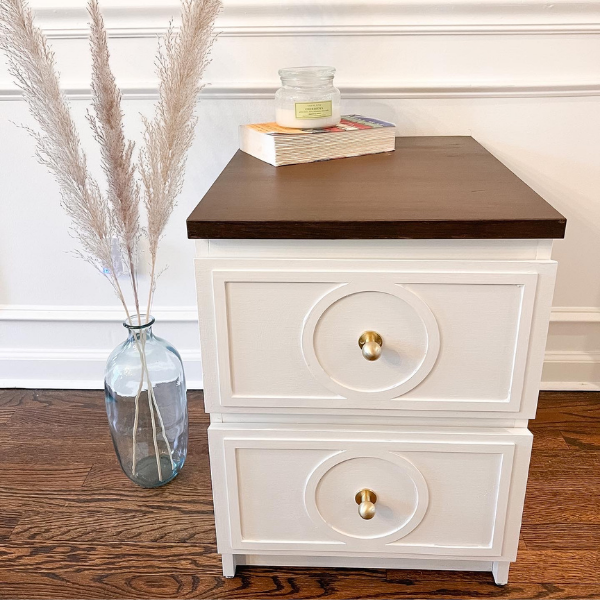
13. How to give the IKEA Malm nightstand a facelift with Overlays
Ready to give that IKEA Malm nightstand a facelift?
Here’s your engaging guide to a chic makeover:
IKEA Malm Nightstand Hack: A Radical Refresh
1. The Vision: You’ve got a basic Malm 2-drawer dresser.
Let’s make it pop by adding O’verlays to those drawer fronts and crowning them with a wooden top.
2. The Why: DIY flipping keeps furniture out of landfills, giving them renewed zest.
Plus, there’s nothing like the thrill of turning ‘meh’ into ‘wow.’
3. The Essentials:
- Ikea Malm 2-drawer dresser
- O’verlays Gracie kit
- Retique it with liquid wood and dark walnut gel stain
- Zinsser Bin Shellac primer & white eggshell paint (like Upcycle latex)
- Tools: foam brushes, mini foam roller, wood glue, chip brush, drill, drawer hardware.
4. The Prep:
- Look up your piece on IKEA’s site using the product sticker to understand its material.
- Knowing the Malm’s veneer/laminate composition means No sanding but prime and paint!
5. Get Painting:
- Prime using Bin primer and a foam brush.
- Roll on a coat of latex paint, leaving the top untouched.
6. Crafting a Wooden Top:
- Skip the laminate shine; opt for a genuine wooden aura using Retique It liquid wood. Slather on, let dry, then apply gel stain.
- Seal with polyurethane post-drying. Your nightstand’s top now boasts a genuine wood look!
7. O’verlays Magic:
- Attach the O’verlay using wood glue.
- Once dry, reward your nightstand with a second paint coat, ensuring you cover the O’verlays.
- Add your chosen hardware to the drawer fronts.
8. Behold the Transformation:
From an average IKEA piece to a trendy, stylish nightstand – that’s the power of a creative flip!
12. IKEA Malm headboard Hack from Aerialsoul

Want to take your IKEA Malm bed frame to the next level?
Here’s how Aerialsoul did it, and you can too!
Here’s their words
We loved the Malm, but our mattress and boxspring almost hid its headboard.
Solution? DIY a custom, taller, padded headboard. Though it wasn’t a cost-saver, it gave us a unique bed we adore.
What We Dreamed Of:
- A comfy tall backrest for reading or laptop work.
- Bedside tables flush with the mattress for our essentials.
- Minimal cable mess.
- Dual-controlled lighting that’s cool and energy-efficient.
Materials Used: King-sized Malm frame, two Malm nightstands, another Malm headboard, and a Pax wardrobe cabinet. Plus, some IKEA lights with compact fluorescent bulbs.
Steps to Our Customized Bed:
1. Nightstand Makeover: We made them taller by flipping the drawer with the shelf. By drilling just two new holes, the drawer sat higher. We shortened the shelf to fit below the drawer, acting as storage for laptop chargers. Additionally, we added a cable grommet hole for tidiness.
2. The Malm Headboard Hack: Before assembling, we installed the lights and set up the switch controls. To add height, we securely stacked another Malm headboard on the original. Here’s a tip: the Malm has a 1″ solid wood border and a 4-6″ solid midsection. Using a stud finder, we marked these solid areas. Then, we reinforced it with 1″ x 2″ wooden strips using drywall screws.
3. Top Shelf Addition: This came from a Pax wardrobe side wall. Its finish matched the Malm’s, and it added sturdiness to the entire structure. We used a 1″ x 2″ wood strip anchored to wall studs as support. A hole in this shelf also helped with lamp cord management.
4. Padded Squares Setup: We aimed for a plush look. Each padding (measuring 32″ wide x 24″ tall) had a wooden backing. We mounted them on a 1″ x 2″ wooden strip across the headboard’s back. In hindsight, strong Velcro strips might’ve been simpler!
5. Nightstand Tops: Crafted from Pax material, these were hinged to unveil hidden storage – perfect for power strips and more. It does ensure the top stays clutter-free, but, fair warning, fitting those hinges can test your patience!
Finally, we pondered covering the headboard’s sides to conceal its structure. Yet, we’ve left it as-is for now. The result? An IKEA Malm bed that’s unmistakably ours.
11. How to upgrade your bedroom with the IKEA Malm drawer hack according to @miss_bethx
Let’s dive in:
- Plan It Out: Before hitting the store, draft a blueprint. Maybe use Photoshop to visualize the exact wood dimensions you’ll need.
- Go Shopping: Head to B & Q and pick wood, preferably thicker than 1cm for sturdiness. Don’t forget the essential IKEA bits, or check out Facebook Marketplace for some deals.
- Build It: Find joy in piecing together IKEA furniture. But remember, aligning everything might test your patience. Persevere to ensure the wood fits snugly.
- Design the Layout: Picture a bed where you can crawl in, boasting tunnels and strategic storage shelves.
- Add Some Color: Paint all the wood white for a seamless built-in look. A touch-up here and there on the furniture will make everything pop.
- Time to Drill: Have you never used a drill before? It’s okay. Secure those freshly painted wood pieces on top. You’ve got this.
- Lay the Mattress: Setting the mattress might be a bit of a wrestle, but it’ll all be worth it once it’s expanding and settling in.
- Accessorize: Garnish your masterpiece with personal keepsakes or décor. Now, step back and admire. You’ve just transformed basic IKEA items into your dream bed. Go you!