Unlock the secrets to a timeless kitchen with “17 Kitchen Projects that are anything but dated.” Inspired by ingenious designs, like the Pinterest-sourced DIY Can Rotator System, this compilation ensures every corner of your cooking haven is optimized.
From a meticulously measured 44 1/4″ x 48″ pantry board to crafty can storage solutions, this guide offers both function and flair. Delve into projects that marry modernity with classic charm, proving that some kitchen innovations truly stand the test of time.
17. A DIY Fold-Out Coffee Corner: Maximize Studio Space with Style!
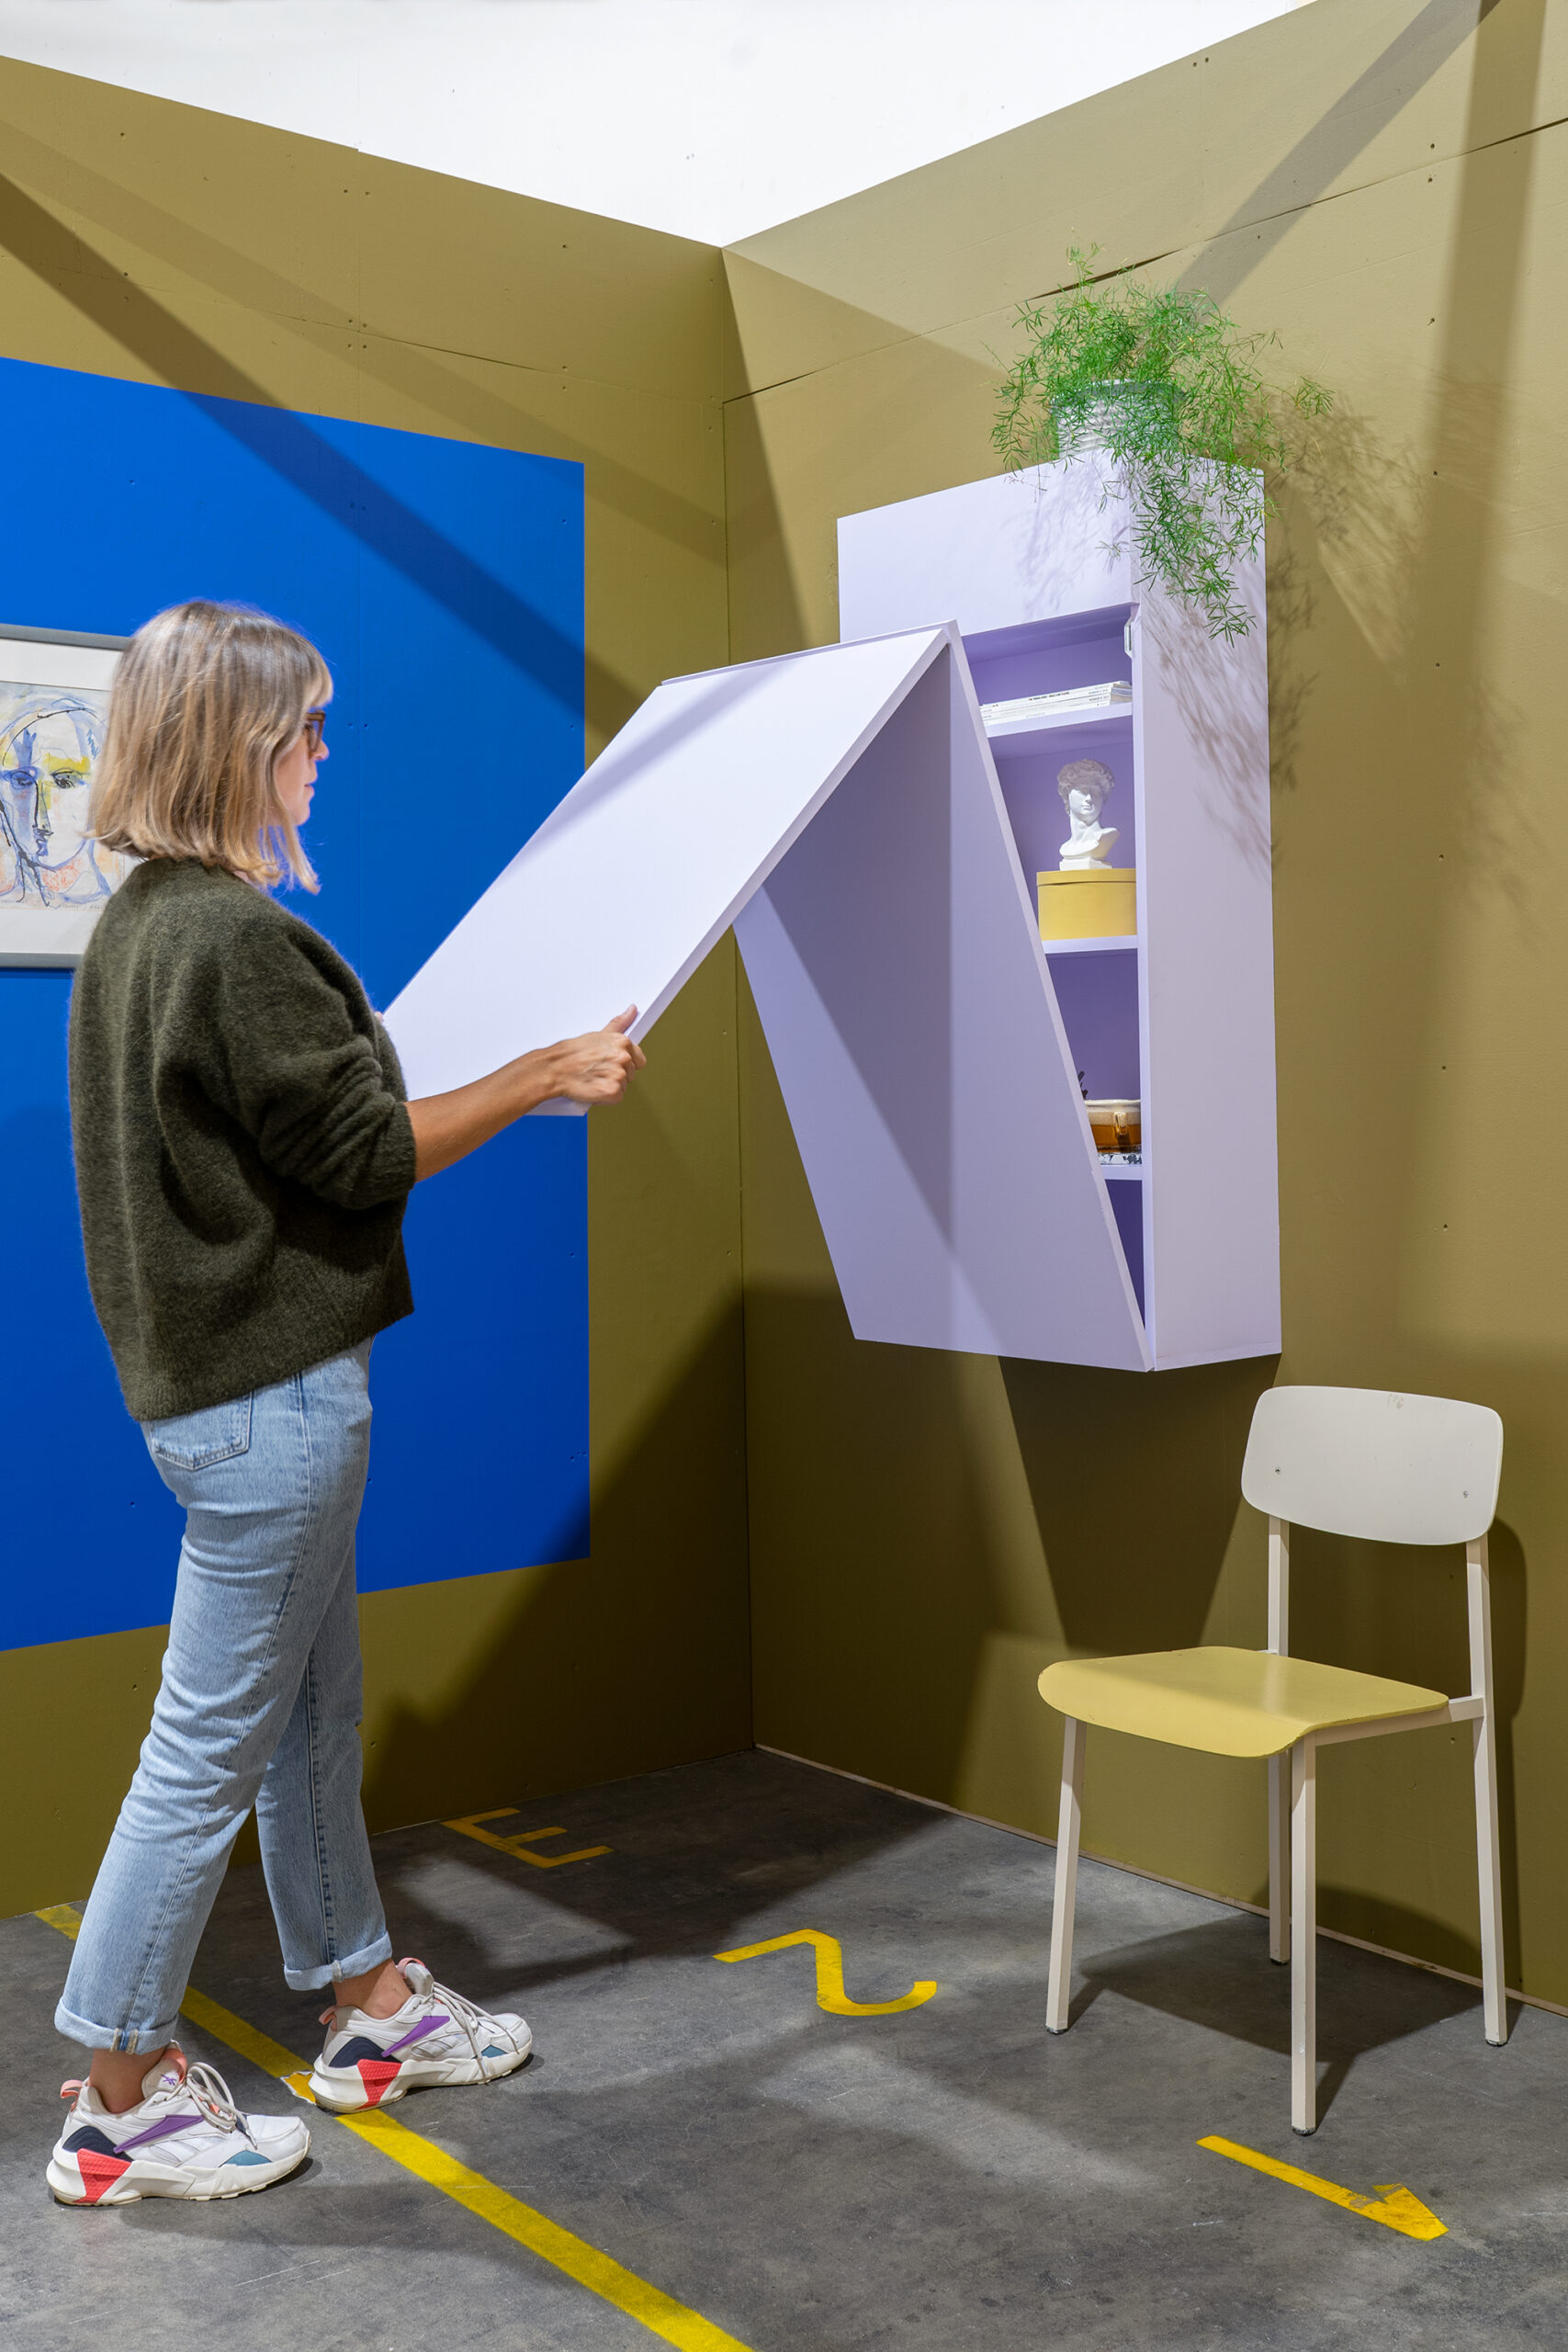
Looking to spruce up your studio space and create a cozy coffee corner without sacrificing valuable room? We’ve got you covered with this fun and engaging DIY project! With a clever fold-out design and practical measurements, you can enjoy your favorite beverage and work with ease. Let’s get started!
1. The Idea:
Craft a fold-out coffee corner that’s both space-saving and functional. It’ll be a wall cabinet with a tabletop and leg, deep enough to store all your coffee essentials, like a kettle, crockery, and storage jars.
2. Cut Wood to Size:
Begin by sawing the wood to the dimensions you need. The recommendation is to use 18mm MDF and secure the plank with glue clamps to your work table. Safety first! Don’t forget to label the parts for easy assembly.
3. Assembling the Cabinet Base:
Attach the top and bottom to the sides using screws, pre-drilling the holes to prevent splitting. To keep it sleek, use a drilling template set for wood connections. Leave a slot at the bottom for cables to pass through.
4. Make Holes for Adjustable Shelves:
For added convenience, create height-adjustable shelves. Drill holes on the sides of the cabinet, and customize your shelves to fit your needs.
5. Attach Table Leg to Tabletop:
Create the table leg using an MDF plate. Remember, the height of the table leg will determine both the table and cabinet’s positioning. Connect the table leg to the tabletop with a piano hinge.
6. Attach Cover and Tabletop to Cabinet:
The flap that closes the wall cabinet is also the tabletop. Add a short flap at the top to close one part of the cabinet when the table is unfolded. Use built-in cupboard hinges for a seamless look.
7. Attach Magnets:
Ensure the tabletop stays securely attached to the wall cabinet by using strong magnets. Opt for ones that can handle a minimum weight of 5 kg to prevent any sudden surprises.
8. Sand Everything Smooth:
Get the perfect finish by sanding all the wood surfaces. If you find it more accessible, disconnect the tabletop using the hinges to make sanding a breeze.
9. Make Hanging System:
Create a blind hanging system using one wide slat, sawed in half lengthwise at a 45-degree angle. Attach one half to the furniture and the other to the wall. Now, you can hook the furniture onto the wall-mounted slat.
10. Painting:
Make your coffee corner pop by priming and painting it in a color of your choice. Add a personal touch that complements your studio’s style.
11. Hanging:
Use the hanging system you made in Step 9 to mount your fold-out coffee corner. Measure and calculate to ensure the table top is level when unfolded.
With this DIY fold-out coffee corner, you’ll have the perfect spot to enjoy your beverages, take a break, or get work done in style! Plus, you’ll love how it maximizes your studio space without taking up too much room. Happy crafting!
Detail: Entermyattic.com
16. A DIY Roll-Out Drawer Solution to Conquer Your Repetitive Kitchen Chaos
 Do you feel like you are struggling with a tight 700-square-foot space for a family of four or much less? Transform your cluttered kitchen island cupboards with custom DIY roll-out drawers. First, plan your drawer heights to fit items effectively. Next, gather your supplies like wood, sliders, and screws from a store like Home Depot and use their lumber-cutting service.
Install the drawers with some trial, error, and creativity, keeping the existing shelving for support if needed. Leave them natural or paint as desired. Voila! An organized, accessible kitchen without the $1,600 contractor price tag! Detail: Toandfroblog.com
15. A DIY Open shelving idea with Extra Baskets
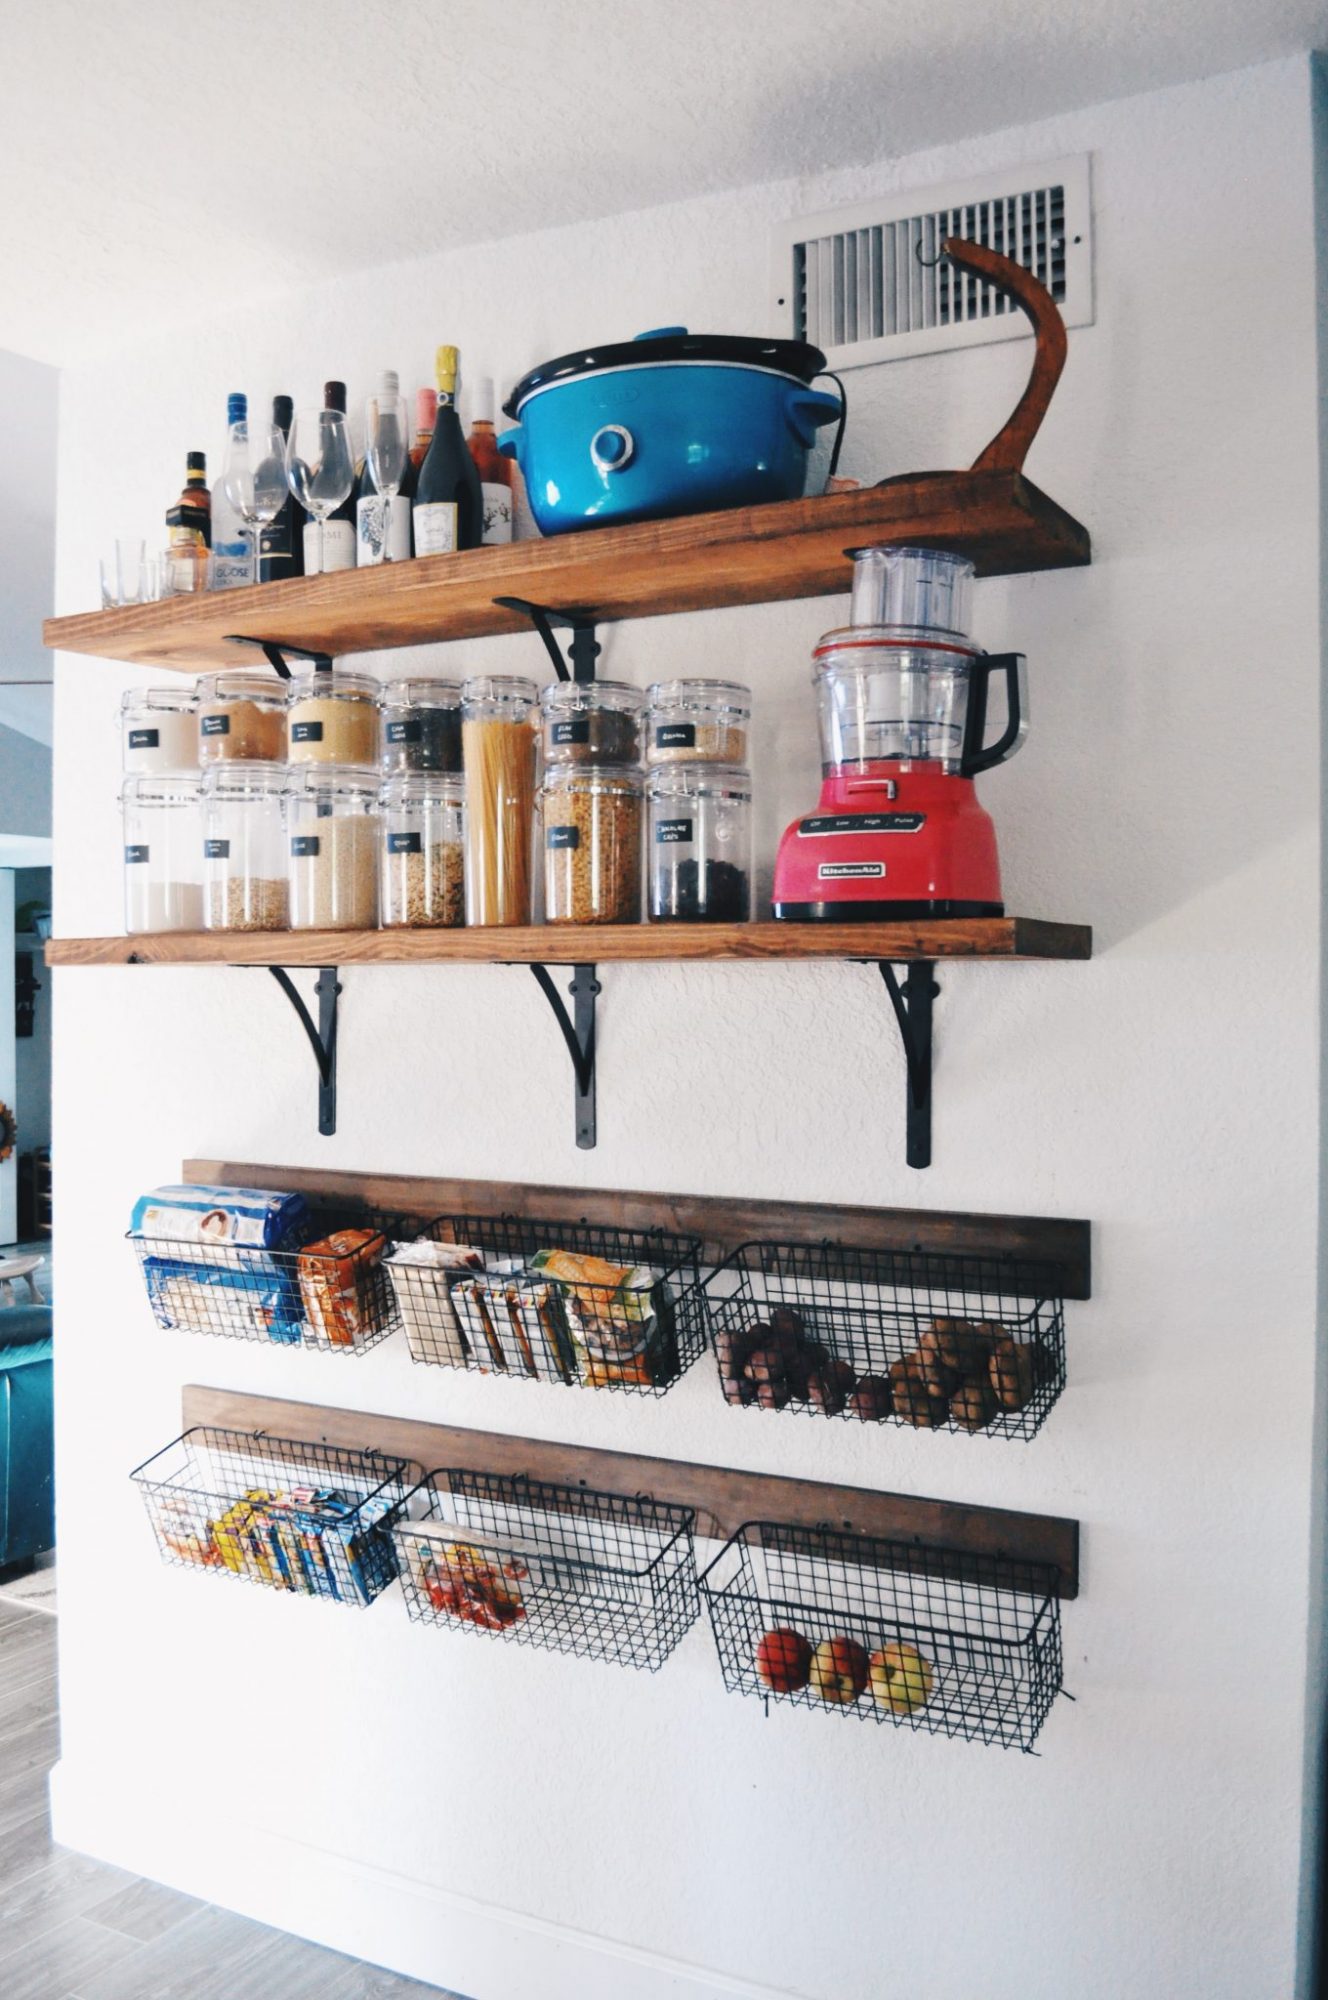 Tight on kitchen storage? Transform a 6.5-foot wall with DIY open shelves using a single 12-foot piece of 8″ x 2″ pine cut into two 4.5-foot sections. Add 16″ long baskets between shelves to create a stylish and accessible space for dry goods and snacks.
Pick a Special Walnut stain for warmth, and use acrylic canisters with chalkboard labels for a clean, uniform look. Remember to find your studs, level your lines, and test the stain first. Finally, a convenient kitchen storage upgrade without the expense of new cabinets! Detail: Themommymyway.com