10. Update your kitchen partition with the ply free-standing cabinet or shelf
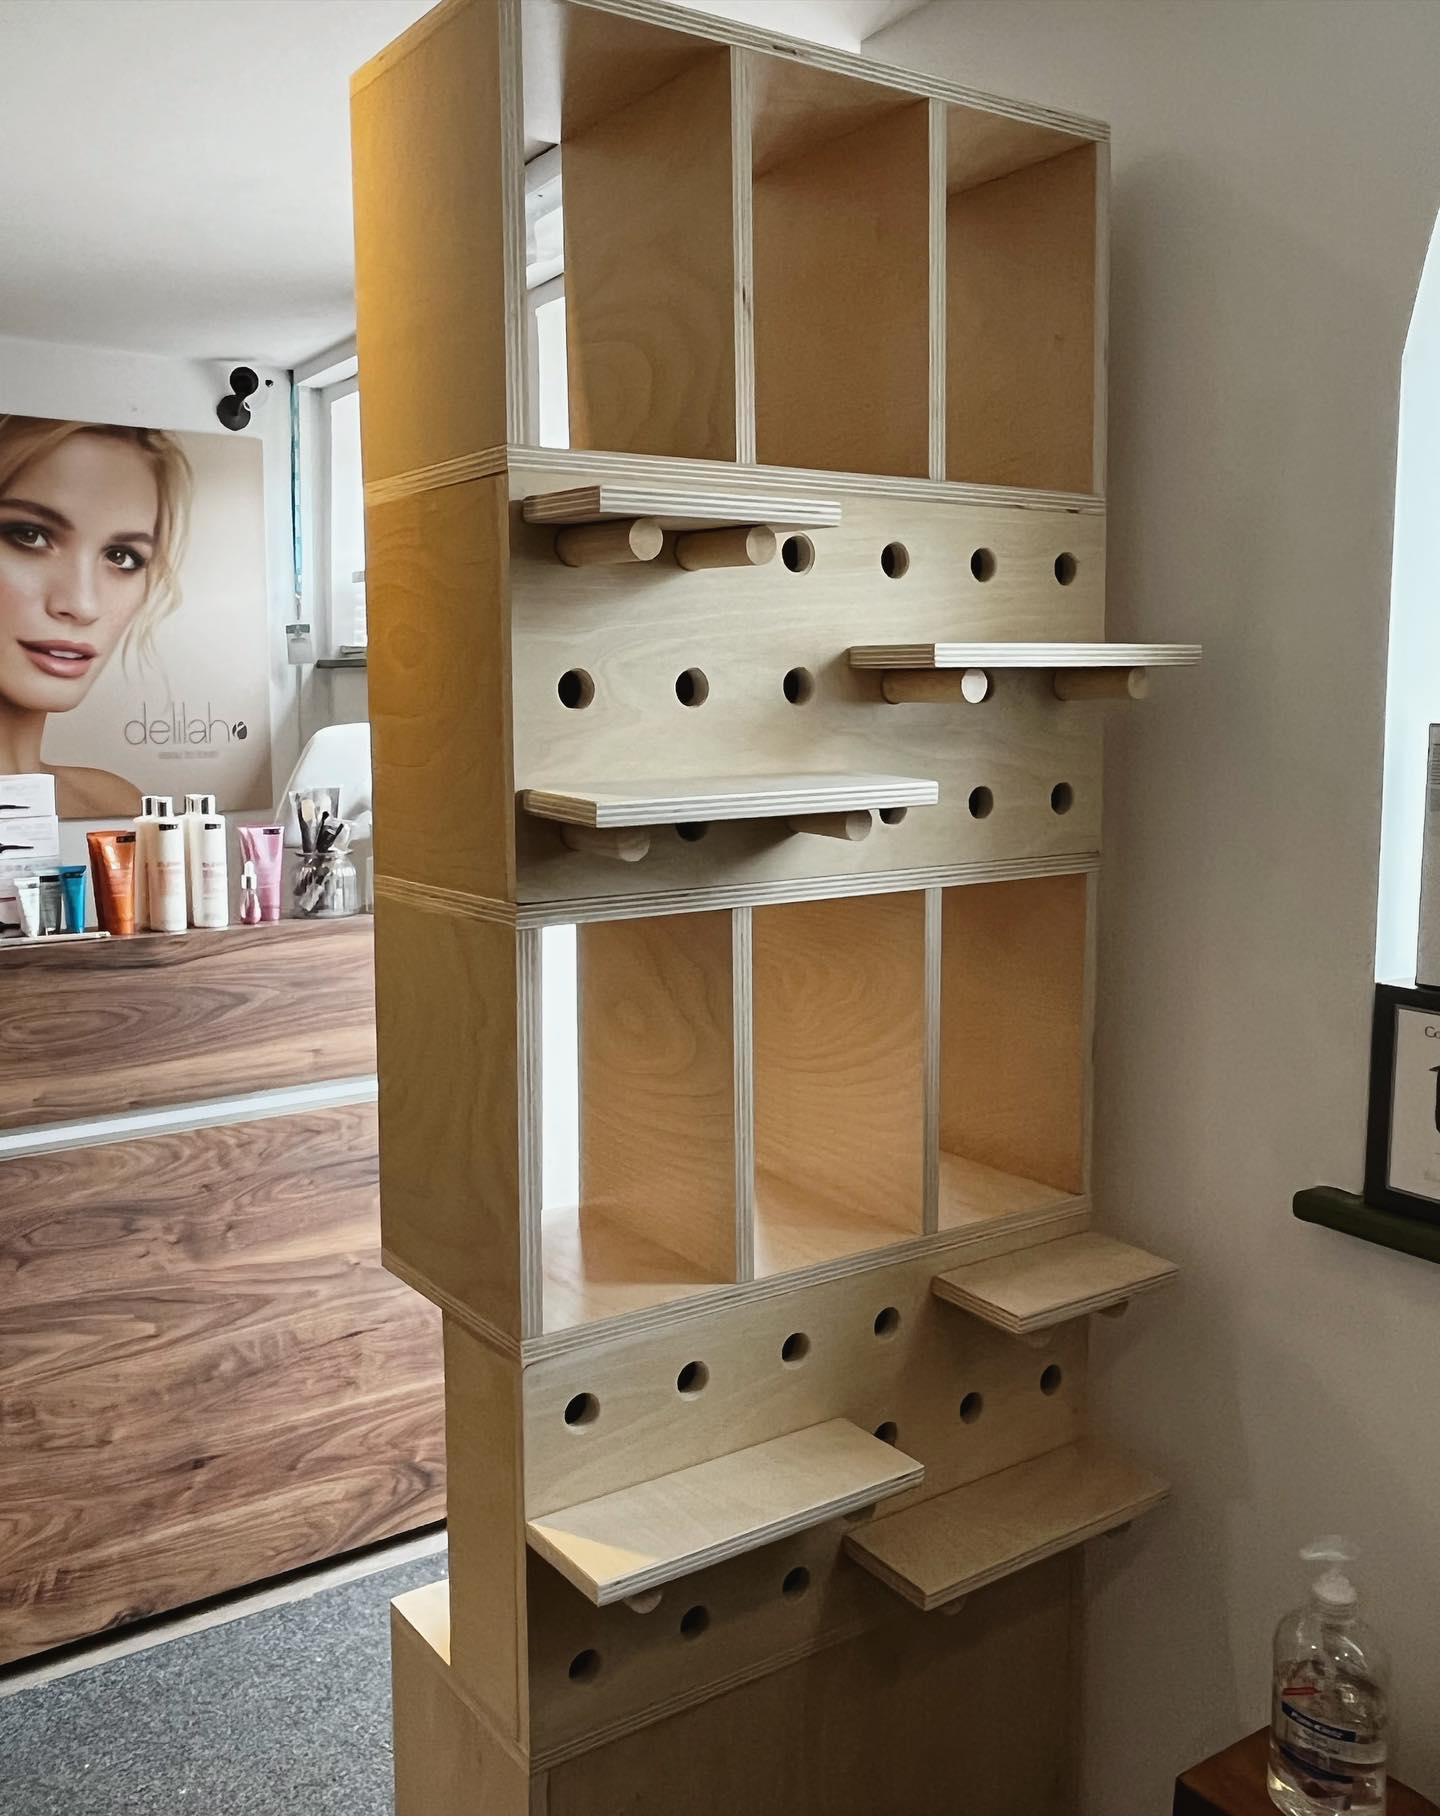 Sophieelisebeauty’s freestanding ply cabinet by Plyhood Design, an ingeniously captivating custom piece, could be your muse for room optimization and woodworking. This one-of-a-kind design uses all sides of the structure, sparking inspiration for innovative furniture hacking. Are you craving to recreate this without touching a saw? Reach out to Plyhood Design. Meanwhile, let these images be your guide in carving your own unique space. Instagram
9. A DIY guide to crafting a bespoke vegetable storage cabinet
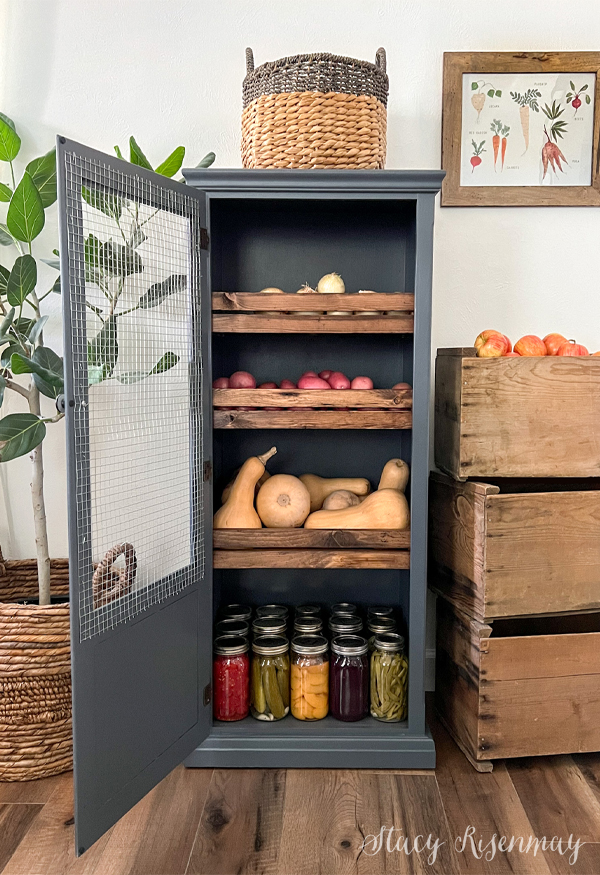 Is your pantry cluttered with bruised root veggies?
Here’s your DIY guide to crafting a bespoke vegetable storage cabinet.
- Locate a pre-loved, ideally 2-feet wide and 4-feet tall, cabinet.
- Lightly sand the cabinet’s surface. Clean it well.
- Carefully remove the door’s wire mesh for easy painting.
- Choose a paint that complements your decor. We recommend a charcoal gray.
- Using a sprayer, apply thin, quick-drying coats of paint.
- While the paint dries, prepare your shelves. Cover the existing particle board with wood-effect contact paper.
- To prevent your veggies from rolling off, add ledges to your shelves. You can achieve this crate-like look with stained 1x2s.
- Once painted, reattach the wire mesh.
- Install new hinges and a knob to finish your stylish vegetable storage cabinet.
Now, enjoy your chic, practical storage solution, perfect for those excess garden veggies. Detail: Notjustahousewife.net
8. Introducing MOD Kitchens: Compact, Concealed, and Customizable!
 MOD Kitchens, the latest innovation from small kitchen expert John Strand, presents four UK-designed models, three of which feature concealed designs that neatly fold away. Ideal for tight spaces like meeting rooms and studio apartments, these genius kitchens hide behind doors to keep things tidy and, yes, save you from doing the dishes. Embrace British craftsmanship, as each unit is skillfully pre-built, requiring minimal assembly.
MOD Kitchens revolutionize small space living with bi-fold doors, simplifying access to your kitchen essentials. The MOD-BF model, offering something unique, boasts bi-folding doors for the top unit.
Versatility shines through with the MOD range of kitchenettes, available in an impressive selection of 18 color finishes. Measuring just 1.2 meters wide, these kitchenettes fit snugly into your compact area while offering customizable options, such as dishwashers, hobs, and various finishes. Detail: Johnstrand-mk.co.uk
7. How to Build Your Own DIY Rolling Kitchen Jar Storage?
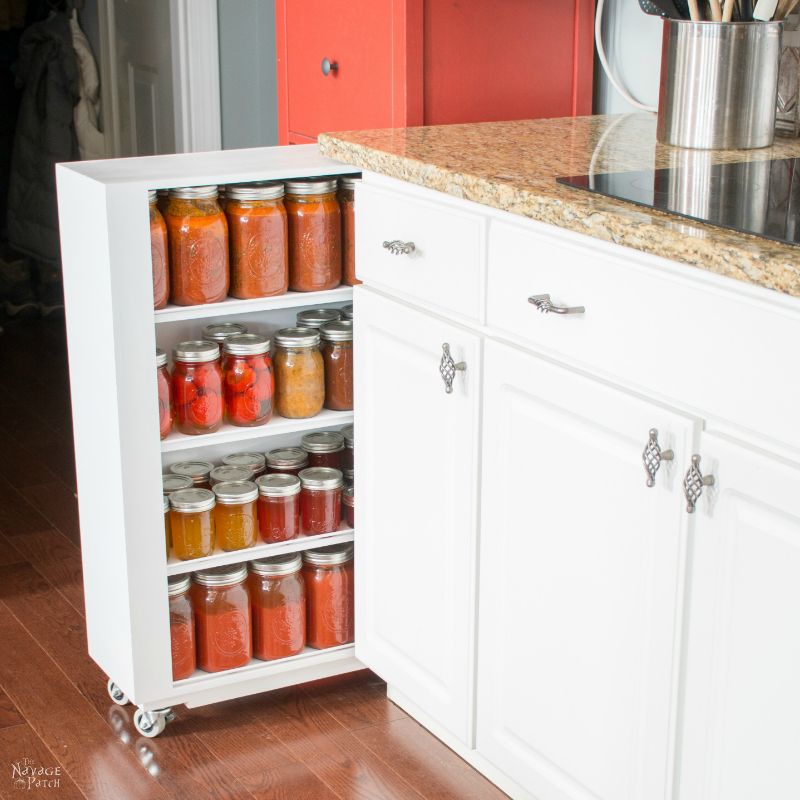 Are you ready to embark on an exciting journey to create your very own DIY Rolling Kitchen Jar Storage? Get ready to transform your kitchen organization with this comprehensive step-by-step guide. We’ll dive into the nitty-gritty details, providing you with the numerical specifics and technical instructions to make your project successful.
1. Gather Your Materials:
To begin, ensure you have all the necessary materials on hand. You’ll need plywood, a Kreg Jig for pocket holes, brad nails for secure assembly, metal rods for the face frame, and drywall spackle to fill in holes and gaps. Don’t forget a Wagner paint sprayer for a professional finish. Check your measurements thoroughly, as precision is key to building this storage cart.
2. Cutting the Base:
Start by cutting two pieces of 3/4-inch plywood for the base, ensuring they are 1 1/2 inches tall when glued together. This recessed base will accommodate the casters, providing additional height for the cart. Remember, attention to detail will save you from any fitting issues later on.
3. Assembling the Base Platform:
Apply glue between the two pieces of plywood and use brad nails to secure them while the glue dries. Make sure the base is 1 1/2 inches shorter in both length and width than the bottom shelf of the cabinet. Center the base on the shelf and trace the outline with a pencil before securing it with brad nails.
4. Building the Frame:
Now, assemble the back, sides, and top of the cart by securing them with glue and screws. Use speed squares to ensure the shelves are level and square. Reinforce the frame with brad nails for added stability.
5. Adding the Shelves:
Measure and mark the locations for each shelf, ensuring they are equidistant. Secure the shelves with glue and brad nails, ensuring they are securely attached from the sides and back.
6. Installing the Face Frame and Metal Crossbars:
Drill holes into the sides of two plywood pieces for the metal rods. Insert the rods into the holes and attach the face frame with glue and brad nails. Ensure the bars are low enough to prevent jar tipping but high enough to allow easy removal.
7. Finishing Touches:
Fill all pocket holes, nail holes, and gaps with wood filler and drywall spackle. Sand the entire piece before handing it over to your painting expert. Trust your Wagner paint sprayer to provide a smooth, flawless finish.
8. Adding the Wheels:
Once the paint has dried, attach the wheels to the cart’s base. Ensure they are secure and sturdy for smooth rolling.
9. Adjustments for an Unsquare House:
In case of fitting issues due to your kitchen’s unique features, be prepared to make adjustments. Trim the base corners to ensure a perfect fit, and congratulations! Your DIY Rolling Kitchen Jar Storage is now complete and ready to accommodate your jars in style. The handle addition, suggested by your smart partner, makes accessing your jars effortless. Detail: Thenavagepatch.com
6. Imagine the convenience of an island that doubles as a buffet and dining table!
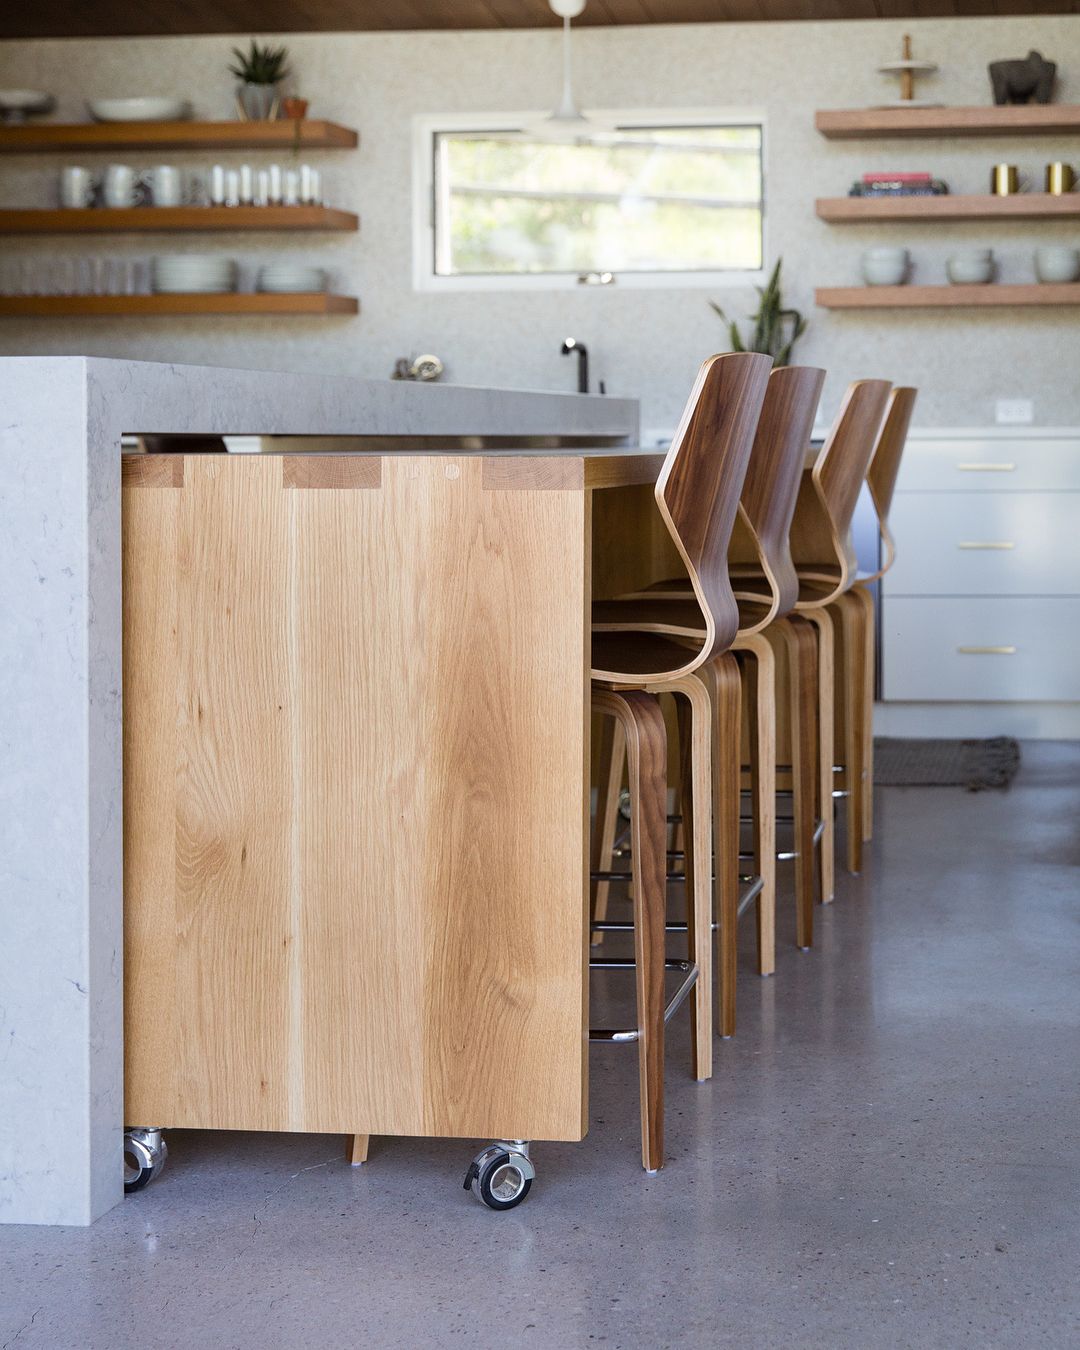 With the following clever, space-saving design, you don’t need to choose between the two. This movable island can be used for meal preparation, parties, or dining, maximizing your kitchen’s functionality. For a perfect space solution, incorporate slide-out seating too. Thanks to this innovation from @millbrookfurniture, you can take your dining experience wherever you fancy in your kitchen. It’s an innovation worth considering if you plan not to reverse-engineer your current kitchen landscape.