Modern kitchens are a fusion of functionality and style, but often, space becomes a constraint. As our homes get cozier, optimizing every nook becomes crucial. If you’re navigating the challenge of a compact kitchen or simply yearning for a decluttered space, we have just the guide for you.
Dive into our list of ’18 Space-Saving Details to Transform Your Kitchen’ and discover ingenious ways to breathe new life into your culinary corner while maximizing every square inch!
18. The “Pantry” Idea to Rotate Your Canned Good
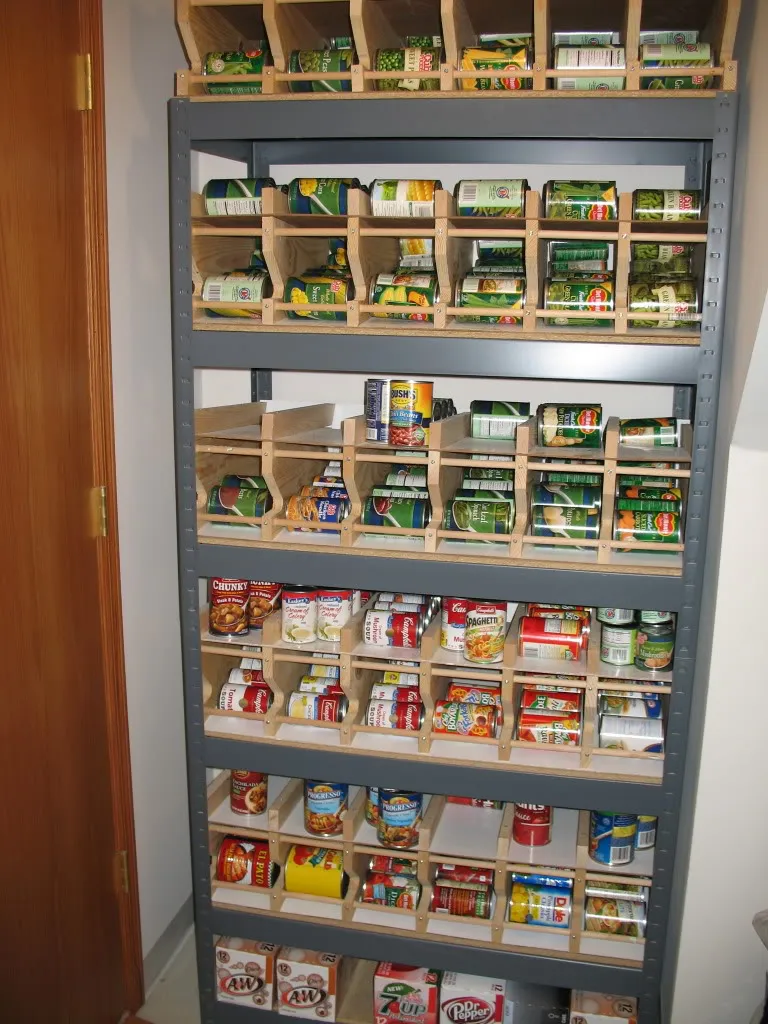
Ready to revolutionize your kitchen space? Introducing “The Pantry”! For under $135, you can create a space-efficient unit that rotates your canned goods in FIFO order, holding a whopping 300 lbs. in just <4 sq. feet.
Here’s your shopping list: 1 3/8” plywood, one pegboard, and nine 1”x10”x8’ pine boards. Follow a tailored cutting and assembling guide to fit your space. Pro tip: Construct in two sections for easier moving (learn from Banker Billy’s red-faced experience). Bonus: The see-through pegboard lets you easily check inventory, and you can customize rows for varying can sizes!
17. Introducing a game-changer: Manage up to 1,000 cans with this DIY can rotator!
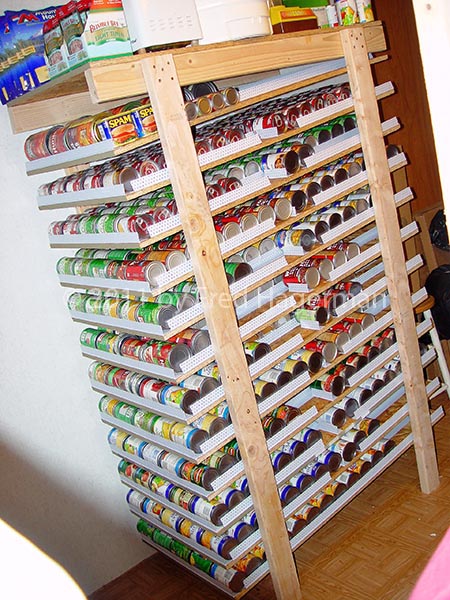
Are you tired of navigating through Can mountains?
With standard veggie cans fit 5 rows on each shelf, each holding 16 cans. Adjust rows for tuna or tomato paste cans and increase capacity. Features include removable gates for versatile row customization.
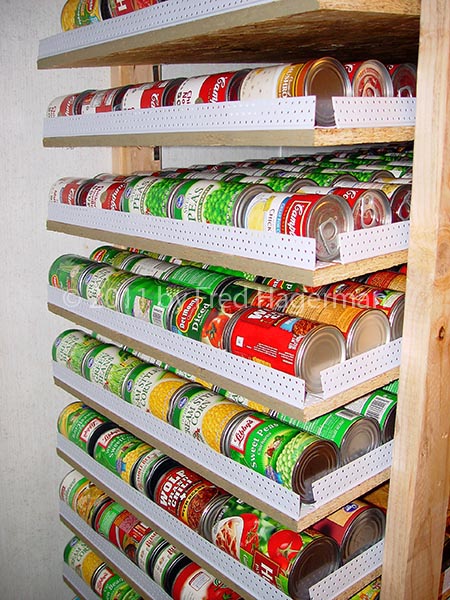 Enhance stability with cross members on the legs or “L” brackets for shelf mounting. No table saw? No problem. Use a circle saw or router. Dive into the woodwork and optimize storage – happy organizing!
16. A Simple DIY Canned Foods Rack in 5 Steps
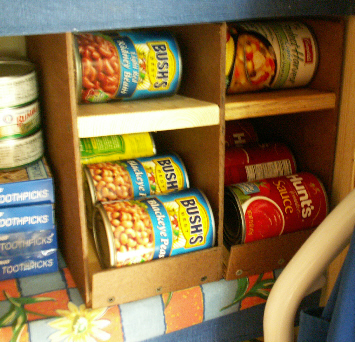
De-clutter your pantry with an easy DIY canned foods rack! Using minimal materials and basic tools, create a functional rack that neatly organizes your cans.
Materials:
- One 24″ x 48″ hardboard sheet (3/16″ thick).
- Two 1×6 pine boards (6 ft long).
- One-inch drywall screws.
Steps:
- Mark 11″ wide strips on hardboard, leaving a 2″ strip. Cut using a saw.
- From the 11″ strips, cut eight 11″ x 12″ pieces (sides for 4 racks).
- Mark shelf positions on one side. Stack four sides and drill holes through them simultaneously.
- From the 1×6, cut back (11″), bottom shelf (11 1/4″), and top-shelf (7 1/2″). Attach a hardboard stop from the 2″ strip to the bottom shelf’s front.
- Assemble by clamping and screwing together. Test with cans. Voilà! Your pantry just got a major upgrade. Repeat for more racks.