Are you tired of struggling with disorganized spaces and cluttered belongings? Look no further! In this comprehensive guide, we bring you 20 innovative and practical modular DIY ideas to address your organization flaws head-on. Whether it’s your chaotic wardrobe, daunting dead space, or cluttered home office, these DIY projects are designed to transform your space into an oasis of tidiness and efficiency.
With modular furniture solutions gaining popularity, we’ve curated a collection of creative and unique ideas for you to streamline and personalize your living areas. From customizable storage units to flexible shelving systems, each project offers a modular approach, allowing you to adapt and optimize according to your specific needs.
Join us as we explore the world of modular DIY and unlock the secrets to achieving a harmonious and functional environment. Get ready to unleash your creativity, enhance your organizational skills, and revolutionize the way you live. Let’s dive into these inspiring projects that will transform your space into a haven of order and beauty.
20-19. A Mounting Shelving from AMBIVALENZ and Cabinet’s Door Hack
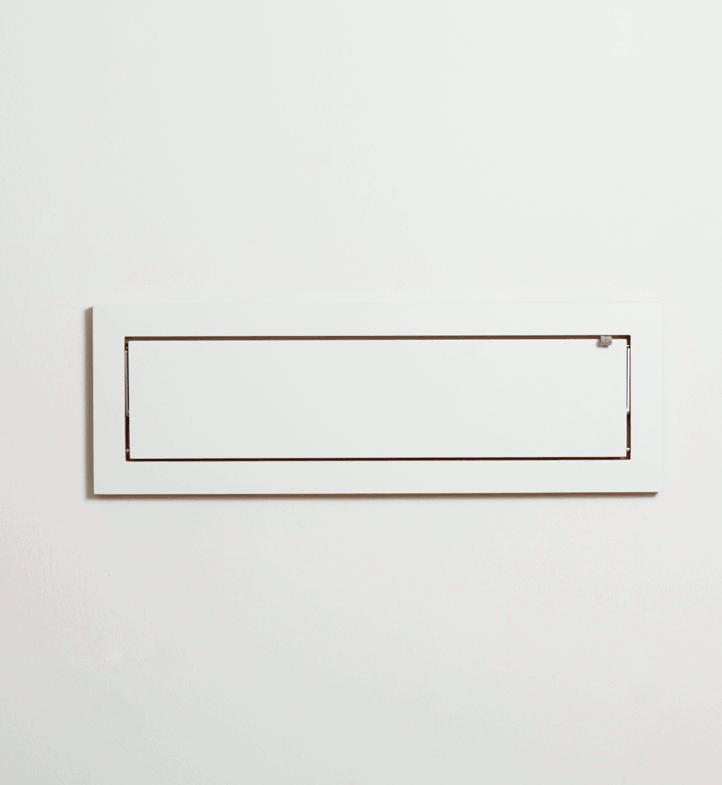
Are you tired of boring, standard shelving systems that don’t meet your unique style and needs? Say hello to Fläpps by AMBIVALENZ, the ultimate customizable wall-mounted shelving system! Trust us, this is not your average shelving unit. It’s like creating your own gallery wall, but with shelves!
The Fläpps system consists of various-sized modules that all have the same mounting mechanism. This means you can mix and match to your heart’s content. Want a combination of small and large shelves? No problem! The possibilities are endless, just like your creativity.
Let’s talk about versatility. Each module in the Fläpps shelving system is a stand-alone shelf that can also be combined with others. The beauty of this system is that you can stack up to five different shelves vertically. That’s right – five levels of awesomeness! Whether you want to showcase your book collection or display your favorite decor items, Fläpps has you covered.
But wait, there’s more! Are you tired of tripping over piles of shoes under your wardrobe? Fläpps has the solution. With a simple trick, you can transform any Fläpps wall shelf with a shallow depth into a convenient shoe shelf. How? Easy! Just insert small magnetic pins into the guide rails of the hinges. This will limit the opening angle of the flaps to 45 degrees, providing a practical and stylish storage solution for your beloved shoes and other angled items.
Now, let’s address the cost and potential drawbacks. Fläpps is priced at around 100+ euros, which is a steal for a customizable shelving system of this caliber. However, it’s important to note that some users have reported discoloration when the shelves are exposed to direct sunlight. Keep this in mind when considering the placement of your Fläpps shelves to maintain their pristine appearance.
19. Looking for an alternative project? We’ve got you covered!
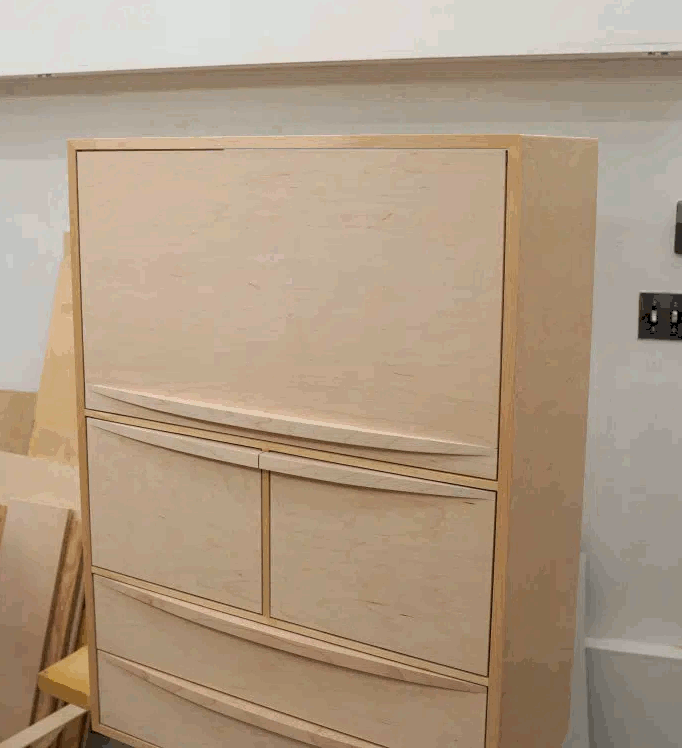
Creating a roll-up door may seem daunting, but it’s simpler than you think—just groove and roll! Start by routing a groove at the top of your side panels; its width and depth should snugly fit your rollers. Next, attach two rollers to the top side edges of the door, ensuring they spin without hindrance. Position two additional rollers inside the cabinet, directly beneath the groove, spaced as thick as the door from the front edge for smooth operation.
Don’t worry about costs; you can repurpose rollers from old drawer slides. Use standard flat head wood screws for axles and washers to maintain the right distance. With these steps, your roll-up door will be ready to impress in no time!
18. Modulate Your Own Furniture with PlayWood
Unlock your inner designer with PlayWood, the versatile furniture assembly system designed to bring your ideas to life! Whether you’re working with wood, acrylic, or any other material, as long as the panels are between 16-20 mm in thickness, you’re in business. The brilliance of PlayWood lies in its connectors—they grip firmly, yet gently. This means no harm comes to your panels, preserving them for future use in new layouts or projects.
But how do you begin? Simply download the design plans, loaded with all the critical details you need. These include precise measurements, material suggestions, and step-by-step instructions.
With these comprehensive guides, creating tailor-made furniture is a breeze, allowing you to piece together a bookshelf, a desk, or even a unique room divider. PlayWood not only helps you construct functional pieces but also inspires sustainable practices by allowing for repeated disassembly and reassembly, without any wear and tear on your panels. So go ahead, shape your space with PlayWood—where your furniture is limited only by your imagination!
17.Brico Modular Shelving Idea
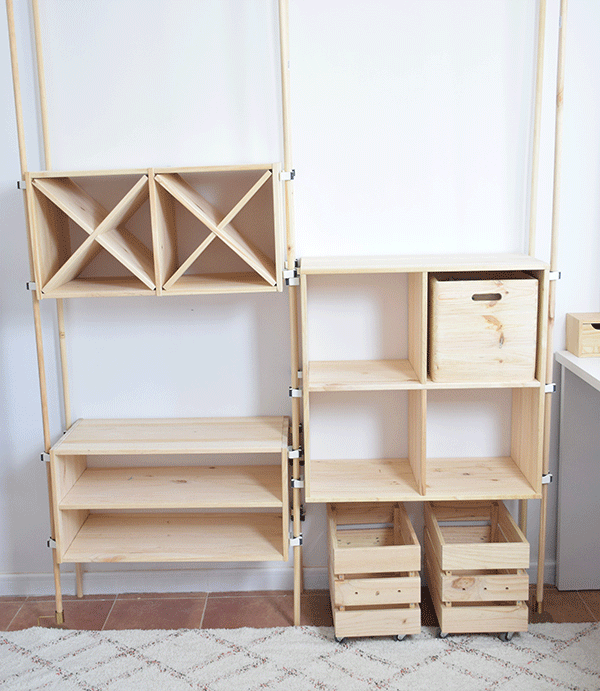
Ready to channel your inner carpenter and add a splash of sustainable style to your space? Picture this: a modular wooden shelving unit with a charming, natural hue, courtesy of Astigarraga Kit Line, where quality solid wood meets responsible forestry. It’s not just furniture—it’s a statement!
Let’s get down to business with the Dinamic series, boasting open modular pieces perfect for letting that wall shine through and adding depth to your studio. Inspired by the sleek Transit shelf design by Sebastian Herkner, imagine wooden boxes cradled by minimal wooden sticks, all held in place with broom holders. You’re not just organizing; you’re crafting decor.
Here’s what you’ll need:
- A two-space modular shelf
- A modular shelf with 2×2 cubes
- Two wooden cubes for flair
- Two bottle racks to act as chic, slatted shelves
- Two home boxes, as adorable as vintage fruit crates
- Six 19mm wooden sticks to tie it all together
- Forty broom holders to secure your masterpiece
- Eight caster wheels for mobility
- A trusty drill, wall plugs, and screws for sturdy installation
Swing by Leroy Merlin for these materials, or any local home improvement shop should have your back.
Set aside less than an hour for assembly—it’s so easy, you might find your mini-me itching to help. When it’s time to mount, mark out the arrangement with masking tape. Remember, with the broom holder’s versatility, it’s okay to eyeball it; you can always adjust later.
For a sturdy hang, match the broom holders on the boxes perfectly with the wall dowels, making sure the edge broom holders are snug for easy stick attachment. Use a spare plank as a guide for precision before attaching to the wall and box. Adhesive-backed broom holders? Yes, please—they make your job a breeze.
After setting up the dowels and leveling the boxes, fortify their positions with extra wall fixings for a secure setup. For extra peace of mind, lock the top with a zip tie—it’ll prevent any topples, but between us, those broom holders have it under control.
And let’s not forget the wheels on the fruit box-style storage—ease of access is key. Put the finishing touch with candle holders on the end legs for that mid-century mod twist.
The transformation’s obvious, and why wouldn’t it be? Your new bookshelf is practically leaping off the pages of a magazine, versatile enough for any room, be it a playful toy corner, a kitchen showcase, or a living room centerpiece.
Tweak the dowels, a stroke of paint, and your personal touch is all that’s left. But really, the natural wood’s allure speaks for itself.
16. A Murphy Bed Double as Wood Panels
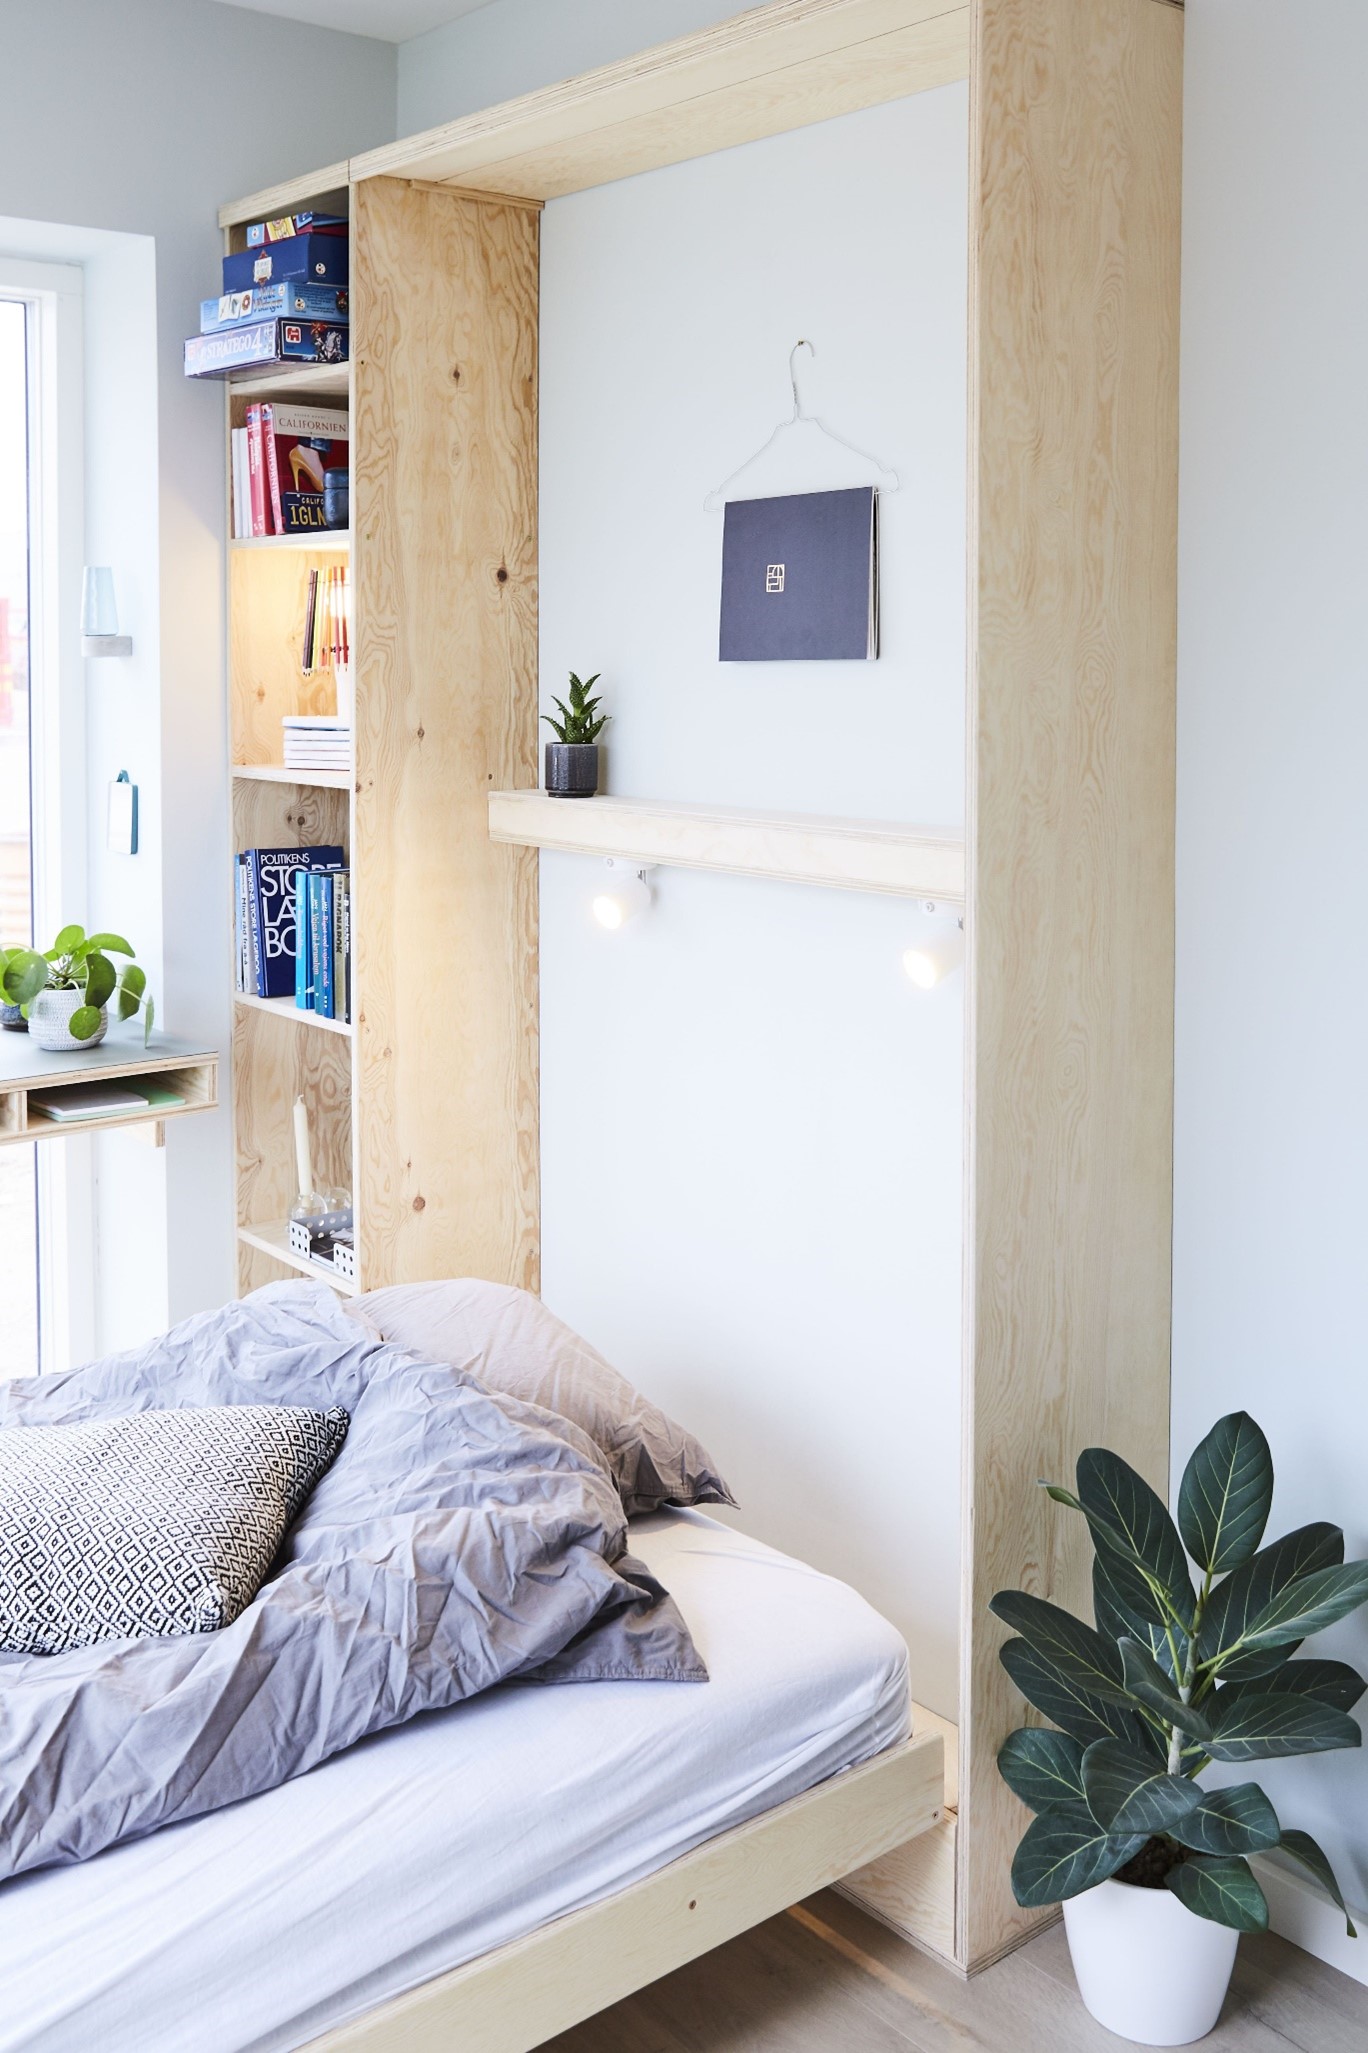
Ready to tackle the multifunctional room challenge? Picture this: a room that’s a guest haven by night and your go-to office, gym, and even a storage spot for Kristian’s racing bike by day. The secret weapon? A Murphy Bed—a stylish wall bed that folds out when needed.
Let’s dive into the essentials needed for this furniture-transforming project—you’ll need wood panels (any type preferred) cut into six boards with a width of 9 cm. For the structure, grab some 18 mm plywood. Here’s the rundown of sizes:
- 1 piece: 15 x 129.7 cm (lid)
- 2 side pieces, bottom, and top piece for the bed frame
- Shelves to taste (varying heights look fab!)
- 1 batten: 20 x 50 mm (for stability)
Before we get our hands dirty, sand down those edges for a smooth finish.
Now, for the nitty-gritty:
Step 1: Start with the lid, because that’s where your closing mechanism will attach.
Step 2: Stick the decorative strip to the lid on one side and to the furniture top.
Step 3: Build the frame by joining the vertical sides, bottom, and top. Drill before screwing them tightly, placing one side piece 40 cm apart for shelving space.
Step 4: Install those shelves into the frame at personalized heights.
Step 5: Reinforce it mid-construction with that batten using angle brackets.
Step 6: Lift the structure into its home and secure it through the batten with two well-hidden screws behind a decorative shelf (bonus points for integrated lighting!).
Step 7: Attach the bottom strip to the structure, using angle brackets and screws for a snug fit.
Step 8: Assemble the bed frame to the plywood bed plate, ensuring it supports the box mattress.
Step 9: Position the mattress, align it precisely, and secure with screws.
Step 10: The shelf, doubling as a shelf/leg, awaits installation at the bed’s front.
Step 11: Assemble the shelf with a combination of glue and screws for sturdiness.
Step 12: Screw the shelf onto the bed front for support, aligning it 15 cm from the top, centered.
Step 13: Attach the hinge fittings at the bed’s bottom end carefully—precision is key for overall stability.
Step 14: Fix the lid to the top with hinge fittings, allowing it to tilt, locking the bed in place.
Step 15: Flip the bed up, lift the lid, and there you have it—a space-saving wall-hung bed!
Embrace the joy of a room that adapts to your life, all thanks to a little woodworking magic!