Looking to breathe new life into a small living space? The magic of DIY can transform even the coziest corners of your home into something extraordinary. With a little courage and helpful ingenuities from the Pros, you can revitalize your rooms without breaking the bank.
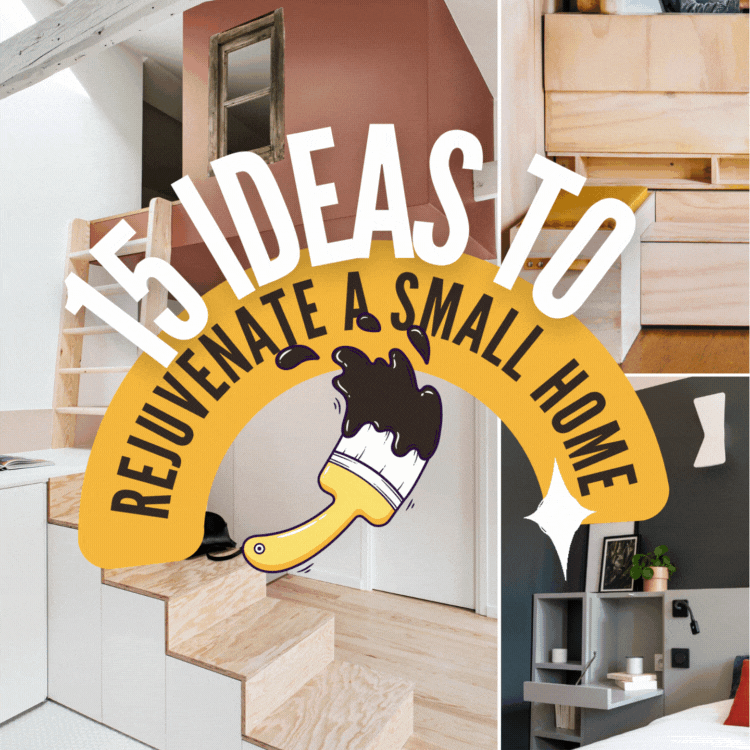
Dive into our handpicked list of “15 Unique DIYs to Rejuvenate a Small House,” where we unveil inspiring projects ranging from stylish storage solutions to clever design hacks. Whether you’re a seasoned DIYer or just starting, these inventive ideas will add character, functionality, and a touch of charm to your small home.
Get ready to be inspired!
15. Take inspiration from the Kererū and Babbaucci plans
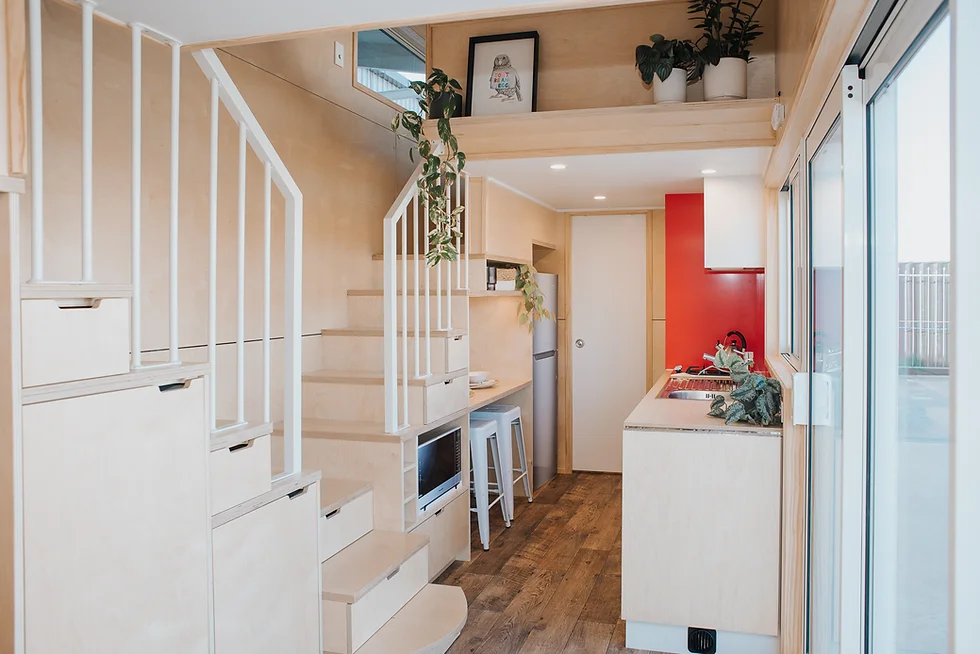
Discover the ultimate DIY inspirations to transform your small house into a rejuvenating oasis! Take cues from the ingenious Kererū and Babbaucci plans to make the most of your space without compromising on style and comfort.
Kererū: The Modern Marvel
Meet the Kererū Tiny House – a modern and lightweight wonder that’ll leave you in awe. With two spacious sleeping lofts, each fitting a queen mattress and custom storage stairs, it’s like a tiny house dream come true! Need room for guests? No worries, the sofa bed in the lounge has got you covered.
Plus, this tiny house boasts an off-grid gas heating system and pre-wiring for solar power, giving you ultimate independence. You can cook up a storm with the gas-powered oven and stove while enjoying the convenience of hot water on tap. Road trip, anyone? This beauty is road-legal and comes with a detachable trailer for added flexibility.
Babbaucci: Chic and Space-Savvy
Say hello to Babbaucci, the tiny house with big ideas! With its clever split staircase, you’ll be amazed at how the lofts create separate, cozy spaces. The compact bathroom doesn’t compromise on functionality, ensuring all your essentials are within reach.
Check this out – there’s a convenient pull-out pantry above the washing machine and a fold-up bench-top extension for extra prep space. Who knew tiny living could be this practical? The thoughtfully designed lofts offer ample storage with multiple drawers, making organization a breeze. And not to mention, the vinyl flooring is not only realistic but also durable and super easy to clean. Practicality meets style in Babbaucci!
Detail: Kererū | Babbaucci
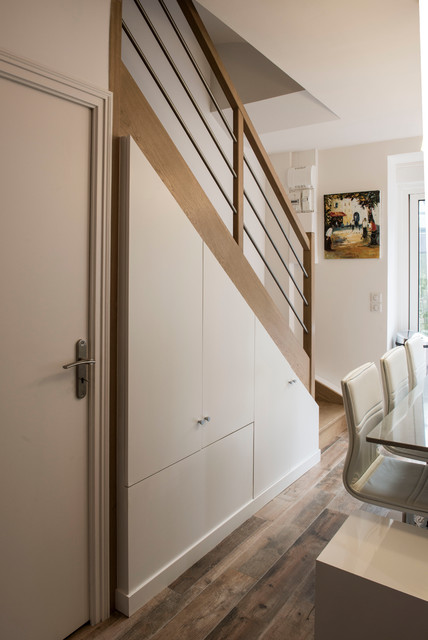
14. Get ready to be blown away by this brilliant small flat transformation by Buj+Colón Arquitectos!
![]() They’ve taken plywood to a whole new level, crafting a stunning staircase that’s more than just a way to get upstairs.
They’ve taken plywood to a whole new level, crafting a stunning staircase that’s more than just a way to get upstairs.
Step into this Madrid apartment, and you’ll be greeted by a plywood staircase that doubles as a storage dream. No ordinary staircase, mind you – this one comes with built-in bookshelves and cupboards, making every inch count!
The Plywood Trio Apartment is a masterpiece of design, featuring three elements crafted from this versatile engineered timber. First up, the star of the show – the staircase. With deep treads and no balustrade, it stands tall as the focal point of the two-story home. Climb up to the upper floor bedroom with style and ease!
As you ascend, you’ll notice cleverly placed pockets of space under each tread, just perfect for displaying your favorite books and magazines. And don’t worry about the larger items – the row of white cupboards below is ready to store them all!
But that’s not all!
The plywood magic continues with a chic kitchen unit that effortlessly blends with the open-plan living space. A white island creates a natural partition between the living area and the kitchen, boasting a floor of turquoise hexagonal tiles. And, oh, the overhanging plywood counter adds a touch of elegance to the entire setup.
One more surprise awaits – a large coat closet nestled beside the bathroom, making sure your outerwear is always within reach. With a window above the cupboard, natural light floods the bathroom, complementing the charming display of plants on the ledge below.
This small flat is a plywood hacking attempt at its finest, where storage meets style in the most creative ways. Buj+Colón Arquitectos has truly outdone itself with this functional and visually stunning design.
Hats off to the plywood wonderland!
Photography by Elena Almagro captures every beautiful detail of this transformation, sealing its place as an inspiring masterpiece. If you’re looking to maximize space and wow your guests, take cues from this plywood gem! Detail: @Dezeen
13. An Inspiring tiny but tall house from a millstone renovation plan.
 Get ready to make your staircase the star of your home with these ingenious ideas!
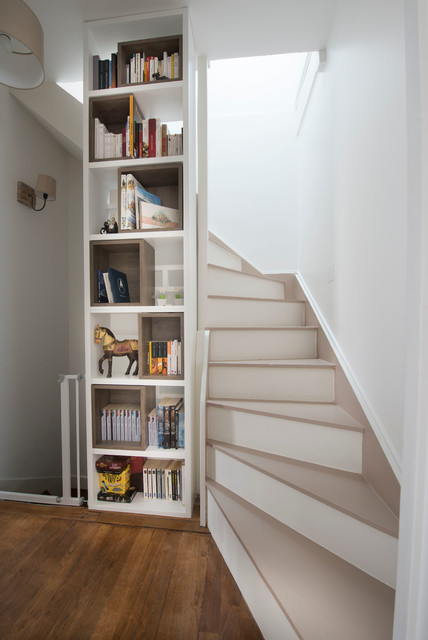
- Install a library shelf along the stationary part of your staircase – it’s the perfect blend of aesthetic and practical.
- Transform unused space into a built-in cupboard under the stairs – talk about a smart storage solution!
- Dress up the landing of your stairway with a niche, giving it that extra oomph.
Stairs have never been more exciting!
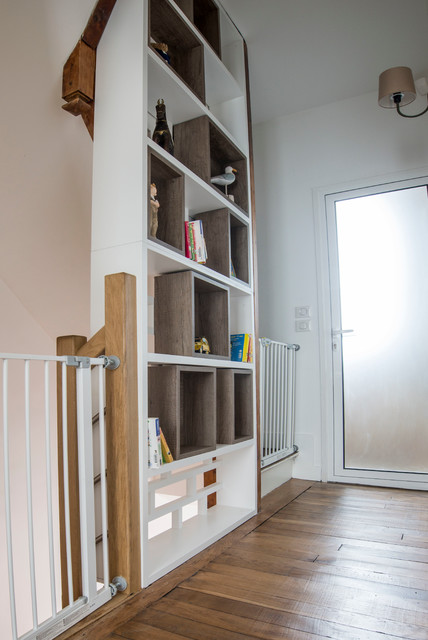
Detail: Houzz.com.sg
12. Get ready to level up your pantry game with these fantastic built-in shelving projects!
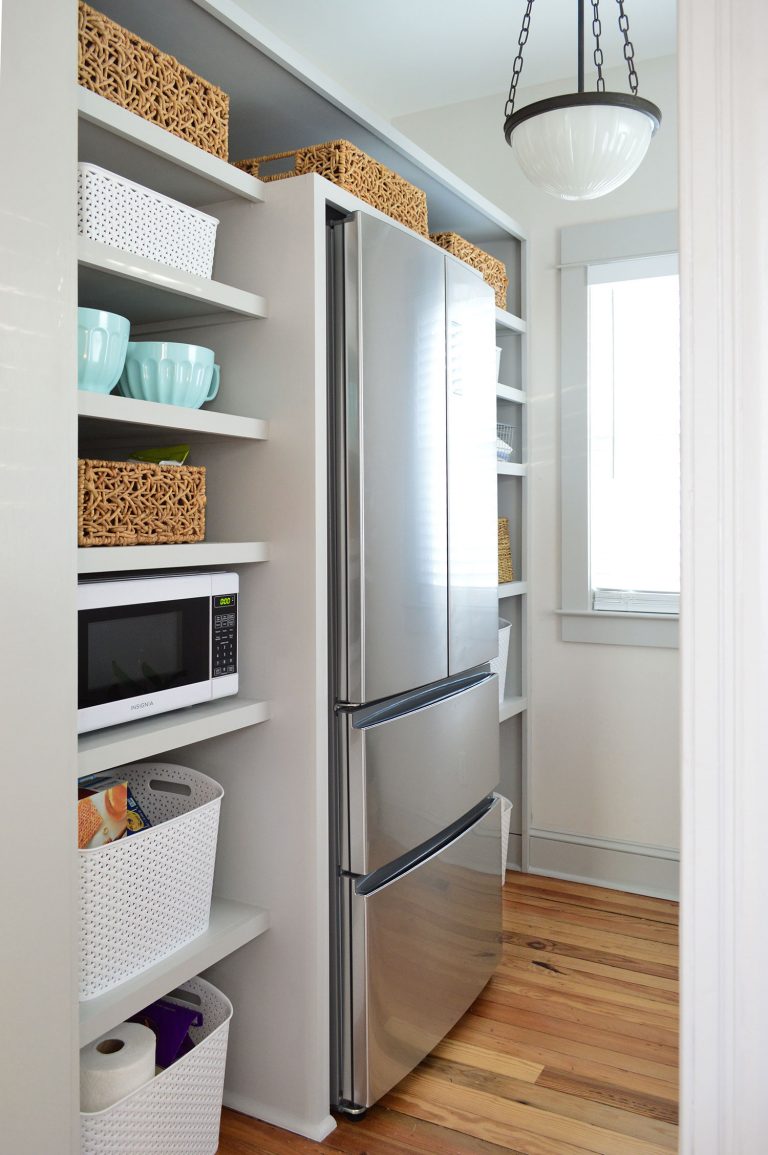
Are you looking for smart storage solutions that are easy to build and can fit even in a small space? Look no further than these DIY pantry shelves made from 3/4″ MDF sheets and 1×2″ pine boards.
What You’ll Need:
- 3/4″ thick MDF panels (ditch the plywood for a smoother finish)
- 1×2″ pine boards for that polished front look
- 3/4″ x 3/4″ wood boards for sturdy shelf supports (or halve your 1×2″ using a table saw)
- Circular saw and power drill
- Miter saw (optional but handy)
- Tape measure, levels, stud finder
- Finish nail gun for a professional touch
- Clamps (optional but helpful)
- Wood screws and wood glue to hold it all together
Instructions:
Step 1: Plan It Out
Start by sketching out your design and calculating how many MDF sheets you’ll need. The possibilities are endless – whether it’s for your pantry, bedroom, playroom, or living room, you can adapt this technique to suit any area in your home.
Step 2: Gather Your Materials
Head to your local home improvement store and pick up those MDF panels. Pro tip: Have them cut the 4×8′ panels into 20″ side strips for easy transport and a precise cut. And don’t forget the 1×2″ pine boards for that finishing touch. Plus, you’ll be surprised how budget-friendly this project is!
Step 3: Remove Existing Baseboards
Get started by carefully prying off any existing baseboards. Save them for later use – you’ll want to put them back once your shelves are in place. Just be gentle with that crowbar!
Step 4: Attach the Vertical Panels
Time to get building! Install the vertical pieces along the walls and next to your fridge. Screw them into the wall studs for a secure fit. The panels next to the fridge may need some creative solutions, like using skinny support pieces to attach them safely without drilling into your appliance. Problem-solving mode: ON!
Step 5: Add the Top Pieces
It’s time to create those large “boxes” in your design by adding the long horizontal pieces. Keep everything square and sturdy by using a level and screws. These shelves aren’t going anywhere!
Step 6: Cut & Add the Shelves
Measure and cut your shelves to size using a circular saw. Optimize your materials by doubling up boards and clamping them securely before cutting. Determine your shelf heights based on the items you’ll be storing – cans, storage bins, and cereal boxes need their perfect spot!
Step 7: Finish Off the Shelf Fronts
Give your shelves that polished look by adding 1×2″ face pieces along the exposed edges. These triple-threats cover rough edges, hide brace pieces, and give your shelves a substantial appearance. A little wood glue and some finished nails do the trick!
Step 8: Caulk, Spackle, Prime & Paint
As with any construction project, the finishing touches are crucial. Caulk any seams, spackle any nail holes, and prime & paint your shelves to perfection. Go for a color that complements your decor – it’s your pantry, so make it yours!
Step 9: Fill & Organize Your Shelves
Baskets, containers, and jars are your best friends when it comes to keeping your pantry shelves organized and tidy. Don’t be afraid to mix and match storage solutions to suit your needs. Make use of every inch of space with smart organization!
Detail: @Younghouselove.com