10. A Kallax Storage bed hack for the Box
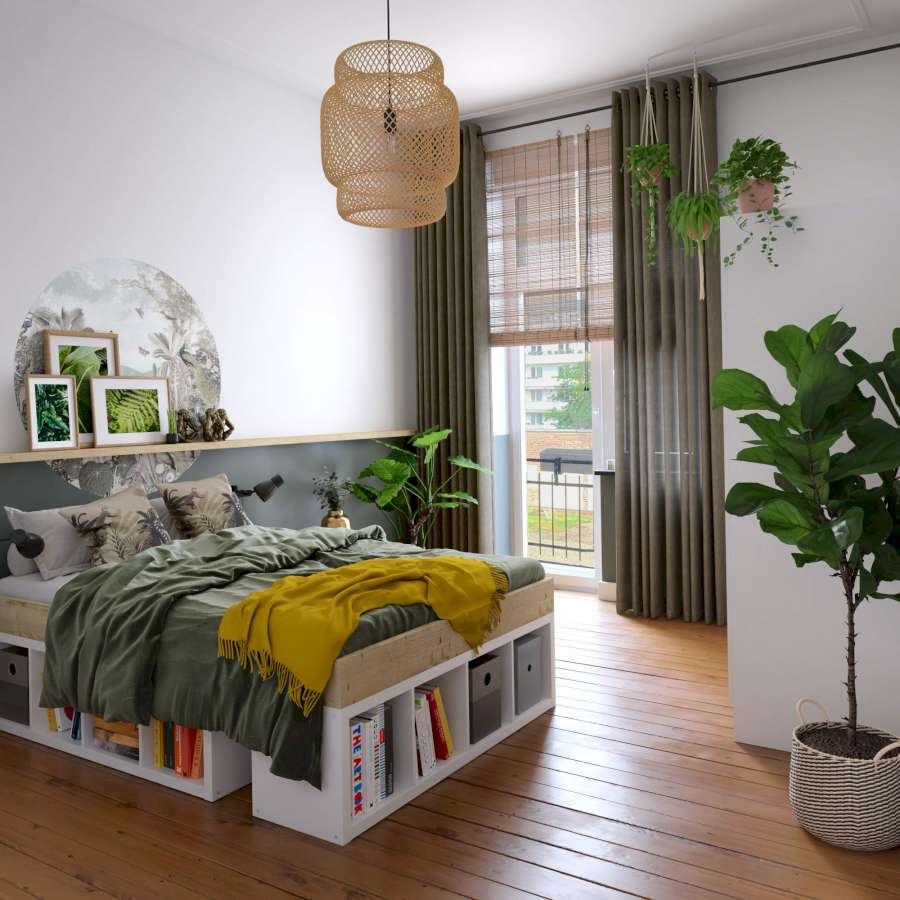
Ready to merge style and practicality with the IKEA Kallax Storage Bed hack? Perfect for those craving extra storage without sacrificing aesthetics. Here’s a step-by-step guide to creating a cozy, storage-rich bed using Kallax shelves, ideal for a 1.40m x 2m mattress.
Step 1: Measure Your Kallax
First up, measure your Kallax (or Expedit) shelves. Size can vary, so it’s vital for planning your headboard, footboard, and slatted frame.
Step 2: Cut Your Boards
Gather your materials. You’ll need:
- 2 side boards: 200 x 15 x 2.7 cm spruce glued wood
- 2 head/footboards: (your shelf length) x 15 x 2.7 cm spruce glued wood
- 2 slatted frame supports: 200 x 5.4 x 3.4 cm spruce frame wood
- 13 slats: (your shelf length – 6 cm) x 9.4 x 2.4 cm for the slatted frame
Step 3: Drill Head and Foot Sections
Pre-drill the head and foot sections with a 4mm wood drill, following the provided sketch.
Step 4: Drill the Slatted Frame Support
Likewise, pre-drill the slatted frame supports with a 4mm wood drill.
Step 5: Glue and Screw
Apply wood glue to the marked areas, aligning the slatted frame supports flush with the side panels. Screw them in place using 4×50 screws, wiping away excess glue with a damp cloth.
Step 6: Time for Color
Protect and beautify your wood. Start by sanding (first with coarse P120 grit, then P180 grit). Choose from oils, glazes, or varnishes for treatment. OBI offers a variety of glazes for a natural wood look, or go bold with opaque PU colored paints in almost any shade.
Step 7: Assemble Frame
Now, assemble the frame parts using 4×70 screws.
Step 8: Marry Frame and Shelf
With help, position the bed frame on your shelves, aligning them flush. Screw the frame to the shelf from above through the slatted frame support.
Step 9: Slatted Frame
Evenly distribute the slats and secure each with a 4×50 screw.
9. A Cute Crate Dresser for the Box
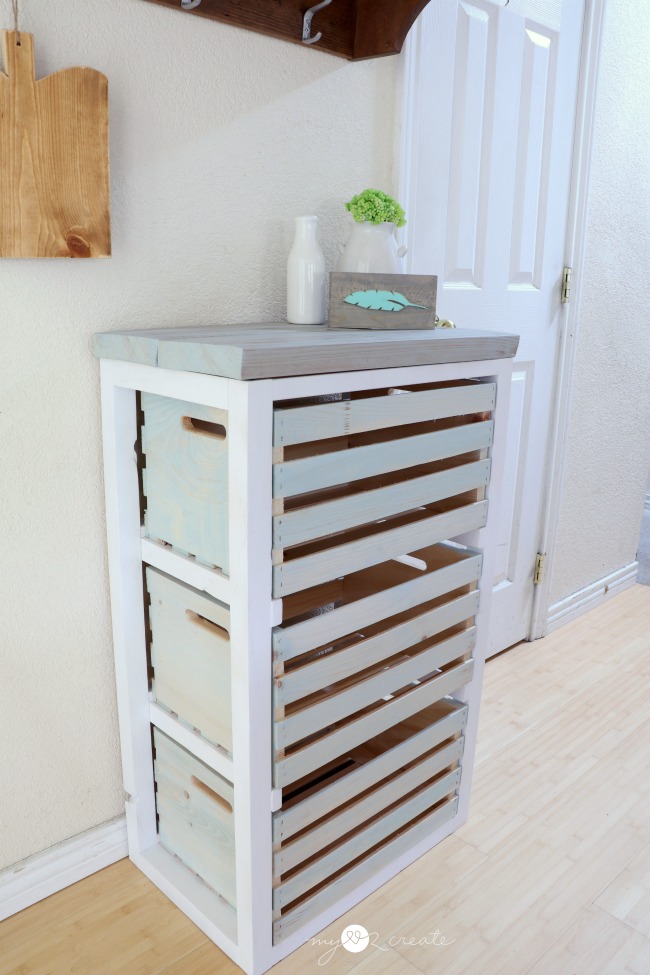
Let’s transform your space with a modern, functional Crate Dresser, perfect for organizing laundry or anything else. This DIY project, ideal for your kids’ room, will replace those mundane plastic laundry crates with something stylish and sturdy.
Supplies You’ll Need:
- 2×2″ x 8′ furring strips (2 pieces)
- 1×2″ x 8′ furring strips (3 pieces)
- 2×8″ x 6′ board (1 piece)
- Miter saw, Kreg Jig, Nail Gun
- 2” nails, Wood glue
- 2 1/2” and 3/4” pocket hole screws, Clamps
- Finishing supplies (paint, stain, polyurethane)
Cut List:
- Side stiles: 4 pieces of 2×2″ at 35 1/2”
- Side rails: 4 pieces of 2×2″ at 11”
- Drawer slides: 6 pieces of 1×2″ at 13 1/4”
- Front/back supports/trim: 8 pieces of 1×2″ at 18 1/2”
- Top boards: 2 pieces of 2×8″ at 22 1/2”
Building Steps:
- Measure and Cut: Use the cut list to accurately cut your wood.
- Drill and Sand: Drill pocket holes in the 11” side rails and some of the 18 1/2” supports. Sand all boards smooth.
- Build the Sides: Attach the rails to the stiles using 2 1/2” pocket hole screws. Clamps can help keep things steady.
- Drawer Slides: Add the drawer slides with wood glue and nails. Use 10” scrap wood pieces as spacers for easy installation.
- Back Support: Attach the back support pieces, starting with one side, then the other, using pocket hole screws.
- Top Apron and Trim: Add the front trim and support pieces. Note: Middle supports are optional but recommended for stability.
- Paint and Stain: Fill holes with spackle, spray paint the base white, and stain the top boards and crate sides with Bleached Blue for a coastal vibe.
- Attach Top and Finish: Once dry, glue and nail the top boards to the dresser. Seal the top with polyurethane.
8.IKEA’s Sektion small Walk in Closet Idea
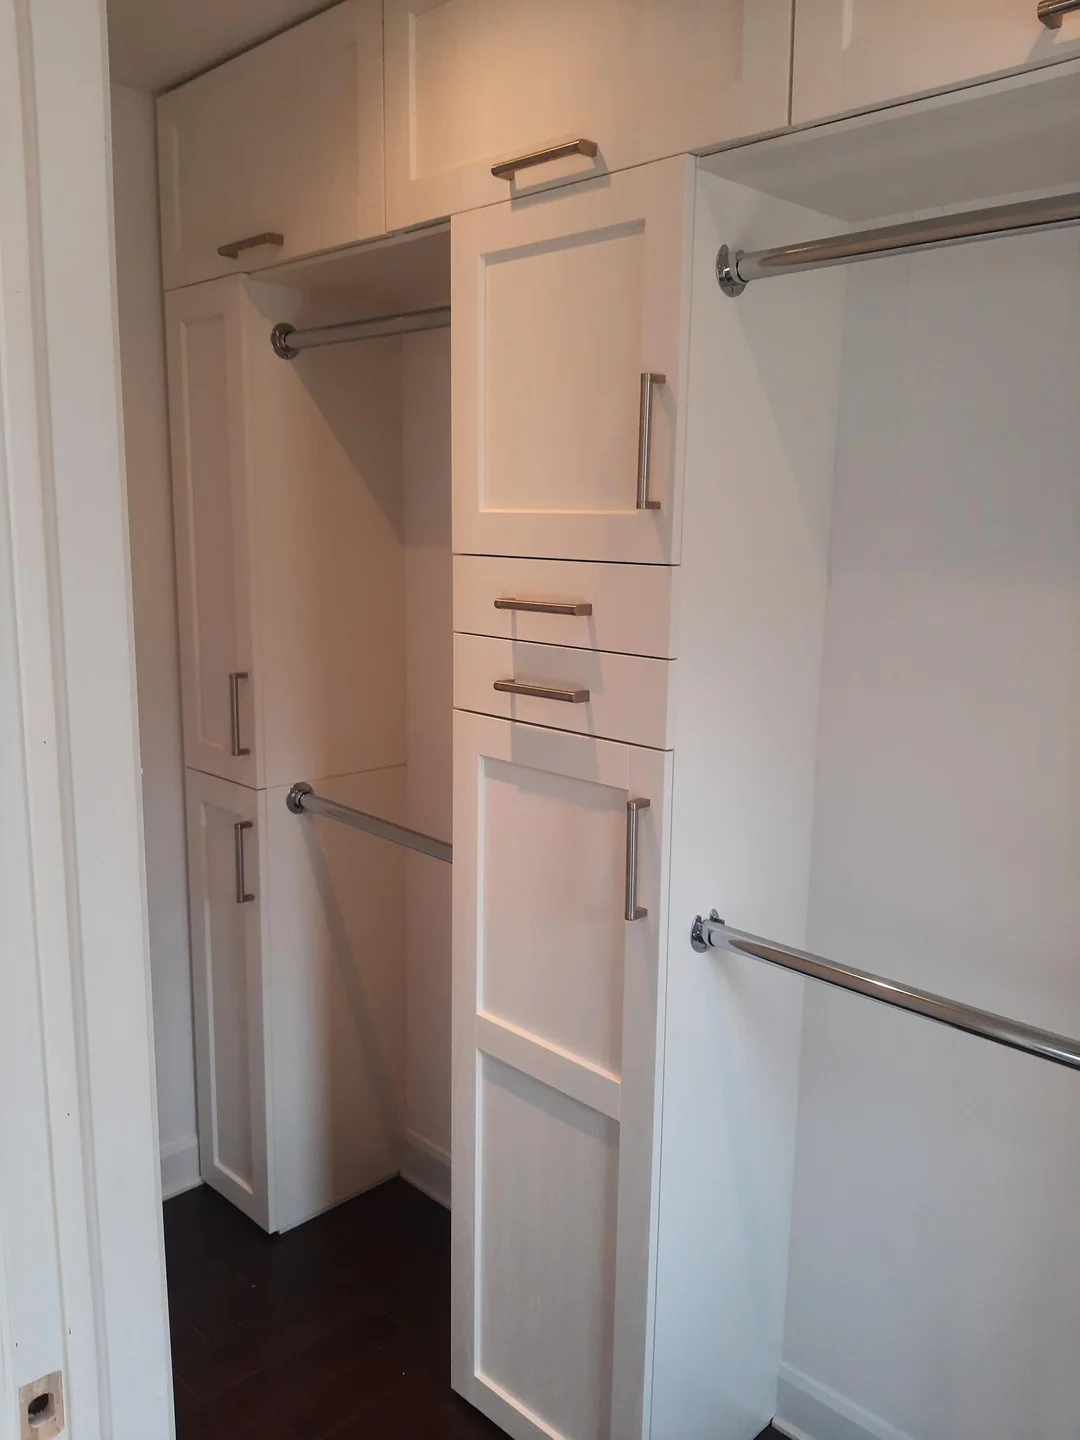
Here’s how to create a 122-inch wide and 96-inch tall stylish closet using IKEA’s functional pieces and a few extras from Lowe’s.
First, you’ll need one SEKTION/MAXIMERA high cabinet with drawers and doors from IKEA for your main storage unit. Pair this with two SEKTION/MAXIMERA wall cabinets with doors and drawers for additional storage space. Add two SEKTION wall cabinets for overhead storage and four SEKTION horizontal wall cabinets for that modern, streamlined look. Optionally, grab an ENKÖPING cover panel to conceal any unsightly camlock holes under the top cabinets.
You’ll also need three 16-in x 97-in pre-drilled white melamine shelves from Lowe’s. These serve as dividers and as raisers off the floor – crucial for door clearance and filling in those gaps against the wall. For your hanging needs, pick up two 8-ft closet rods and five closet rod flange sets from Lowe’s. To assemble, use particle board screws for a secure fit.
Later, the backbone of your new closet: the cabinets. You’ll want to grab a 40″ upper cabinet and an 80″ pantry cabinet. These are your storage superstars, providing ample space for clothes, accessories, and more. Opt for vertical opening cabinets above for easy access and a sleek look.
Now, let’s talk about the hanging rods – crucial for your array of outfits. Head over to Lowe’s (or your favorite hardware store) and pick up sturdy rods with matching hanger hardware. Make sure they’re robust because they’ll be carrying the weight of your fashion choices. When installing, secure each side with three screws to ensure stability and peace of mind.
You might be wondering, “Why not an L-shape to maximize space?” Great question! The thing is, the corner cabinet in the desired style wasn’t available. Plus, mixing and matching different styles can lead to compatibility issues. But hey, no sweat! The closet, being 48 inches wide, works perfectly without the L section. This choice actually leaves a sweet spot for a full-length mirror – a must-have for outfit checks!
So there you have it – your guide to crafting a chic, space-efficient walk-in closet. With smart cabinet choices and robust hanging solutions, you’re all set to turn that smallish area into a haven of organization and style. Get ready to enjoy a closet that not only holds all your beloved clothes but also adds a touch of elegance to your daily routine!
7. Apothecary Dresser Design for your Denim and Jeans
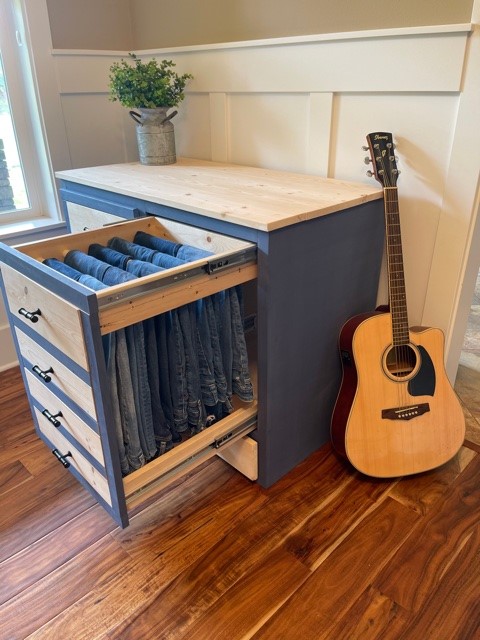
Ready to create something unique and super functional? Let’s build an Apothecary Jeans Dresser that’ll make your friends say, “Wow, where did you get that?” This DIY project is all about merging practicality with creativity, perfect for organizing your denim collection.
Step 1: Measure and Gather Materials
First up, measurements. This dresser is tailor-made for your jeans, so think about how much space you’ll need. Head over to shelfhelpnow.com for custom-cut plywood pieces, ensuring they fit your envisioned design. You’ll also need some inspiration from Ana White’s plans to kickstart your DIY journey.
Step 2: Pocket Hole Joinery
Time to put those woodworking skills to use! Assemble your cut pieces using pocket holes, creating a strong and seamless bond. This method is perfect for a sturdy dresser that can withstand daily use.
Step 3: Employ Spacers
Spacers are your secret weapon for even shelving. They’ll ensure each compartment is perfectly aligned, giving your dresser that professional touch.
Step 4: 1×3 Bay Supports
Add 1×3 bay supports for extra stability. These are crucial for keeping your shelves in place and your jeans neatly stacked.
Step 5: Assemble Shelf Help Pieces
Bring your shelfhelpnow.com pieces together. This is where your dresser starts to take shape.
Step 6: Time for Rust-Oleum Chalked
Give your dresser a rustic charm with Rust-Oleum Chalked paint. This step is all about personalizing and adding a bit of character to your work.
Step 7: Slider and Drawer Installation
Install sliders and drawers for easy access. This is where functionality meets design, ensuring your jeans are just a pull away.
Step 8: Rod Installation
Insert rods for extra hanging space – perfect for belts or maybe even more jeans!
Step 9: Doors and Finishing Touches
Add doors and complete the final installation. This is your chance to refine any rough edges and ensure everything opens and closes smoothly.
Step 10: Top It Off with a Tabletop
Lastly, build and install a tabletop. This not only adds more storage space but also creates a perfect spot to fold and organize your denim.
6. Tingby Side Table Hack @Lovelyhomecouture
This isn’t just any hack; it’s a creative twist on IKEA’s Tingby side table and Rödeby bamboo armrest tray, transforming them into a stylish rolling storage unit, perfectly complementing your acoustic panels under the desk.
Here’s What You Need:
- IKEA Tingby side table with wheels – for that mobile charm.
- Rödeby bamboo mat – to add a touch of natural elegance.
- Hackas furniture handles – because details matter.
- Cabinet magnetic closure – to keep things neat and tidy.
- Installation glue – for a secure, sturdy hold.
- Cordless screwdriver – your trusty tool for this fun adventure.
- And most importantly, a spirit of fun and creativity!
Let’s Dive Into the Hack:
Assemble the Tingby Table: Start by assembling your Tingby side table, following IKEA’s instructions. This will be the base of your new mobile cabinet.
Attach the Rödeby Mat: Use the installation glue to attach the Rödeby bamboo mat on the top surface of the table. This not only adds a chic bamboo accent but also provides a sturdy, textured top for your future printer or any other gadgets.
Handle It with Hackas: Screw on those sleek Hackas handles. They’re not just for aesthetics; they make moving your rolling container a breeze.
Magnetic Personality: Install the cabinet magnetic closure. This little addition ensures your storage unit stays closed and secure as you wheel it around.
Rolling in Style: With the wheels already part of the Tingby table, you’ve got yourself a movable, stylish storage solution that’s perfect under your desk or anywhere in your workspace.