13. A built-in wardrobe IKEA Hack with walk-through door
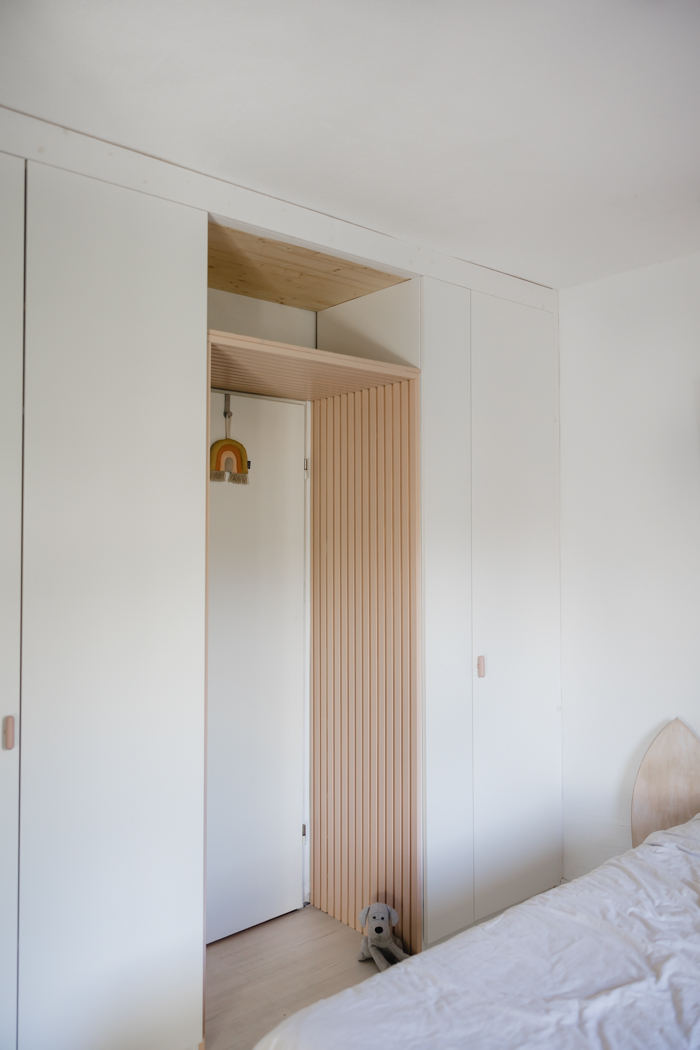
It’s time to roll up your sleeves and transform your bedroom with an IKEA hack for a built-in wardrobe featuring a walk-through door. This isn’t just any wardrobe; it’s your ticket to a chic, customized space.
First things first: gather your Pax elements from IKEA. You’ll need three different sizes for this project: a small 50 cm unit, a large 1-meter unit, and a 75 cm unit on the right. It’s fantastic how Pax offers such versatility, right? Plus, you can repurpose parts from an old Pax if you’ve got one lying around.
Now, let’s build this beauty. Begin by setting up your Pax units with precision. It’s crucial they’re aligned perfectly for that seamless, built-in look. Next, create a wooden frame around the top, right, and left sides of the setup. This frame is your canvas for attaching boards as cladding, turning a simple wardrobe into a statement piece.
The trickiest part? Matching the color of the white Pax doors. But with a bit of mixing magic, you can replicate that classic IKEA white.
Let’s talk about that air space above the door. Hide it stylishly with a wooden panel that rests on the cupboards. Add a second board to frame the passage, doubling as a handy shelf for backpacks and other clutter.
For a real wow factor, we’re using Orac Decor’s W111 BAR wall panels for the passage. Yes, they’re pricier, but the quality and child-safe features (shockproof, paintable, waterproof) are worth it. Painted in Farrow and Ball’s ‘Setting Platter’ tone, these panels elevate the space from ordinary to extraordinary.
Painting the panels is where patience pays off. Use high-quality paint for a flawless finish. While a spray gun can speed up the process, a fine varnish brush does the job with a little more elbow grease. The effort? Totally worth it for the stunning result.
12. A Modern Style Flaxa Hack for the Box Bedroom
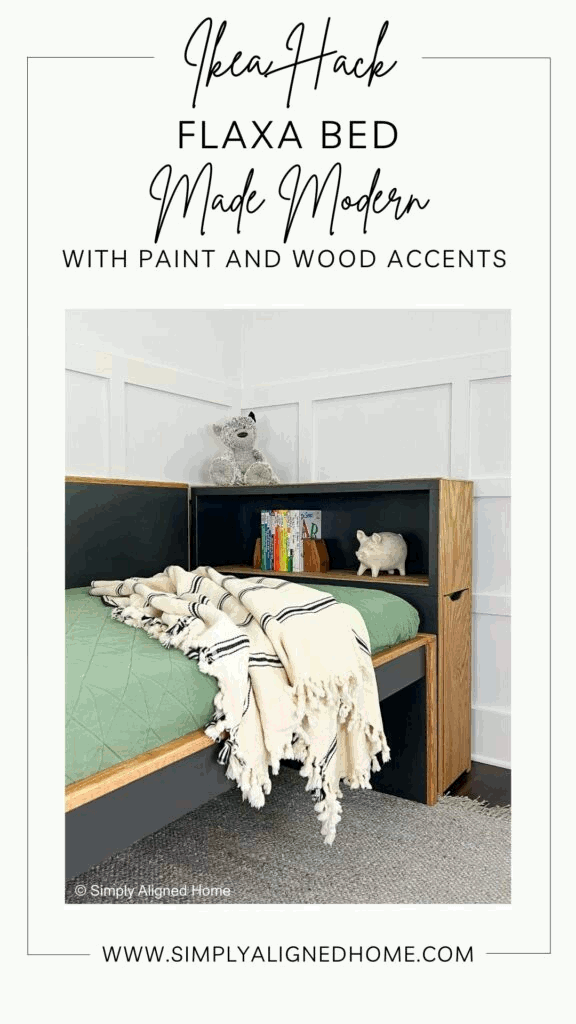
Get ready to transform an IKEA Flaxa bed into a modern masterpiece with just paint and wood!
First, grab your tools: a 220-grit sanding sponge, a 2″ angled brush, a roller, and some oil-enriched enamel in your favorite color (In this case Iron Ore). Remember, oil-based paints can be smelly, so keep your workspace ventilated.
- Start by lightly sanding the bed to scuff the surface, ensuring the primer and paint adhere well. Wipe off the dust with a tack cloth, then apply two coats of primer using the brush for edges and the roller for even coverage.
- After the primer dries, apply the enamel with a brush and roller for a smooth, line-free finish.
- Next, it’s time to add wood accents. For the trim, use 1×2 oak boards, measuring and cutting one piece at a time to avoid mistakes (wood is expensive!).
- Sand the cut edges and non-routed parts with 220-grit sandpaper.
- Attach the trim using construction adhesive and a finish nailer. Pro tip: route the edges of your wood trim before attaching it to avoid a messy cleanup.
- Stain and seal the wood trim with Watco Danish Oil in Light Walnut. For a less smelly process, let it dry in a well-ventilated area.
For the bed ends,
- Rip 1/4″ oak plywood into 2-1/2″ wide slats using a table saw.
- Cut them to length with a miter saw and sand the edges. If your slats cover any screws, mark and drill holes for easy disassembly later.
- Stain and seal the slats, then attach them to the bed with glue and a brad nailer, using a scrap piece of plywood as a spacer.
For the headboard,
- Wrap it with 1/4″ oak plywood. Rip the plywood for the inside shelf, top, and front of the unit to size, then cut out a section for the drawer using a jigsaw. Stain and seal these pieces too.
- Finally, attach the plywood to the headboard with construction adhesive and 1″ brad nails (use 3/8″ brad nails for the thinner drawer).
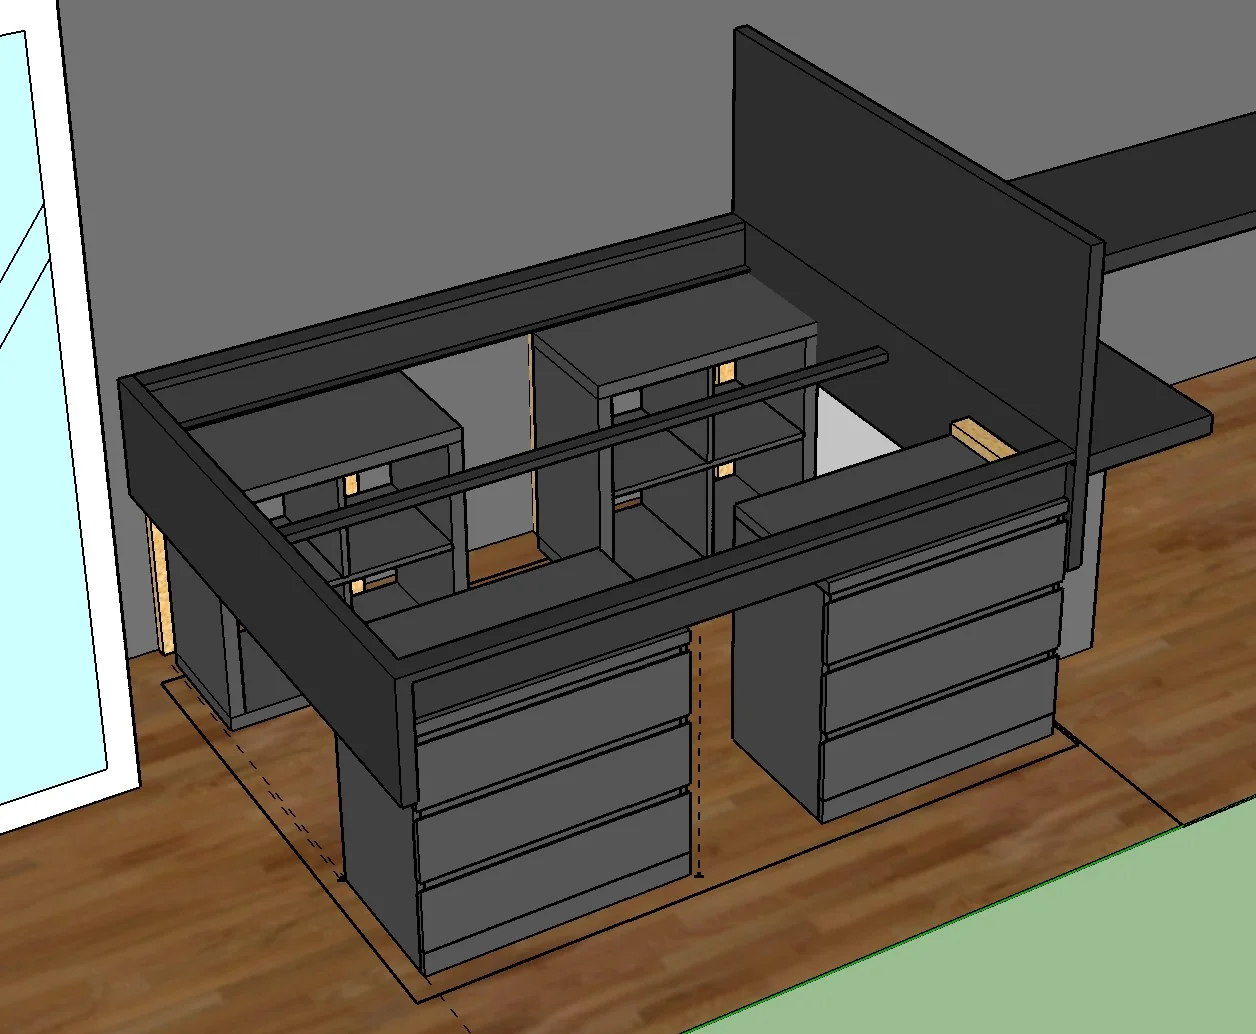
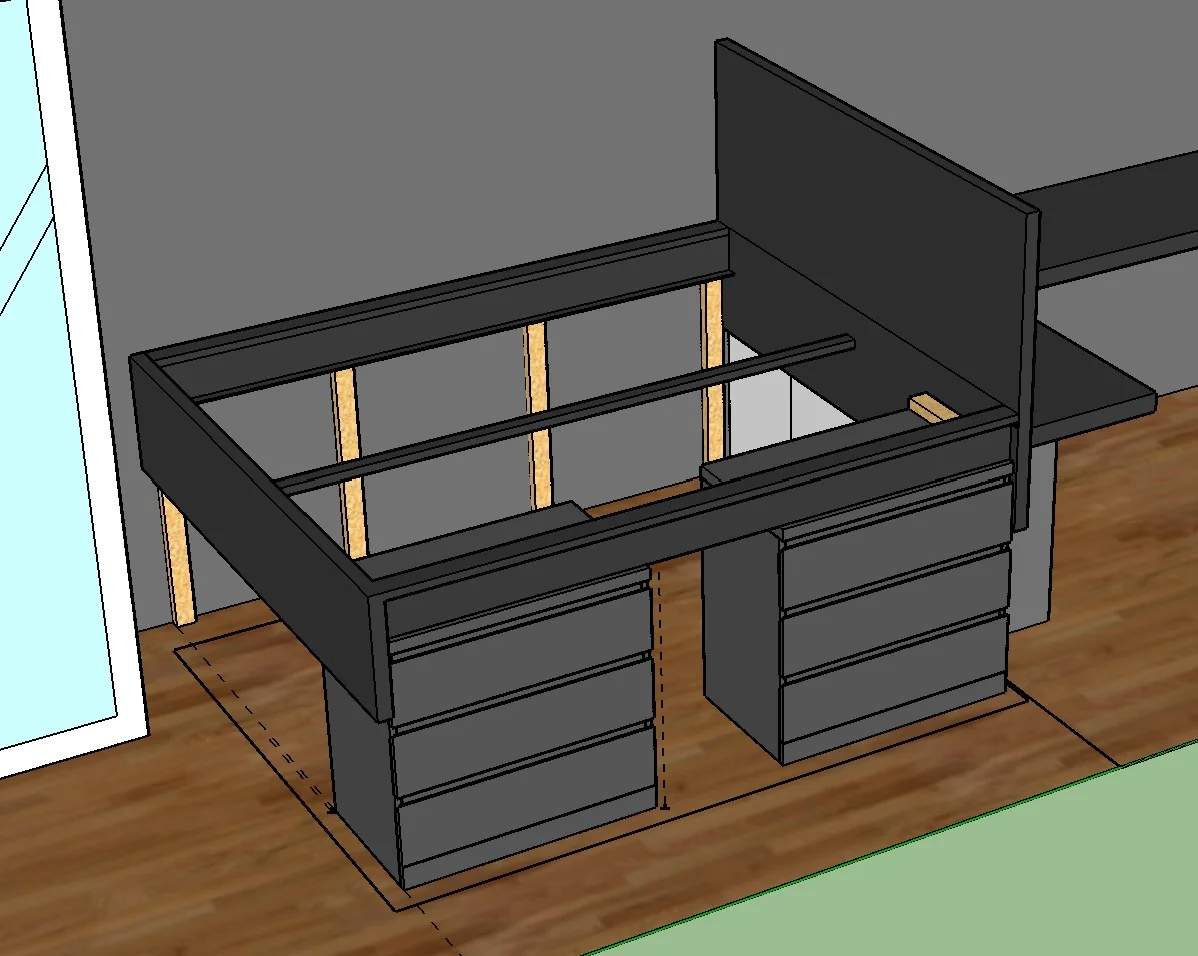
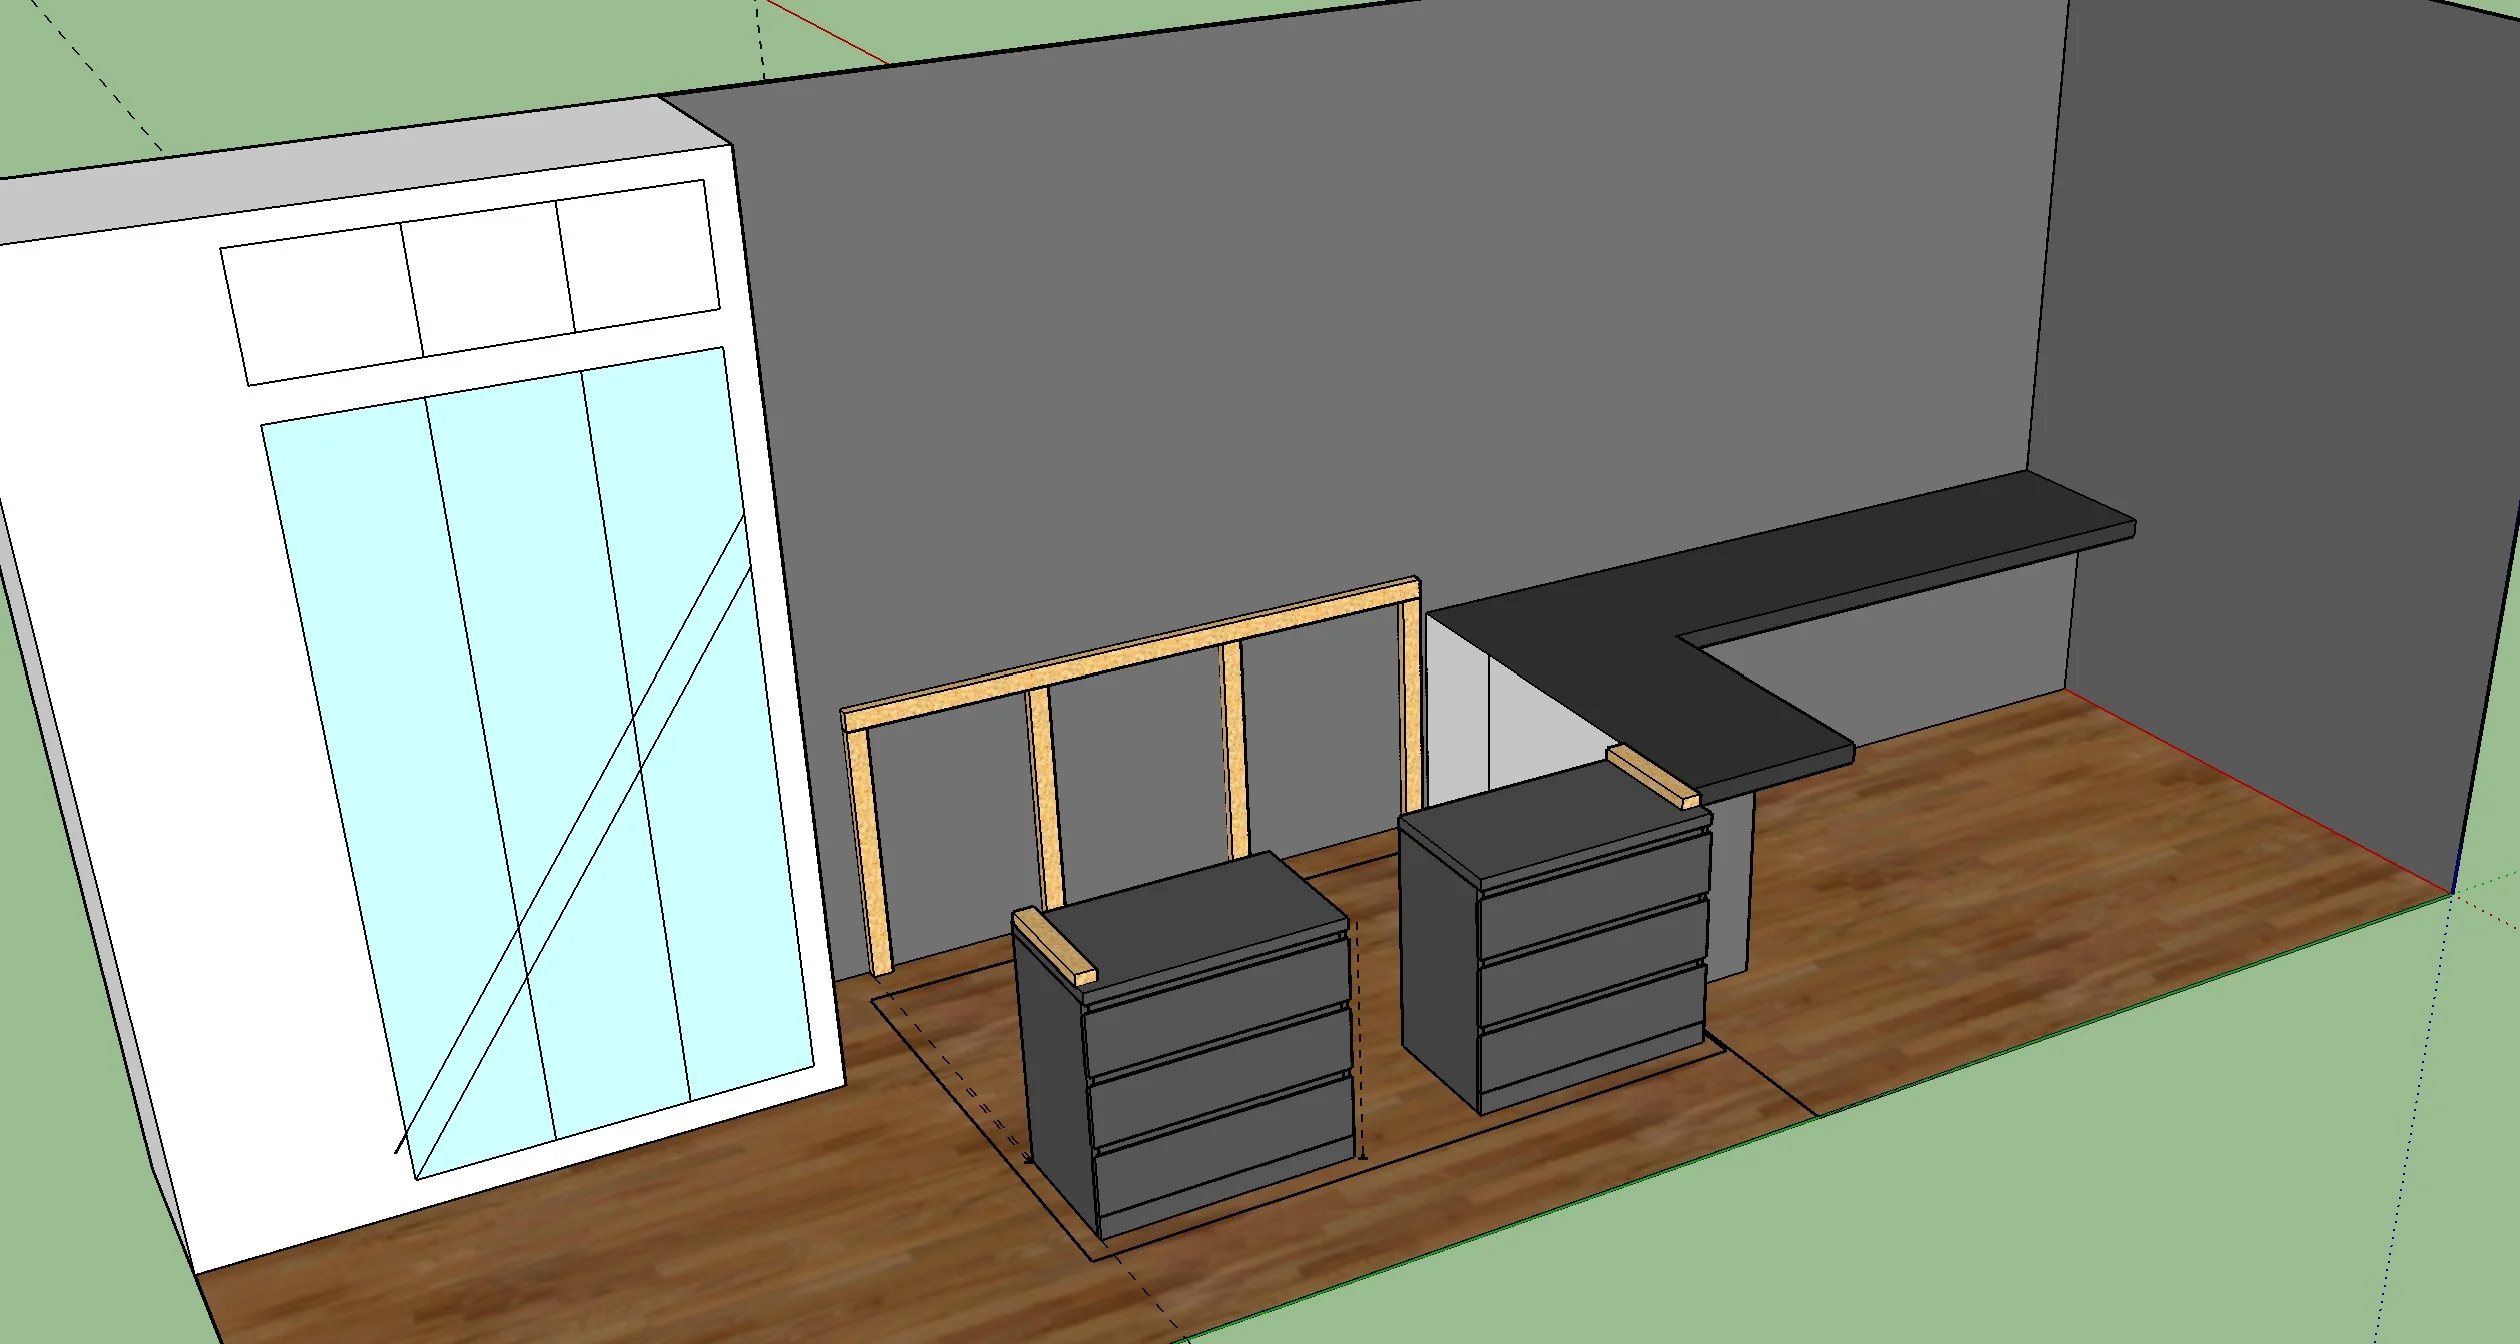
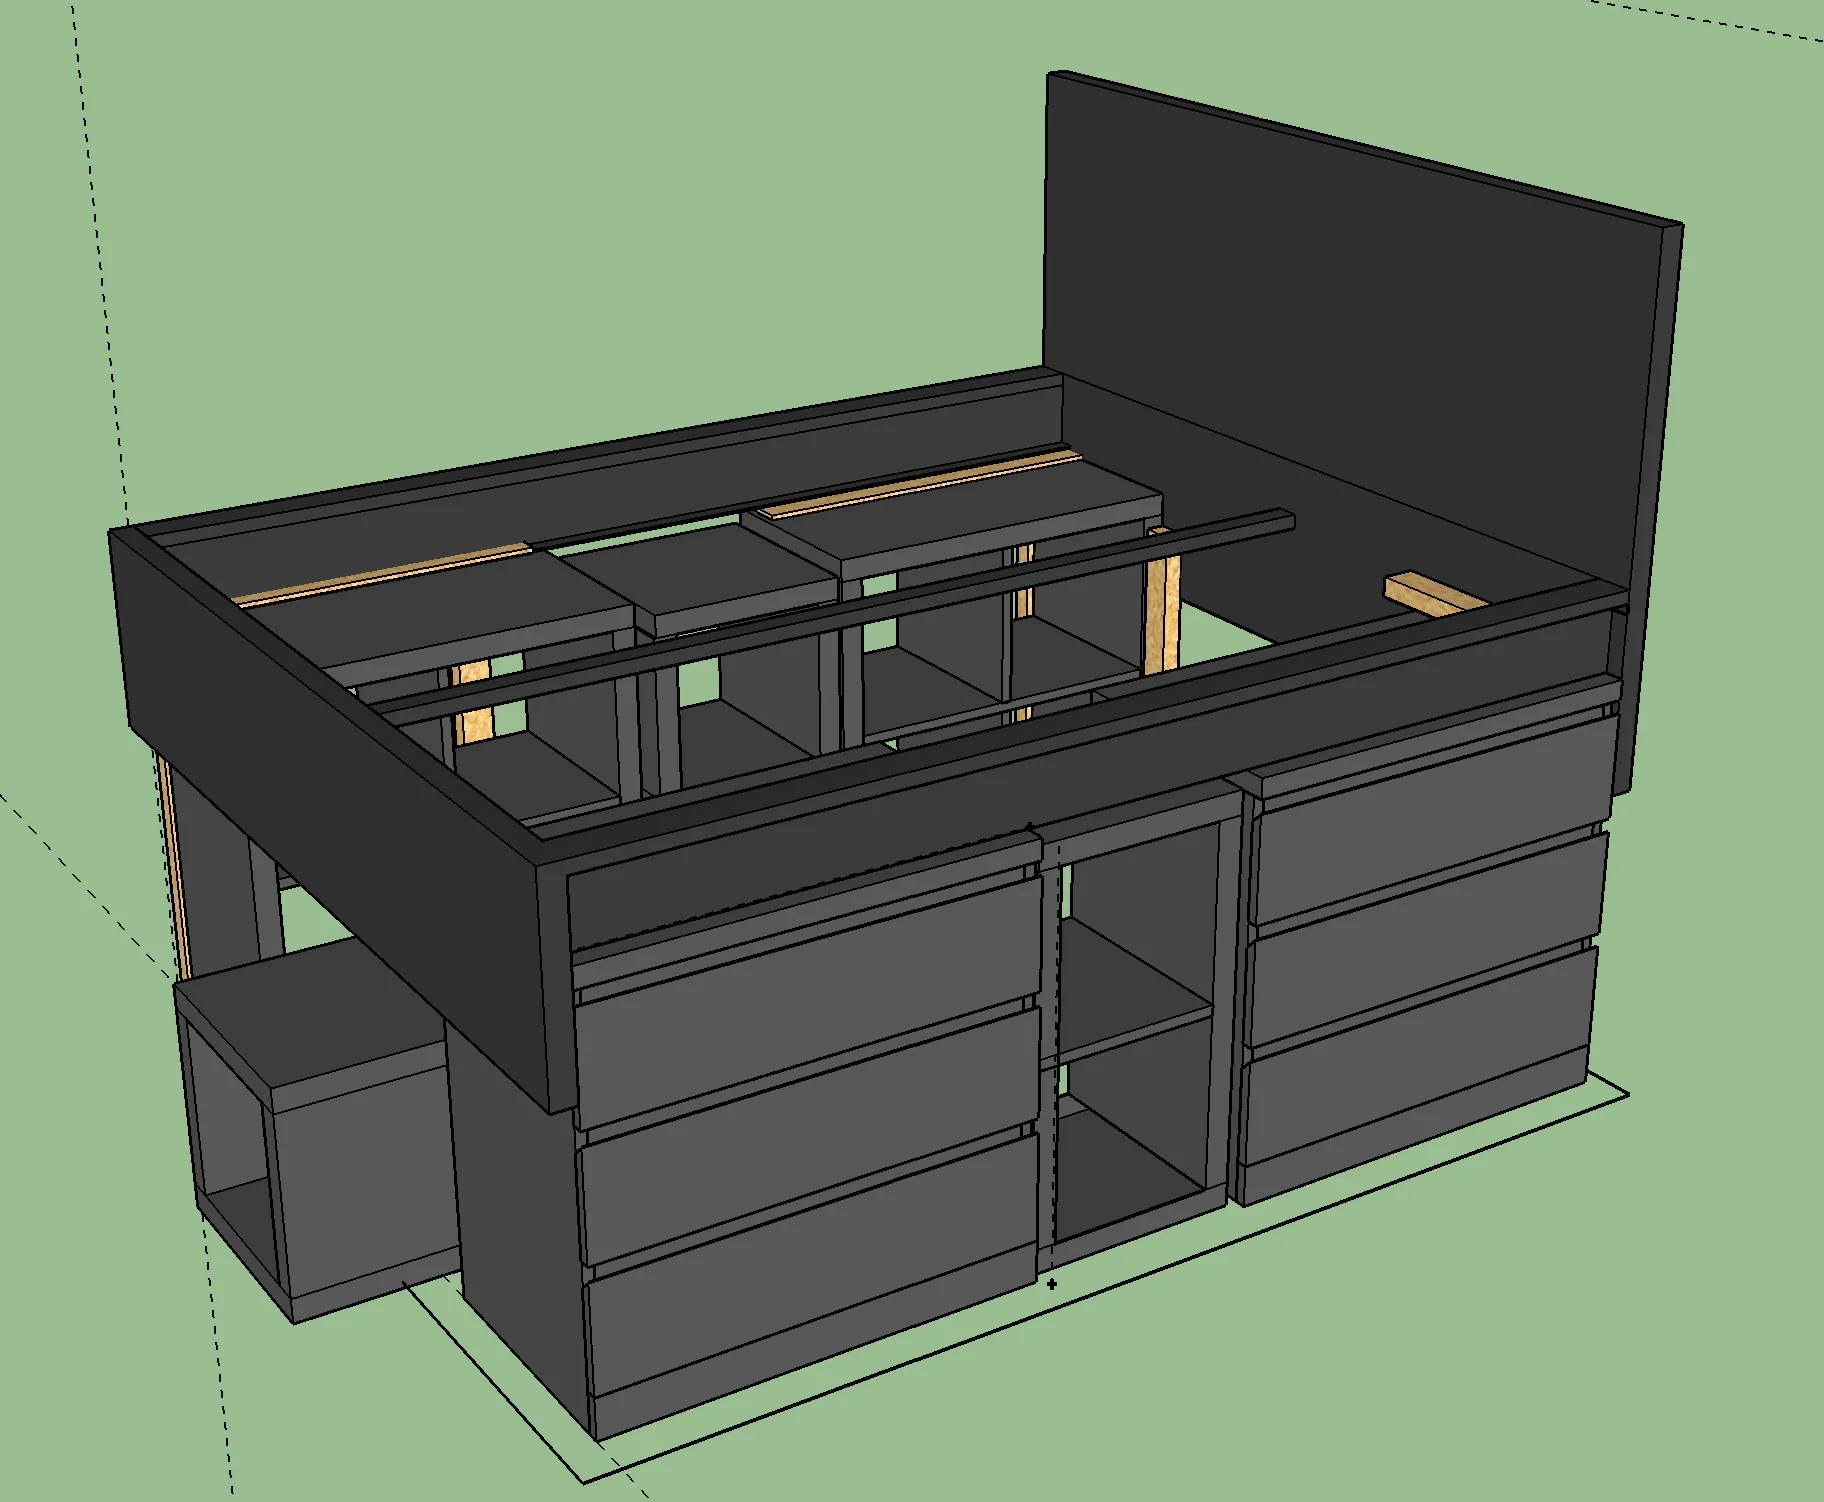
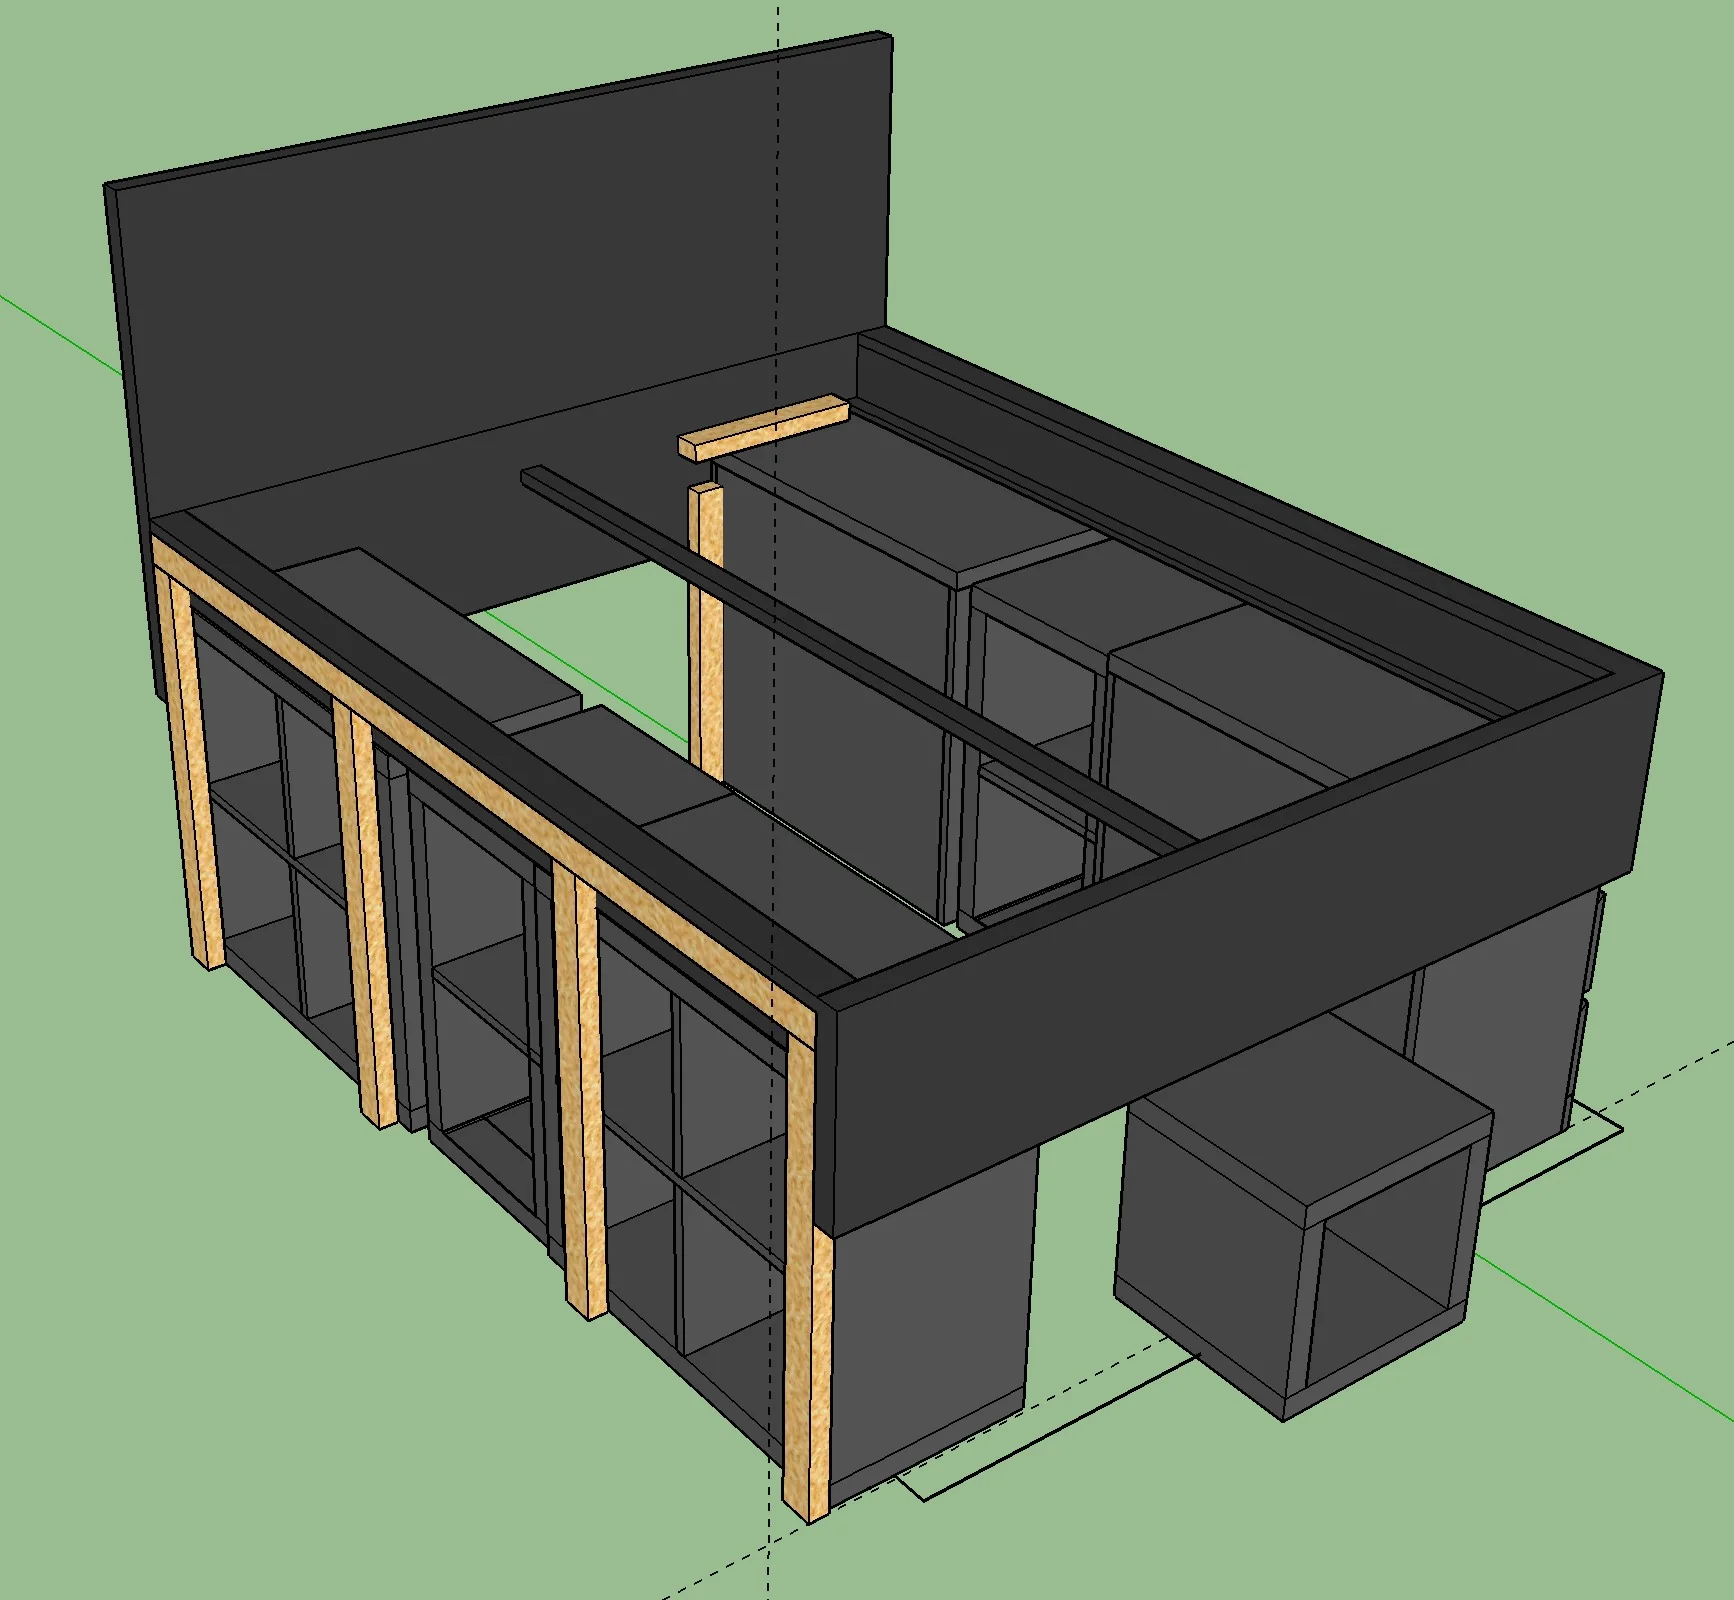
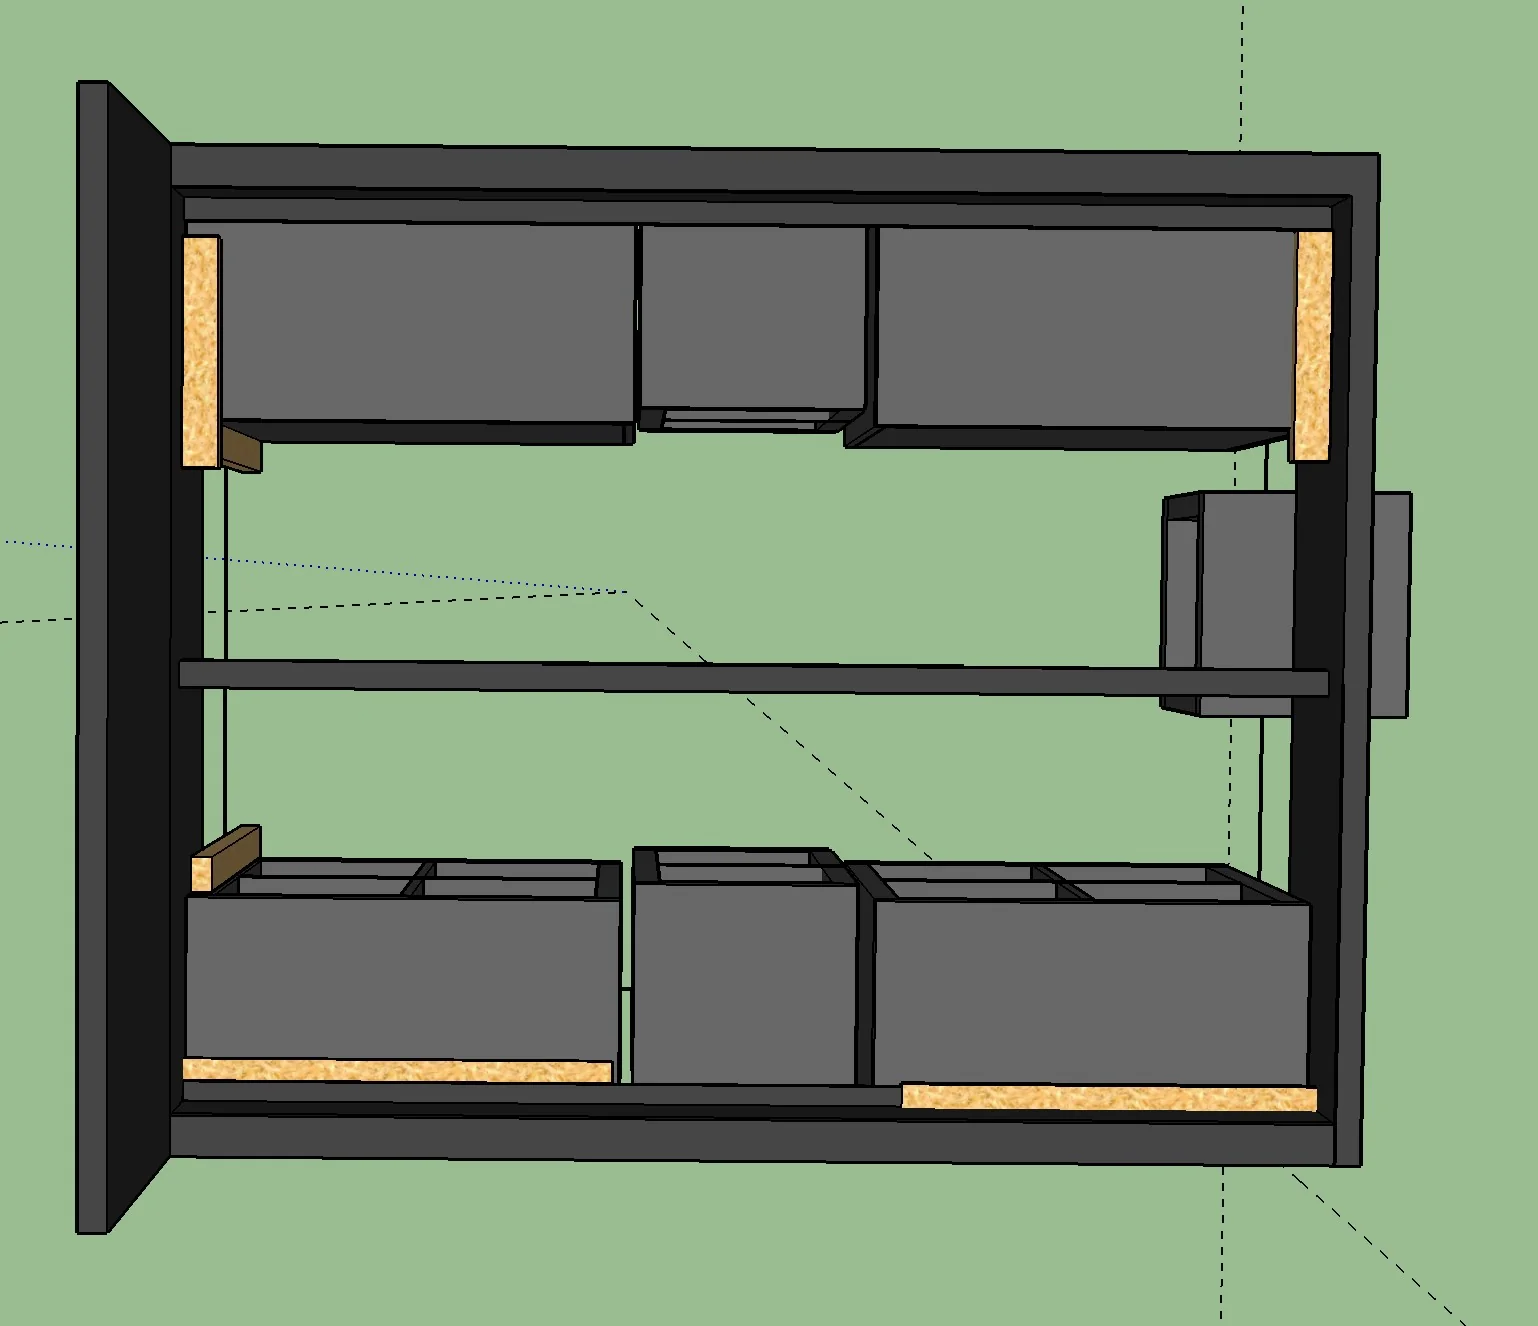
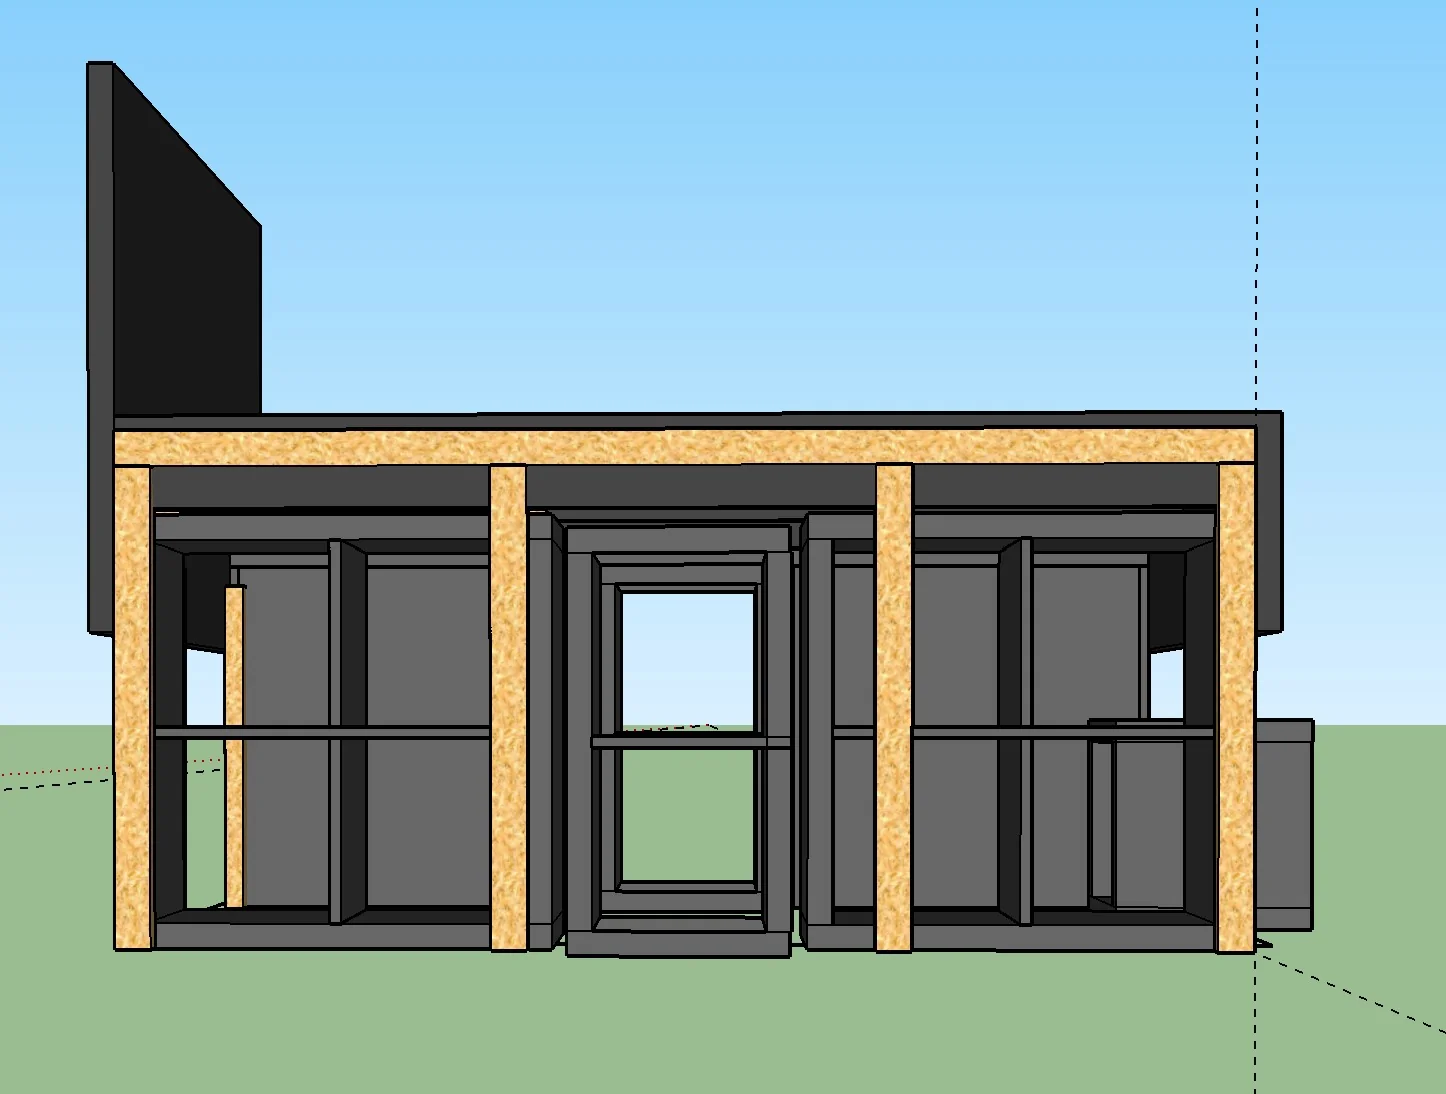
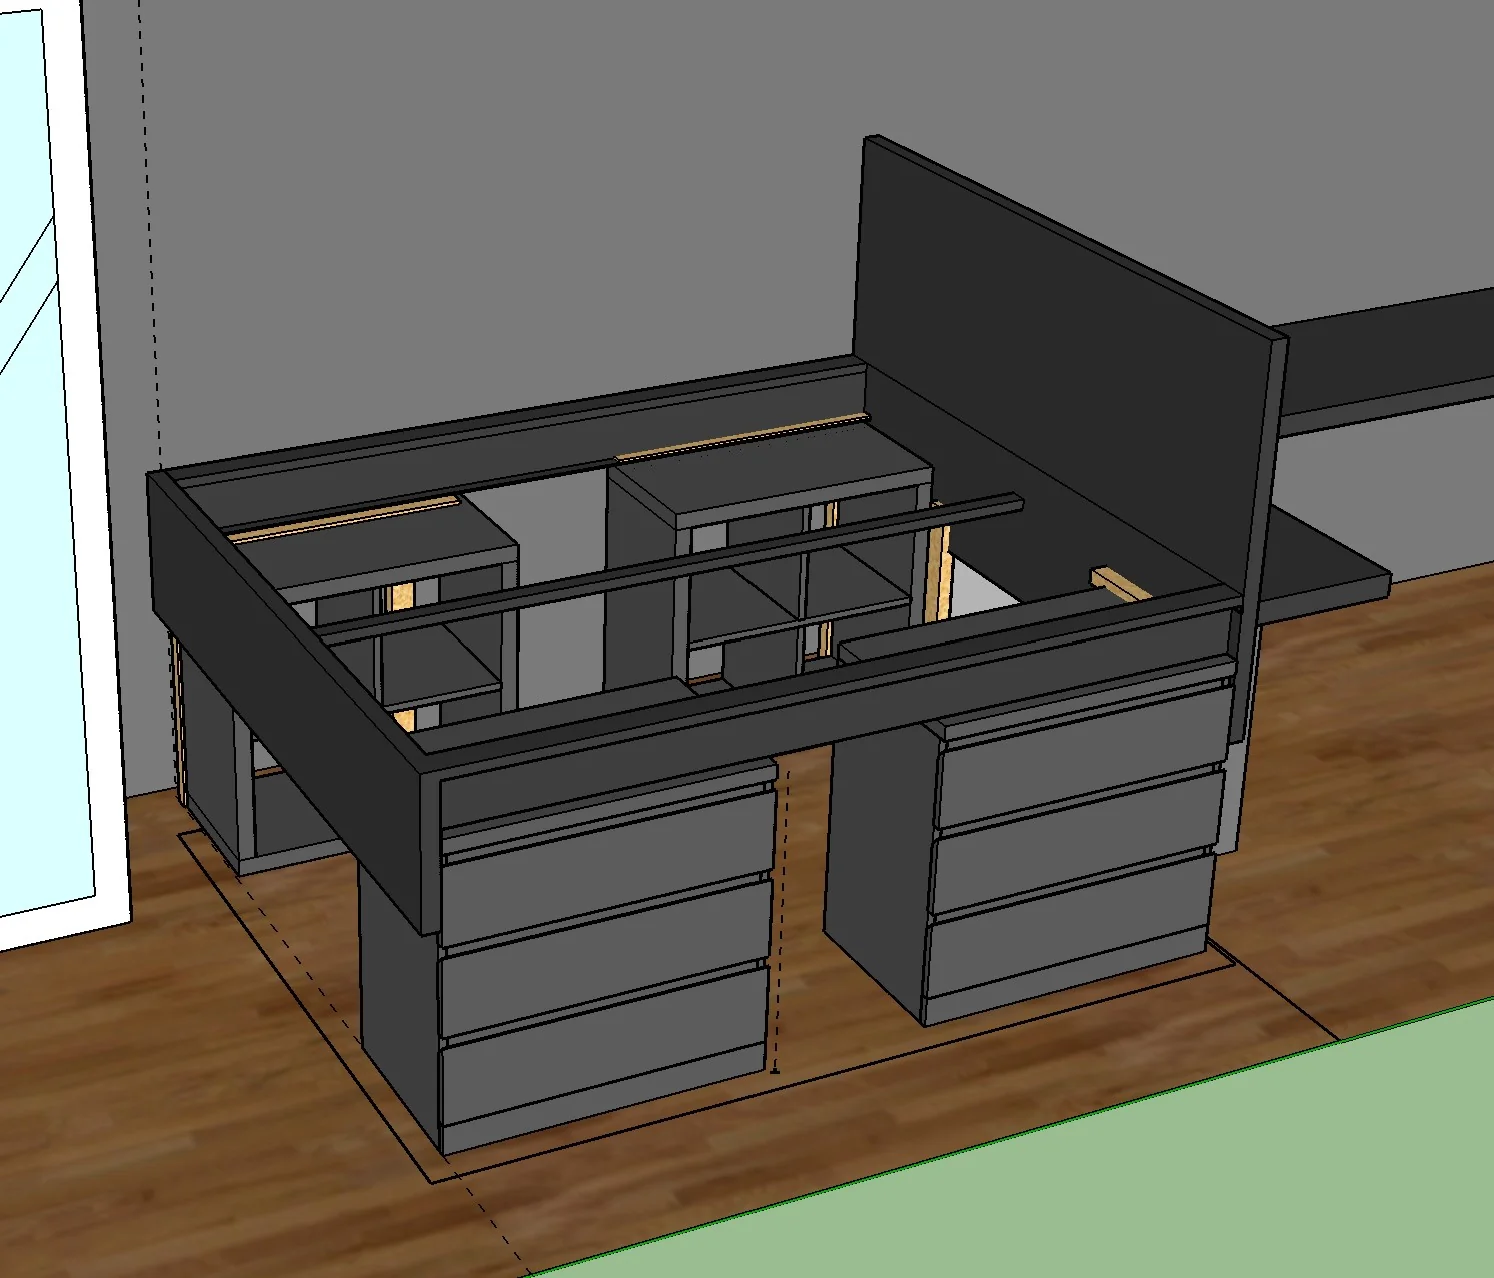
11. A MALM/EXPEDIT Platform Bed with Full Plan

Embarking on a DIY project like the MALM/EXPEDIT Platform Bed Update can be both exciting and challenging. This project, an ingenious blend of IKEA’s MALM and EXPEDIT series, transforms a standard bed into a customized, integrated bedroom showpiece. Here’s an expanded view of how to successfully execute this project with a focus on stability and aesthetics.
Firstly, it’s crucial to understand the importance of the bed’s support structure. As noted in the initial thread, the original design relied on the headboard and footer for support. However, for this upgrade, the bed’s weight distribution needed rethinking. This is where the decision to invest in more—and significantly sturdier—wood comes into play. Opting for thicker and wider lumber is a wise move, ensuring the bed can support significant weight without relying on the underlying cupboards.
When constructing the frame, it’s recommended to use robust wood like pine or oak. For a standard double bed, aim for wooden beams at least 2×4 inches in thickness. This frame acts as a solid foundation for the bed, ensuring none of the weight strains the cupboards below. The dimensions of the frame will depend on your specific bed size, so measure meticulously.
To further enhance stability, bolting and screwing the bed and frame to the cupboards is a smart strategy. This integration not only provides additional rigidity but also ensures everything remains in place without shifting. For this, use heavy-duty bolts and screws, ensuring they are long enough to penetrate through the bed frame and securely into the cupboards.
The final touch involves anchoring the frame to the wall. This step is crucial for minimizing lateral movement, a common issue with standard beds. For wall attachment, use sturdy wall anchors suitable for your wall type (be it drywall, brick, or another material). The screws for attaching the bed to the frame should be at least 3 inches long, ensuring a firm hold.
In terms of tools, you’ll need a power drill, a saw (if you’re cutting wood to size), a screwdriver, a level, a measuring tape, and potentially a stud finder for wall anchoring. Safety equipment like gloves and goggles are also essential.
This project is not just about creating a functional bed; it’s about enhancing your bedroom’s aesthetic appeal and utility. The integration of MALM and EXPEDIT pieces offers a modern, sleek look while providing additional storage options.
In term of plans: