Decorating a home can be a challenging task. After searching the answer on the internet, you probably get more confused than before. Worry not, this time, you have my hand to tackle that task. Next, this is more than a dozen cheap DIY Home décor ideas you can take and test for yourself by your list maker simphome.com. Start from number 1.
For your learning experience, this list also comes with a video format you can repeat and enjoy as many time as your heart desire.
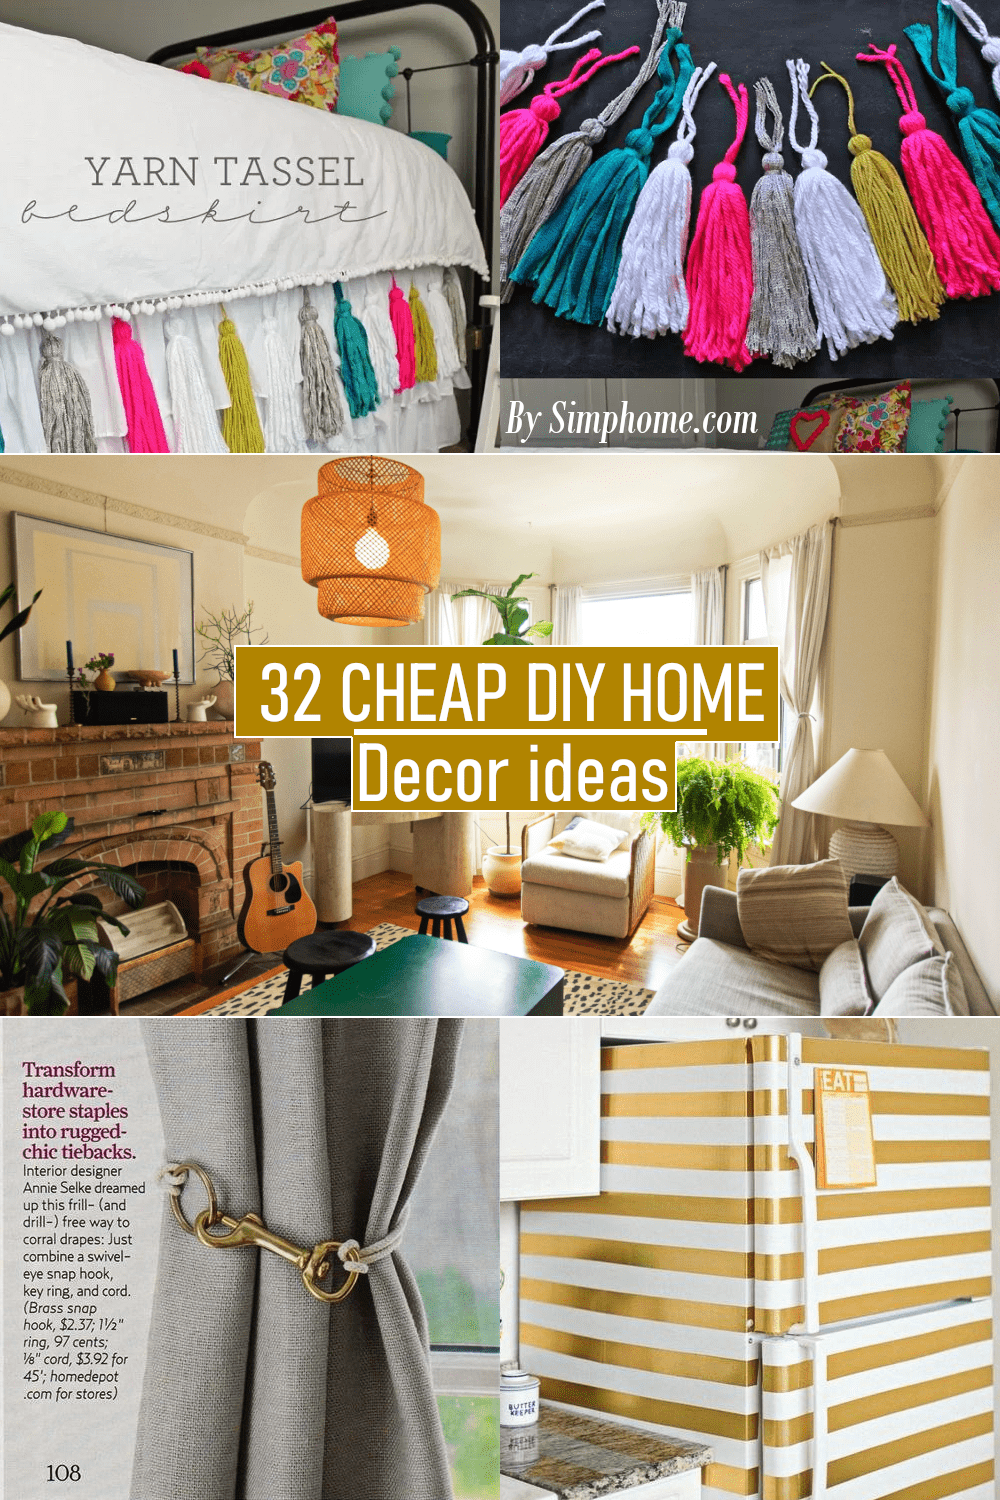
🔊32 Cheap DIY Home Decor Video:
List Entries:
45 DIY Home Décor Wooden Projects
25 DIY Shabby Chic Décor tutorials
10 Lovesac and DIY Bean Bag Ideas
10 Doormat Ideas; Funny, Unique, and Clever
1. Painting linoleum or vinyl floor
If you use linoleum or vinyl as your flooring, then you can try to paint it to change the look to appear more expensive. More info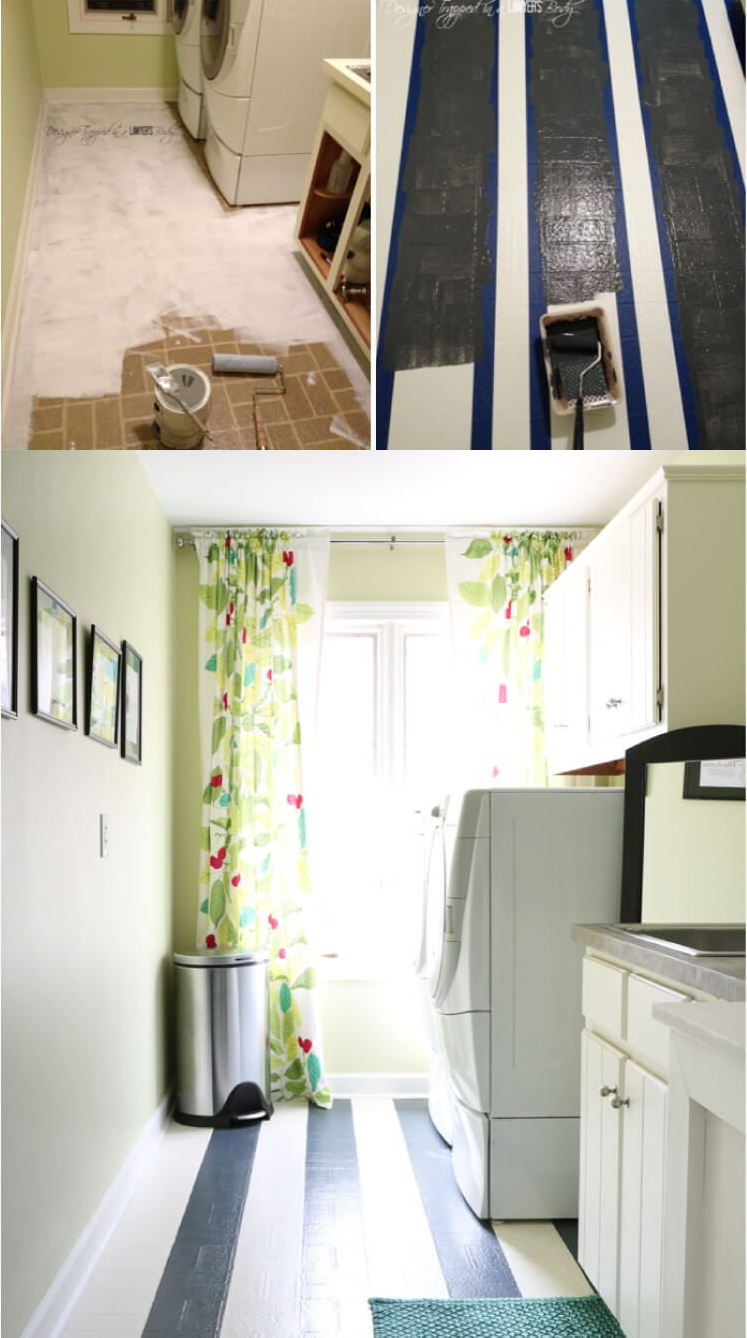
2. Closets mirror
Expensive closets has build-in mirror on its door, you can make this your own by using simple DIY home decor project mirror with cheap frame, paint, and attached it to your closets door.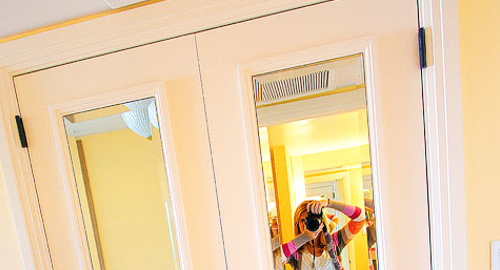
3. Cover your garage with curtain
You might have a garage shelf filled with wire and other tools which always look messy no matter what you do. Try to cover the shelf with curtain to hide the mess from view.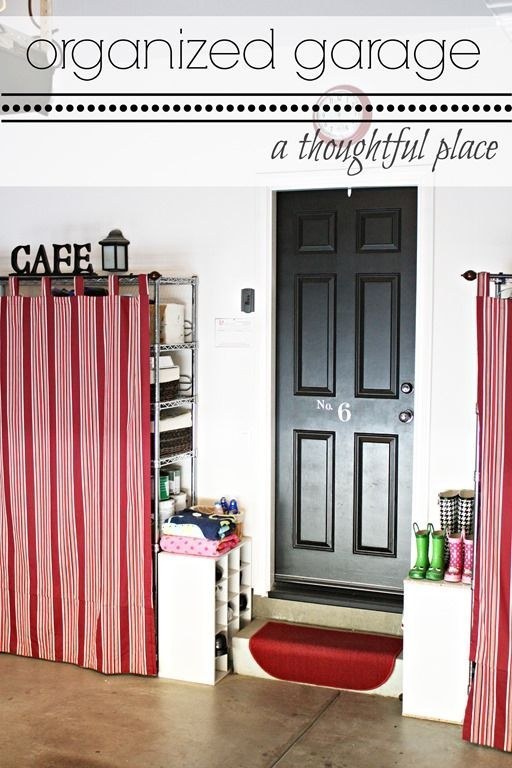
4. Waved your drapery
Messy drapery on your window treatment can be make to be neat by waving it with basket weave. Here’s more info.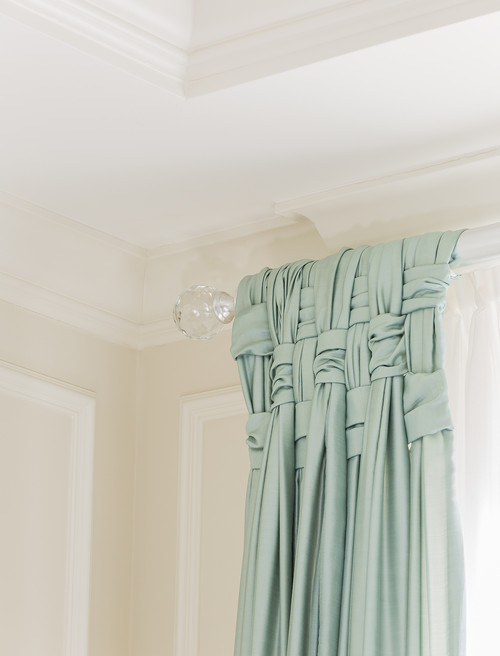
5. Brash snap hook your curtain
Decorate your curtain by tying in using keyhole, yarn rope, and a brash snap hook which you can cheaply purchase only for $2 in your local hardware store.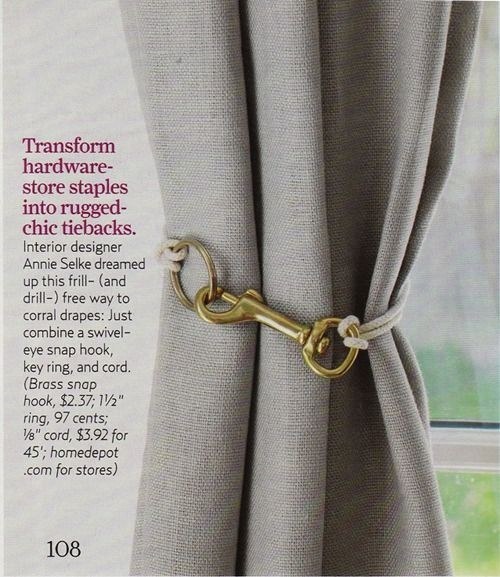
6. Tidy television wire
Messy television wire can be tidy using rod for shower curtain. More detail and requirements
7. Simple decoration for windows
If you do not want to use curtain for windows then you can still decorate it with brackets. More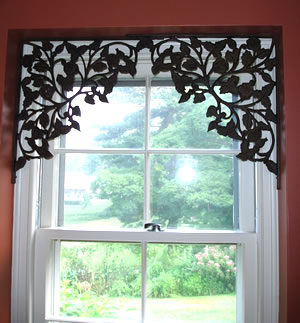
8. Decorate your shower curtain
It is easy to decorate your shower curtain with this little solution. Just use an old napkin ring then tie ribbons as decoration. Find the supplies in etsy.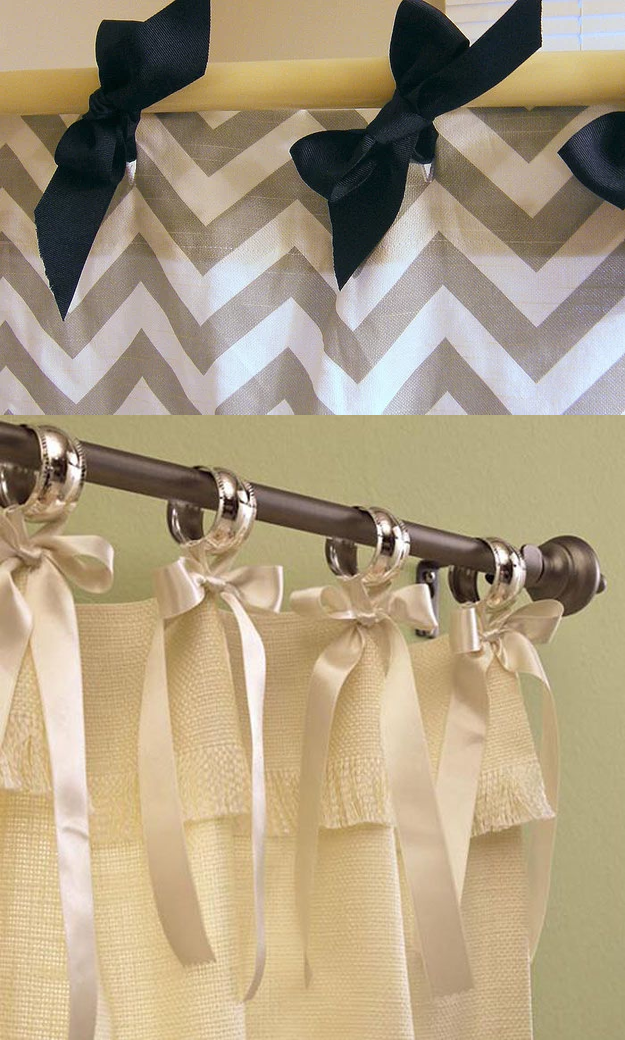
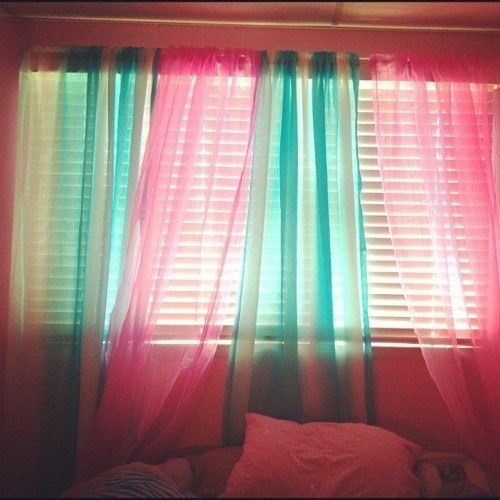
9. Sheer curtain
Decorate teenage room with sheer curtain windows treatment by mix and matching the color.
10. Place area rug correctly
In bedroom use the big 8 inch by 10 inch size area rug and place it rightfully under the queen size bed until the headboard or right before the lamp table. In dining room pull out the chair as if you want to sit down on it, and purchase rug size which will fit to the area where the chair stand when you pull it. As for living room, make sure you put front legs of the sofa or chair on the rug. More detailed information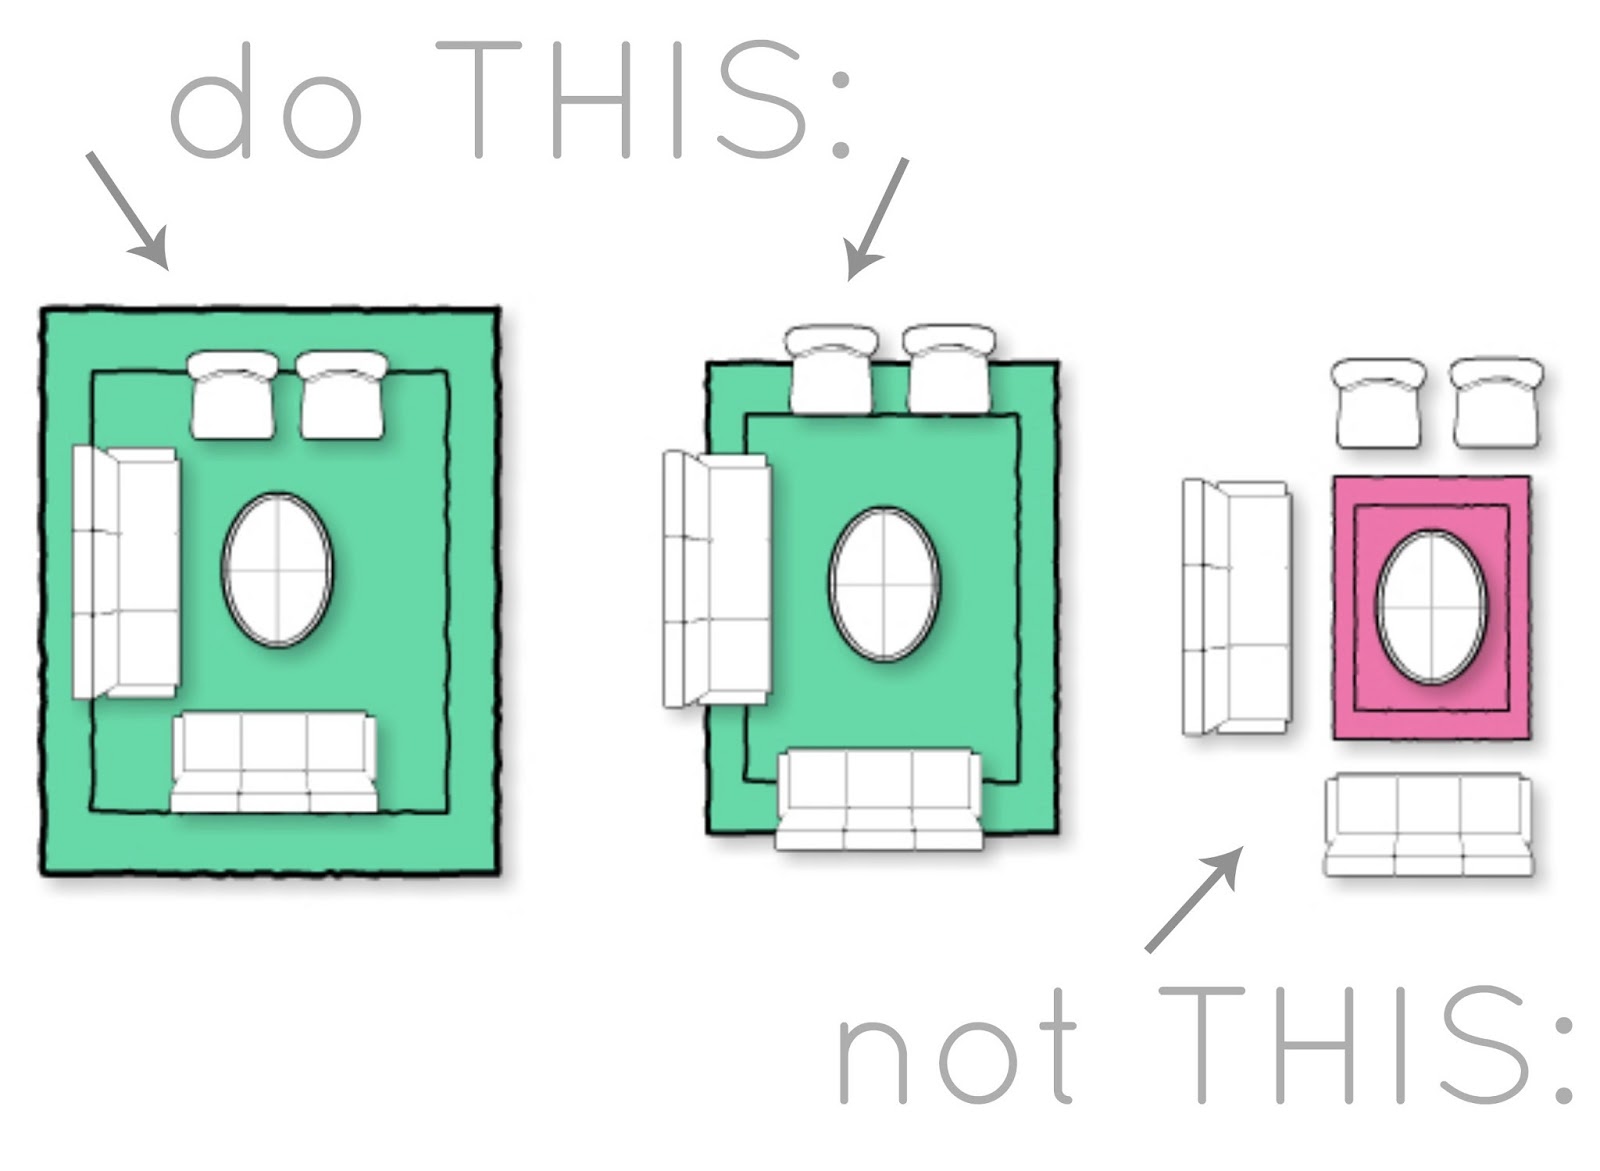
Pause: Fore more info related to source of this list, help yourself by playing this video. In case you feel lost because you cannot find detail information related to this list, help yourself by visiting this pinterest board.Feel free to pin, repin, or comment..
Continue with our list
11. Fancy fridge
Make your fridge fancier with this project. in simple word, spraying it or putting washi tape on it and done. Idea by theeverygirl.com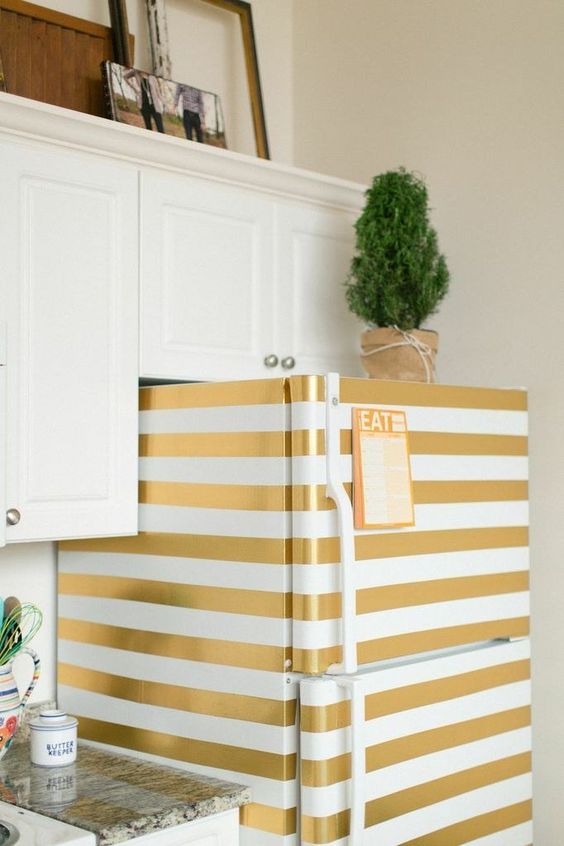
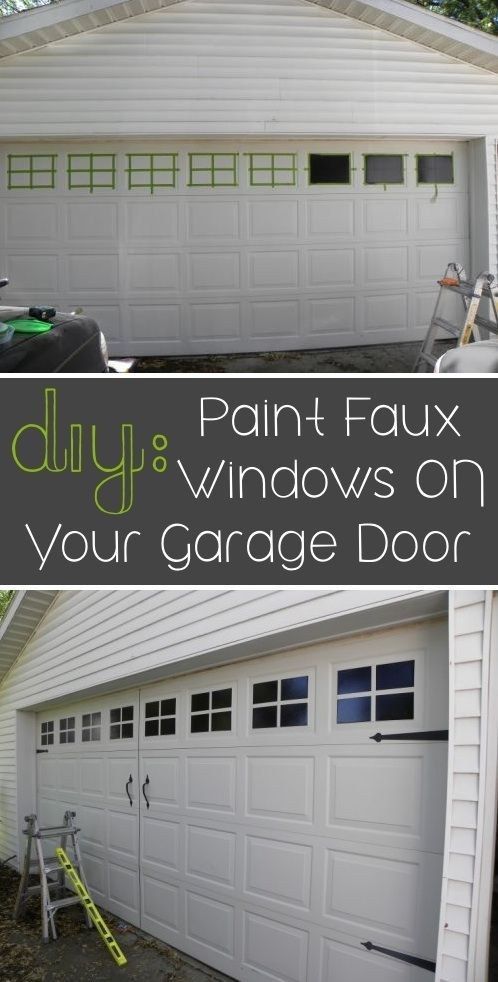
12. Garage door window
Make a faux garage door window by painting it with black color paint by twopeasinabucket [Play our video in this post to learn more because website is no longer active]
13. Expensive looking flat screen TV
Add designers expensive looking on your flat screen TV by adding frame on it. just choose any material that you want as the frame, from classic, chic, to minimalist style then make a custom frame for your flat screen TV. DIY, Info, and Disguise that flat screen.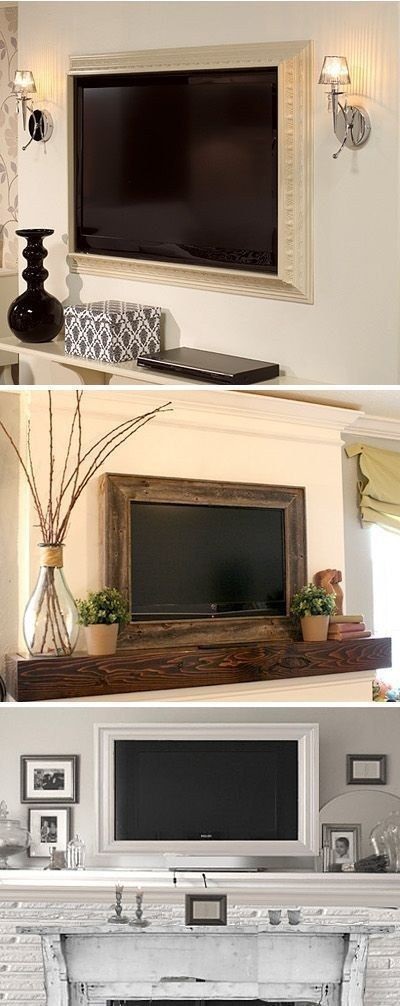
14. DIY bedskirt tassel
Ever see those expensive bedding with tassels on the bedskirt. You can actually make it your own. Just use a colorful yarn, cut it in 8 inch length with scissors wrap it to create the tassels, put a clipboard on it, and then just put in on your bedskirt. More information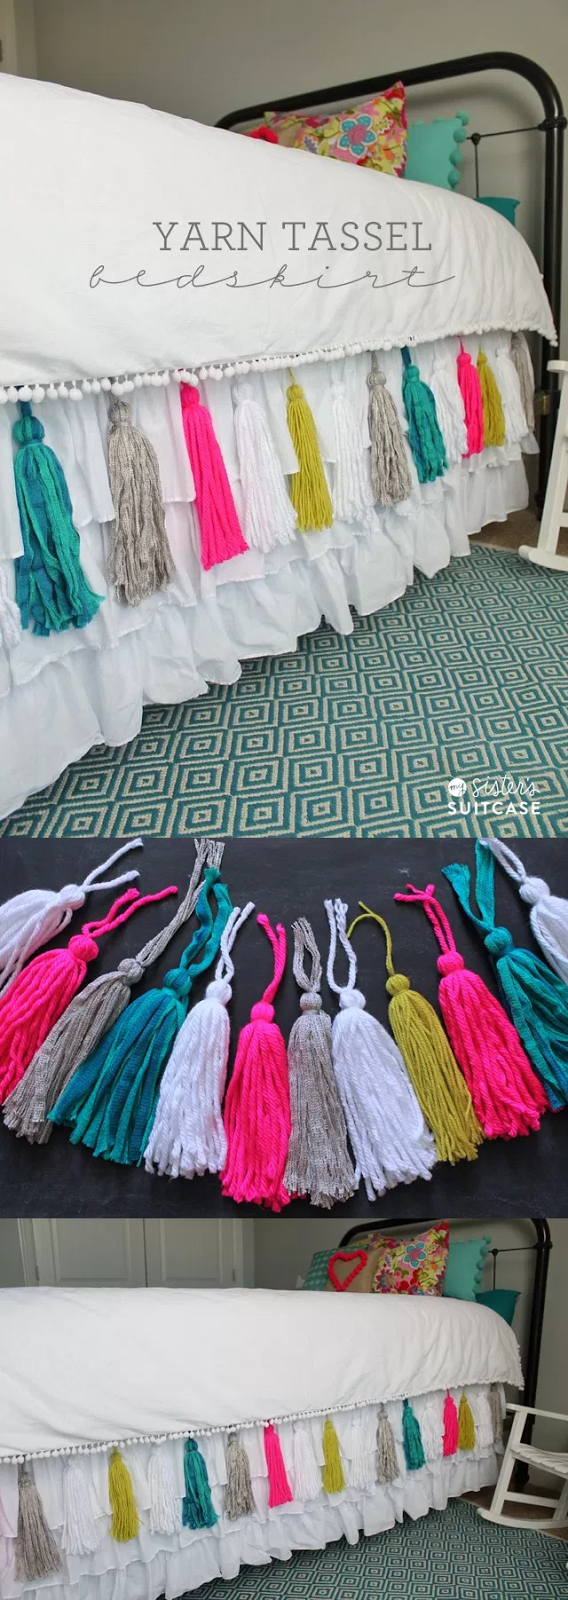
15. Organize your kitchen sink items
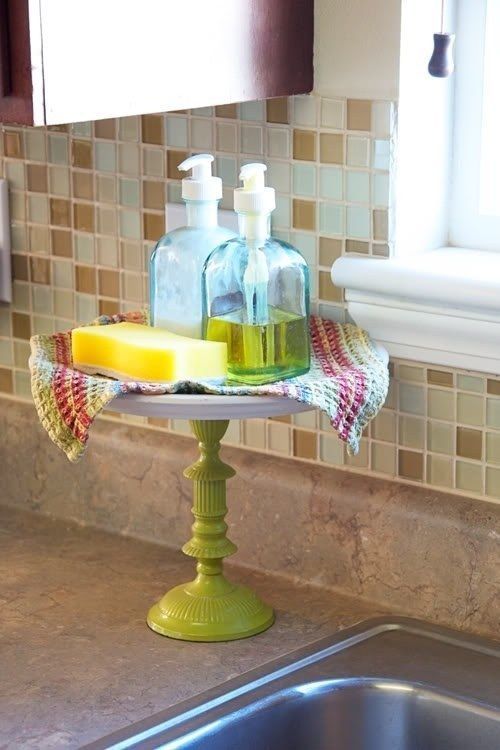
Try to organize your kitchen sink items by putting in on an unused cake stand.
16. Decorate your air ventilation
Add a rubber outdoor doormat that has a lot of spaces in it to allow the air to come through it and attach it inside your air ventilation. Detail
17. Repaint your old air ventilation
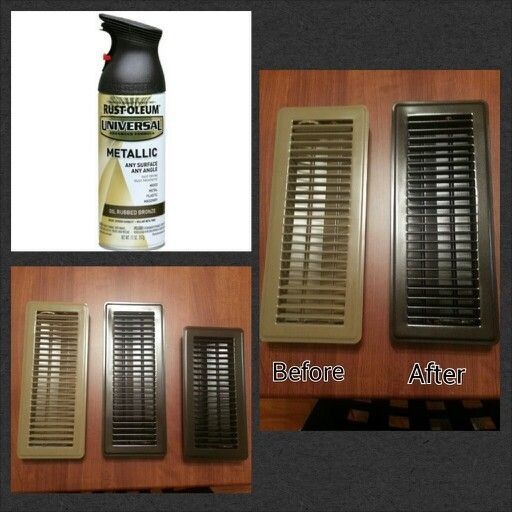
You can easily spray paint your old air ventilation with primer and metallic paint to make it look new again. Just purchase one can each for 10 of your air ventilations. IMG
18. DIY canopy bed
Ever want to have canopy bed? You can try to DIY it and make it your own. Just use some curtain rods and drill in on your bed ceiling to surround it. Then hang 6 lightweight fabrics with your favorite pattern on it. There you have your own canopy bed.s underneath it to make it a portable shelf.
19. Accent ceiling
Most modern house only has crown molding on the ceiling with white painting that makes it look boring. But actually you can make your ceiling to be a DIY project accent ceiling by painting it to replace your accent wall function.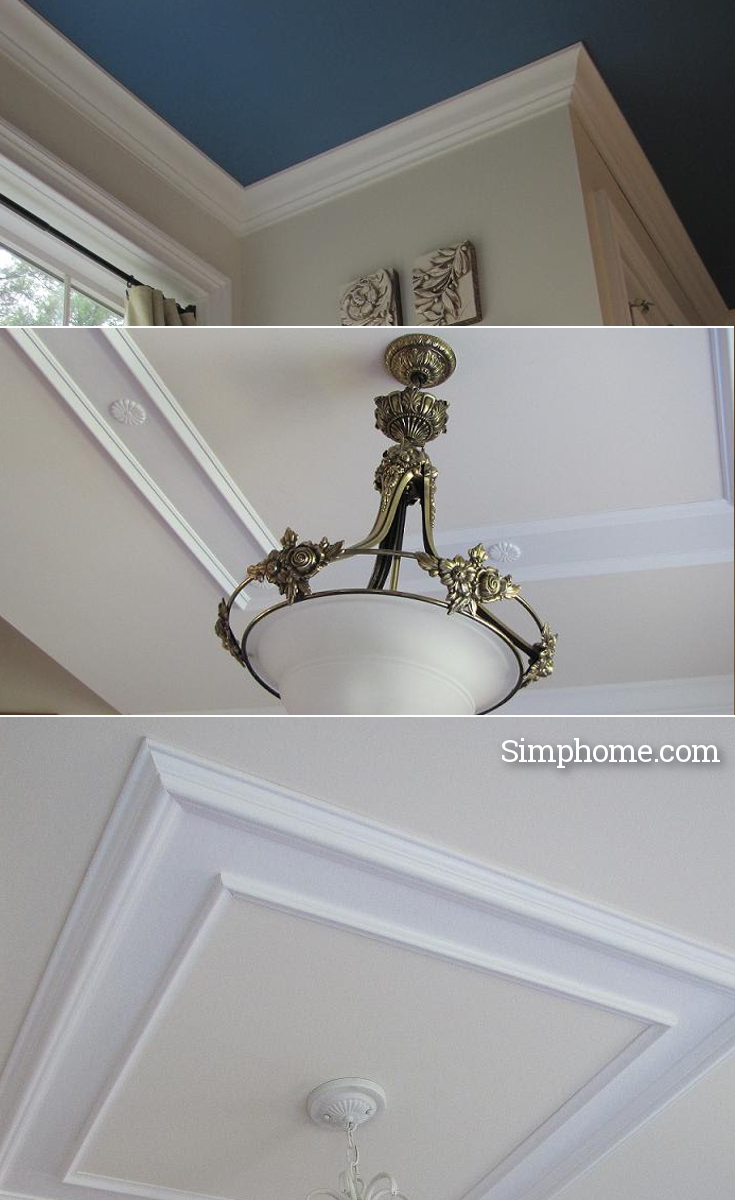
20. Decorate your light switch
You might want to have an expensive looking light switch with decoration on it. actually it is very easy to make it your own, just bring your light switch plates to your local craft store and try to find picture frame which can fit it perfectly. If you are handy and want to have uniform frame for all of your light switch then just purchase trim pieces to make the frame yourself.
After you find the right frame use Krazy glue to attached them on the plates. Then you need to spray the frame using top coat paint with gloss clear finishing. Do not forget to do it in a well ventilated area and wear a mask while spraying. After all of them dry, all you need to do is to put back the switch plates to finish your DIY home decor project.
21. Light shade metal decoration
Making your own light shade metal decoration is not that difficult especially since it is cheaper than purchasing the real metal shade. To make it you need a few sheets of punched metal, spray adhesive and E-6000, clothespins, painter’s tape, light panel, cutting disk dremel tool, parchment paper, top and bottom wire ring in 16 inch size, straight pipe in 11 inch size. There is a seven steps easy project tutorial to make this decoration complete with picture that is easy to follow.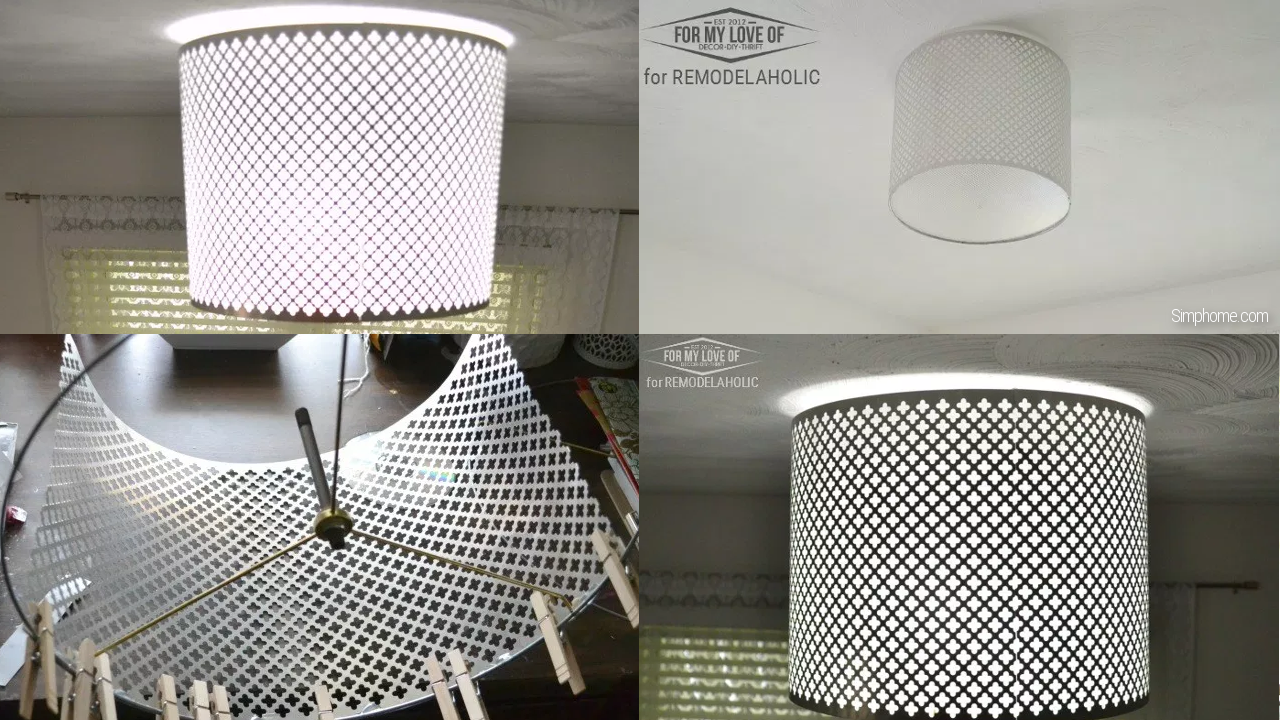
22. Make balloon drapery
Have you ever see a balloon drapery on those grand houses which make the window looked grand as well. You can actually make this on your own using curved shape shower curtain which you can attached on top of your window then put drapery on it. If you simply want to buy it, get it here.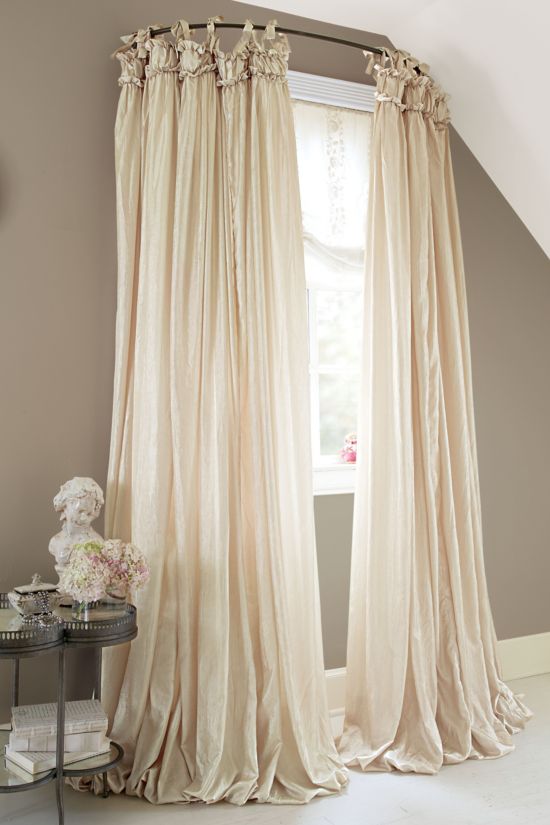
23. Repaint your kitchen equipment
If you have old stainless steel equipment inside your kitchen which still function well but appear old and unsightly, try to renew the look by repainting it using liquid paint for stainless steel. Source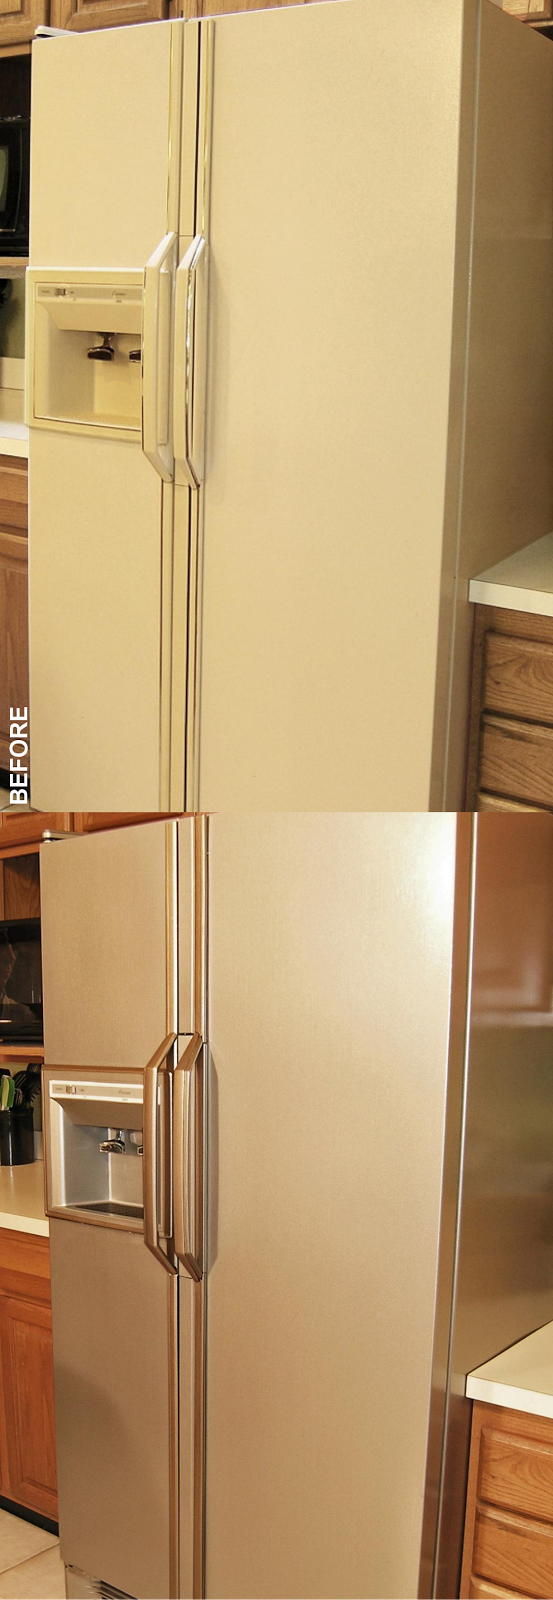
24. Taller ceiling illusion
If you have low ceiling and want to create a taller ceiling illusion, then you can try to use two tone painting style. To do this DIY home decor project, all you need to do is to paint half of your wall with different color and let the top part of the wall still in its original white color. Source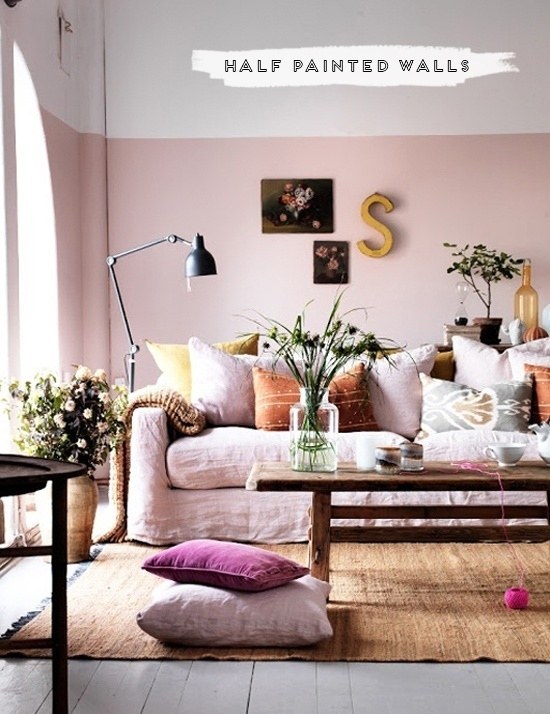
25. Create your own rustic look
You can create your own rustic look cheaply by adding wood planks on your room walls then paint it roughly to create the rustic look. It will only cost you $28 for each wall with 6 wood planks, choose fence boards for cheap bargain. Other things that you need is construction adhesive, saw, spacers, sanding block, trim, brush, this link, and of course the paint.
26. Create your own window shade
No sewing needed when making this window shade since it only use magnet so you do not to be really handy. Just choose any color of fabric remnant that you love. Fold on top edge to make the trim then glue 4 magnets on the fold that you have made. Lay scratch paper when you glue the magnet so it would not stick to your table. Cover the fabric seam with ribbon so it would not fry open.
Now you are done with the window shade, next is making the pom pom as decoration by using wool yarn then glue a piece of string on the bottom seam of the window shade while inserting the pom pom every few inches. This project window treatment is now done.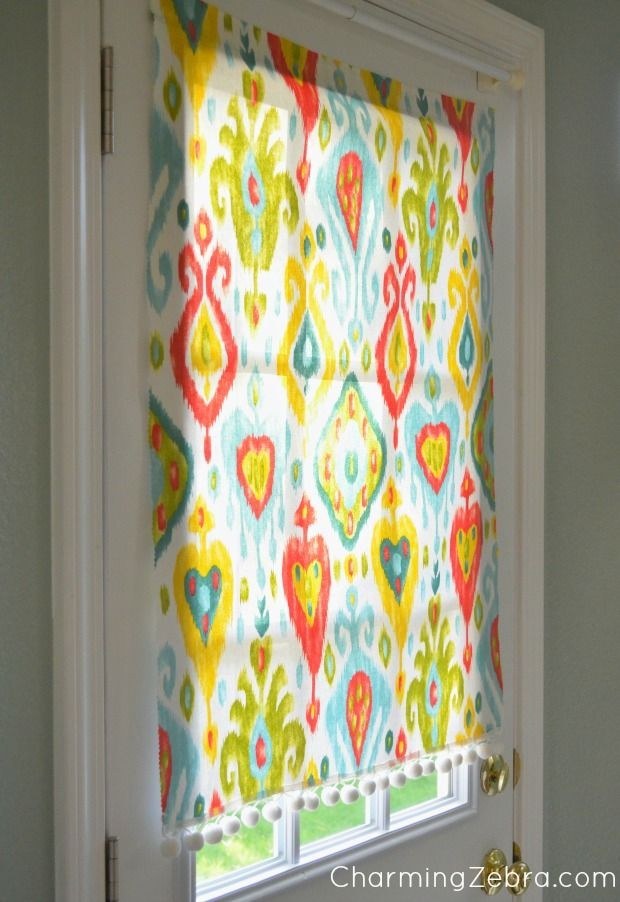
27. Un-stain then re-stain your old drawers
Purchasing new drawer cabinet might cost you thousands of dollars, but here we can remodel your old drawers cheaply. Use spray stripper on the drawers to un-stain them then let them be for a while until the old finish loose then use plastic scraper to strip it off, sand all of it to completely remove the old finishing. Re-stain the drawer with two coats of stainer and finish it with poly coating.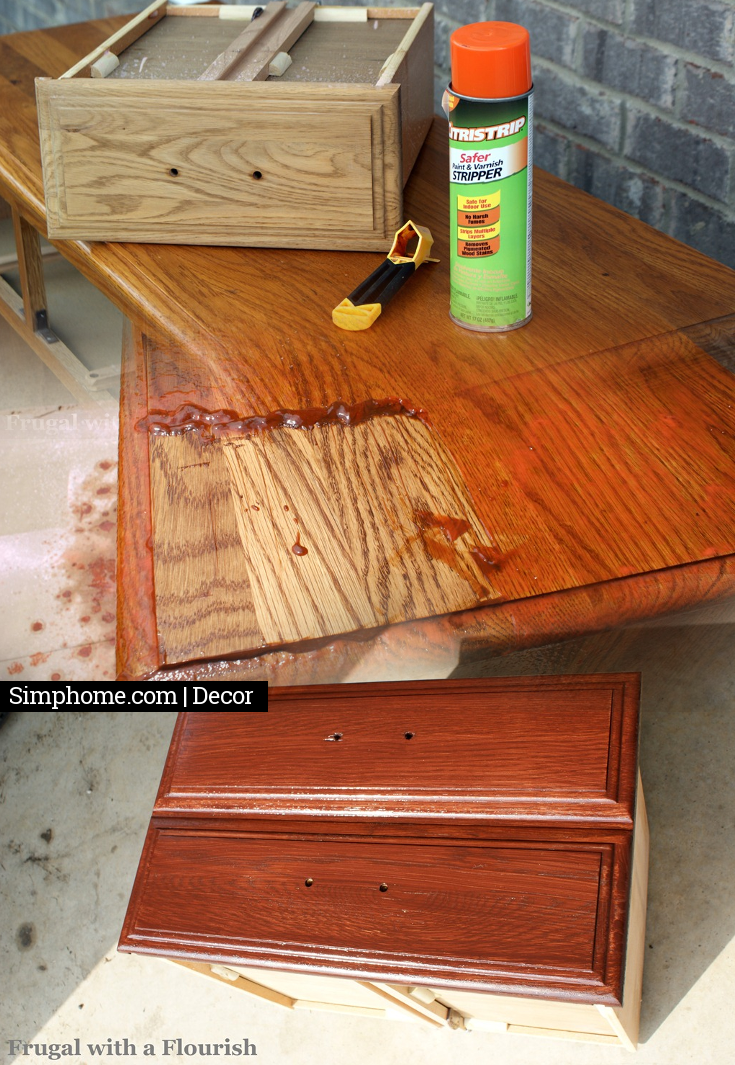
28. Rustic style bathroom mirror frame
Add a frame to your bathroom mirror to get rustic style which match well with other decoration you have in your bathroom. Grab detailed instructions to execute this idea properly here.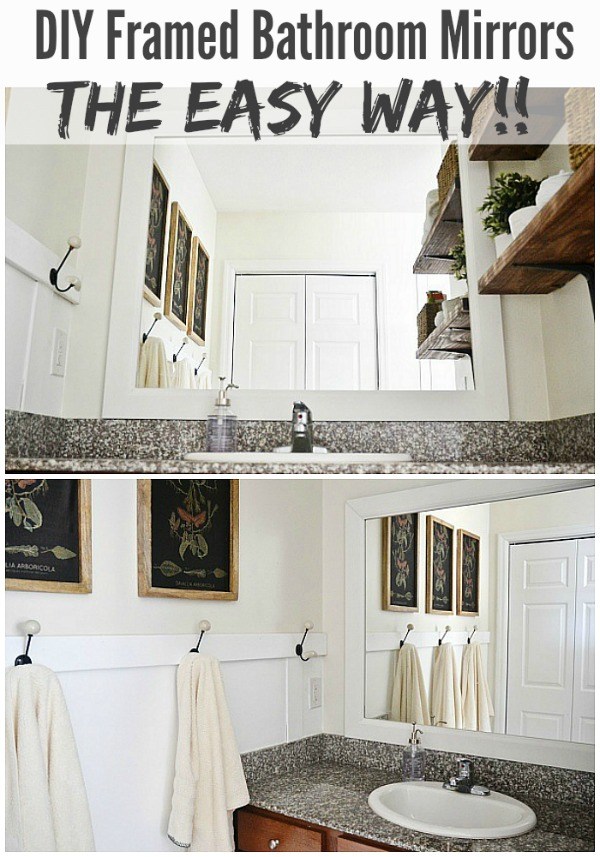
29. 3D tile gel sticker
You do not need to change your kitchen backsplash as you can cheaply use a 3d tile gel sticker only for $7.48 each. Just peel and attached it on your kitchen backsplash to update it with this DIY home decor project.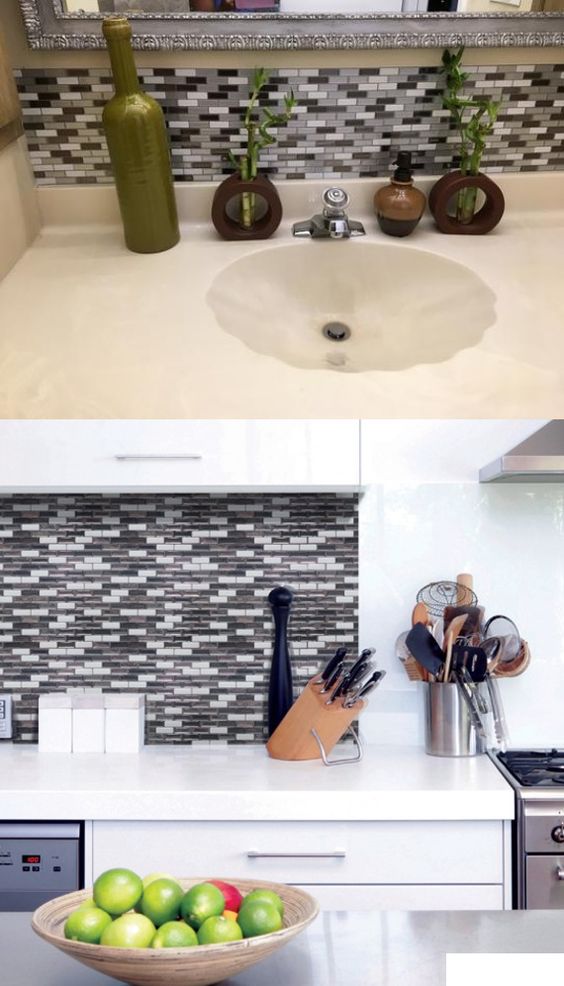
30. Decorate your cord
Try to decorate your old black cord using red suede cover which only cost no more than $2. But the price may already change by now. Update here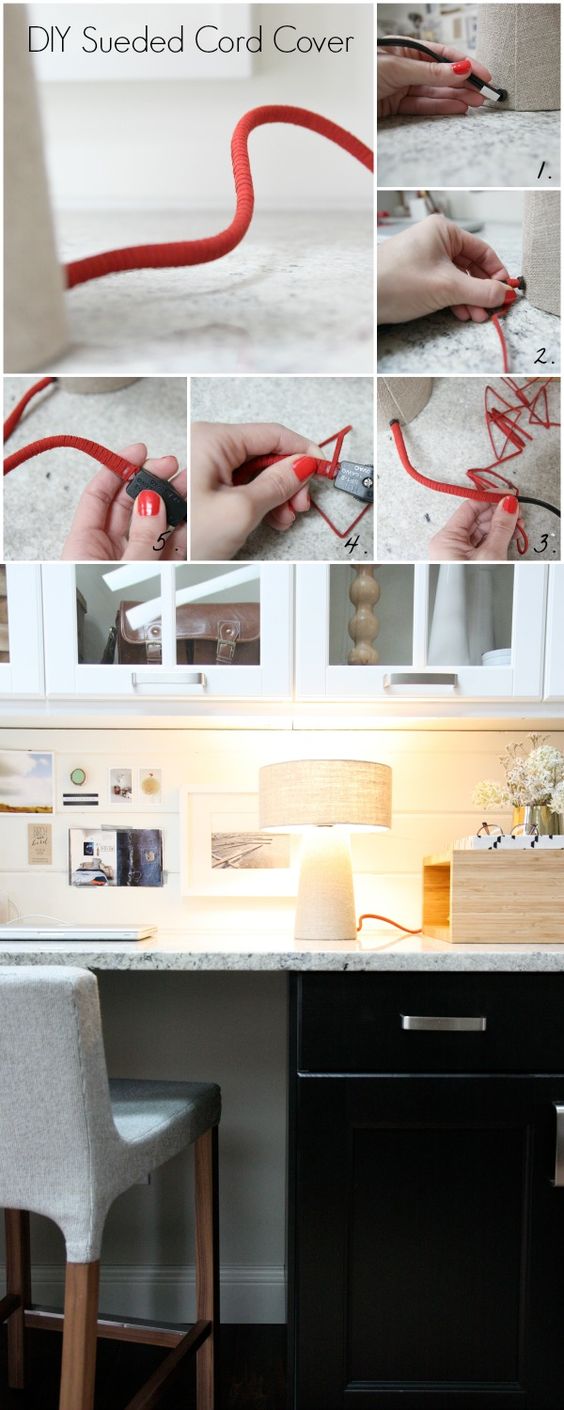
31. Create thick baseboards
Put a thin trim a few inches above your original baseboard then paint it with the same color as your thick baseboard. There you will get thick baseboard trim molding. But Of course my short explanation is not enough.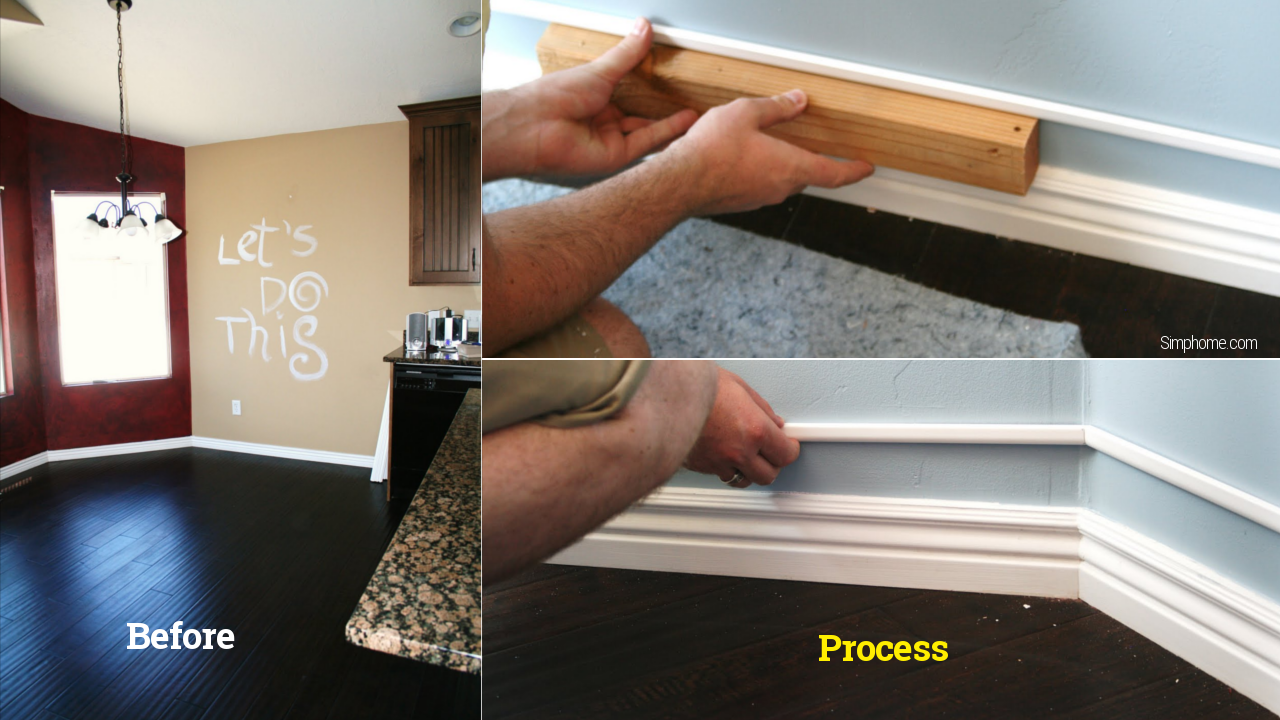
32. Decorate your kitchen cabinets
On top of your kitchen cabinets nail an extra board with crown molding on the edge for decoration. Now you get extra space on top of your kitchen cabinets from this DIY home decor Project.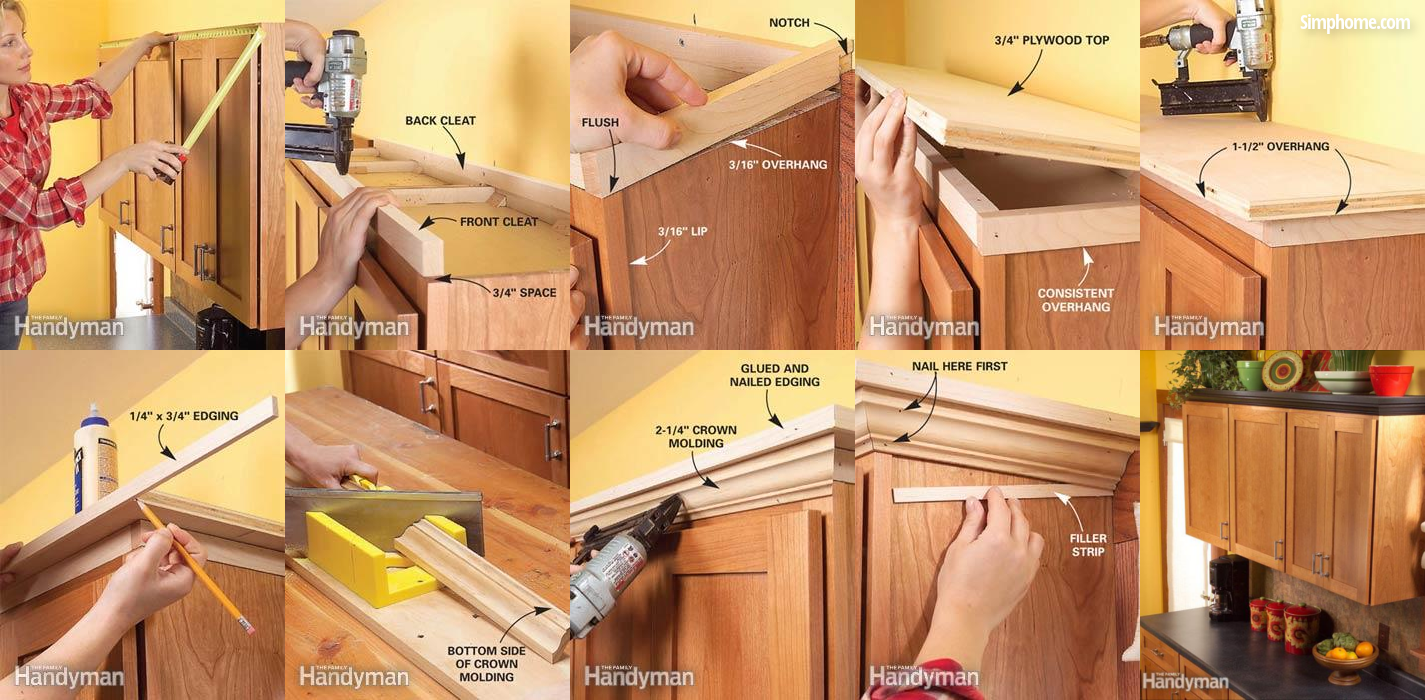
Done, now you can share this post to anyone close to you in social media. Thank you in advance.
Or do it later and tell them that they can also learn about next décor ideas too
DIY HOME DECOR IDEAS USING TIN CAN:
5 Smart DIY Tin Can Organizer Ideas That Don’t Look Cheap:
Do a little hunt around your house for random empty tin cans because these teeny-tiny things here still can serve purposes if you re purpose them right. Next you are going to learn smart DIY Tin Can organizer that I don’t look crap. Sorry I mean, Cheap.
1. As Gold Pencil Holder
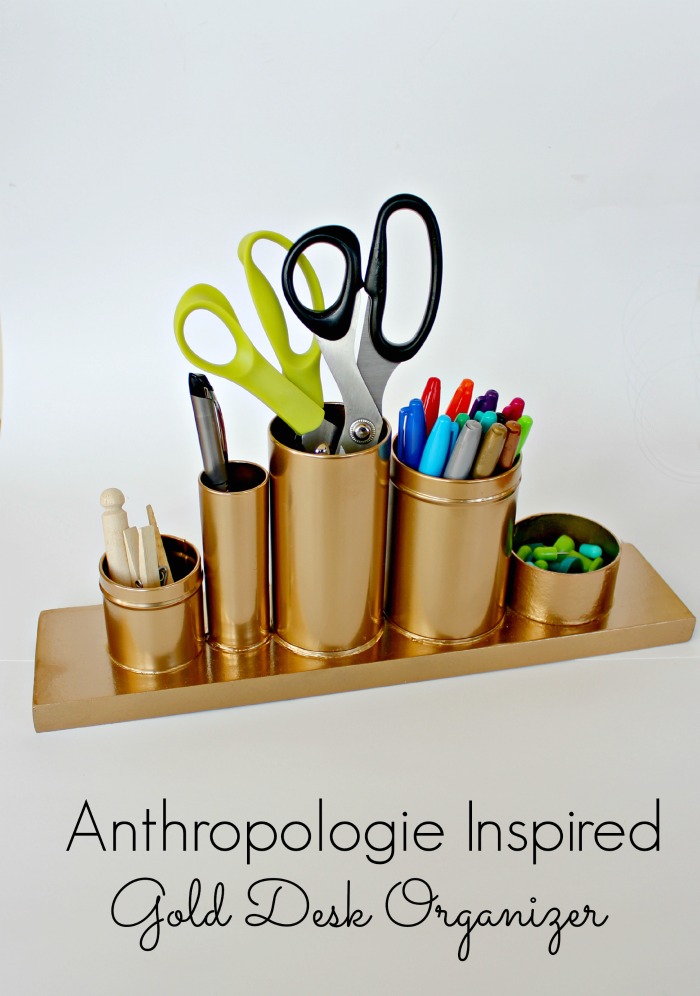
Turn your tin cans into a pencil holder and coat them in gold spray paint so your friends won’t suspect a thing. Cut a spare board to size and sand it on all sides and edges. Glue the cans down on the board with liquid nails and let it dry. Paint your cups with several coats of gold spray paint. You might have to do 3 coats to completely cover wood grain on the board. Fill your new organizer with scissors, pens, highlights, and pencils! One of the many DIY tin can organizer ideas that don’t look cheap that’s totally worth trying. (via diyprojectsforteens)
2. As Tin Can Lanterns
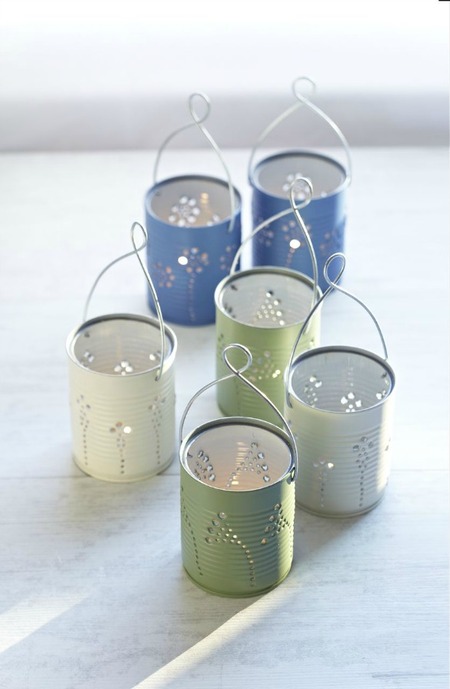
With only tin cans you can have some eye-catching lanterns. Remove the label (if your cans happen to have any) and pack the cans with sand, top up with water and freeze them overnight. Draw your design in a piece of paper to fit the size of the cans and tape in place. Put the cans on the sandbag and punch holes in them. Put them in the fridge for 30 minutes after each 10 minutes of work so they remain solid. Punch a pair of holes opposite each other 3/8 in. (1 cm) below the top of the cans for fitting the handle. Remove the sand and make a handle out of a 10 in (25 cm) length of a wire. Fill the cans with newspaper and spray paint them evenly and attach the handle once they are dry. (via craftfoxes)
3. Flower Vase Ideas
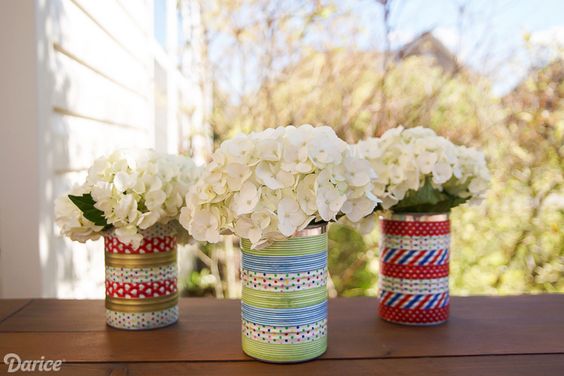
With only empty cans and place-mat, you can have your own vase. First, decide how tall and wide you want your vase to be and use scissors to cut the place-mat. Create a cylinder with the piece you cut and staple the ends together so they stay put in place. Cover the seam where the ends meet with Washi tape or electrical tape. Place the can inside of the cylinder and voila! Super cute and easy to make! (via darice)
4. As White Wine Racks
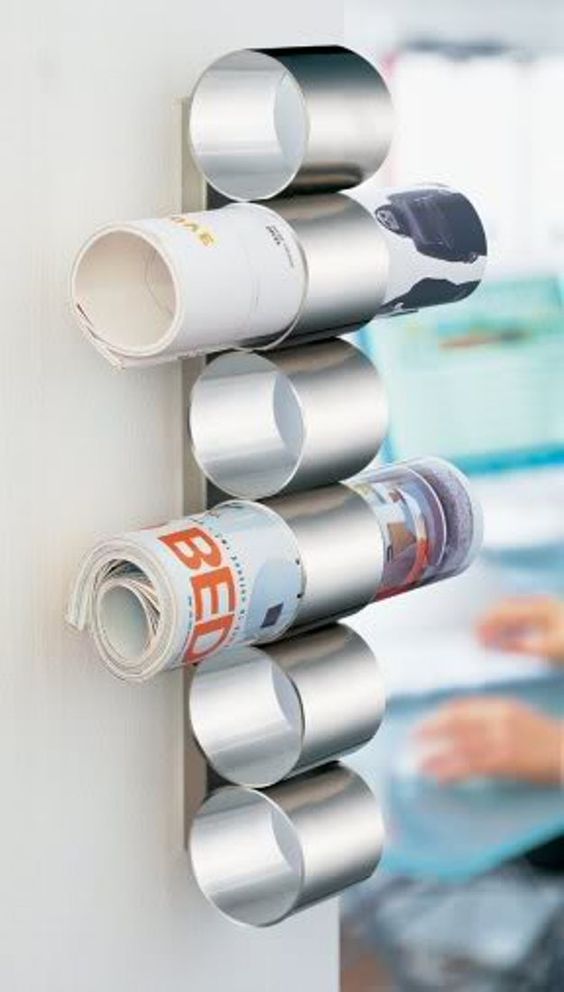
This is really practical if you are a fan of wine. The trick is to remove both ends of the can, and then arrange them however you like. Then stack and glue the cans to each other. Paint the cans beforehand if you want to make the rack look cuter. (via cornerstoneconfessions)
5. Rock Covered Bucket
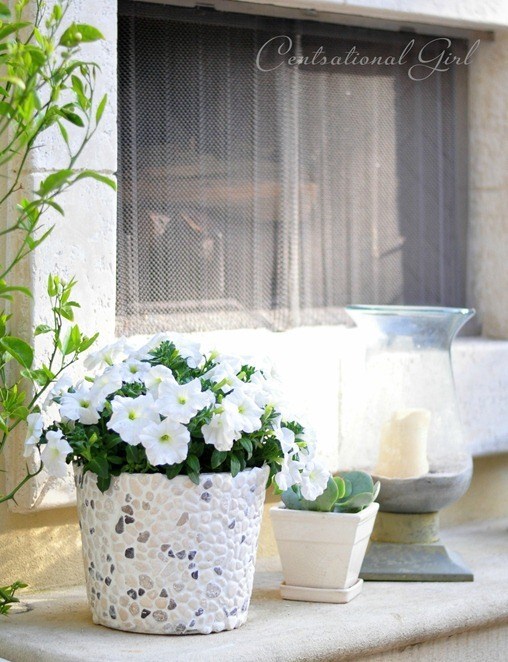
Instead of going to Home Depot and spend money on planters, you can make one on your own with a strong (not flimsy) metal can. Punch a few holes in the bottom with a hammer and a thick nail first for drainage. Apply a thick layer of thin set mortar then cut the mesh tile with a box cutter and layer the tile on the outside of the bucket. Mix up some grout and add it with a putty knife, then remove excess with a sponge. There you have it! A nice fully functioning planter ready to use. (via hgtv)
5 Clever DIY Tin Can Upcycling Ideas Worth Trying:
Empty cans? Sounds useless right? That might be right if you don’t feel like putting on your thinking hat. Don’t throw your coffee cans and put them to organizational use.
6. Hang Your Spatula
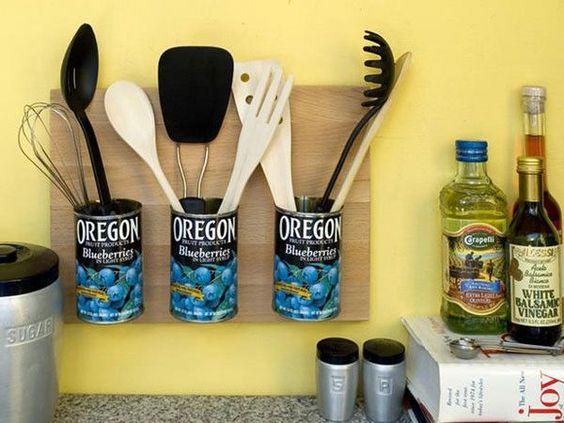
Instead of hoarding all your kitchen accoutrements in a rack or inside a cabinet, make your own cooking utensil holder out of tin cans. Don’t throw your empty blueberry cans and put them to organizational use by bolting them to a wooden cutting board with a frame hanger on the back. Mount the board on the wall near the stove so your spatula will always be within your reach when cooking! Make your cooking activity with this DIY tin can up-cycling idea worth trying at home. (via terra)
7. Chic Design Placemat Vases
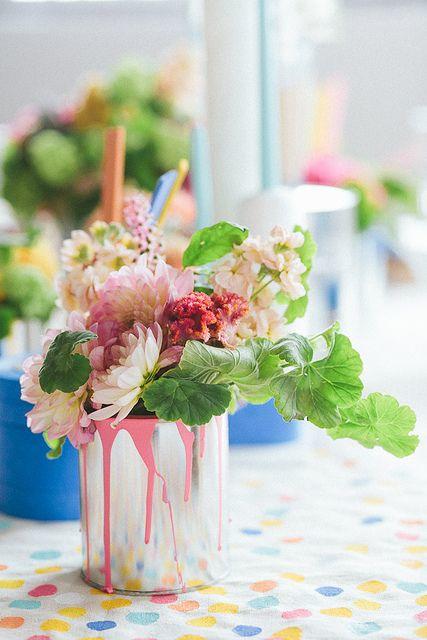
Glass vases are sometimes pricey but you want to put your flowers in a beautiful and decorative container. Don’t worry, with only empty cans and placemat, you can have your own vase. First, decide how tall and wide you want your vase to be and use scissors to cut the placemat. Create a cylinder with the piece you cut and staple the ends together so they stay put in place. Cover the seam where the ends meet with washi tape or electrical tape. Place the can inside of the cylinder and voila! Super cute and easy to make! (via pinterest)
8. Tin Can Lamp
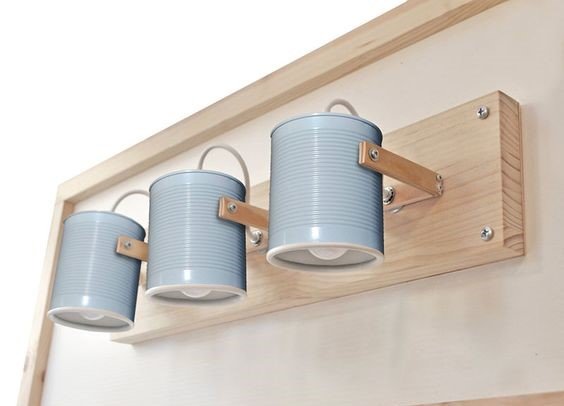
Yep! You read that right. If you want to do a little workout and craft at the same time then this idea is perfect for you. Use ice prick and a hammer to poke holes all over two large cans (except for the bottom of one). Drill a hole towards the bottom of the base can that’s the right size for your light kit to be inserted. Coat your cans with the color of your choice and let it dry. Put the light through the hole and screw in the light bulb from the inside. Adhere two cans together with liquid nails by simply squirting it along the edge of the base and place the top can on top of it. (via contemporist)
9. Can Clock
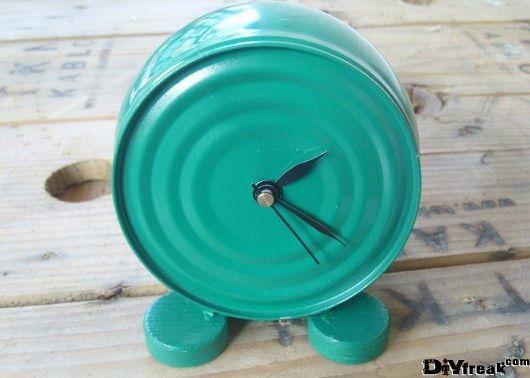
Who would’ve guessed that an empty tin can has the potential to be repurposed as a clock! Everyone can does this by simply attaching a couple of wooden legs to the sides of a can. Coat the jar and the legs with the color of your choice. The last step is simply insert a clock mechanism inside the can and there you go! A cute little clock you can place on your nightstand. (via buzzfeed)
10. Plant Markers
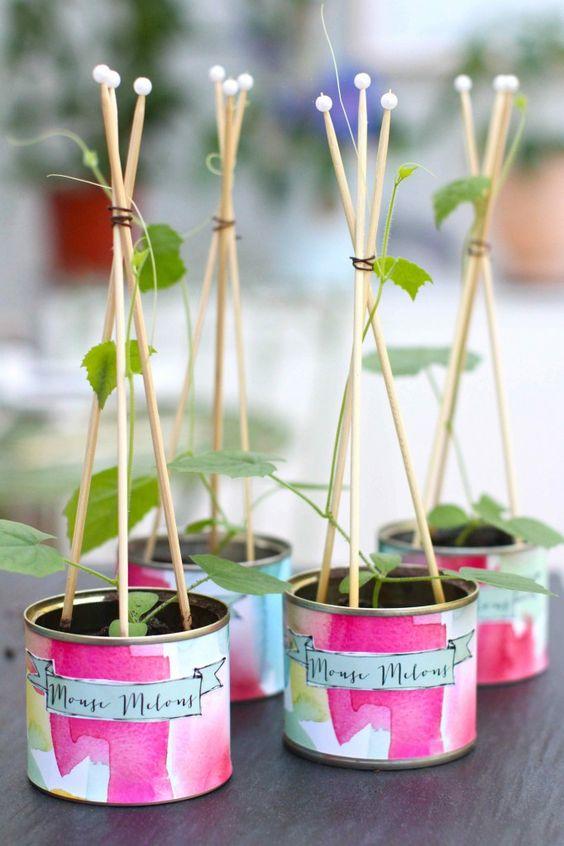
This is a simple thing but is totally worth trying for everyone who has a slight tendency to forget things all the time. Cut out strips from an aluminum can, then write the names of your plants on a piece of paper. Trace the lettering into the aluminum strips and trim the edges so you can stick it into the ground. This applies for cheese markers too! (via katescreativespace)
5 Creative Storage Ideas From Tin Can:
These little things still serve quite a lot of purposes even when the contents are already gone. Put on your thinking hat and get a little creative with tin cans for your own organizational use. With slight tweaks here and there, you can repurpose them into versatile storage.
11. Stash Your Spatula
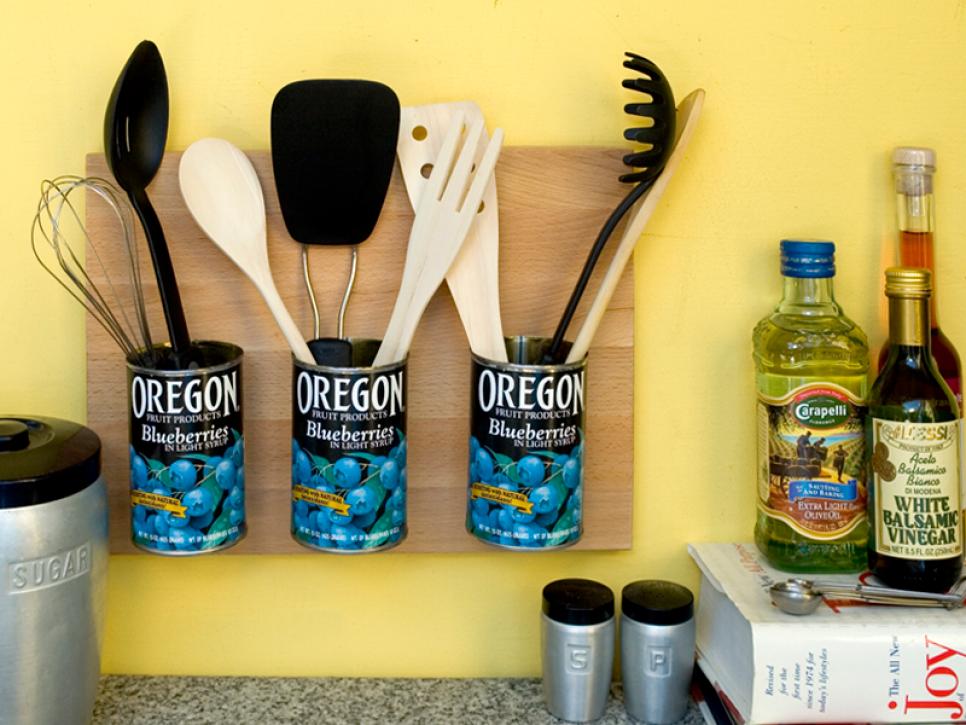
Your pie-cans are perfect for storing your cooking utensils. Bolt three striking cans into a wooden cutting board and secure them with a frame hanger on the back. Mount the board on the wall near the stove for easier access when cooking. Of course, you can opt to peel the label off and wrap the cans in a pretty floral wrapping for a more beautiful display. This creative storage idea from tin can will only take a half hour at most out of your schedule.
12. Clutter Cups
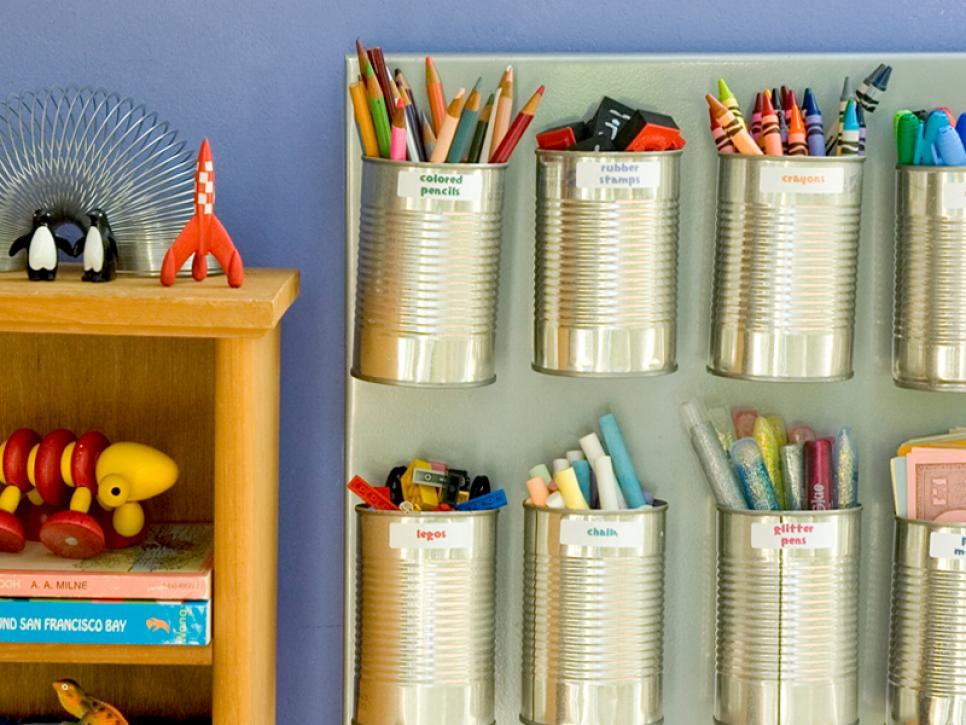
Your pens, highlights and coloring pencils are scattered to the four winds? Sort them out with tin cans and make your bedroom a little more organized. Attach a heavy-duty magnet to a soup can with hot-glue and stick it to a steel cookie sheet. You can decide for yourself how many cans you will stick on the sheet but we recommend that you get 10 of them. This simple project is useful if you happen to have a kid. Hang it on your kid’s bedroom using a plate hanger and use the cans to hold crayons, chalk, pencils, or even small toys. Label each can for easy identification.
13. Genius Dividers
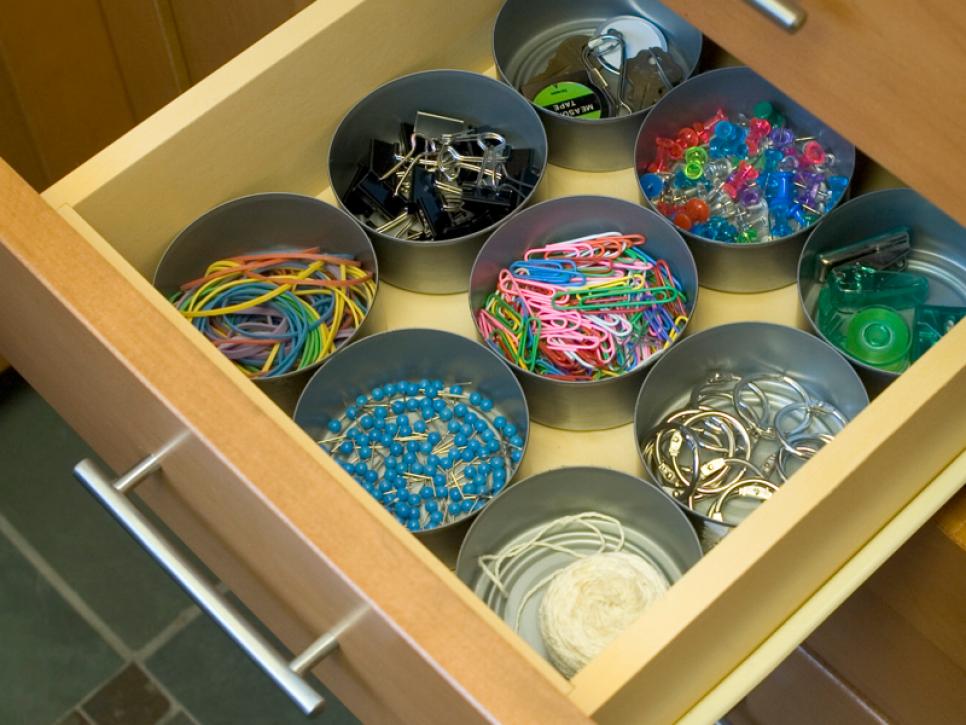
Every homeowner always have one of their drawers stacked with trinkets and useless junk. It gets irritating when you have to spend a lot of time searching for your keys inside a drawer full of knick-knacks. Get every item sorted out by cleaning a dozen of tuna cans and nestling them into a drawer. Each container can be used to store rubber bands, clips, thumbtacks or knitting supplies.
14. Organize Your Closet
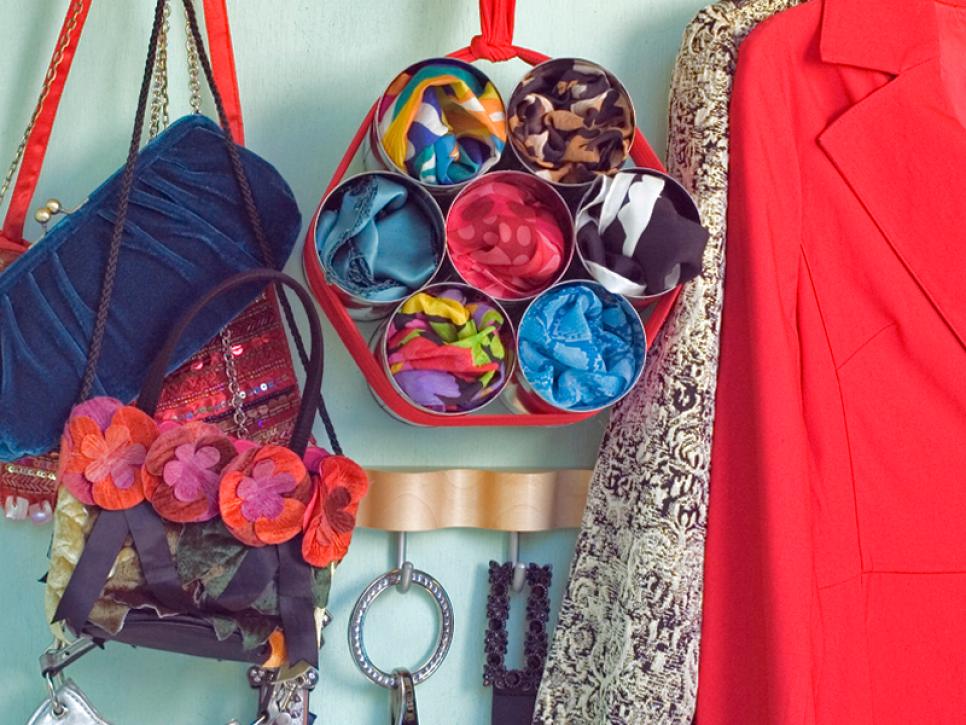
Who would think that cans can be great storage for something that is usually stored in a closet? By simply arranging seven sleek soup cans in a tight circle with one can on the center and wrapping a long sash around the bundle of cans, you can display your scarves inside the cups. Secure the bundle with a knot at the top, then hang it on the wall. Not only will you get a free organizer but it also adds stylish organization to your wall or closet, whenever you decide to display it!
15. Cute Towel Holder
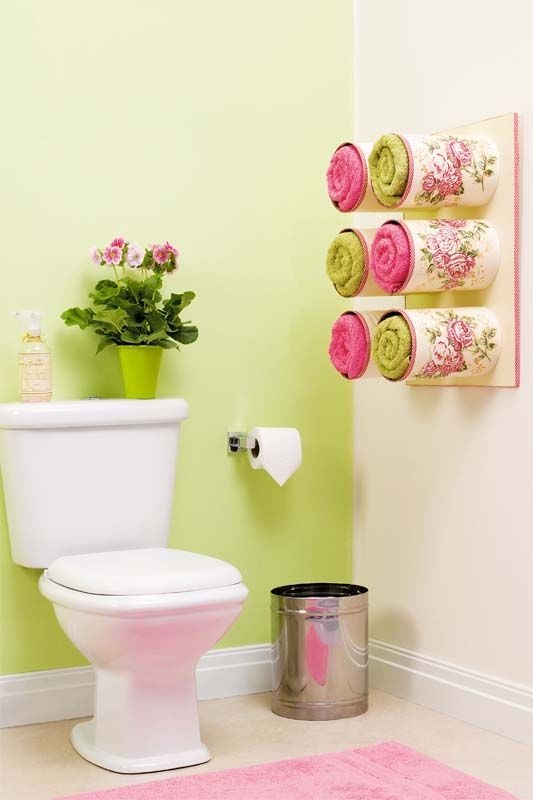
If you think hanging your towels on the back of your bathroom door makes the room seem messy or that the distance between your door and the bathtub is not convenient for you, then try this easy DIY towel storage made out of tin cans! Repurpose 6 (it can be more or less than this) tin cans by hot-gluing the bottom of the cans to heavy-duty magnets. Then attach them on a steel or iron board and mount the board into the wall near the bathtub with bolts. Wrap your cans in floral wallpaper for a cute look.