If your home looks boring and lifeless, it’s time for a major overhaul. Gladly enough, we have some affordable DIY solutions for you that can put even the most oddly-shaped corner of your room into some practical use. This isn’t to say that your home interior will rival a celebrity’s home worth millions of dollars. But, it will definitely be worth the minimal time, effort, and investment that goes into it.
So, are you ready to add some homemade touch to your beloved home without shaving off a lot of money? Since vintage decors are hot right now, let’s explore 60 vintage and shabby chic décor ideas to spice up your home in the easiest and fastest way possible without spoiling your budget. Yes, all the vintage décor ideas discussed below are inexpensive and easy to realize. In fact, you will be surprised how some degree of organizational attention can make your regular home items a conversation piece without shaving off top dollars on them.
FYI, This topic composes 4 different sections: A video (which you are about to see), Top 20 ideas, 3 top 5 relevant ideas, and 4 relevant lists I already upload earlier. Totally, this blog has published 60 vintage/shabby decor ideas so far.
🔊20 DIY Vintage Home Decor Video:
List Entries:
30 DIY Rustic Furniture Projects
25 DIY Shabby Chic Décor tutorials
15 DIY Rustic Furniture Projects for Your Bathroom
10 DIY Rustic Furniture Projects for Small Kitchen
10 DIY Rustic Bathroom Decor Ideas
20. Creative Globe Recycling
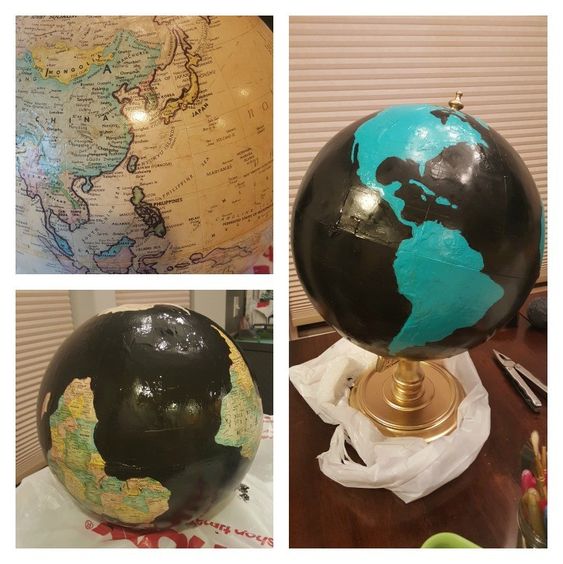 Don’t retire your old globe yet. You can use the store-bought globe and give it a vintage look within a matter of few hours even if you are someone with dinosaur-dated skills. It’s a brilliant and inexpensive way to add an extra spark to the desk where the globe currently rests. The best part is that you don’t need any forward-thinking technology or tools to get the job done.
All you need is some paint and regular markers to make a conventional globe into a wonder-struck item in the middle of an ordinary day. Not your cup of tea? Don’t fret yet! I swear; you won’t break a sweat to give life to this unique creation. Just pull out your black marker from the shelf to outline the continents on the globe.
Then, apply a few coats of black paint on the ocean area. Once the paint dries off, fill the continents with teal color, and allow it to dry for a couple of hours. Spray paint the stand with any color of your choice. Finally, add some sort of sayings to the shaded black area of the globe. That’s it! For a few hours’ worth of time and effort, you will end up with a fantastic self-creation that will really stand out at your desk.
19. Personalized DIY Map Magnets
(Play video for more presentation)
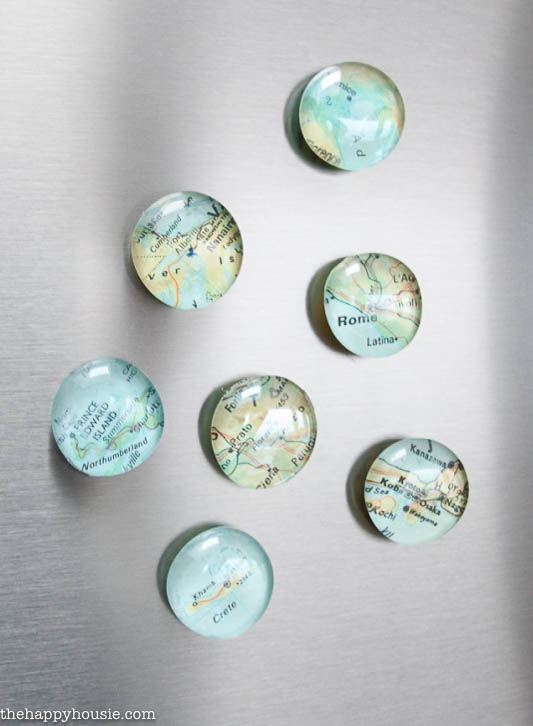
If you are someone who loves map related things, here’s another DIY project along the same lines. These personalized miniature map magnets are simple and fun to create. Even an eight-year-old will be able to knock this out of the park. After all, how hard is it to cut parts of a map and plant them to a magnet? My budget for this little DIY project is nothing more than a few dollars.
Of course, I make sure to get strong enough magnets that can sustain the weight of the glass rocks and the paper. I usually purchase the round glass rocks from the floral section of the dollar store. Once they are acquired, I stick the map cut out on them. Then, I added another layer of glue to the backside of the glass rock to stick them to the magnet. For a few minutes of work, I end up with these adorable little jewels.
18. Personalized Photo Map Wall Board
 Let’s stick to the map theme because this one is a killer. Truthfully speaking, I haven’t come across any other DIY idea that can rival this one to track and cherish my travel memories. All I literally do is cut photos from my trips and paste them on the places that I have visited. Easy as pie, isn’t it?
As a common-sense tip, remember to cut your pictures in the shape of the states/countries from the map of the country or world you want to do. Frankly speaking, it’s a highly rewarding and fulfilling experience to witness the map fill up with life-altering travel pictures. What better way to recall the special days of your life?
17.World Map Tagging Wall Art
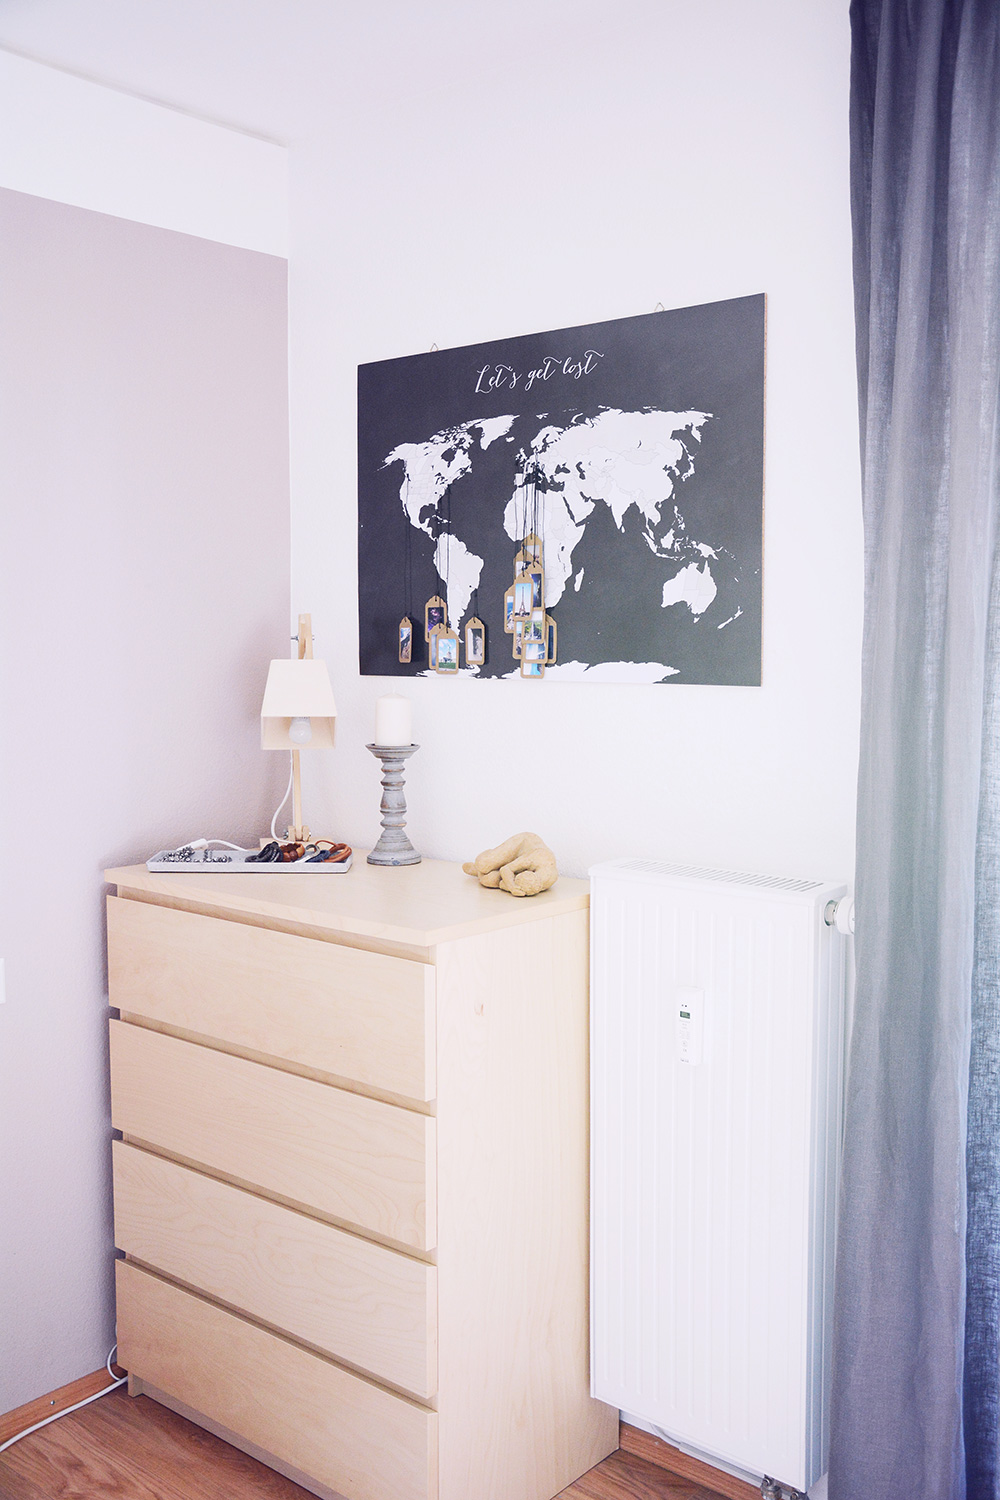 Let’s not put an end to the map saga for a little while because of its user-friendly and budget-friendly nature. The world map tagging wall art we are about to discuss now has always been an amazing conversation starter in my living room. At its core, it’s just a world map with push pins on it that highlights the places that I have visited so far. Each pin has strings attached to it with my most beautiful travel photo tags.
Personally speaking, I found the wall art to be the best means to put myself on the world map in my own unique style. It’s also been an inspiration for me to travel more. I often imagine where I will be traveling next. By the way, framed or unframed, both will work great. Of course, if you decide to frame the map, keep in mind that it will prove to be the most expensive part of this DIY project. That said, it will look so much cooler in a frame.
16.Homesick Map Art
 If you have an empty wall to fill, this homesick map art should be on your radar. Not only will it prove to be a talking point, but it will also help you beat homesick blues. If done well, it won’t look one bit handmade. All you need is a matted frame, cardstock paper (to fit inside the frame), and preferred material (sand, dirt, grass) as the main ingredient for this DIY project.
For example, I have used sand to depict California, grass for Montana, and so on. You will begin by drawing the shape of the map on a cardstock paper with a glue. Then, you will sprinkle the dirt, grass, or sand on the glue drawing and wait for it to dry. Next, you will shake off the excess dirt, grass, etc, so that you are left with the desired shape of the map. Finally, you will plant the paper in the mitted frame.
That’s it! The rustic look of this homesick map art will prove to be a certain people-pleaser.
15. H&M HACK: Wall Hanging DIY

To put the words into action, you will need to get a cotton table runner that catches your eye, put your sewing machine to work, and end up with display-worthy results. The best part is that you can get the job done within a few hours without knowing how to weave. No hardcore measurements, markings, or talent needed at all. And, you will still be able to nail this thing!
14. DIY Geometric Lamp Decor
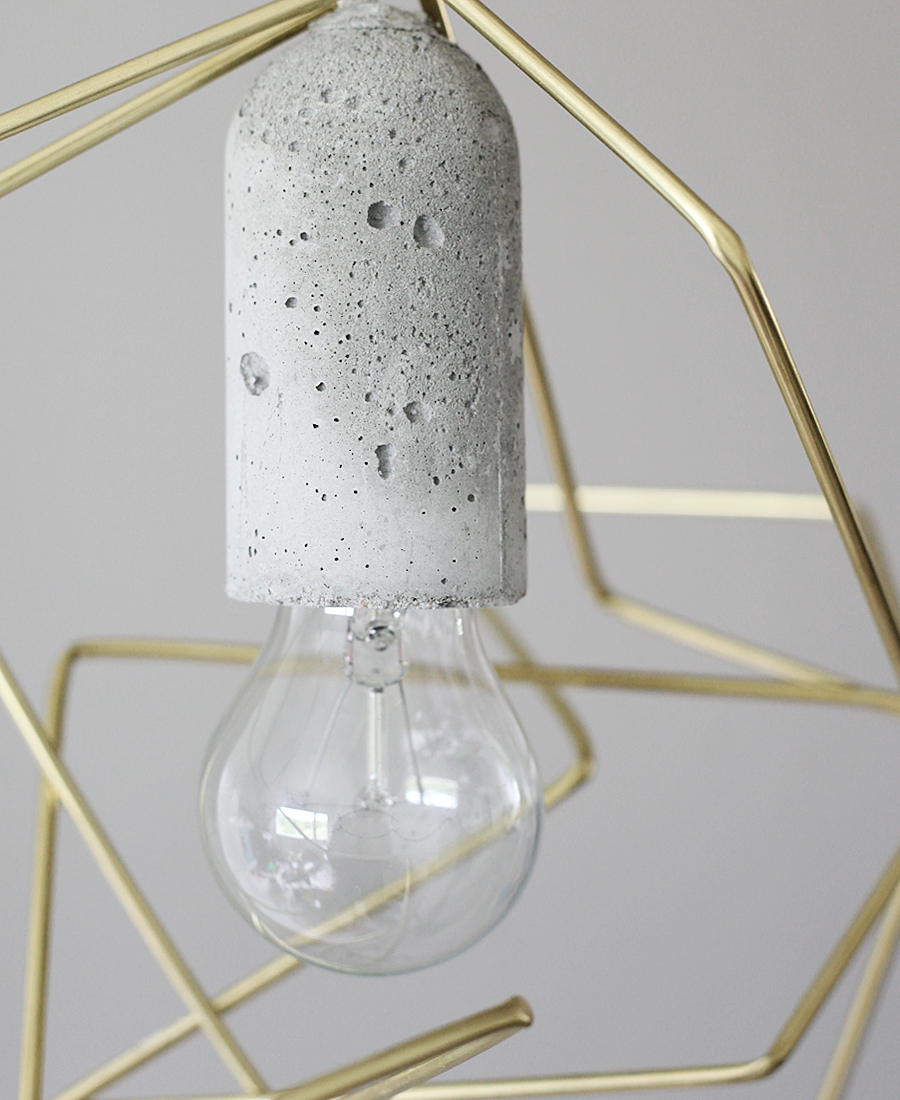 At first glance, this might seem like a complex science project. But, you won’t believe how easily you can create a highly adorable and functional geometric lamp decor. The only major effort from your part would be a visit to the hardware store to procure four thin and hollow metal tubes. Once those are acquired, you need to simply twist them into many folds to create a unique shape around the bulb. Of course, don’t forget to tie the tube ends to ensure that the structure stays in place at all times.
Once this is done, place the light bulb into the cage-like created structure. Right off the bat, you will notice that the lampshade has a mixed vintage look to it, which will garner a lot of eyeballs and compliments from onlookers.
13. DIY Minimal Floor Mirror Project
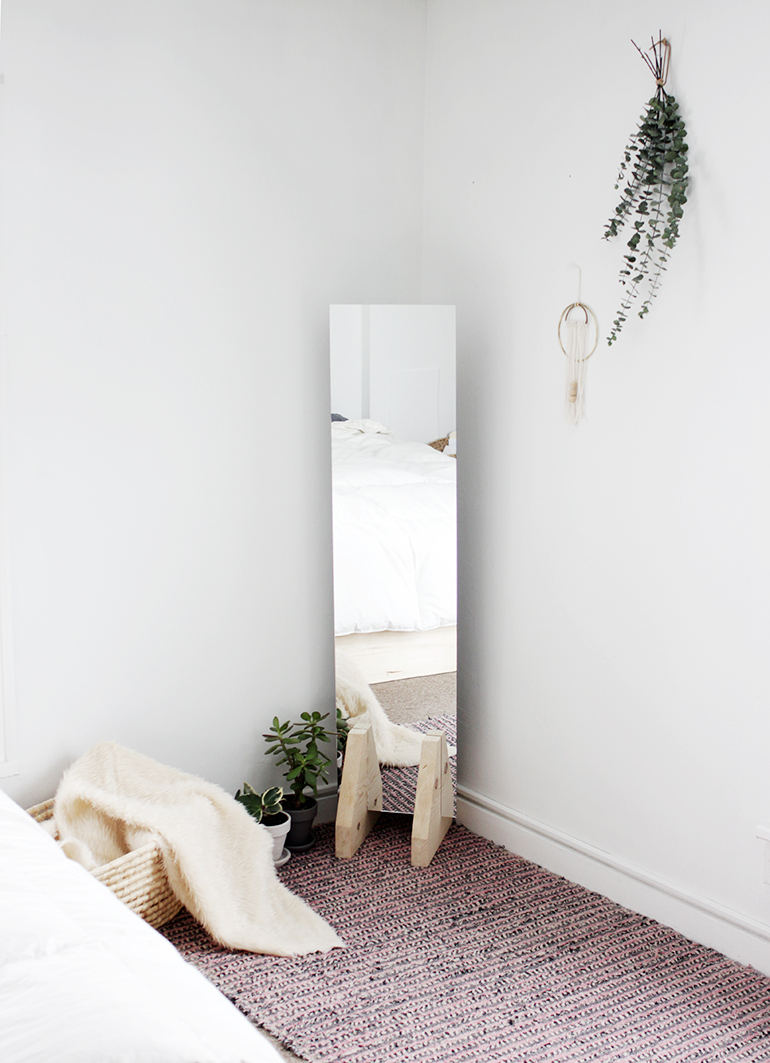 If you are a fan of minimalist home décor, then this DIY floor mirror should be right up your alley. It’s a semi-gigantic floor mirror without the gigantic store price. This DIY project can be completed in one afternoon at a fraction of the cost of a store-bought mirror. And, you would need only a few basic tools to get this thing done.
First up, think of a board to attach the mirror. You will need 12″ x 12″ pieces of wood.
Measure and cut the wood to fit the mirror. Also, sand the edges (if needed) to create a sturdy home for the bad boy.
Once done, slide the mirror in the place. Apply glue on the back of the mirror while placing it on the wooden structure so that the mirror stays in place at all times. Try it out; this mirror DIY project should be a lot of fun!
12. DIY Wall Clock
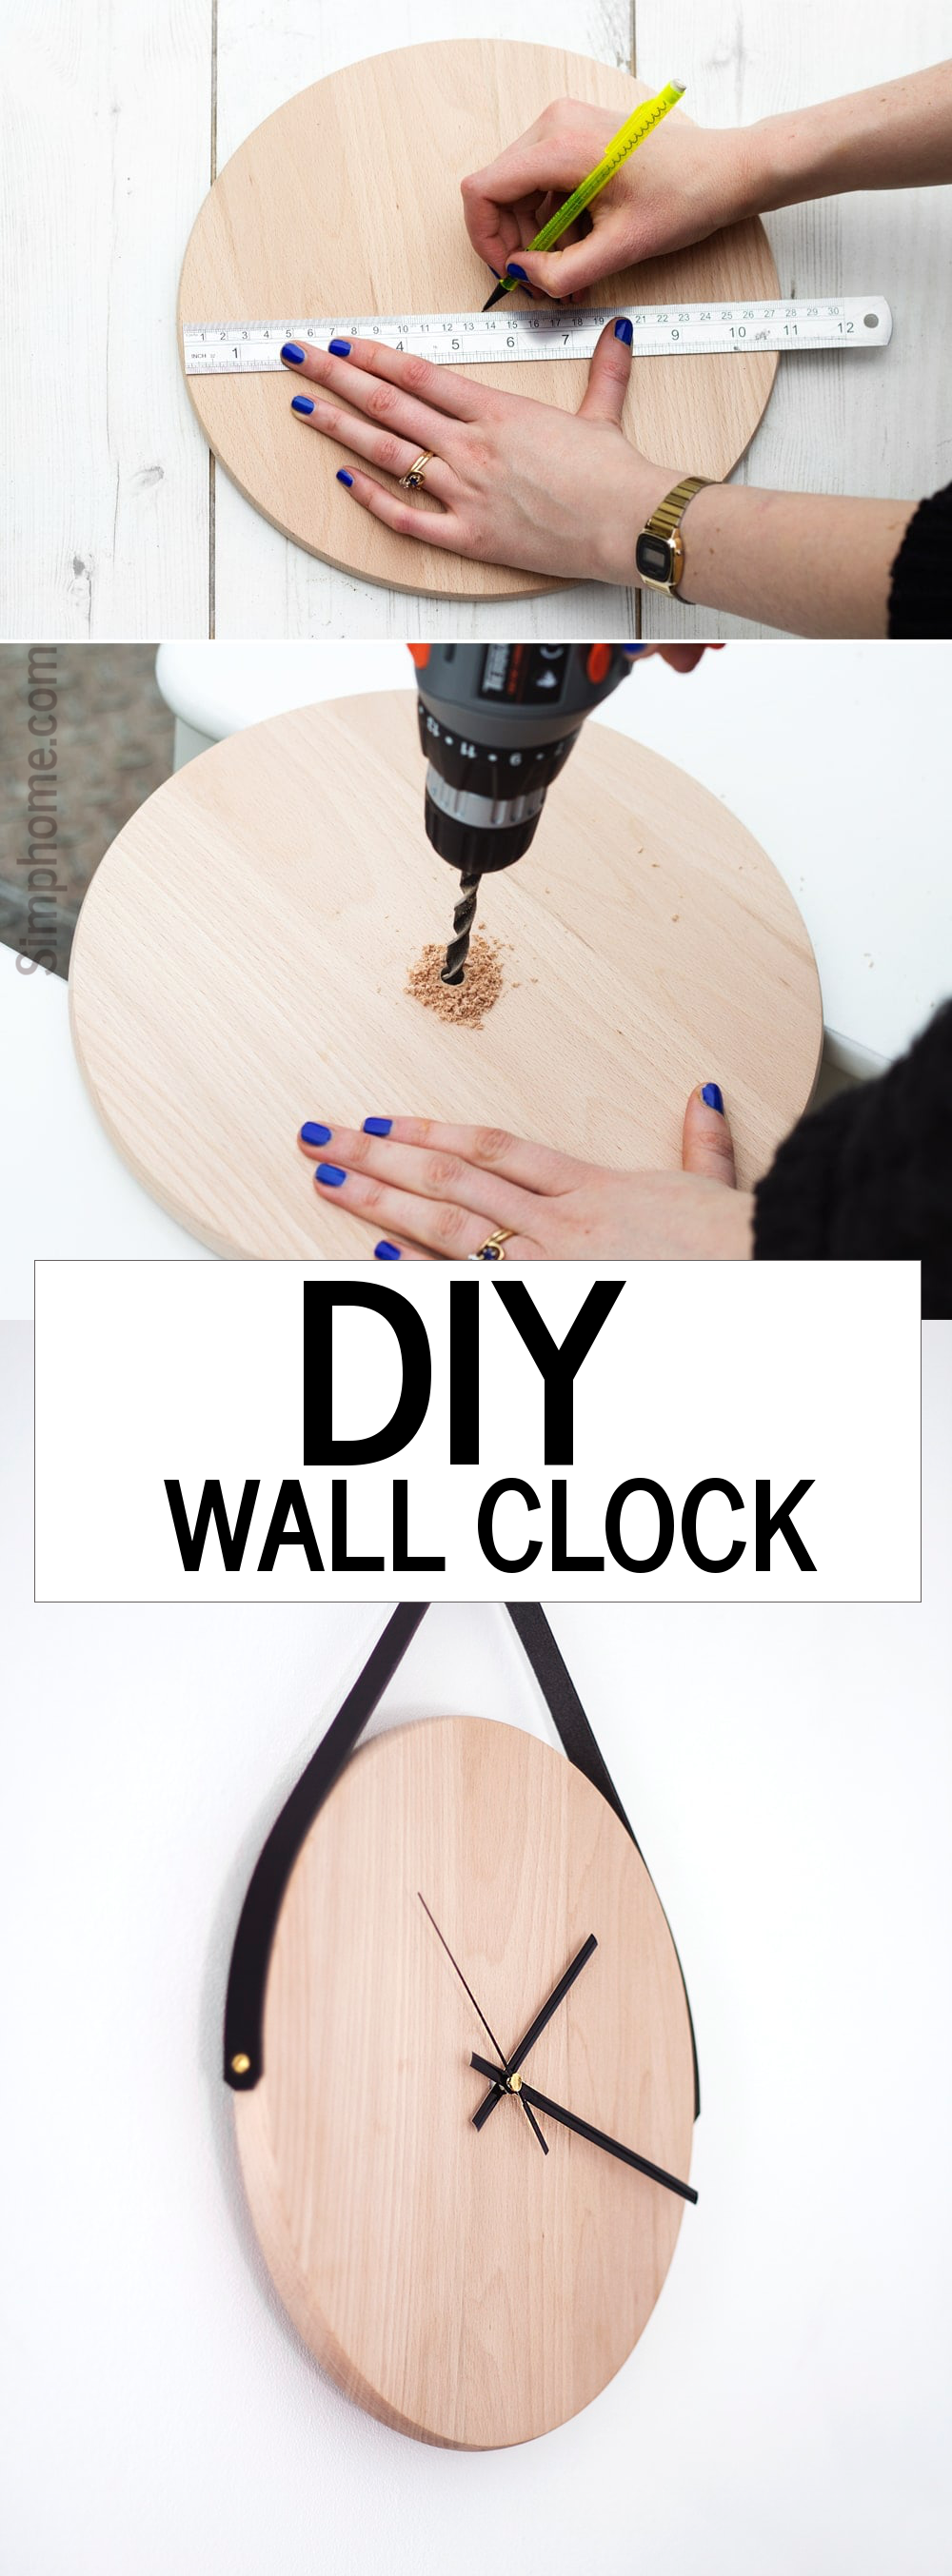 Guess what time it is? It’s time to get creative and build a customized clock with personality from the comforts of your home. The wooden clock in question is easy to build with just a few supplies.
You can start by drilling a hole at the center of the round wooden board. Then, cut the wooden board from behind to fix the clock mechanism. Thread the clock movement piece through the center hole and follow the basic instructions you received to put together the hands of the clock. To attach the clock, you can make use of an old belt. Finally, hang it and admire your work with pride.
11. DIY Beverage Cart
 Be prepared to raise the bar to make a glamorous cocktail station that will inspire you to wheel your entire soft drinks and cola collection to the expecting company. To make this industrial-inspired beverage cart, you will have to essentially cut and prep the lumber for the handles, trays, and crosspieces with a saw. The beautiful angle iron will look great for the legs.
The casters on the bottom will help you move the cart around like a breeze. The finished product will turn out to be a satisfaction bomb. As you can see from the image above, the cart can hold quite a lot of beverages. So, load all your fresh fruit juices, sip a drink, and pat your back for the fabulous job!
10. DIY Dip Dye Candleholder
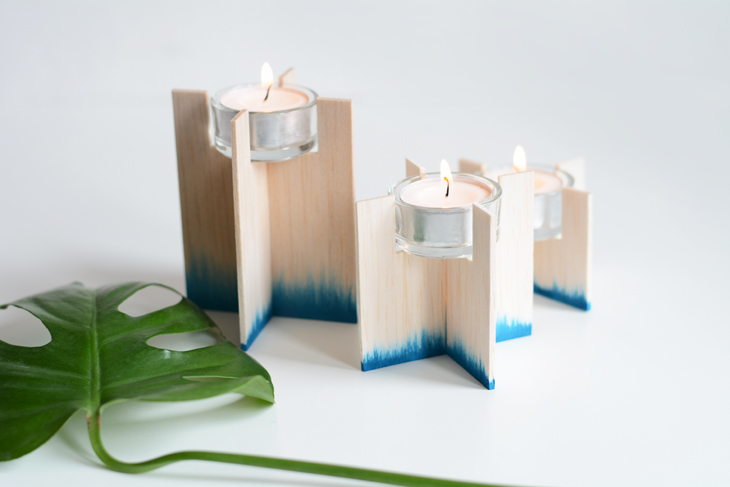 No one will ever know how little you spent to create this masterpiece. It’s a simple DIY project that you can do with things lying around in your house. For the wooden frame, I used some leftover Balsa wood (can be easily store-bought) that were sitting idle in my house for a few years. There are many ways you are cut the Balsa wood because it’s the easiest type of wood to work this. Because of its flexibility and lightweight, it’s highly used in architectural projects.
A 2.55 mm thick Balsa wood can do the trick over here. Paint the wood according to your liking. Once the wood is cut and painted in the desired shape and color, place the tealights in the jars and then populate the wooden candle holders.
Trust me: you will witness your space light up like never before!
9. Hoop Shelf DIY!
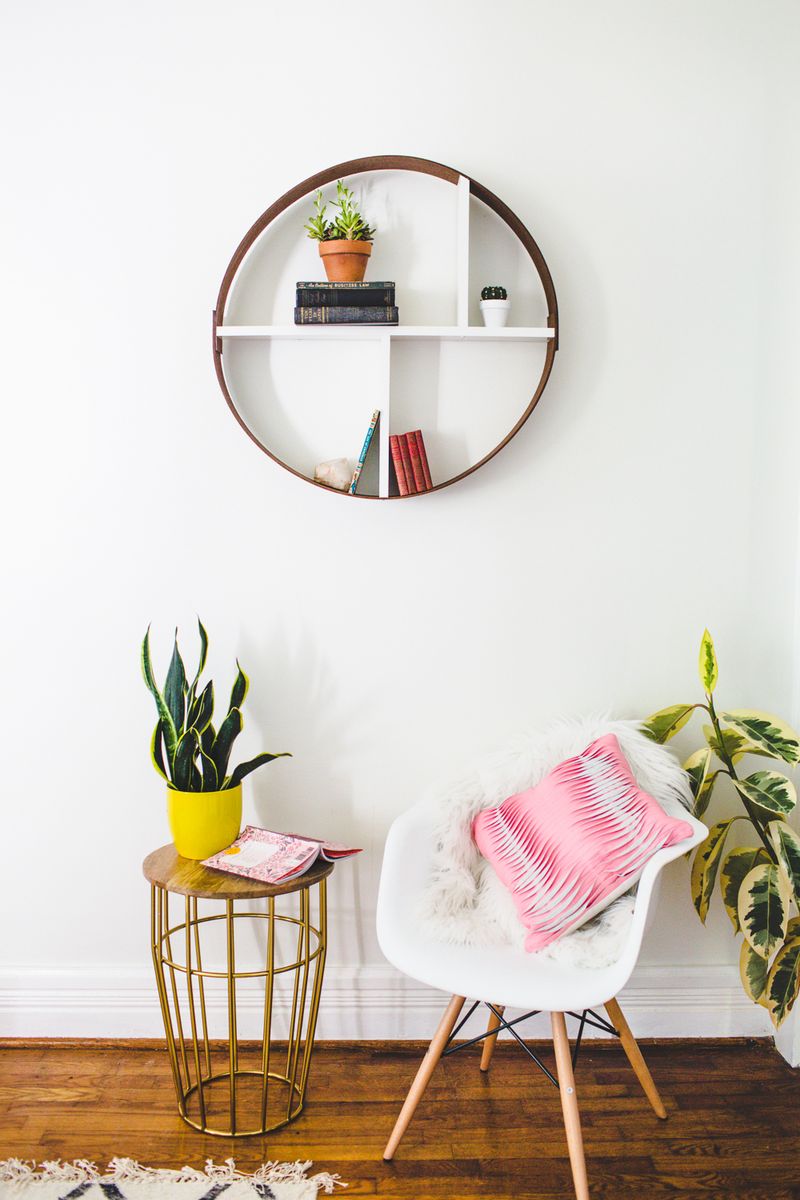 Enhance any wall within an hour with this amazing and budget-friendly hoop shelf. This hoop shelf has a touch of vintage style to it, and it provides more storage room without taking any extra space. Let’s learn the simple way to build it with affordable supplies.
To begin with, you will have to create a sturdy circle out of a wood to support whatever objects are going to be placed on it. Position a piece of wood at the center of the round shelf. Also, insert two wooden ledges inside the circle and stick them with hot glue. Press them well to make sure that they are secure or put a screw or nail on the wall. If you want, you can paint the outside of the shelf, or you can go with the natural look of the wood. In either case, you will be highly pleased with the end result. From books to flower pots, you can display a lot of things in this wonderful creation of yours!
8. DIY Leather Magazine Holder
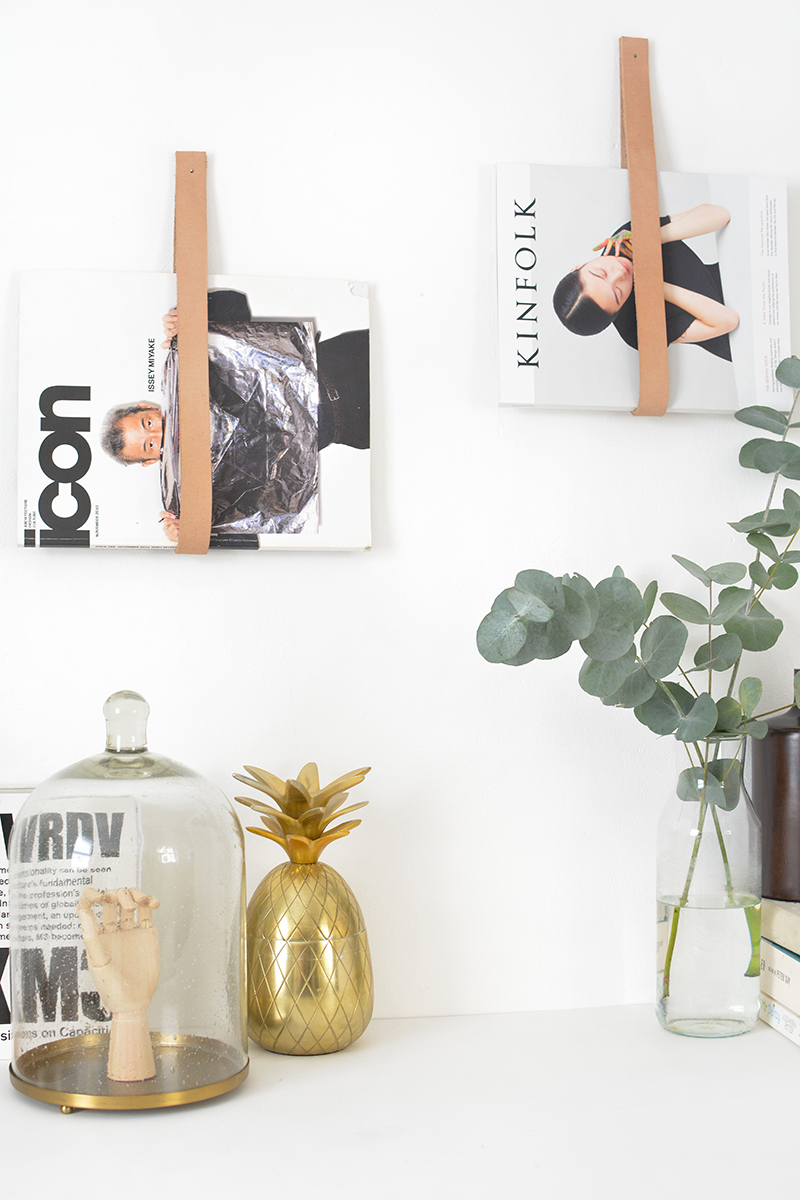 Organize your magazines with this stylish DIY leather magazine holder. This DIY project makes use of leather straps, which can be easily ordered online. Fold the strap into half and punch two small holes at the opposite ends so that you can hammer a nail through them to secure them to the wall. Then, slip the magazines to display them in a stylish manner. If you read a lot, now you can have ample storage space for loads of them. Don’t let the ultra-simple work fool you. This magazine holder looks cool and elegant in almost every home décor you can think about.
7. Double Basic Table to Rolling Beverage Cart DIY
Serve your drinks in vintage style by turning two regular tables into a rolling beverage cart that will be good enough to provoke guests to admire your DIY skills. For this amazing creation, you will have to build the top and bottom frames by planting one table over the other with the screws and hooks so that the final product looks like the image above. The visible top surface can be covered with any attractive material of your choice. Of course, don’t forget to add a towel bar as per the installation instructions.
Add casters as well by using your nail gun. Including the hardware and everything, this homemade beverage cart will cost you less than half of what you would pay for it in a store.
The best part is that she will turn out to be a beauty.
(To know more play video and follow hyperlink)
6. DIY: Matt’s Woven Leather Stool
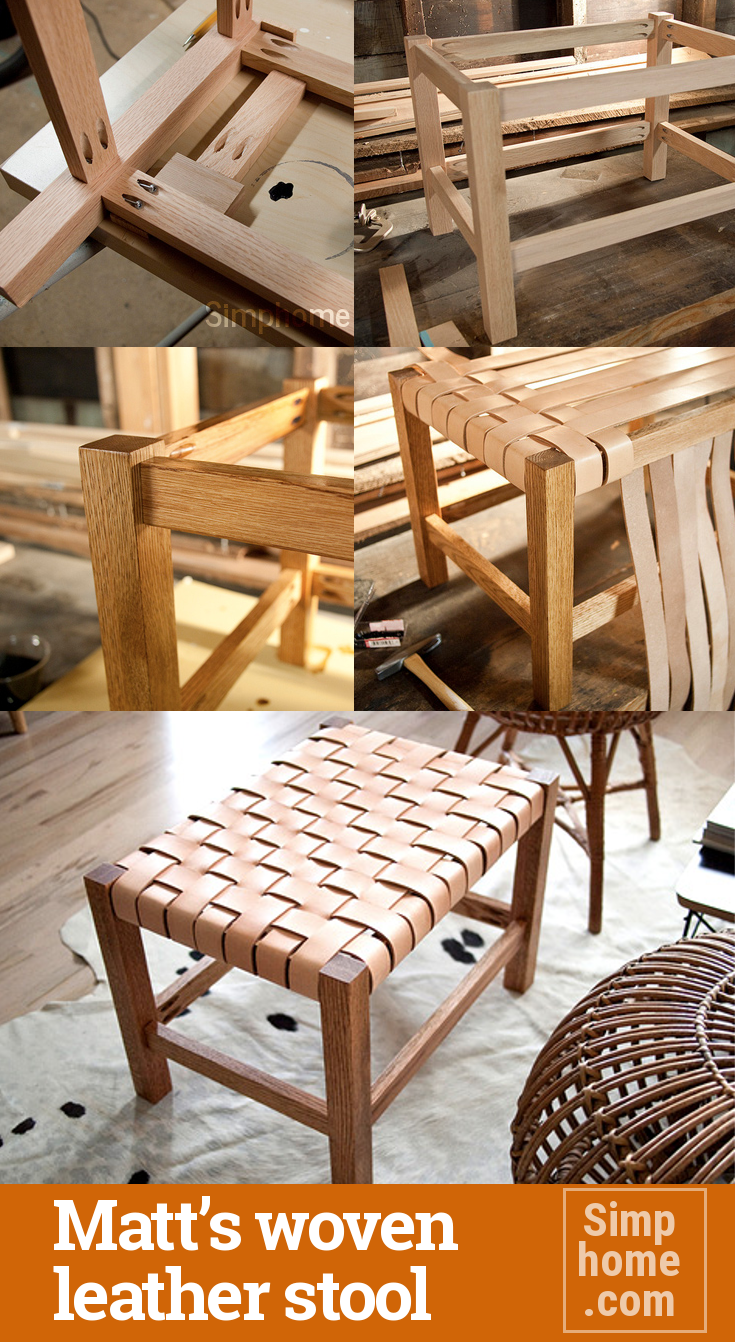 As you can tell from the image, this timeless stool looks so cool that you can never tell whether it’s store-bought or not. Better yet, it’s a lot easier to build one from scratch than what it appears from the surface. The frame by itself is a rectangular bench that is made from wooden boards. The boards are sanded for a smooth furniture-grade finish. And, the leg pieces are attached with regular screws and hammer.
Finally, the leather straps are wrapped completely around the frame to prepare the seat. You can use the stool for holding books or as a breakfast tray. As a pro tip- don’t forget to maintain some gap between the leather straps. So, there you have it—a designer quality stool without casting a blind eye to your wallet.
5. DIY Mid Century Modern Coffee Table
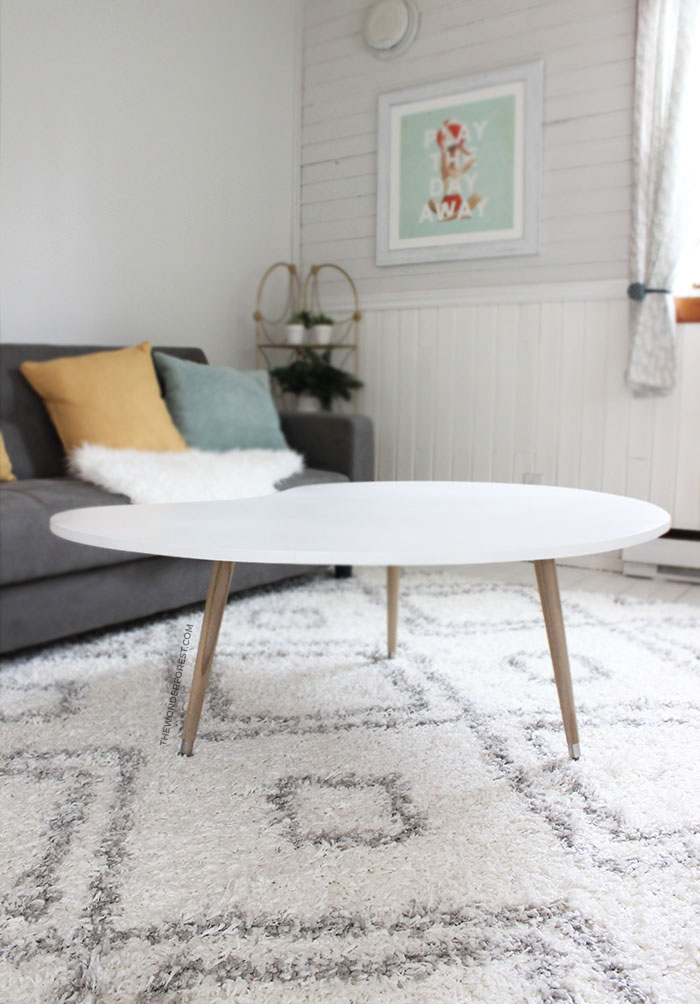 Are you keen on enjoying a cup of coffee on a self-made coffee table? What better way to showcase your DIY skills? Plus, it’s surprisingly easy to put together a coffee table in the middle of an ordinary day. The supplies required are minimal and shouldn’t cost you more than fifty dollars. Yes, fifty dollars and a few hours of labor for a forever beautiful coffee table. Not a bad trade, isn’t it?
To create a circular coffee table, begin by drawing a circle on a thick MDF sheet. Cut the shape with a jigsaw. Of course, sand the edges to take care of the weird curves. Then, drill holes at the bottom surface so that you can attach the legs. Once the legs are attached, wrap them up so that you can paint the top. Allow the paint to dry to enjoy a cup of coffee on the gorgeous table.
4. DIY Blush Pink Mid-Century Side Chair Makeover
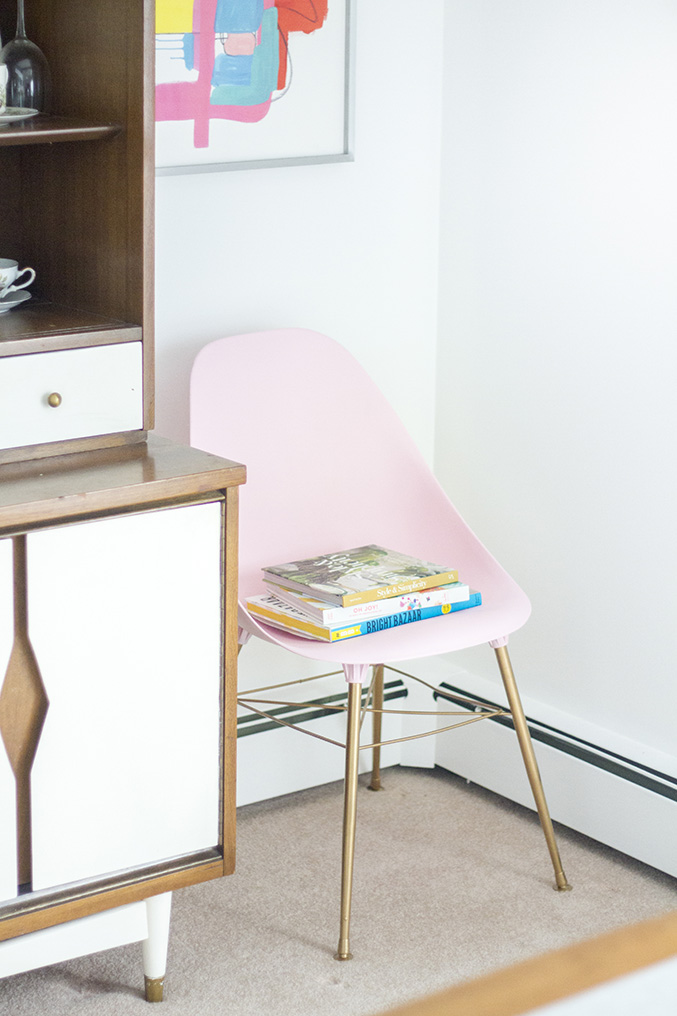 Who knew that a spray paint could completely transform a dull chair into a vibrant one without any fuss? You can start off this project by tidying up the used-chair with some alcohol-based cleaning solution. Then mask the plastic portion of the chair using a tape so that you can spray the metal portion with gold paint. Once done, allow it to dry overnight.
Then mask the metal portion (newly painted) of the chair so that you can spray paint the plastic area of the chair with pink or any other color of your choice. Once done, allow the paint to completely dry for a day so that you can enjoy your new throne to the fullest. As you can tell, all it took is some paint coating to completely transform an old chair into a vibrant beauty.
3. Nail Polish Marbling
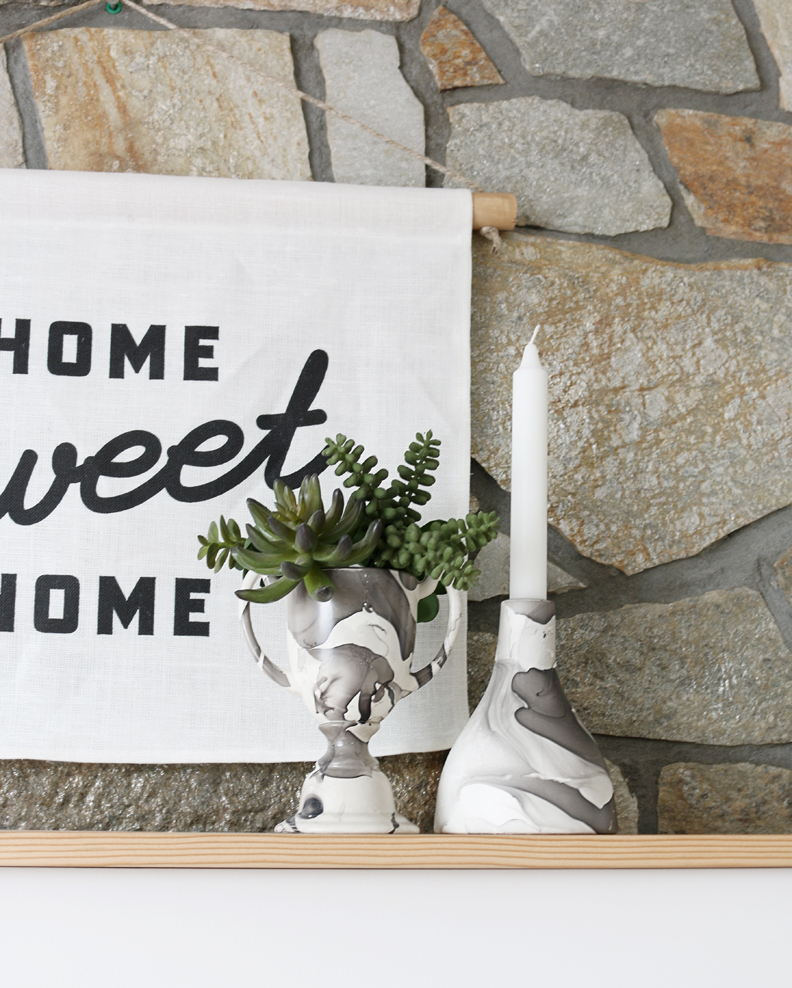 I love this! It’s a no-brainer DIY project that requires nail polish, water, and a container that’s large enough to accommodate the marbling object. Since nail polish doesn’t cost an arm and a leg, use a new one for a nice smooth finish. Add enough water in the container to submerge the object and begin dropping the nail polish. Swirl the nail polish with a stick. Wait for a few seconds and dip the object across the nail polish on the water. Once the object picks up the color, place it on a piece of paper and allow it to dry.
The nail polish sticks really well. If you notice gaps in color, re-dip the object. You can make use of a cotton ball to remove any smudges. The final product will look like a beautiful, expensive investment. Anyone out there can totally pull this off like a pro!
2. Tiered Macrame Plant Hanger
Show your plants some love with this tiered Macrame plant hanger. It will grace your space like nobody’s business. This tiered plant hanger uses square and half knots to create the design. So, you won’t have to fry your brain over this DIY. It hangs at two levels, and you should be able to handle this one easily. Keep in mind that plant hanger is made of cotton rope, which makes it flexible by nature. So, you can easily fit flower pots of different shapes and sizes.
Just look for a lovely window, where you can hang it from the ceiling to showcase your craft. Make it once and love it for several years and beyond. Trust me; it’s a satisfying craft!
(Play Video To Preview This Topic)
1. Multi-Purpose Vintage Phone-Charging Lamp DIY
(Play video for more presentation)
At first glance, it might seem that you will need an engineering degree to pull this thing off. But, this notion is far from the truth. There are only three steps to this intimidating project. All you have to do is assemble the outside part, which essentially involves you screwing things together. Then, comes the wiring part, which is insanely easy. Finally, the cakewalk part-you decorate it the way you like.
Beyond this, you don’t have to do anything. You don’t have to cut wood, drill a hole, or do anything else along the same lines. Plus, you can easily get all the parts for the project from a local hardware store—lightbulb, USB wall charger, power cord, light socket, outer plate, box, light cord, nipple, locknut, and washer. Once everything is put together, it will light up the bulb and invite a bright smile on your face!
Idea No.21- No.25:
There are some smart and creative vintage shabby chic décor ideas for small homeowners, which can test out your creative skills to the next level. These works are great to deliver stunning outcome although they may require extra work and efforts. But if you are patient enough and you are determined enough, the final result will be rewarding – at least for your home décor aspect. Next, I am giving you 5 Vintage Shabby chic Décor Ideas for Small Homeowners: Some Great Ideas.
21. Vintage Lamp
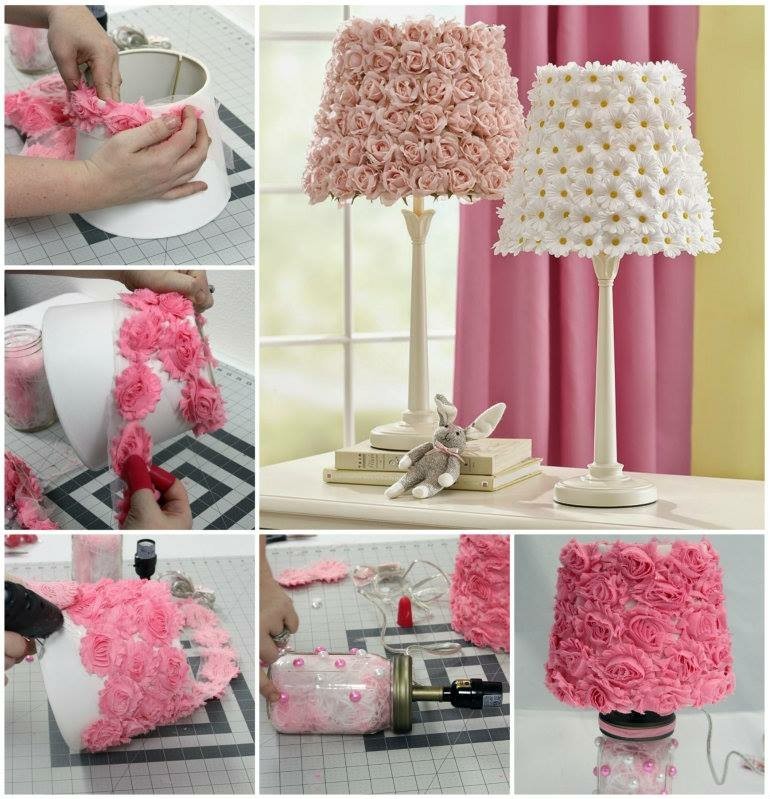 If you have plain and unattractive lamp, why not improving it to the higher ground with vintage look? The simplest way is to buy small flowers and attach them on transparent tape. Once you are done, you can circle the tape around the lamp until it is completely covered with the flowers. Feel free to use any flowers that you want – there are no specific flowers or whatsoever. This is a simple and inexpensive way to deliver vintage shabby chic décor ideas for small homeowners without having you to deal with complicated efforts.
22. Attractive Wall Décor
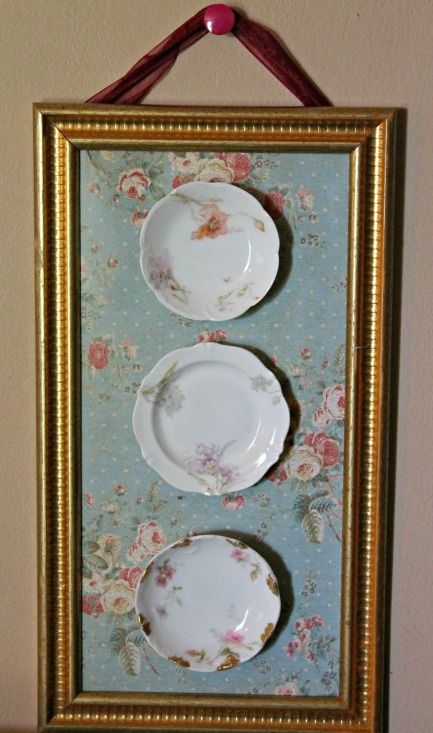 This is only an example of what you can do with the items you can find around the house. Combining vintage plates and unused tray is enough to transform them into an attractive wall décor. If you don’t have a tray, an old picture frame will do – any form or shape will be okay. You can paint it with the color that you like and then attach the plates on it. It is pretty simple and yet it creates an appealing wall decoration. Feel free to tweak with the types of accessories or frames you want. Source
23. Rustic Country Photo Ideas
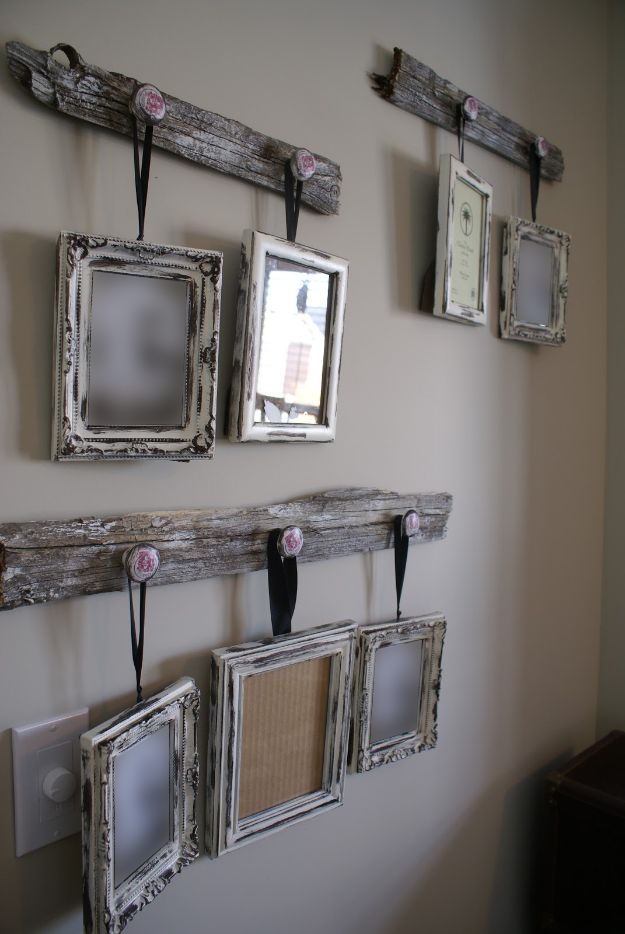 If you want to create a unique photo ideas for your house, this idea can be perfect. You may need to have a wooden plank with a hook. Use the hook to hang the rustic photo frame. This is a unique vintage shabby chic décor ideas for small homeowners to hang the photos of loved ones. If you want to create a more modern look, choose a different style for the frame or paint the wooden plank with bold colors. @Pinterest
24. Vintage Flower Vase
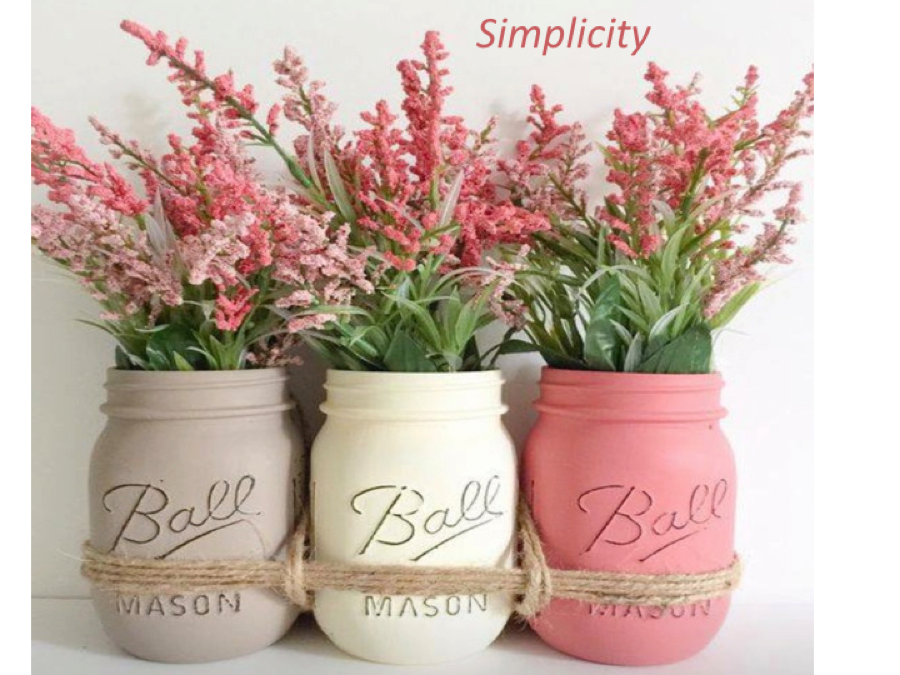 If you have tons of unused glass jars (you can have the plastic ones if you don’t have the glass), why not turning them into attractive vases? You only need to paint them with attractive colors and feel free to decorate them the way you like. Whatever types of paint you choose, be sure that it is safe. If you want to be able to wash those jars, make sure to choose the paints specially designed for kitchenware so the paints won’t be washed off. @Pinterest
25. Suitcase Sidebed Table
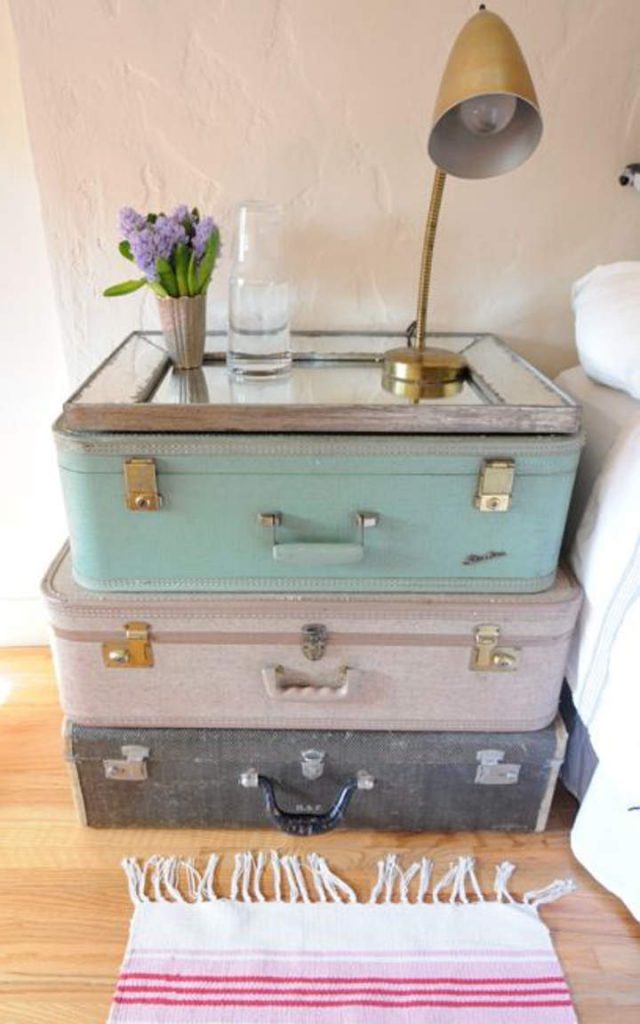 Do you have lots of suitcases and you want to make use of them? Why not paint them, stack them, and then turn them into the sidebed table? There are various ways to turn them. You can stack them and glue them together so they make a solid table. If you want the extra storage, simply stack the suitcases so you can still use the compartments inside. Make sure that you paint the suitcases, and you have your personalized table with vintage shabby chic décor ideas for small homeowners.
Idea No.26- Idea No.30:
What are the best DIY shabby chic storage ideas for money-saving moms? If you are a mom, you know that budgets can be quite tight so forget about buying stuff for your personal needs. However, there are actually great ideas that use the unused items around you.
For instance, using an old tray or an old picture frame can be a creative alternative – not only you can save up money but you can also create a personalized item for your storage needs. From 26-30, I am going to give you 5 DIY Shabby Chic Storage Ideas for Money Saving Moms: some creative Options.
26. Jewelry Display Storage
 If you have an unused picture frame, you can easily attach wires to the frame. It will create a platform where you can save and also display your jewelry collections. Of course, it would be wise if you can paint the entire frame (frame and wire) with the unique color that you like – whether it is bold or calm or nude, it is entirely up to you. The best scheme is to make sure that it will look great for your room or makeup station so check the color of the room first or any accompanying hues inside the room.
27. Jars for the Kitchen
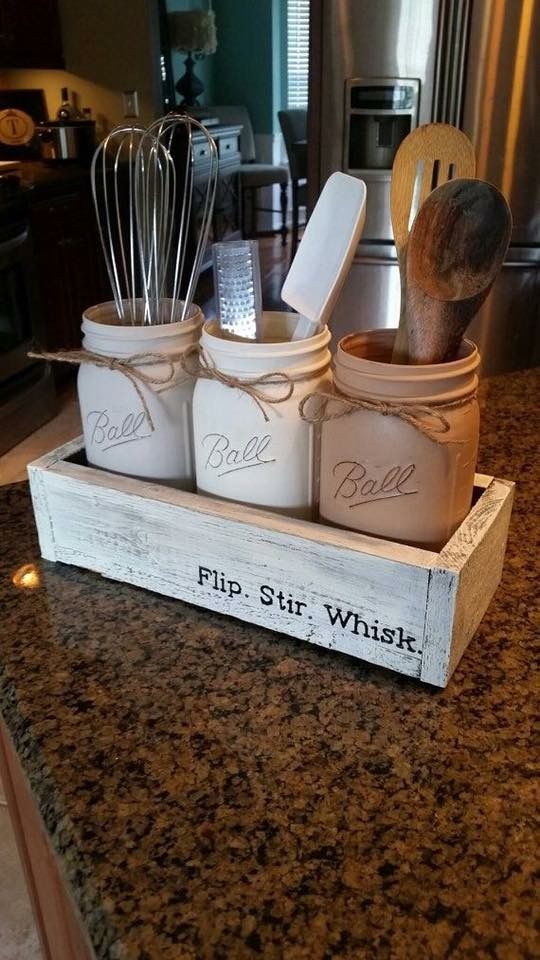 Just because you are trying to save up money, it doesn’t mean that you can’t style up the kitchen. By using old Mason jars, you can paint them and use them as containers. This picture is only one example because you are free to do any decoration that you want with the jars. This is one of the best DIY shabby chic storage ideas for money saving moms. Feeling bold with bright colors? Or do you prefer the calmer tones for neutral effect? It is up to you! Don’t forget to use food-grade paints and give labels to each jar.
Found in Pinterest saved by Megan Cruise
28. Old Crate for Bathroom
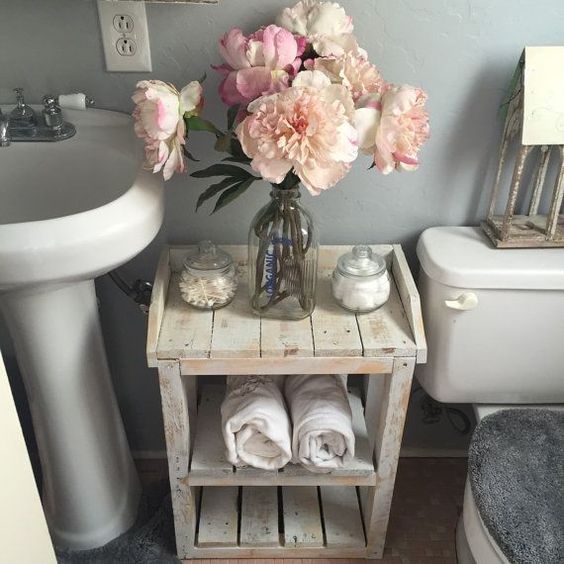 You can make use of an old crate for your bathroom storage supply. If you want to use a natural color, you don’t need to paint it or whatsoever. Leave it bare and simple. The crate can be used to store towels and other bathing suppliers. The top surface can be used as the display area. You can put some knicks and knacks, even small glass vases for the flowers.
Again, making use of anything unused around the house is a part of clever DIY shabby chic storage ideas for money-saving moms. With your keen eyes, you know which ones are potential and which aren’t. Found an idea in Etsy but now it is gone
29. Hanging Frames
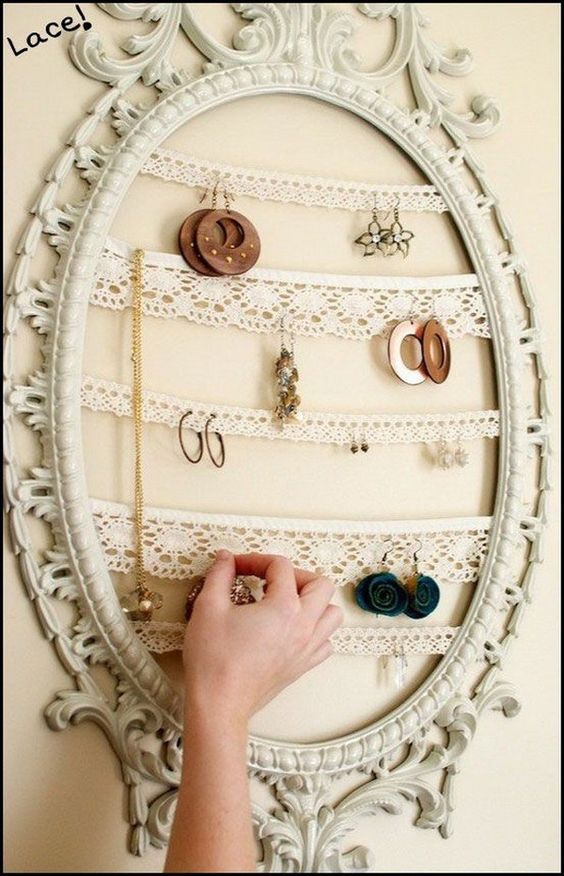 This idea is similar to the first one, where you can make use of an old frame for your jewelry storage needs. However, in this idea, you use lace instead of wire to hang the jewelry. This idea is super perfect when you have tons of earrings – or any hanging accessories. Simply hang the earrings on the lace and you don’t need to worry about them being scattered anymore.
30. Rustic Wall Décor
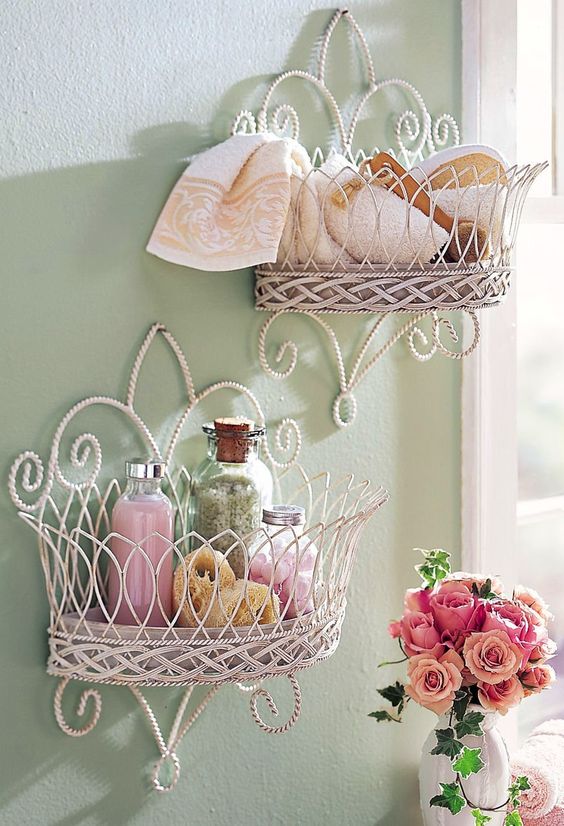 This rustic basket isn’t only good for wall decoration but also for additional storage needs. You can use it anywhere, including in the bathroom. In this example, you see one basket contains bathing supplies while another one is for face towels. These baskets are inexpensive, perfect for your DIY shabby chic storage ideas for money-saving moms.
Idea No.31- No.35:
Having cute shabby chic bedroom decor ideas can help your personal room to achieve the desired look. You don’t have to spend a fortune to deliver such an appealing effect. If you have some old and unused items, you can turn them into additional accessories. Your bedroom can look great without you having to do any fancy work. Next, this is 5 Cute Shabby Chic Bedroom Décor Ideas without Spending too Much.
31. Chic Bedside Area
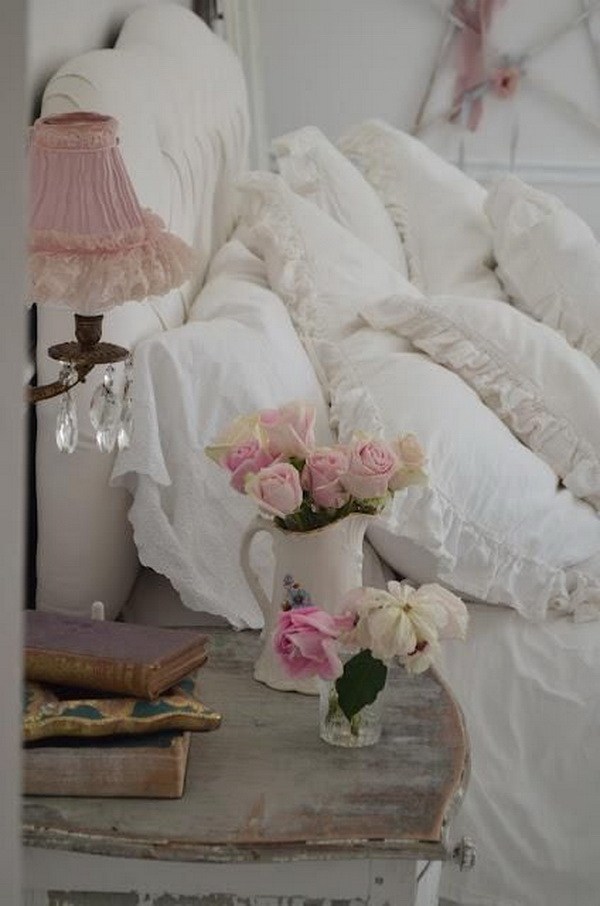 If you have an old wooden door and an old wooden table, they can be used to decorate the bedside area. Even if you buy the new ones, painting them with special cracked paints will create such an effect. To create a rather neat shabby look, using natural colors for the cracked paints.
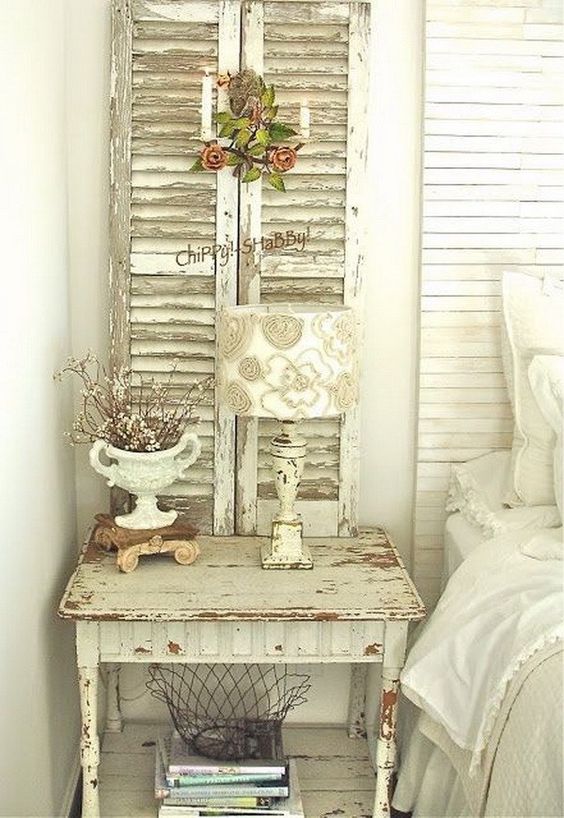
Add a simple but beautiful table lamp and some greeneries (flowers are also okay) to spark up the atmosphere. As you can see, this bedside area is looking great without causing the too lousy or gloomy effect.
32. Small Accessories
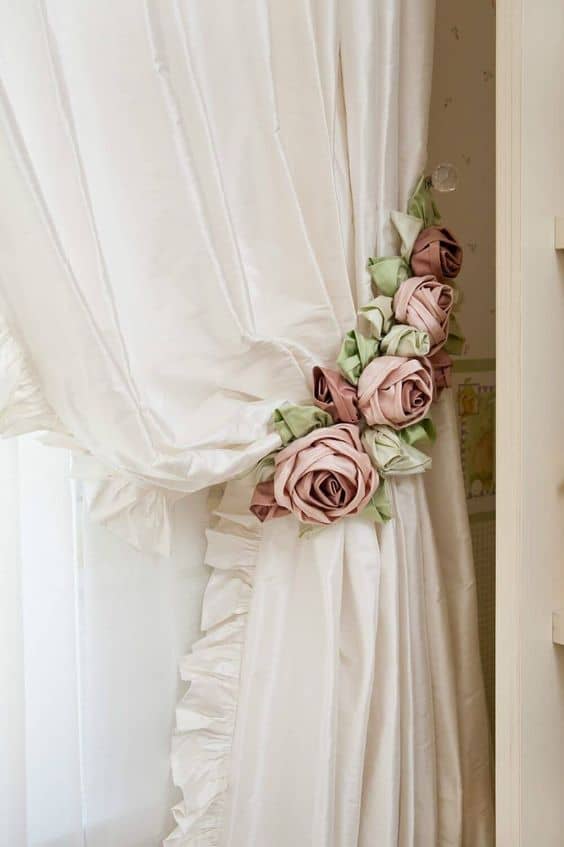 Adding small accessories here and there shouldn’t be a problem. In fact, if you can pay detailed attention to small areas in the bedroom, there are some parts that can use a touchup look. For instance, a flower curtain holder will look great for your shabby chic theme. Small but related accessories are part of the cute shabby chic bedroom decor ideas that can really improve a room without you having to spend a fortune or break excessive sweat. Photo frames or window decor can also be a part of the small accessories design.
33. Old Door for Book Shelf
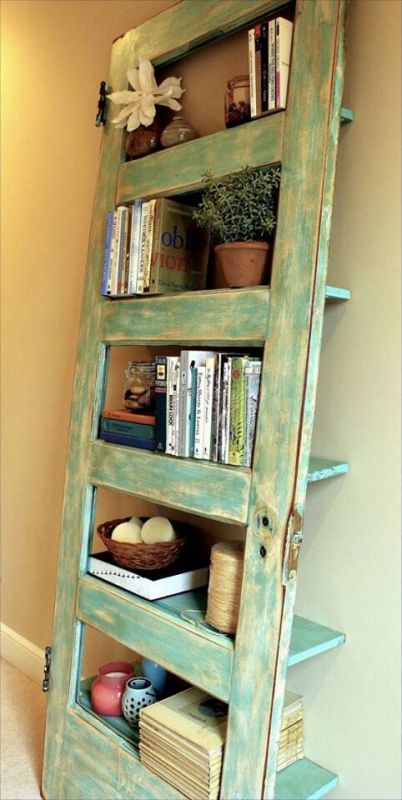 If you have an old door, why not reusing it into other stuff? Simply add wooden shelves and you turn the unattractive door into a unique and creative bookshelf. It doesn’t extra work, really. Simply add paint and make it look like an old and worn effect, add the shelves, and voila! You have your personalized bookshelf that can be placed inside the bedroom. It’s a simple and yet smart cute and also shabby chic bedroom decor idea that everyone can try.
34. Thrifty Gallery Wall
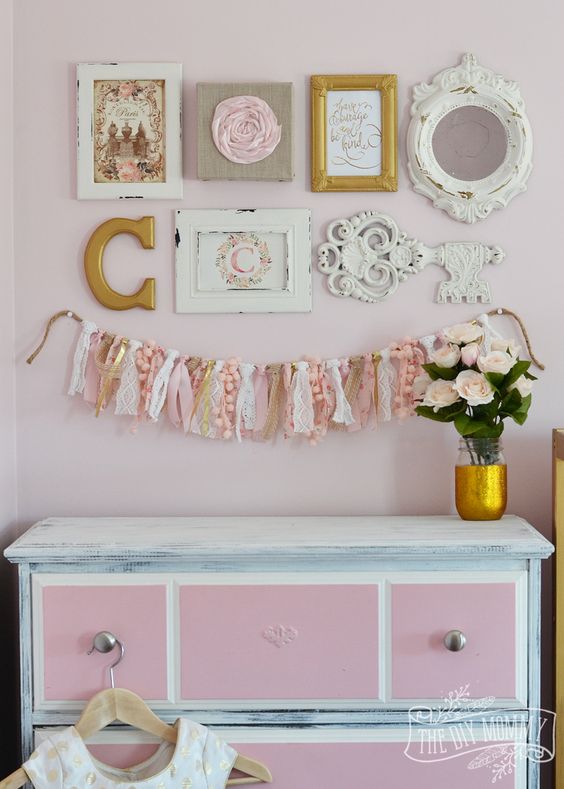 If you have several unused photo frames, wooden boxes, or other stuff that you no longer use, why not turn them into something unique and special? A simple paint job will transform them into beautiful kinds of stuff – and you can dedicate a special wall to hang them all. You don’t always have to go with bold or bright colors; the simple and nude ones will create a drastic effect.
35. Cool and Calm Paint Work
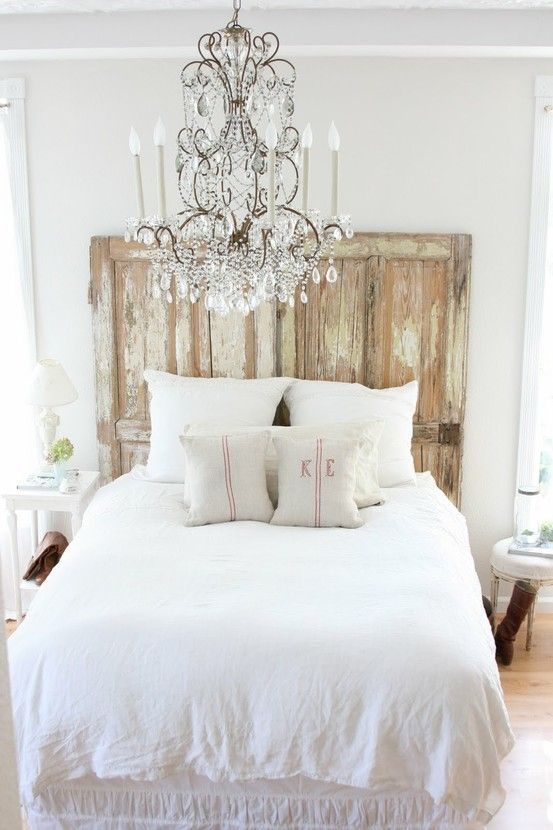 Besides choosing the right accessories, don’t forget to pick the right colors too. A bedroom should be your shelter; your retreat and a place to calm down. Choosing a calm tone will help to deliver the atmosphere. Of course, you can still be creative with the accessories – such as a unique mirror or the wooden window slats that can be used as the headboard.
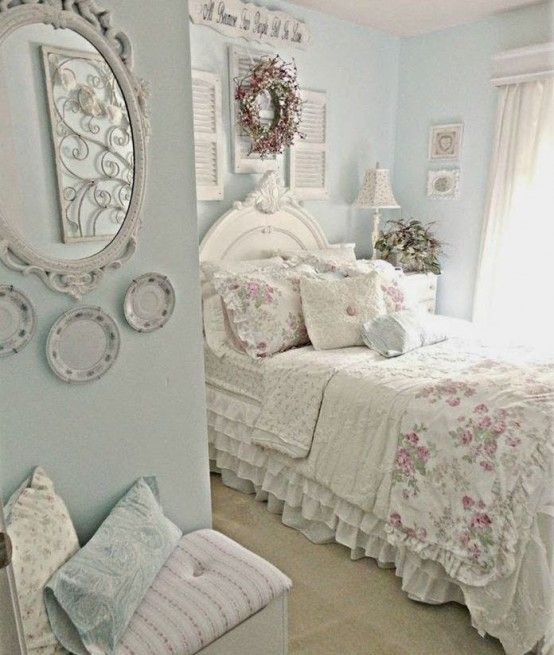 By combining colors and unique items, you should be able to deliver such an amazing effect without spending too much. After all, that’s the whole point about cute shabby chic bedroom decor ideas, right?
Idea No.36- No.60
Extra Idea:
10 DIY Shabby Chic Décor tutorials
10 Elegant Boho Bedroom Décor Ideas