A living room is one of the most lived-in spot in your home. It is where you serve the guest and spend time with friends and family. So, it is important to make it look at its best. Even if your living room is small and in-capacious, you still can make it stylish by applying some decoration ideas.
But if you are one of those who have problem with budget, skip the overpriced décor and try a creative ways by decorating your small living room on your own.
These Do-It-Yourself décor ideas can refresh your small living room and give it a more personal feel. Same as other lists under Living room category, this compilation is brought to you by Simphome. FYI, it is completed with next relevant video and lots of relevant bonus ideas:
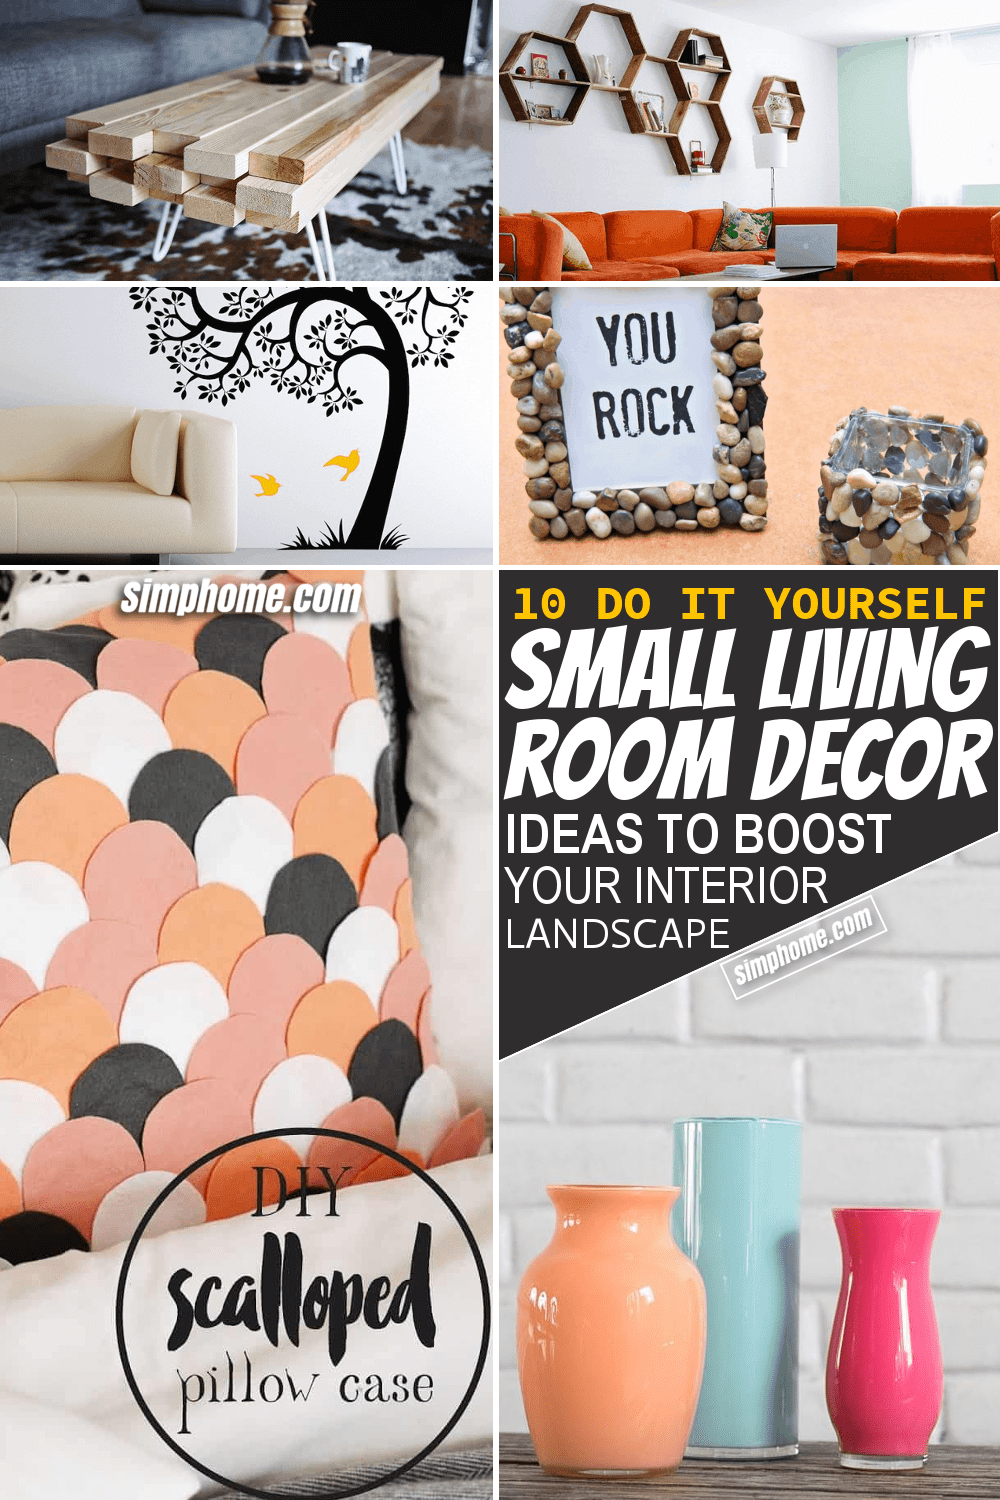
🔊10 DIY Small Living Room Décor Video:
List Entries:
12 Ideas to Declutter your Living Room and Make it More Organized
12 DIY Storage Boxes for the Bedroom, Kitchen, and Living Room
12 Clever Living Room Furniture Ideas and Arrangement
10. Fantastic Brass Chandelier
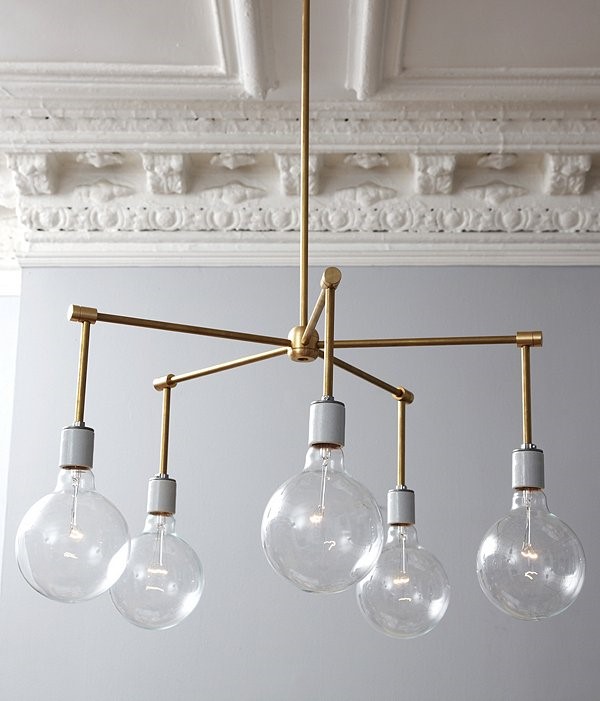 Remodeling the old lights into an unpolished brass chandelier can be the first choice. You will need a set of materials to make the brass scaffold such as brass loop, brass pipes, adjustable brass swivel, and wire twisted cord. You will also need a set of electricity tools for the lights such as sockets, 5-hole top large cluster body, and light bulbs.
First, wire the sockets for the light bulbs.
Then, construct the brass arms, and screw the sockets in place threading the wires. Next, prep the cloth wire and secure it with electrical tape. Join the wires by gently pushing them inside the cluster body. Then finish up by screwing the brass loop to the top of the brass scaffold.
Also learn:
10 Sustainable Furniture Ideas for Living Room
10 Wooden Furniture Ideas For Limited Living Room
10 Small Living Room Styling Ideas
10 Inexpensive Ways to Renew Your Living Room
9. Wooden Crate Coffee Table
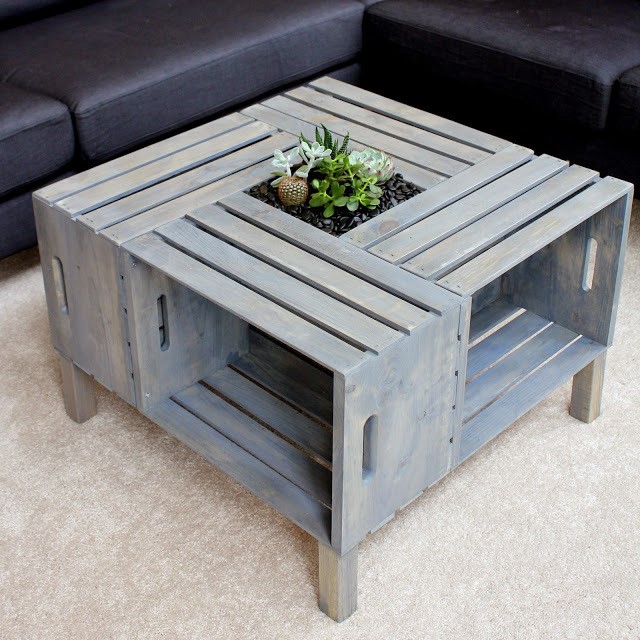 Abandoned wooden crates can be a great choice to make a coffee table. You will find it very easy to make.
To make this coffee table, you will need 4 wooden crates, 4 furniture legs, your favorite wood stain color (don’t forget the brush), 1.5″ screws, and L-brackets.
Begin with smoothing the crates surface using sandpaper and stain them.
Once they have dried, arrange them to form a square shape in upside down form so the top of the table will be flat. Screw the 4 crates together by using the L-brackets.
Screw the 4 legs and it is ready.
Lastly, use your creativity to decorate the center of the table.
Making a tiny succulent garden or simply put some garden rocks or colorful beads would be awesome.
Also learn:
10 Centerpieces for Family Reunion Table Ideas
10 DIY Coffee Table Ideas on a Budget
How to makeover Ugly Coffee Table
How to make a simple Lego table
8. Pebble Picture Frame
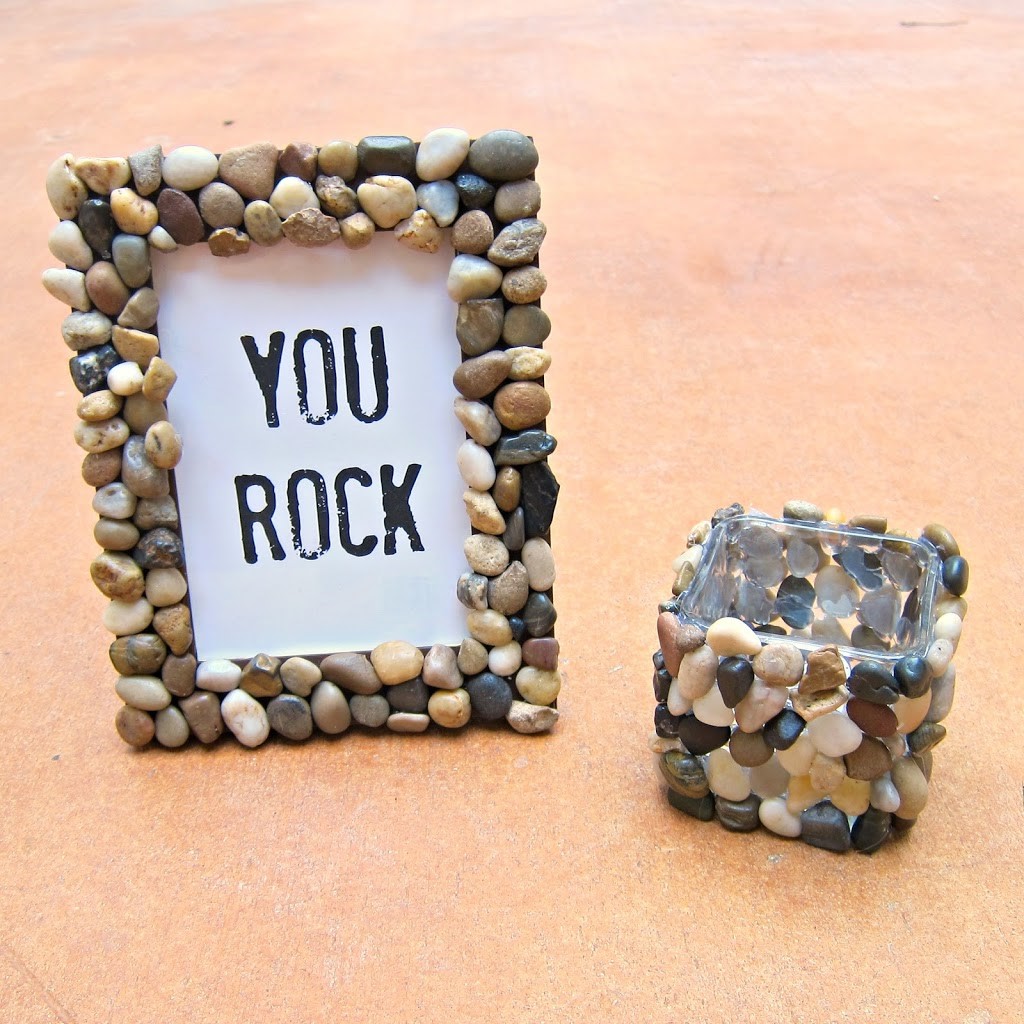 Give a natural touch to your picture frame with crafted rock pebbles. It’s really easy and inexpensive to make. It is better for you to remove the glass from the frame before attaching the pebbles. Then glue the pebbles to the frame.
Tip: Begin with the outer edge to the center so you can have a neat straight line. Reassemble the frame and now you can add photo or picture.
7. Colorful Vases
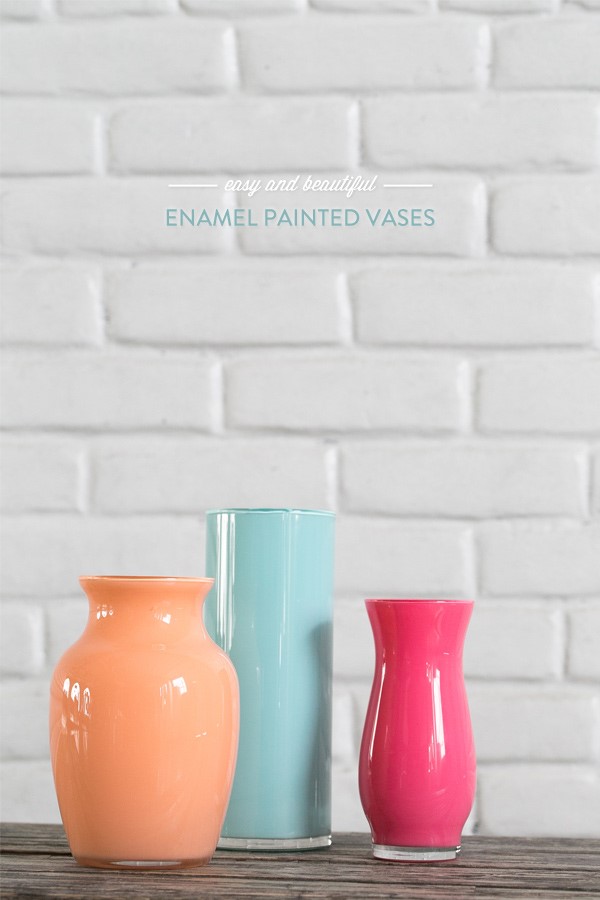 Who doesn’t want a fresh, modern feel, and eye-catching colors in the living room? Get some vases in different size and shape, enamel paint, paper towels, and paint brush.
First, clean the vases with hot, soapy water. When they are completely dry, paint the vases inside out. Once the vase is painted, lay it on a paper towel to let the paint drip off.
The longer it’s in upside down position, the thinner the coating will be, which is good so it won’t end up with bulky paint. Dry the painted vases over night.
6. Accentuate Your Pillow Case
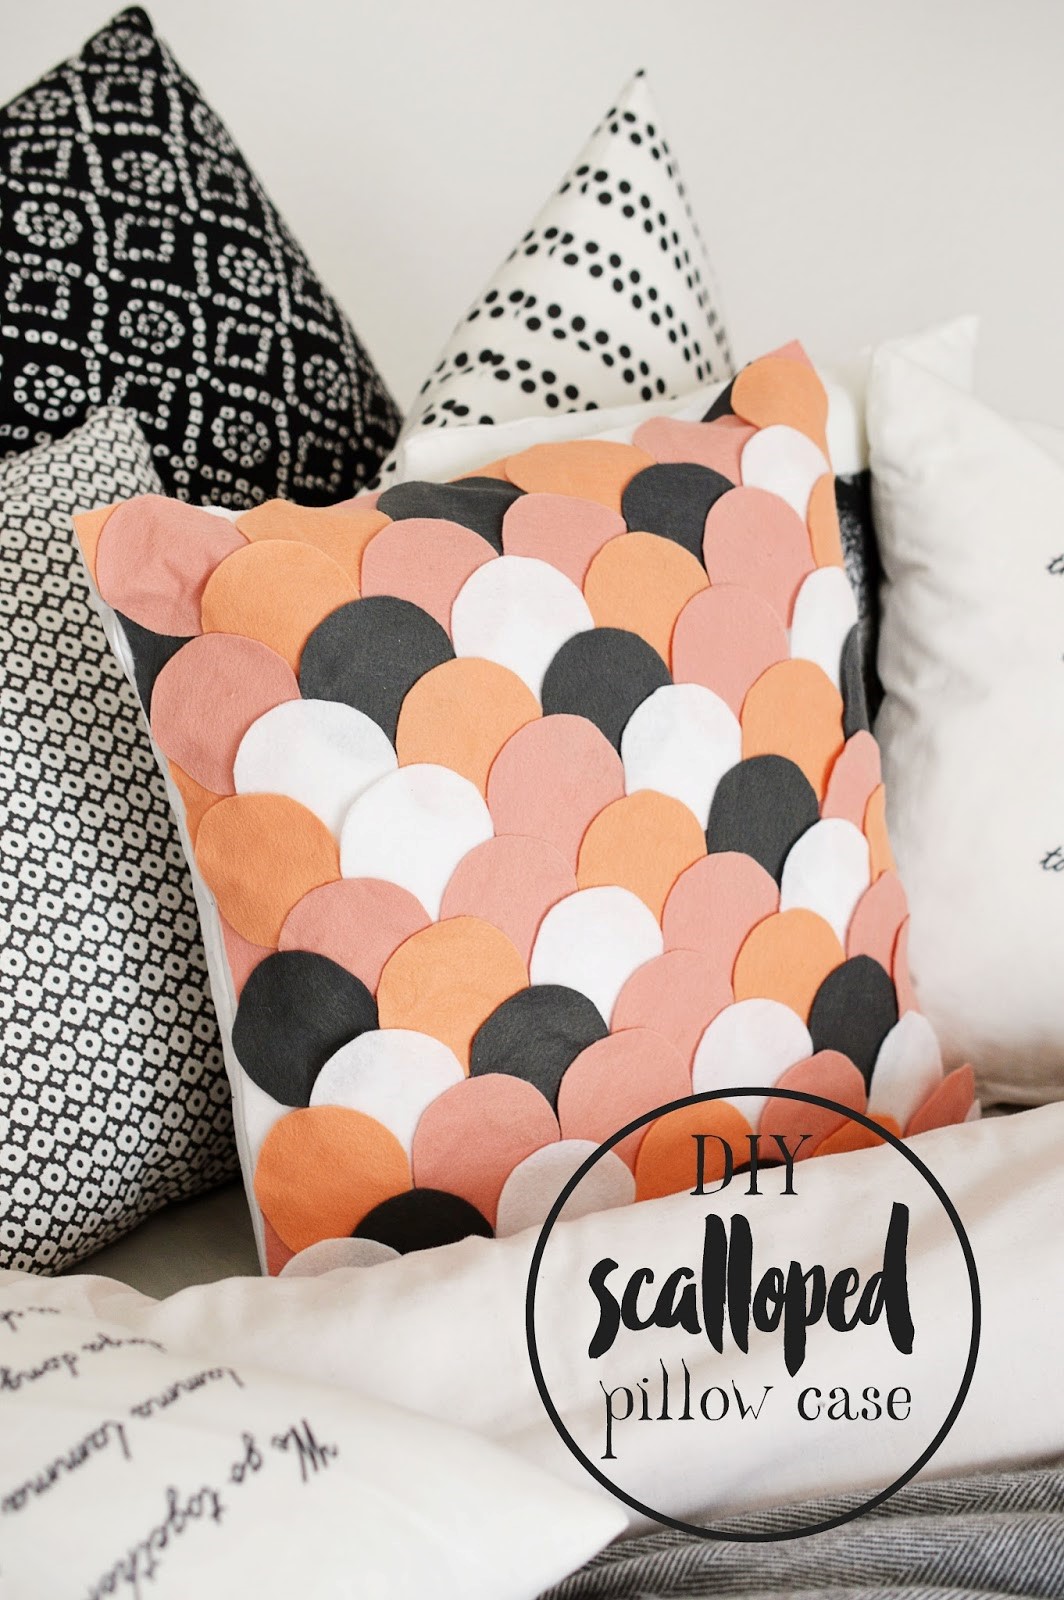
First, make circle patterns on a sheet of felt. Then, arrange the circles on the pillowcase. Start with the top row and make sure to overlap the circles with the first row to create the scallop shape. Glue them down if you have got the desired look.
5. Stylish Room Divider
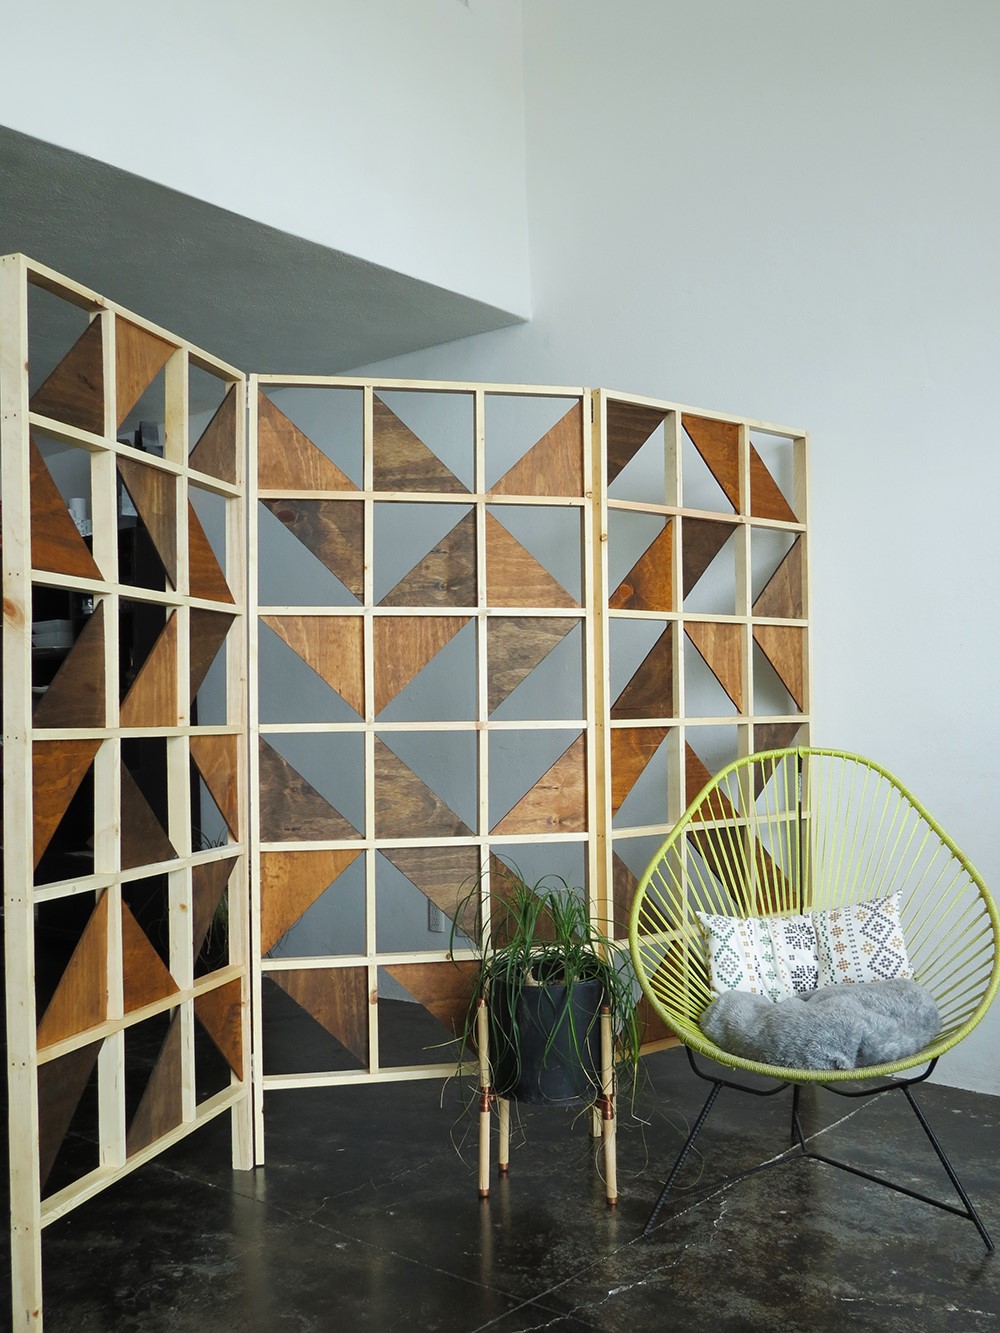 Separate your bedroom and living room with a room divider to get a little bit privacy. If you can’t afford a stylish one, you can make it yourself.
To make this chic geometric room divider you are gonna need a stack of plywood and 1×2 lumber. Trace 27 squares on plywood boards and cut each squares in the middle diagonally so you will get 54 triangles.
Sand all the triangles, stain, and let them dry. Now, start building the divider’s frame from the lumber.
Start by making your cuts and assemble them with nails. Now that the basic framework of a panel is complete, add the smaller vertical divisions within each row. Finally, fill the square gaps with the stained triangles. Arrange them in the panel until you are happy with the design. Last, connect the three panels using hinges.
4. Artistic Coffee Table
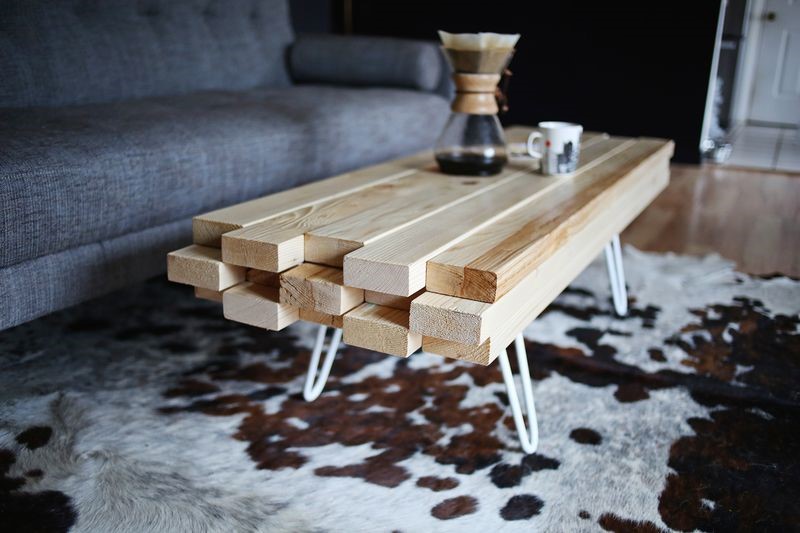 Whether your living room is modern or rustic, this natural coffee table will be perfect. Prepare 2×4 boards and cut it to the sizes 9 55 inch, 12 8.5 inch, and 2 13.5 inch; and 2 bench style hairpin legs.
Set and lay out the boards which consist of three rows. Create a hollow center and the legs have to sit inside the table to make it sturdier. Next, layer by layer, screw all the boards in place and the legs on as well. Last you’ll want to sand the entire surface and edges well. Then seal with a few layers of semi-gloss polyurethane.
3. Mural Art
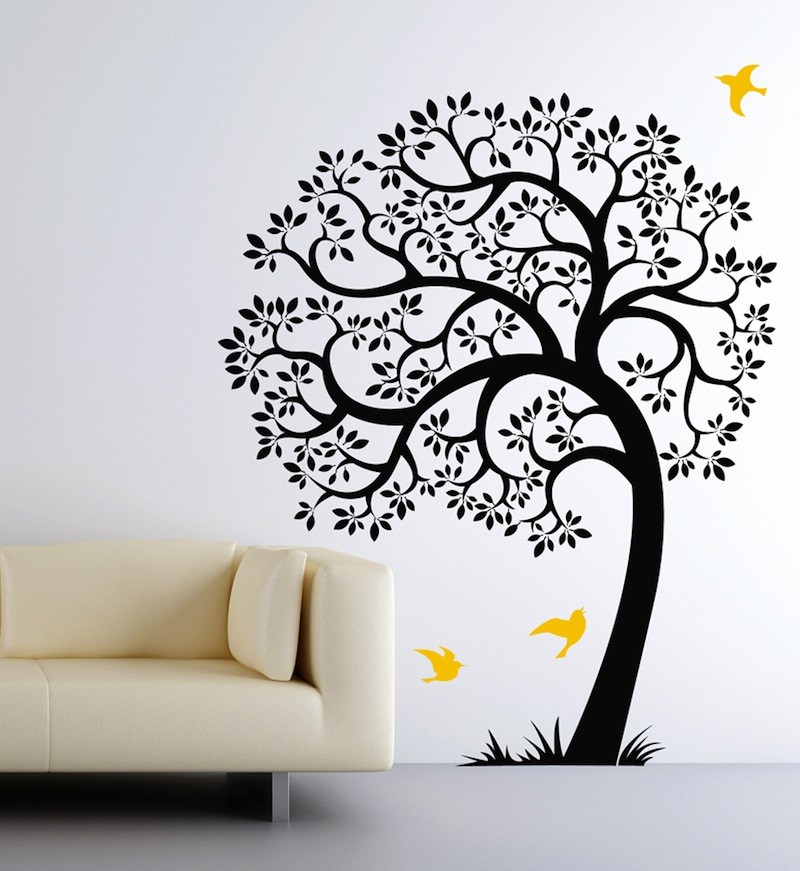 We’ve been working on furniture and display decoration, now let’s do something playful with the wall and create a mural art.
Mural art is any piece of artwork painted or applied directly on a wall, ceiling or other permanent surface.
You don’t have to be an artist or attend brief drawing course to do it. Just go with your imagination. Either black city silhouette or colouful trees and flowers will be compatible. Or if you don’t wanna make your hands dirty, instant mural stickers are now available everywhere with various design.
2. Hexagonal Open Shelves
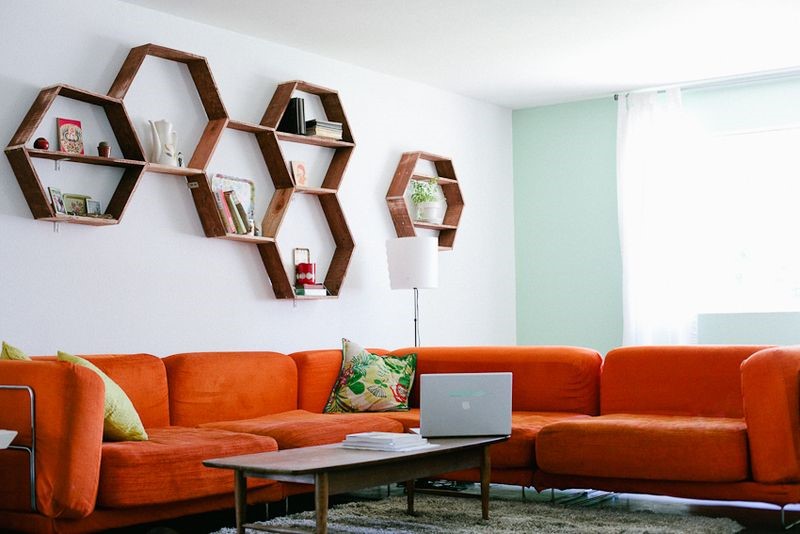 A shelf or an accent wall? Why do you have to stick to one of them if you can have them both?
These hexagonal shelves that resemble a honeycomb will be your safe bet when it comes to ditch the clutter as well as making a great accent wall.
Here are the steps to make a single hexagonal shelf. Cut 6-exact-same-length (12” is perfect) woods with 30 degrees angles for both edges. The angled cuts should both go in to make the other side shorter. Take the 6 pieces and set them standing up on the ground. Designate which side will be the base of your shelf and work up from there. Screw the pieces together using drill. Sand down all the edges and stain the woods.
Now hang the hexagonal shelf using a stud.
Recommended: 12 Living Room Shelving Ideas
10 Living Room Shelves or Shelving Ideas
10 DIY Pipe Shelving Ideas Or
1. Display The Plates
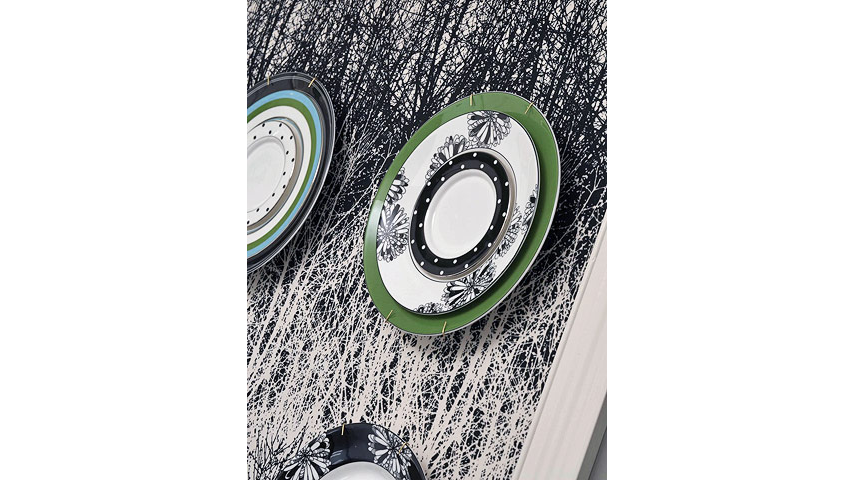 If you are looking for living room décor ideas on the cheap, this one is yours. Go look for your unique plates collection. Pick two plates with contrast colors and sizes. Glue them with epoxy or all-purpose glue and hang with plate hooks in columns on the wall. Do the same way with the other plates that you want to display.
Those are 10 DIY small living room décor ideas that you can try yourself and won’t cost you a fortune. Happy trying or happy browsing next improvement ideas you would probably love to try as soon as you finish reading all available material provided on the post!
EXTRA LIVING ROOM DECOR IDEAS:
5 Clever Decor Hacks for a Small Living Room:
One easy way to make your current curtain becomes fancier is by adding complexity. Adopting the concept of flowing curtain, you could add fabric extension to the item.
1. Easy Cutesy Pillow
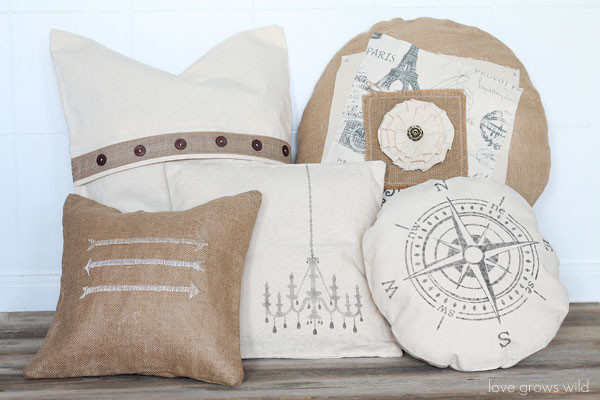
The highlight in the living room is the pillow. Therefore, you need a brand-new look for your plain cushion. Since the process is quick and easy, you need to prepare iron adhesive, needle and thread beforehand. On the back of the pillow, you usually found zipper edge. Glue a ribbon on it by using the adhesive tape and heating it on the iron. For prettier result, you could sew several buttons on the ribbon. (via lovegrowswild)
2. Strie Paint
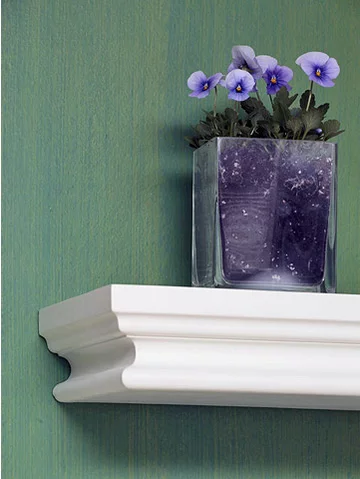
Allow one focal point in the living room to rise gracefully. For example, you have a display wall with monotonous color. Get it lovelier by applying strie paint; the combination of yellow and green paint. The base layer is yellow-green with semigloss effect. Top it with the solution of 1 green paint and 4 decorator glaze. Without waiting until the paint dried, drag a brush down from the top wall, leaving the scratch pattern. Allow to dry overnight. (via bhg)
3. Curtain Extension
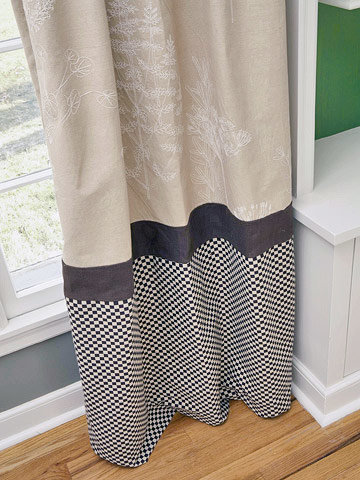
One easy way to make your current curtain becomes fancier is by adding complexity. Adopting the concept of flowing curtain, you could add fabric extension to the item. Try to infuse different tone or pattern, for example: black and checkered fabric. If you have enough spare time, you could sew it. If you want to do it quickly, then take the fusible webbing. For best result, you need to take off the curtain from its rail. (via bhg)
4. Photo Steps
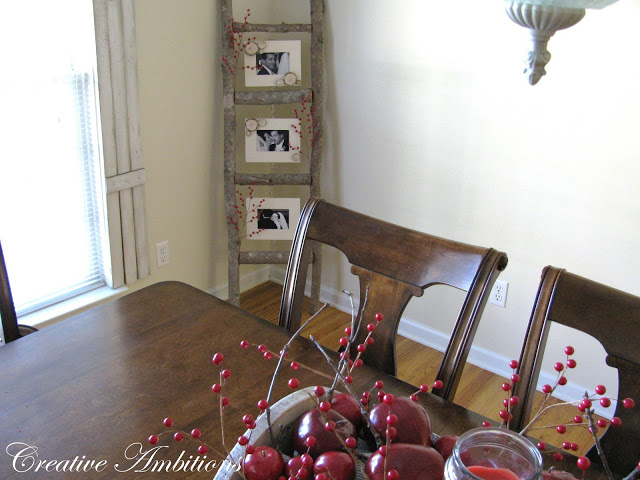
Spring or autumn is the perfect season to trim the tress. After the process is done, you will suddenly have a lot of artistic small branches. Build your own photo steps with these tools. You also need screw eyes and hemp string. After finishing the ladder look, you need to push the screw in. Put it in the middle spot, facing to the inner side of the square. Now it’s time to put on the photos. Tie the photos with hemp string. (via creative-ambitions)
Recommended Lists:
20 Dining Table Design Ideas You can Copy and Follow Right Now
10 Small Dining Table Ideas and DIY
10 Centerpieces for Family Reunion Table Ideas
5. Silhouette in a Frame
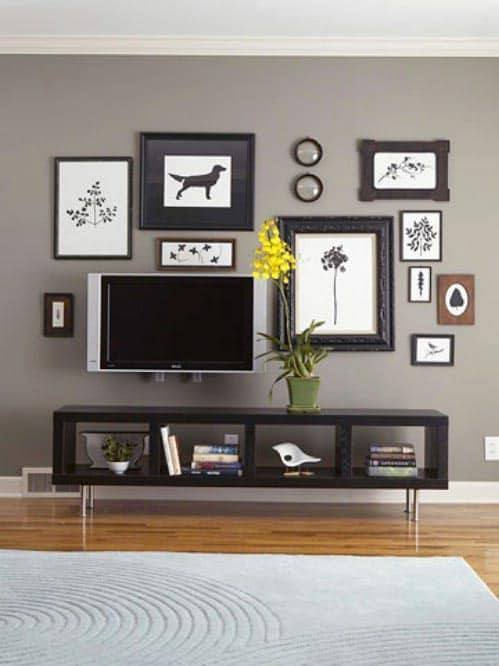
Not all people love to hang the picture of him/her in the living room. They prefer to put up artistic drawings instead. If this is the case, then you could take this silhouette idea. Get various patterns online: knight, cat, bird, etc. Copy the image on a black paper and glue it on the paper. For long lasting color, install the glass cover. It especially applies for tropical region, which has high possibility of sun washing. (via bhg)
5 Creative Small Living Room Improvement Ideas:
For a small living room, mostly you don’t have the luxury to let walls to be a room divider. For that reason, use A rug and cupboard to take this job. More on that later.
6. Suitcase Table Project Idea
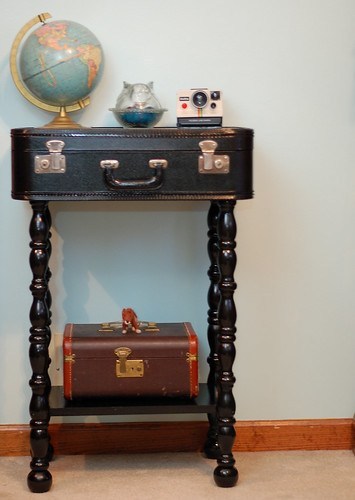
Now you could transform the table to have double storage level. Pairing the old suitcase and the suitable table legs, you could get a chic suitcase table. Make sure the legs has been painted with coordinated color. Set the suitcase to its legs by drilling screws. Cover the screw mark inside the suitcase by using pretty fabric. It will also serve as the pad for your first storage level. You could also put knick knacks or cookie jars on the suitcase. (via starsforstreetlights)
7. The Muuto Wall Lamp Project
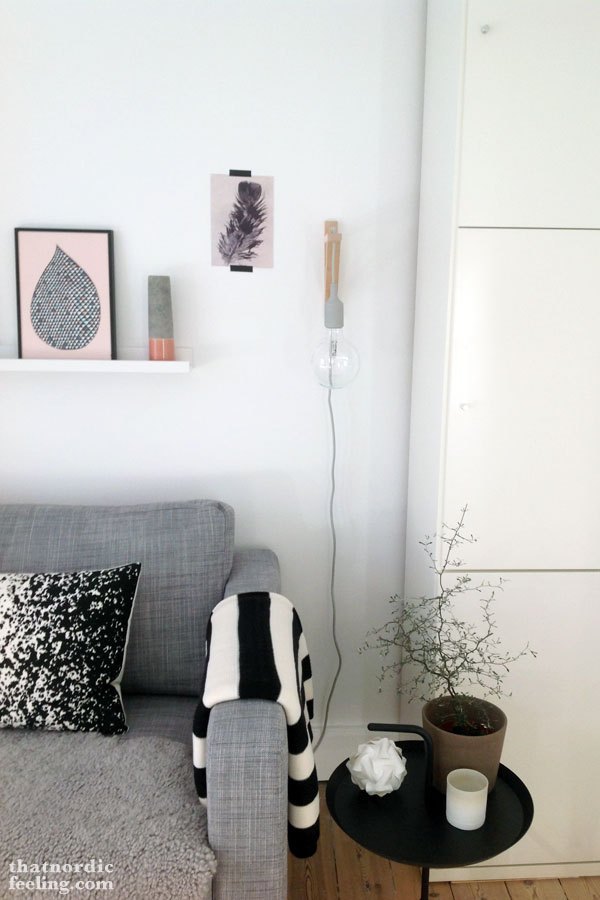
The corner of living room is usually dark and lack of lighting. Turn the table by installing a chic muuto wall lamp. Go to the store and buy a bracket, a lamp, and a plug. Choose a spot which is not too far from the electric socket. Mount the bracket to the wall, setting the bar to face down. Drill two holes on the bracket: one near the bar tip, and one near the wall. Set the fixture and light it up! (via thatnordicfeeling)
8. Take This Stylish Rug Idea
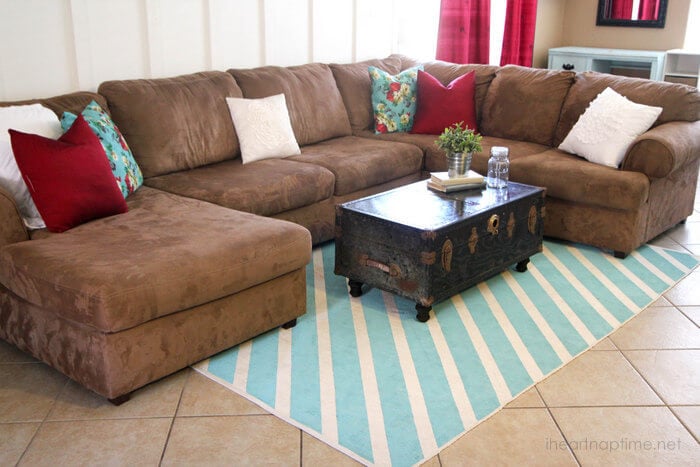
For a small room, you don’t have the luxury to let walls be the room divider. A rug and cupboard take this job instead. Give some pattern on the plain boring rug. You will need paint, measure tape, painter tape and roller brush. Decide for a pattern first. Then you have to tape the pattern, which may take more than an hour. Spread the paint on the surface, and let it dry. Peel of the tape and spray fiber coating liquid before setting the rug on its original place. (via iheartnaptime)
9. Or The Pencil Wall
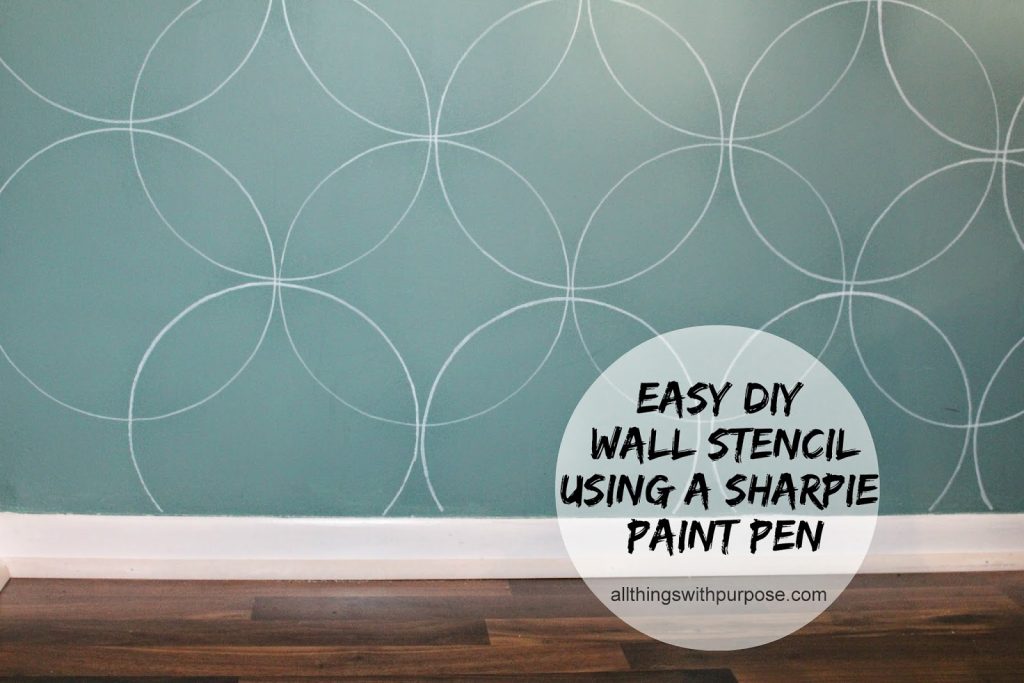
Doodling on the wall could be fun and artistic too! As long as you know what to draw and put guiding lines, there will be less room for errors. Guess what? You only need paper cake plate and an oil marker. Find a round plate that suits your design. Remember: the smaller the plate, the longer you will work on the project. Start from the left side and down, continued with tracing to the right side. When reaching the edges, fold the plate. (via allthingswithpurpose)
10. Or The Warm Pallet Lamp Project
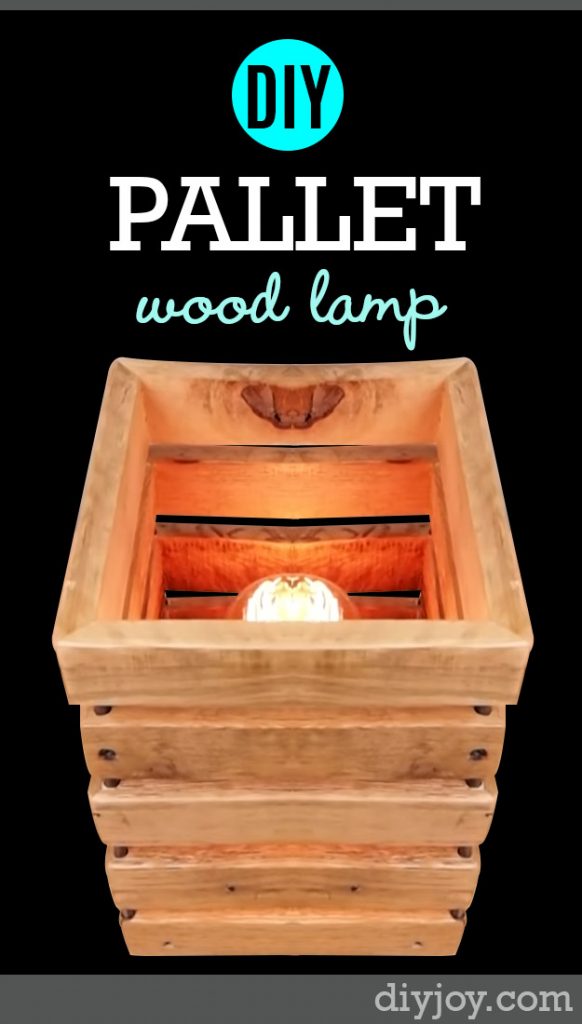
Prepare the materials: pallet wood, plywood, lamp holder, lamp cord, and light bulb. Cut the plywood to 6 x 6.5 inches size as the base. Then you have to make a crate frame using the pallet wood. Make sure you provide some spaces to let the light escapes from the pallet frame. Paint them with your favorite color. Before fixing the plywood to the frame, mount the lamp holder and install the lamp fixture. (via diyjoy)
5 Small Living Room Decorating Hacks You Need to Try:
The green color of this eclectic style will obviously make your living room feel fresher. Paint your wall with light green color to refresh the whole room. Add your favorite art works on the green-painted wall to make the living room feel cozier.
11. Play With the Scale
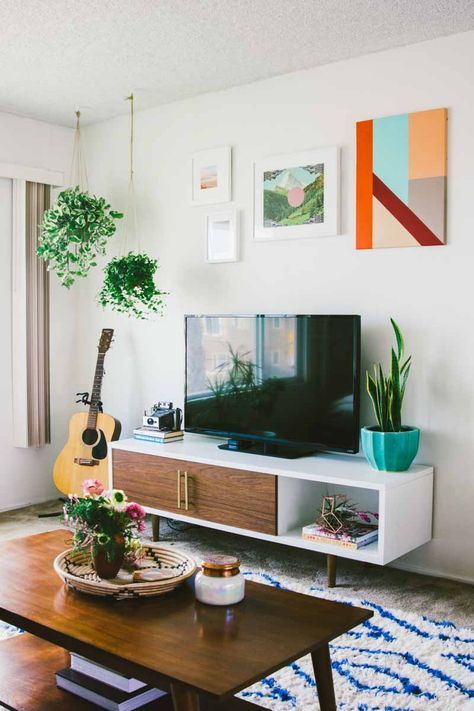
Another way to maximize your small-sized living room is by playing with its scale. Make yourself feel comfortable in your small living room by applying big scale. Put some small stuff together in small space to tighten things up by visual view. This step will make your small living room look bigger. Hang some art works behind your television to maximize the function of your wall. Squeeze as much coziness into your room as possible. (via terminartors)
12. Traditional Living Room Idea
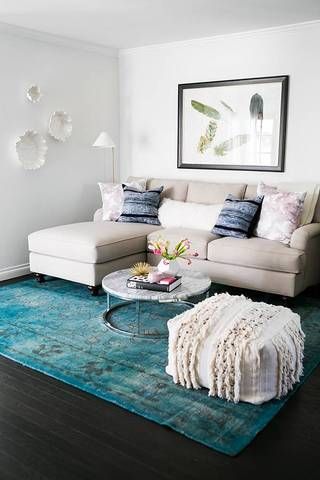
This idea will require some ottomans to improve you small living room. Using ottoman as the main media, you can really maximize it in decorating your living room. Paint the wall with plain and white color as the beginning. Do not apply too eye-catching colors to give the traditional charm. You can also add some art works on the wall. Use white-framed art works to strengthen the traditional charm. To strengthen the traditional charm, apply white-colored ottomans to your living room. Add also a wooden and glass table in the middle of the living room. (via domino)
13. The Cheerful Concept
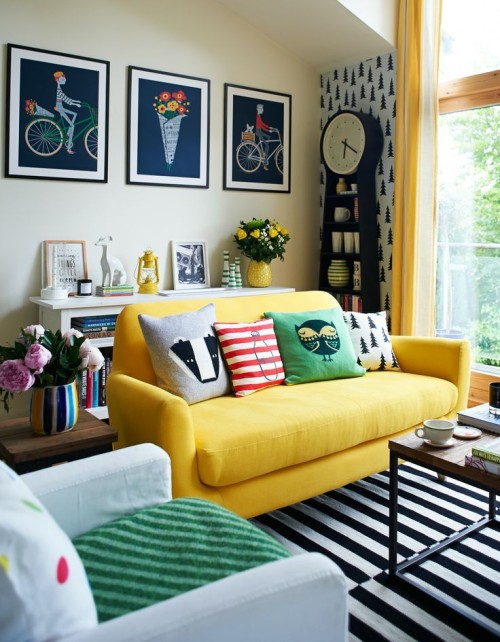
This idea is the most recommended one if you want to design your small living room for your children. Start from the wall; paint it with a usual white color. Then apply a bright yellow color for the curtain. Provide a small table to put some stuff near the wall. A yellow-colored vase will add the cheerful feeling. Maximize this table by putting some eye-catching things or art works. Then finally add a bright yellow sofa to complete the cheerfulness. (via gallerieb)
14. The Casual Eclectic Living Room Idea
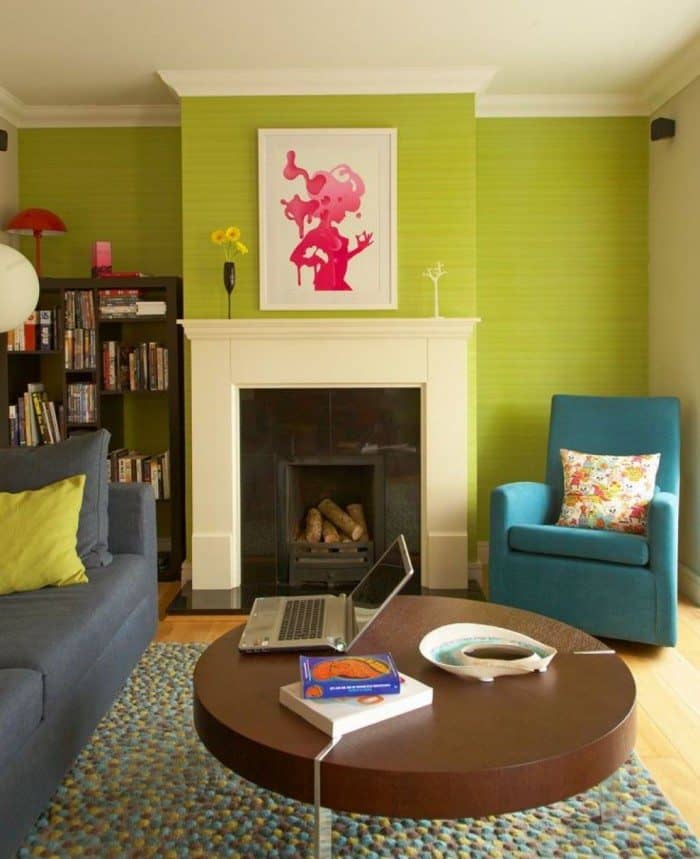
The green color of this eclectic style will obviously make your living room feel fresher. Paint your wall with light green color to refresh the whole room. Add your favorite art works on the green-painted wall to make the living room feel cozier. Use couches with grey color to match it with the room décor. Add green accents pillow to make it more comfortable. Use rustic wooden table in this eclectic living room to complete the casual eclectic charm. (via wearefound)
15. The Smart Lighting Living Room
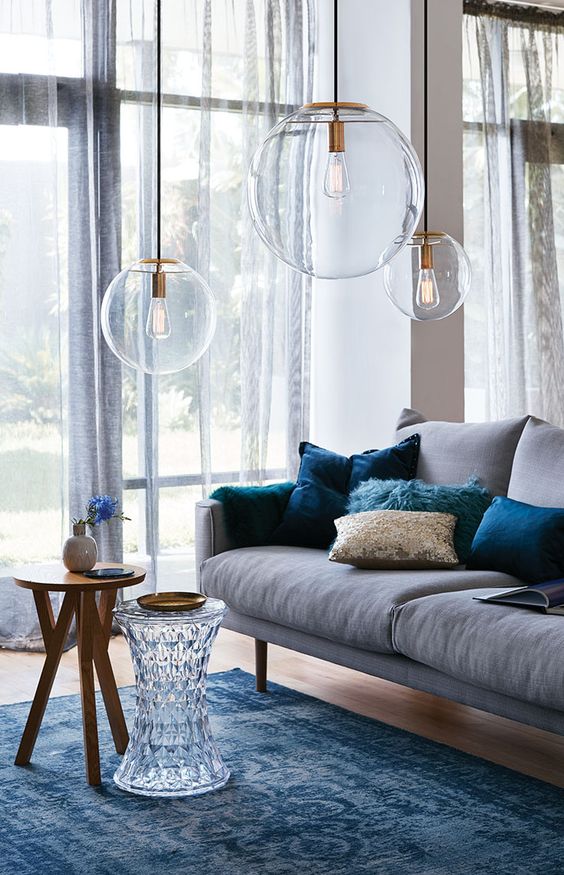
This idea offers you the way to maximize your small-sized living room by adding the simple parts, which is the lighting. Create the atmosphere that you want in your living room by putting a well-managed and a well-placed lighting. Pick a lighting that can be hung from above or can be applied to the walls to save the room on the floor space. Try to apply an extra-ordinary lamp style with this idea; three lamps are hung at one place. Save your room space by maximizing the lighting concept. (via denvertavern)
5 Ways How to Optimize a Small Living Room Interior Décor:
To tell the truth, even shelves on the wall occupies some spaces. Then the best way to claim the space back is to install the invisible shelves. The secret is to use the L-brackets as supports. But more on that later. Let’s open the next section with a simpler one
16. Craft A Custom Candle
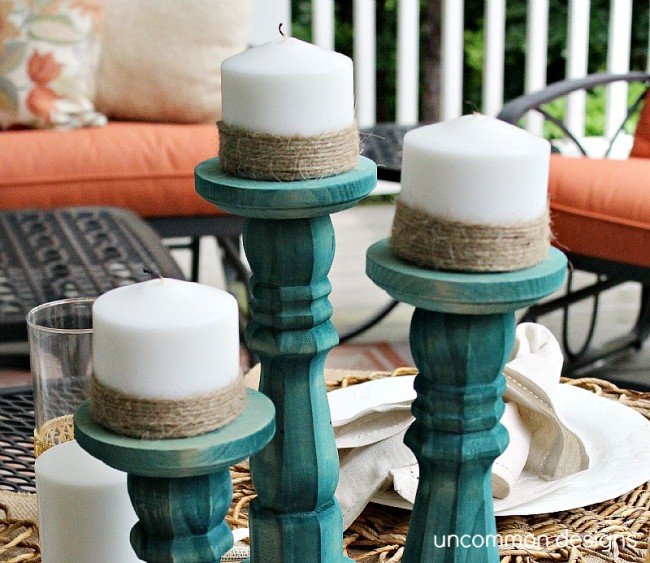
Set the atmosphere in your room with one of the most traditional means: candle. You can do better than only lighting it: do it in style. What describe classic vibe the most? It’s a simple jut twine or probably natural rocky sand. Twirl the jut on the lower part of the candle, covering one fifth of the whole candle. Using rock won’t be any different. You only need to attach the stone to the candle by using glue. Let the stones cover half of the candle. (via uncommondesignsonline)
17. Or Craft A Pet Crate
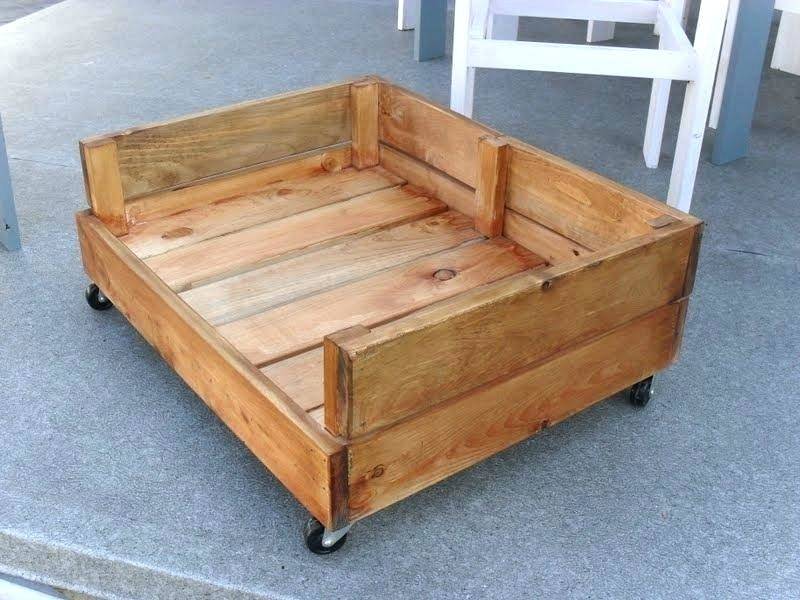
Dog owner probably share similar experience on how the pet rules the sofa in the living room. Even when the guests come, it sometimes refuses to move from its comfort spot. Make your own pet crate to give them special place to nap. Clean the used milk crate and remove the board in one side. Attach caster on the bottom so you could move it anytime. Repaint the wood with danish oil. Lay dog’s cushion on its new bed. (via home-frosting)
18. The Corner Shelf Project
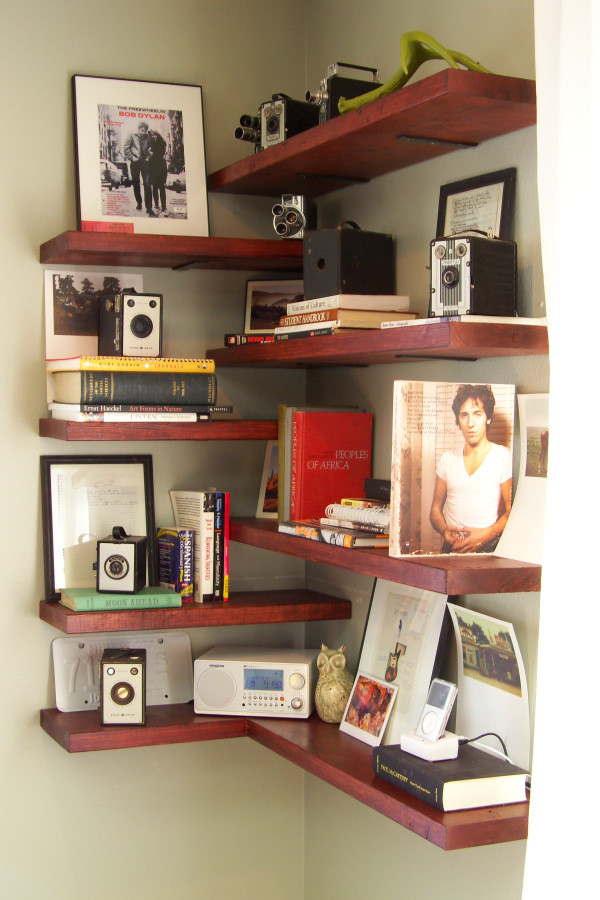
Since you need extra place to display things, don’t let the corner wall slipped. By using pine board, you could make a fancy shelf. Don’t forget to coat it with wood color or any tone to your favor. Lock the color with coat spray. Follow the structure of your corner wall: alternate between the short and long board. Mount them to the wall with L brackets. The arrangement should go in every other line, so there would be long board in between the short ones.(via ahomewest)
19. The Invisible Shelves
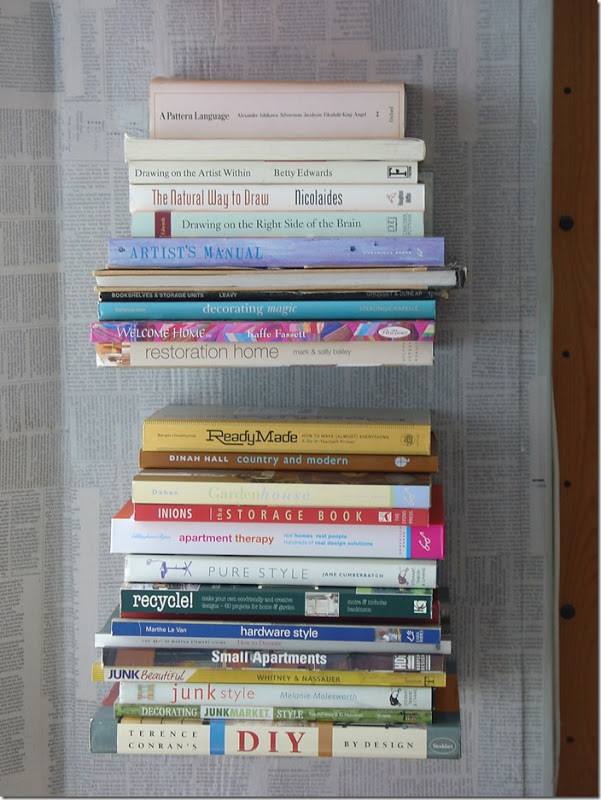
To tell the truth, even shelves on the wall occupies some spaces. Then the best way to claim the space back is to install the invisible shelves. The secret is to use the L-brackets as supports. It takes far less space compared to a shelf. For each bracket you need around three to five screws. Drill the screws to your wall and make sure the bracket is even. Then you can start stacking your books, starting from the biggest to the smallest. (via maydecemberhome)
20. The Heart Strings Project
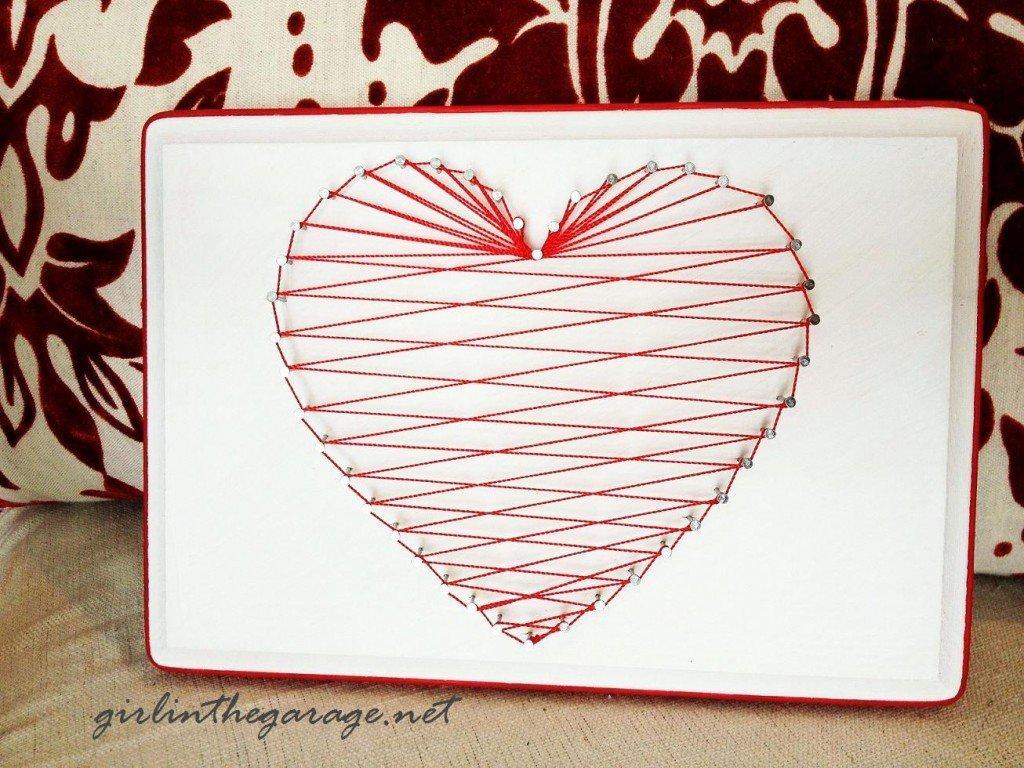
This is a project you could do in your spare time with minimum complexity. Line up a white painted hardwood, nails, hammer, and red thread. Don’t forget to cut heart shaped paper for nail tracing. Put the heart paper in the middle of the wood use it as guidance for hammering the nails. Tie the thread from the bottom nails, and take zig zag route to fill the heart. Do the dead knot on the top nails to end the project. (via girlinthegarage)
5 Ways to Improve Your Current Small Living Room Décor:
Undoubtedly living room is the place where you will spend most of your time with your family. To create pleasing atmosphere, sometimes people like to do some improvement to their small living room. If you are one of them, then this section will probably help you in realizing your plans. Radically or not, your present living room interior décor may already scream new change
21. Get The Natural Finished Living Room Concept
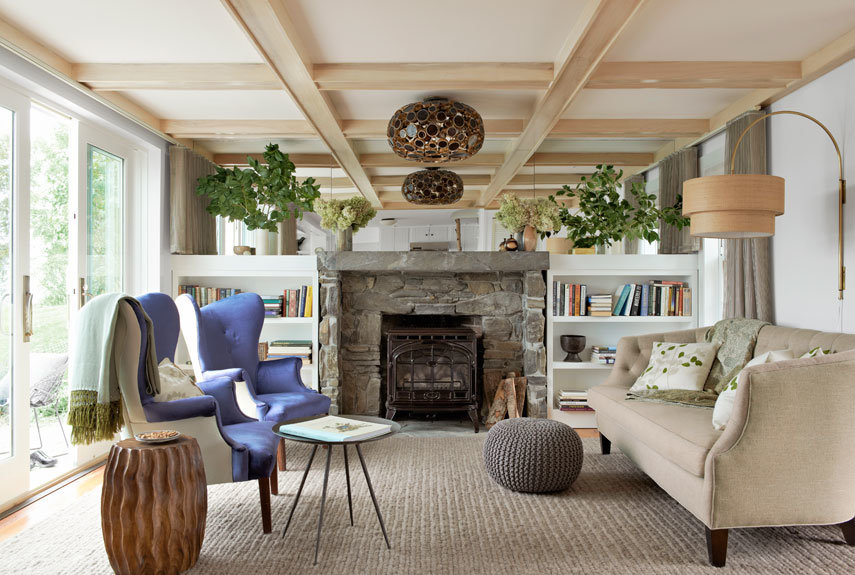
This idea will also offer you how to feel wider space in your small-sized living room. Apply a couple of narrow windows with sliding doors to give you any panoramic water views. Add a fireplace in the middle of the room to complete the room. To make the space feel wilder, building bookshelves is also recommended. (via countryliving)
22. Or Simply Add Drum Coffee Tables
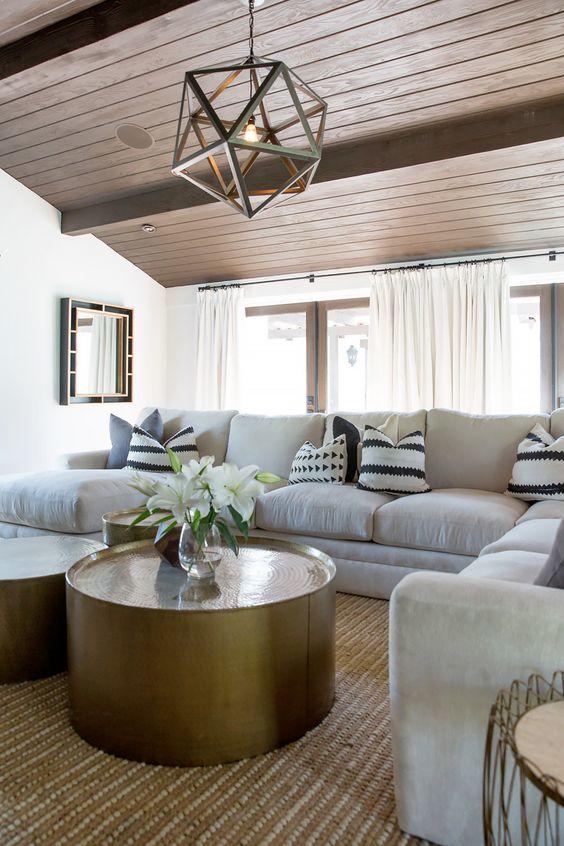
Tables for coffee are not always rectangle-shaped. You can adapt the African style in maximizing drums as a tale. Place as many drum tables as you like in front of your sofa while you are watching television. Use drum as your coffee tables to ease you in moving and placing it anywhere you like than using common coffee table. Avoid any knee or toe accident by using this kind of table. (via mydomaine)
23. Apply Bright and Dark Colors
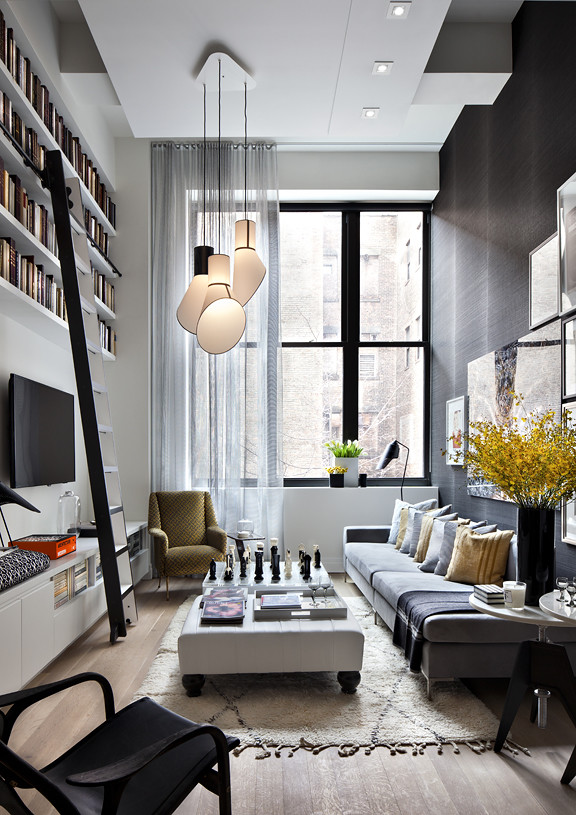
Sometimes you can have meaningful improvement by just maximizing the color of your wall. Create a clean-lined and sophisticated backdrop by painting your walls with black color. Its simplicity will bring you the nuance of New York apartment nuance. To add the dramatic feel, put a giant chessboard on the table to support the dark concept with its black and white color. Add also a white and plain bookshelf with black-colored book cover as the complement. (via decoholic)
24. Or The Yellow Wall with Artworks
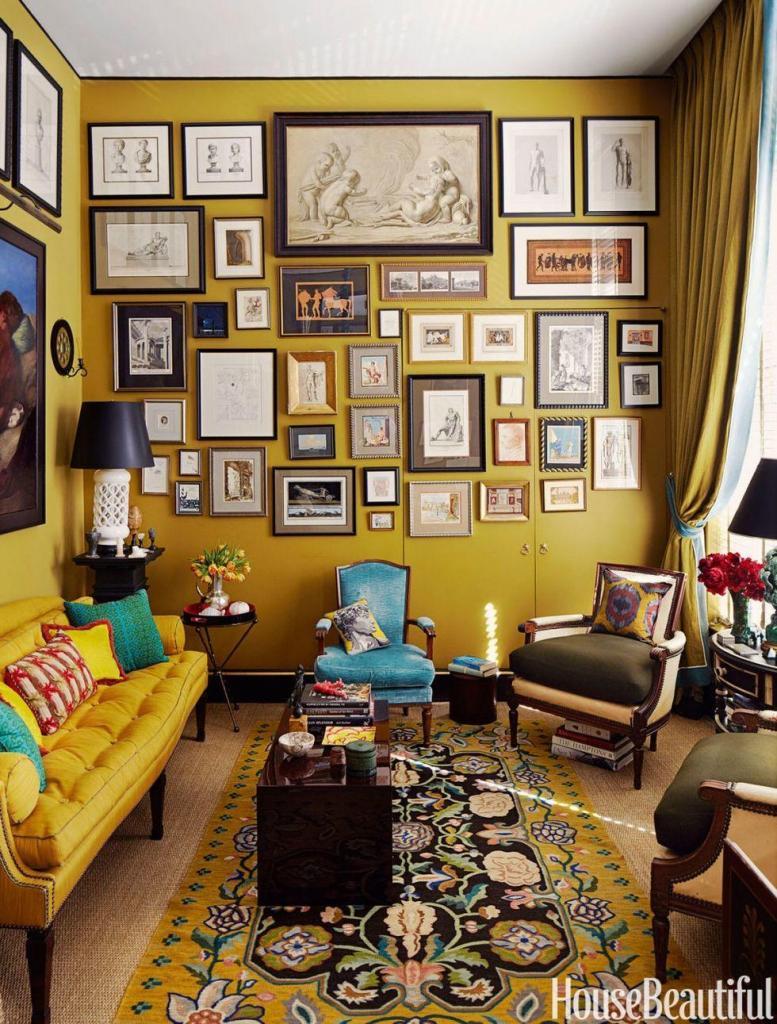
You can also use artworks to improve your living room. The point is display it strategically. Well placed artworks will help you in creating the atmosphere. Place the artworks wisely on the wall and make sure you do not find any space left. Of course you need to start with the yellow-painted wall, and so do with the rest. Try to use yellow color for every main element like curtain, rug and the couch. (via livingroomideas)
25. Or The Wild Living Room Concept
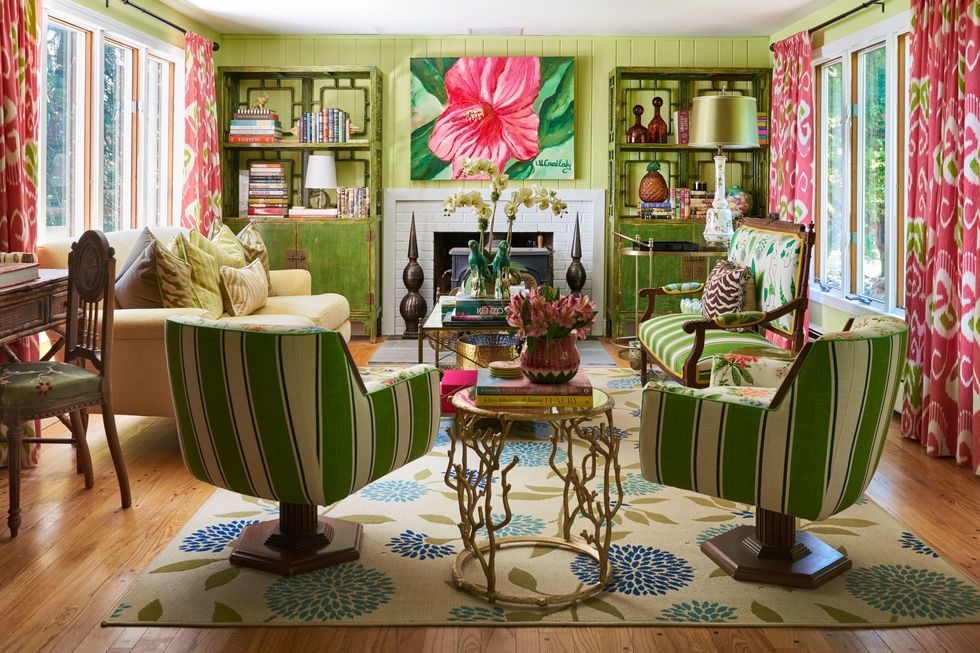
You can absolutely go wild with this idea. Adapting jungle style, you will need more green colors than before. Paint the wall with light green color then add some green-colored bookshelves in the room. While the green and light yellow couches strengthen the jungle charm, you can use pink and green-colored curtains as the complement. Add a fireplace in the middle of the room to make it looks wilder. (via wirindiagrampedia)
5 Ideas How to Decorate a Small Living Room:
There are more than dozens small living room decorating ideas you can find in internet or interior book and magazine. Staying in a small house pushes you to be more creative with the storage and the decoration. While considering both points, you cannot cross comfort and fancy look from the list. That is why you need some tips to make it work.
Or may be not, anyway, let’s find next new idea on the list
26. A Tinted Bottle Project
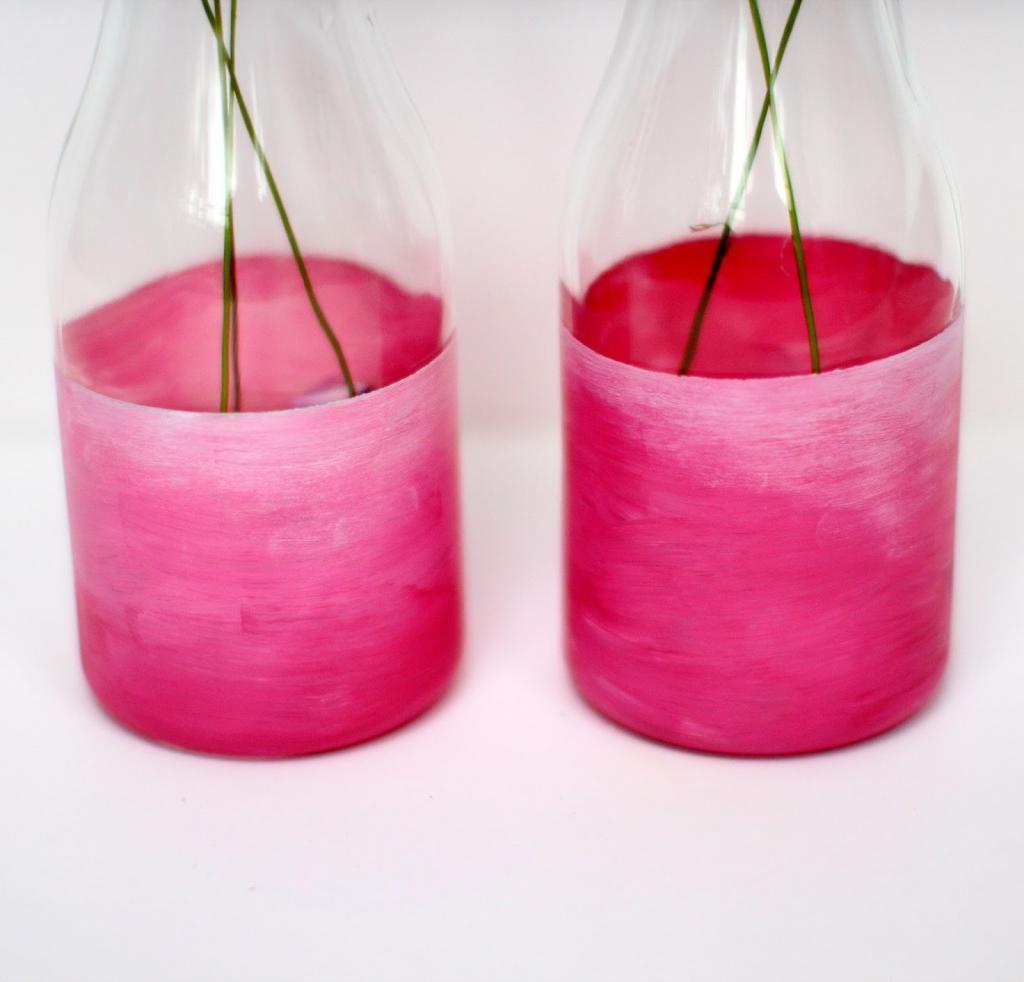
This project will transform your table into something bright and blooming. You will need empty milk bottle or glass, emulsion paint, and duct tape. To spread the color, you could use your hand or rough brush: the messy color shapes different art. Stick the tape on the bottle to let you limit the border and start staining. Pink and white will suit romantic theme, especially with the ombre look. Allow the bottle to dry for several minutes before removing the tape and done. (via katescreativespace)
27. The Artistic Lyrics
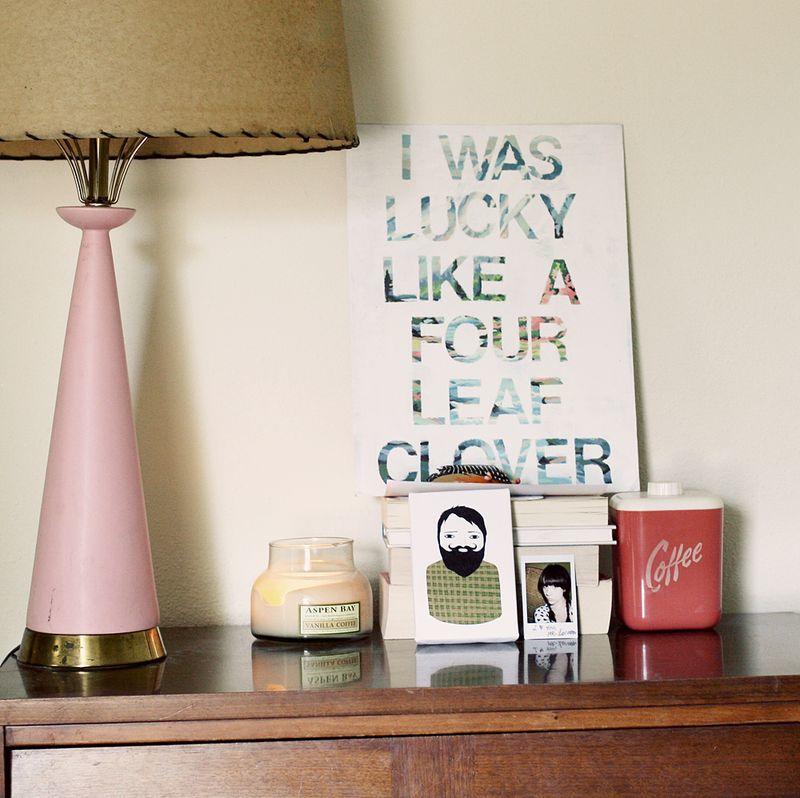
Have you got beautiful art stacked in the corner of the room? Put it back to the front row by adding a little bit magic on its surface. You will need artwork letter sticker. For the next fifteen to thirty minutes, you will be busy to cut the sticker to letter, forming your favorite lyrics. Stick the letters on the drawing, then apply several layers of paint on it. Turn on your hair dryer to speed up the drying process. Pull the stickers carefully. . (via abeautifulmess)
28. The Letter Wall Art
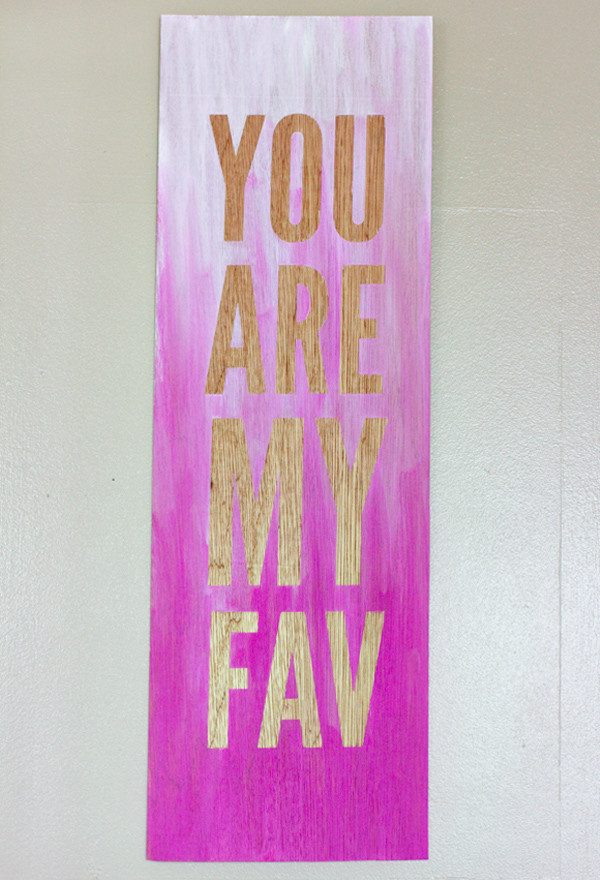
See the reclaimed wood on a garage sale? You could turn it into something artistic with duct tape and two tone paints. Just see how the natural pattern of wood blends with colors. Set the area where you want to tape the letters. Mix two tone colors in three small cups, each has degraded colors. Stain the wood with lighter shade on the top, and switch swiftly to the darker shade on the bottom. Peel the sticker when the paint is completely dried. (via sarahhearts)
29.Three Dimensional Beauty
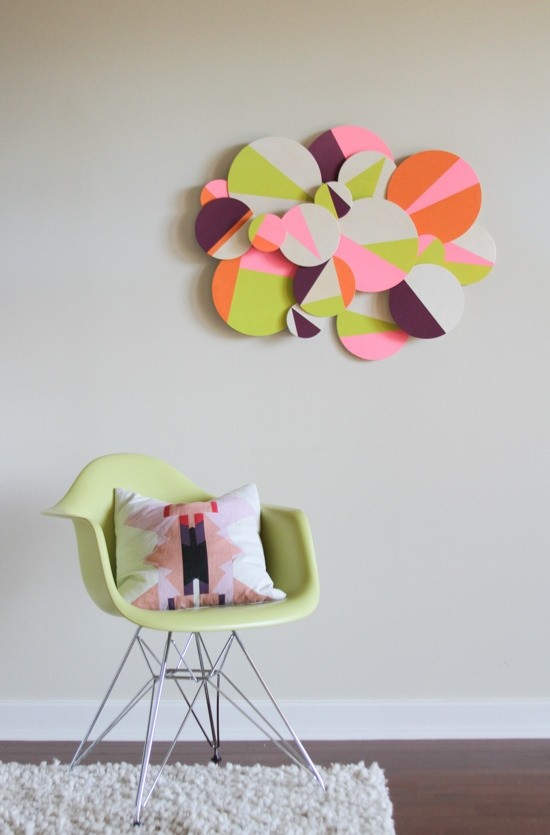
Fill up the empty wall with this beautiful property. Made from thin circle wood, this wall art gives off fancy vibes in the room. There is no limit in colors, but it is better to pick just five of the best. Purchase the acrylic paint of the chosen color, wood glue, 4, 6.5, 8, and 10 inch plywood. Paint the wood diagonally with three colors. After that, organize them to replicate a flower bloom, using the biggest circle as the base. (via curbly)
30. The Pretty Jars Project
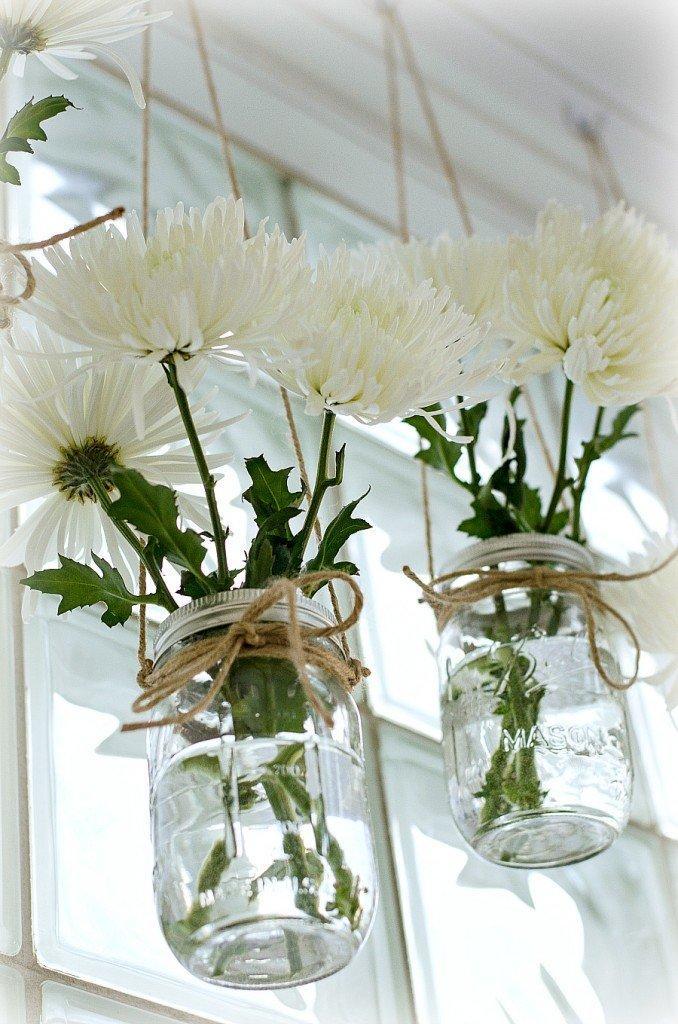
By using jute and hooks, you could create a superb decoration for your window in the living room. Grab some mason jars and fill one third of the jar with water. Insert some pretty flowers in it. Mount the hook on the wall, about two inches higher than the curtain rail or the window frame, if you don’t use curtain. Tie up the jute around the jar neck and leave it long enough to reach the hook. Make it even prettier with a ribbon tie facing to the front. (via itallstartedwithpaint)