For decades, wooden tables have become enticing furniture to pick. Nevertheless, when they got scratches and bumps over the years, it presents a horrid view. It’s time to go to a furniture store? Not really. You can strip them off with a proper retouching.
One of the reasons why we love makeover projects is that we get a fresh look at a minimum cost without scratching the wood. Tinker your ingenuity a bit and you get a renewed stuff.
To make things easier, I have 10 before and after wooden table makeover project offers. Here we go.
And as always, this list is ranked for you by Simphome.com
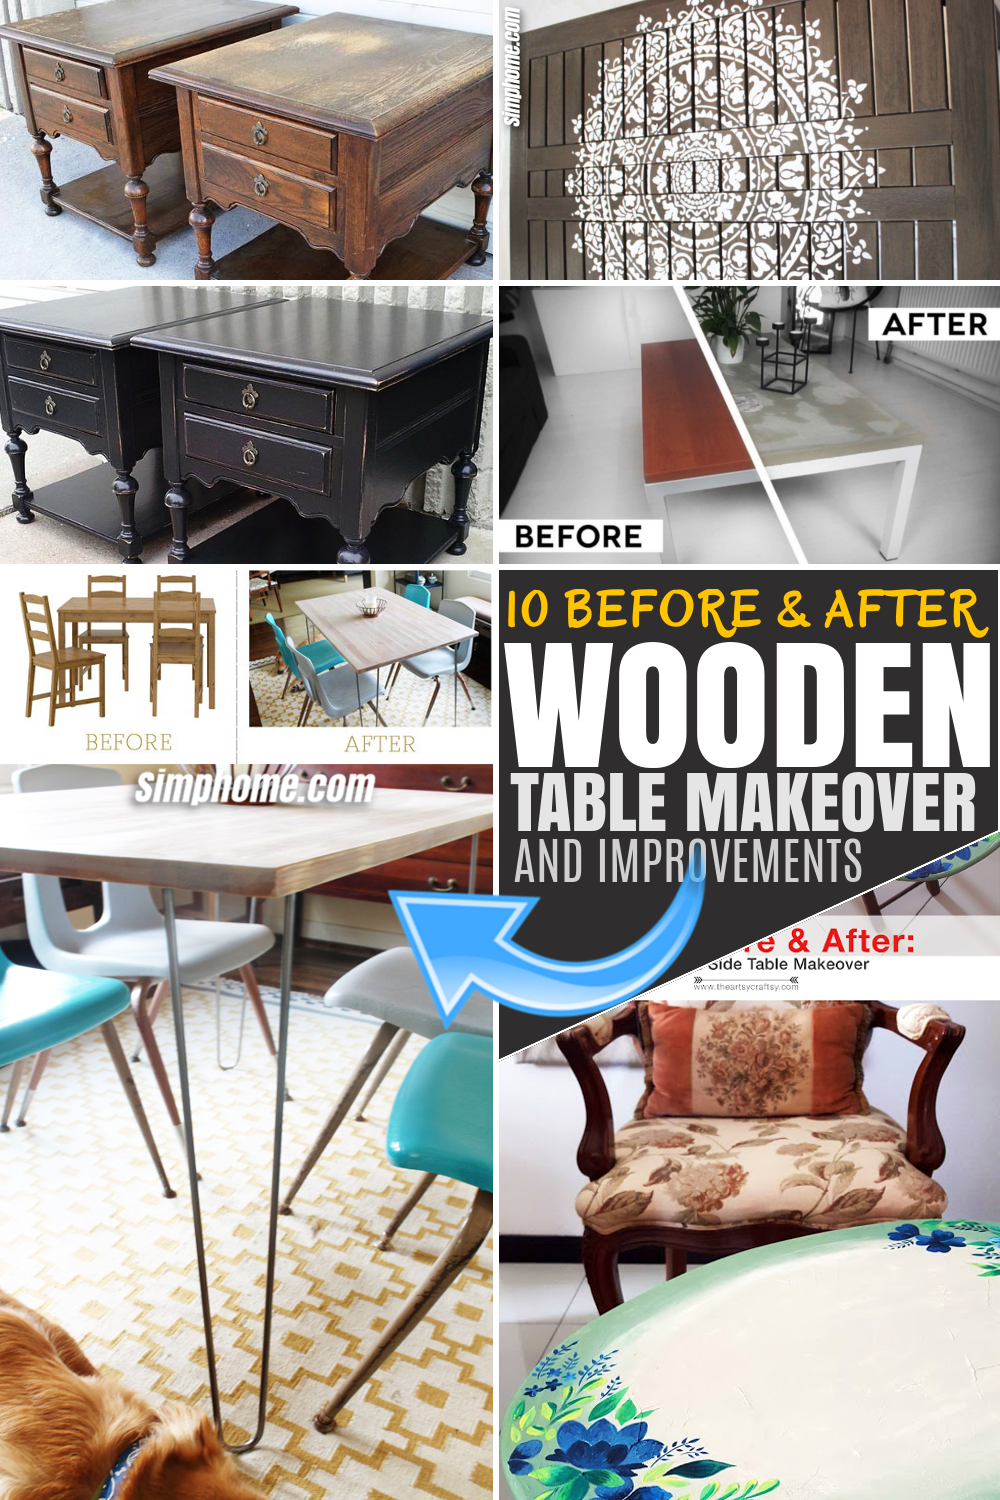
10 Before and After Wooden Table Makeover Projects Video:
List Entries:
10. A Crafty Side Table Makeover project idea | Theartsycraftsy
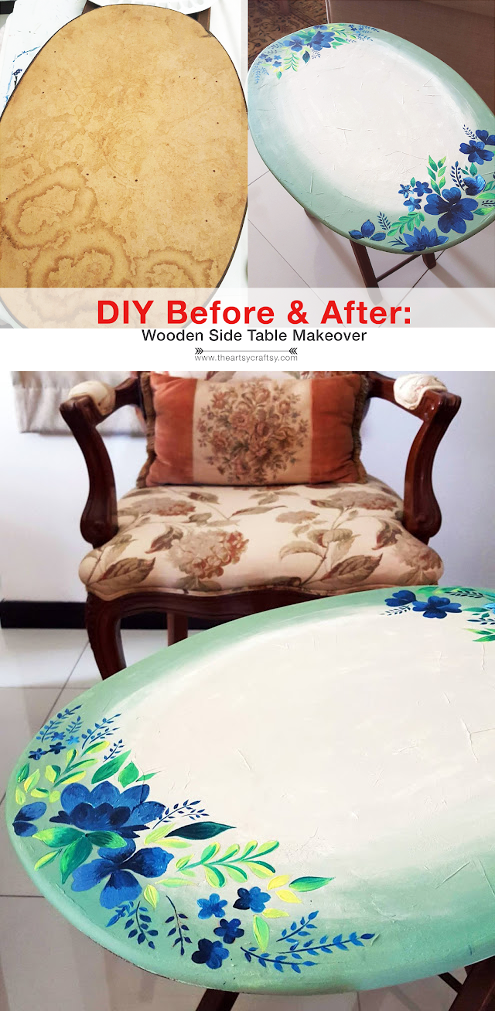 A wood painting project is a good opening. Let’s turn an old, foldable wooden side table into a folk-art inspired table.
First, use a basecoat to cover the stains. When it is dry, paint the background using olive green and beige background colors. Begin with the corners and slowly switch to the beige tone, until the center.
For floral design, sketch the pattern and then paint it cautiously.
It is sounder to interchange between light and dark for the flowers and leaves.
9. Update your wooden Table with Spray Paint | Beforevafter
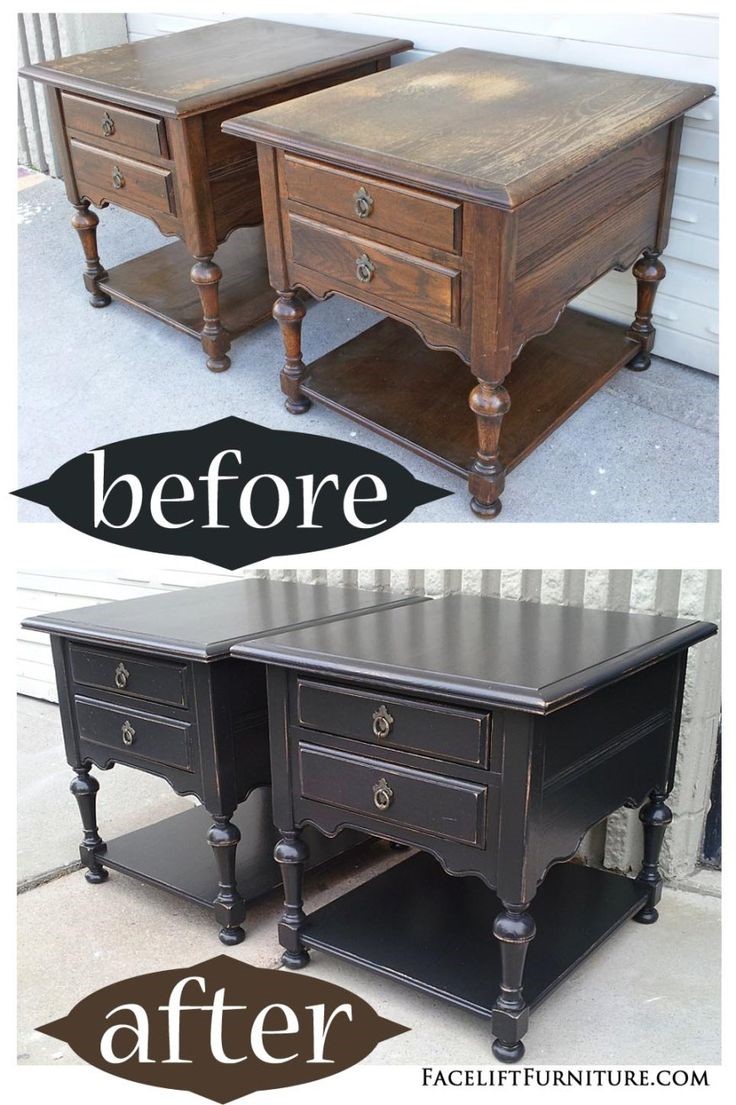 Next, we are heading to an easy-peasy way to update your end tables. Do you have them at home? They are feasible products to put some decor or things.
Even so, when they are aging, they need renovations. One of the most efficient and handiest ways to revive them is spray painting.
Prepare a spray paint and some sandpapers. Clean up your table from dirt. Then, sand the scratches and bumps. After you finished, clean it up once more. Now, spray it with your desired color. Keep in mind, for the best result you have to paint several times.
You got its vigorous fuss back!
8. A Tile Top to Herringbone Top project idea | Thebudgetdecorator
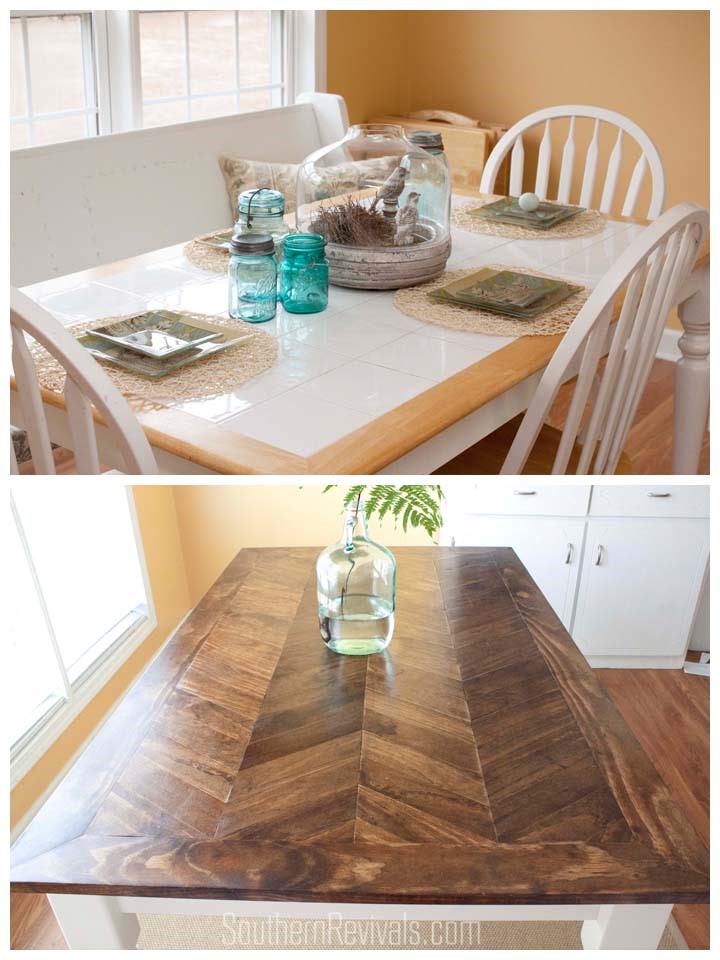 It’s a more complex job but it’s worth it. Rather than trade the tabletop, you can apply a wooden herringbone pattern on it.
Supplies you need:
1 x 4s (frame around the pattern), 1 x 3s (pattern pieces), a miter saw, screws, high-quality glue, stainable wood filler, sandpaper (120 grit), stain and sealer.
Start by measuring the size of your table and lay out the design. Double-check it to ensure its precision and cut the boards.
Using screws and glue, add a new frame around the tabletop. Fill all of the screw holes with stainable wood filler. Sand the tiles; add the glue to each piece individually and apply it to the table. Fill in any gaps with wood filler. Once it’s dry, sand the entire tabletop to even it out and get it ready to stain. Your job is done!
7. An Abstract Console Table project idea | Deliciousanddiy
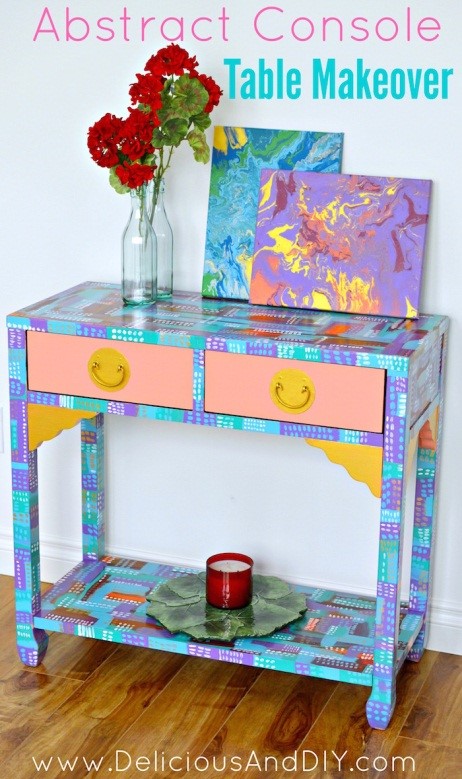 It’s a bright and lively thing to cheer up your corners.
In the next minutes, you will get a gorgeous furniture piece.
Supplies: some Deco art products (adjustable), deco art metallics, enamel, color stain, vintage effect wash, varnish, multiple size brushes.
First, Kick-off right away if you have a primer base. Create brush strokes in a geometric-pattern-like with the blue and green shades. You are free to make mistakes, it’s an abstract art anyway!
Add a layer then let it dry. Next, layer more colors on top and on the above shades one by one.
Fill in the gaps and layer on existing layers. Repeat for the legs.
Now, draw your pattern by using multiple brushes.
Give a coat and finish it with varnish.
6. A Wooden to Concrete Tabletop project idea | Youtube
Is it possible to transform a wooden table into a concrete one? Absolutely! We’ll snatch a groovy and unfussy minimalist concrete tabletop from a horrible coffee table.
Prepare some cement, a bucket, paint, a tray, a roller, sandpapers, a trowel, a plastic sheet and a screwdriver. Take the screws off the frame and detach the tabletop. Then, put your plastic sheet on the floor and lay your frame on it. Pick your paint and paintbrush, start painting. After you paint it, let the frame dry. Now, sand the entire tabletop. Next, vacuum it to remove all the filth. Mix the cement and water in the bucket, then apply the cement on the tabletop, bit by bit. Using a trowel, ensure the cement is even and smooth. Wait until it is dry, attach it to the frame and screw it.
5. An Ikea Table Hack with Masking Tape | Design Sponge
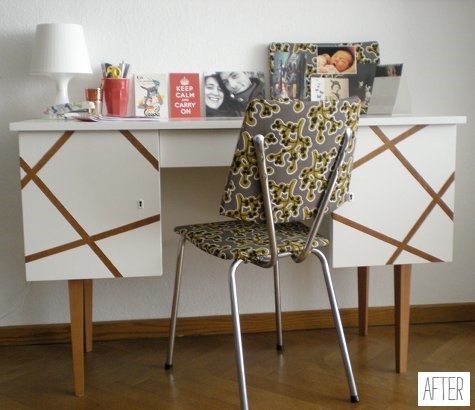
Supplies:
A Masking tape and a pencil.
All in all, you can bring any color into play, but it’s better to match it with the legs to fashion harmony.
Take a pencil and draw your design directly on the table. Hence, you can imagine the end-product.
After you finished your preferred layout, stick your masking tape accordingly.
Mission accomplished!
4. Install Hairpin Legs for a Mid-Century Modern Look | Acutedesigns
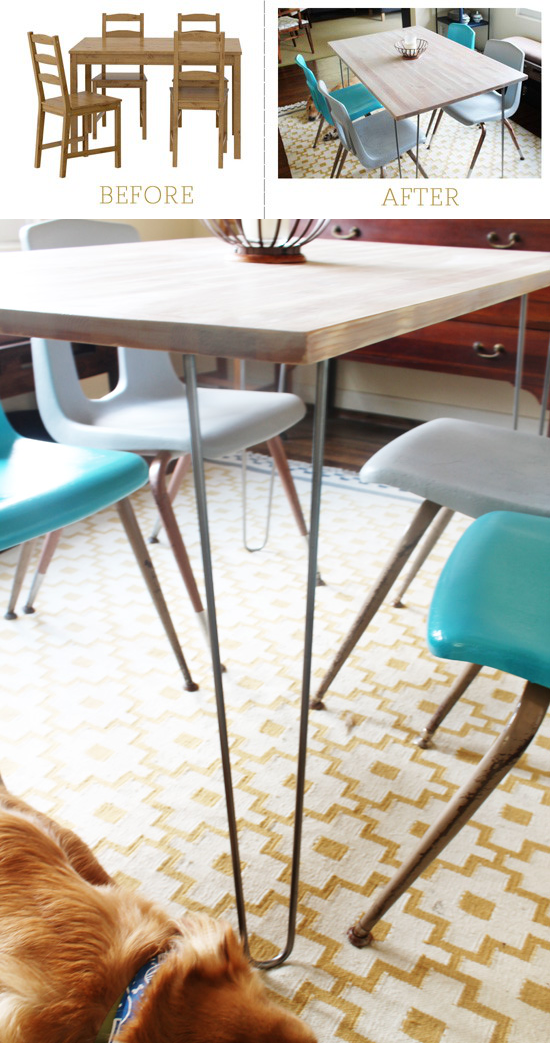 Believe me; the whole grind is so green. Once you perform these undemanding steps, you’ll pull off a modern look at a rate of knots.
Supplies you need: Some sandpaper, stain, hairpin legs, screws and a screwdriver.
Instruction:
Start by removing legs and trim. Sand the tabletop and sides; wipe away the dust and stain the wood. Next, take the hairpins legs, screw them to each of the four corners. That’s all!
3. Stencil Your Old Table | Simplenaturedecorblog
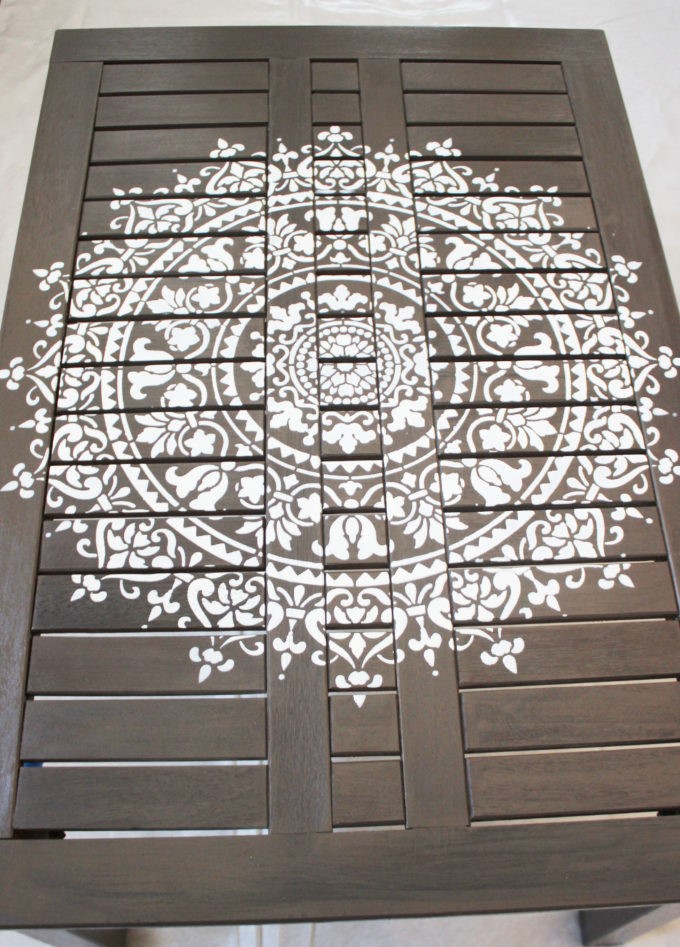 It’s a tranquil DIY project yet it has a huge impact. You can do it in no time. Here’s how.
Prepare a stencil, a spray adhesive and a spray paint. Put the stencil design on the table. Spray the back of the stencil with the spray adhesive. Lay your stencil flat and press it down. Then spray the spray paint over the stencil pattern. Remove the stencil and admire your perked-up table.
Quick and chic!
2. A Wooden Top to Glass Top project idea | Dwellingsbydevore
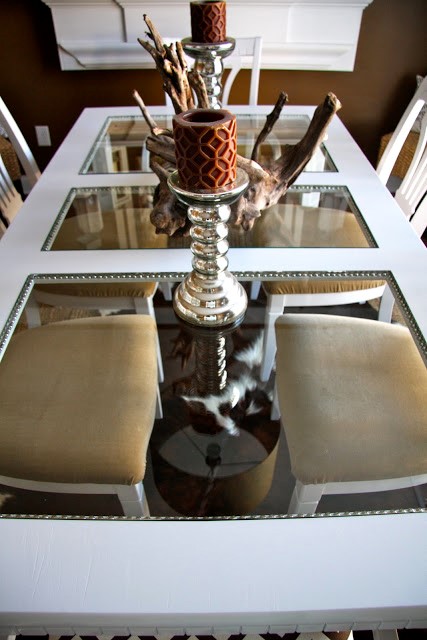 Are you hopeless with your old wooden table?
When it comes up with a large damaged area and only have the outer border left to handle.
Probably, you want to swap it with the new one.
Hold on!
You can convert it by replacing the tabletop with glass.
Moreover, it benefits your exquisite rug or whatever beneath.
First of all, cut three rectangles out of the top and create a lip for nail heads. Get nail heads trim and drill tiny pilot holes. Then, use a nail punch to hammer them in. Next, order some glass and apply them. You got it, baby!
However, we need to remind you, it’s a knotty work. If you’re in doubt, it’s better to get it done.
Lastly number 1. A Modern Style, Mid-Century Table Makeover Project Idea | PoppyTalk
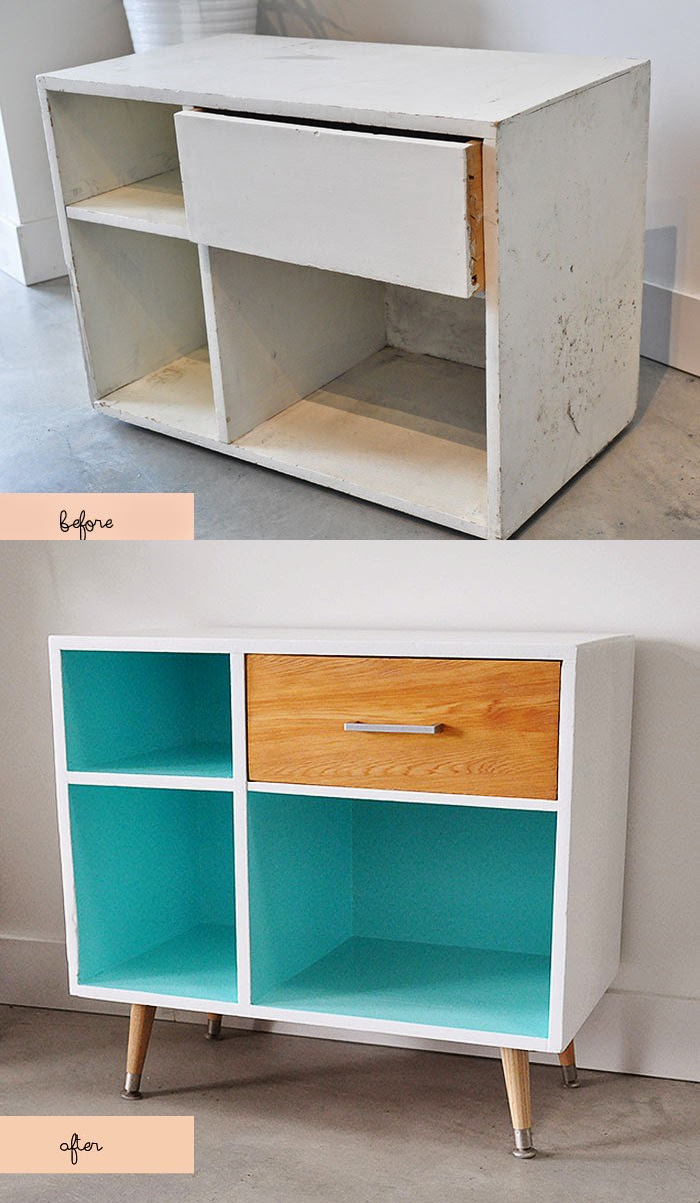 After installing hairpin legs, here’s another path to bring your mid-century modern table back to life.
Supplies:
• 2 primer coats
• 2 high-gloss enamel paint coats
• 6” mid-century modern style wood & metal legs
• 2 Tung oil coats.
One, sand it all over (drawers paint).
Two, apply 2 coats of primer and 2 coats of high-gloss enamel paint. Then, attach 6” mid-century modern style wood & metal legs. Lastly, apply 2 coats of Tung oil for the drawer and legs. Safe and sound!
You’ve come along way. In all honesty, most of these 10 before and after wooden table makeover projects are pretty natty. Still, you may want to visit hyperlinks here or other DIY blogs to learn everything you need. Do you have some revamped furniture? Share your ideas!