For some, furniture can be costly. But rather than investing in an exorbitant new piece, why not breathe a new life into old chest of drawers? You’ll not only hoard your bucks but also give a fresh look to your chest of drawers. Sounds good, doesn’t it?
For budget-friendly furniture updates, consider revitalizing your old chest of drawers and shopping for table tops online. Online stores offer various table tops in different materials, colors, and designs, allowing you to achieve a cohesive and cost-effective transformation for your living space. This approach saves money and lets you express your unique style through furniture choices.
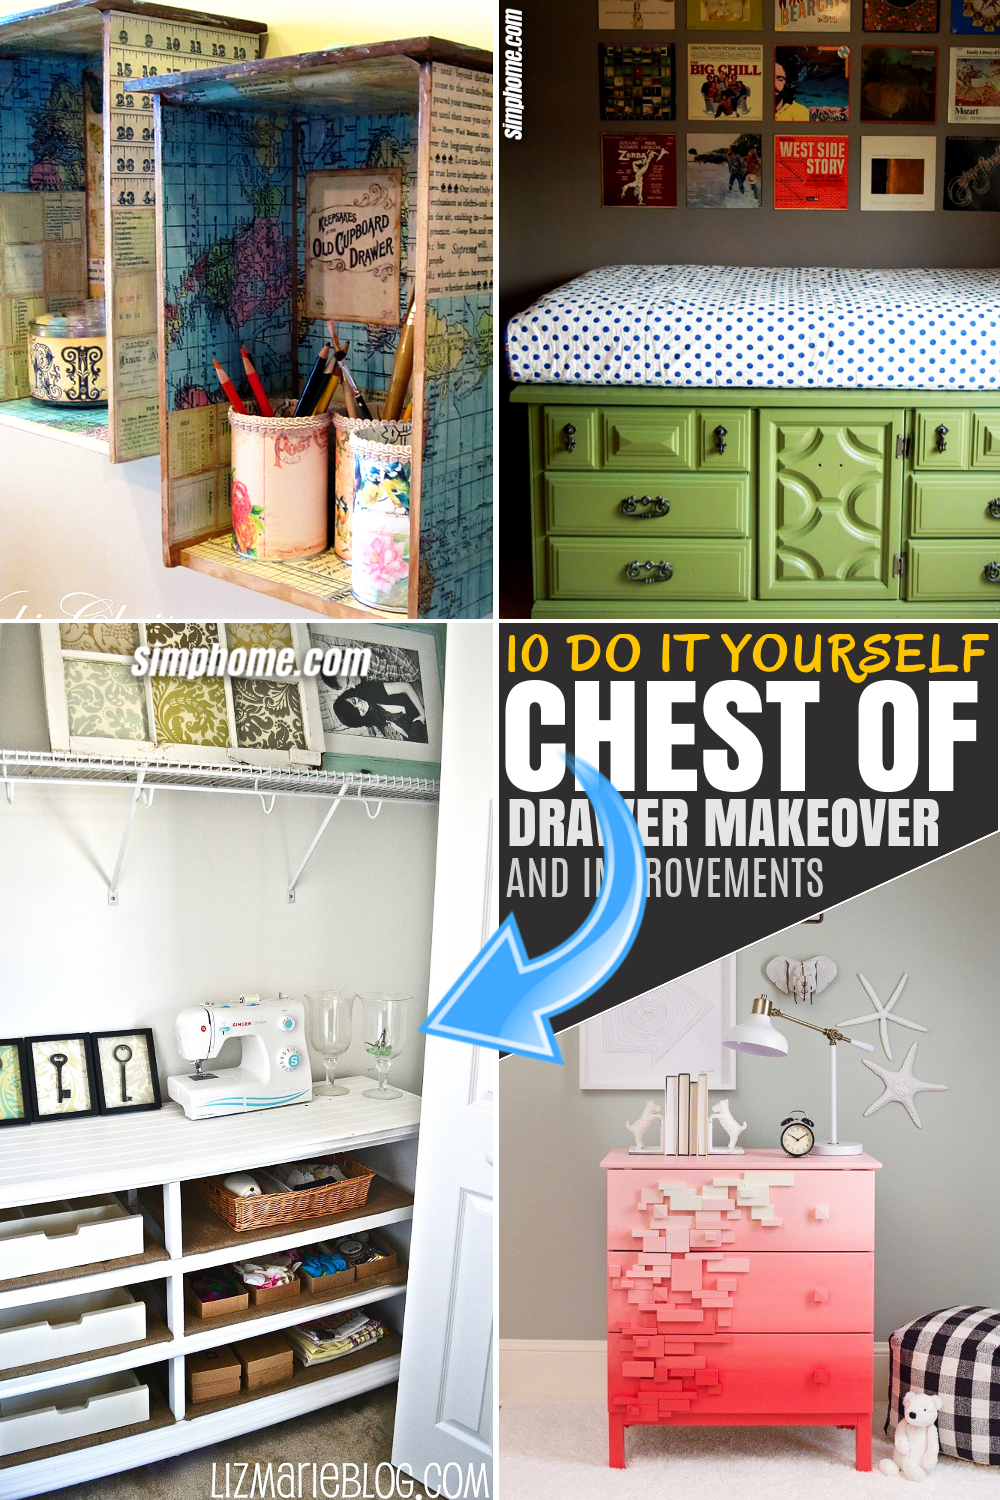
Here are 10 unique chests of drawers’ makeover and improvement ideas for you to employ.
Let’s take a peek!
As always, enjoy this list, and visit hyperlink for more detailed information.
or enjoy this next relevant thing first
10 Unique Chests of Drawers’ Makeover and Improvement Video:
List Entries:
- 20 Creative DIY Projects for Anyone Living in a Small space
- 20 DIY Projects for anyone living in a Boring space
- 22 Home Curb appeal ideas
- 20 Smart DIY Hidden Storage ideas that'll keep clutter in check
- 20 Lit Small bedroom organizing ideas
- 20 Decor Projects that will upgrade your home
- 20 Organization Projects and decoration for a Small Living Room
10. Chest of Drawers Re-facing Idea with Wallpaper | BHG
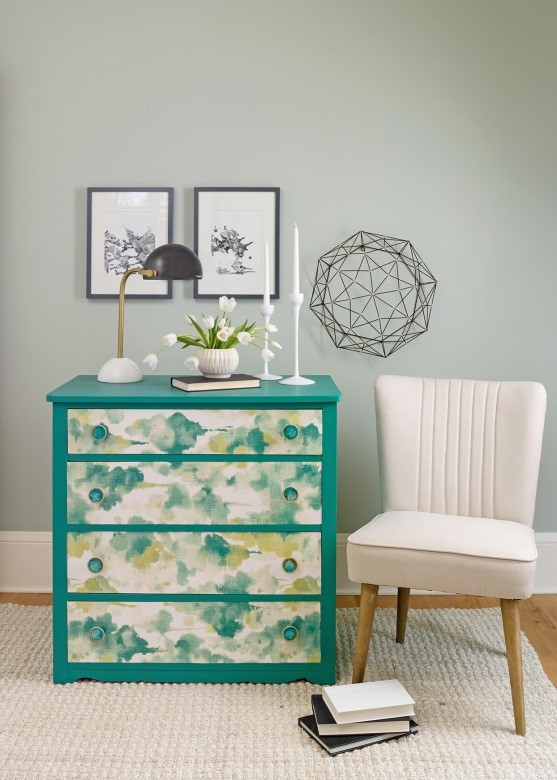 Wallpapers can do some magic when it comes to overhauling a home. Did you know that they can also do the same with your tired chest of drawers?
Get some wallpaper, a cutter, glue and then we can work it out.
Ensure your drawers have a perfect flat front because a textured surface won’t do well. You can crack it by sanding, priming and painting. Then, measure your wallpaper precisely, cut it out and adhere it with glue.
To wrap up things, install vintage drawer knobs for it.
Finish! The most pleasant part is: you get a sizable impact at a smidgen cost.
Tip: It’s better to use spray adhesive, it flattens any air bubbles.
9. Chest of Drawers has Turned into a Bench with Storages | Homestratosphere | Instructables
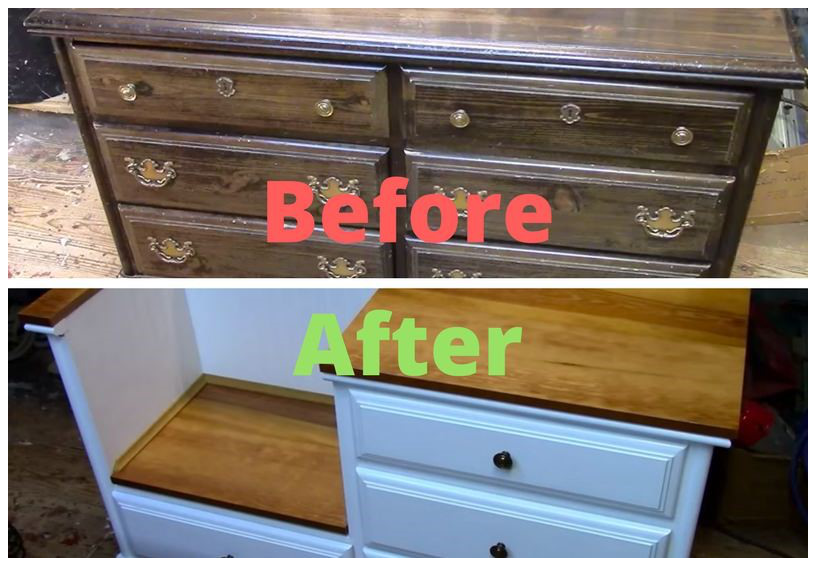 Whenever you go to garage sales, it’s not uneasy to find aged, trashy drawers yearning for a revamp. Repurposing one of them into a bench with storage will be witty.
To do this project, you need a handsaw, sandpapers, paint, a paint brush and varnish.
Use a handsaw to cut off the fallow drawers. Try to not leave asymmetrical shape. Sand the rest and clean them. Ensure you flatten them in an even and clear state. Go for any color you and paint them. Let them dry and you can apply the varnish. A cool piece you have!
8. Wall-Mounted Shelves from Drawer project idea | Vickichrisman
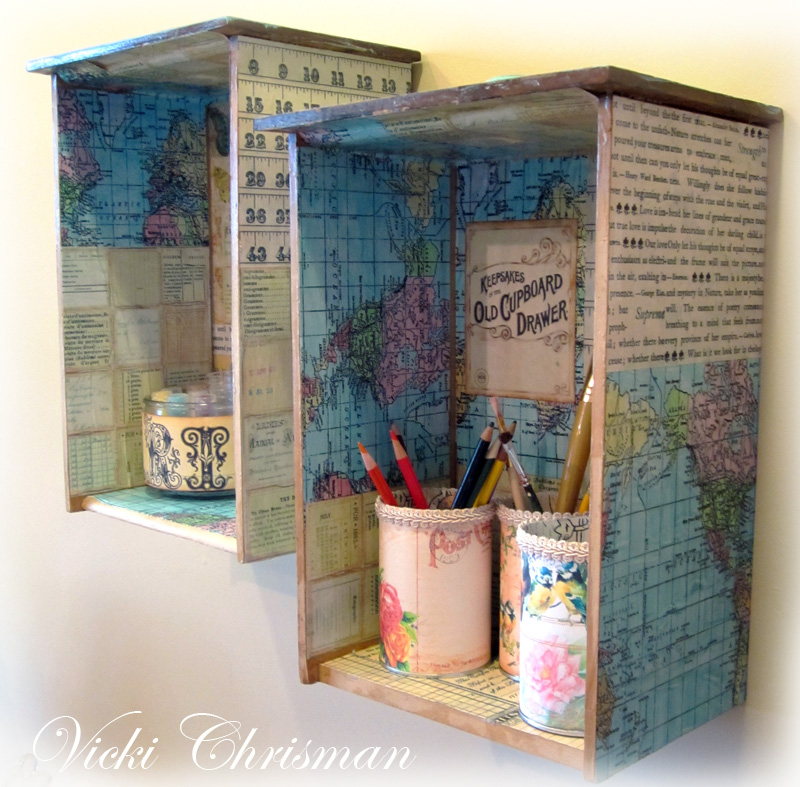 Peep at these staggering shelves. They add a rustic style into your room slickly.
Well, it’s a pretty handy task to do. First of all, Prepare some decorative papers, vintage postcards, sandpapers, scissors and paint plus scrapbook adhesives.
Next, clean up the drawers, probably you need to sand them. Then, paint the top of the drawers. After it is dry, take some décor papers and scrapbook adhesives to adhere it inside and outside.
Pick the vintage postcards and stick them on the cans to embrace your work supplies. Add photo hangers to the backs to finish it off.
Also read: 10 DIY Pipe Shelving Ideas.
7. A Vintage Kitchen Island project idea | Curbly
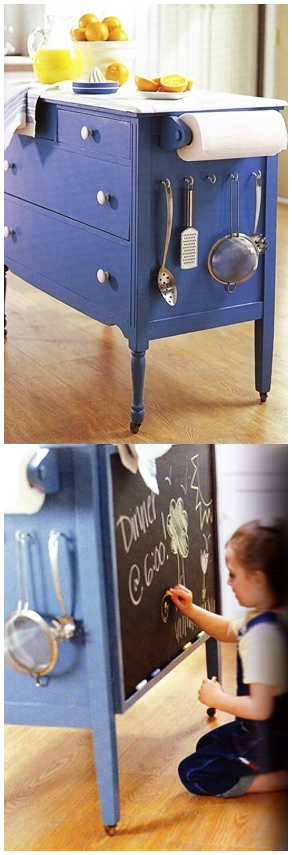 After you work this out, you’ll get perplexed on what you love most, its color or alteration. It’s time to turn your old dresser into a divine and functional kitchen island. Besides, one of its sides is covered with a blackboard that will keep your kid busy doodling when you are slaving over a hot stove.
First, wipe out all the dirt from your dresser or sand it to get a finer result. Then, paint it with your preferred color. Install some pulls and hooks on the sides. Install tile or marble countertop to round out the kitchen island. To finish it, add a blackboard for notes or kid-fun.
Other Kitchen Island ideas:
10 Cheap DIY Kitchen Island Ideas for Low Budget People.
How to Up-cycle Bookshelf to a Kitchen Island.
6. From Chest of Drawers transformed into Open Shelves | Lizmarieblog
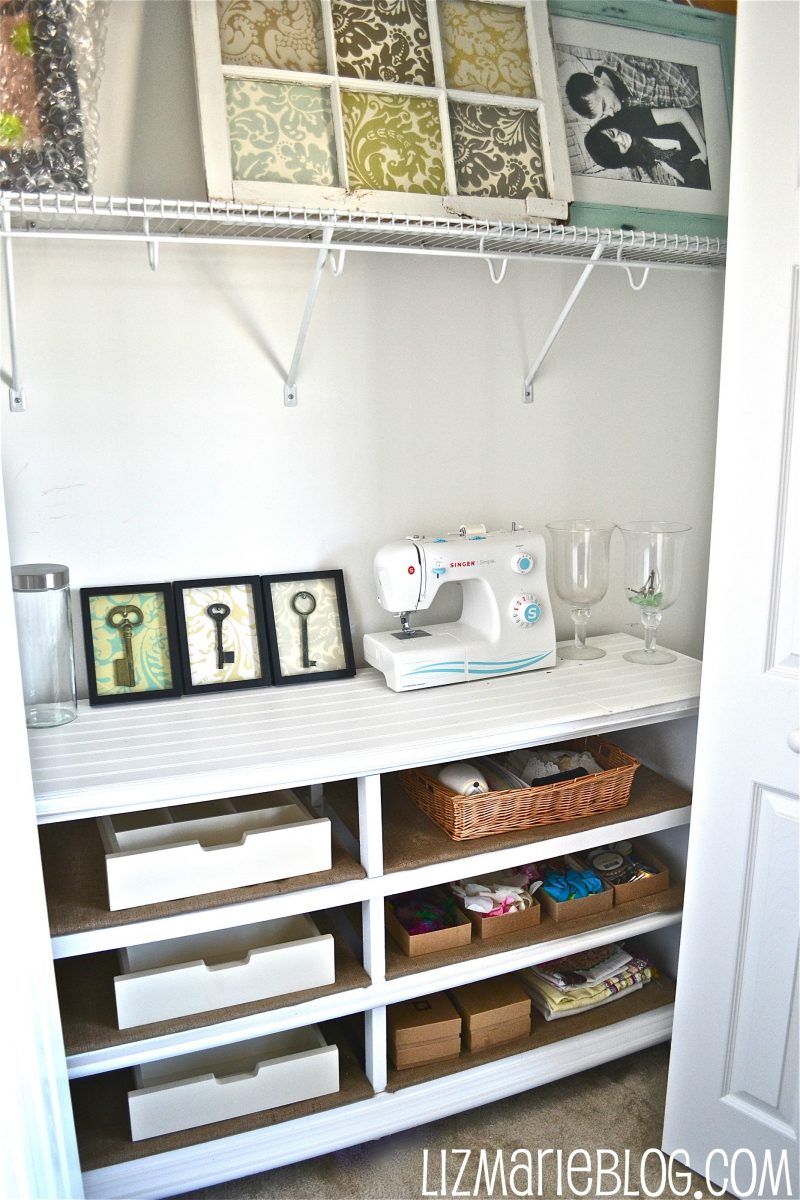
Initially, remove unnecessary items.
Next, do a lot of sandpapering and sealing to make it even and clean, before applying fresh paint coats.
Now, measure the drawers’ space and had boards cut for the shelves. Wrap them in burlap & staple them on the wood. Pore the shelves over, if they fit the space firmly, forget the nails. Staple the beadboard to the top of the dresser and fill the ridges. All set! It’s a great place for organizing stuff and it will give you the joy of litter free. Say good bye for losing small things.
5. Ombre Color Gives Your Chest of Drawers a Facelift | BHG
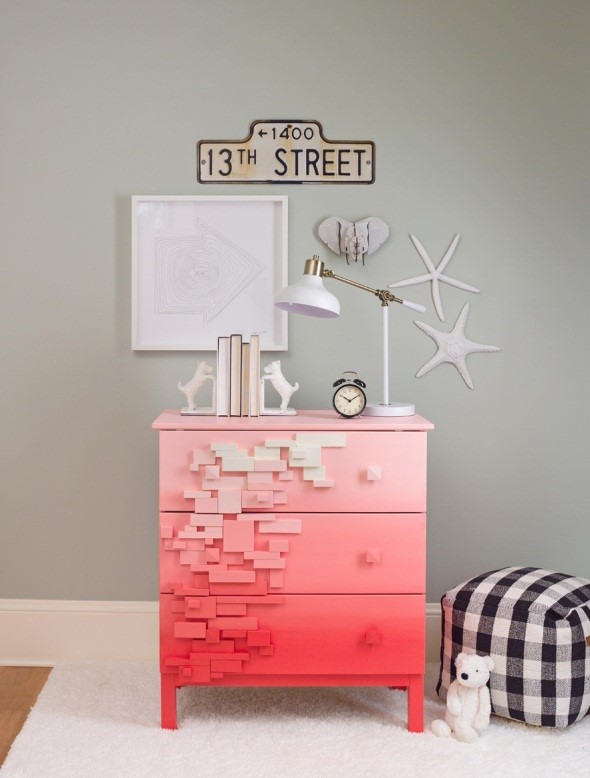 Ombré, a gradual shift in shading from one color to another, is a no-fuss way to facelift your dresser.
Pick a bright color, section your dresser into three parts. Cautiously, paint the top and middle part with their matching colors. Spot the linking point of the lightest and middle color, then, mix the two shades. Use it to blend the two parts together. Recap for the rest.
Now, cut a woodblock into squares and rectangles. Paint the blocks and stick them onto the dresser drawer fronts.
4. Upcycling Chest of Drawers into a Twin Bed | Ladybirdandfellow
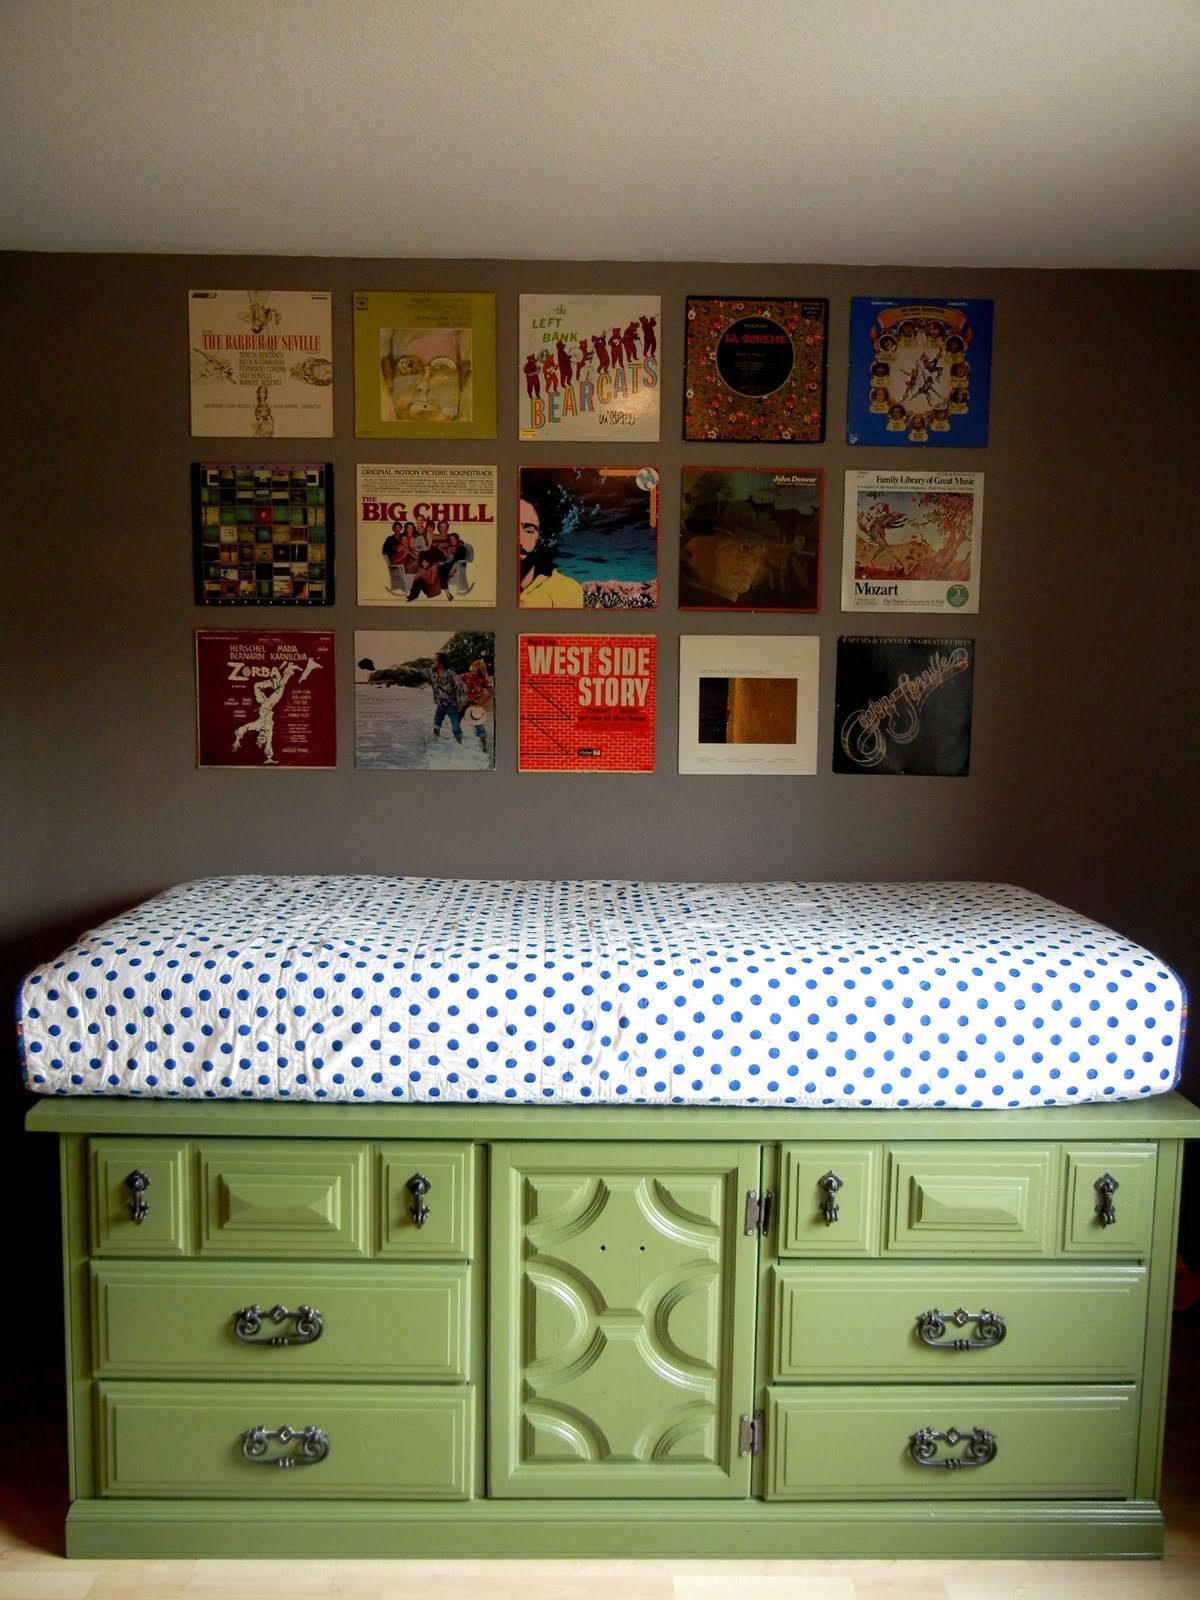 Check your dresser. Does it have an exact length as a standard twin mattress? If it does, then this will your next project to add your space, without losing vital storage. You’re going to love it.
Supplies you need: paint, a paint brush, some wood, L brackets and wood screws, a handsaw.
First, paint your dresser. Then, cut the wood based on your requirement. Connect them with screws. Install some L brackets to strengthen each corner.
Additional storage? Checked.
A bed? Checked.
A place for kids to hide and freak out the grandparents?
DOUBLE CHECKED!
3. A Fancy Desk Project on a Budget | Thriftyandchic
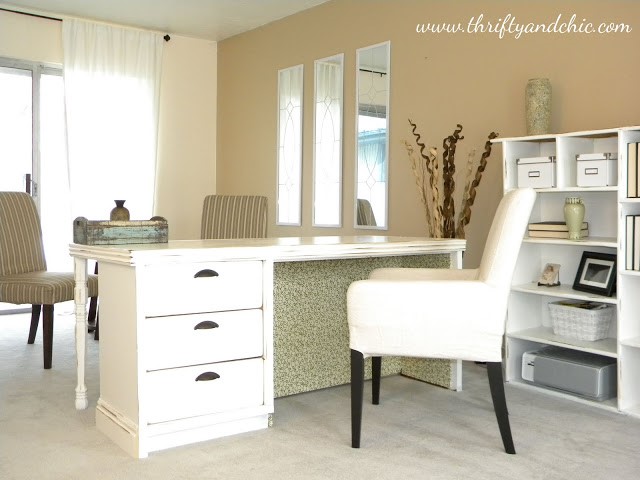 Let’s shift a dresser into a fancy desk.
Wait! Are you serious?
Yup, your old dresser must have bumps, bruises and a few broken drawers. With a watchful planning, you can deliver another art.
Get rid of some drawers. Using jigsaw, take out the framing of the other two columns. Pry off the drawers’ handles that you keep. Cut the staples then sand them.
Now, paint the base and attach particle boards to the top. Screw in the top and into the frame of the dresser below. Fill the gaps with wood filler. Apply spindles to balance the ‘desk’. Next, add molding and baseboards, and then paint them.
Pick a piece of sandpapers and distressed it a tad, so, it isn’t plain white. Rub some dark walnut stain. Coat entire things with polycyclic and install new pulls. It takes a lot of patience, but it’s totally worth it!
2. Chest of Drawers to a Mudroom Bench | Theweekendcountrygirl
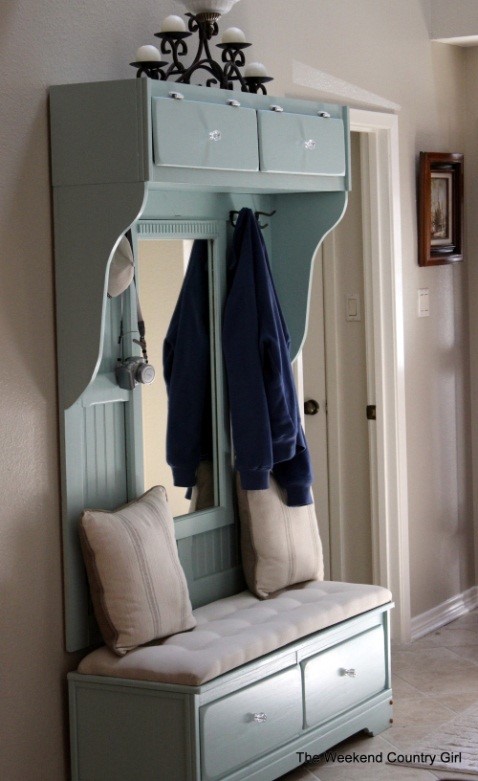 Give your chest drawers a second chance by turning them into a mudroom bench in the following steps.
First, remove the top two rows of drawers from the dresser and create a bench by adding a plywood top. Next, build a separate top piece from the rest drawer fronts.
Chop off the mirror frame top and route the 2X4’s to match the mirror. Then, construct a board and bat over the beadboard back to connect the piece visually.
The beadboard and top are connected, but they float over the bench. It allows an easy installation and access to electrical without cutting holes in the wood. Finally, add crystal knobs and paint it.
Relevant mudroom improvement ideas:
10 Awesome & Worth Trying Mudroom Makeover Ideas.
10 Creative ideas On How to Revamp your Mudroom.
Lastly number 1. Classic Planters from Old Dresser Idea | Homedit
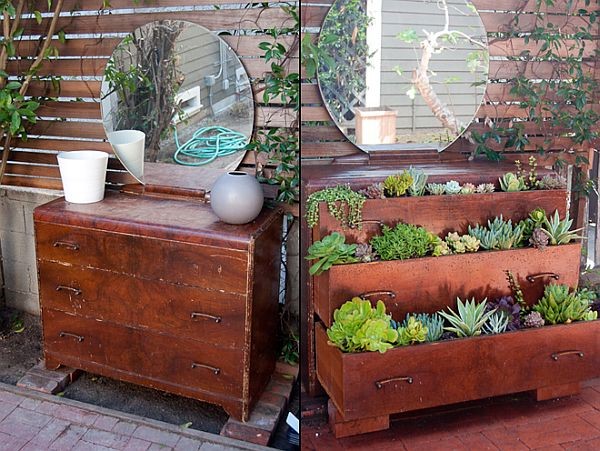 Adapting furniture is an enticing idea, at all times. For this old dresser, you will have something else. Three spacious drawers and a rustic look, the dresser is a great the way it is. Hence, instead of an extreme overhaul, you just need to pull the dresser outside.
Then, fill its drawers with plant pots and your hard work is over.
It’s as easy as winking!
So, there are myriad ways to revive dressers or chest of drawers. I am sure one of those 10 unique chests of drawers’ makeover and improvement ideas will inspire you to take one action or two. I have to admit, several are time consuming and labor intensive. However, I believe the result will be rewarding.
Good luck with your decision and see you again with other furniture improvement idea below!