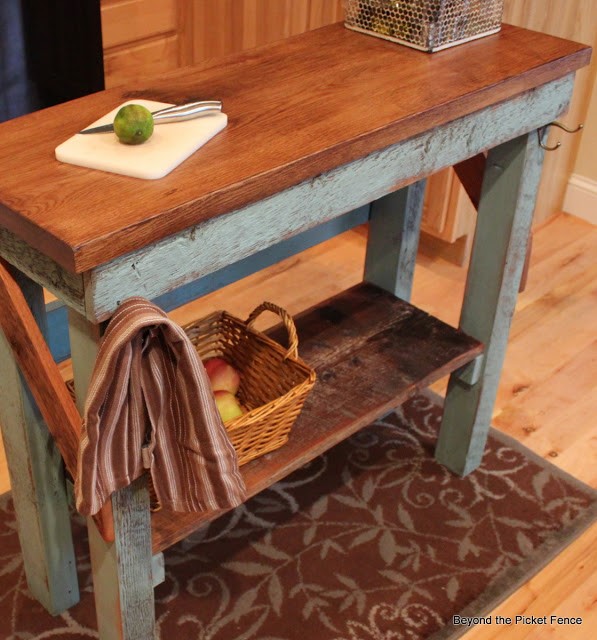
A kitchen island provides storage and display. Even better, it can also be a dining table where you can tuck away your morning toast and orange juice for breakfast. Unfortunately, some stylish kitchen island available in home-improvement stores can cost an arm and a leg, leaving you DIY works as your only option. In this list, I have compiled 10 cheap DIY kitchen island ideas that I think won’t hurt anyone’s bank account. As usual, I made this list for you for simphome.com
10. Transforming a cabinet into a kitchen island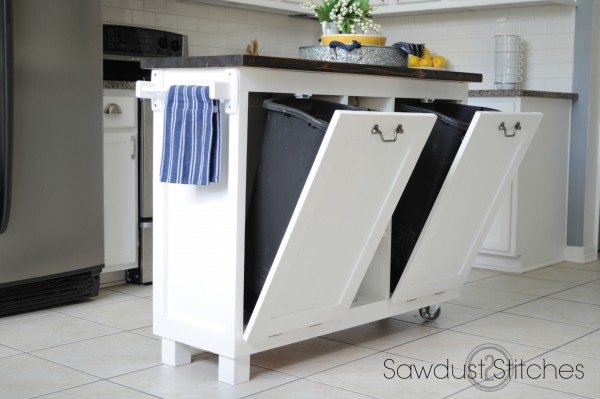
If you are strolling around the neighborhood and come across second-hand cabinets that are still in a pretty good shape in a garage sale, don’t miss the chance to buy it. Trust me! These cabinets can turn into a fabulous kitchen island. They just need a little tweak.
First, you need to remove the doors, hardware, and face frame. Second, paint them. Third, assemble an open shelf and install them in the center of kitchen island, separating the left and right side. Fourth, to finish the hack you need use cleat and hooks.
If the frame of the cabinet is still sturdy but suffer blemishes, cover them with leftover paneling. To make the kitchen island look more special, add trim pieces at the top and bottom of it.
Lastly, slide in a dust bin on each side of the open shelf, add doors, hinges, castor, and legs. In the end, you have a kitchen island with accessible dust bins that you can hide and unhide at will without lot of efforts.
9. Farmhouse Kitchen Island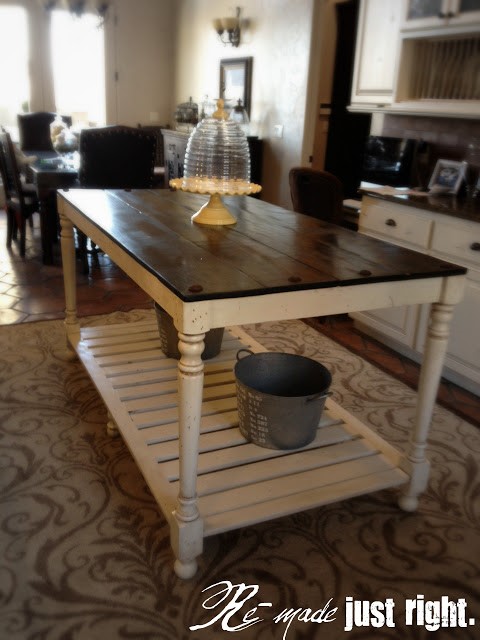
Curvy legs, rustic legs, and shabby table tops. If combination of these words is beauty in your mind, Next, I’ll tell you a formula how to produce it. First, you’re going to need 1X4 pine for the sides and bottom rack, 1X10 pine boards for the top, 4 stair case posts, wood glue, and a link inside description.
First, cut pine boards that you’re going to use to make a bottom rack, then line them up by attaching each end of the pieces on the two ends.
Once the bottom rack is done, attach it to the bottom legs, then attach the top boards. Since the bottom rack consists of a lot of wood, the hack needs you to add two extra legs supporting the kitchen island in order to make it sturdier. These extra legs will be useful especially if your kids often have sudden urges to climb up your island.
8 A Barn Wood Kitchen Island with Towel Holders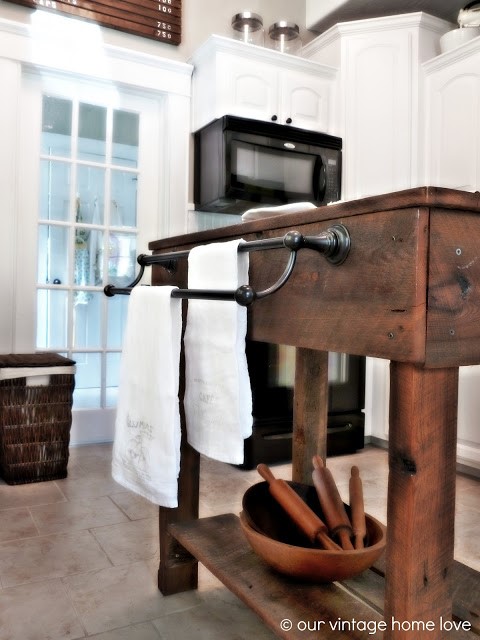
One of the best ways to salt away some money during any furniture makeover is by using leftover wood boards. It brings smile to our friends in environmental foundations and adds a well-worn look that many homeowners are crazy about.
This kitchen island is made of old barn wood. Before working with the boards, give them a good scrubbing using soap, water, and a scrubbing brush. After that, let them dry.
Now, let’s work with the top. First, Place the boards side by side. They have to be 23”x37”. 3 pieces of wood aligned side by side 23 inches across and cut 37 inches long. Next, take another two boards and cut them into 18” in length. You need them to connect your planks.
Pre-drill them first before you attach them with wood screws. After Done, start assemble the sides and legs. For a perfect finish, sand down your new rustic-kitchen island before applying three coats of polyurethane. A Comment said a best feature of this hack submitted by two towel racks that anyone can use to access towels when needed. There is no way I could disagree it.
7. A Simple Kitchen Island idea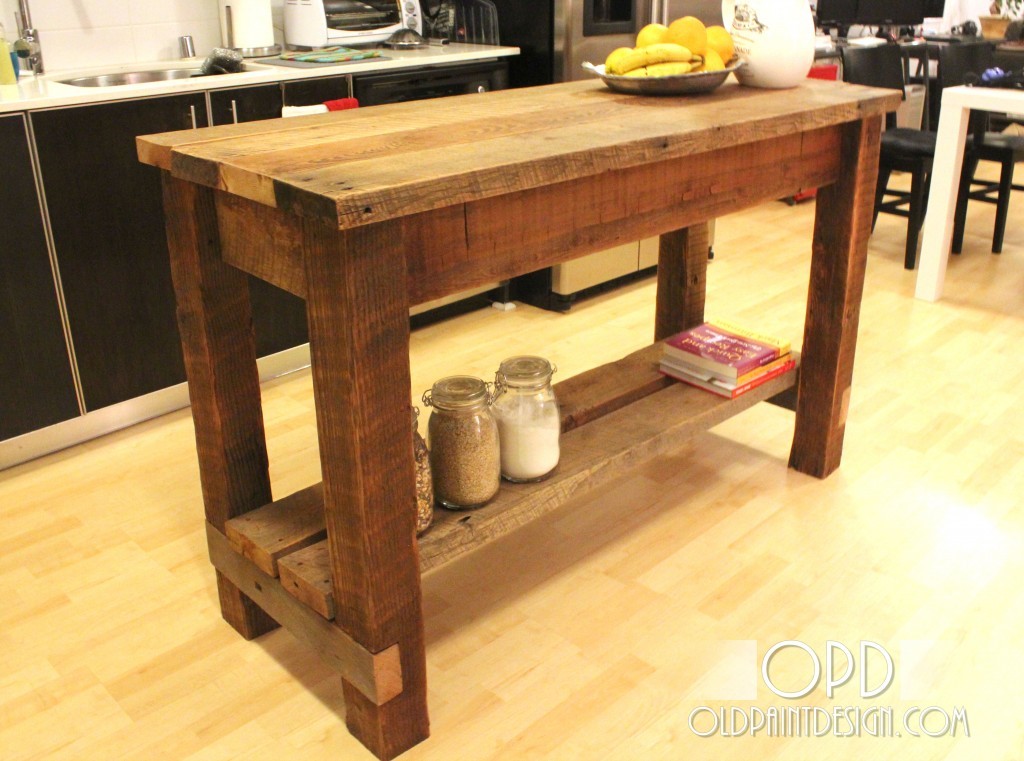
This kitchen island is suitable for a busy person like you who does not have enough time to take more than a single DIY project a year. It is simple, cheap, functional, and reliable in a good or bad day. It features three drawers, a bottom rack that functions as an additional storage, and your taste of woodworking art.
To make this kitchen island, First, you’re going to need plywood, wood glue, wood filler, 3 set of 12” bottom mount drawer slides, and a link from oldpaintdesign. They’re proud sharing it publicly. To finish this hack, you have freedom to stain it whatever you like, or even paint it – anything that personalizes your style is welcomed.
6. A Rustic Kitchen Island idea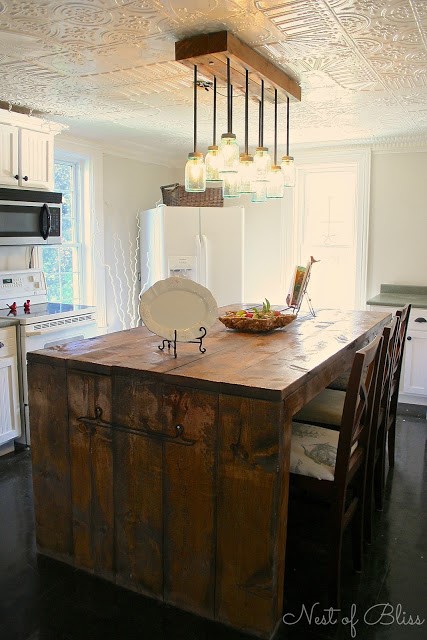
When stepping into this kitchen, a rustic kitchen island will gaze your eyes. DIY jar lamps shed beautiful light onto the kitchen island which is the most conspicuous thing in this kitchen. You can also bring this look home.
Author of this DIY used some old wooden boards assembled together using screws or nails. It comes with an open space under its worktop, allowing anyone sit comfortably without bumping knees onto solid support posts. It also has two open shelves functioned as extra storage and it invites you to click link inside description area to learn more.
This is another challenging kitchen island hack that you can include in your next DIY agenda. It is tricky, but, with a piece of wood (material for a table top), 4×4’s wood (for the legs), and some planks (for the long side apron pieces), you can solve it.
Once you’ve got these supplies, assemble them using nails or screws, and complete it with staining or painting them as you please.
4. An Elegant Kitchen Island idea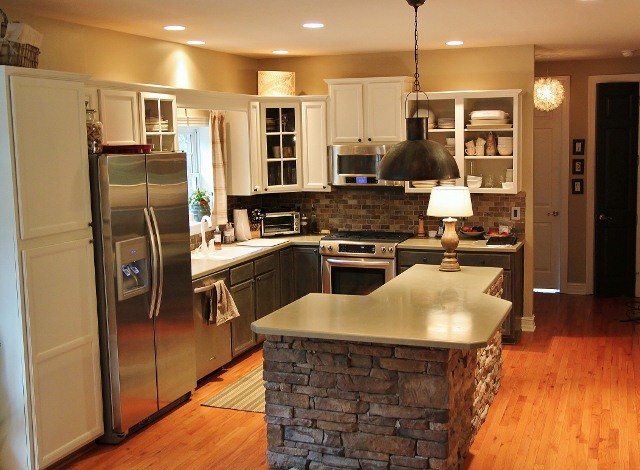
Improving a look of your kitchen doesn’t always entail a lot of work and major overhauls. First, look around your kitchen and figure out what you can do with your existing furniture like your kitchen island, for example.
You don’t have to throw your weekend in your garage to make a new kitchen island. All you need to do is just buying faux stone tiles and cover the legs of your existing kitchen island with them. And, Done! A brand-new kitchen island is all yours.
3. Free Pallet Mocktail Bar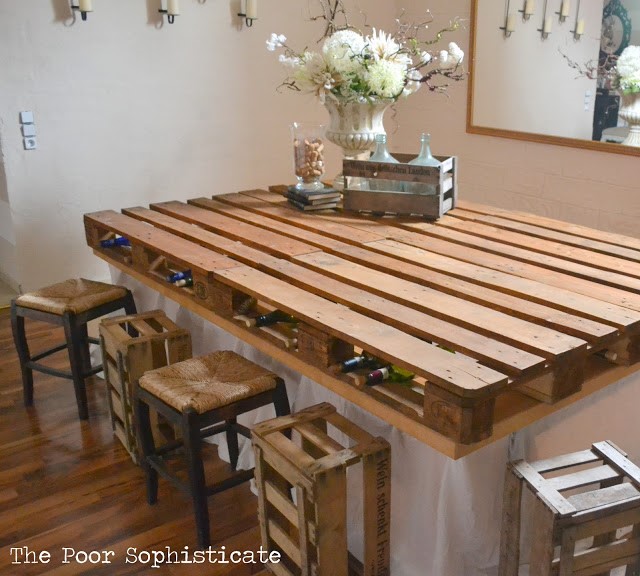
This wooden bar can be alternative spot to hang out with your friends or family. And a decent kitchen island or olive oil storage solutions if wine or mock-tail testing is not your thing. It is affordable, required materials are mostly free, and it is mobile. Just find two wood pallets, clean them, sand them if you need, lay them on top of your existing table, and invite everyone to admire your new kitchen centerpiece.
Lastly! You might need to cover the not-so-good-looking table with a white cloth before stacking the pallets. To kick it up a notch, convert some wooden crates into wooden stools. Make sure they are sturdy enough and you’re good to go.
2. A Kitchen Island with Pegboard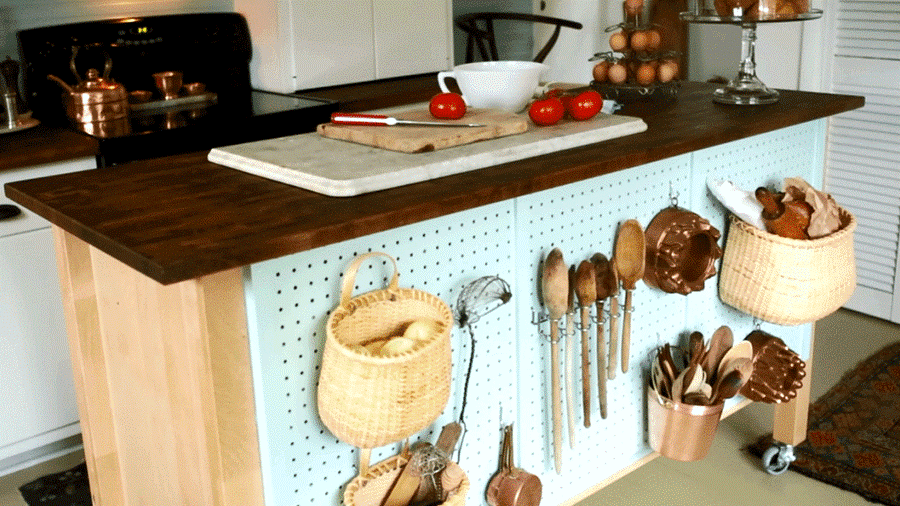
Crave more storage? Get your hand on this brilliant kitchen island hack. First, get some pegboards and affix them to the front of your kitchen island. Add some hooks to the pegboard, Then, hang your spatulas, baskets, and plastic buckets. Like what you can see in this picture. That’s it, you’ve killed two birds with one stone. You get your kitchen island renewed and have more storage for your kitchen utensils.
1. Modern White Kitchen Island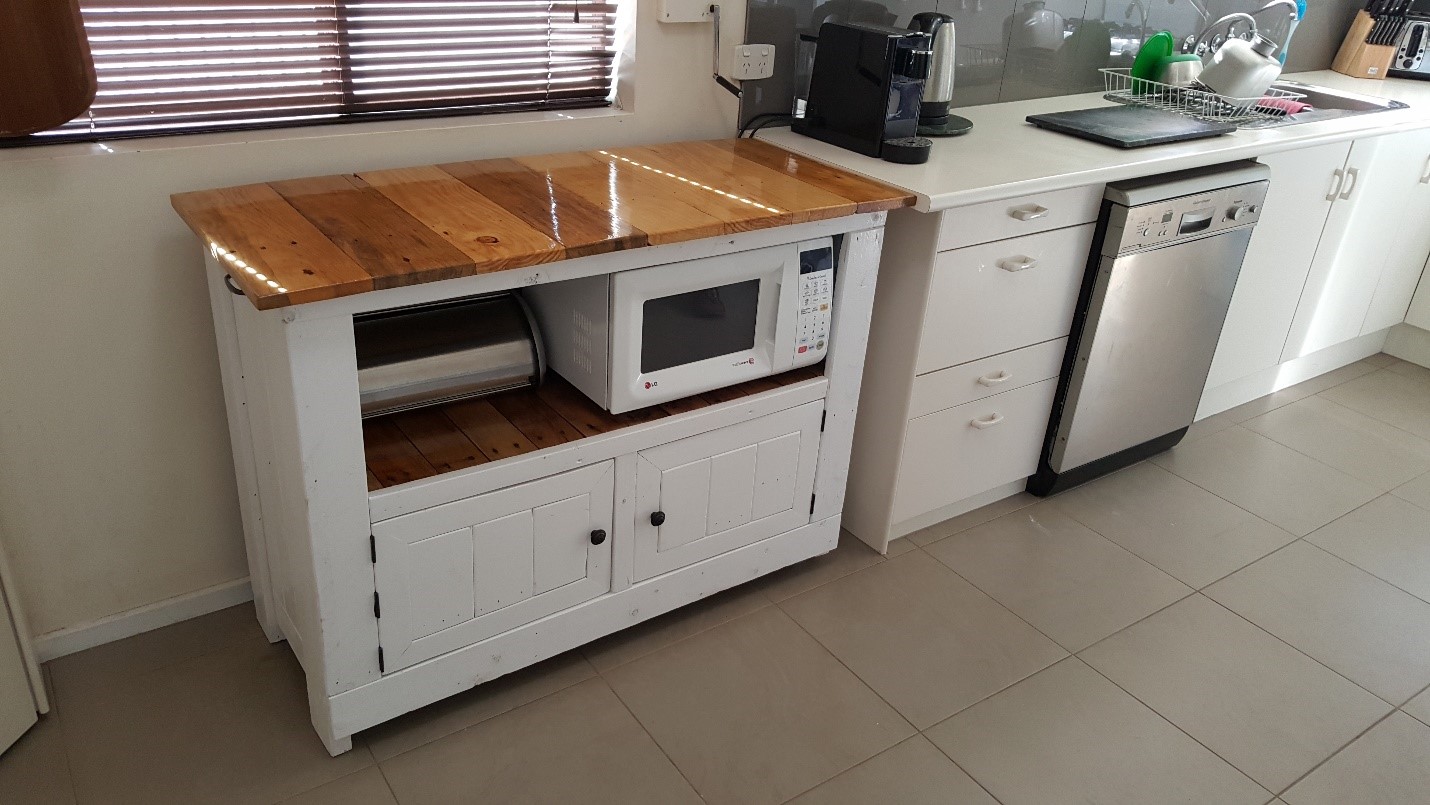
This kitchen island requires advanced carpentry skills and your valor. More over when hammer, nails, or screws generate traumas. Otherwise, you’ll need recycled pallets and a little MDF for the bottom shelf and backing. You also need to use clamps to keep the side pieces together while you are screwing the back support. Once you assembled all the pieces, you can work on the finish.
Tip: use gel stain for the top and accentuate it with polyurethane for a perfect sleek look. if you are not sure about this information, don’t hesitate visit hyperlink for more guidance. And may be together with someone with a professional woodworker’s title on his name’s card.
Those are 10 DIY kitchen island ideas that you can do by yourself at home. Or at least try. Some of them won’t cost you anything if you have the materials needed already while some others might need extra money and see you again later, may be, with more makeover ideas in the near future.
