Some homeowners feel a little bit unhappy with their home due to the limited space. What makes it worse is they have to cram everything into it. As a result, adding more furniture into the house become a daunting task.
One of the best tricks to make a home become more spacious is by investing in a wall-mounted desk. It offers clean floorspace and in the same time, it improves a home interior decor landscape too. More about that later, soon, I am giving you 10 DIY wall-mounted desk ideas (include a video) that you can take to give you room extra workspace as well as additional storage solutions. Let’s check them out!.
However, before that, I have to tell you that not only a relevant video but this list is also completed with useful information that I believe super relevant with those who is still studying in collage and struggling to find spare storage for more books or an old typewriting machine.
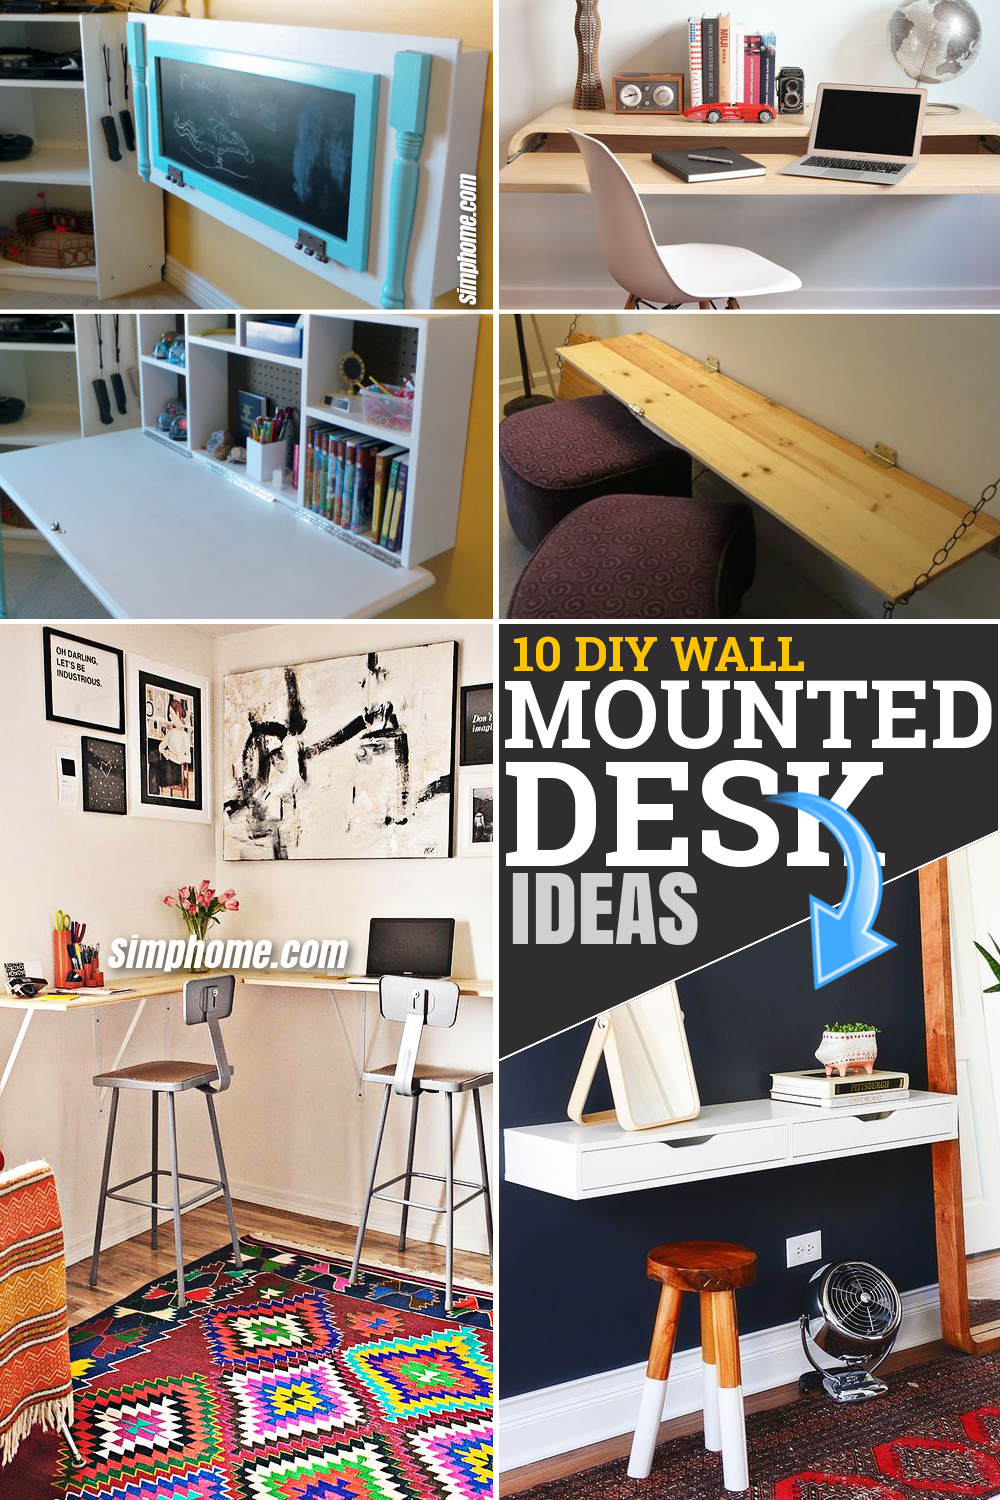
5 Exciting DIY Wall Mounted Desk Projects Deserve Your Attention:
University or post-graduate students today live in tiny apartments. Some live in condominium units very close to their schools. While they get to enjoy the proximity and the location, they don’t have much room to work with. They only have enough for a desk for studying and a small kitchen but not much else. The good news is that you don’t need much desk space to be productive. Please understand that university housing, especially in the private market, has been getting reasonably tight. Property developers have taken advantage of the students’ need to live as close to their schools as possible. They have come up with very convenient living spaces but at the same time are quite tiny.
How to Make the Most use of your Available Student Living Space
It’s become a necessity to make the most out of whatever space you have, and this includes a DIY desk. This furniture is a type of desk that you can mount on a wall and collapsed if you’re not using it. Here are some ideas on how to come up with a drop-down desk to enjoy the space you free up.
Project No.1 A Drop-Down Desk Project on a Wall
Build a drop-down desk with either a corkboard or a pegboard inside to hold your screw materials and pieces of paper. The great thing about this type of board is whenever you are folding your desk, you are quickly reminded of significant dates or projects that you need to work on. These are the top priority notifications that you post on your corkboard or pegboard. When you’re studying, you can bring it down, and when you’re done, you can fold it up to stow it away.
Project No.2 A Slim Desk Mounted Project On A Wall
Make a slim desk mounted on the wall with a pull-out extender. Instead of a fold-up, you use a pull-out extension to create the desk. This technique ensures that you have something to rest your hands on as well as your books when you are ready to study. Your school supplies and everything that you need can be placed within an easy reach as you sit down and work. The desk can then be pushed back when you don’t need it anymore.
Project No.3 A Double Desk Storage Project on A Wall
You can also build a desk that doubles as storage on the wall. This idea means the cover of the cabinet is the desk area, but it has a pull-down unit with a collapsible leg which becomes a desk and a storage area. This dual-purpose approach maximizes whatever space you have. You don’t need a big area to study because when you bring it out, you have a big enough desk for your books and school materials. It is sufficient to write on or work on your laptop. When you’re finished, it is effortless to fold up. The most important feature is the storage at the back. This way, you take advantage of its usage value.
Project No.4 Make use of your Corner Space
Generally speaking, corner spaces of any kind of table or other furniture are considered dead space. When people are working on a flat surface, they tend to focus on the center. This part is where almost all of the action takes place. The surrounding area is often overlooked. By paying attention to the corner space and building your makeshift desk there, you will have an L-shaped slim desk that can be used to store more school materials. This way, you maximize your space. While the actual work area is relatively small, collapsible, and dual-purpose, you also benefit from other fixed areas by keeping stuff there like lamps, plants, end tables, and whatnot.
Project No.5 A Double Mounted Bookshelf on A Wall
You can also use a bookshelf already in its place to double-duty as a study desk. The good thing about it is that all your books and supplies are within arm’s reach while you study. Depending on how much space you work with, the surface area for your actual desk might be small, but still, this would be an excellent supplemental area to do your homework. If you are living in a tiny room, your best bet is to do your assignments at libraries in your university. This way, you have all the space that you need. You can also study in a more disciplined approach because when you’re there, you only study, and when you go back home, you study a little bit and do other things.
That’s it.
Return to our main topic, next we are going to discuss a video that I already mention in the opening.
10 DIY Wall-Mounted Desk Video
Before you avoid the video I am telling you that it contains a unique voice over completed with nice music, awesome video graphics, and familiar images that you’ll probably love to share with your pen pal in Pinterest, Instagram, or Myspace
10 DIY Wall-Mounted Desk List Entries:
10. Simple DIY Wall-Mounted Desk
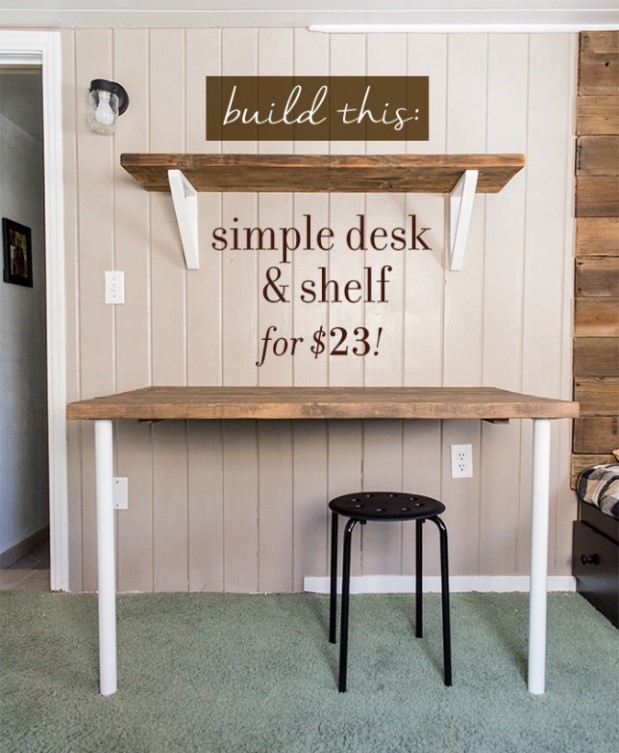
These desks are extremely simple. Both of them are a perfect project for your weekend. The smaller desk makes a great shelf that hosts your books or knick-knacks while the larger one can be used as the workspace to do your homework.
The shelf is attached to the wall using wooden brackets which help it float well. On the other hand, the table is supported with two posts. But you can add a twist to the original idea so that your desk become a wall-mounted one.
All you need to do is just cut a 2x6x16’ board into 48” lengths. Sand them down to remove the splinters, line them up, then attach furring strips to the boards using screws to secure them.
Now, it is time to make the brackets by assembling three pieces of furring strips using wood glue and nails. By doing this, you’ll get one bracket. Once you’ve got two brackets, you can begin to screw the brackets to the wall, and set the desk on top. Don’t forget to secure them using screws.
For your information, you can also upgrade your bare wall with your own realistic drawing piece. Check link inside description area to find satisfying realistic drawing videos that you can copy and replicate. I look forward to seeing you there and let’s comeback to next idea of our list.
Related Topics:
10 DIY Home and Wall Decor Small Space Ideas.
10 Wall Mounted Bedroom Cabinet Upcycling ideas.
10 Wall Decor Ideas for Boring Walls.
10 Creative DIY Wall-Mounted Ideas.
9. A Standing Desk idea
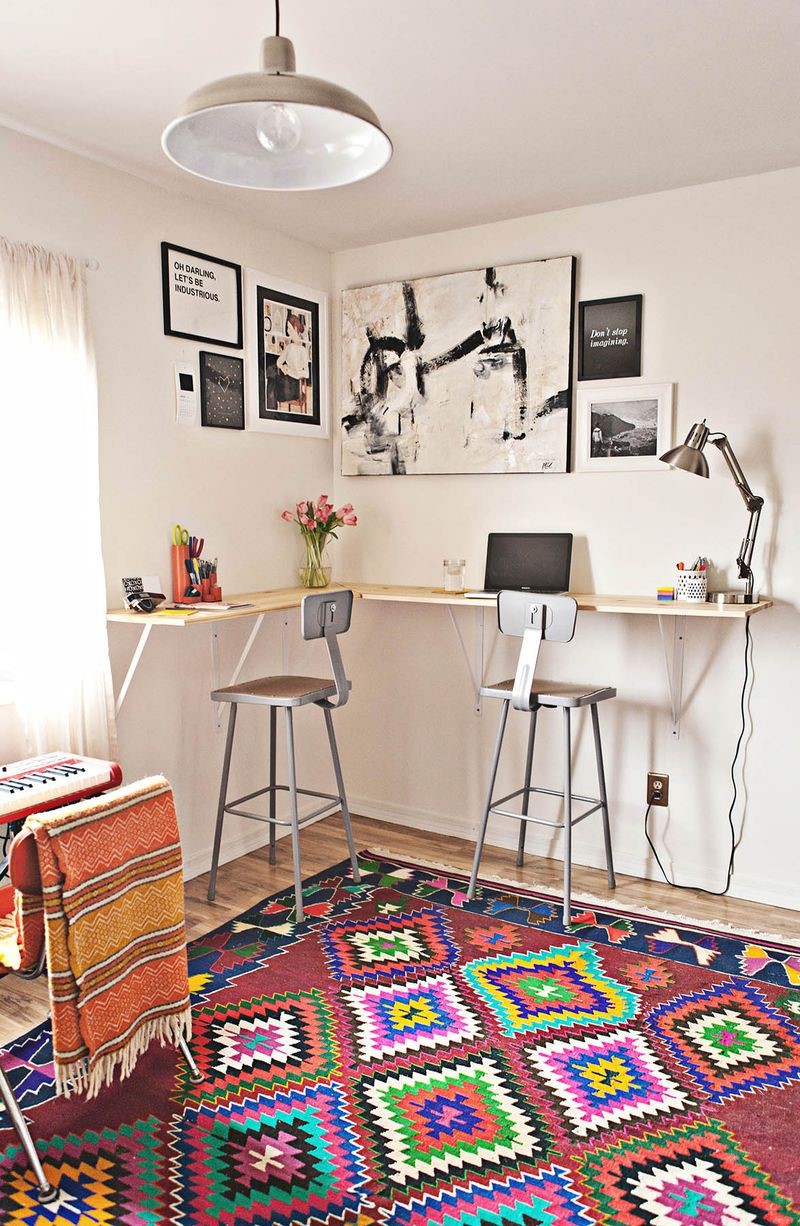 The best thing about a DIY project is you can get the furniture you need on the cheap. More importantly, it can fit snugly into the available space in your room, just like this corner standing desk.
The first thing you need to do is cutting the boards to size. If you want to position your desk in the corner, make sure that you make an angle on each board. Sand them down to smoothen the surface so you can apply the finish well.
Now, attach the brackets that you have bought to the wall. It would be better if you mount your brackets to studs if you want them to be sturdy enough to hold piles of files and books. Once the brackets are on their place, top them with the boards and secure them with screws.
8. A Rustic Floating Desk idea
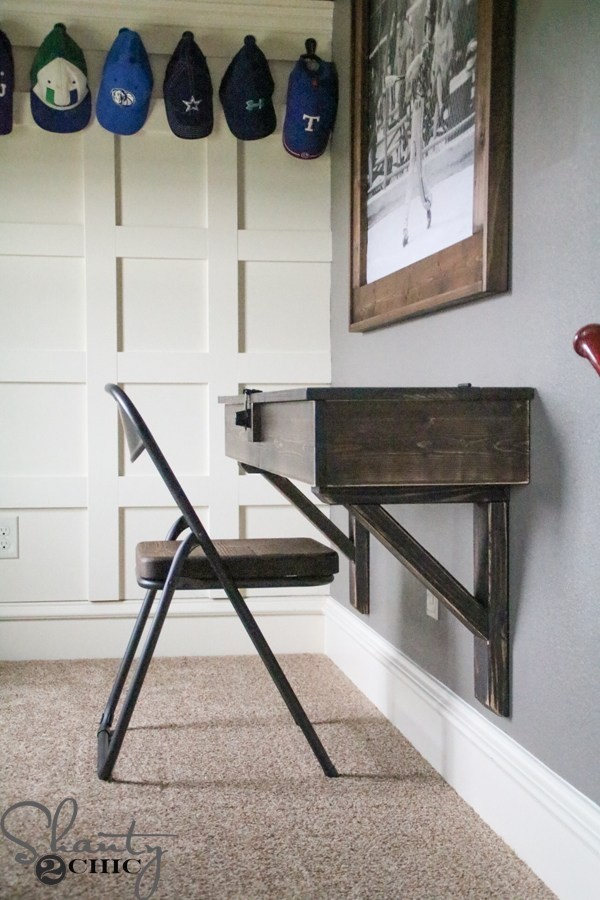 This floating desk is what you need to add the touch of rustic look into the space. Furthermore, it has a flip top that provides more storage.
To make this desk, you need to cut a board into a 57”x13.5” piece. Drill three pocket holes on both edges of the board. After that, you can move on to make the corbels. Once they are ready, attach the corbels to the board, and make sure the pocket holes are on the opposite side. Then, make the front of the desk and attach assemble it to the desk.
Attach a piece of board as the top part of the desk, and make sure its sides overhang ¾”. Cut a scrap piece and attach it to the centre of the front of the desk to create a lock. After that, you need to make the cleat on which your desk will sit.
Once the cleat is ready, attach it to the studs of your wall, then top it with the desk. Finally, install the top part of the desk using three hinges so you can flip it.
7. A Wall-Mounted Drop-Down Desk with Pegboard idea
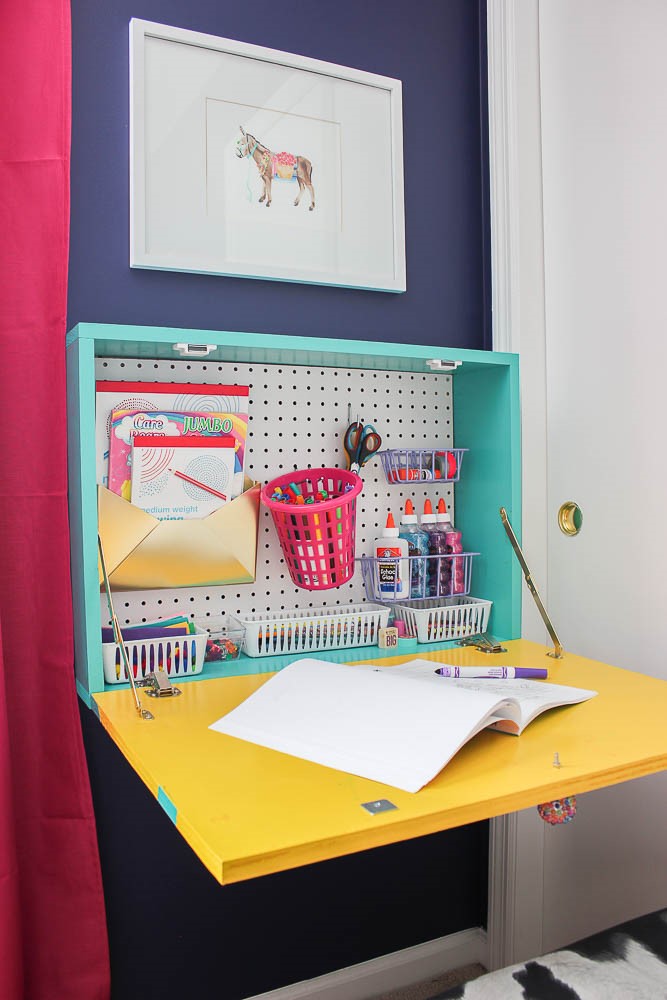 This drop-down desk is amazing. Not only will it save some space, but it will also provide nifty storage space and a desk top for your kid to study or make some craft. The pegboard attached to the desk allows you to have plenty of storage by adding some hooks and baskets. And when you’re done, you can fold the desk and hide the mess away.
To make this desk, you are going to need some boards, hinges that allow it to be folded back, two magnetic door catches, two lid support hinges for the left and right side, 1 pair of 90 degree surface mount hidden spring hinges, a knob that you’re going to use to pull the desk down, pegboard panel, and a little bit of imagination when painting the desk.
6. A Wall-Mounted Desk with Extra Workspace idea
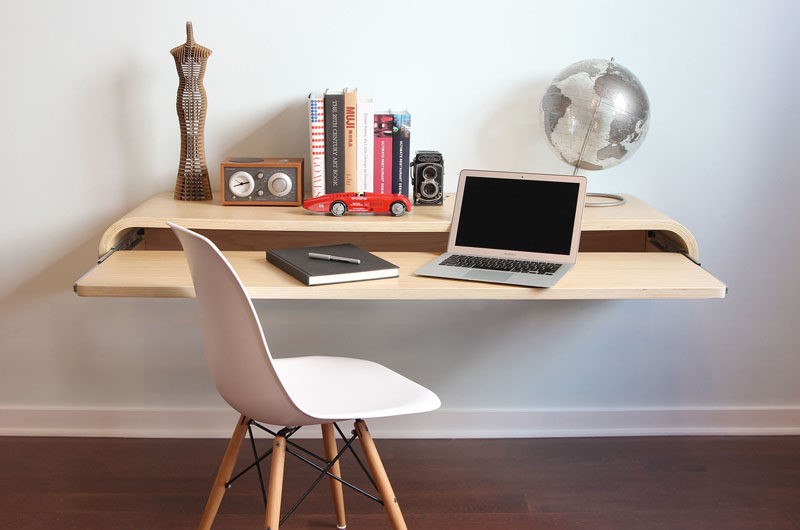
This desk features clear-cut curvy edges that will suit your modern home immensely. It also has two slides installed on the left and right side of the desk, allowing an extra desk top to be pulled out when you need an extra space to work. Once you are finished, push the additional desk top back, so you can conserve more space.
5. A Wall-Mounted Desk with Drawer idea
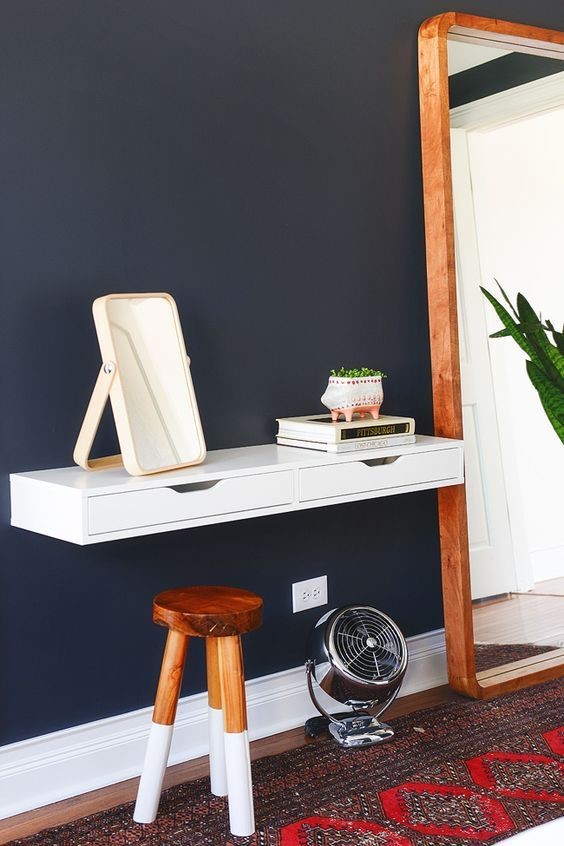 If you are seeking additional storage space without making your home look more cramped, this sleek white desk can be a great solution.
You can make it from scratch by getting some boards, cut them to size, and assemble them to make a shelf with drawers. Use L brackets to make it float and sturdy. But if spending hours – or even days – to do a DIY project is not your thing, you can always do an IKEA hack.
If you happen to have IKEA Alex computer desk with drawers, just cut the legs and mount the desk on the wall using brackets. Simple, right?
Related: 10 Smart ways How to Organize Kitchen Drawers.
4. A DIY Murphy Desk idea
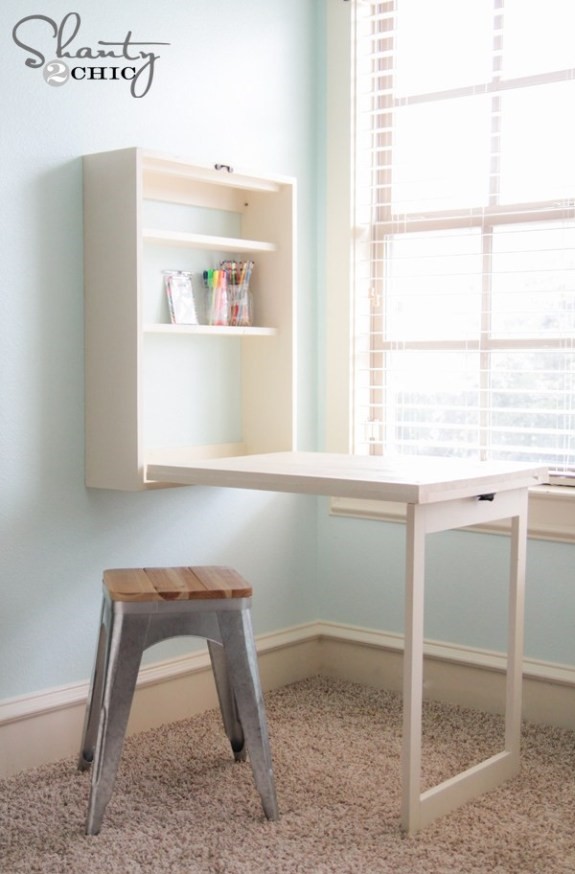 This DIY Murphy desk will be suitable for your small kitchen or your kid’s craft room as it has some shelves to store smaller items. When you unlock the swivel latch and pull the cabinet door, you’ll get a multi-functional desk. But when it folds up, it will become a chalkboard where you can jot down a memo. To make this desk, you’re going to need some pine or whitewood board, piano hinges, wood screws, suitcase or swivel latch, and magnets.
3. A Homework Hideaway Wall Desk idea
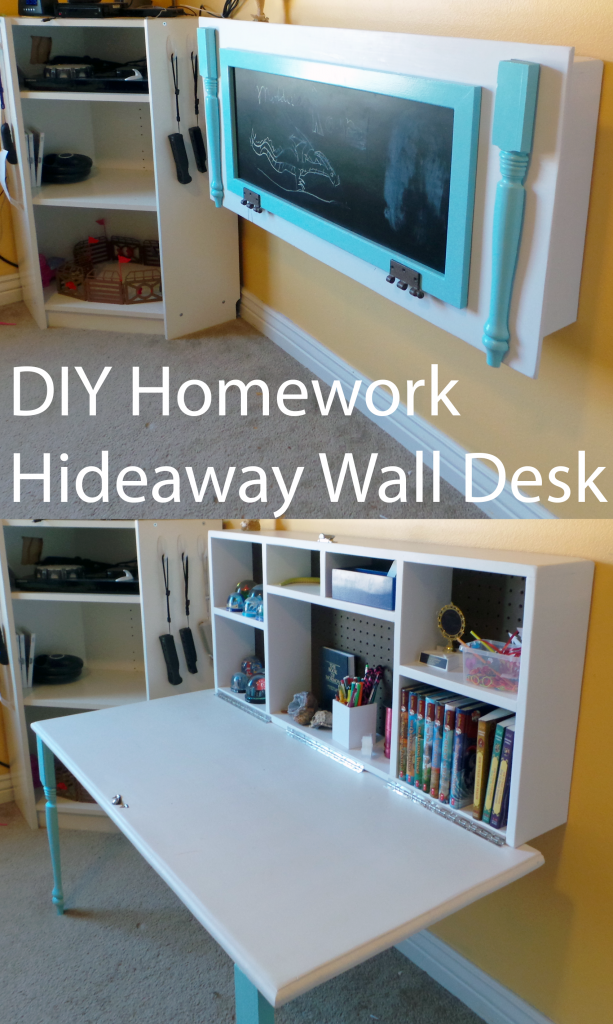 This is another great idea for a small room. Your kid is going to love her new desk. This desk features some shelves to host books and stationery, and a pegboard panel to hang scissors and stuff. The best thing is the piano hinges that enable you to fold the desk to save more space, and get a functional chalkboard for your kid to draw on.
The first thing you need to do is making the shelves. You can make as many shelves as you need. Then, you need to create a Dado groove in the back of the frame – about an inch hanging off the back – that will be used to receive the pegboard. You will also need to install hinges to fold the decorative legs, so it is flush with the chalkboard when the desk is folded.
2. A Simple Wooden Foldable Desk idea
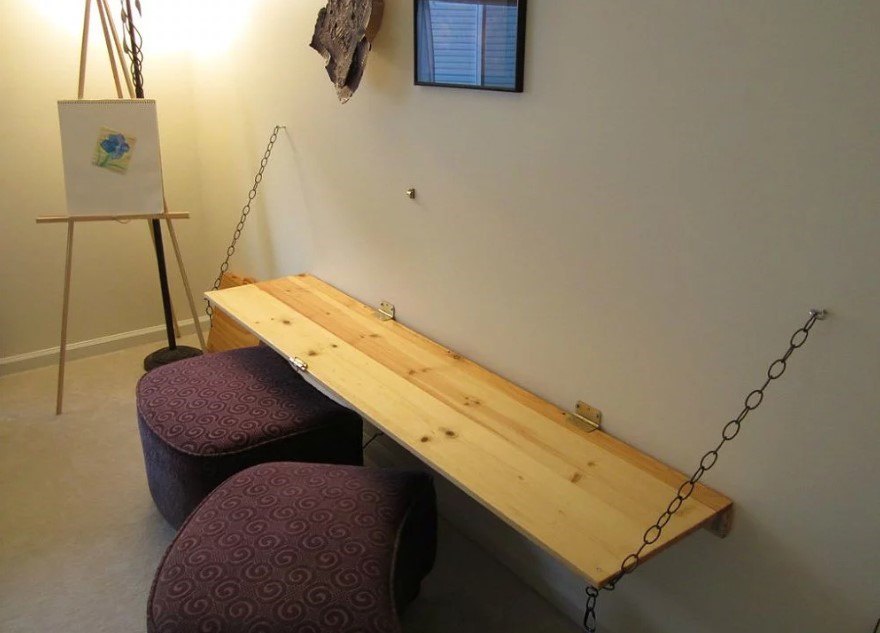 Are you looking for another real space saver? This simple foldable desk is for you. It is actually a board which is attached on the wall using screws. Two chains are installed on both ends of the board to support it. Two hinges allow the board to be folded and a swivel latch lock is attached on the wall to keep the board stay close to the wall when it is not being used.
Lastly number 1. A Craft Desk with extra Storage idea
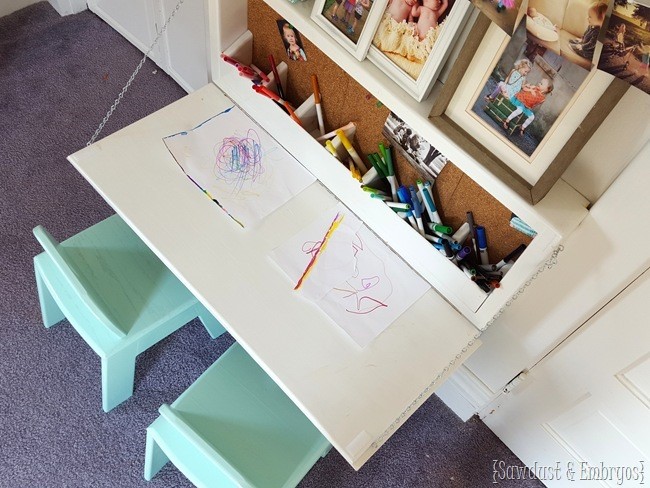 Let your kids explore their imagination with this foldable craft desk with storage. The way to make this desk is the same as the previous drop-down desk.
You can begin with making the frame, then attach the frame to the pegboard. After that, make some shelves that will be used to hold stationery. Don’t forget to install hinges and chains on both ends of the desk to hold it in place.
So those are 10 DIY wall-mounted desk ideas that will not only make your life become easier, but also incorporate additional storage space. Are you ready to make one?
Done,
See you again next week with more art or home decor lists that you can use to improve or upgrade your living room’s wall and until that time, get ready for our next lists.
References:
10. Simple DIY Wall-Mounted Desk | Jennasue Design Blog
9. Standing Desk | A Beautiful Mess
8. Rustic Floating Desk | Shanty 2 Chic
7. Wall-Mounted Drop Down Desk with Pegboard | Rain On A Tin Roof
6. Wall-Mounted Desk with Extra Workspace | Contemporist
5. Wall-Mounted Desk with Drawers |More Like Home
4. DIY Murphy Desk | Shanty 2 Chic
3. Homework Hideaway Wall Desk | Organized Mom
2. Simple Foldable Desk | Don Pedro Brooklyn
1. Craft Desk with Storage | Reality Dream
Other Storage Improvement Ideas you Should not Missed:
10 Efficient Shoe Bench Storage Ideas to Untie the Mess
10 Low-Cost DIY Kitchen Improvement Storage Ideas
10 DIY Bathroom Storage Furnitures
10 Storage Solution and Upcycling Ideas for Cheap
10 DIY Storage Ideas for Small Bathroom and Laundry
10 DIY Storage Ideas for Limited Kitchen and Dining Room