Let’s get straight here; most of us need extra space in our kitchen! View simple ideas to get it for examples: re-planning and rebuild new kitchen space or buy a new house. It is no brainier for those listed in 1% world’s richest list. Those who “unfortunately” don’t have the need I already refer to in a first place.
Back to the topic, today I am going to share 10 DIY storage ideas for limited kitchen and dining room by Simphome. Ideas that you can erase from your memory later after you have successfully listed your name in a new world’s richest list.
Here we go!
10. Use DIY Wire Shelf Risers to Expand your Storage Space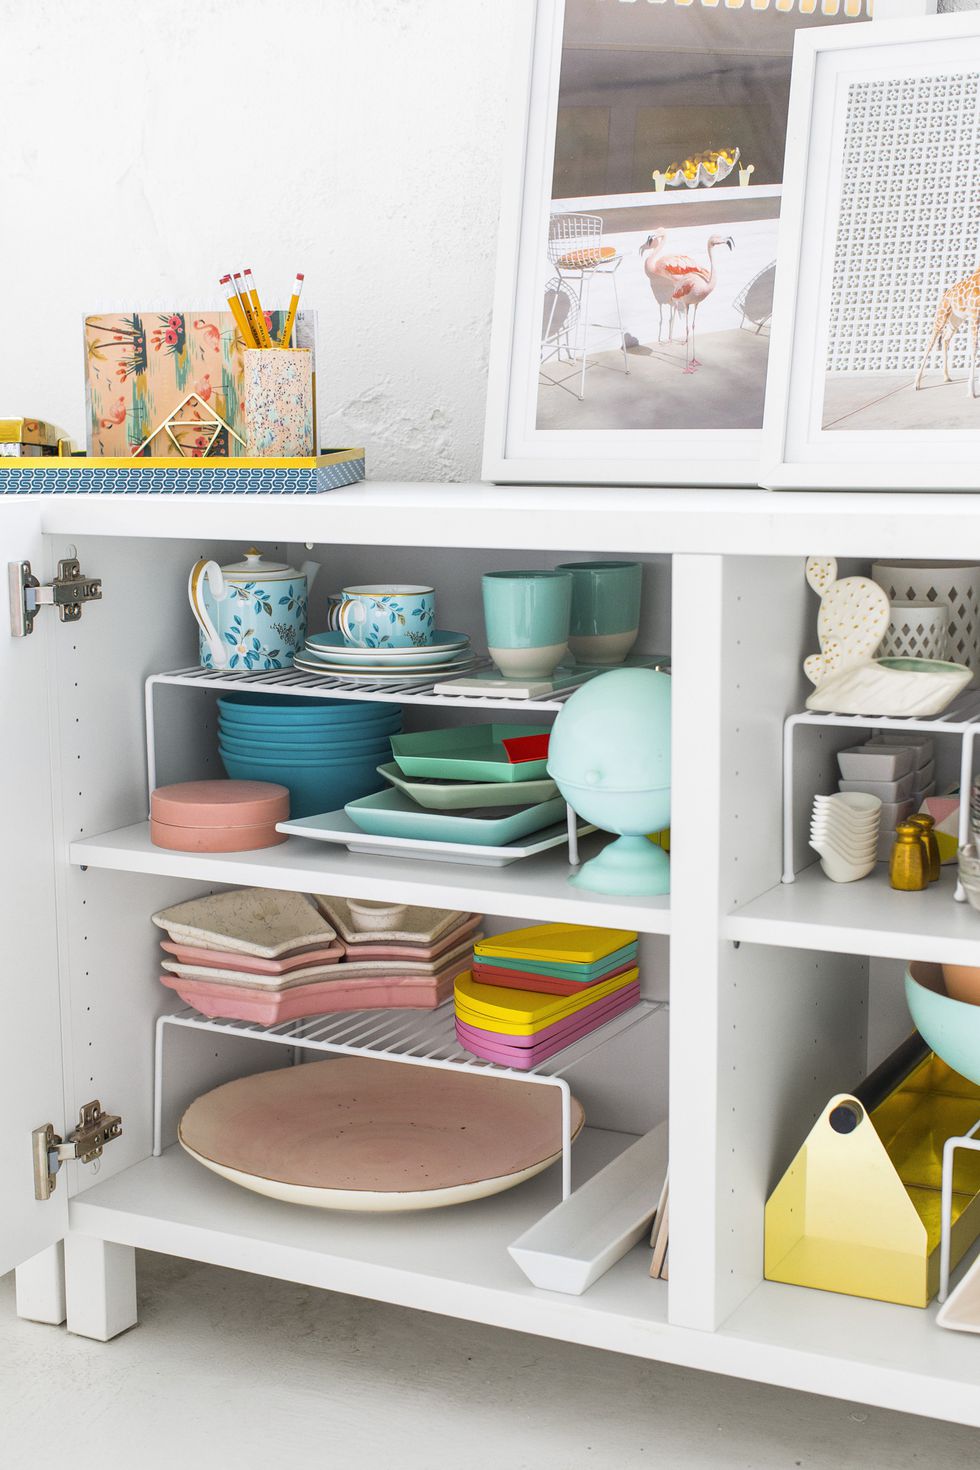 Prepare your pliers, a measuring tape, iron, glue, paint, and, of course, wire.
Measure your needs and cut the wire. After you have finished with the wire, attach them to the iron using glue. For the finishing process, paint them white and synchronize it with your cabinet. If you don’t wanna break a sweat, you can just get some on Amazon.
By applying wire shelf risers, you can enlarge your cabinet storage without changing your limited space. It gives your enchanting mugs, dishes, and cute bowls, more resting area. Include any other unmentioned dishware you need to hide from your eyes.
Credit: Good House Keeping
9. Harness Versatility of Pegboards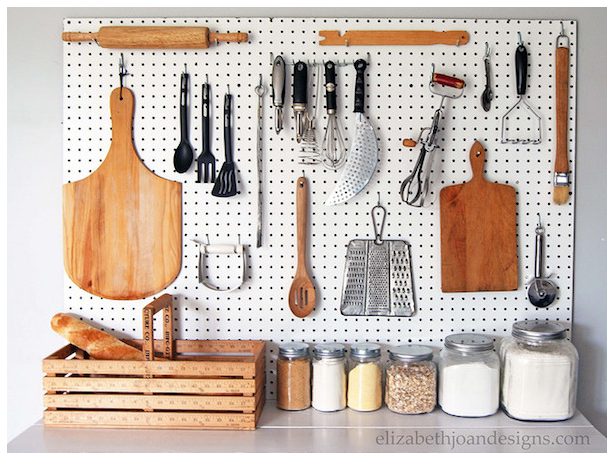 Next, you can cook anything you desire (almost) stress-free if you have a sufficient-space kitchen for all your ingredient and supplies. Problems arise when your kitchen lacks enough space while all your cabinets are already cramped with cans.
Your option,
First, prepare a pegboard unit, a saw, a drill, a measuring tape and wood screws.
Before you do the cutting, set all your kitchenware on the board. This way, you will able to picture position, design, size and layout of your kitchen pegboard. Make sure it accommodates utensils you have and your kitchen wall. Not too big and not too small.
Last, cut it carefully and screw it on your wall.
Done! You can easily grab any kitchen utensils you need now.
Credit: Make Space
8. Hide your Measuring Cups away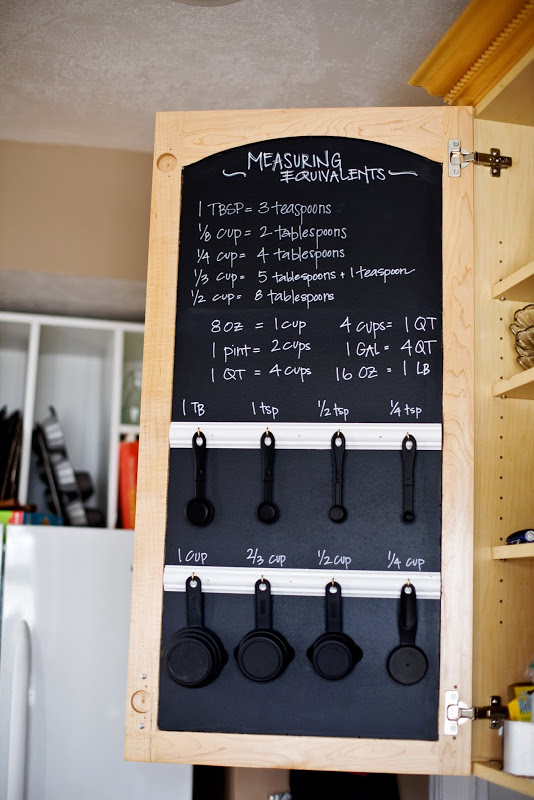 If you are obsessed with volume measurement, bring your cabinet door into play.
Instead of having headache because you have to find measuring cups in a rabbit hole, you will find it right away. As long as you don’t misplace them after they are cleaned.
If this one seems difficult, you can simplify things.
Take a black paper, a measuring tape, scissors, a white marker (or a chalk) and screws. Follow your cabinet’s door lines and cut your paper according to the direction of the line.
Then, get a white marker or a chalk, write down size of you measuring cups along with the conversions, and draw the position of the screws on the paper. Pay attention to this image few seconds to get the idea.
After you done, attach your paper, screw a wooden bar or two, give your wooden bar few nails or hooks, and finally hang your measuring cups there.
Tip: You can also use aluminium plate, plywood, or used photo frame to replace the wooden bars.
Credit: Mandi Tremayne
7. Make a Shelf above your Windows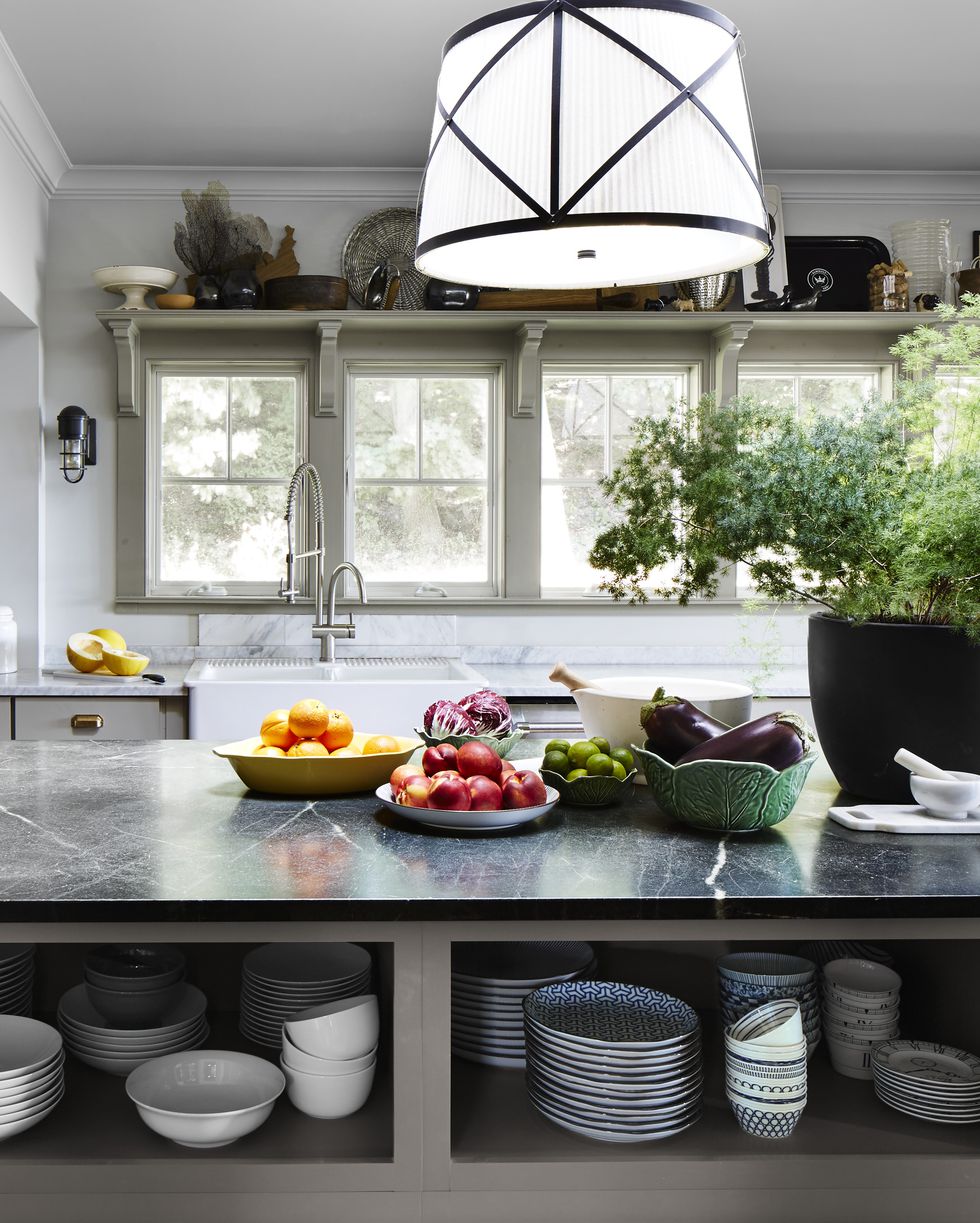 When it comes to limited storage space, you need to be smart to exploit every little inch you have. It includes a space above your windows. Instead of blank space, use it as a shelf. You only need a board, a saw, a measuring tape, screws, paint and L-shaped woods.
First, calculate your need then cut your board. Next, using wood screws install your L-shaped wood and put your board on it. You can paint it white or any other color you desire if you want.
There you have it! A new hanging shelf above a window for your plates, bowls, and other kitchen utensils. Wait, you can also screw your board onto your L-shaped wood to make your new hanging shelf sturdier.
House Beautiful
6. A Stylish Espresso Cart idea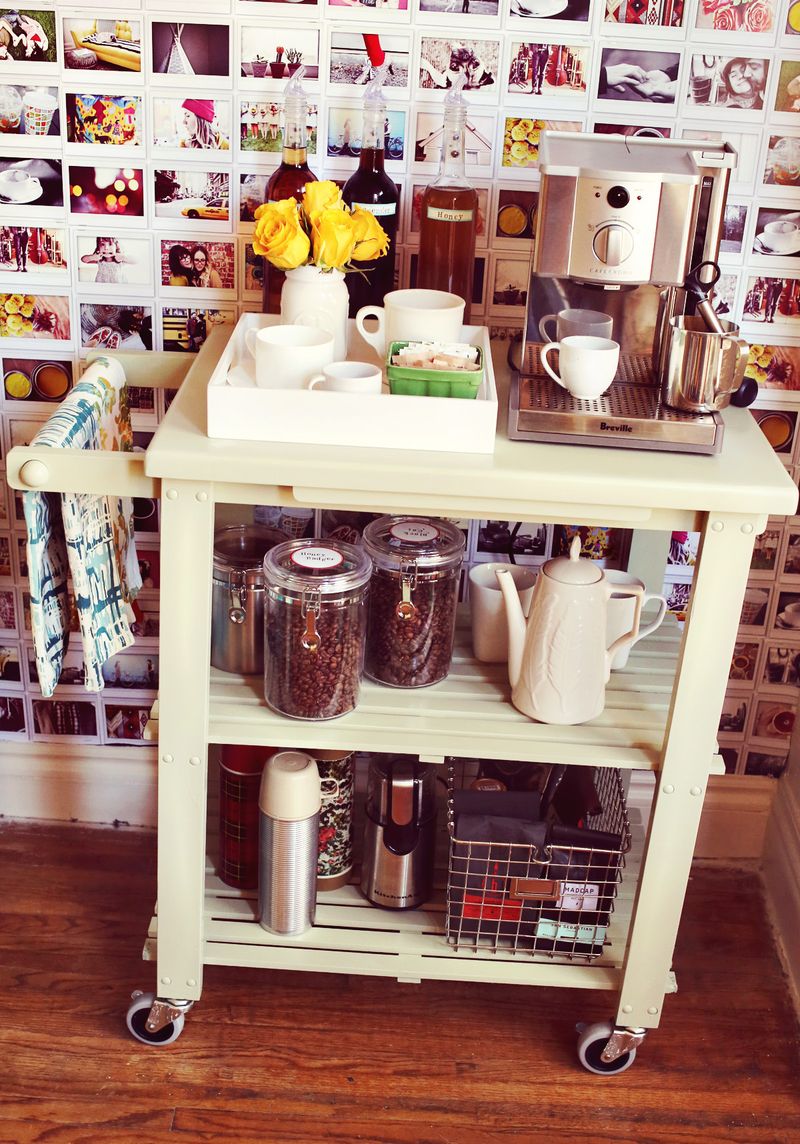
First, remove the knife block, then the wheels. Next, paint the cart and add a coat of polyurethane to protect it from scratch. It is not obligatory, but I am sure that you want your paint lasts longer, right? For a final touch, add some new casters and a little caulk to secure them.
Credit: A Beautiful Mess
5. Wall-Mounted Folding Dining Table idea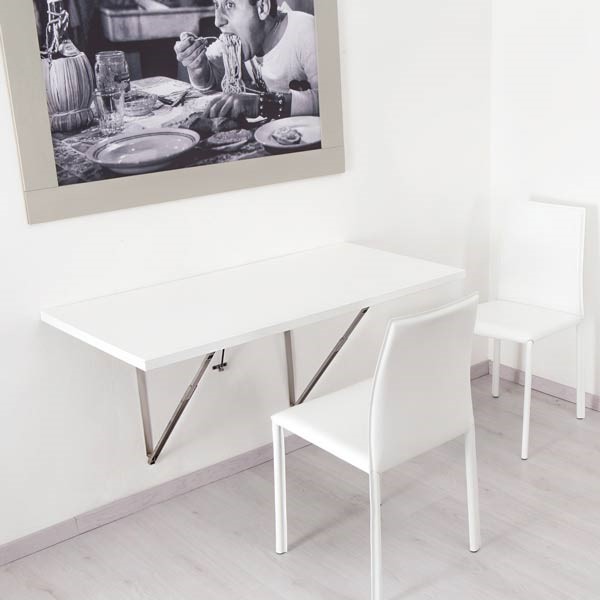 Your supplies are: a plank of wood, retractable brackets, a baton, a measuring tape, a pencil, a circular saw, wall anchors, a wall anchors setting tool, a drill driver and screws.
After you get the measurement, referring to it, cut the plank wood. Next, measure the height of the table and attach the bracket to the wall carefully. A careless work will result in an unbalance dining table and it could be dangerous. Last step; fix the dining table to the bracket. Youtube
Tip: You can paint your new dining table to revamp it if you want. But if that’s your interest, do it before installation process begin.
4. Repurpose an Old Ladder Bluntly, a strong old ladder is enough to execute this idea. After you ensured the ladder’s strength, here’s the list of your supplies:
Non-pressure treated 2×4 lumbers, a drill, 3-inch wood screws, length of chains, screw hooks, and paint or stain.
After everything is prepared, cut 4 lumbers. Using your drill, attach them into a square (rectangle) shape. Then, measure the frame’s width (from inside to inside). It is measurement you need for the cross “beams”. Next, Screw the cross beams, add screw hooks to each corner and paint (or stain) them. Last step, find studs in your ceiling, drill in four screw hooks, add chain, and hang your new creative storage solution.
Credit: Oh Me Oh My Blog
3. A Spice Rack Cola Crate idea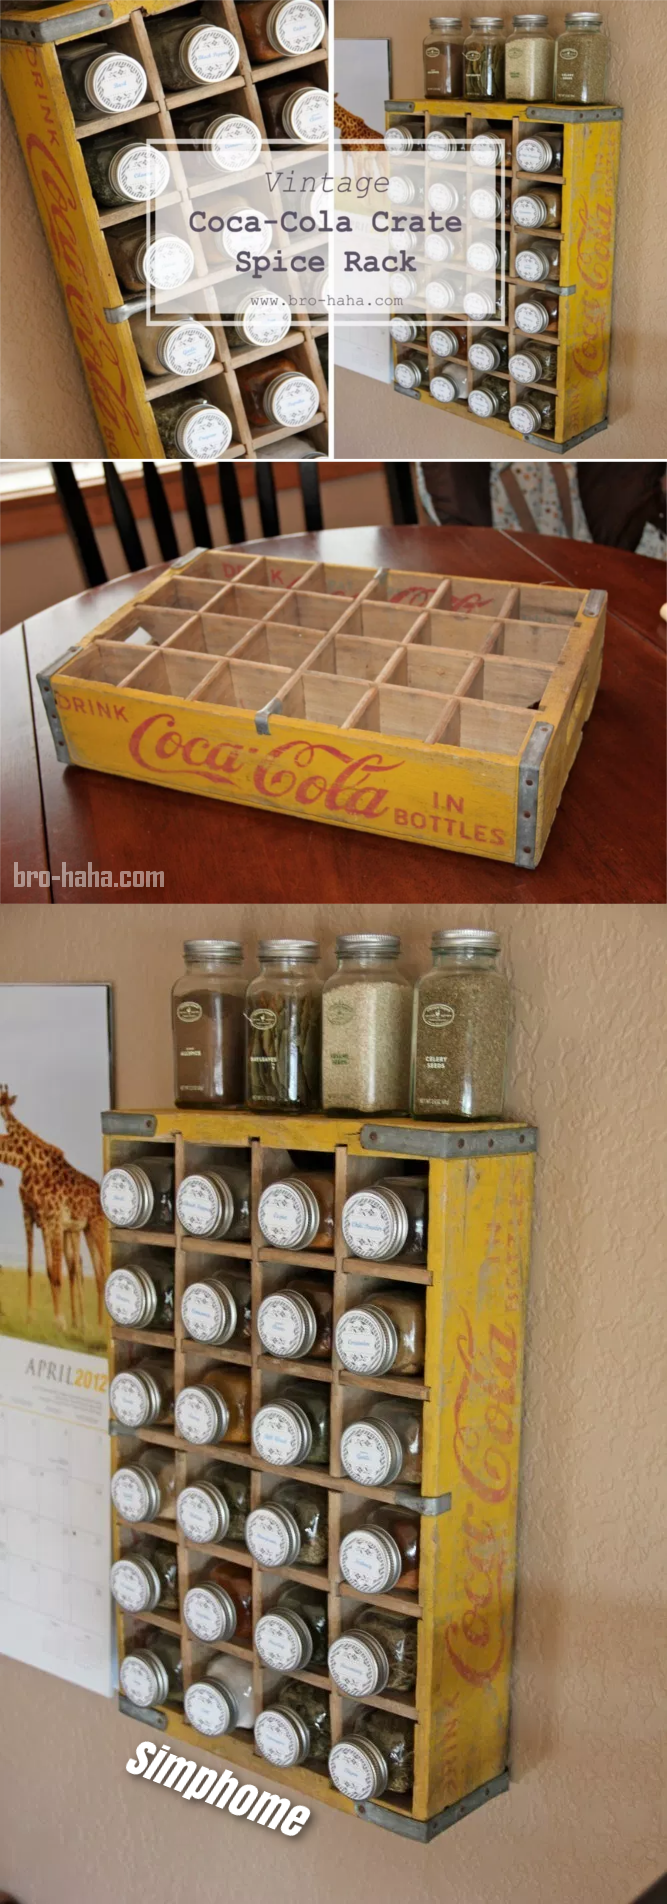 It is a flawless answer for your spices need! More often than not, it is annoying fail to find a spice you need when you are in the middle of cooking.
To be brief, you need a big spice rack or at least sufficient.
Nevertheless, rather than buying a big-ticket rack, you can simply reuse a cola crate to fill your need. Go to a flea market, get one, but first, pick it cautiously and ensure it is strong enough and not infested by termites already.
Because you are going to use it for a long time.
After you get it, vacuum all the dust out, dry and clean it up. To hang it on your wall properly and sturdily, drill in some extra-large picture hangers and hook them on the metal strip running across the back.
It’s all safe, sound and ready to use now.
Credit: Bro Haha
2. Use Your Fridge as Spice Rack with magnet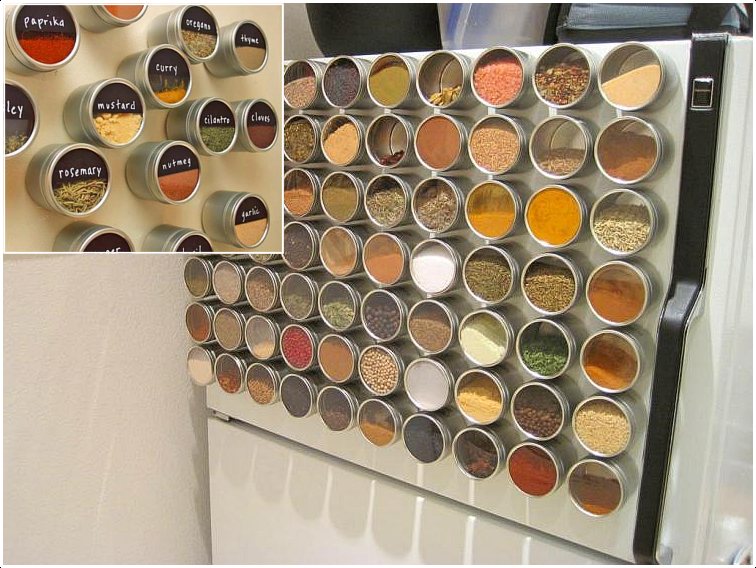 It is a real deal!
In fact, probably, it is most effortless and effective way to store spices. With this idea, you can see, select, reach, and use any of your spice needs within seconds. if you are in rush right now, get these exquisite magnetic tins in your shopping list, attach them on the fridge or other metallic things later and leave this video now.
And oh, last thing, label them to maximize all feature of this idea, or otherwise, you may put salt inside sugar tin and vice versa.
Oddity Mall
Lastly number 1, Silverware in Mason Jars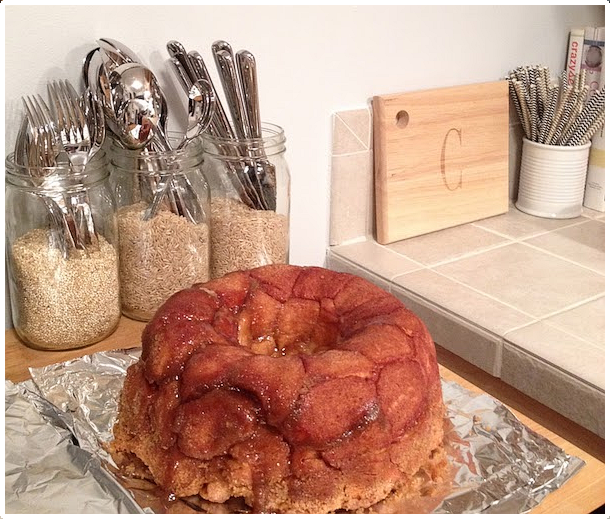 Tired of outdated spoons container, forks, and knives? Or, do your drawers full with spatulas or rolling pins already and thus make your new silverware has no place to sit on?
Take mason jars, fill it white or brown rice, house your utensils there, put them on your kitchen counter. And if you have to, move your old bulky utensils container somewhere else.
Forget ideas to paint your new storage and move on with this idea until you get cheaper and more effective kitchen utensils storage solutions.
FYI: The Rice will limit or protect metal scrapes against the glass.
Credit: Make Space
SO,
With one of these 10 DIY storage ideas for limited kitchen and dining room I hope your can stretch your little kitchen space and dining area. Stick around for more small kitchen improvement ideas and thanks for your attention.