The cupboard takes up quite a place in the bedroom in which you store your daily private stuff. Thus, keeping it catchy is important for your bedroom improvement. And talk about improvement, you can actually renew it by doing one or two makeover projects that I am going to share with you soon.
Some paint and new hardware can do the trick when it comes to cupboard-makeover projects.
You can even try some extra modifications to give your odd cupboard a second life. It won’t cost the earth because you can do it yourself with a little creativity. Next this is 10-Bedroom Cupboard Makeover ideas that you can bookmark to occupy your next weekend or two.
As usual, this list is compiled for you by Simphome.com.
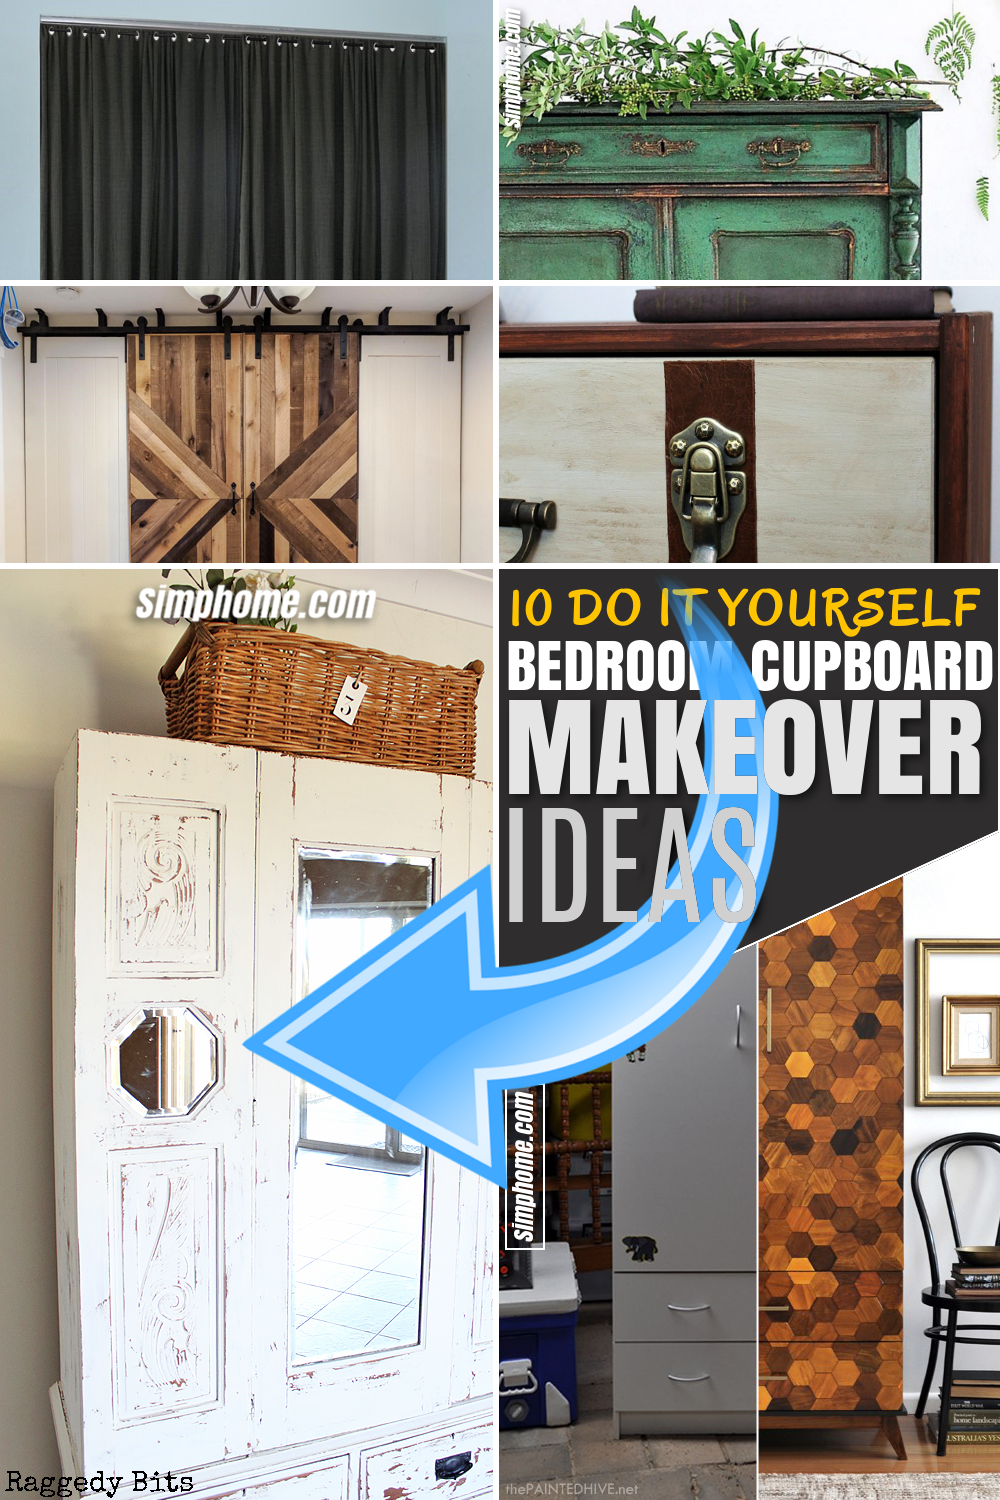
FYI, You can also enjoy video format of this list by pressing play button of next video file:
10 DIY Bedroom Cupboard Makeover Video:
List Entries:
- 10 Bedroom Linen and Sheet Organization Ideas
- 10 Clothes Storage Idea that Would Work Even without A Closet
- 10 Bedroom Closet Ideas You Can Use to Upgrade Your Storage Solutions
- 10 Ideas On How to Turn a Bedroom Into a Closet
- 10 Creative Ideas How to Maximize Small Closets
- 10 Storage Ideas for Bedrooms without Closets
10. A Nautical-Themed Cupboard Project idea | Myshabbymoments
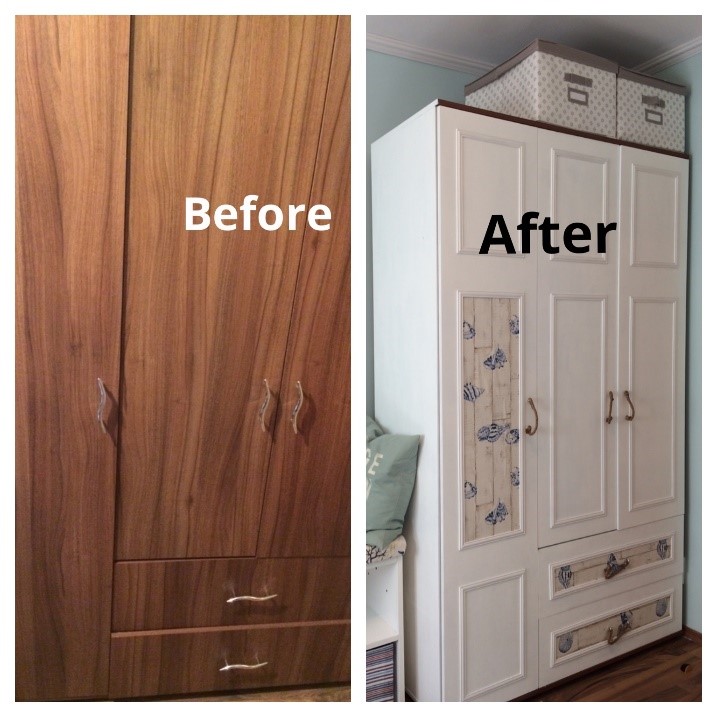 Repaint and redesign your cupboard with white nautical theme. First, decide a design you want for the doors then remove the doors and drawers. Cut a wood trimming and attach them to the doors by following your design. Then paint the wardrobe after sanding it down meticulously. Add a little nautical touch to the white wardrobe by gluing down blue sea-shell washable wallpaper. For the handles, you can make use of nautical rope to spice it up.
Also read:
10 Bedroom Wardrobe & Cabinet Upcycled ideas.
10 DIY Pipe Shelving Ideas.
9. A Whitewashed Farmhouse Cupboard project idea | Raggedy-bits
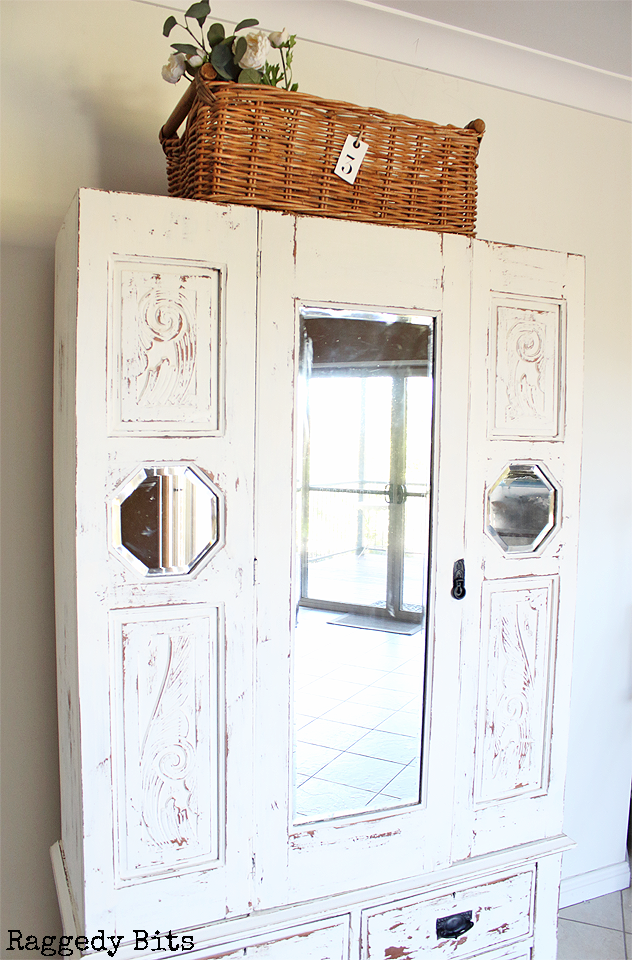 This makeover holds the old look of your cupboard which had been good to you for many years. Before starting your works on, get rid of all the grime and dirt by washing it. Once it dries, sand away any lumps or bumps with sandpaper. Now, tape off the hardware and spray them black. Repeat this step twice or three times till you get a deep color of black. Then, paint the cupboard with two coats of Fushion Mineral Paint. This paint has a top coat in it and the longer you leave it the tougher it becomes making it harder to distress. Now, your old cupboard is ready for new adventure.
8. An Antique Green Cupboard improvement project idea | Homestolove
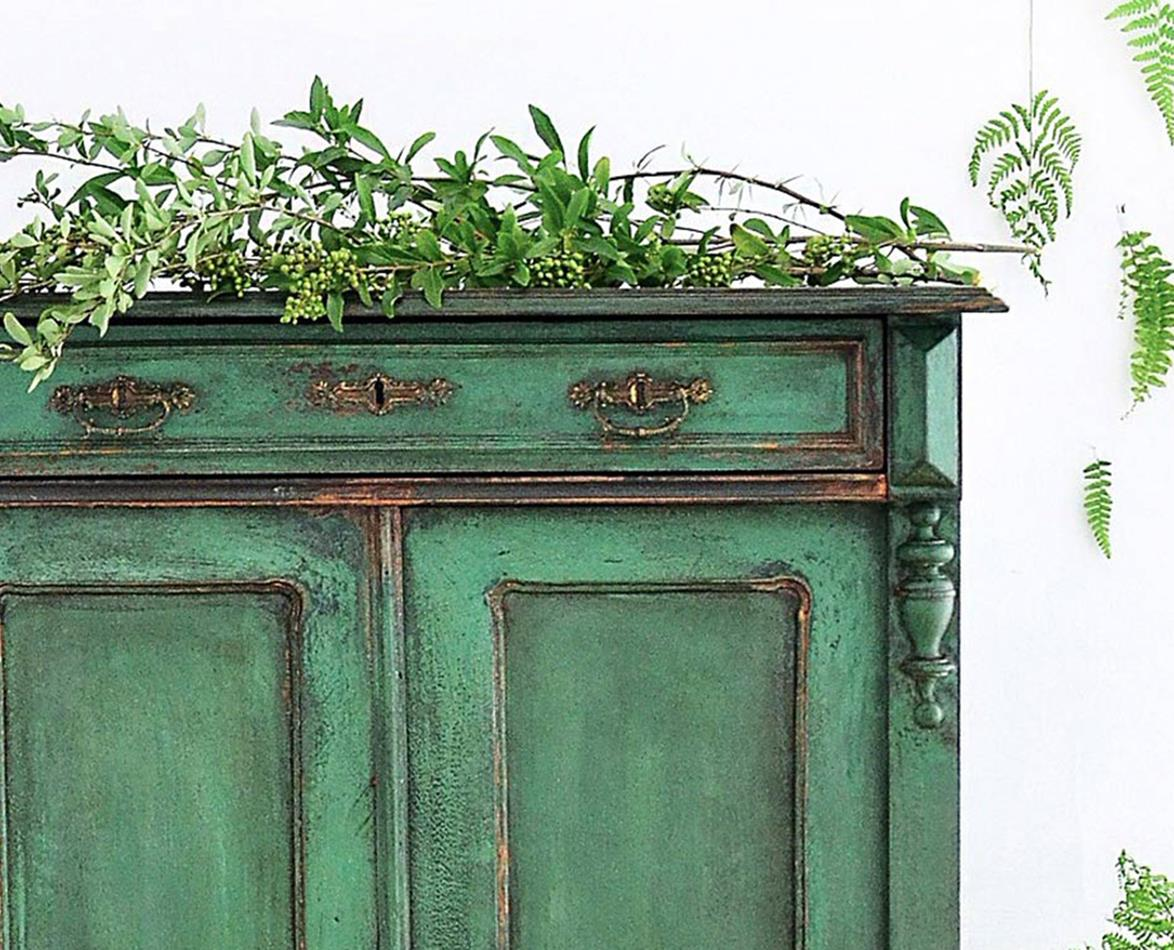 If you’re an antique furniture lover, you must try this rustic green cupboard project. Use green series of Annie Sloan Chalk Paint ™ to create beautiful green gradation.
The first step is building layers of paint. Using brush, apply layers of Antibes Green, Florence, Olive, and Chateau Grey thickly along the closet. Before the paint completely dries, move back your brush in every direction to create textured surface.
Next step, darken the edges of any areas that would naturally distress over time, such as legs, corners and edges of doors by using a mix of Graphite with water. Third, create a deep bottle green color by mixing Antibes Green and Aubusson Blue for the final coat all over the cupboard. Once the paint has dried, start sand and scrape the cupboard.
7. A Hexagonal Style Cupboard | Thepaintedhive
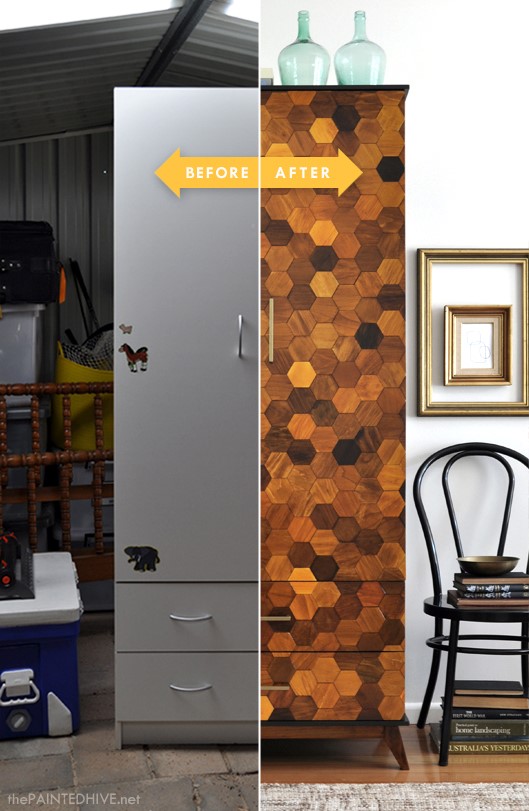 Try this hexagonal pattern style to your out-of-date cupboard. To begin with, took off the doors, pull out the drawers, and remove all the hardware. To give the cupboard a new nice frame, add a new top and base with two ply sheets. For the base, cut off the toe-kick base, and connect four new feet to the plywood. Attach the new top and the base by drilling some pilot holes and screwed the base on from inside the wardrobe. The hexagonal pattern is made from timber mosaic.
No need to hand-cut these million-little shapes because you could get some ready-made ones online. Stain all the hexagons and tile them onto the cupboard using glue. Trim off any over-hanging hexagons and sand the edge. When everything is set, pull in the drawers and install the hardwares. It looks fabulous right!
6. A Suitcase-Look Ikea Dresser Hack idea | Girlinthegarage
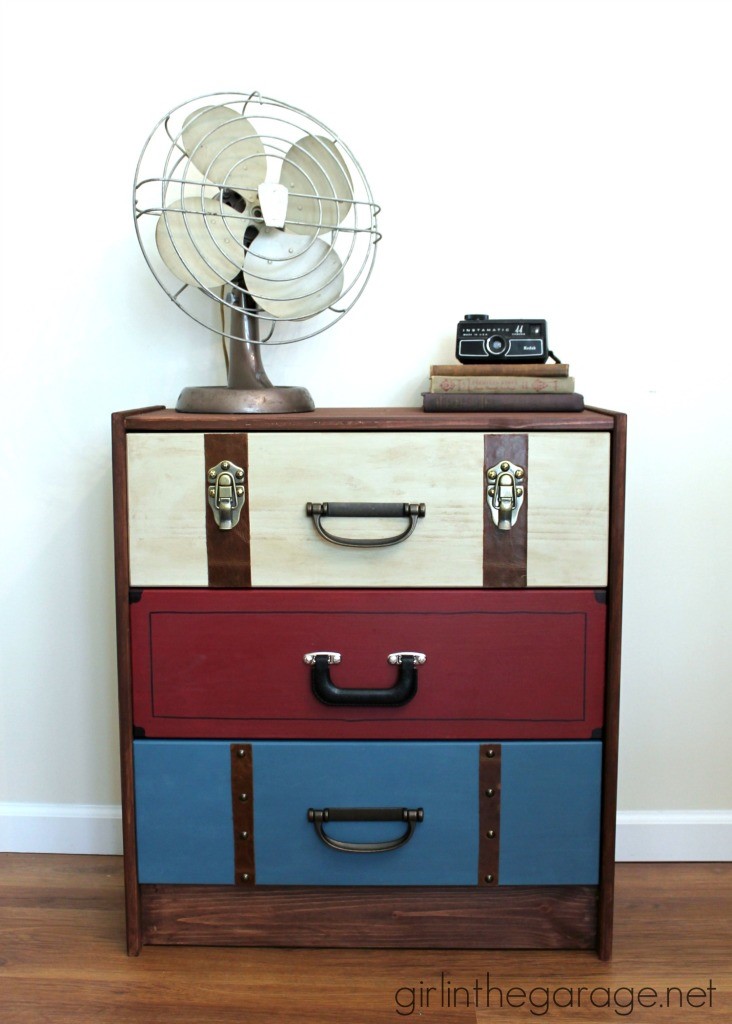
The fun part is playing around with the design of the suitcase dresser. Choose which hardware and accessories will go on which drawers. The result will amaze you!
Also read:
10 Inspiring DIY Dresser Makeover Projects That Will Give You New Storage Solutions.
10 DIY Crafting and Storage Improvement Ideas Using Used Skateboards.
5. A Denim Dresser Makeover idea | Sweetpickinsfurniture
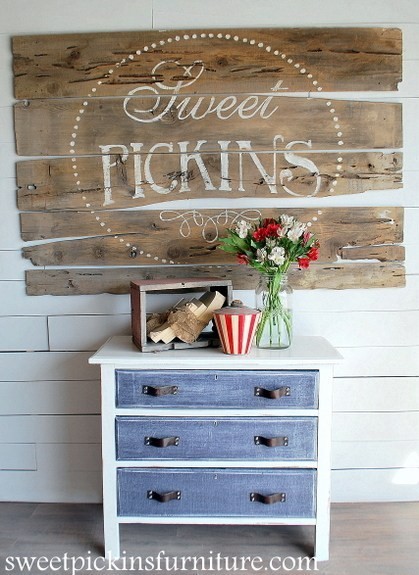 Paint is magic. The denim on the dresser is made of paint. Here is how to do it.
Lightly sand the dresser, then, apply a layer of oil-based-primer. Next, prime it white as the base for the denim treatment. Start brushing a glaze on the whole drawer. Make the lines of the denim by brushing over the entire drawer in one direction using the linen treatment brush.
Then, brush the opposite direction to give it a fabric feel. Take a wire roller, and roll across and down to get worn out look of denim. Paint the rest of the dresser white. Last, cut up an old belt for handles. That will match the dresser perfect.
4. A Mirrored Built-In Cupboard Door project idea | Home-dzine
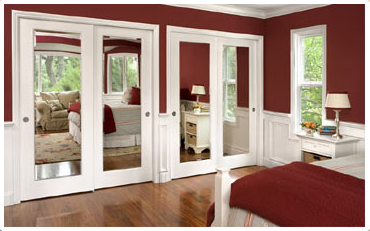 Adding a full-length mirror to your built-in cupboard doors will increase the amount of light and add the illusion of space in the room, which is good for a space-challenged bedroom. What you need for this project are mirror cut to size, mirror glue, mirror brackets and screw fixings.
First, measure and mark the position to center the mirror on the door. Marks an inch from the edge of the four corners to indicate where to insert the screws. Then, mount the mirror to the door using mirror glue.
Apply a plenteous layer of mirror glue to the entire back of the mirror, and immediately press the mirror to the door. Wait for two minutes for the glue to set. Next, install mirror bracket and screw fixing to secure the mirror.
Also read: 10 DIY Bedroom Door Décor ideas.
3. Add Trims to Your Bi-Fold Cupboard Doors | Do-it-yourselfdesign
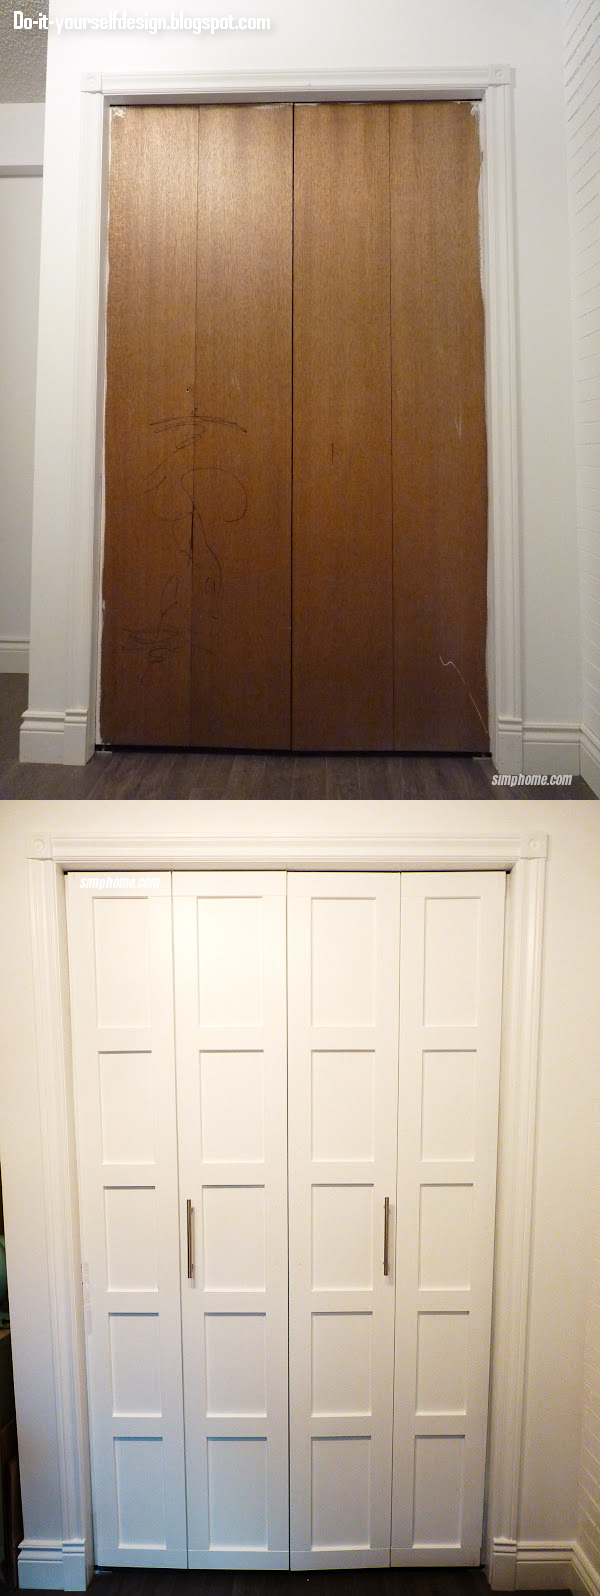 Another makeover idea is embellishing the cupboard doors with trims and re-paint them. To do this project, lightly sand the cupboard doors surface. Wipe clean with a damp rag. Prepare the trims and cut them out into size. To affix the cuts to the doors, use a liquid nail calking instead of nail gun or screw. Paint all the closet doors with 1 coat of primer. Next, Paint them all with 2 coats of white paint. For finishing, install the metal handle. Your new affordable cupboard is ready.
2. Replace Your Cupboard Doors with Curtain | Hunker
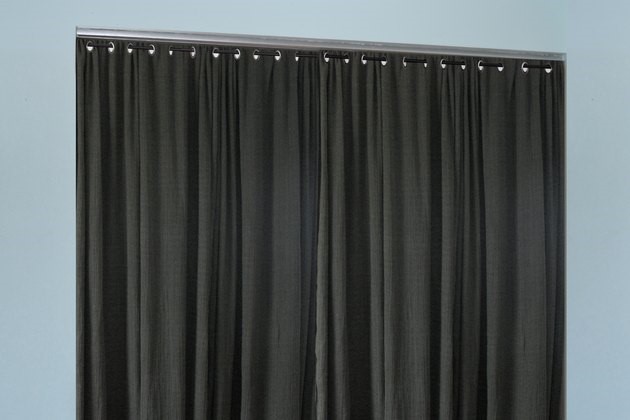 To give a new feel to your cupboard, consider to change the conventional cupboard doors with curtains. Curtains with metal rings slide easily and save your space from fully-opened doors. Various kinds of curtains are available on the store, so you can pick one as you wish. You can also choose the fabric pattern and play with some accessories. Try hanging fabric panels with bold color graphic prints as they can add a visual punch to bedrooms. Bead and ribbon curtains might appeal to children and young adults.
Relevant Ideas:
10 Curtain Ideas for Small Bedroom
How to Turn Plain IKEA Curtains Into White Columns of Gorgeousness
Lastly number 1. Replace the Regular Doors with Sliding Barn Doors | Patchworkandpebbles
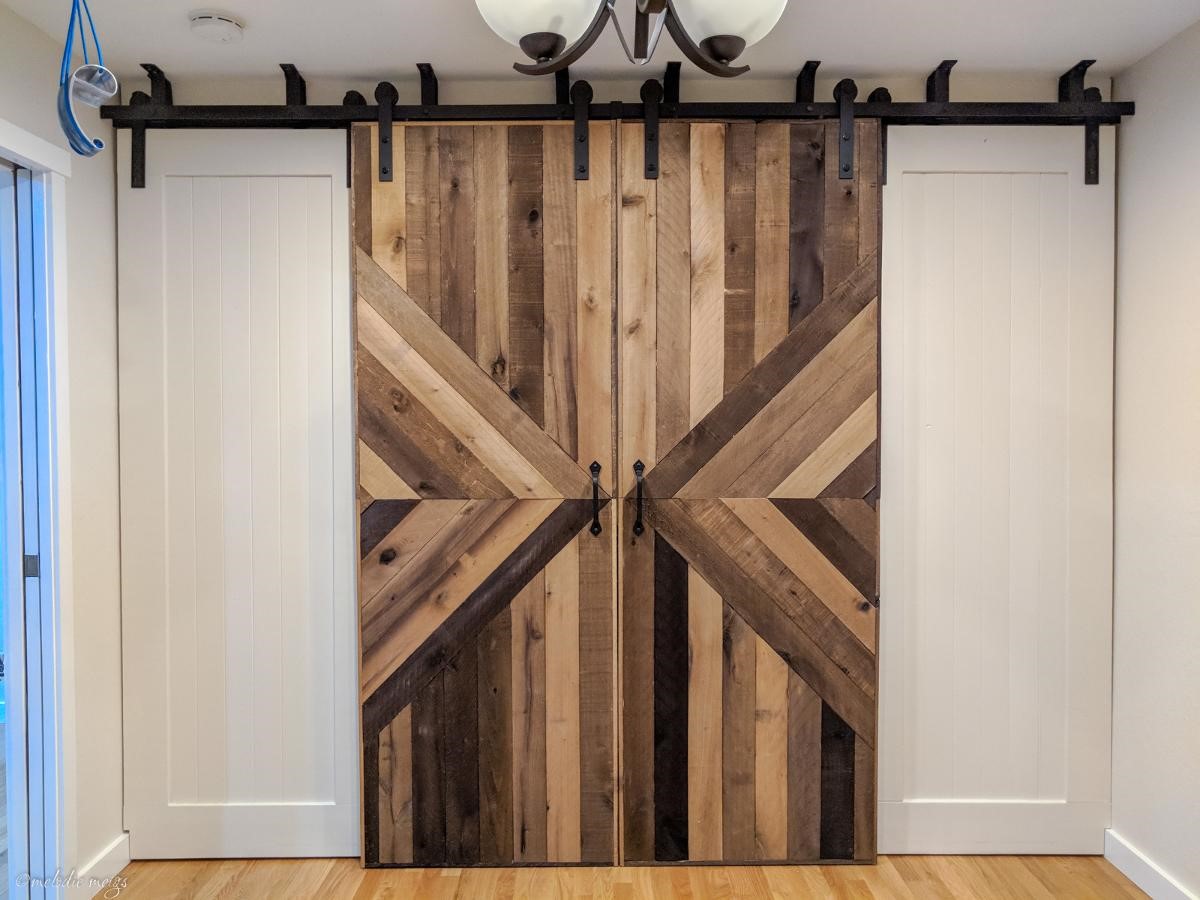 Another alternative to replace your ordinary cupboard doors is this sliding barn doors. It is suitable for walk-in closet which consists of four door panels on two tracks. The two center barn doors are made with plywood and pre-weathered boards, and the two outside white doors are made with cheap cedar paneling. The materials you need are ceiling-mount hardware tracks, sheets of plywood for the backing of the doors, liquid nails, and iron handles.
First step is mounting the hardware to the ceiling, then make the center weathered barn doors.
Third step is making the side doors. Next, install all the parts to its places.
So, Your cupboard is not the only a part of the furniture in your bedroom, but also a style that gives a statement to your bedroom. Whether repaint it or change the hardware, these cupboard makeover ideas are easy and inexpensive. Don’t forget to try one!