The side table is more than just furniture to spruce up the bedroom. Furthermore, it can accentuate a room when laid out and styled well. It comes in various styles that you can buy, but it is not too difficult to DIY. Well, at least for some with advanced woodworking experiences.
So, as we know together, building your own side table will save you a fortune, and you can personalize it according to your taste and need. Without further ado, here are 10 DIY Inspiring Side Table for Bedroom Ideas that you can take to upgrade your bedroom’s appeal by Simphome.
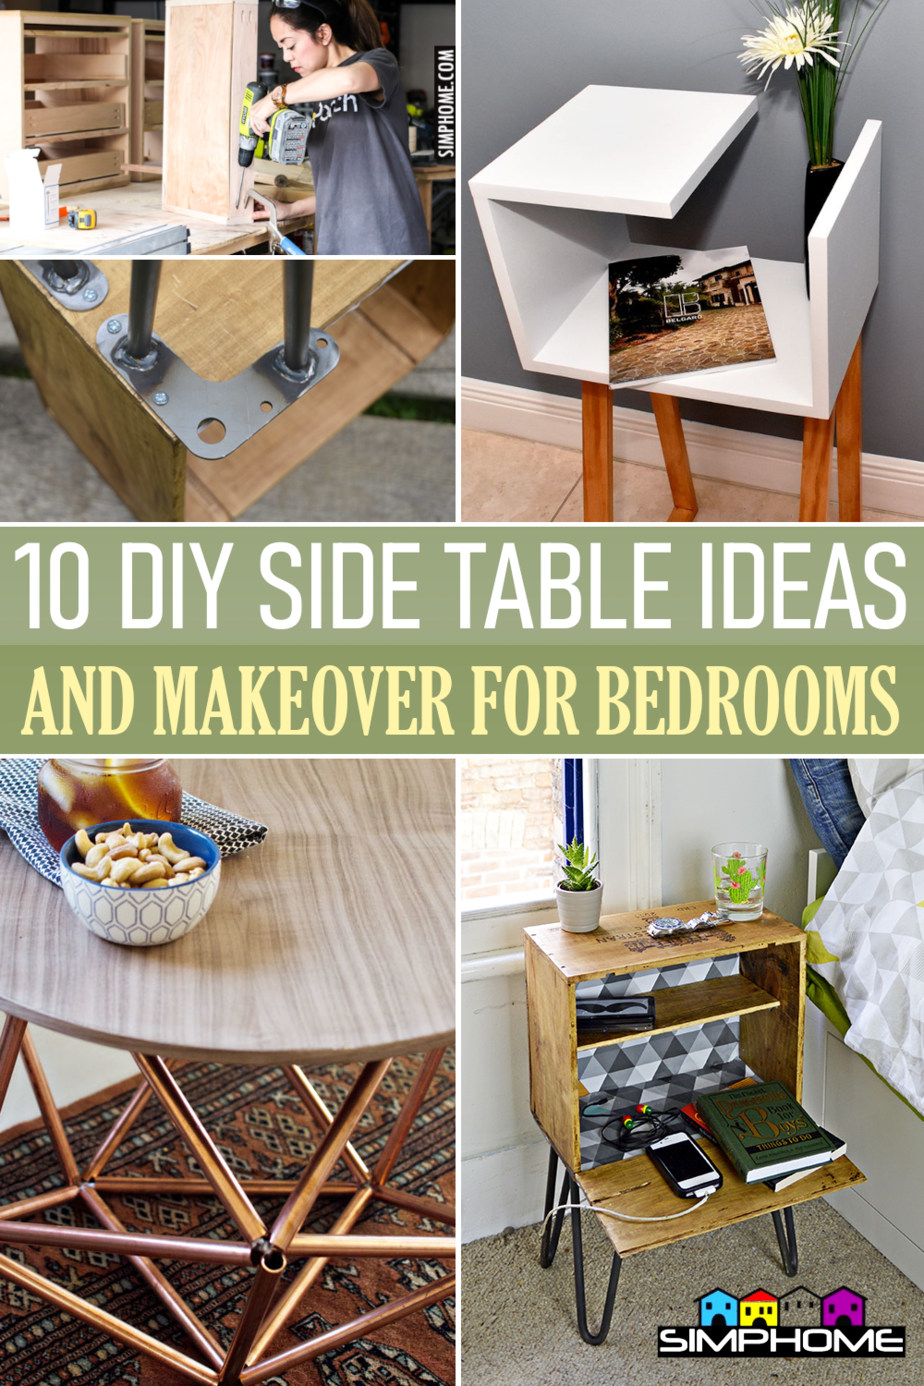
10 DIY Side Table for Bedroom Video:
10. One-Piece Hanging Side Table Idea.
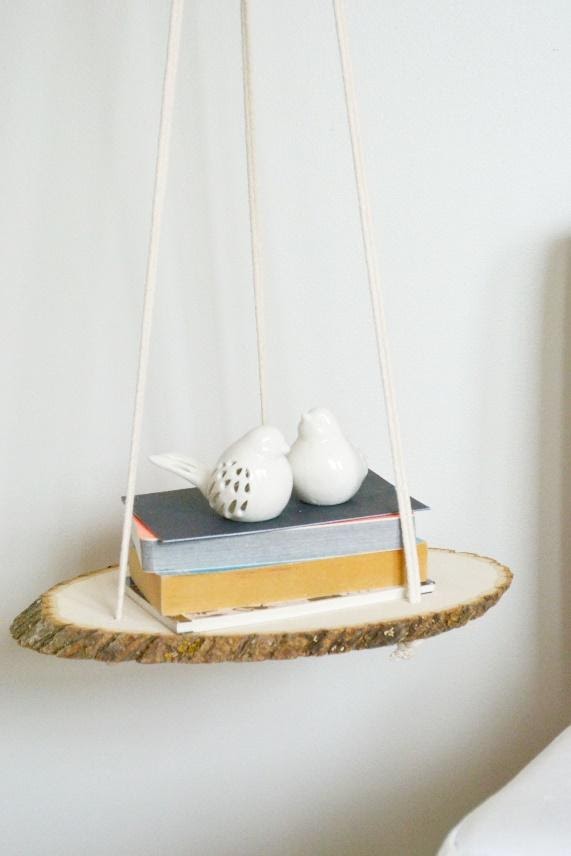
If you only need space to hold a few books, plants, or a bedside lamp, this kind of shelf is excellent as an alternative to a bedside table. This project is effortless, and you can finish it in a few minutes. Moreover, you can move it elsewhere if needed.
To make this bedside table, you only need to drill a piece of wood and hang it by inserting some ropes through the drilled holes. You can apply any finish before making holes to match the bedroom décor or keep its real color for a natural rustic element.
9. A Hipster Side Table Idea.
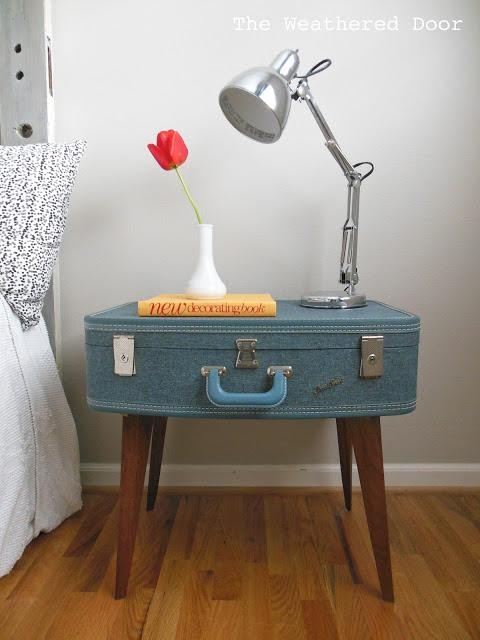
Building a side table does not always mean making it from scratch. Sometimes, you can get a new hipster side table like this by upcycling old things. Not only does it give a unique style to a bedroom, but it also provides plenty of storage inside the case, ideal for hiding some clutters.
- You can make this vintage table by removing the table legs you can no longer use.
- Then, glue and nail them to a block of wood. This way, the legs top will be wider and sturdier to support the suitcase and the weight it may get later.
- Last, screw them into the suitcase.
Consider attaching decorative accents like crystal, ribbon, lace, or sticker to add more beauty.
8. A Side Table for Kids Idea.
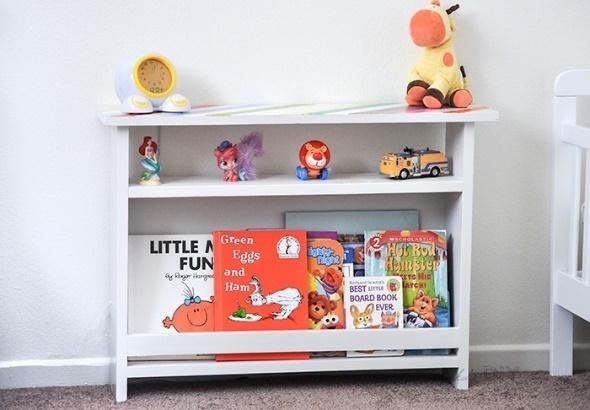
This colorful countertop side table would be a lovely pair for any kid’s bedroom. They can keep their books, toys, and nightlight within reach. The most important thing is it is eminently simple and easy to DIY.
- First, you must determine the table’s desired size and cut the board into sizes.
- Build the frame by attaching the shelves to the sides, then add a rail in the front.
- Next, nail or screw a piece of plywood to the back.
- Grab the other board cut for the top, then paint it the color you or your kid desire.
7. How to Repurpose A Wine Crate?
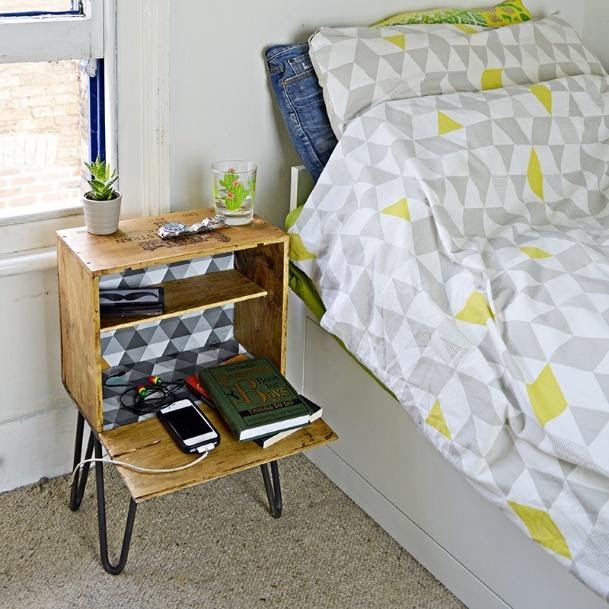
Another thing you can turn into a fabulous side table is a wine crate. Like the previous upcycling project, this one doesn’t require much change. But first, you need a container with lid and hairpin table legs.
- Cut less than half of the lid to make the shelf, while the rest will be the table lip.
- Next, coat it with paint and add more interest using wrapping paper.
- For the final step, attach the hairpin legs.
- For the front legs, screw half the leg brackets into the lip and half into the crate. By doing this, you will hold the lip in place as well as create an extra shelf.
6. A Sliding Barn Door Idea.
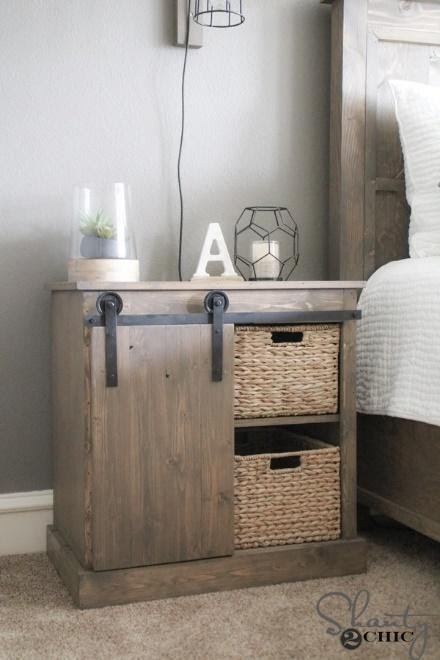
In case you want to add a farmhouse style in the bedroom, this sliding barn door side table idea will be a lovely candidate to try.
- Cut the plywood into sizes, and assemble the nightstand cabinet. Like another cabinet, you must make the frame and put a shelf. You may customize the size and the number of shelves you want.
- After you’ve done with it, start making the barn door.
- To make the barn door, you’ll need two pulleys, hex screws, 1″ spacers, and a flat bar.
- First, measure the bar in the width of the nightstand, then cut it down.
- Screw it with a 1″ spacer to the furniture, assemble the pulleys to the shorter cuts and screw them to the door.
- Finally, spray the elements before attaching them.
5. A Floating Side Table Idea.
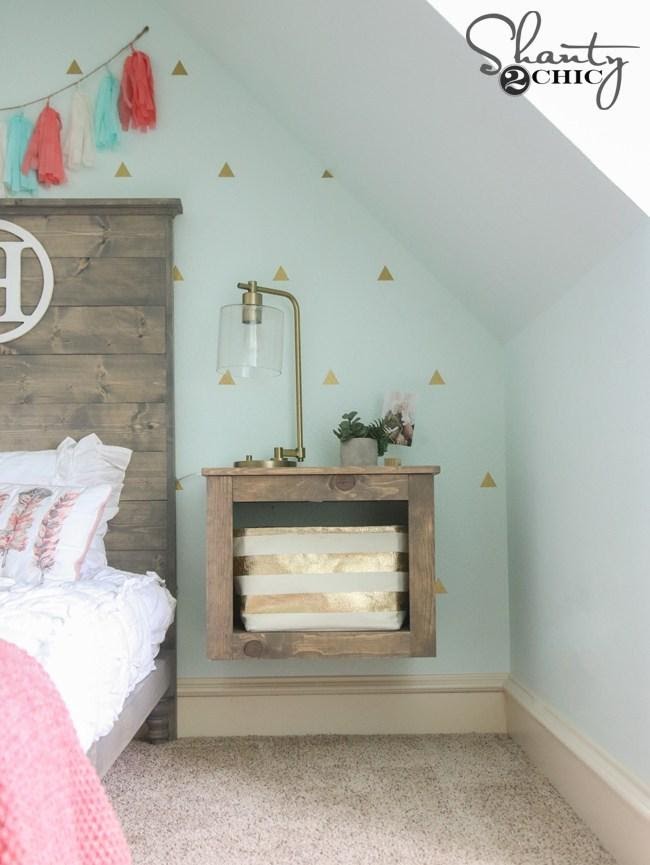
If you are looking for an easy-to-follow DIY plywood bedside table, try to adopt this one. This floating storage keeps your floor free while making it easy for you to clean the space underneath. It also allows you to have one basket extra as additional storage.
The primary material for this project is ¾” hardwood plywood.
- Cut it into size, then assemble it into a box frame.
- Last, hang it on the wall using wooden support.
- Attach the base about 2.5″ from the bottom to hide the floating support. With It, you give your side table a more professional look.
4. A Futuristic Side-table with Pentagon Legs Idea.
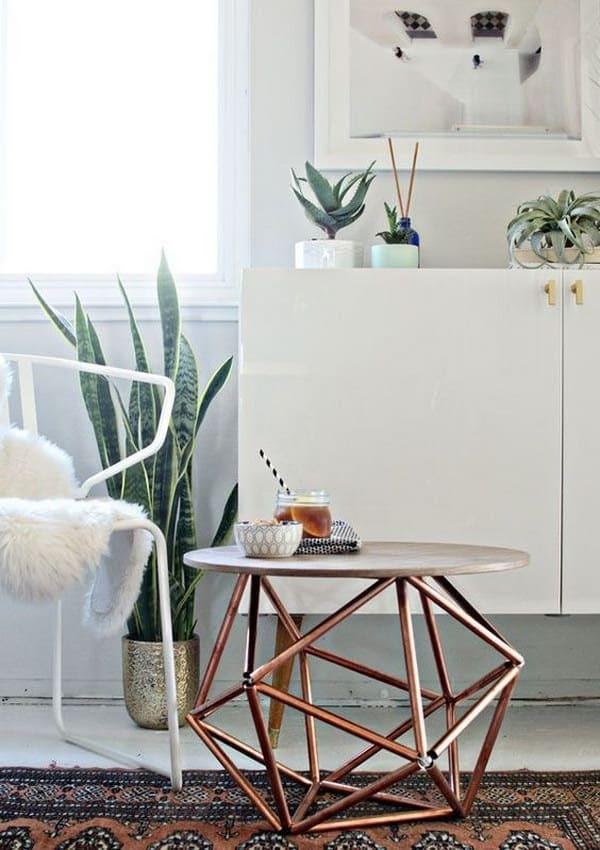
This side table is for people who don’t want to trouble themselves with too much measuring, cutting, and dirty working space.
- Just buy a pipe from home depot and have them cut it in 10” for you. Any pipe will do well, but in this case, the side table uses copper pipe. You will need 30 pieces 10″ in length.
- With the help of clear polypropylene twine, join the first three pipes into a triangle. Continue adding triangles until you come up with a pentagon flat.
- Pull the twine tightly so the shape is no longer flat, then tie it at the end of each triangle. Keep on joining the pipes until it becomes a 3D pentagon.
- Finally, attach it to the tabletop.
3. A Modern Side Table Idea.
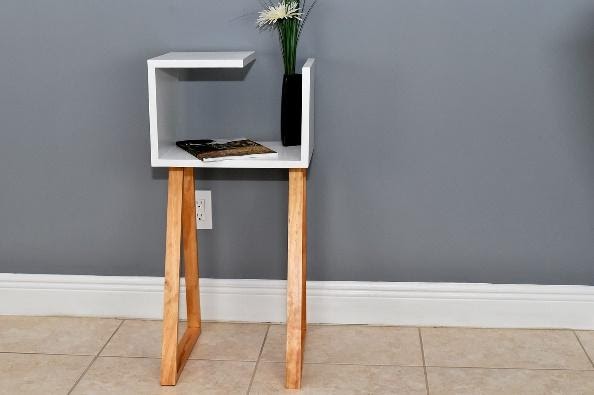
For those who are fond of simplicity and modern design, consider this side table Idea. It comes with clear instructions, and, in short, you only need to assemble the board into a box.
- Cut the top a bit shorter, paint it white, then let it dry.
- While waiting for the table to dry, make the legs using 22” long pieces. However, you can opt for another table legs design if you don’t want to bother yourself with cutting at a degree angle.
- After you’ve finished with the legs, assemble them in the table box.
2. A Slim Side Table Idea.
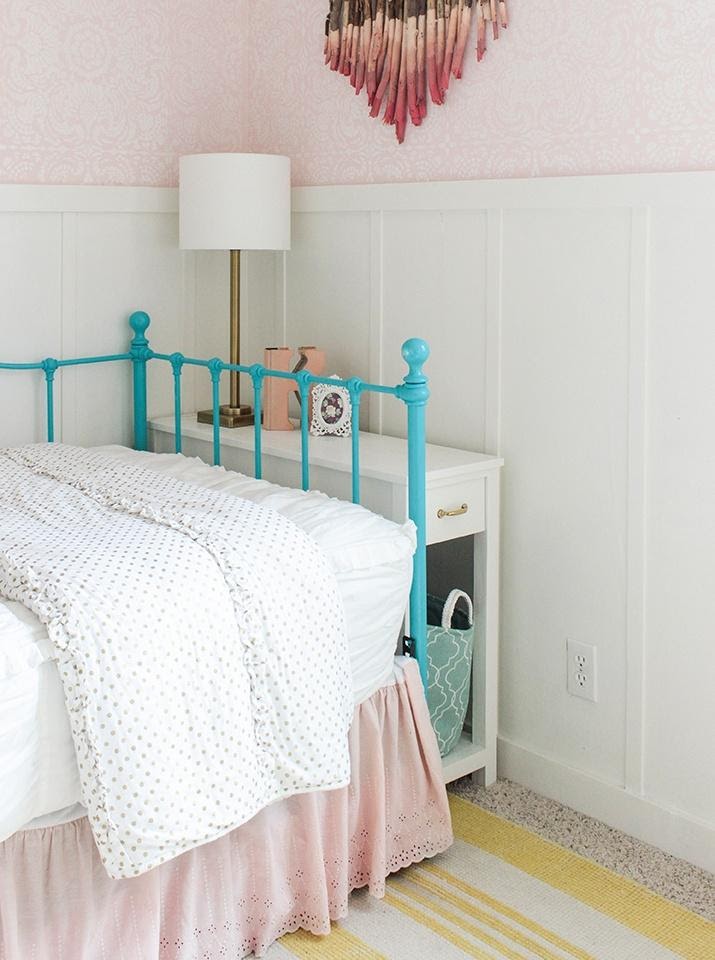
Not all side tables at the store can fit your space, especially when you have a narrow bedroom. This table can occupy a room between the wall and the bed, and it is probably a side table that fits to complete your bedroom right now.
Unfortunately, a product similar to this one is not easy to find. So, if you are interested in making it, here are the steps.
- First, build the front and back frame using a board, then attach the side aprons.
- Next, create the bottom shelf and attach it to the legs.
- Screw the top board using 3″ wood screws, then build the drawer.
- Finally, paint it the color you like.
Since you will place it in a narrow space, it will be better to use casters for the leg to push it in effortlessly and pull it in and out.
Lastly, Number 1. 3-in-1 Sidetable Idea.
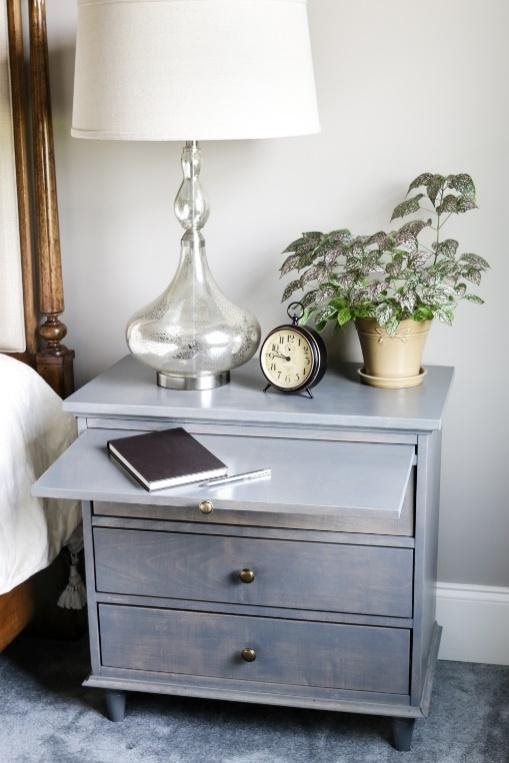
It is probably hard to find single furniture with a pull-out writing tray, abundant storage space, and a remote charging station in one unit. Even if you can, it will cost you a fortune. Nevertheless, you can make it yourself without wasting loads of money to purchase it.
- Using plywood and some screws, start to create the drawers and the tray.
- Next, build the drawer box, then spray the unit with some paint.
- Once it’s dried, make a small cut in the back for the charging cord and glue the USB charging station.
Tip: To prevent the writing tray and the drawers slide out, it’d be better to attach a small chain to the back.
You can try this idea on How to Craft Simple DIY Hidden Storage or charge Station for a portable version.
So, No need to be an expert in crafting your own side table. Start by successfully finishing the simplest idea on the list and challenge yourself to experiment with the harder ones. You just need to convince yourself to start it and a link inside the following reference.
Reference:
10. Diys.com
9. Theweathereddoor.com
8. Anikasdiylife.com
7. Pillarboxblue.com
6. Shanty-2-chic.com, Shanty-2-chic.com
5. Shanty-2-chic.com
4. Homedepot.com, Thedesignconfidential.com, Thedesignconfidential.com
3. Homedit.com
2. Shadesofblueinteriors.com, Buildsomething.com
1. Jenwoodhouse.com