Some of us have a love-hate relationship with our dresser. It provides us a means to store more of our clothing, especially in bedrooms that lack closet space. However, sometimes it can be a source of frustration and disappointment. Maybe it’s hiding a big mess inside, or it’s starting to look dated, or it has insufficient storage space.
Whatever issues you’re having with it, Simphome.com has a list of twelve dresser ideas in a modern bedroom that might help.
🔊12 Modern Bedroom Dresser Video:
List Entries
10 Unique DIY Bedroom Dresser Makeover
10 Inspiring DIY Dresser Makeover Projects That Will Give You New Storage Solutions
10 Wardrobe Layout Storage Ideas
12. Glam HEMNES Dresser Hack.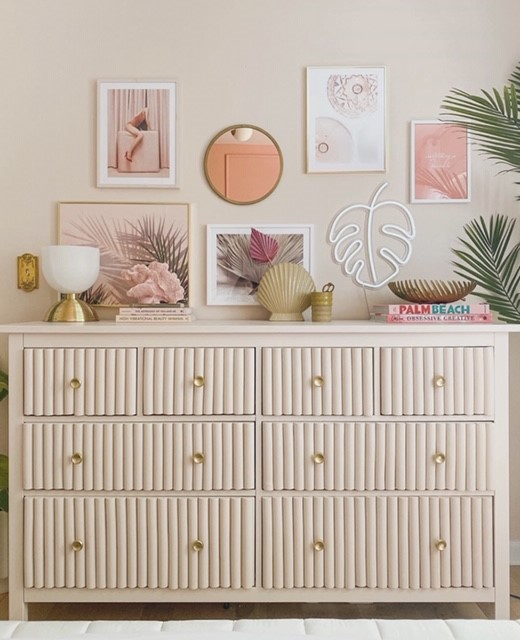
Give a HEMNES dresser a retro and glam makeover. It’s one of IKEA’s dresser lines, and we’re particularly interested in the 8-drawer model.
First, assemble it and then prime and paint the drawers and the frames separately.
You’ll need more than 50 half-round foam moldings. Cut them all to the height of the drawers they belong to using a craft knife. Ensure you have enough for each drawer and paint them all.
Next, line all the drawer bottoms with the removable wallpaper you picked. After that, proceed to hot glue all the half-round foam on their respective drawers.
Drill through the foam from the back using the original handle holes as guides and install the knobs.
11. Vintage-Style Storage.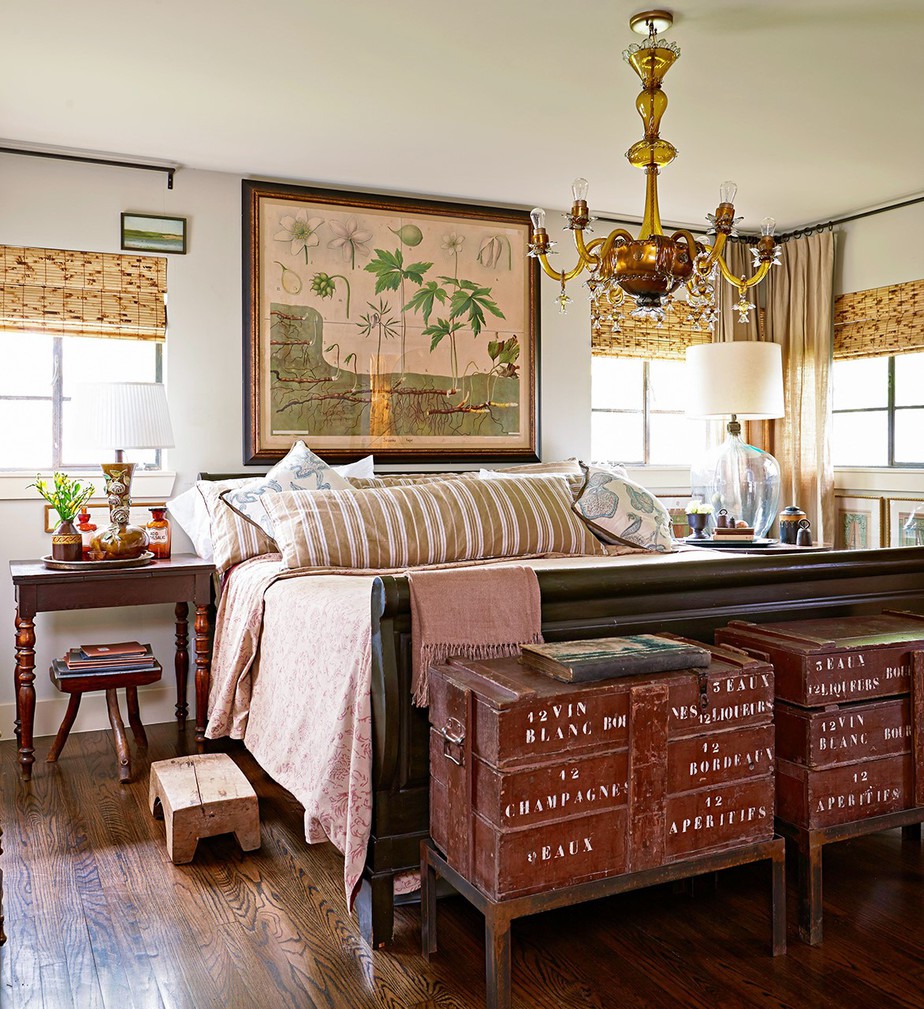
Sometimes, you’ll be in a flea market and come across items that you know will fit perfectly inside your home.
It could be classic décor, unique furniture, or in this case, a couple of vintage but still functional hand-stenciled trunks.
They found a home at the foot of a large bed and serve as storage for various linen and pillows inside a bedroom. Since the room has a predominantly natural color scheme set against a bright neutral background, the brown vintage trunks fit right in.
They sit on a frame with four legs and liven up the room and give it more character.
10. Classic Rock Dresser (An Ikea Makeover)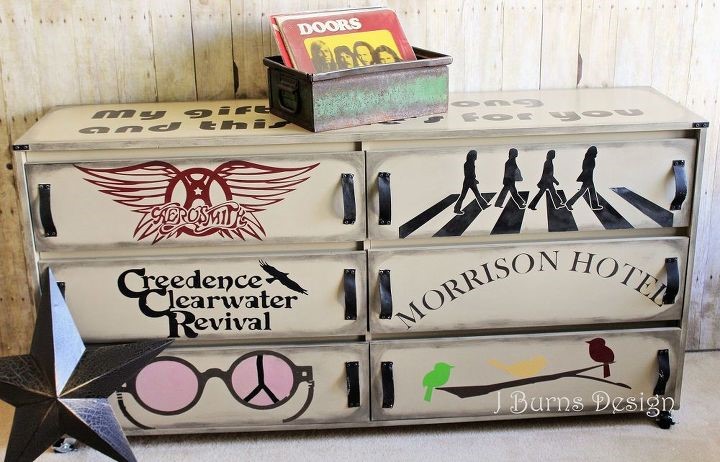
Another IKEA hack you can try is converting one of its dressers into a classic Rock N Roll dresser. It’s all up to you to choose the theme you want.
Remove the bottom feet and replace it with four lockable casters at the corners. Sand the whole thing down with high grit sandpaper. Wipe clean and paint it in the color you like.
If you don’t know how to make the stencils with imaging software, you can download some online and use a vinyl cutting machine to cut them.
Attach them to the drawer faces and paint. Peel off the stencils while the paint is still wet. To make it even more unique, install leather handle straps on both ends of each drawer.
9. How to Stain a Dresser.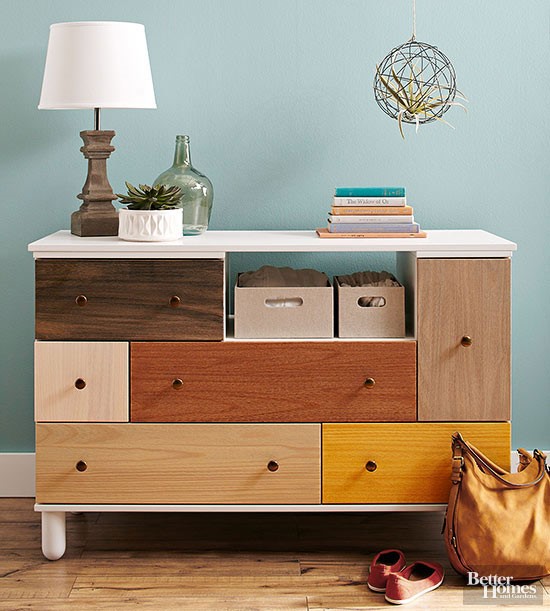
Remove all the drawers of an unfinished dresser and uninstall any non-wood hardware. Then proceed to prep all the surfaces by first sanding with 180 grit sandpaper. After that, wipe away the sawdust with a tack cloth.
Use painter’s tape and carefully cover drawers’ sides. Wipe with wood conditioner to make the stain stick consistently, then leave it for about 10 minutes.
Next, you can start applying stain with a foam brush. Start at the top and work your way down to the bottom, making sure to spread any drips.
Again wait for ten minutes before wiping all the excess stain away with a clean piece of cloth. Let it dry for a couple of hours.
If you want it darker, apply another coat and repeat the process until you get the shade you want.
8. How to Apply Stencil Texture to Your Painted Furniture Makeovers.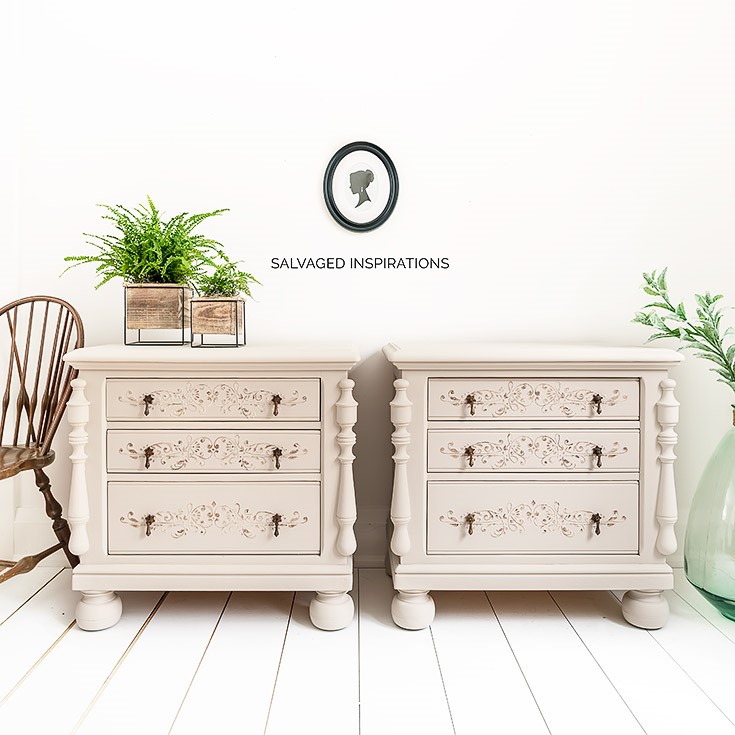
If you haven’t used raised stencils before, it can be a bit intimidating at first. Don’t worry if you make mistakes because the material is easy to wipe off while wet.
First, use green painter’s tape to block out any part of the stencil design you don’t want appearing on the drawers. You can also use the tape to hold the stencil in place.
Dip a craft stick into the fiber paste and apply it to your putty knife. Spread the paste evenly across the design.
Remove your stencil carefully and wait for the paste to harden a bit. In the meantime, clean the stencil after every application to have to maintain a sharp pattern.
When it’s 100% dry, you can smooth out all the rough edges. You can achieve different effects by using various finishes.
7. Mid-Century Modern Dresser Makeover.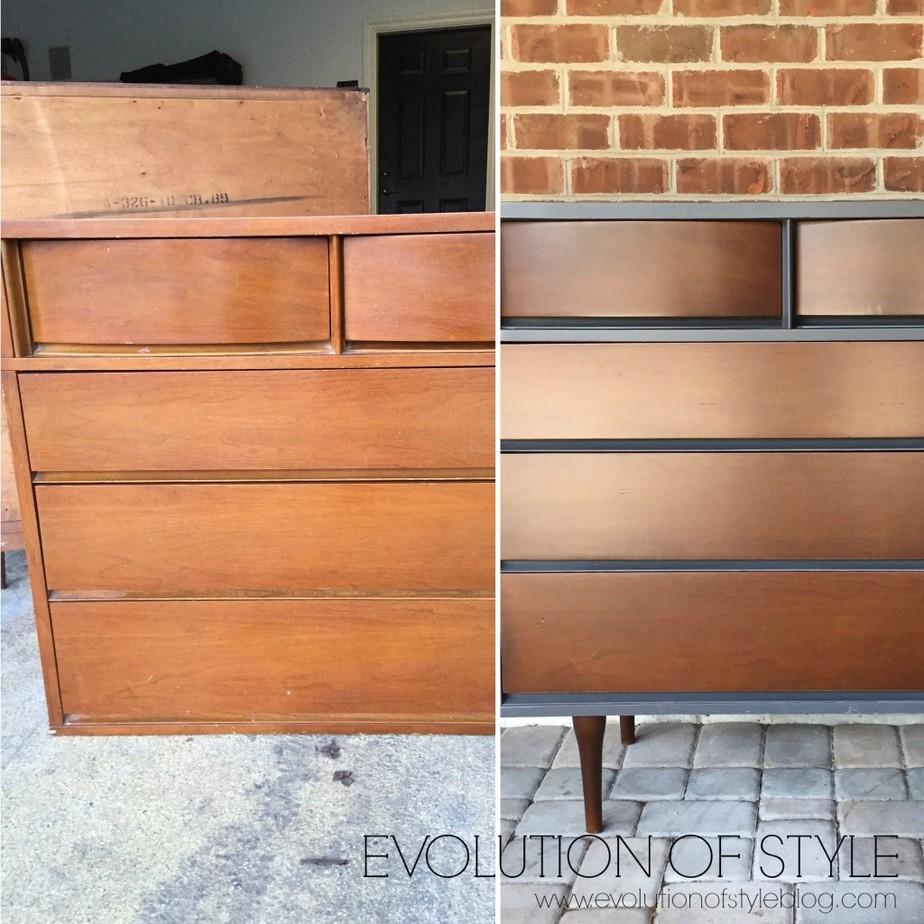
There were a lot of minimalist designs from this period that became timeless. They were simple but sleek and had clean lines.
The dresser in this example has an understated elegance, but its top had seen better days and needed patching up. The first thing to do was to remove the legs.
After applying putty to all the wear and tear, it got a thorough sanding from a 180 grit sanding pad and sprayed with primer. When it was dry, it received fresh coats of dark gray paint.
The drawers got sprayed with a 1:1 ratio of walnut stain and clear satin poly. The result is a beautiful sheen but not too glossy. The shade matches well with the eye-catching brown legs.
6. DIY Dresser Makeover With a Stenciled Top.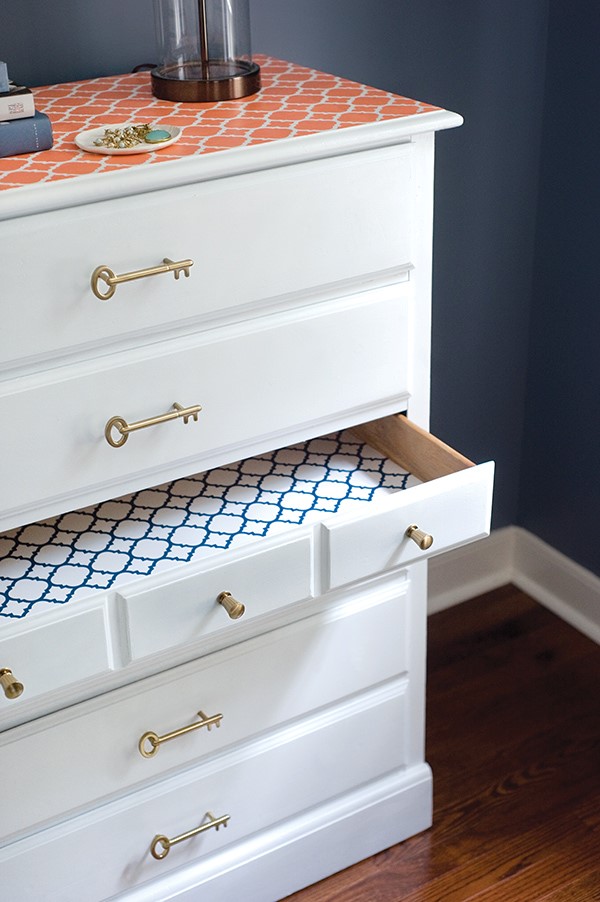
You can give an old dresser new life with this simple DIY makeover.
Begin by removing all the old hardware from the dresser. Next, sand the surface thoroughly using an 80-grit sanding block.
Prime the dresser frame and the drawers, including the drawer sides and bottoms, and leave them to dry. Then apply fresh coats of white paint with even brush strokes and wait for it to dry.
Use a stencil and contrasting orange color to form a grid pattern on the top. Line the drawers with drawer liners having the same design but in navy blue.
Then install the key-shaped bronze drawer pulls to the larger drawer faces. The smaller ones get a bronze knob each.
5. Organize Better with this Kamiler 7-Drawer Dresser for the Bedroom.
This sleek drawer dresser has a black colored metal frame that holds seven drawers. It has handlebars at the top to help carry the dresser around the room, although it can get quite heavy when full.
The drawers are actually fabric bins with wooden handles at the front. They’re not as deep as regular ones, but they have a high profile and can contain taller objects just like bins. They also have a top lid, which earns it more plus points.
The advantage of tall but narrow drawers is that they don’t take up much floor space but can store several items. With seven containers, they provide a great way to separate and organize their contents.
The top and backing are MDF and water-resistant and provide an extra surface to put décor and small plants. BUY IT HERE
4. Experiment with this DIY Industrial Dresser Made from Lockers.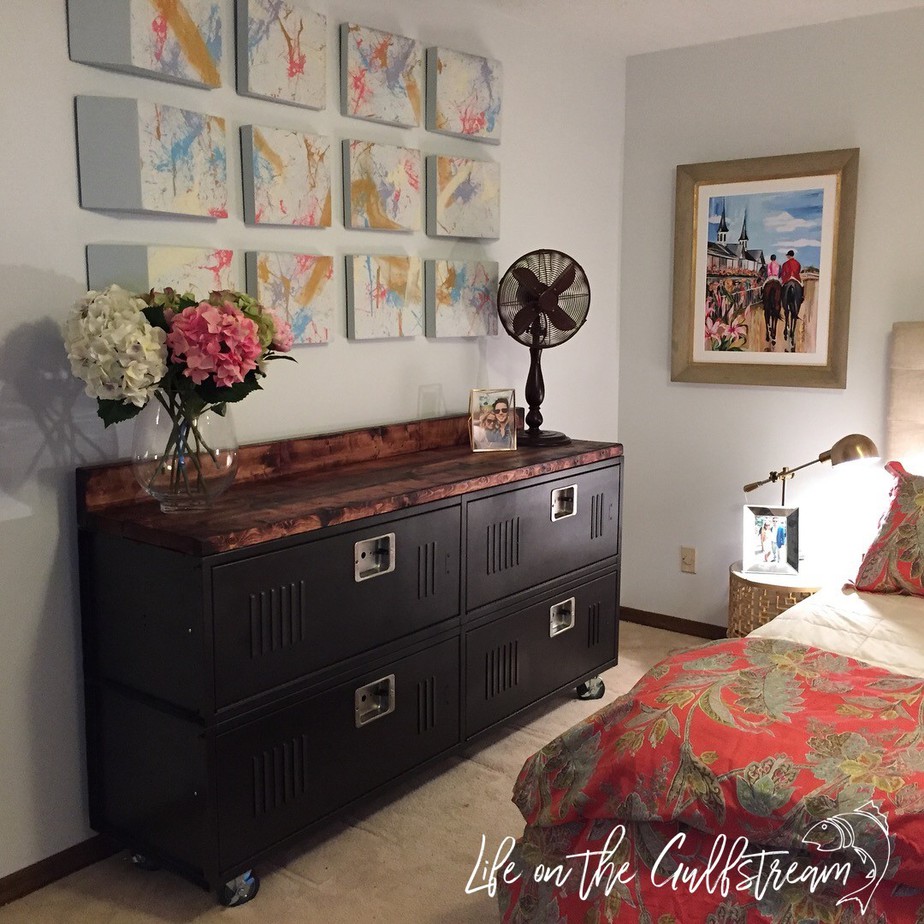
It’s an excellent idea for an industrial themed dresser made from a steel locker.
If you sit the locker on its right side, you get a dresser with four compartments that have doors that swing downwards. Genius! Chains were added to prevent the doors from opening more than 90°.
The first thing to do is to grind the legs off and attach casters on the corners with nuts and bolts. Remove all the hardware to make it easier to paint, preferably with a matte black color.
The top consists of three 2”x6”x8’ industrial lumber with low backing and joined together with pocket-hole screws. You can stain the wood and spray two coats of protective clear lacquer finish.
3. And Optimize it With These Sweet Folding Techniques.
In case you haven’t heard of it or are only vaguely aware, there are sweet clothing and linen folding techniques that are a legit method of optimizing storage. We won’t go into detail on how to do each one of them. However, consider this a heads-up to something significant that you may want to learn.
For example, did you know that there’s a way of rolling jeans that takes three times less space than folding them?
Did you also know there’s a way of getting a clothing item in a drawer without disturbing the others? It’s a common annoyance that makes organizing clothes in dressers tedious, but you can finally lick the problem!
2. Complete your Small and Awkward Master Walk-In Dresser with this Corner Closet Solution.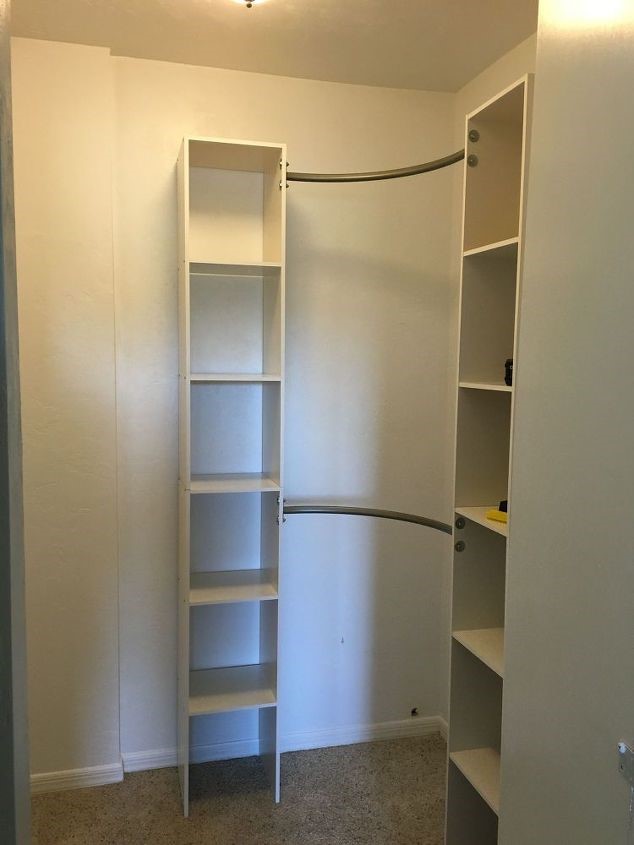
This corner closet idea is a smart solution for a cramped and oddly shaped master walk-in closet.
Two slim, open shelve towers divide three hanger sections. They are high enough to accommodate two levels of hanging clothes.
Two straight bars on the left anchored to the left tower and wall are for hanging formal clothing.
The two curved bars anchored on both towers are for more casual attire. They are the highlight of this closet solution and make efficient use of that corner. You can find them on Amazon.
The single bar on the right is for jeans and pants and leaves enough space at the bottom to place a hamper. This layout pretty much provides easy access and organization to all the clothing items.
1. Back to the Simple one, Style your Bedroom Chest of Drawers This Way.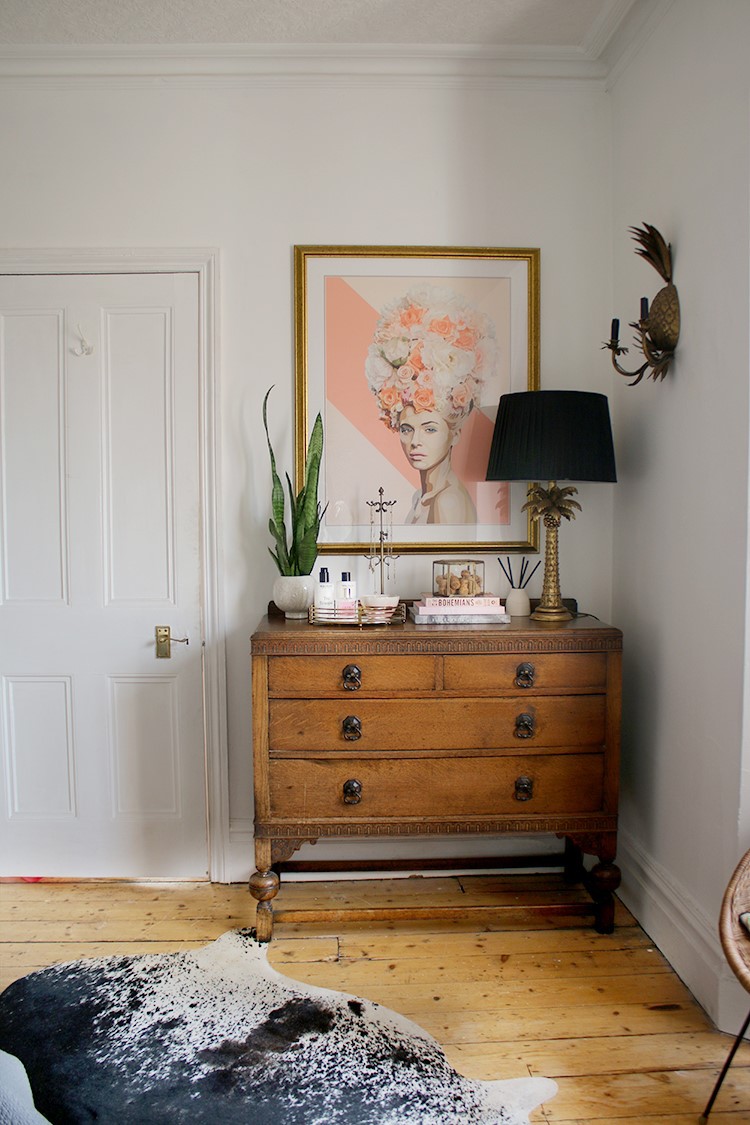
You can’t go wrong by placing a mirror above a dresser.
However, if you already have a mirror somewhere else in the room, you can hang framed art instead.
On the dresser top, plants or flowers are always welcome. You could also place an elegant looking tray to organize small items. A lamp is also one of the mainstays and will add illumination to that corner at night. Putting something of personal interest to you would help lift your mood.
Conclusion:
I think this list has successfully covered all the bases regarding dressers in a bedroom.
Also, the list has touched on its practical and functional side as well as its aesthetic benefits. Simphome even has included folding techniques to help with clothing and linen organization.
It’s a very vital piece of furniture to have. Not only does it help you store and organize your clothing, but an elegant dresser will also help enhance the beauty of the bedroom.
Reference:
12. Ikeahackers.net
11. Bhg.com
10. Hometalk.com
9. Bhg.com
8. Salvagedinspirations.com
7. Evolutionofstyleblog.com
6. Homedepot.com
5. Amzn.to
4. Lifeonthegulfstream.com
3. Pinterest.com
2. Amzn.to, Hometalk.com
1. Swoonworthy.co.uk