Key points:
- To get more storage inside a rental kitchen, you can utilize the top of your cabinets creatively.
- Use Pegboard
Pegboard is a wonderful way to store extra pots and pans. What is a better option to use the area than setting it atop the cabinets? It is ideal storage to store bakeware or spare cutting boards (remember not to hang it right over the sink when you’re busy cooking). - The sliding basket is a simple system that lets you clean cooking utensils in one place without opening every door and drawer. It is a great way to save space in the kitchen.
- You can also use the sliding basket for food storage: add it to the uppermost shelf of your cabinets, or install it on the wall above your refrigerator instead.
- Use a hanging locker
Hanging storage is great because it frees up valuable cabinet space. And you can use the space in many different ways, so you have many options (see below). - If you have a rental or condo kitchen or lack the means to do any other extensive remodeling, you can easily make additional storage space in the area directly under your kitchen sink. You only need a couple of inexpensive plastic crates (you can find them at most home goods stores) and a few hooks to hang them from.
- You can also use the top space on a shelf above your washer and dryer – as long as it’s tall enough to fit both – by constructing small rolling shelves that will hold larger items such as cleaning supplies and detergent and laundry baskets.
People rent a house for several reasons. Some cannot afford to buy one, while others do it because they temporarily stay in a particular town or city.
A rented house is usually small, resulting in limited space for foot traffic, let alone for more furniture. Therefore, you cannot purchase more shelves or cabinets to organize your kitchen.
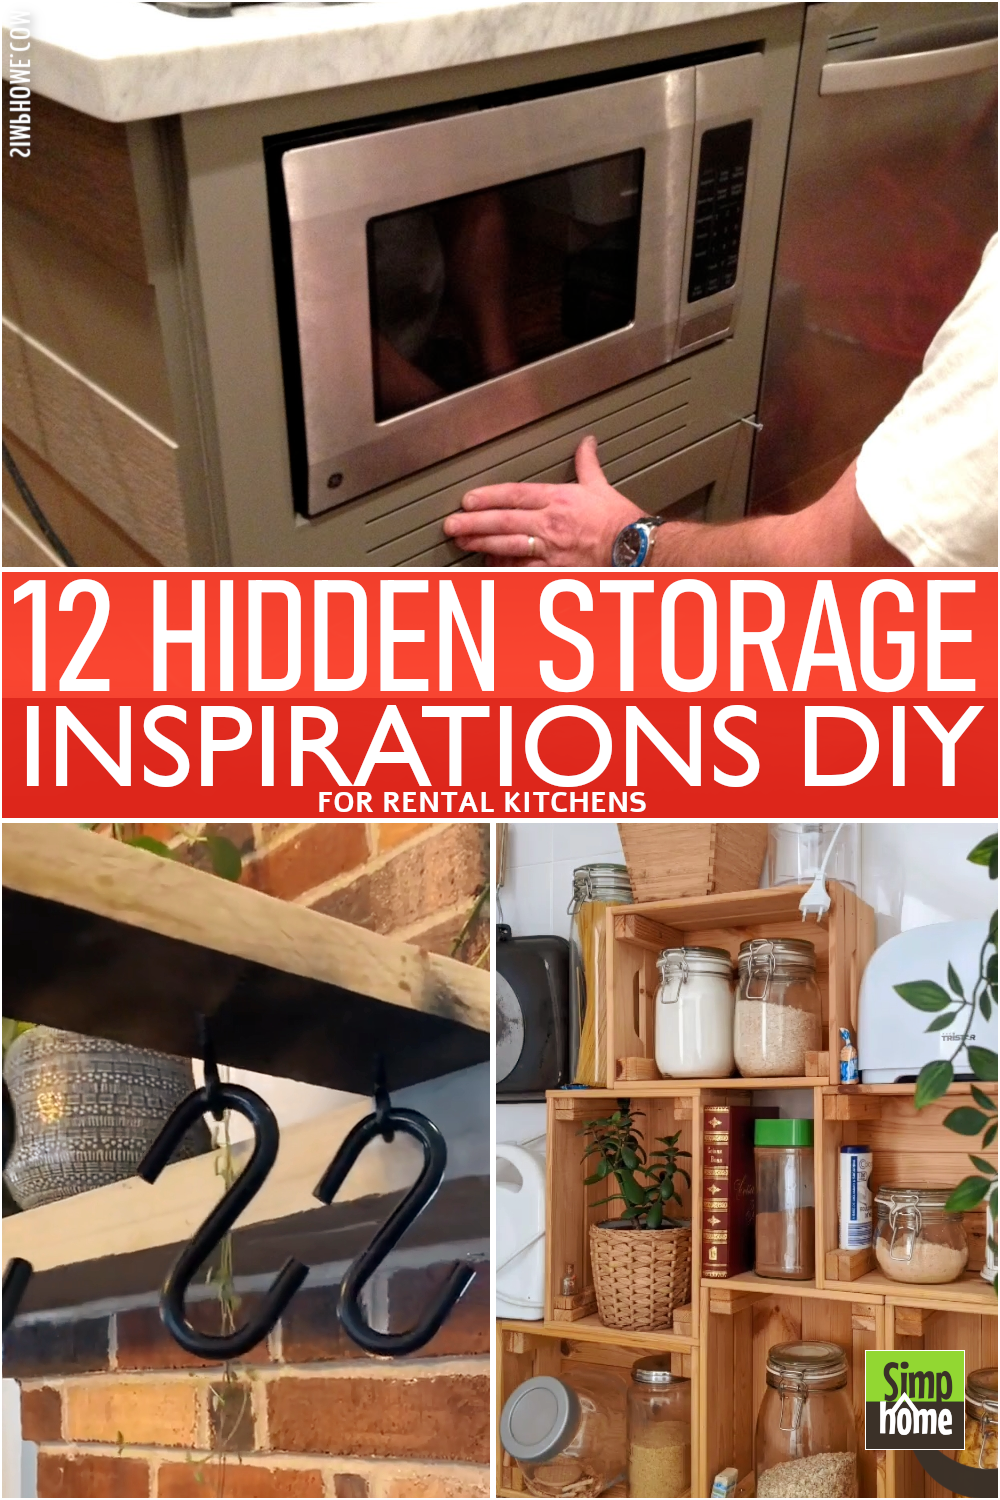
Do not let limited space discourage you from keeping things tidy. These 12 hidden storage inspirations DIY for the rental kitchen will help you cope with your cooking area without taking up more space. As always, Simphome presents you with the list.
List Entries:
12. The Diagonal Drawer Organizer Idea
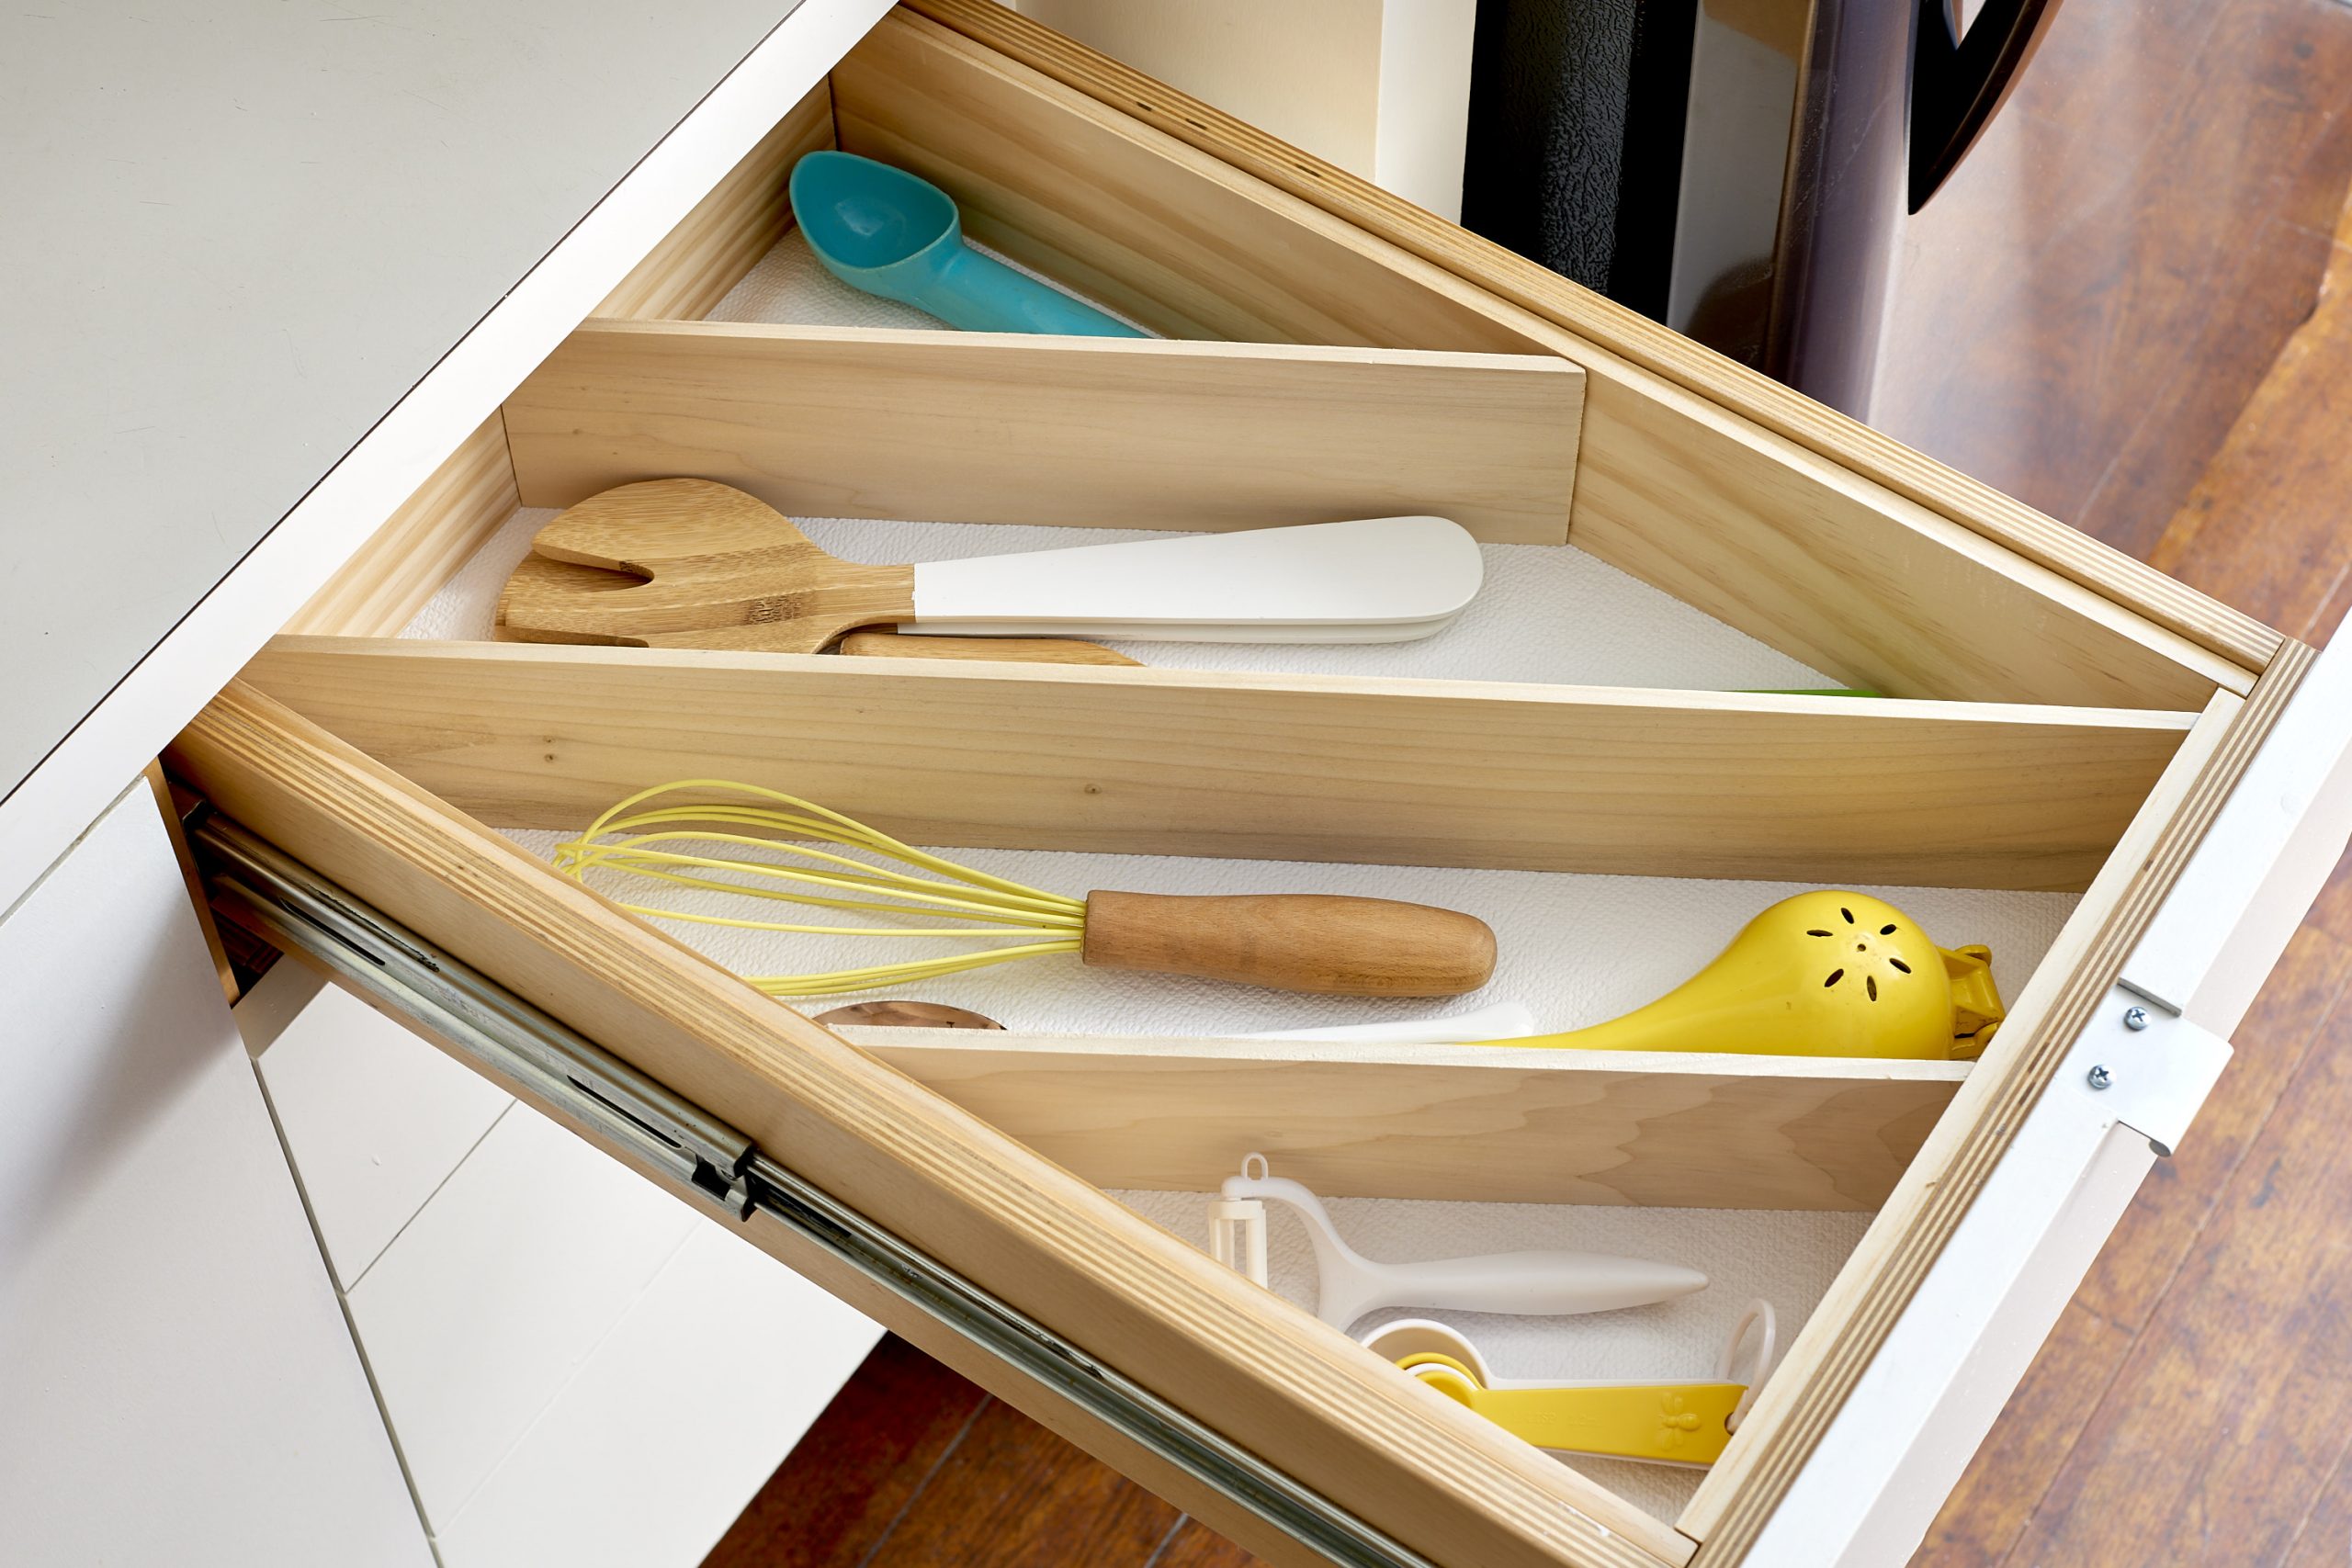 The drawer is the area that is prone to clutter because you tend to toss everything into it. Now, you can end this mess with a diagonal drawer organizer.
You can find this organizer in stores. However, the ready-made versions may not fit your drawers perfectly. Therefore, making them yourself is your best bet.
First, empty your drawer and measure the inside of it.
- Then, cut craft boards to create the frame.
It is optional, though. You can directly install the pieces in your drawer to create diagonal partitions.
However, you will not be able to remove the organizer when needed. - Once the frame is ready, try to picture the utensils that you will store inside the drawer.
- Then, group them based on their length and width. This way, you can figure out the sizes of the dividers.
- Next, cut the diagonal pieces and glue them down to the frame. Finally, slide the organizer into your drawer.
Many people place the small appliances they use on a daily basis right on the countertop, resulting in a not-so-appealing look.
If you also experience this problem, you can try this brilliant solution.
You only need to install drawer slides behind the cabinets so that you can pull a board concealing the appliances up and down. You can also install beadboard paneling to add more style.
Relevant instructions:
1. Gather the equipment needed for this project. These include a pencil, ruler, chalk, a chisel, hammer (if you are using a manual level), and a screwdriver. You also need sandpaper for furniture refinishing.
2. Remove any existing wall art on the walls where you plan to install the storage. Paint the bare spot with your desired color to complete the look.
3. Draw a rectangle on your designated wall to mark it as one room. Mark 2 ft x 2 ft spaces on this rectangular area to measure later when you re-install your cabinets later
4. Install a beadboard paneling on the wall. You may opt to buy one instead of making your own.
5. Install kitchen cabinets on the wall
6. Install the drawer slides behind your cabinets
7. After installing, pull them up and down to reveal hidden storage for your small appliances.
10. A Secret Pantry Door Project Idea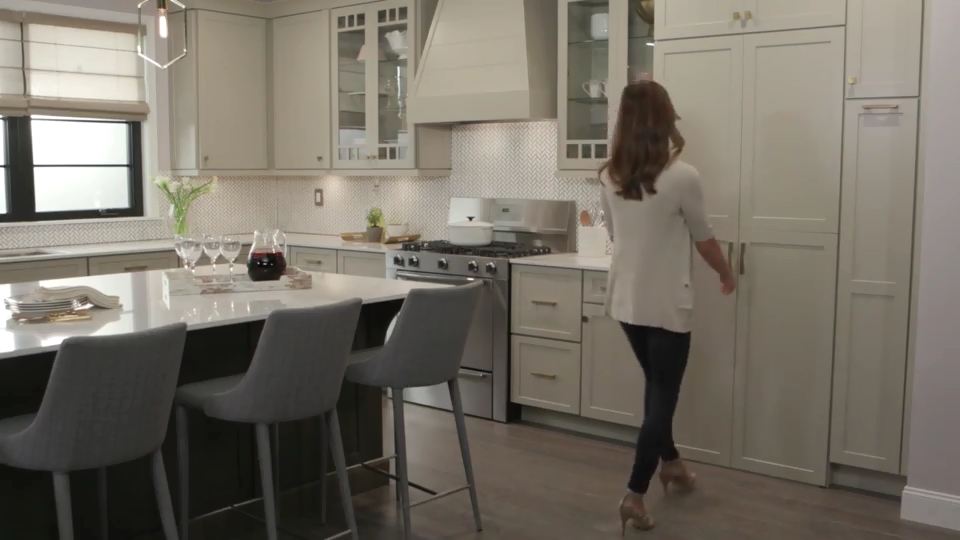
This kitchen can be the best place to play hide and seek because no one will find you.
When you step into this kitchen for the first time, you might think it is like many other standard small kitchens. You will not notice that it has a hidden pantry until you open the tall cabinet doors.
This kitchen features full-height doors that look like standard cabinet doors. They provide functional access while serving as a cohesive element.
9. A Mini Coffee Bar Idea with Stainless steel touch @Studiodearborn
Stainless steel is popular because of its durability and sleek look. Therefore, incorporating it into your kitchen can be a good idea.
This coffee bar features drawers coming in different sizes. The owner uses the lowest part to store coffee because it has stainless steel lids inside it to maintain its freshness.
The upper drawer features dividers that enable the owner to store spoons and other utensils without mixing them up.
Relevant details, you can consider replicating the project or a similar one:
1. Start the project with the cabinet doors. You can either make them yourself or purchase them ready-made.
2. Install drawer slides to hide your small appliances and utensils.
3. Create a mini coffee bar with drawers of either size to store your coffee accessories or utensils in the right drawer spaces.
4. Install a stainless steel countertop with panels to create a classy coffee bar look.
5. Apply decorative touches such as paint and wall art on the walls or shelves to complete the look.
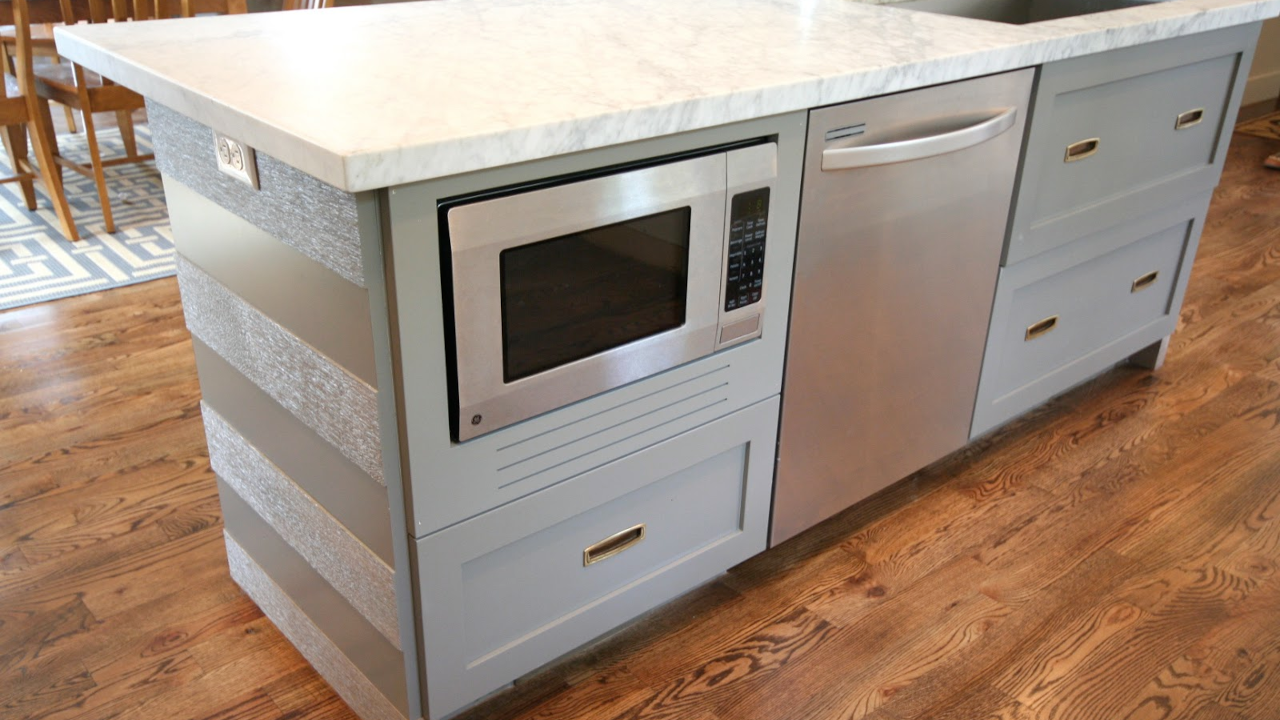
8. A Fake built-in microwave Project Idea
 A built-in microwave can be pricey. However, who could resist admiring its sleek look?
You can get the sleek look of a built-in microwave without costing a fortune. You can do this by faking it.
If you think this kitchen island features a built-in microwave, you are wrong. It is only a standard microwave put inside a cabinet with an outlet in the back.
The owner needed to build a riser so that the microwave could sit snugly. Then, he positioned the microwave in place and faked the look by installing the cabinet door.
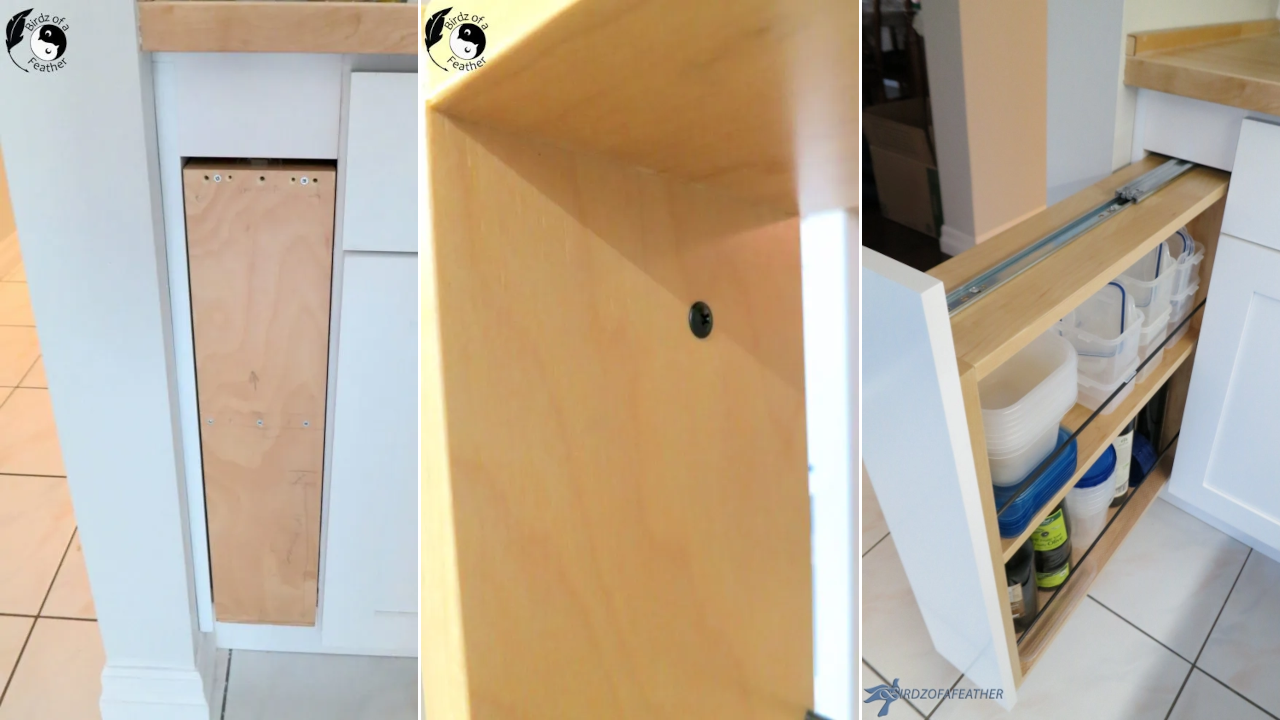
7. The Pull-out cabinet DIY project by Birdofafeather
 Some cabinets leave an awkward opening between them and the wall. You cannot let this space remain open because it is not appealing. Thus, you will need a filler strip to conceal it.
Instead of installing a filler strip and not tapping into this opening, you had better incorporate more storage solutions into this awkward space.
You only need to measure the opening to create some shelves that fit snugly into it. Consider installing kite rods or dowels threaded through the front and back of the shelves to create railing. This way, you can prevent bottles of condiments and sauces from falling.
To make the shelves more accessible, you need to install a drawer slide on top. Finally, place the filler strip onto the drawer front to match the cabinets.
6. A Fridge Cabinet Surround Project Idea
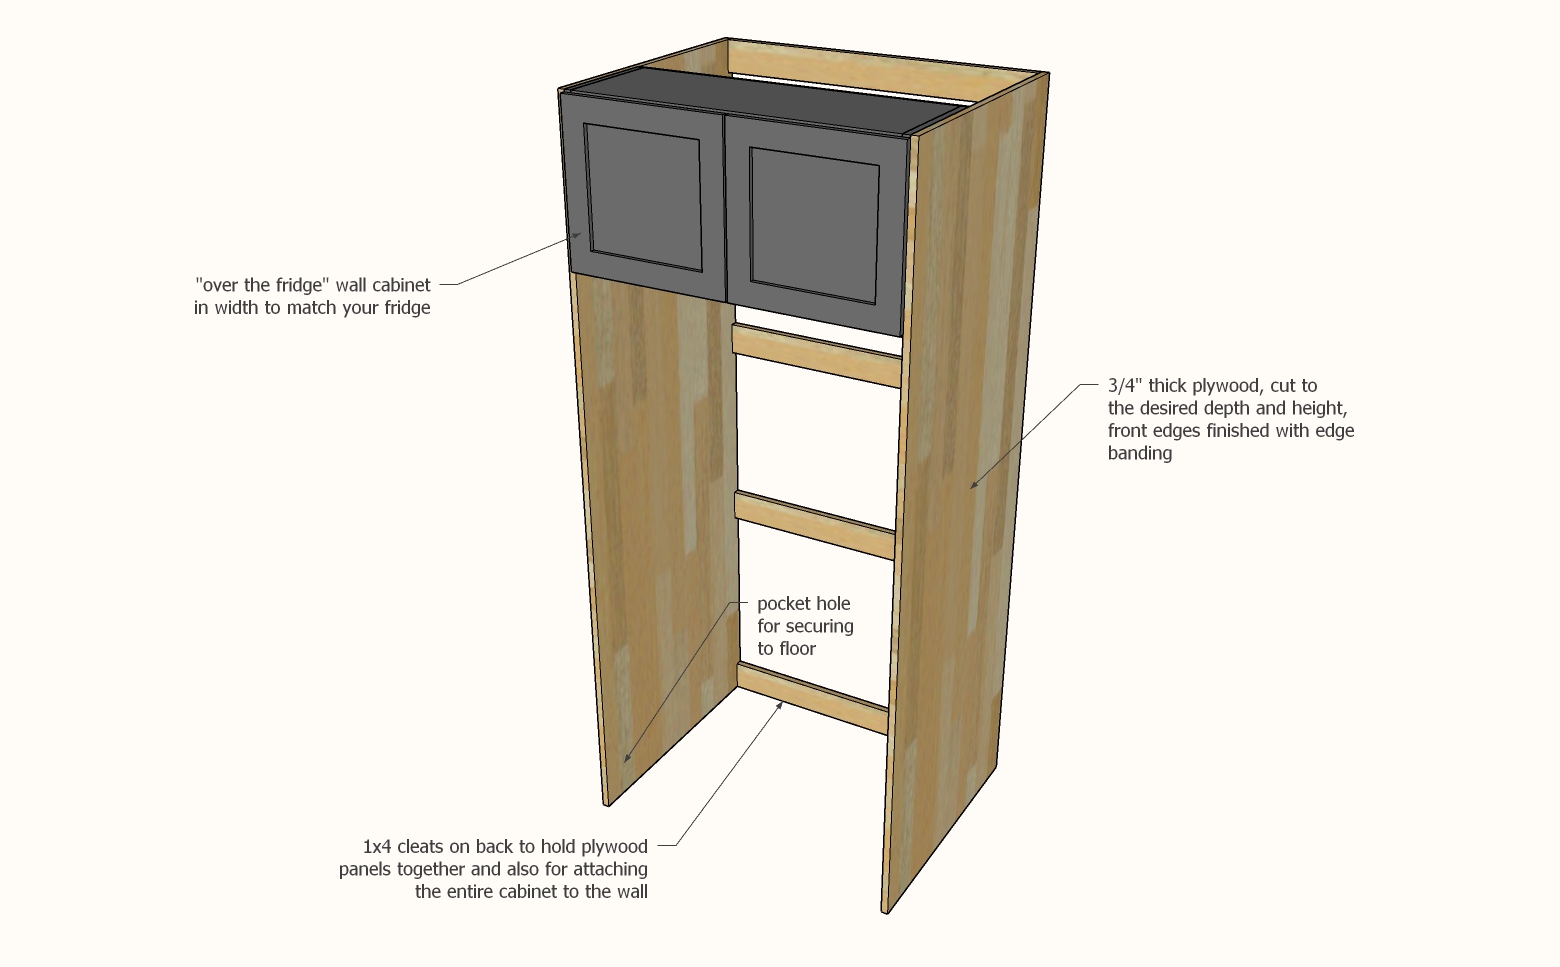
- You only need to measure the dimension of your fridge to determine the size of the plywood panel to create the frame.
- Then, apply the same color as the cabinets to carve out a united look.
- Next, add the over-the-fridge cabinets. You may need a clamp to hold them in place while you screw them to the frame.
- After that, screw the frame into the neighboring cabinet for peace of mind.
- Next, screw the cleats into the studs in the wall. For extra security, secure it to the floor using metal L brackets or screw it through the pocket holes you have drilled previously.
- Finally, install the upper cabinet doors and crown molding for a more finished look, and you are ready to shove the fridge in place.
5. The One-side Built-in pantry Project Idea by @Home and Huffman
This is another refrigerator cabinet idea you can copy. However, this one will help you deal with clutter better.
Instead of creating the frame using a single plywood panel, you can create more storage by making more cabinets on the side. This way, you can have an additional storage solution without taking up more space.
Relevant details, you can consider replicating the project or a similar one:
1. Start with the overhead cabinets.
2. Measure the dimensions of your refrigerator first.
3. Cut out the sheets of plywood to create the frame and panels. Ensure that it will not stick out from the wall if you work in a tight space like a kitchen island.
4. Install the upper cabinets, doors, and front trim for a more finished look.
5. Position your refrigerator into place and install cleats to secure it to the floor for safety purposes, especially if you have pets and small children running around your home that might trip on something
6. Use the same color as the cabinets and trim to add unity.
7. Add more storage into the leftover space by making more mini-cupboards.
8. You can even use the same shelf drawer system to add more storage.
9. Use casters to move the refrigerator from time to time
10. If you are using a refrigerator that is not rectangular, you will have to install a guide for it.
11. You can also use plastic sheeting for handles and small shelves for additional storage
Do you have another awkward space next to your fridge? Try to tap into it with these handy shelves.
You only need to measure the gap between the fridge and wall to determine the dimension of the shelves you will create. Then, stain the pieces before assembling them.
Do not forget to install four wheels at the bottom and a handle on the front part to pull out the shelves easily. You may also need to nail a plywood panel at the back and dowels on the opposite side to prevent bottles from falling.
Relevant details, you can consider replicating the project or a similar one:
- Begin collecting more than enough plywood panels to cover the gap between the fridge and wall, as well as the four wheels at the bottom
- Install a cord to pull out the shelf effortlessly
- Measure four boards cut to a precise size of 4x4x8 cm (1×1×2 in), then attach with screws
- To hide the shelf from view, you may want to use an adjustable fabric curtain that you can use to hide the shelves from sight when not in use
- Cut two pieces of 4x4x30 cm (1×1×12 in) into two pieces of 66 cm (26 in) long, then nail them on both sides of each shelf
- Stain the whole thing, then smooth out the surface with sandpaper
- Stain each board evenly
- When staining each board, watch out for drips and splatters, and wipe them off immediately with a sponge dipped in soapy water
- Make sure you move your microwave shelf far away from your newly installed shelves to avoid mixing up the location of both objects
- Finally, ask your landlord to install leveling bars on door frames and appliances to ensure that doors and appliances open and close easily without hitting any obstacles
- You may also want to add an adjustable curtain that you can use to hide the shelves from sight when not in use
- Finally, paint the handles and other edges with a gold or silver color if that matches your style
3. 3 #Renterfriendly ideas to use empty kitchen walls to maximize storage @Blamedrunkrita
Are you looking for renter-friendly storage solutions? Try these three ideas for your rental kitchen.
- First, stack up some small wooden pallets on the countertop to create ample storage for jars, condiments, and kitchen appliances.
- Second, invest in several strong suction cup hooks to hang pans.
- Last but not least, use trellis and S hooks to hang pots and containers.
These ideas are simple because you will not deal with tools. You only need to use your creativity.
2. The pot rack hack idea for limited ceiling area @delaneyordway
Do you not have more space on the floor and walls for storage? Then, tap into the ceiling.
Who would have guessed an old ladder could come in handy? You only need to suspend it from the ceiling using heavy-duty S hooks. Then, screw some other hooks to the ladder to hang your pans and pots.
Relevant details:
- Measure the size of your ceiling area and ladder
- Drill holes on both sides of your ladder, about one-third up from the bottom
- Cut some hooks to match the measurements of the drill holes
- Screw them onto the ladder and hang pots and pans on them
- Find a higher place to store your backpack and other items
- You may go to hardware stores to buy additional hooks if necessary
- Finally, sand the surface of the ladder
- When sanding, be careful not to remove labels or paint
Lastly, number 1. The final rental kitchen organization hack from @lonefoxhome
Trying to find the appropriate measuring cups inside a drawer is no picnic. You can try to overcome this problem by installing hooks behind your cabinet doors.
Once the hooks are up, hang the measuring cups in the correct order. Then, when you need them, you only need to open your cabinet door and pick one.
If you want more storage, you can try assembling over-the-toilet racks in the corner of your kitchen. You can use them to store baskets and appliances like an air fryer, blender, etc.
Finally, you can install a dispenser for your trash bags under the sink.
Improvement ideas that you also try to upgrade the idea:
- You can also improve your rental kitchen by building DIY shelves or display racks to store pots, pans, and other kitchen appliances.
- Also by building an over-the-door storage rack that can hold baskets and other accessories.
- By installing a wooden hanging pot rack behind the cabinet door to hang small pans, containers, or other kitchen tools.
- By installing a wooden cutting board above the kitchen sink to store small tools like utensils and sponges.
- By installing a magnetic knife strip to hang knives from underneath your cabinet door
- By installing wooden slats above your cabinet door to serve as a display rack for pans, teapots, or other items
- Another idea you can try is to use the QR Scan tool to easily keep your items labeled with barcodes, as you’ll do it from your phone screen.
- Alternatively, you can also hang a magnetic strip with labels from above your bar to organize your tools and utensils.
In conclusion:
Managing and organizing a rental kitchen is no easy thing. You will also need to put a lot of effort and creativity into your effort.
Rental kitchens often become cluttered with many cabinets and drawers in the kitchen. Many people struggle to find the right tools and accessories because they are too small and scattered all over the room.
There is a new way by which you can maintain your rental kitchen more organized, especially when you move out of your place:
- A good rule is to keep everything in one cabinet or drawer with an open space around it – i.e., do not put everything you can think of into the same cabinet.
- Consider installing a third-drawer cabinet for small appliances like your blender, toaster, and coffee maker
- The best way to organize stuff around your sink is by installing open shelving. Place the things you use less often on top of the cabinets
- A mobile microwave stove can also be a great idea if you have a small kitchen with little space in it
- If you do not have enough space in your kitchen, consider upgrading your cabinets with modern backsplash tiles behind your cabinets to enhance their beauty and liven up the atmosphere in your kitchen
- If you want to take your rental kitchen to the next level, you can add bar stools and chairs to your kitchen
- You can also install a soft drink rack or open shelving and display plants and flowers
- Fill in empty spaces by installing an over-the-door hook rack for pots, pans, pitchers, and other accessories
- Create additional storage for pots and pans by using unused planks of wood to build hanging shelves for them underneath the cabinets
- Install a small towel rack for sponges and other cleaning tools
- Install bar shelves with baskets underneath for pots, pans, and cutting boards
- You can install a corner cabinet to fit your microwave under the cabinet
- You can also install open shelving in the corner of your kitchen to save space
- Install an over-the-sink wooden planter to grow some herbs and plants
- You can also upgrade your rental kitchen by creatively hanging pots, pans, and other objects from a ceiling-mounted ladder
- If your kitchen is small and cramped, you can also install a portable pot rack on the wall near your sink and place the pot on the hooks
- To organize your pots and pans, consider creating a wall organizer to store them in
- You can also consider getting creative by installing an overhead shelf to hang kitchen utensils and accessories like knives and spatulas
- Consider adding baskets or shelves under your cabinets to store containers, cutlery, utensils, etc.
- To maximize storage, you may install hooks on your cabinets to hang kitchen towels, pot holders, etc.
- If you want more storage space, you can also try assembling an over-the-toilet rack in the corner of your kitchen to store baskets and utensils
- You can install a dispenser for trash bags under your sink
- Install hooks behind your cabinet doors so that whenever you need them, you only need to open the door and pick one
- If your rental kitchen is small, consider adding wall shelves to organize your pots and pans
- Consider installing a cutting board above the kitchen sink to store small tools like sponges and utensils
Creating a comfortable place to cook may not be easy. It is not difficult, either. You only need to spare some time and use your elbow grease to implement these 12 hidden storage inspirations DIY for a rental kitchen.
References:
12. Thekitchn.com
11. Tiktok.com/@beforeafter.design
10. Pinterest.com, Diamondcabinets.com
9. Tiktok.com/@studiodearborn
8. Mydesigndump.blogspot.com
7. Birdzofafeather.ca
6. Ana-white.com
5. Tiktok.com/@home_and_huffman
4. Tiktok.com/@laurynlady
3. Tiktok.com/@blamedrunkrita
2. Tiktok.com/@delaneyordway
1. Tiktok.com/@lonefoxhome