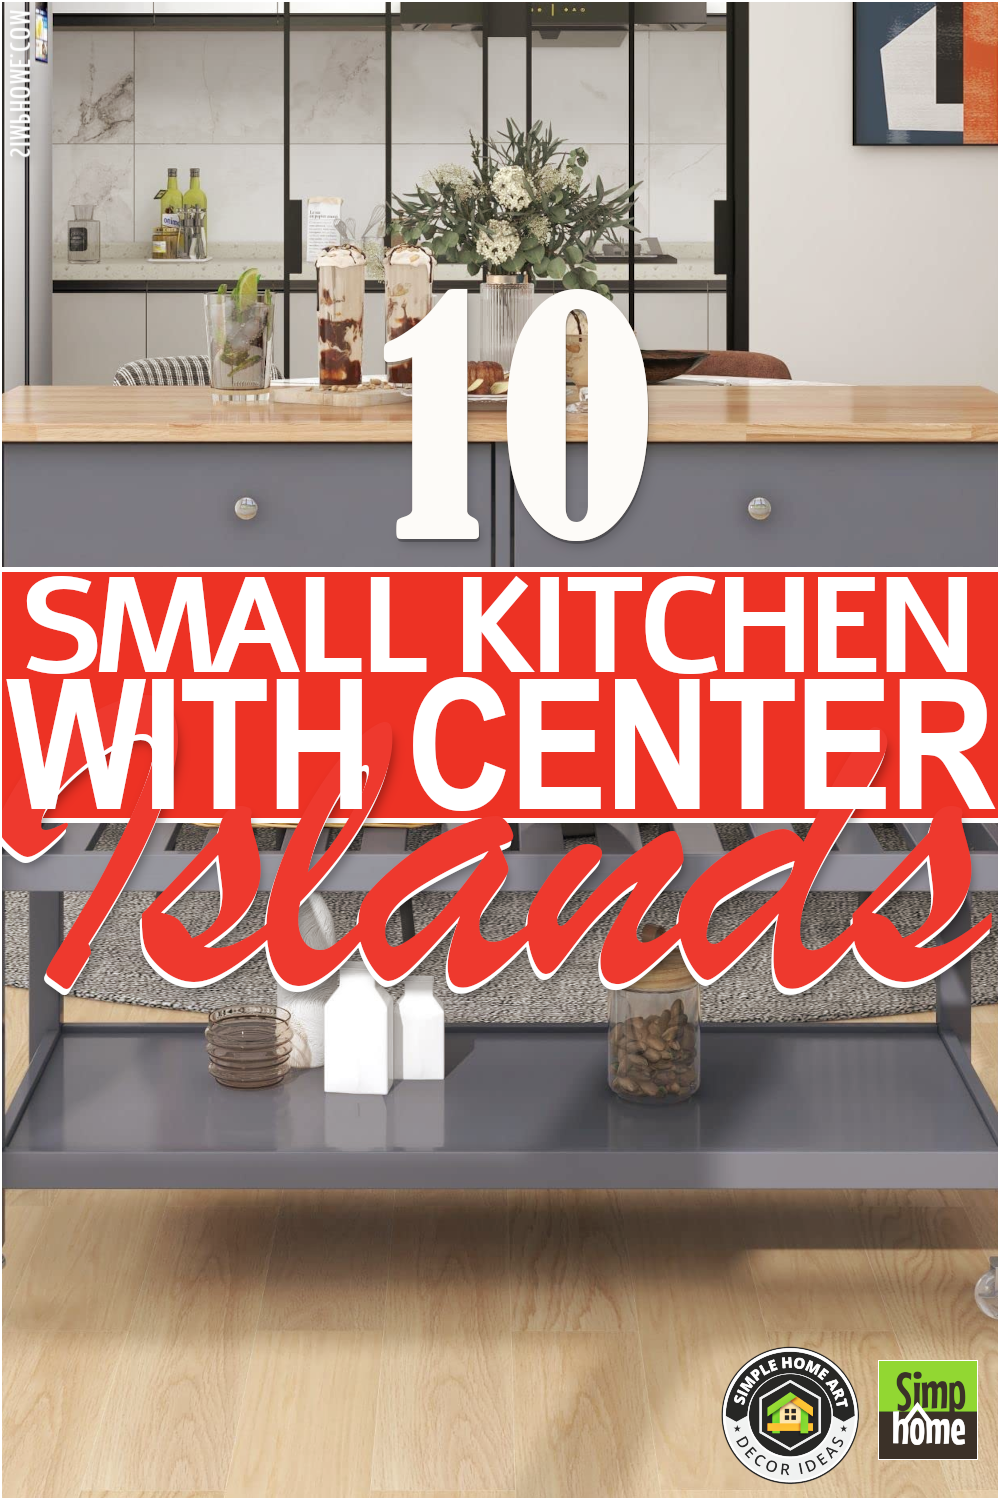
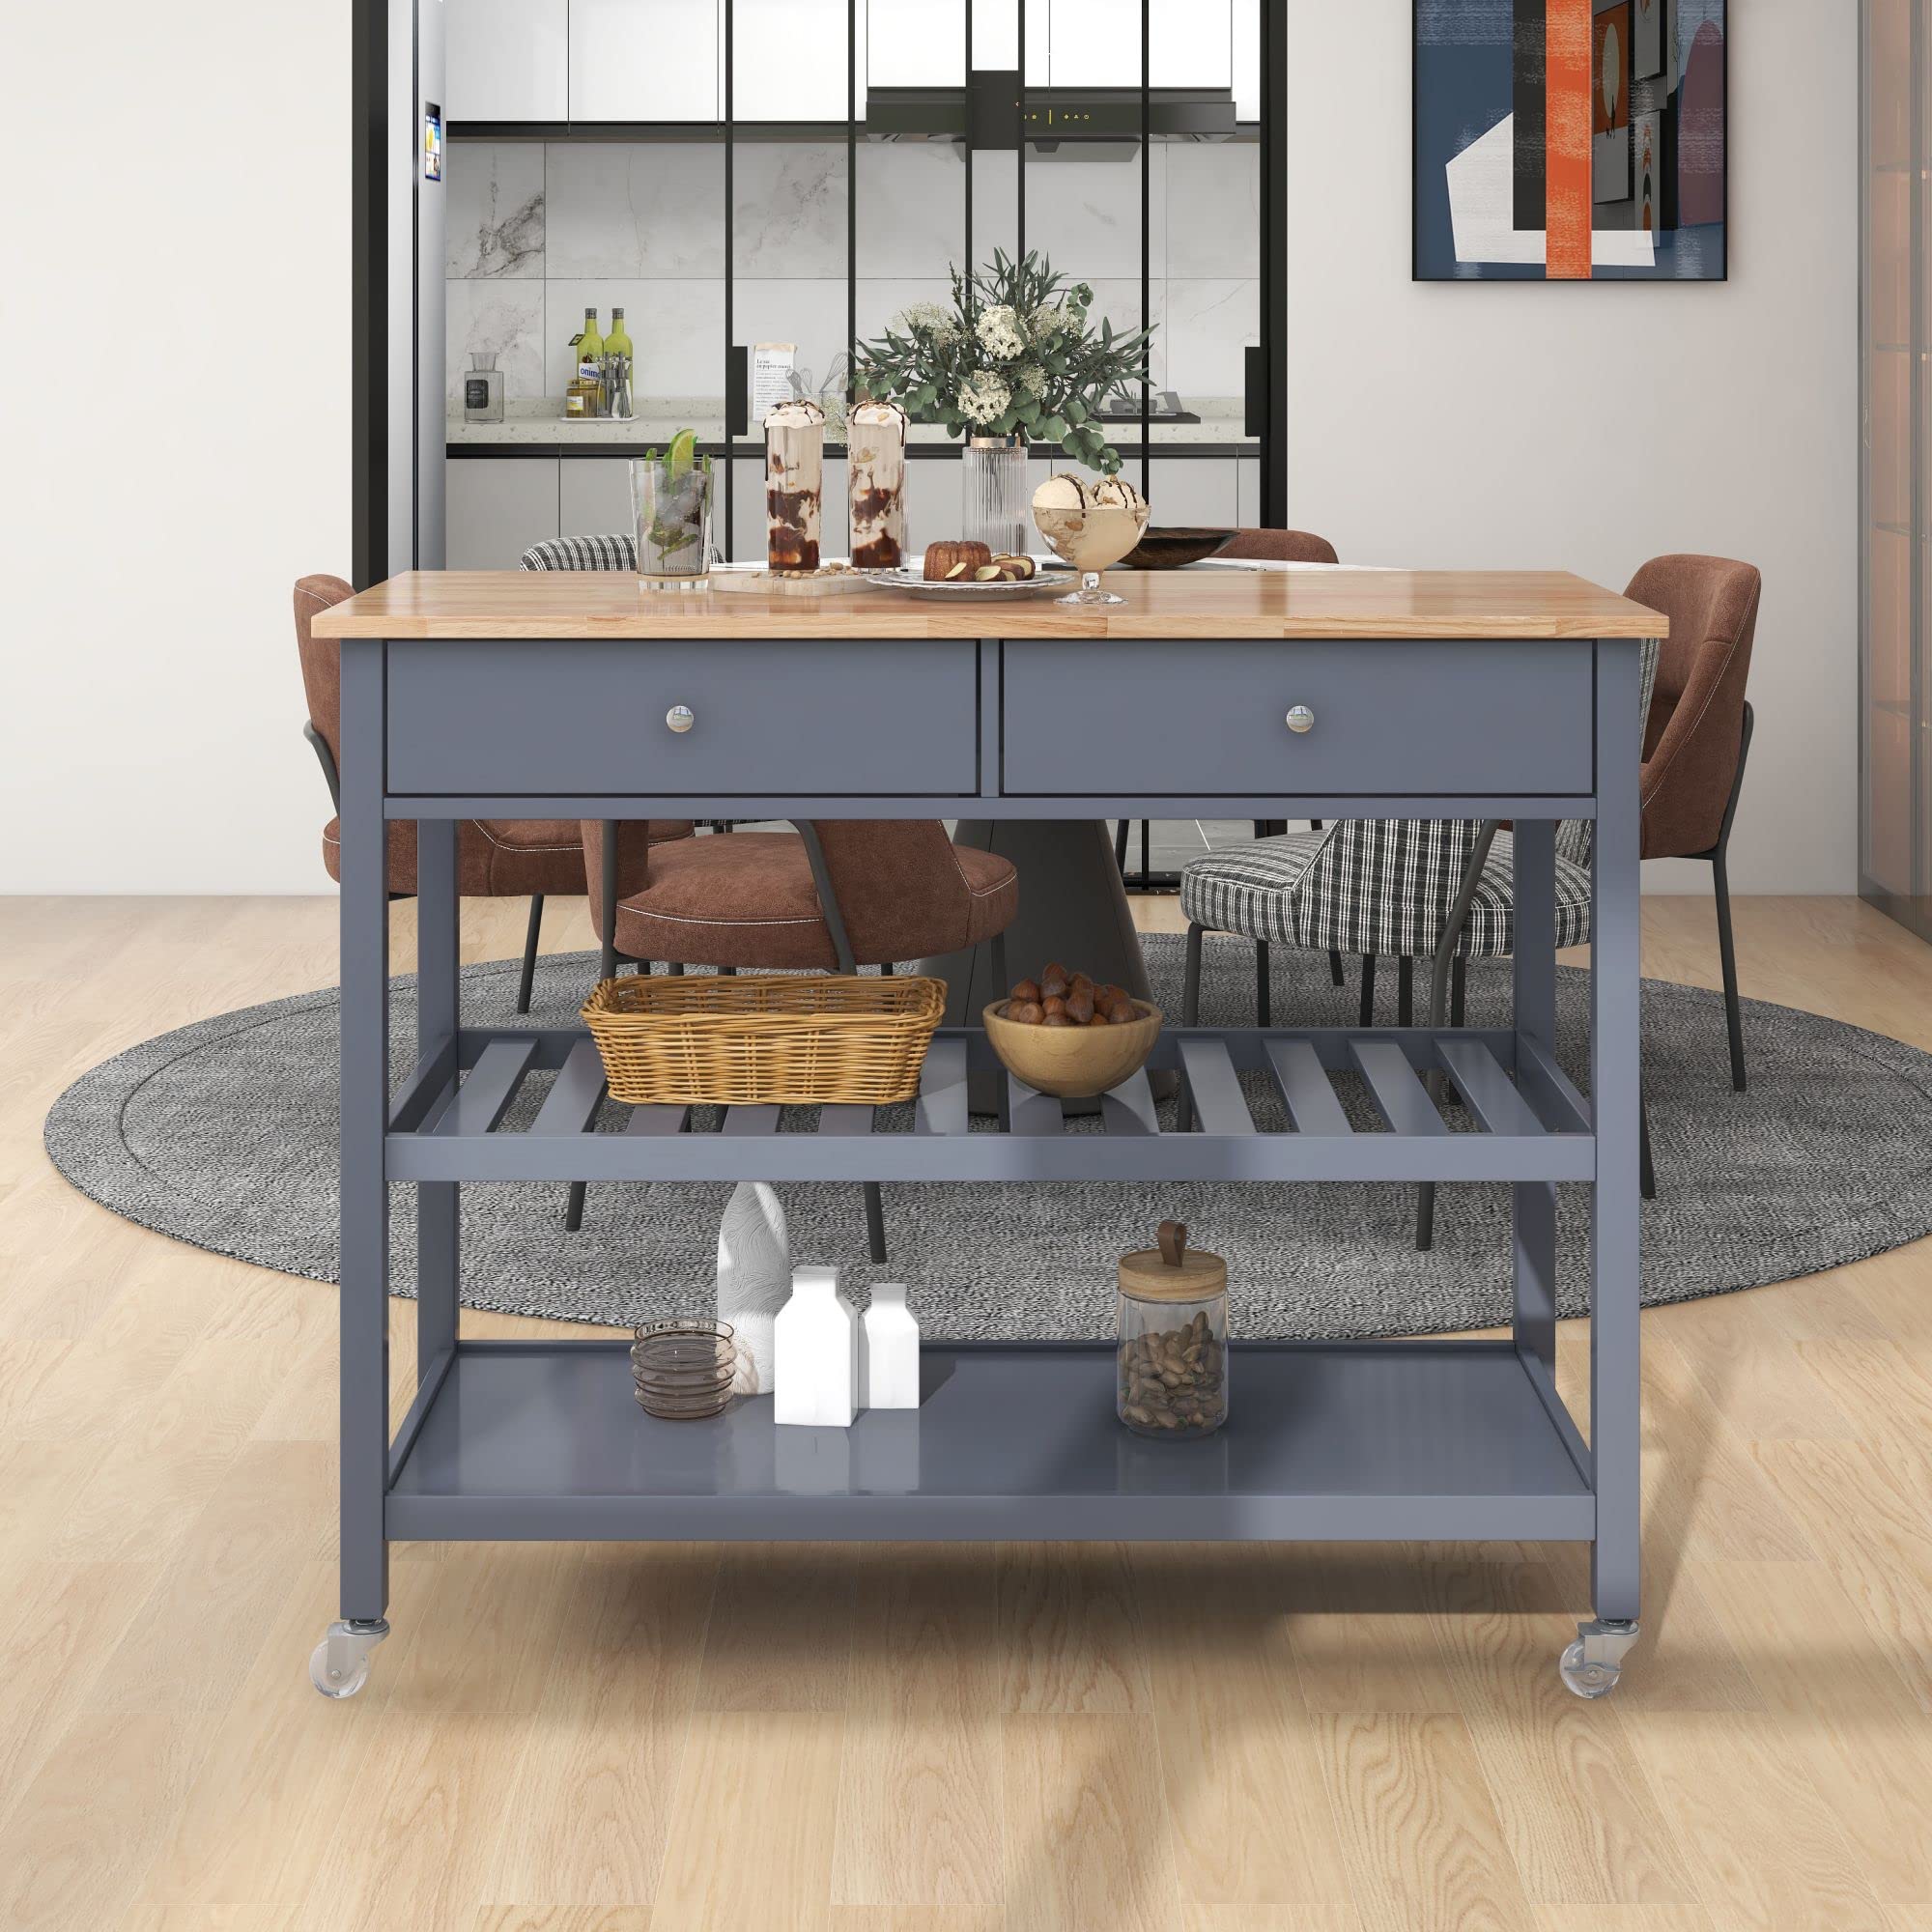
It is such a privilege for a small kitchen to have an island. It means you have extra space to work comfortably. Thus, do not take it for granted. You can turn your island into the centerpiece of your kitchen.
You do not need to invest in a new island to upgrade your kitchen. We have compiled 10 small kitchens with center island improvement ideas to help you spruce up your cooking space without breaking a sweat. As always, Simphome presents you with the countdown.
10 Small Kitchens with Center Island Video
10. Modernize your kitchen with Slats
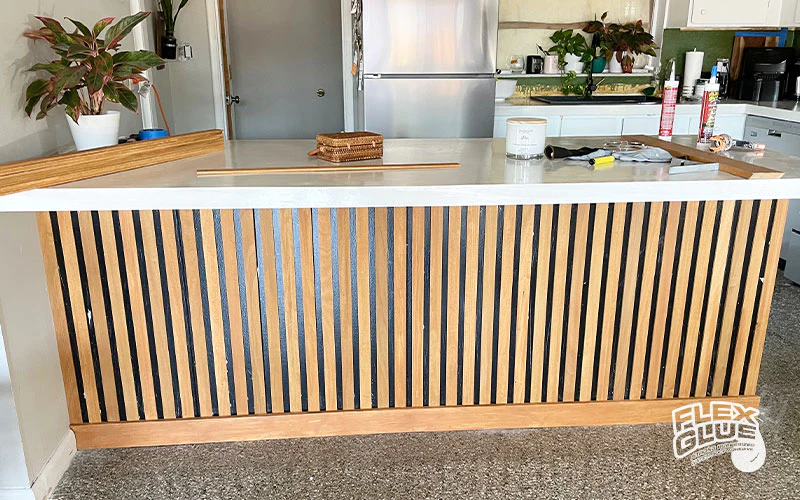 Improve your kitchen island using this simple idea. This is a DIY project that even a beginner can do it effortlessly. The main materials you need to have are poplar boards and flex glue.
First, you must measure your poplar boards and cut them using a chop saw. Then, attach your first layer of wood slats to the island using flex glue. Give some spaces between the slats to create the second layer.
Wait for several minutes until it is dry. Afterward, you can start arranging the second layer over the open spaces between each slat. Then the island will be fully covered with slats.
9. Create Your Kitchen Island in a Day
 Creating a kitchen island from scratch can be daunting, especially if you are not good at woodworking. What if we say you can make one within a day, even if you are a complete novice? Is that even possible? Just give it a try!
This effortless kitchen island will be the next project that you can brag about. It seems complicated. Actually, it is super easy.
You only need to get two identical dressers. Push them back to back, and you will see a small gap between them. Cover it with trim.
Once you have covered the gap, you can sand, prime, and paint the island to your liking. You can also install new hardware to match your kitchen interior.
Now, get back to the trim you use to conceal the gap. You may find it a bit awkward. Therefore, you will need two thick strips and glue them on each side of the trim to perfect the look.
Finally, Top the dressers with a countertop, and you get your handy kitchen island in less than a day.
8. Simply add Wheels and call it a day
 Having an island on wheels would be highly beneficial. It’s not merely portable but also possible for you to use as a cart.
You don’t need to purchase a brand-new island to get this type of island. Check out four caster wheels in your favorite online shop or nearest carpentry shop. Then get your drill and hammer. Then, fasten the wheels under each leg of your island.
7. The Open Shelving Island Idea
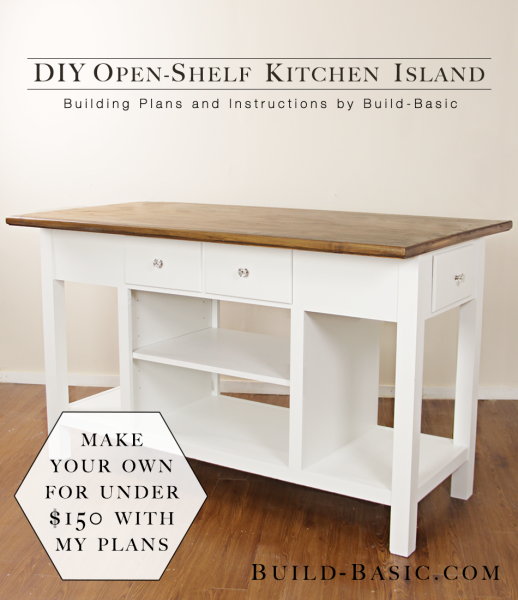 Open shelving island should be one of your considerations. It gives you additional storage. You can place whatever you want, cooking appliances, dining sets, recipe books, or even random accessories. Moreover, this design will help you find your stuff more easily since it’s an “open” shelving.
If you’re a DIY-doer, try to build one. You can repurpose your old wooden properties or purchase inexpensive wooden palettes.
As a good rule of thumb, you should begin with measuring and cutting the wood. Then, assemble the cleat, apron, and crosspiece to create one side. Ensure that the apron is flush with the top edges of the two legs. You will also need to install the crosspiece 7-1/2-inches from the base of the legs.
Next, connect the sides with long aprons and crosspieces to get the frame. Then, insert the cleats and base before you install the dividers and shelf.
6. Invest in a DIY Extra Pull-Out Dining Table project
To build this additional island, you need to get plywood boards as the primary material. Do the measurement thoroughly and ensure the additional piece fits snugly into the kitchen island.
The most important part is the drawer slides at the island’s base, which enables you to pull out the extra counter easily.
5. A centered island with wood slats and trim idea
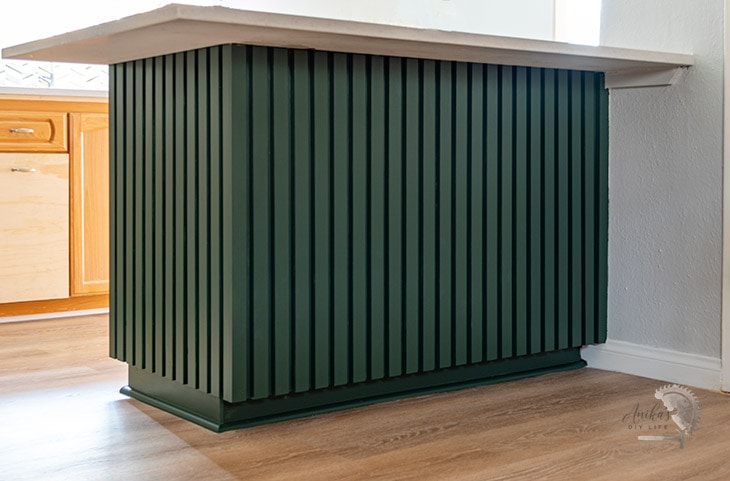 Upgrade your plain back kitchen island using wood slat trim. It will instantly turn your island into your kitchen’s center attraction. First, decide what type of wood you will use. There are varieties of options. You can use either decorative molding or standard boards.
Then, you can remove any old trim and nails and prep for paint. Next, measure and calculate the number of boards needed for the slats. This step is followed by attaching them to the island body.
It is highly advisable to begin at the corner. This will help you to control where the seams are. After all the slats are attached, you can start to paint them. Don’t directly apply your preferred color. Use white color first.
You can do this conventionally using a paintbrush and roller during this process. Or use a paint sprayer, which is easier and faster.
4. Turn a Desk into a Kitchen Island
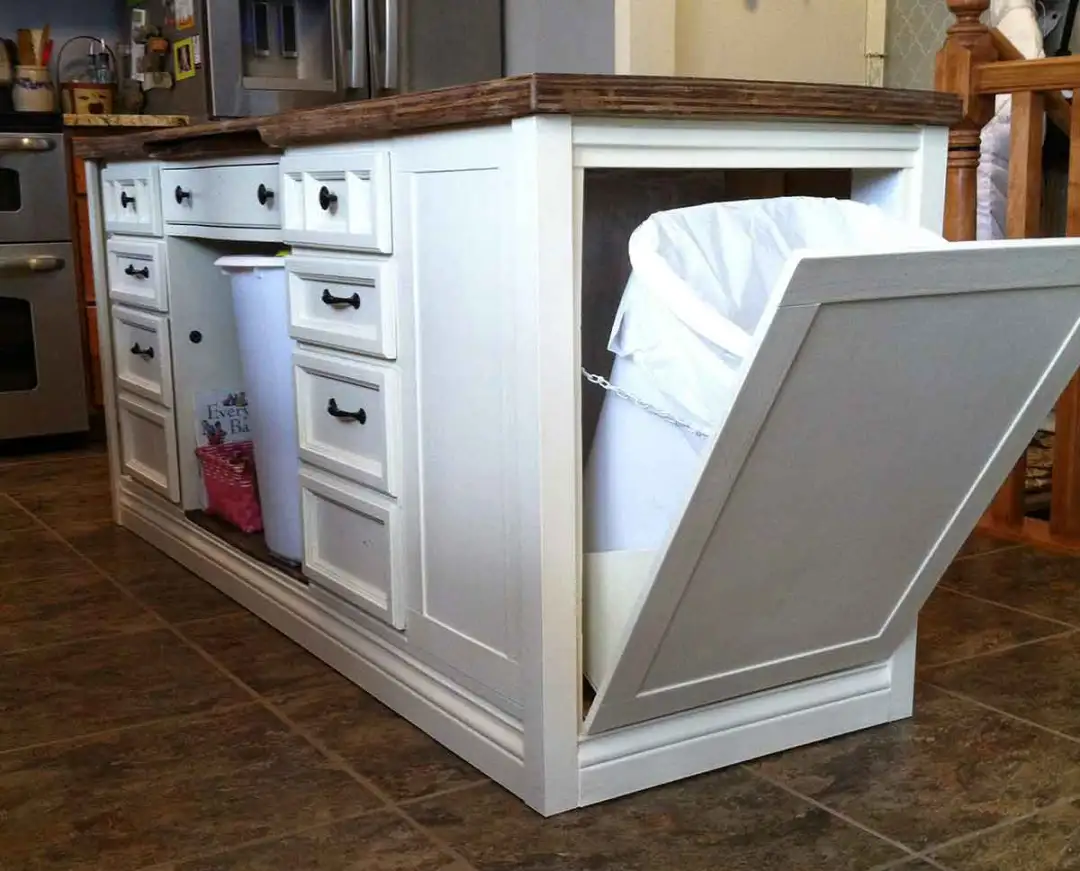 If you have an old desk, you can turn it into a kitchen island. It can be a ready-to-go island. But you can also have some modifications to have a more functional island. For instance, you can hide your trash inside your kitchen island. The first step is building a trash can structure and attaching it to your desk or dresser piece. Then, make the tilt-out door by creating the bottom piece (consisting of a square wooden rod with two triangles on each side to support the trash can) and the front “door.”
Then use a continuous hinge to attach the bottom of the door to the island. In addition, attach a small chain at the top to hold the front door. Last, you can add several adjustable felt pad levelers. This will help you to move the island without damaging the floor.
That is one of many surprises you will see on this kitchen island. On the other side is an additional rack to store trays, baking sheets, and a cutting board.
The countertop also features a trash lid that allows you to access the trash can better without even opening its door. You only need to use a bowl to trace the opening. Cut it out, and that is it.
Do not worry! The lid will not fall to the trash can because it fits snugly with the opening, and the cleat will support it.
3. The Old Dresser Transformation from Allcreated
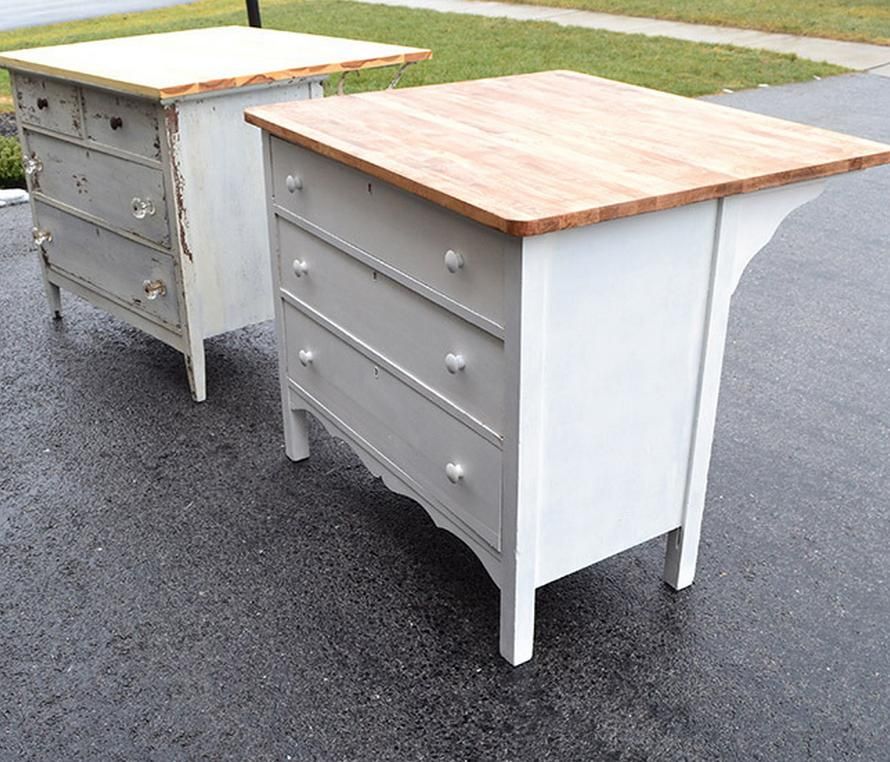 This is another great idea to repurpose your old dresser. Moreover, it will give you a multifunction island without spending too much money. Make sure to have the right size so it won’t limit your mobility.
Before it is ready to use, add the countertop block, which you can customize in a local woodworking shop. And if you want, you can repaint the island body.
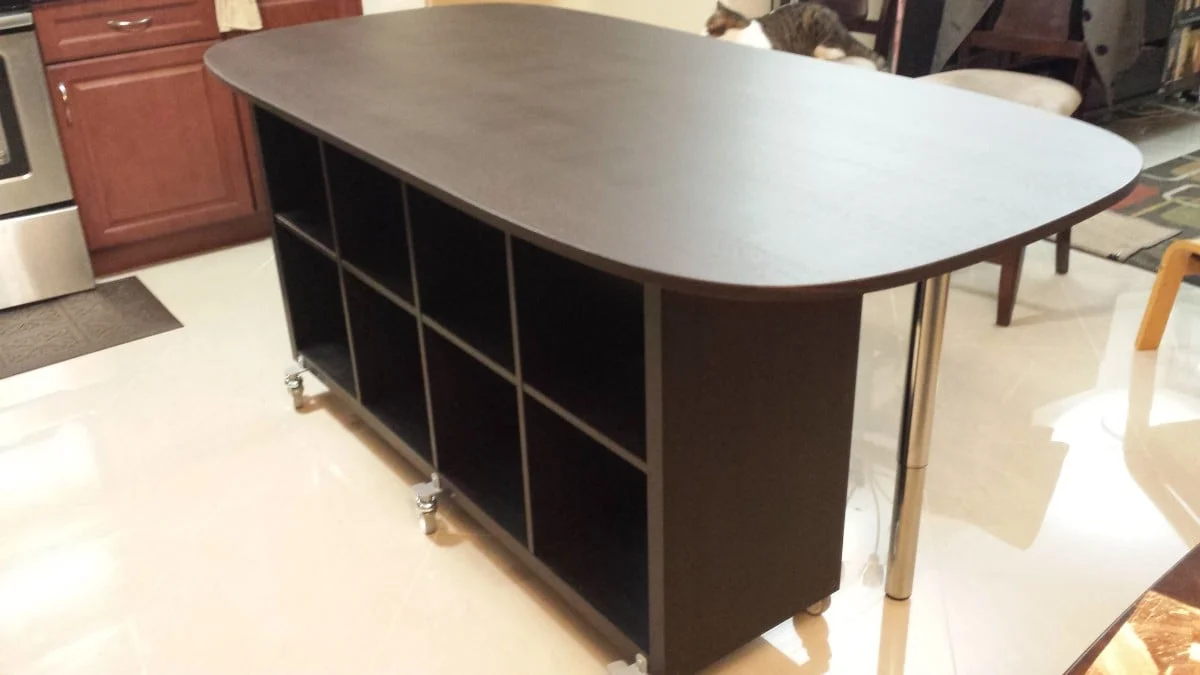
2. From Bookshelves to a Handy Kitchen Island
 Another upcycling idea is turning your bookshelf into a handy kitchen island. Get a couple of shelving units, metal legs, and paint. Before moving the shelving to your kitchen, install the metal legs. There are various types of metal legs. Choose one which suits your style. Then repaint it.
Tip: If you want additional storage, you can install a pot lid on one end of the kitchen island. You can add a hook rack on the other end to hold your utensils, kitchen towels, and potholders.
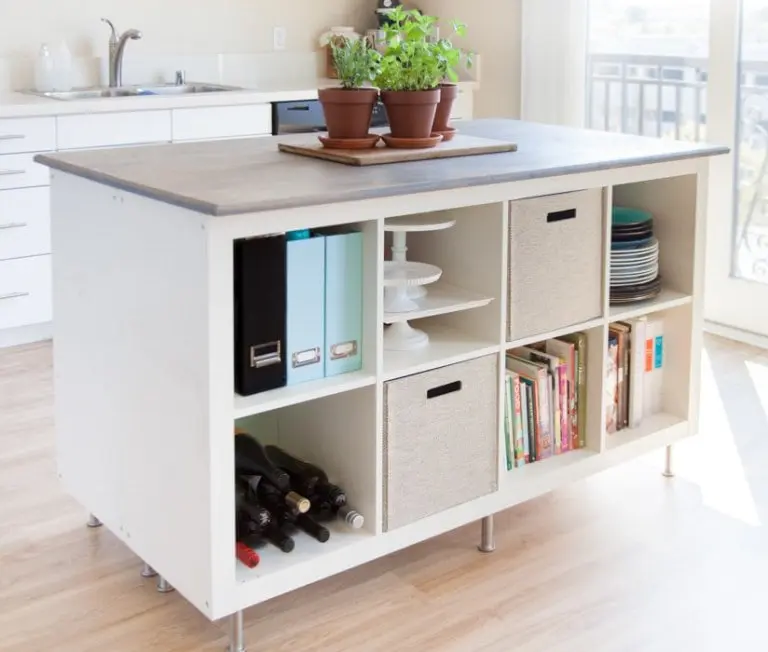
An Elegant IKEA Kallax Kitchen Island
 Looking up in Ikea will be a good decision if you want a brand new island. For instance, you can purchase this IKEA Kallax kitchen island which looks minimalist and elegant.
Several Ikea items are needed, such as Kallax, Oppeby tabletop, Kallax casters, Gerton adjustable leg, and sheet metal screws.
The first step is working on the tabletop. After that, lay the mounting plate for the Gerton leg on the two furthest out into the corners’ built-in mounting holes. Assembly of the Kallax shelf. Then, place the mounting plates for the casters (one on each end and another in the middle) on the bottom of the shelving unit. Last, place the tabletop onto the Kallax shelf.
Those are all the 10 small kitchens with center islands improvement. Decide one idea which is the easiest and doable for you.
References:
10. Flexsealproducts.com
9. Bhg.com
8. Homedit.com, Ikeahackers.net
7. Build-basic.com
6. Thespruce.com
5. Anikasdiylife.com
4. Thishomemadehome.com
3. Allcreated.com
2. Craftsyhacks.com
1. Ikeahackers.net