Next, I will offer you my latest discovery on how to turn a small kitchen appear 1 time or 2 times larger or more. Most of the ideas would be labor extensive, which means you mostly won’t find affiliate recommendations included in the list. I know you hate that, so let’s start the countdown. And as always, this research compilation is presented for you by Simphome.com
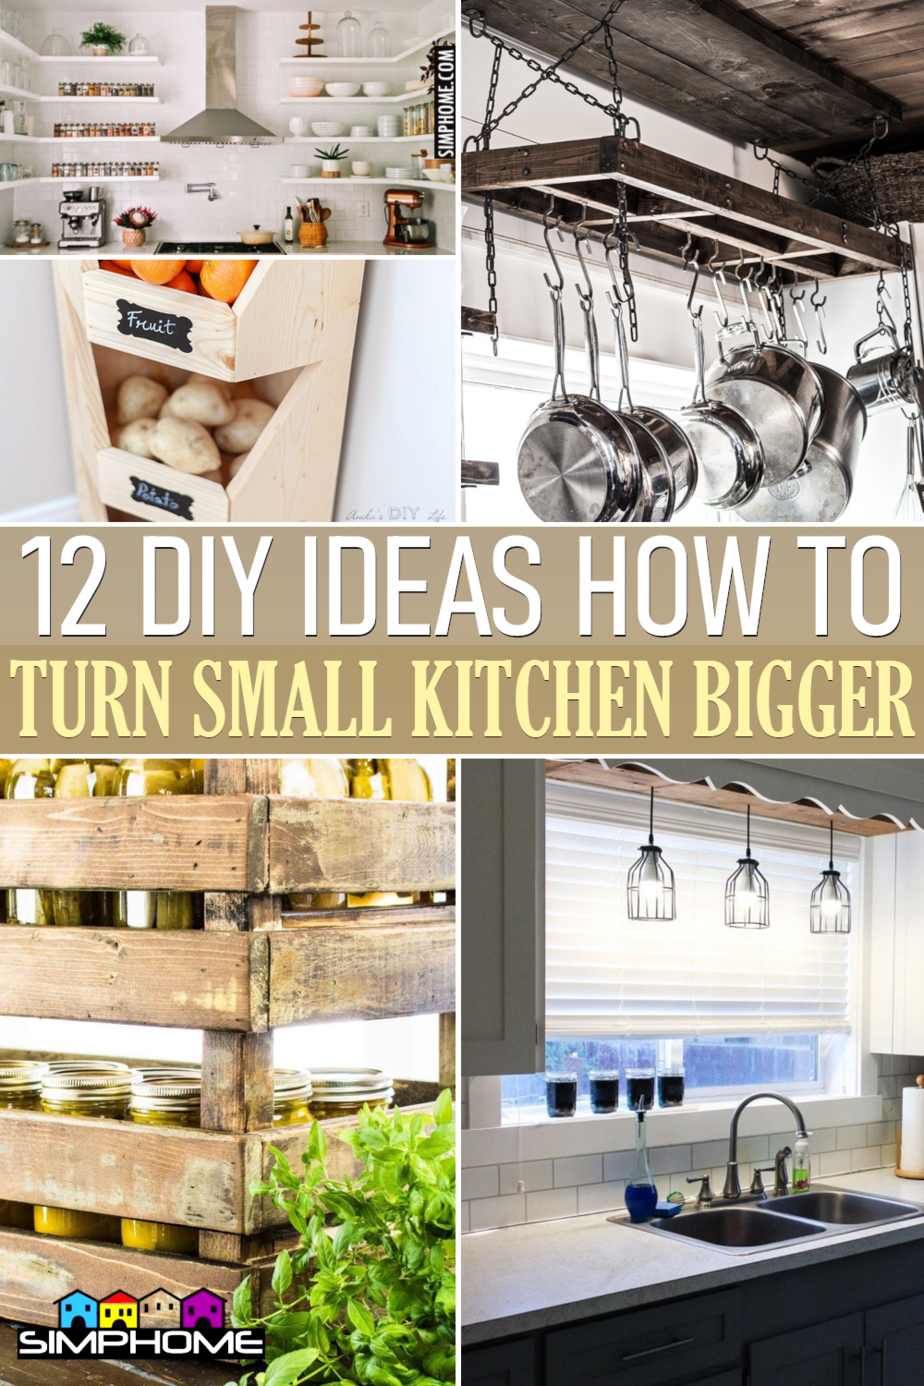
🔊12 Ideas on How to Make a Small Kitchen Look Bigger Video:
List Entries:
10 Tricks to Squeeze a Little Extra Storage Out of a Small Kitchen
10 Small Kitchen Living Room Combo Ideas
10 Tips on How to Turn Small Kitchen Feel Bigger
12. Make it White
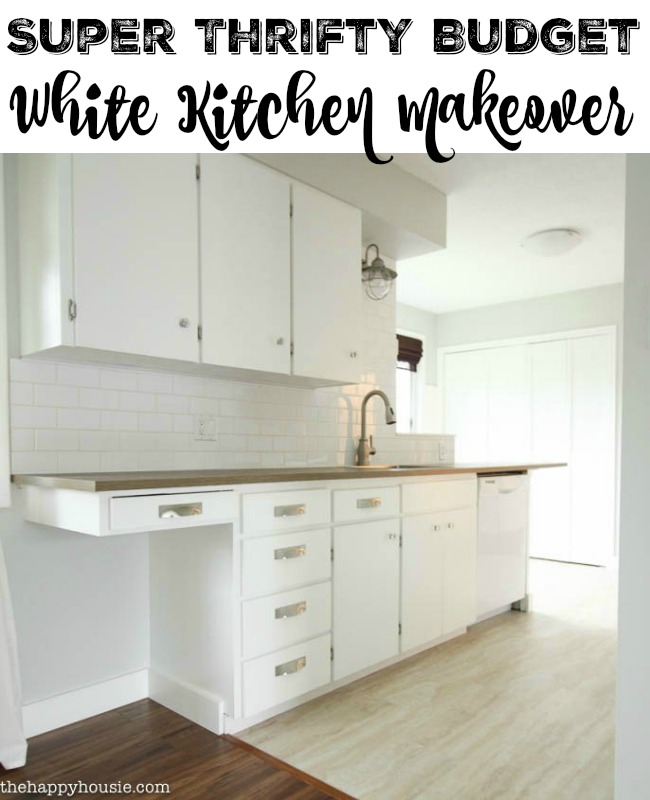
Using white is one of the first ideas seasoned designers will pull out of their bag of tricks to make any room seem bigger.
Light bounces off white surfaces better than any other color. White on the walls, ceiling, counters, and cabinets reflects natural and artificial light and gives a kitchen a bright and airy feel.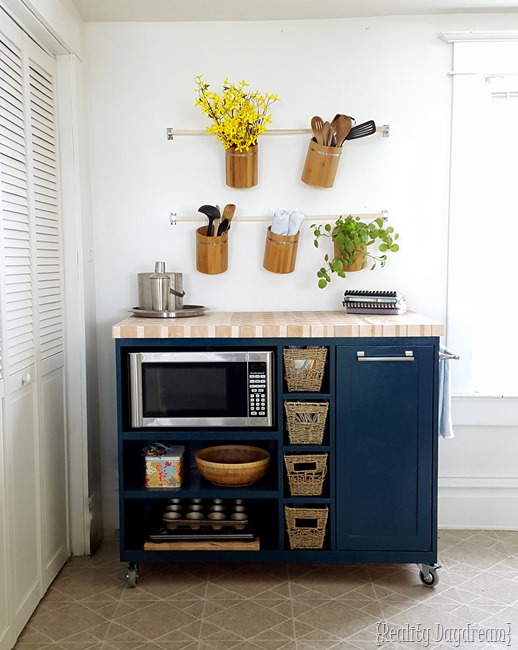
On the other hand, dark colors tend to do the opposite and make space – especially in a tiny kitchen – look and feel more cramped than it is.
While it may not increase the square footage, white creates the desired illusion of spaciousness pleasing to the eye. If you feel that’s not enough, you can try more solutions. For example, craft this DIY custom rolling kitchen island that you can push out of the way when not in use.
11. Extend your Cupboards up to the Ceiling
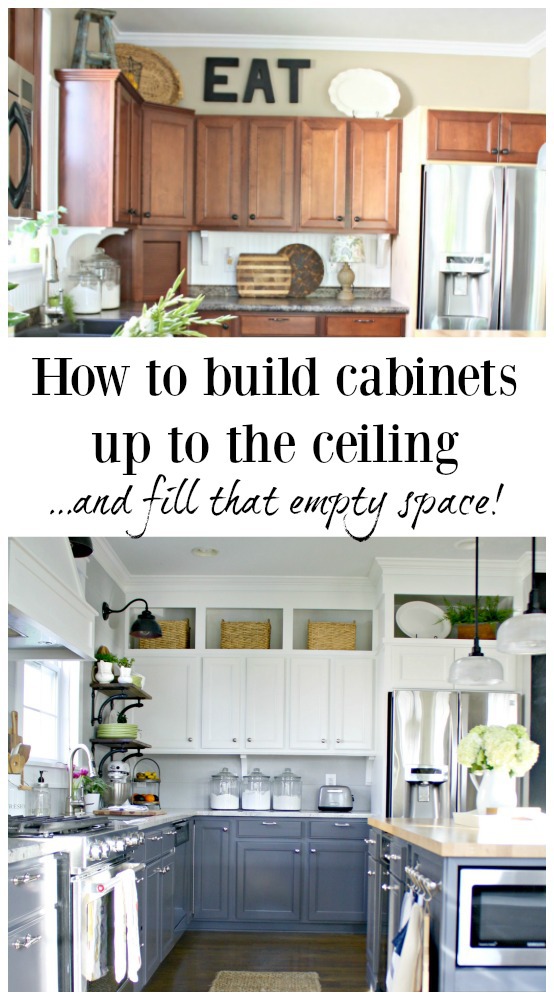
You can make your kitchen seem larger by extending the cupboards with built-in open shelves up to the ceiling. It’s even better if you paint them white.
Start by measuring the width and depth of each cupboard and the height you want. Next, cut 3/4” plywood to these dimensions and assemble open boxes with wood screws.
In this example, the owner also added a protruding box and a side panel to make the refrigerator look built-in. Secure the boxes to the cupboards with screws. Screw scrap wood flush to the box’s tops and the ceiling for anchors to install a header.
Add 1-1/2” trim to cover the box faces. Also, add two trims to conceal joints where the side panel, box shelf, and header meet.
Lastly, add the crown molding to match with the existing one.
10. Maximize the Space
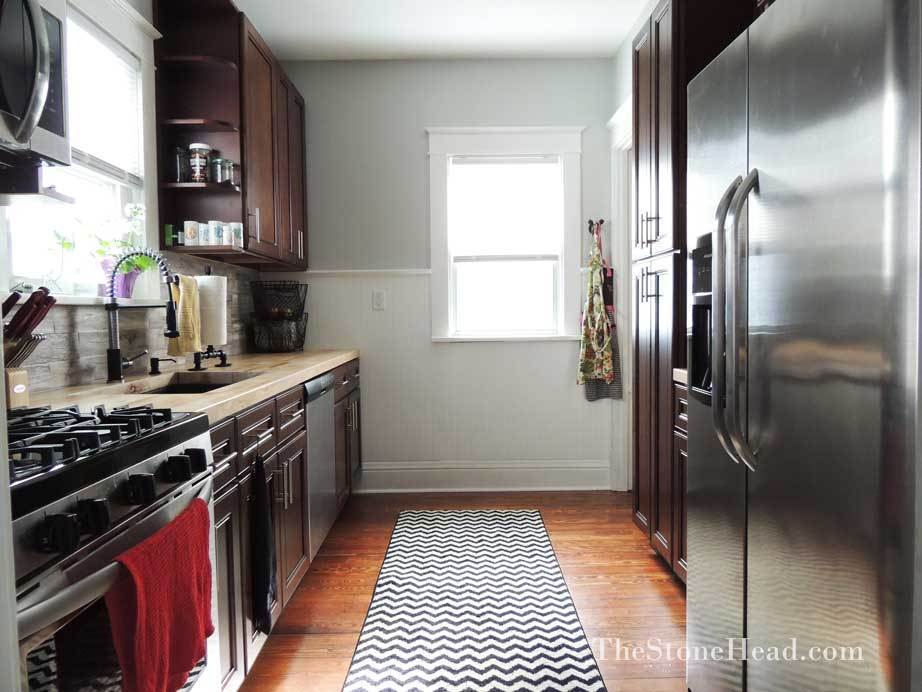
For this galley kitchen, the key was maximizing what little space it had.
Every appliance is built-in flush with the cabinetry. Even the microwave oven found space among the cupboards above the recessed range oven. A two-foot wide, floor-to-ceiling pantry cabinet adds even more space to store plenty of items. Longer cupboards also added more storage.
Beside the sink, round end shelves serve as spice racks on both cupboard sides. Even the window sill acts as a shelf for plant décor. The ample storage frees up the countertop. You’ll find only the most often used items. The excellent use of space feels less cramped, and you can move around conveniently on an unobstructed floor.
9. Hanging Pot Rack Idea
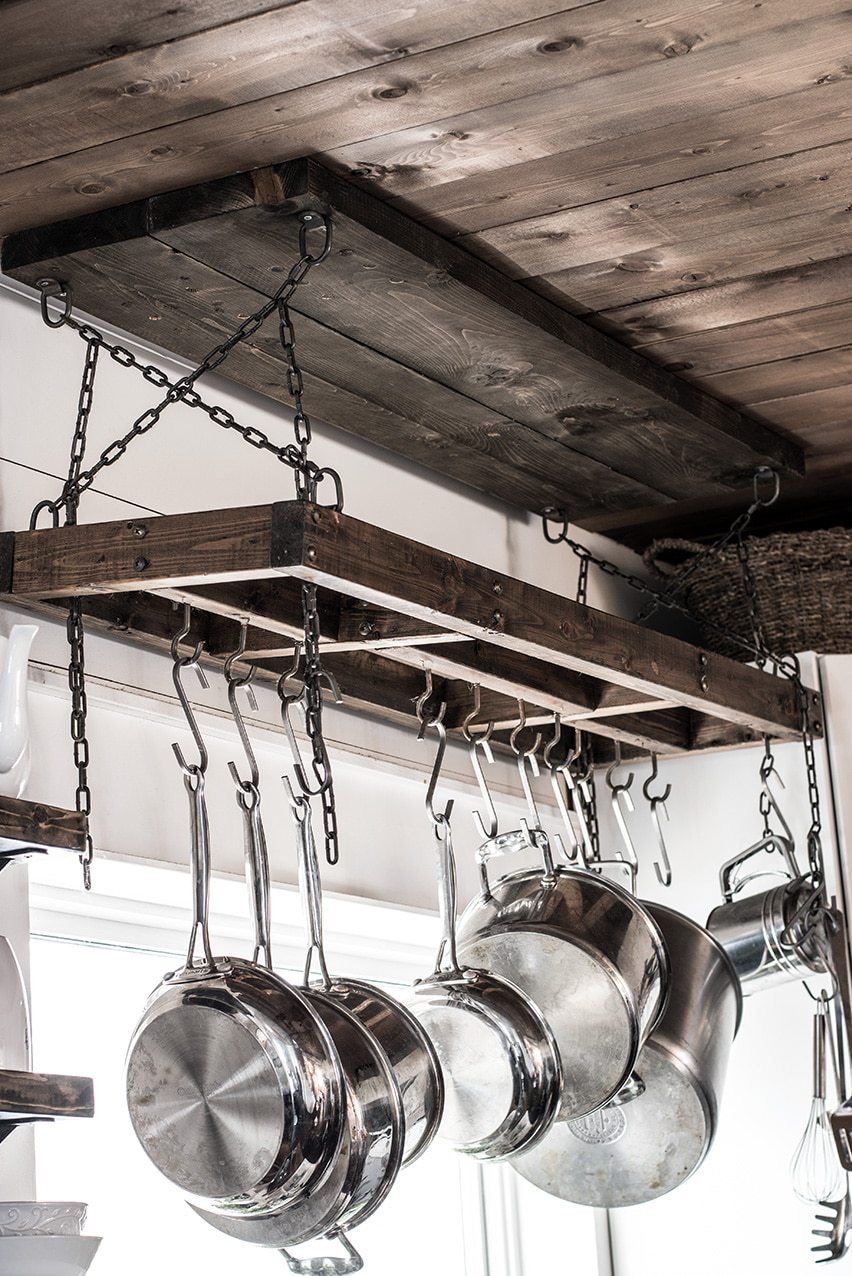
The space above the kitchen sink window is often the most overlooked area for storage. With a hanging pot rack, you can hang your pots and pans with a decorative flair.
First, glue two 4’ 2x8s together for the top “base.” Screw it to the ceiling where you marked the studs. Cut 2x3s to build the 4’x16” rectangular lower frame and put them together with screws.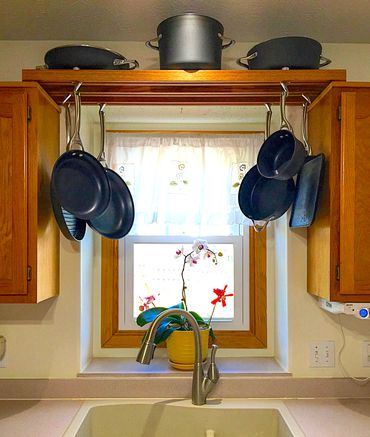
Add bracing where you’ll drive 12 hooks to hang your pans. Attach metal clasps to the four corners of the base and bottom frame, where you’ll attach your chains using threaded links. You can also try this less complicated method of mounting the frame on top of the cupboards and uses swivel hooks. In any case, make sure that your pots and pans are in mint and presentable condition.
8. Kitchen Pendant Light
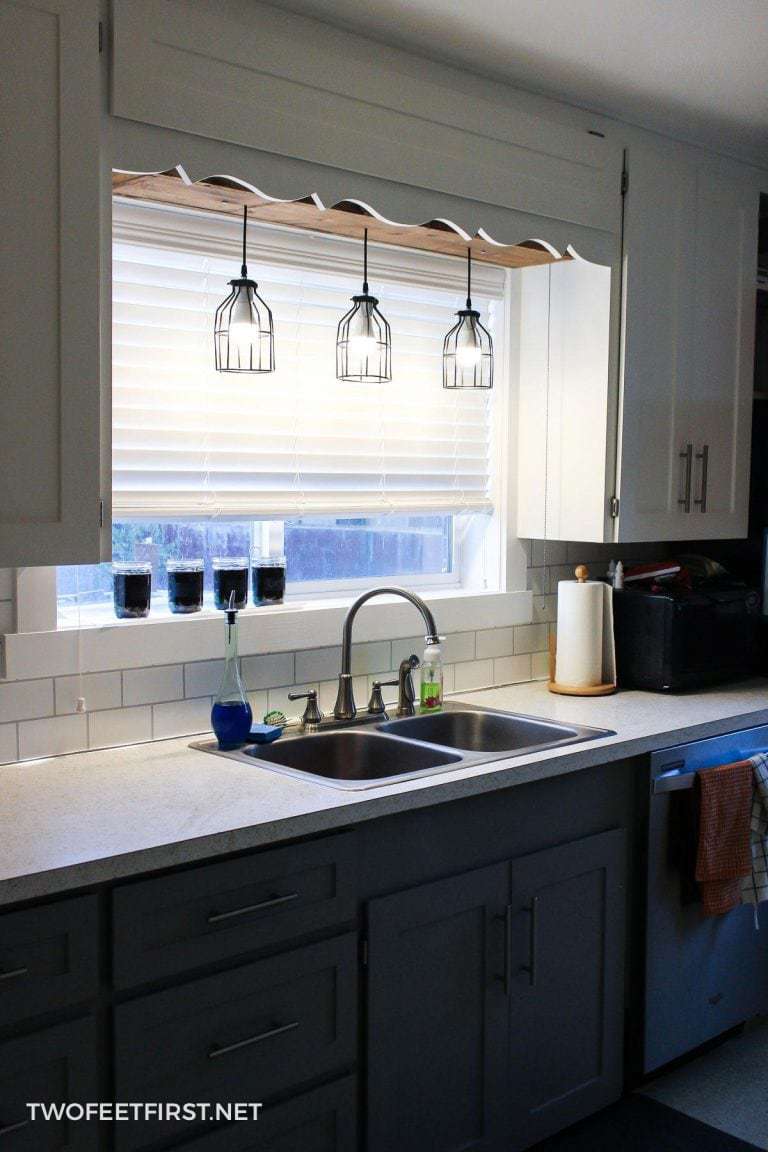
Another way to augment the lighting over the sink during nighttime is with whimsical DIY pendant lights.
For a more rustic look, spraypaint the black bulb guards with oil-rubbed bronze. Then build a frame using 1x3s that wrap around a 4’x8”x1” board for the lightbox. Next, drill three 1/4” holes where you want your pendant lights. Add two 1/4” holes where your 4” mounting bolts would go to mount the box on the ceiling.
Also, drill a hole on one side for the pull chain switch, then stain the box to the color you like. The wiring is mica insulated for an antique look. Connect both wires to the new sockets in series and one wire to the pull-chain switch before tapping your existing wiring. After the wiring, attach the bulbs and guards on the sockets.
7. Rustic Storage Bins Idea
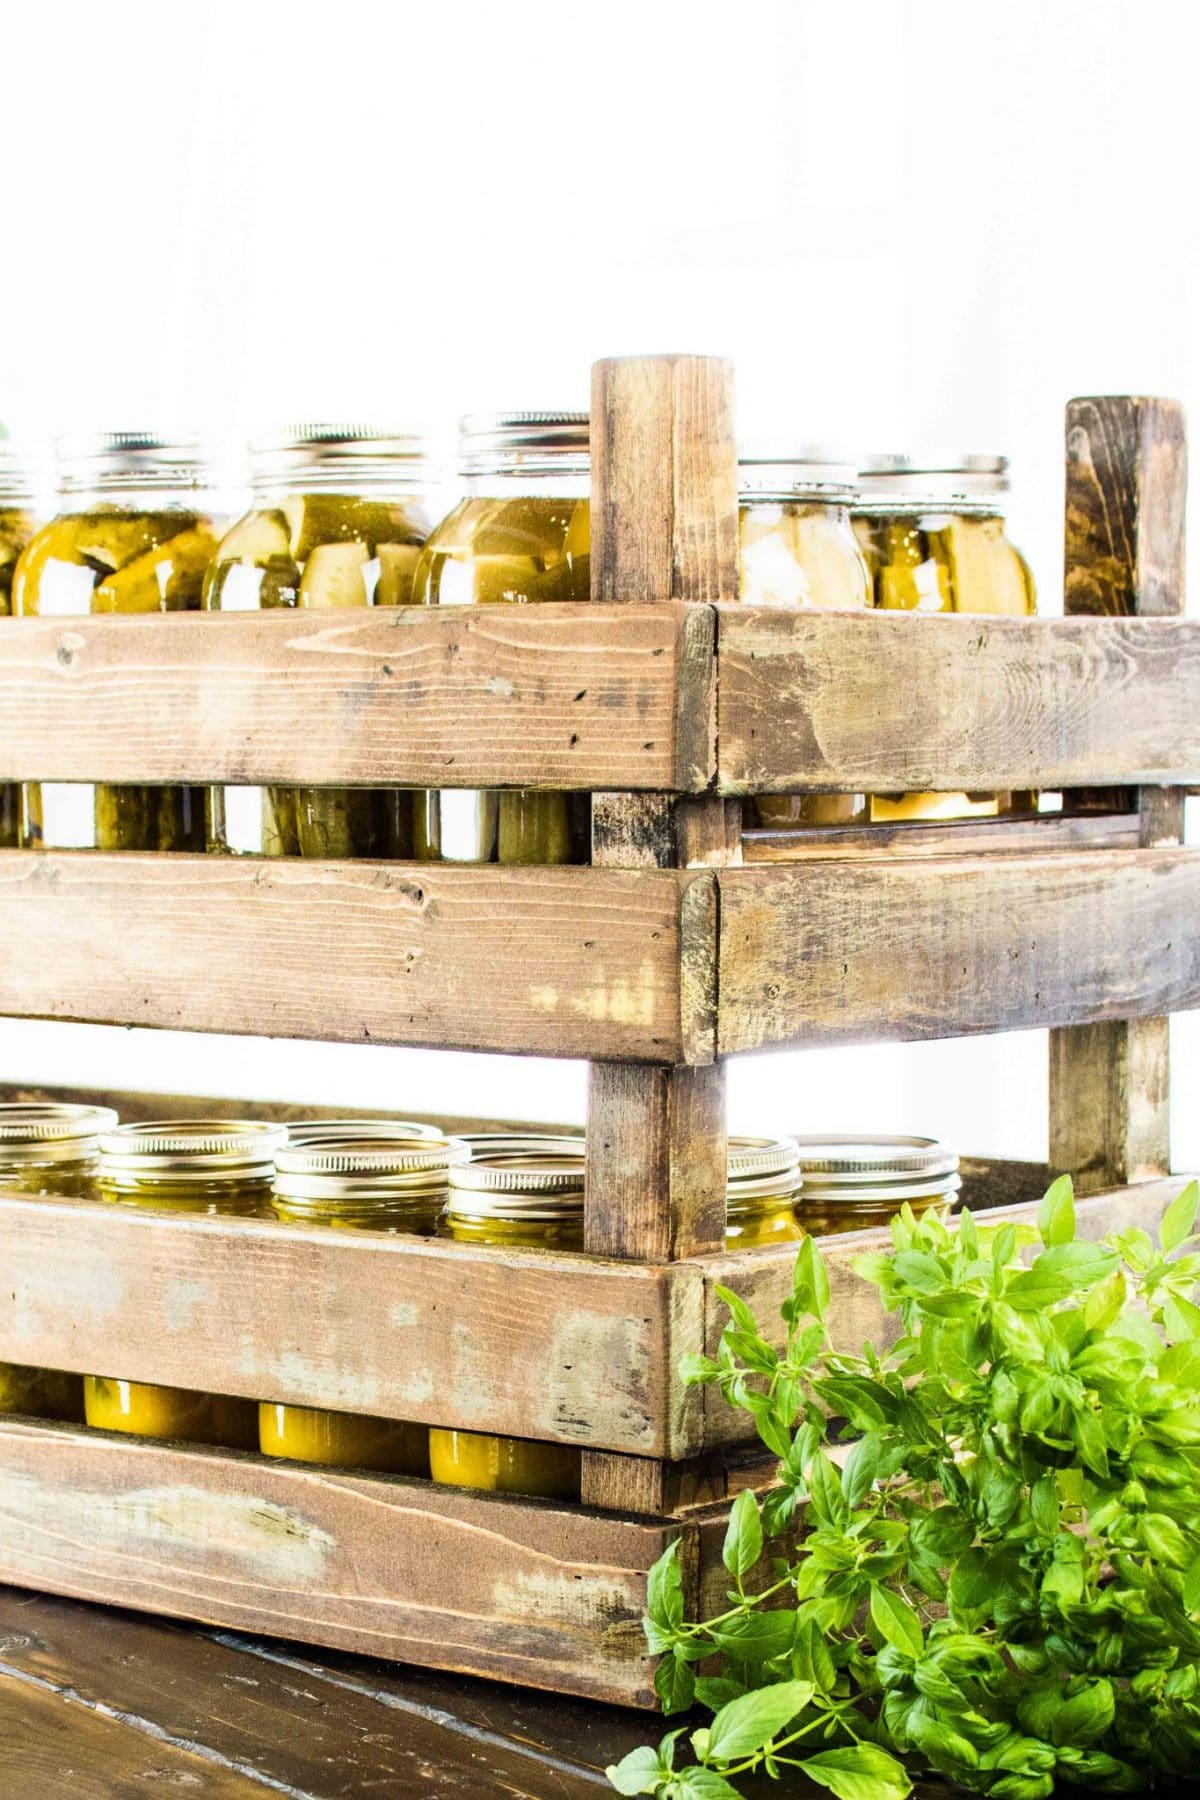
These rustic-looking DIY stackable storage bins are a great way to store some of your stuff because they look good and only take up the same floor space.
Attach two 2x2x7-1/2” boards to both ends of a 2x2x9-3/4” with screws and glue to form a “U” shape. Then make another one. Next, attach three 1x4s under these U-shapes for the floor. Place the first 1×3 side pieces around this frame about 3/4” lower than the bottom to form a lip.
Add the second 1×3 sidings about an inch above the first one ones. That should leave the four posts protruding at the top where you can stack another crate identical to this one. Build as many of these rustic containers as you need.
6. Folding Dining Table
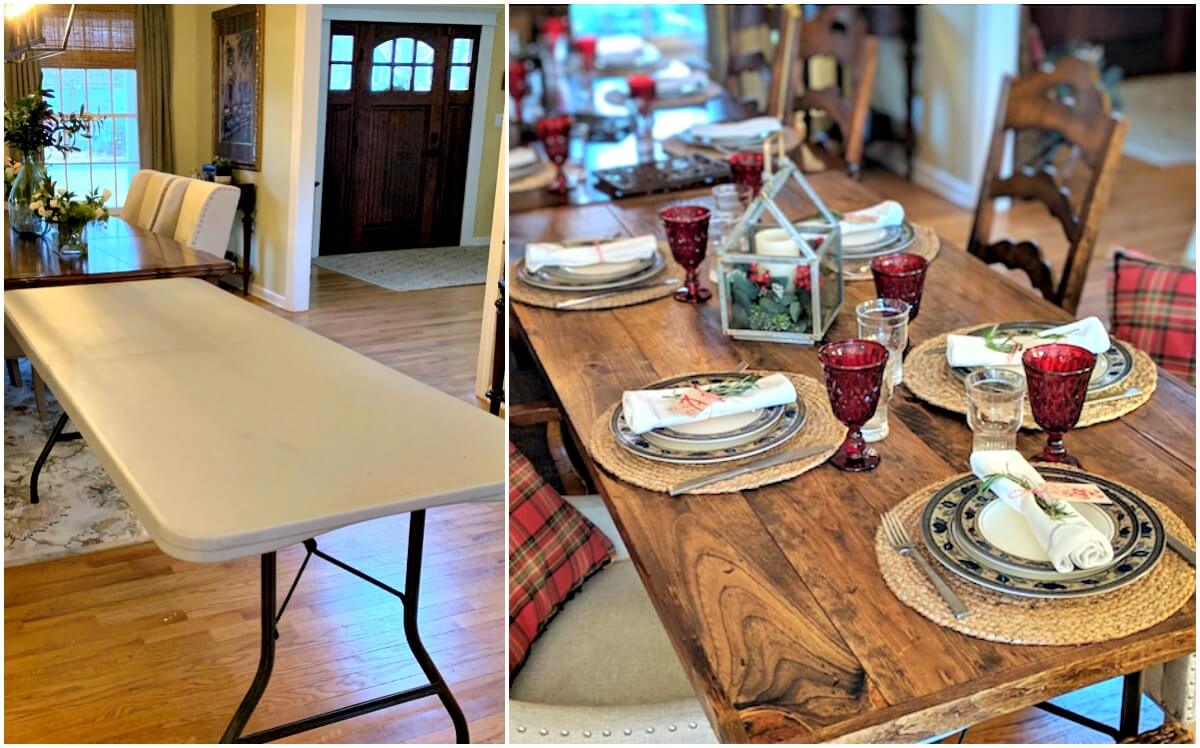
A simple way to make a DIY wooden folding table is to cover an existing plastic one with a wooden tabletop.
Cut 1”x6” boards to cover the plastic top. Around six pieces should be enough. Lay them down side-by-side and glue them together. Next, apply wood glue to the entire surface, then attach a similar-sized thin luan plywood.
With the plywood still facing up, attach a 1×2” trim all around the edge of this new tabletop with glue. If it’s larger than the plastic one, you can glue 1×2 stoppers laid flat on the underside. Use Mini Wax stain for a natural look. Then it’s all a matter of laying it over the folding table whenever you’re going to use it.
5. DIY Corner Bin
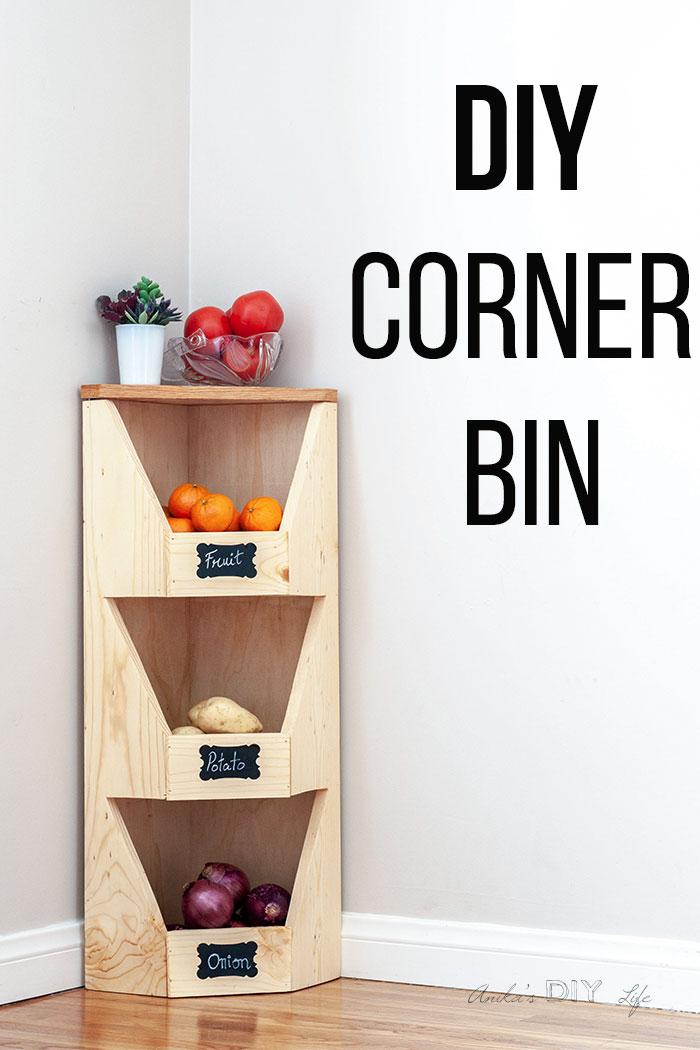
To free up more space, build this DIY corner vegetable bin to store your potatoes, onions, garlic, and even fruits.
First, cut 9×9” plywood for the three bottom pieces. Mark 4-3/4” from two opposite corners and cut a diagonal line from both points. For the 10×10” top, mark the diagonal 1-1/2” from the opposite corners and cut. Next, join two 31”x10”x1” plywood backing from mitered corners with glue and finishing nails. Attach a bottom piece every 10-1/2” to this backing starting from the lowest one, then add the top.
The two sides are 1×6” boards 31” long. From the top front corner, mark 4-1/2” back and 7” down, and cut diagonally from those points. Repeat the process every 3-1/2” down until you reach the bottom. Finally, attach both sides to the bin and also cover the diagonal fronts with mitered 1×4 boards. Pasting pretty printed labels on these faces will help your household know what food item goes where.
4. No Upper Cabinets
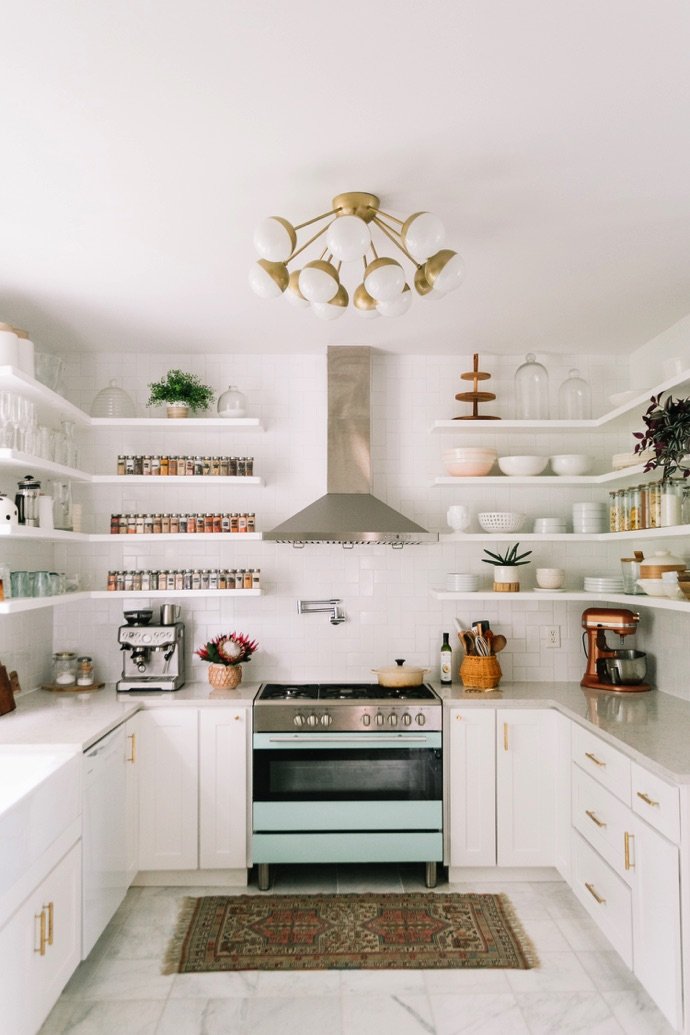
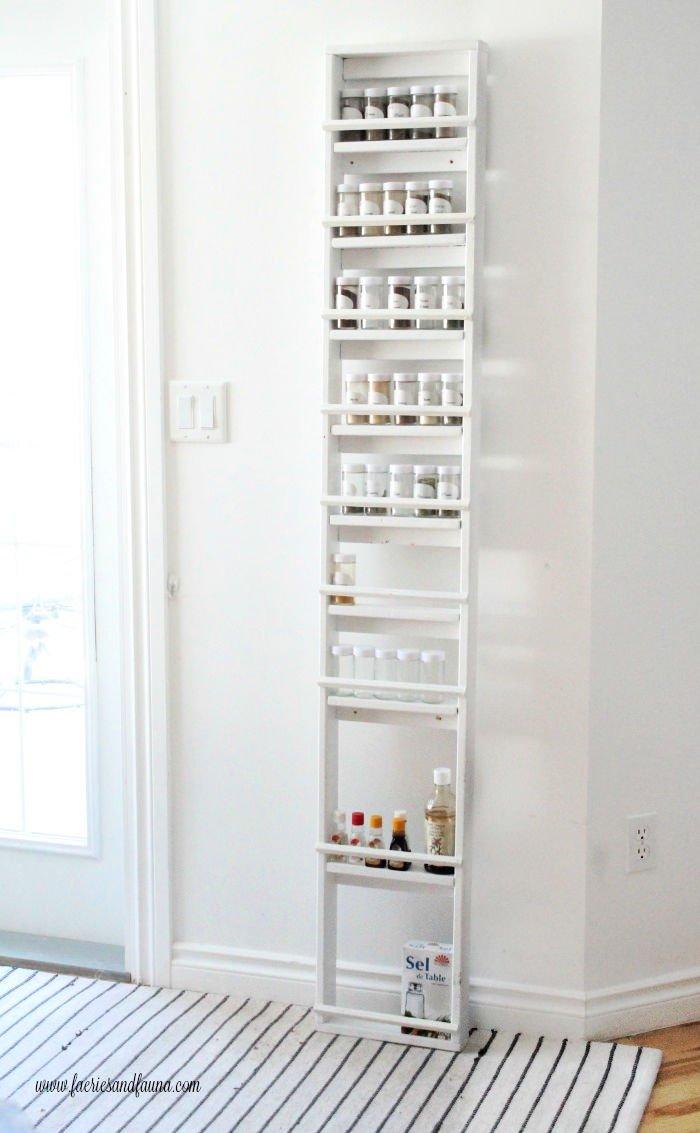 Probably the most effective way to make a kitchen seem more spacious is by getting rid of cupboards entirely.
Instead, use open floating shelves painted white. By revealing the wall behind the cupboards, it will show just how large the kitchen is. Before, the upper cabinets ate up wall space that made the kitchen seem more confined. For best results, extend the white subway style tile backslash to the ceiling.
You can also craft this large Custom DIY Spice Rack if you need more shelf space.
3. Wall-Mounted Mug Rack
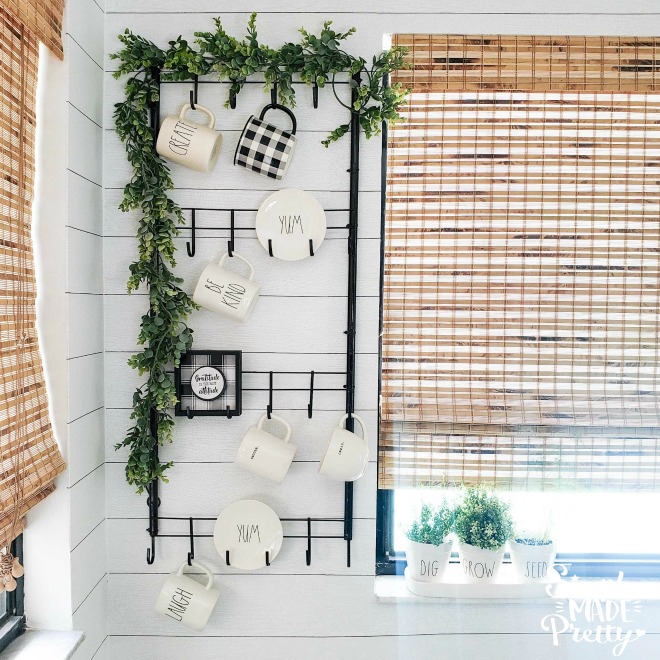
Instead of putting your pretty mugs on a countertop dish rack, why not hang them on this DIY mug rack?
Removing the dish rack will help you free up some countertop space while providing lively decoration on a wall. Get about 4-5 over the door hooks from Dollar Tree and hammer the top wires flat. Also, disassemble two mops and get only their metal poles. You then glue the door hooks to these poles, secure them with zip ties, and then spraypaint everything black.
After it dries, you can mount it on the wall using anchor hooks and begin hanging your mugs and even small platters. Maybe add a vine along the top and dangling from one side for more style points.
2. Built-in Fridge
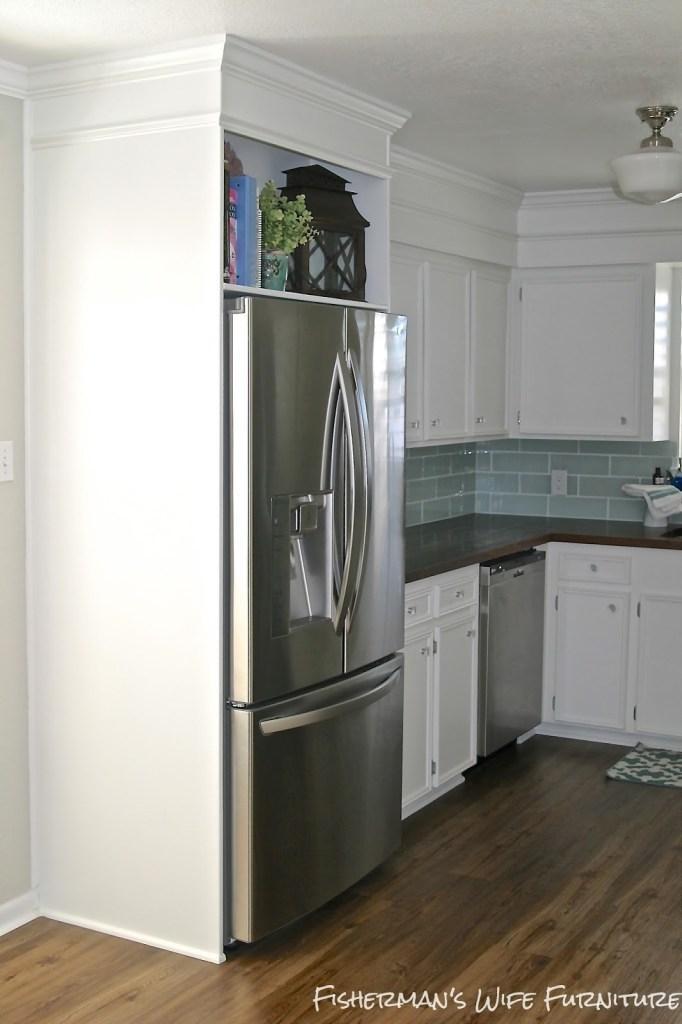
Besides enhancing the style and overall appeal of a kitchen, a built-in refrigerator maximizes space significantly around it because of its size.
With the fridge tucked in flush within the cabinetry and out of the way, people can move more freely than left standing alone on a wall. It streamlines the flow of movement resulting in more efficient work in the kitchen. In the example, the owner even utilized the space above the fridge to excellent effect with open shelves. Together with that of the pantry, the sidings of the ref enclosure form a divider and entrance.
They help elegantly define the kitchen from the rest of the dining area but in an open layout that doesn’t feel confining.
Lastly, Number 1. 3 DIY Kitchen Cabinets Ideas that Increase your Storage Solution Options
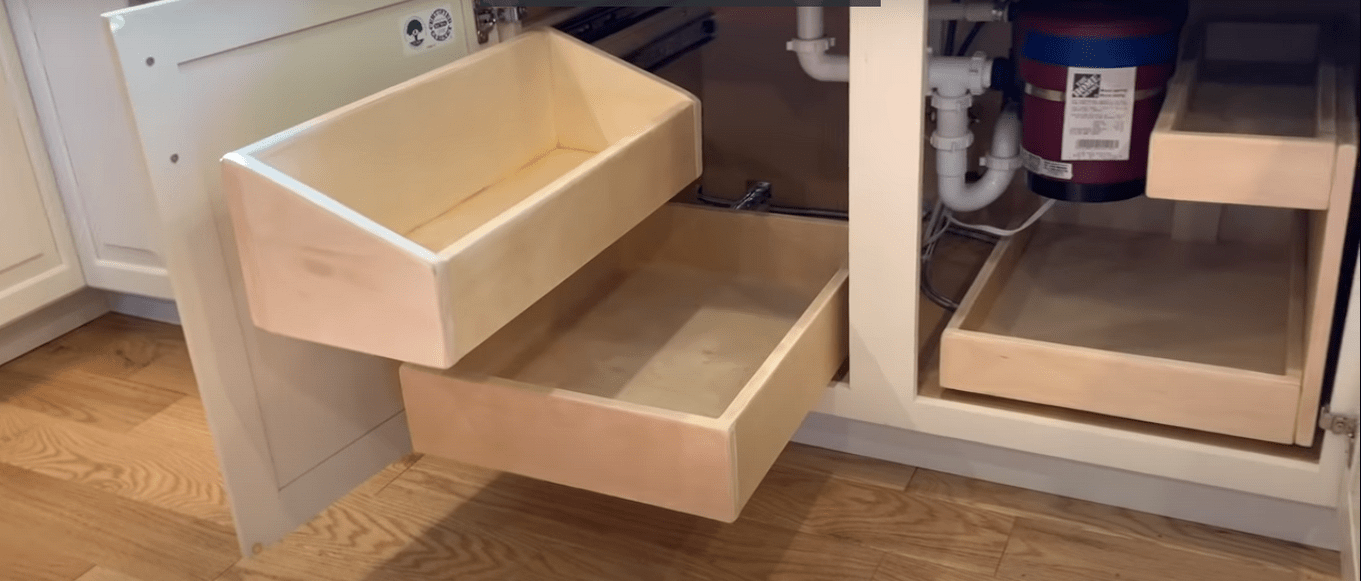
For more detail information related to this point, play available video featured on the list or reference area one scroll away from this point.
1.1. Cabinet Door Racks
You can build door racks for various items and cabinets in your kitchen for more storage.
For example, you can install them on your cabinet sink doors to hold cleaning items and detergents. On another cabinet, the doors may have a spice rack holding small spice bottles. However, make sure they don’t collide with any shelves inside when closing them.
1.2. Cabinet Pullout Shelves
Another ingenious solution is to install pullout shelves that are merely internal drawers. That makes them a lot more convenient than fixed shelves. They’re ideal for awkward spaces, such as inside the cabinet sink. It doesn’t matter if they have an odd layout because they’re behind cabinet doors.
They also have sidings to keep items from falling off when you move them.
1.3.Raise your Cabinets
You can also raise cabinets to the ceiling to utilize the space above. Adding open shelves underneath will not only add storage space but even result in roomier feeling countertops.
Reference:
12. Thehappyhousie.porch.com, Realitydaydream.com
11. Thriftydecorchick.com
10. Thestonehead.com
9. Littleyellowwheelbarrow.com, Cnet.com
8. Twofeetfirst.net
7. Littleyellowwheelbarrow.com
6. Livingrichwithcoupons.com
5. Anikasdiylife.com
4. Theglitterguide.com, Prettydiyhome.com
3. Simplemadepretty.com
2. Fishermanswifefurniture.blogspot.com
1. Youtube.com. Youtube.com, Thecrazycraftlady.com