There’s no shortage of hidden places where you can put away your snacks, linens, or even more food! That’s why it’s always helpful to have a few secret places tucked away in your kitchen. And one such place is the oven door! So grab a spatula, and we’ll show you just how easy it is to make space for future dinners.
Key Points:
These 12 hidden and secret storage for the kitchen should provide you with additional places to store your things like spices, herbs, and even some food. Some of these are pretty obvious, while others are not so obvious. So without further ado, here are some of them!
Your Limited kitchen does not always have to look that way!
- It’s a good idea to have a variety of secret storage for the kitchen as it will give you more options to choose from.
- Open your oven door and then lift the rack up. Now walk over to one side of the rack and lift this grate until it disengages from the hook at the top.
- At first glance, this may not seem like an ideal location to store spices, but keep in mind that some of them can withstand the heat of an oven.
- To store your spices and herbs, take your spatula and then push the rack up until it’s resting on top of the grate
- Make sure you’re standing on top of the rack as well so that it doesn’t fall off!
- Push your spices/herbs down into this space under the rack, so they don’t fall out when you turn on your oven.
- This is a great spot to keep all things you don’t use often or need to store away from sight.
As the place where you prepare your meals and store foods and appliances, the kitchen is prone to clutter. You might think that you have organized it well. It turns out that the mess keeps coming repeatedly.
If the clutter keeps coming, maybe you need these 12 hidden and secret storage for the kitchen ideas. They will help you hold the mess at bay while improving the look of your cooking space.
As always, Simphome presents you with the list.

List Entries:
12. Just Organize It
 When talking about hidden storage, you might think about doing a DIY project or purchasing multipurpose furniture. Well, let’s begin with the simplest thing that everybody can do immediately – decluttering.
Sometimes you do not need new cabinets or shelves because decluttering the existing ones will be enough.
- You can begin with preparing at least three boxes.
- Then, take everything out from your cabinets. After that, begin to sort things up.
- You may come across broken cups, expired foods, or any other item that you will not use anymore. These things will go to the “trash” box.
- Then, you will find the items that you do not use quite often, and you may not need them anymore. If they are in good shape, consider putting them in the “to donate” box.
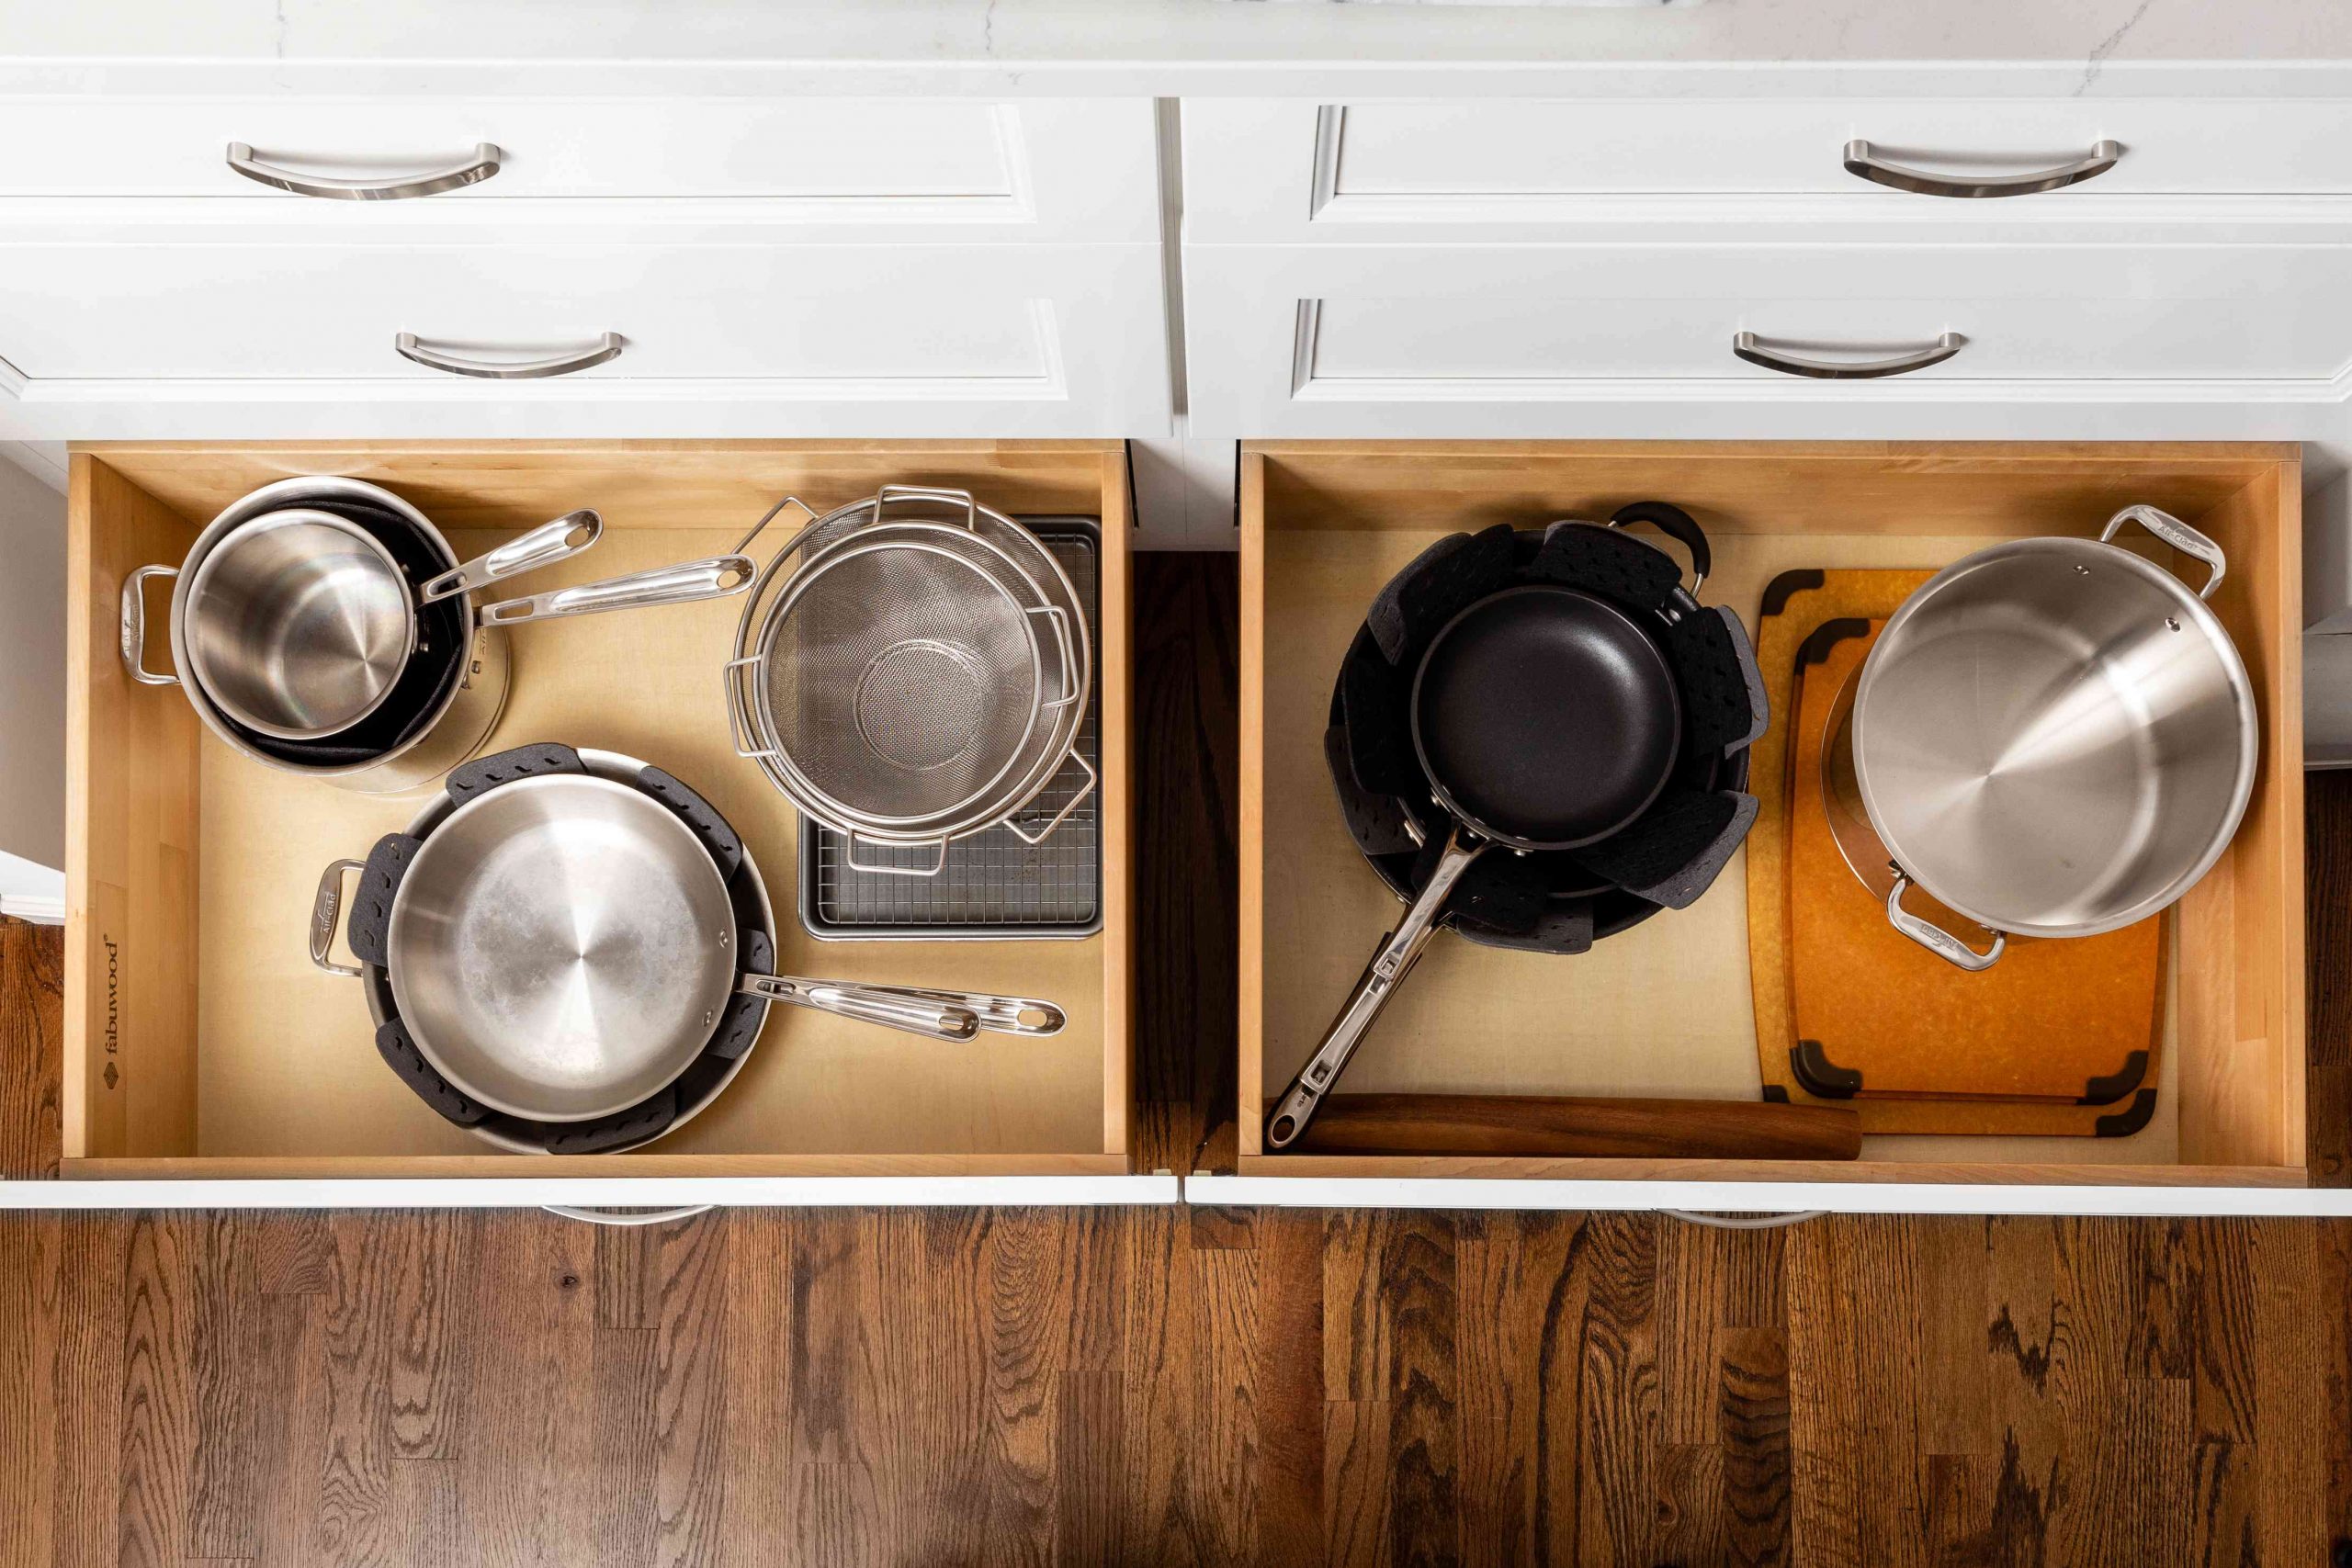
- Next, put the items you still use back in the cabinets. You had better place foods in the upper cabinets while pots and pans in the lower ones.
Detail instructions:
- Separate your foods into four categories: breakfast, lunch, dinner, and snacks.
- Clean all the kitchen cabinets and shelves first.
- Begin to clean up things in your kitchen by taking everything out of the cabinets; this includes food storage items such as cookware and utensils and food storage containers such as plastic bags, boxes, casserole dishes, etc.
- Throw away all the expired items such as food that has been kept in the refrigerator too long.
- Put the items on your “to donate” list in the boxes, and place these boxes near your garbage can so you will know where to dump them when you finish recycling your trash.
- Place all the remaining items back into their original places at each step of this process (first into cabinets, then onto shelves, and lastly onto a counter or table).
- Finally, distract yourself from thinking about all those stuff by organizing a collection of ceramic, glass, or other beautiful pottery pieces that you could use to decorate your kitchen instead.
11. The best used for the haunted corner
 The corner of the cabinets can be a dead end. It provides ample space for additional storage. Unfortunately, you cannot reach that spot because it is in the awkward corner.
Do not worry! This cabinet hack can be your solution. First, you need to build the cabinet bases on the left of the corner.
Next, construct the cabinet carcass. This one will be able to roll back and forth from the opening and into the awkward spot in the corner. Therefore, you will need to install four casters at the bottom and another one on top to make the cabinet glide easily.
Once the rolling cabinet is ready, you can make the slide-over cabinet. This cabinet uses piano hinges that allow it to swing to the outside. This way, you can access the rolling cabinet in the corner.
10. The Secret of kitchen island
 An open floor plan allows you to have a more spacious look by eradicating the walls separating the kitchen and living room. However, this design usually does not feature a formal dining room.
You can try this idea if you want to have a formal dining room but do not have much space for the tables.
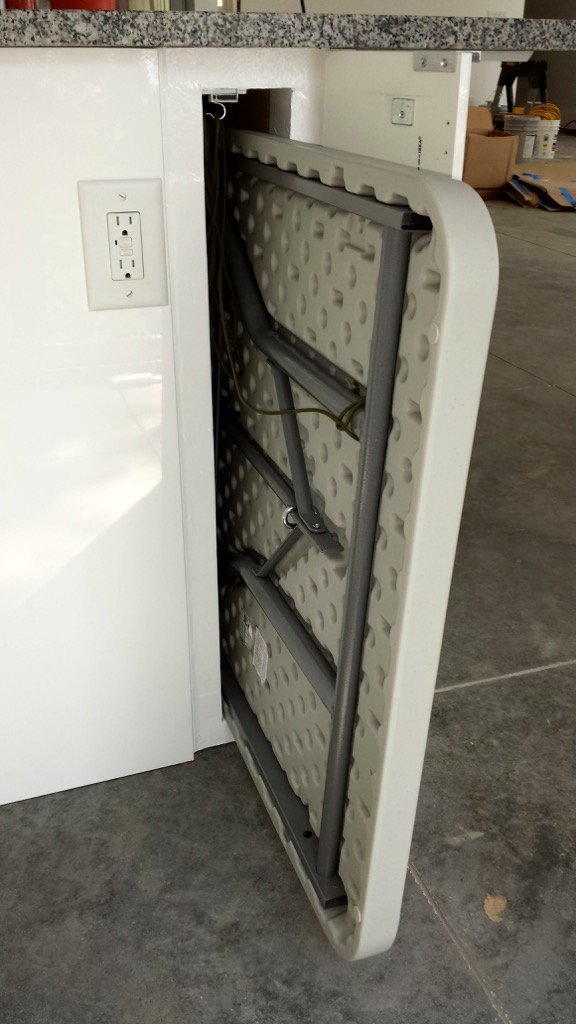
This kitchen island does more than just offer ample countertop to work on. The truth is it also keeps a secret because it hides two 5-foot tables. You will not notice them until you see them yourself.
Basically, you need to build a box from 2x4s to house the tables. Then, attach it to the existing island. After that, install a piano hinge to a standard IKEA door to create the opening. You can also use a small magnet door closer to make the door close perfectly.
Finally, insert the foldable tables into the box. You may find it hard to reach the farthest table. Thus, consider installing a hook near the opening. Then, tie a paracord on its leg, and tie the other end of the paracord to the hook. This way, you can access it without breaking a sweat.
9. Hide the entire doors or trick the corner kitchen area at least Idea by H2interiors and Furniwell
Every inch is priceless in a small kitchen. When you open the pantry doors, you will find that they have taken up a lot of space. As a result, you will be likely to bump into them.
Instead of letting the pantry doors swing outward and block the foot traffic, you can hide them away.
You will need to use Euro hinges that allow the doors to swing outwards to make these doors. Then, you will also have to install a pocket door system that enables the doors to slide into the pockets and disappear.
#SECOND IDEA#
Another way to tackle the awkward space in your small kitchen is by incorporating additional storage into the cabinet corners.
You can simply purchase customized racks. Make sure they are flush with the cabinets when you put them back.
Here comes the fun part. You can insert more racks inside the lower cabinets when you pull the outer racks out. This way, you can organize your kitchen better without worrying about the limited space.
Detailed instructions:
- Clean up the cabinets and shelves.
Do not put everything back in immediately after cleaning. Instead, wait until you have finished decluttering the cabinets and shelves. - Pull out the existing storage system to access more space.
Remove all the drawers from your kitchen cabinets and begin to search for unused drawers inside them again. This idea will free up a good amount of space in your kitchen, thus enabling you to install additional storage such as racks, bins, or containers in the unused cabinet spaces. - Install new storage systems or shelves that require less space but still provide sufficient storage capacity than that of drawers or cabinets on which they are mounted
- Install additional storage systems, shelves, or baskets at the lower back corner of your kitchen to utilize the space under cabinets.
- Make new cabinets at the lower corner to organize more pots, pans, etc.
- Get creative and create a tiny kitchen island that can comfortably fit inside your cabinet space
- Create a rolling storage system so it will not take up valuable floor space
8. The vertical sliding dor trick for your unsightly toaster or anything else
Hiding the kitchen utensil can result in a super clean and tidy cooking space. Unfortunately, the cabinets are full already. Therefore, you need to build additional storage solutions.
You can try making a shelf in the corner, under the upper cabinet. Then, install trim and roller blind to hide it away.
To build the little door, all you need to do is:
- Pick up a standard leaf door
- Cut the panel board to size to cover the opening in the kitchen cabinets and be able to slide through it easily with its hinges still working. Then, cover it with some paneling or veneer so that you can get rid of the visible screws and hinges.
- Attach three piano hinges to the top of this door. Then, attach a long piano hinge to one side of an L-shaped bracket on the other end, which will be used as a handle for your new little sliding door.
- Slide the cabinet door between the cabinets and into the corner. Then, add some molding to hide the ugly screws.
- Use a few screws to lock in place your new cabinet door. You can choose to screw it directly or only into the wall.
- You can also use a few screws or glue to attach your little sliding door in place under your upper cabinets so that you can access it when necessary.
- Add a small piece of trim to finish it off.
9. Alternatively, you can build a storage system on the outside of your kitchen cabinets
Some people also use it for their pantry because it can fit inside their existing kitchen units.
This design is rather easy to build. You just need a few boards clamped together and some screws to hold them in place. You can also add some molding or decorative plaques if that’s what you want to look like when you’re done with the project.
Detailed instructions:
- Get rid of all the doors (When possible)
- Start by removing the hinge from the pantry door and extracting it through the opening. Then, remove all the door panels and off-cut them to make room for new doors.
- Remove all the cabinet drawers in your kitchen. As well as any shelves underneath them you may have installed in place of cabinets instead of drawers. This trick will give you a better functioning space at your disposal to install racks, baskets, or any storage items that do not require drawers. Remove all doors from under this area for maintenance access only, not for access by guests or visitors to your home.
- Install hooks or pegs in the upper cabinets so that you can hang whatever you need to store in your new space.
- Cover the walls of your pantry with panels or wallpaper so that you can hide all the ugly doors and drawers. As well as any doors or cabinets.
- Install cabinet racks, shelves, and baskets to drawers if you have less space left to use for storage in your pantry units (but remember: always check with a professional before installing any appliance inside a new storage area).
- Add a long sliding and folding door to cover your pantry area.
- Add hooks inside the newly installed sliding door to hang or hold utensils and pans.
- Add a handle that’s easy to grab onto when you want to move it aside and take a look at what’s inside your pantry, as well as something with which you can easily open up the sliding door and expose all your stored items in full view for easy access.
- Install panels, tiles, or any other decorative elements around the outside edge of your newly installed cabinet racks, shelves, hooks, or drawers for added visual appeal.
- If you don’t like how it looks, replace or adjust the sliding door to your liking.
7. A Kitchen Island Secret Project by Decoholic
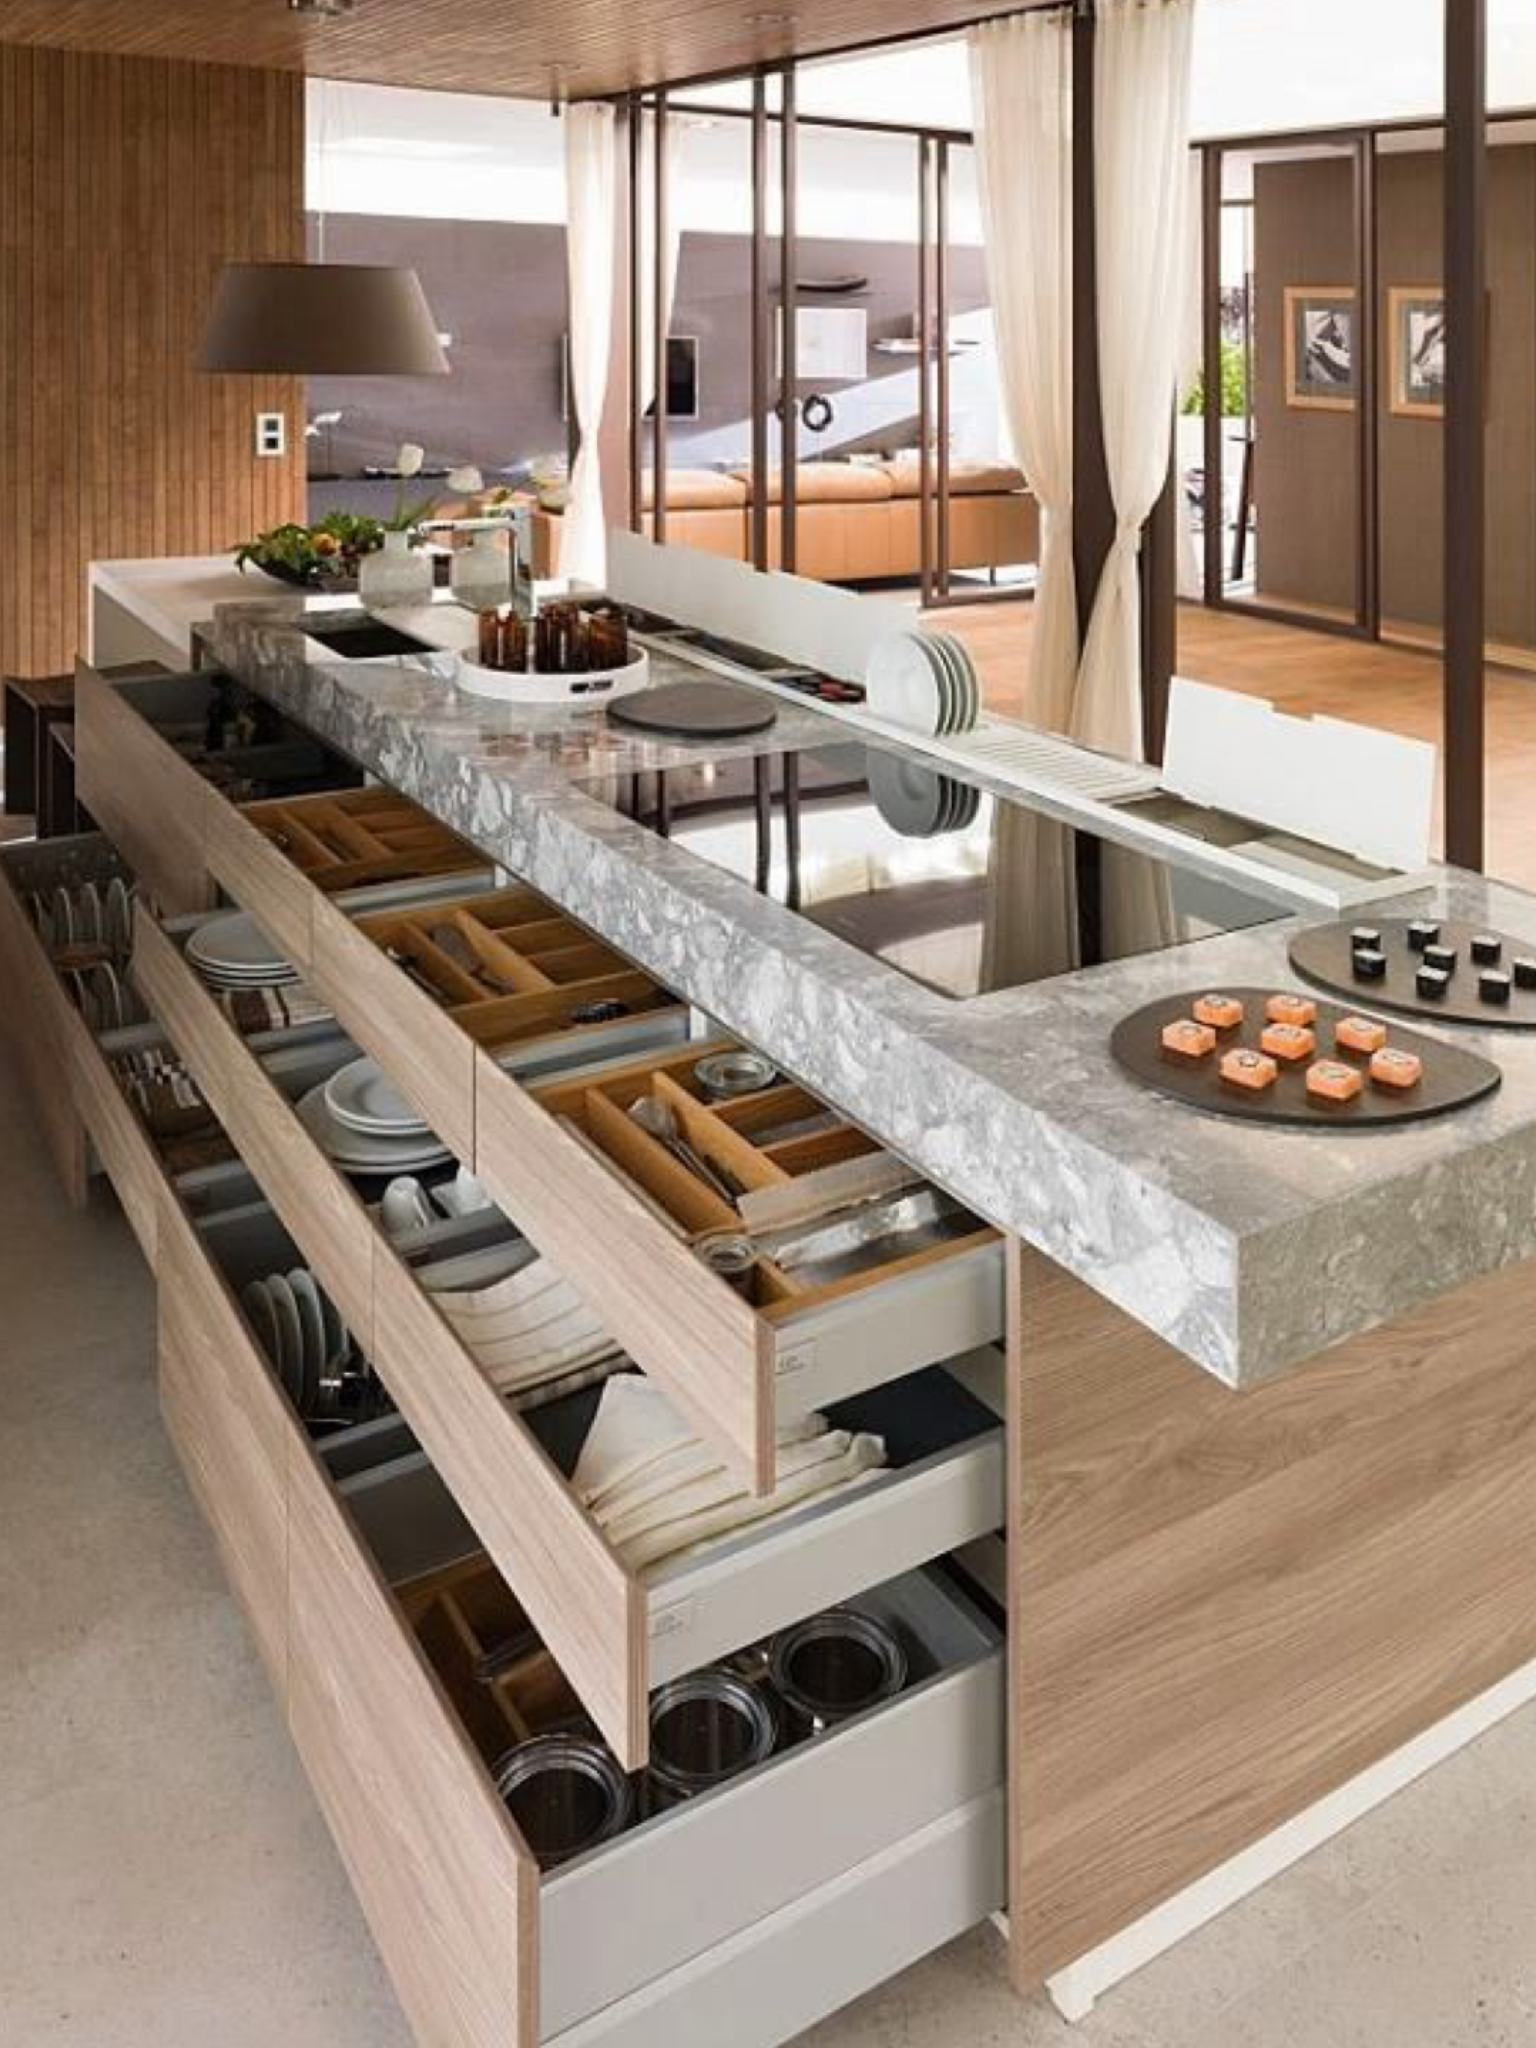 A kitchen island is a valuable item you must have if the space permits it. It provides more countertop for you to prepare the meals. It also allows several users to set down their plates, forks, and spoons and enjoy the meal.
Some kitchen islands even have hidden storage like drawers or cabinets that help you organize spices, condiments, dishes, and cutlery better.
6. A Tiered Shelving idea Inside a boring Cabinet
Your cabinets are your life saviors. They have saved your days from clutter countless times.
Unfortunately, clutter gets bigger, yet your cabinets are still the same.
If you think your cabinets cannot hold clutter any longer, think again. Maybe you just need to invest in some raised cabinet shelf racks. This way, you can use the available space more efficiently.
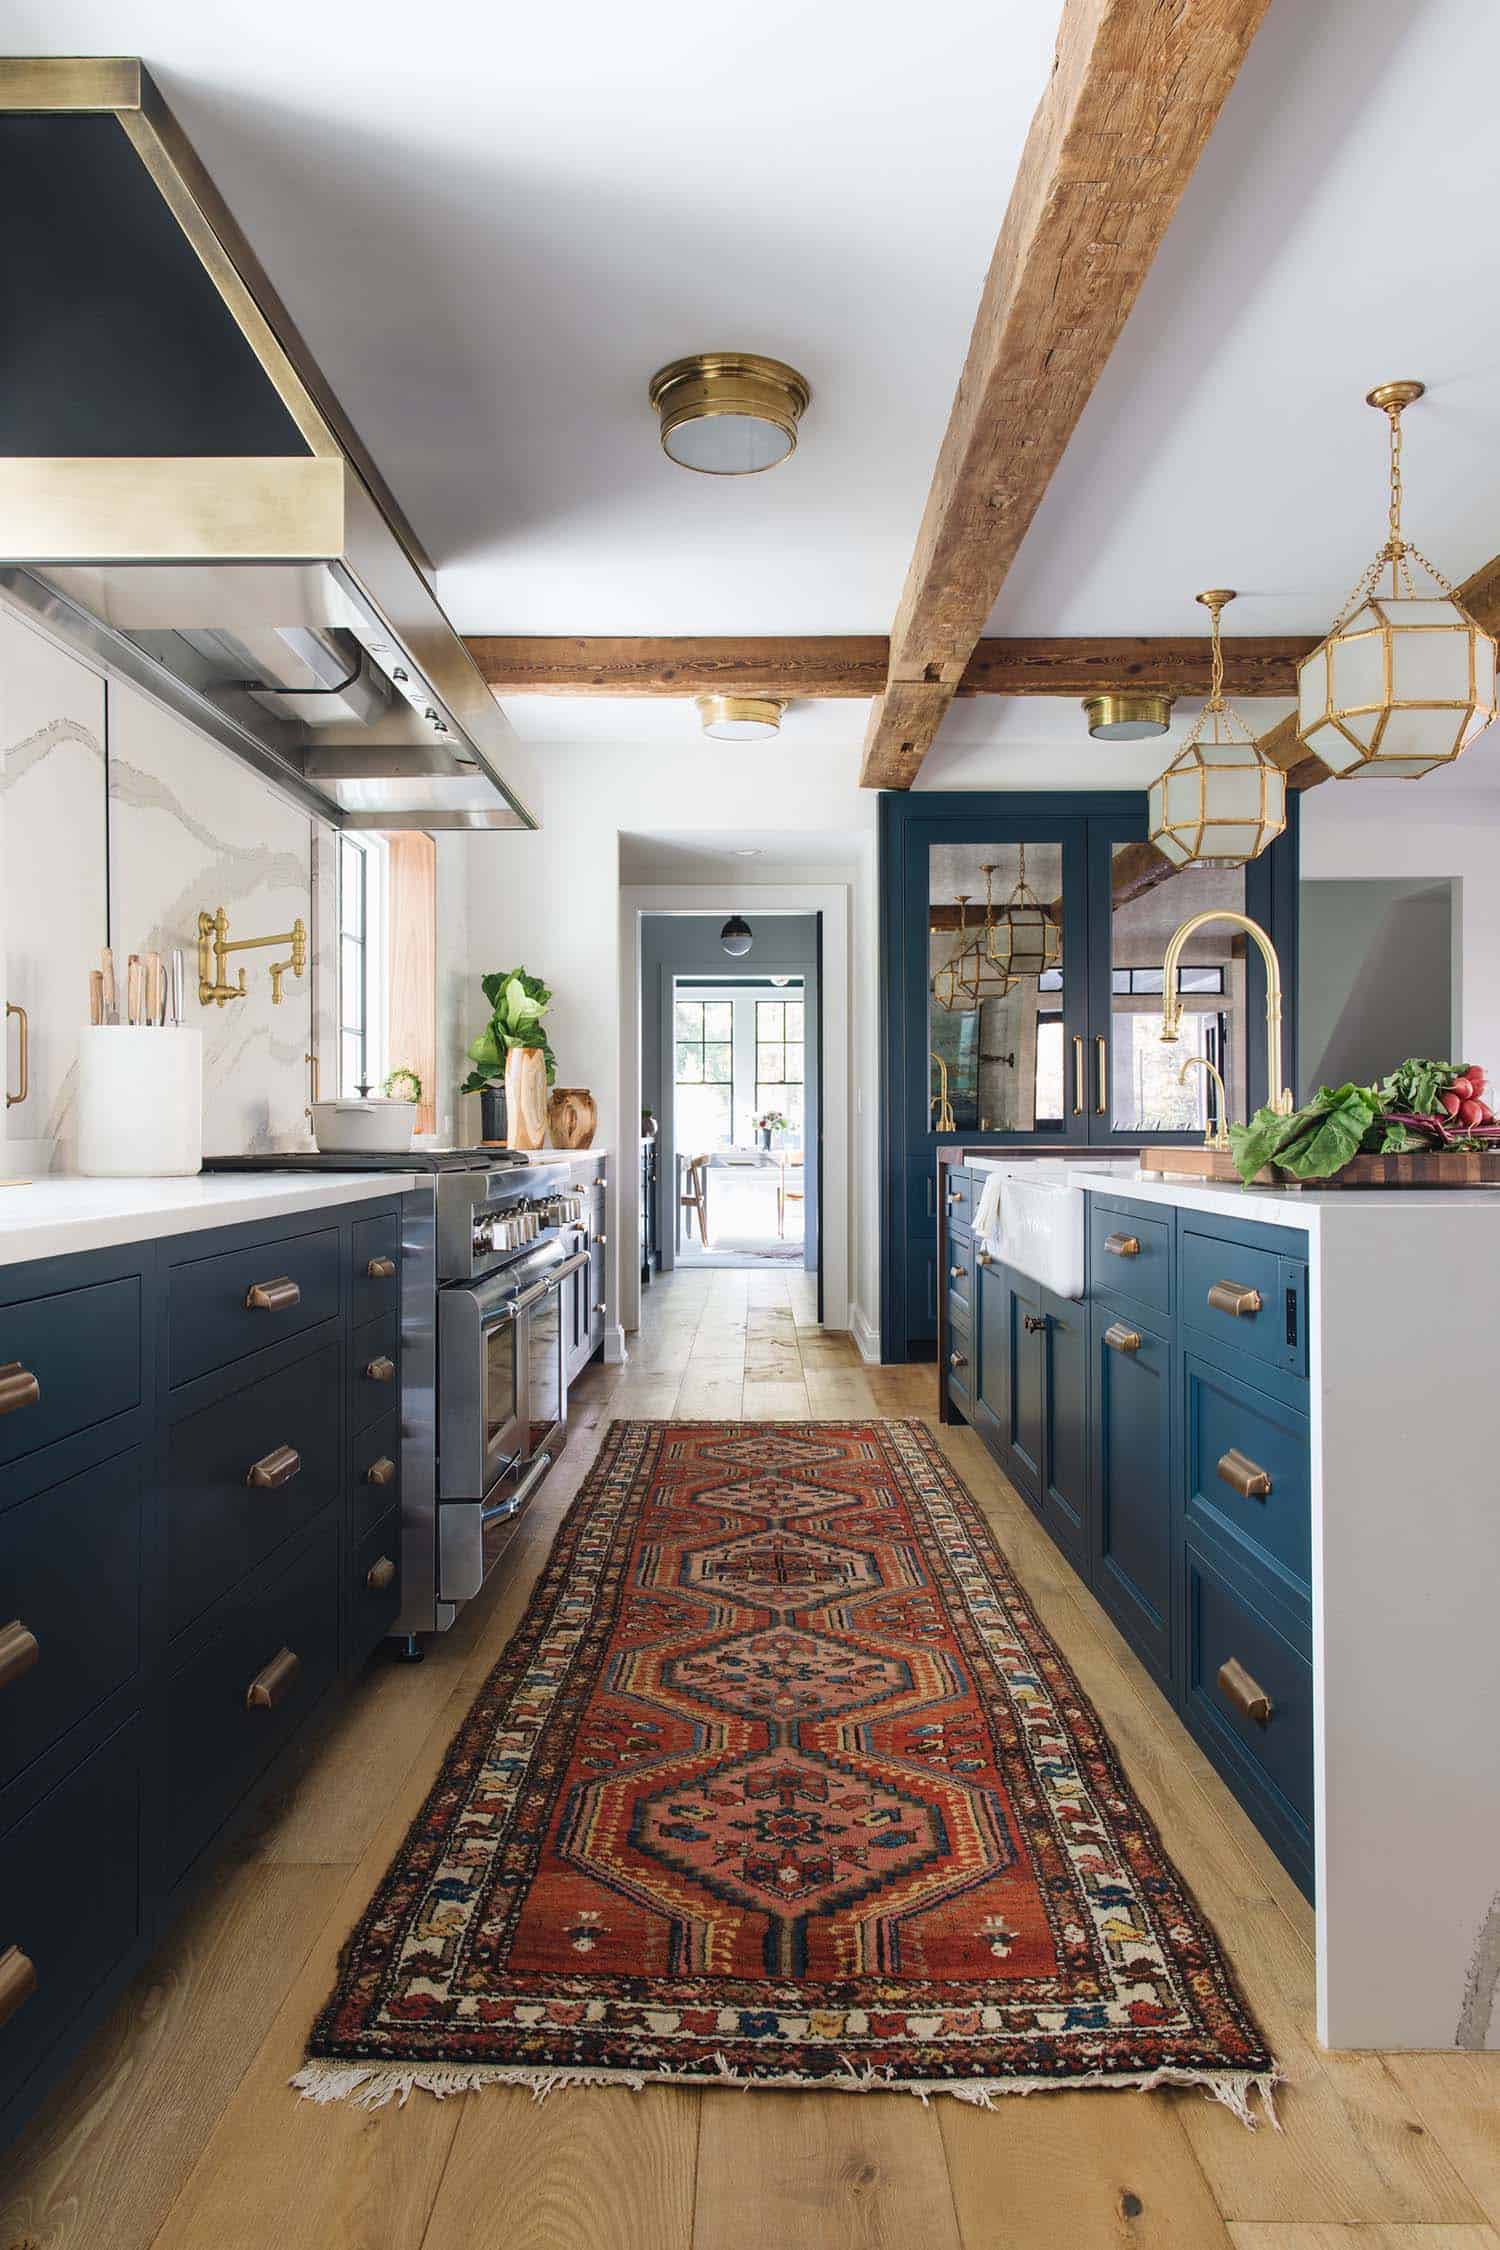
You might think that the marble backsplash is the only wow factor in this kitchen. Behold! The backsplash has brass handles on both sides. When you pull them aside, you will find some hidden shelves that you can use to store cups or kitchen utensils.
Detailed Instructions:
- Remove the old backsplash and trim.
- Install the new backsplash – choose a color that matches your new tiles.
- Cut a board to fit between the tiles using a saw and chalk line around your cabinets and tile backsplash. Attach it using screws and anchors in corners where they meet the tile…and voila! You’ve got yourself some adjustable shelves where you can store things you need throughout the day, like spoons, forks, or small cookware.
- Install any shelving you want to use as another shelf or even add more shelves for more storage space (for example, coffee mugs, favorite glasses, dishwashing soap).
- Measure the height of your cupboard top so that the thickness of the countertop will be equal to that.
- Make sure you layout your new countertop to overlap onto the cabinet tops by at least 3/4 inches.
- Attach bottom cabinets with large screws into the plywood counters, making sure they’re level and plumb on all four sides as well as evenly spaced from adjacent cabinets.
- Install a new sink – usually a single bowl, but if you have space for a double-bowl sink, then go for it! You’ll love it when you have more room for pots than in your old kitchen (if there was one).
- Install the new faucet and fill the sink with water to make sure it works. Turn on the water supply and listen for leaks – fix them if you hear one.
- Cut out your countertop for your sink. Make sure that there’s enough space to get under it easily, but also make sure that your sink is not extending out into an area where you walk or stand a lot, like next to a refrigerator or stove!
- Install the sink base (sink + faucet) inside the countertop and attach an overflow drain on the backside of your sink so that any spilled water can drain harmlessly into your cabinet below instead of overflowing onto your cabinet flooring.
- Install your new faucet, and lastly, you’ll install your new cabinet knobs.
- Fill up the space between your cabinets and the countertop, foam if necessary to keep spills from coming on the floor.
- Install a door or drawers in front of your shelves or drawers – this way, you can serve food on your table without dirtying it by putting bowls or dishes inside the cabinets so that you can remove them easily for cleaning; later!
When you step into this kitchen, you might think it is just an ordinary cooking space. Wait until you see the secret of it because it will definitely blow your mind.
This kitchen features a hidden pantry that no one will notice. Once you open the door, you can find a pretty spacious pantry. This way, you can have plenty of storage.
The most exciting thing is the door. It looks like a shaker cabinet door that covers a small pantry.
Detailed instructions:
- First, you need to measure the door you will use.
- You need to cut the piece of wood the size same as your door.
- Make it fit with the door that you will use, then nail it on the sides. (Note: The last thing is very important because it will support the weight of the shelves.)
- Use a chalkboard paint coat and apply 2~3 thin layers. (This way, you will have a smooth surface and won’t feel any difference with a real chalkboard.)
- Apply the chalkboard paint to all the doors, both inside and outside. (Do not put any cardboard between the door for better adherence.)
- When dry, you can use a chalkboard surface sticker to create a nice look.
- Use oil-based primer on the main door piece of the pantry but don’t forget to paint it before finalizing because it will stain easily. (You can apply two thin coats of Galaxy green .)
- Use chalkboard paint on all surfaces except for both sides of the doors. (Do not put any cardboard between the door for better adherence.)
3. The Surprising Storage hack by @Ridgewoodcustomhomes
This classic kitchen embraces the timeless charm of traditional style. It even has corbels installed on the cooker hood.
Do you think it is fantastic? Hold on a second! You have not discovered the mesmerizing feature yet.
Apparently, the corbels are not just decorative items. When you pull them, you will find spice racks you can use to store spices and condiments.
Detailed instructions:
- To make the corbels movable, drill holes on them and run strings through the holes.
- After your corbels are installed, you need to install spice racks inside.
- You can paint your corbels and spice racks in the color of your choice, and you are all set!
This breakfast nook is a perfect place to enjoy your toast and tea. Then, you begin to wish it had storage.
Well, you have got what you wished. You might think that it is an ordinary bench with flat paneling. It turns out that it hides a long drawer that you can use to store many things.
Detailed instructions:
- Saw off the bottom frame, which you should remove before attaching the first and second pieces.
- After you saw off the bottom frame, drill a hole through which to screw in the dowel rod.
- Attach the bottom of each side panel to that rod and then use your screws after a bit of trimming for fit.
- Now, you’re ready to attach the top drawer panel to the dowel rod, putting one end through from one side and attaching it on the other using screws (which you should pre-drill for fit).
- Once you have attached the top panel, you can fill up your storage drawer with whatever needs to be stashed!
- You can install a pull-out spice rack on the kitchen island for more storage.
Lastly, Number 1. The UTENSIL RAIL RACK IDEA @Africanfoodie
Pots and pans are bulky, and thus they tend to gobble up the space in the cabinets. Therefore, you need to use this hack to store them better.
A shelf slide rail can be your life savior. You just need to screw it to a strip of wood with the same length as the rail.
Then, pre-drill the wood so that you can screw in some hooks. After that, attach the rail to the top of the cabinet. Finally, you can hang your pots and pans while saving a lot of space. Even better, you can find and grab them easily.
Detailed instructions:
- Take a wooden plank the size of the rail.
- Screw the screw and hooks to the plank and to the wall where you will be installing it.
- Attach it on top of your cabinets or storage box (where you will be installing it).
- Put your pots and pans on it while they are still on the rack.
- You are all done!
Conclusion:
Small space is not an excuse to get messy. With these 12 hidden and secret storage for the kitchen ideas, you can organize your kitchen well without giving you an eyesore.
References:
12. Thespruce.com
11. Sawdustgirl.com
10. Ikeahackers.net
9. Tiktok.com/@h2interiors, Tiktok.com/@furniwell
8. Pinterest.com
7. Decoholic.org
6. Pinterest.com
5. Onekindesign.com
4. Tiktok.com/@lindydenny
3. Tiktok.com/@ridgewoodcustomhomes
2. Tiktok.com/@irishdellboy
1. Tiktok.com/@africanfoodie