Every inch counts when it comes to trying to maximize storage. But you don’t have to create a sophisticated closet system or buy high-end accessories to meet your storage needs.
Here are how to use the back of a door or closet door and available add-ons to create a helpful organizing solution. These 10 behind-the-door storage DIY projects will help you store more without taking up a lot of space. For more detailed information, follow the Simphome link inside the reference.
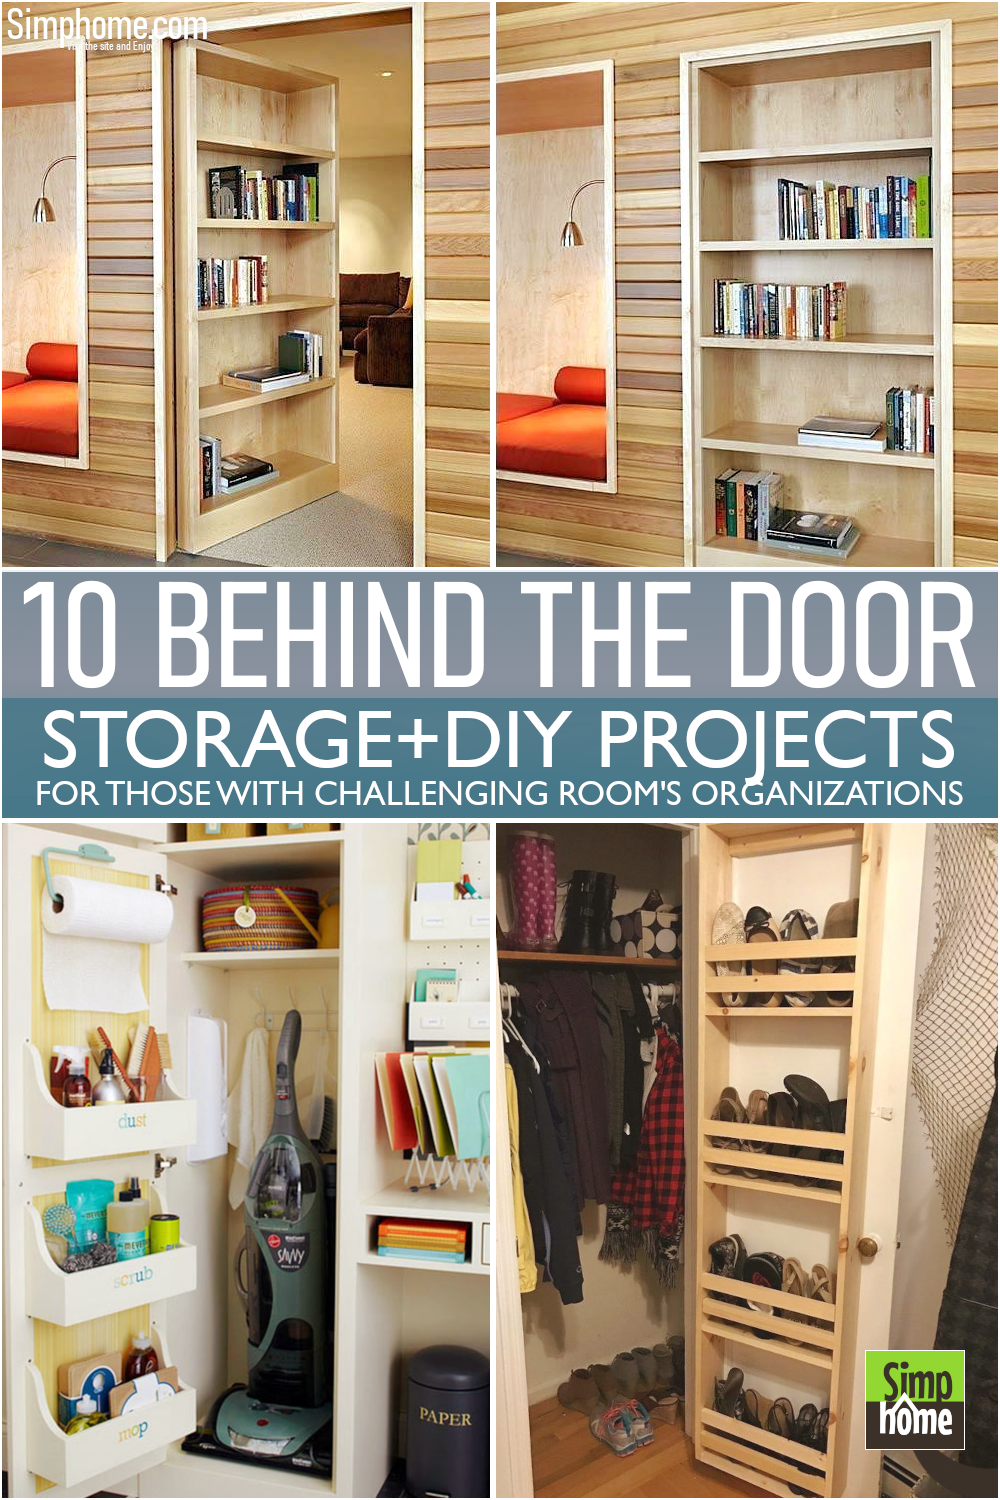
🔊10 Behind the Door Storage DIY Projects Video:
List Entries:
10 Space Saving Door Ideas
10 Indoor Floating Garden Ideas
10 Doormat Ideas; Funny, Unique, and Clever
10. Back of Door Kitchen Storage Idea with a Shoe Holder
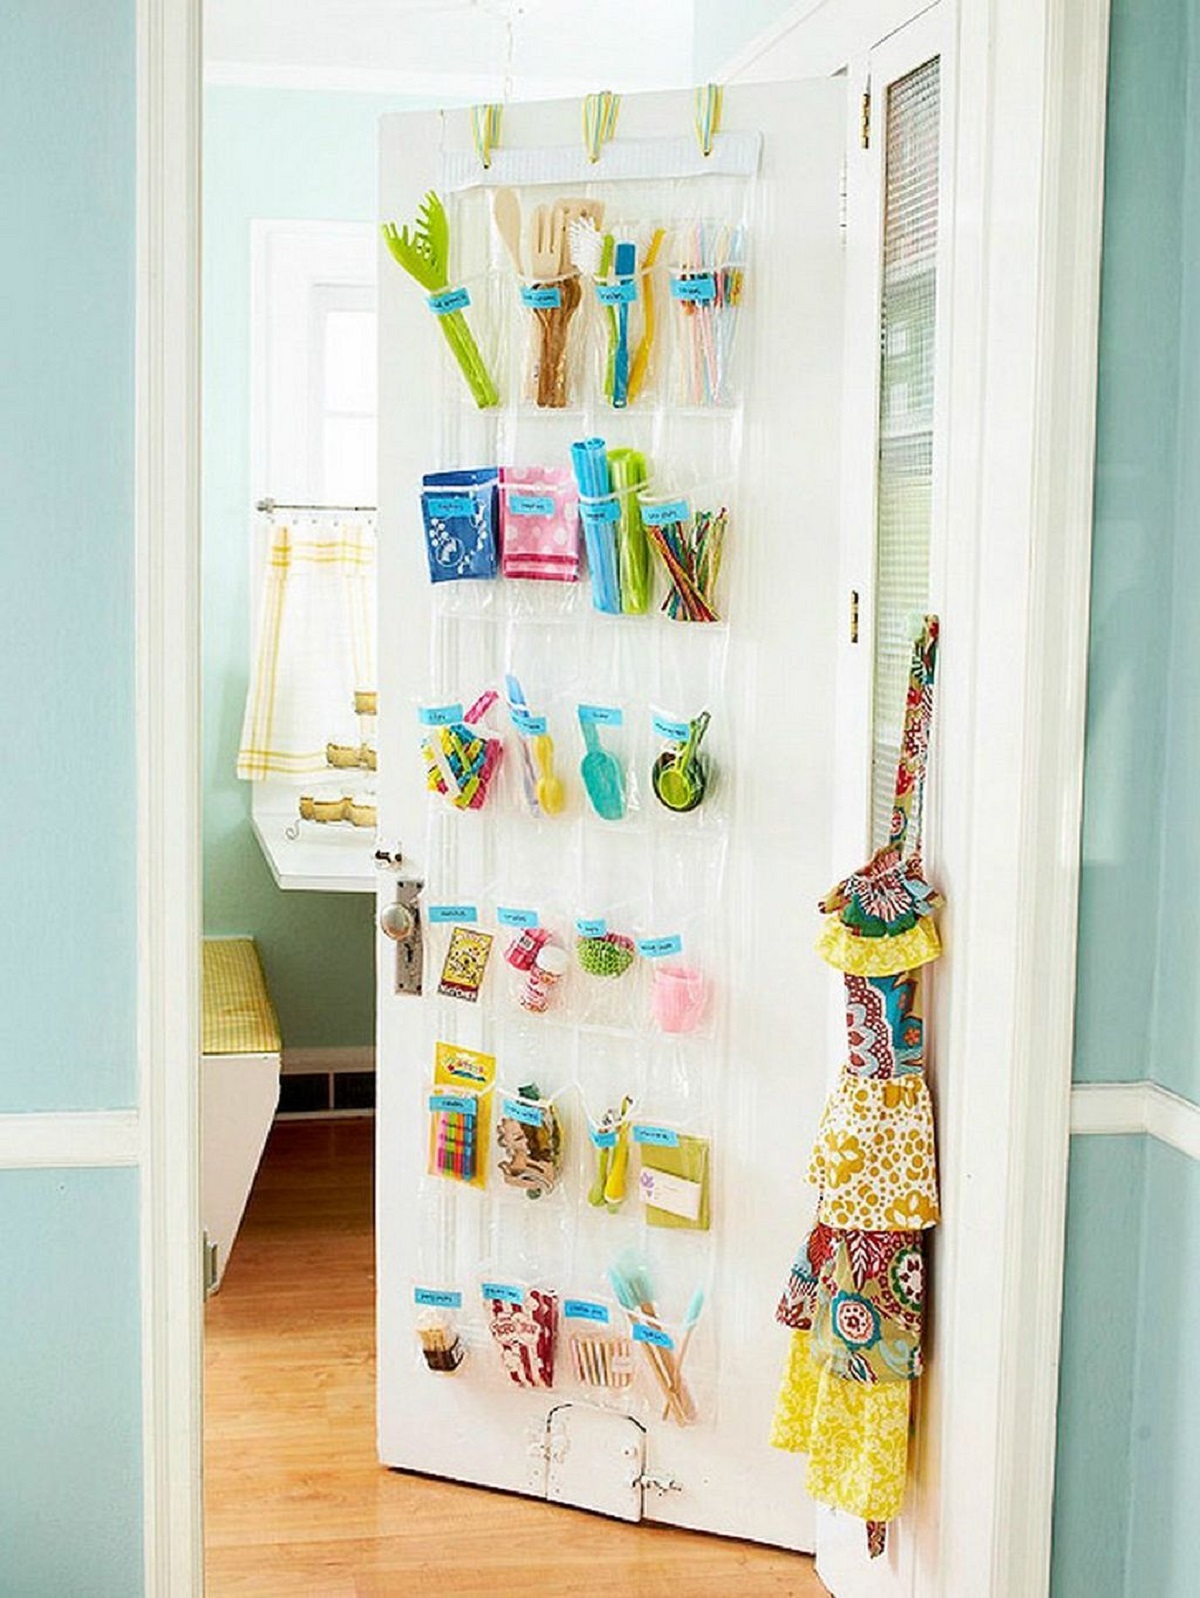 Perhaps the most straightforward way to increase space for storing behind a door is with a shoe holder, most of which are simply clipped to the door, making it very renter-friendly.
This custom shoe holder storage is ideal for kitchen utensils of different sizes, as it has ample pockets of different shapes and sizes too, but there are plenty of other options out there to choose from.
How to make it? Attach three screws to the top of your kitchen door and hang a clear shoe holder from a ribbon hanger. Label each pocket with a colored label and store kitchen utensils and supplies. This DIY project is very easy to do independently without hiring an expert.
Detailed Instructions, In short:
- Measure a ribbon hanger and dimension a pocket for a pantry item.
- Mark the holes for the screws on the door frame.
- Use a drill to make three 1 inch holes on the side of your door frame, not through the bottom of it.
- Hang your shoe holder from the ribbon hanger, and make sure the clear pockets face the doorway.
- Mark each pocket with a colored label and store kitchen utensils and supplies.
9. Bag Storages with Hooks
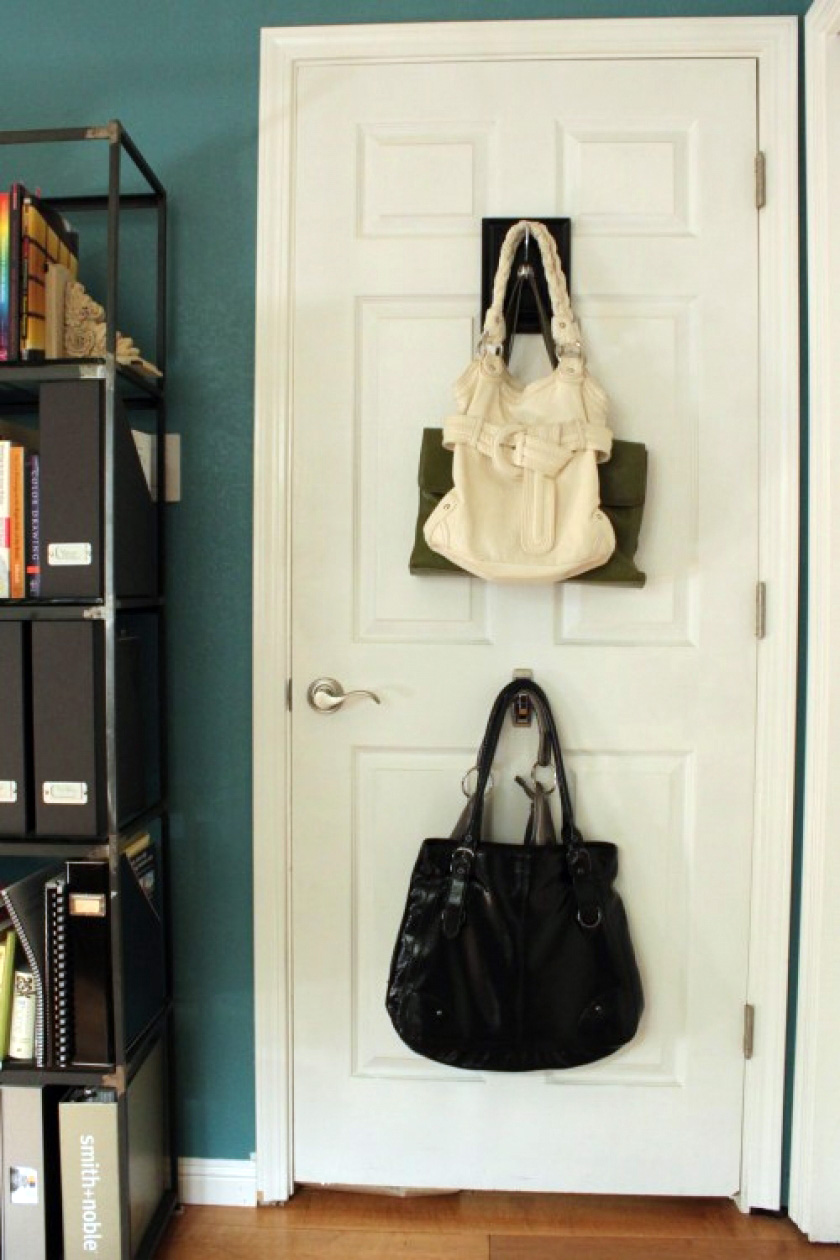 If all else fails, this ready-made bag holder slides right over your door and makes use of wasted surfaces in your closet or bedroom. You can try hanging your bags outside the closet doors if you do not have any available vertical space. Besides, the look of your bag or wallet will add texture and color rather than being cluttered.
Use a hook because it’s straightforward and cheap to get at antique stores, flea markets, and hardware stores. There’s plenty of room to customize the look, whether you want to match your door or top it off with a bit of DIY paint job. Grab a handful to attach to your door and up your entire bag collection.
Detailed Instructions, In short:
- Measure a hook and dimension a space for a bag.
- Print out the pattern, so you know where to place the hooks in your door frame.
- Measure your door frame with a tape measure and use it to cut two pieces of wood from scrap lumber.
- Attach one piece of wood to each end of the hook, making sure the ends are flush with this wood, then screw them in place.
- Screw the hook onto the wood.
Additional Idea, A Shoe Storage idea from a Wine Rack
If you have a few extra dollars to spend on a shoe holder, you can get this one for your shoes placed in your closet or bedroom, which makes use of wasted surfaces in your closet or bedroom. You can try hanging your bags outside the closet doors if you do not have any available vertical space. Besides, the look of your bag or wallet will add texture and color rather than being cluttered.
8. Caddies Storage behind the door
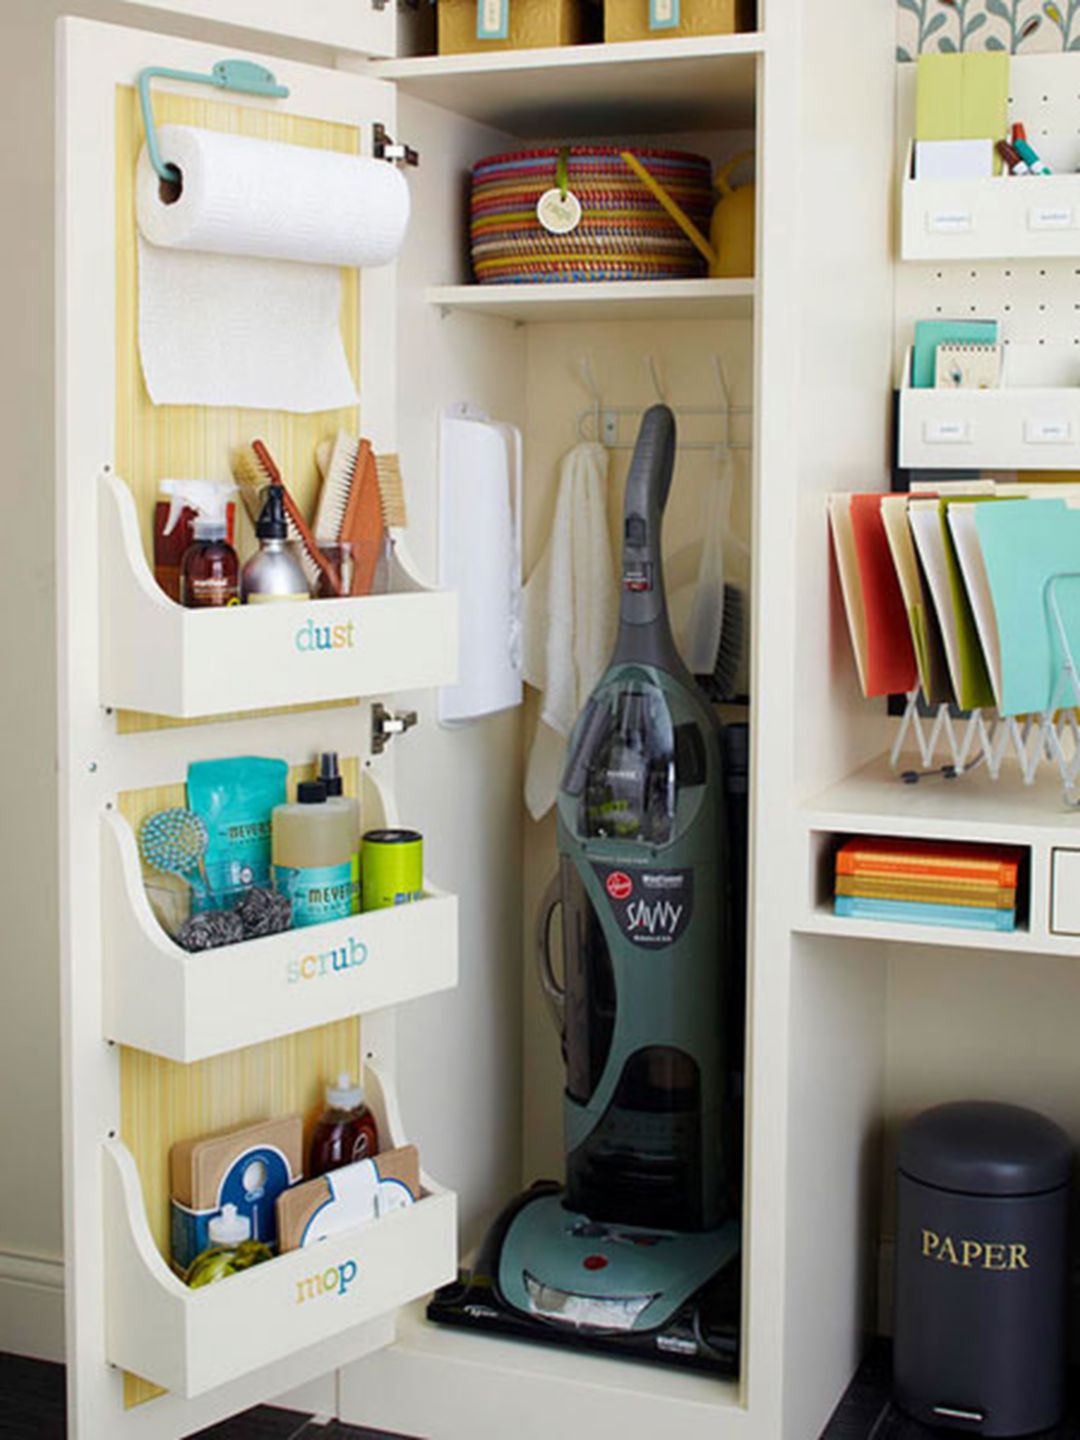 Do cleaning products end up falling apart under your kitchen sink or cabinets? Move cleaning supplies to a more accessible place by installing caddies r or trash can at the back of the door.
Arrange the compartments by product type, and you’ll know exactly where to look for a floor cleaner, dusting spray, or anything else you might need.
More details:
- Measure and mark the door frame. Use a level to make sure it is straight.
- Attach the screws to the door frame ahead of when you hang the caddy door storage.
- Measure and mark where to place the screw holes for the caddy storage on your door frame, using a pencil and level to make sure it is straight.
- Drill your caddy holes.
- Screw the caddy to the door frame by screwing those holes through the metal plate and the wood.
- Attach a chalkboard to your caddy if you want to write on it or keep a reminder of what’s inside – it is a great idea for storing menus, a list of guests, kitchen utensils, etc.
- Attach a label to the caddy where you can label it for a specific product. This way, if you need to look for a particular cleaning product, you know where to find it.
The idea is to keep everything in one place and make it easy to shop for things by type, rather than by various colors or cans. In this case, I’ve also painted mine black because black goes with everything!
To improve the look of your door, you can also attach a chalkboard to your caddy if you want to write on it or keep a reminder of what’s inside – It’s a great idea for storing menus, a list of guests, kitchen utensils, etc.
10 DIY Shoe Rack Project and Storage Ideas
10 Efficient Shoe Bench Storage Ideas to Untie the Mess
10 Creative DIY projects that will Revamp your Shoe Storage
10 Shoe Storage Project Ideas for Limited Space
10 DIY Shoe Bench Project Ideas
7. The Extra Linen Storage behind the Door
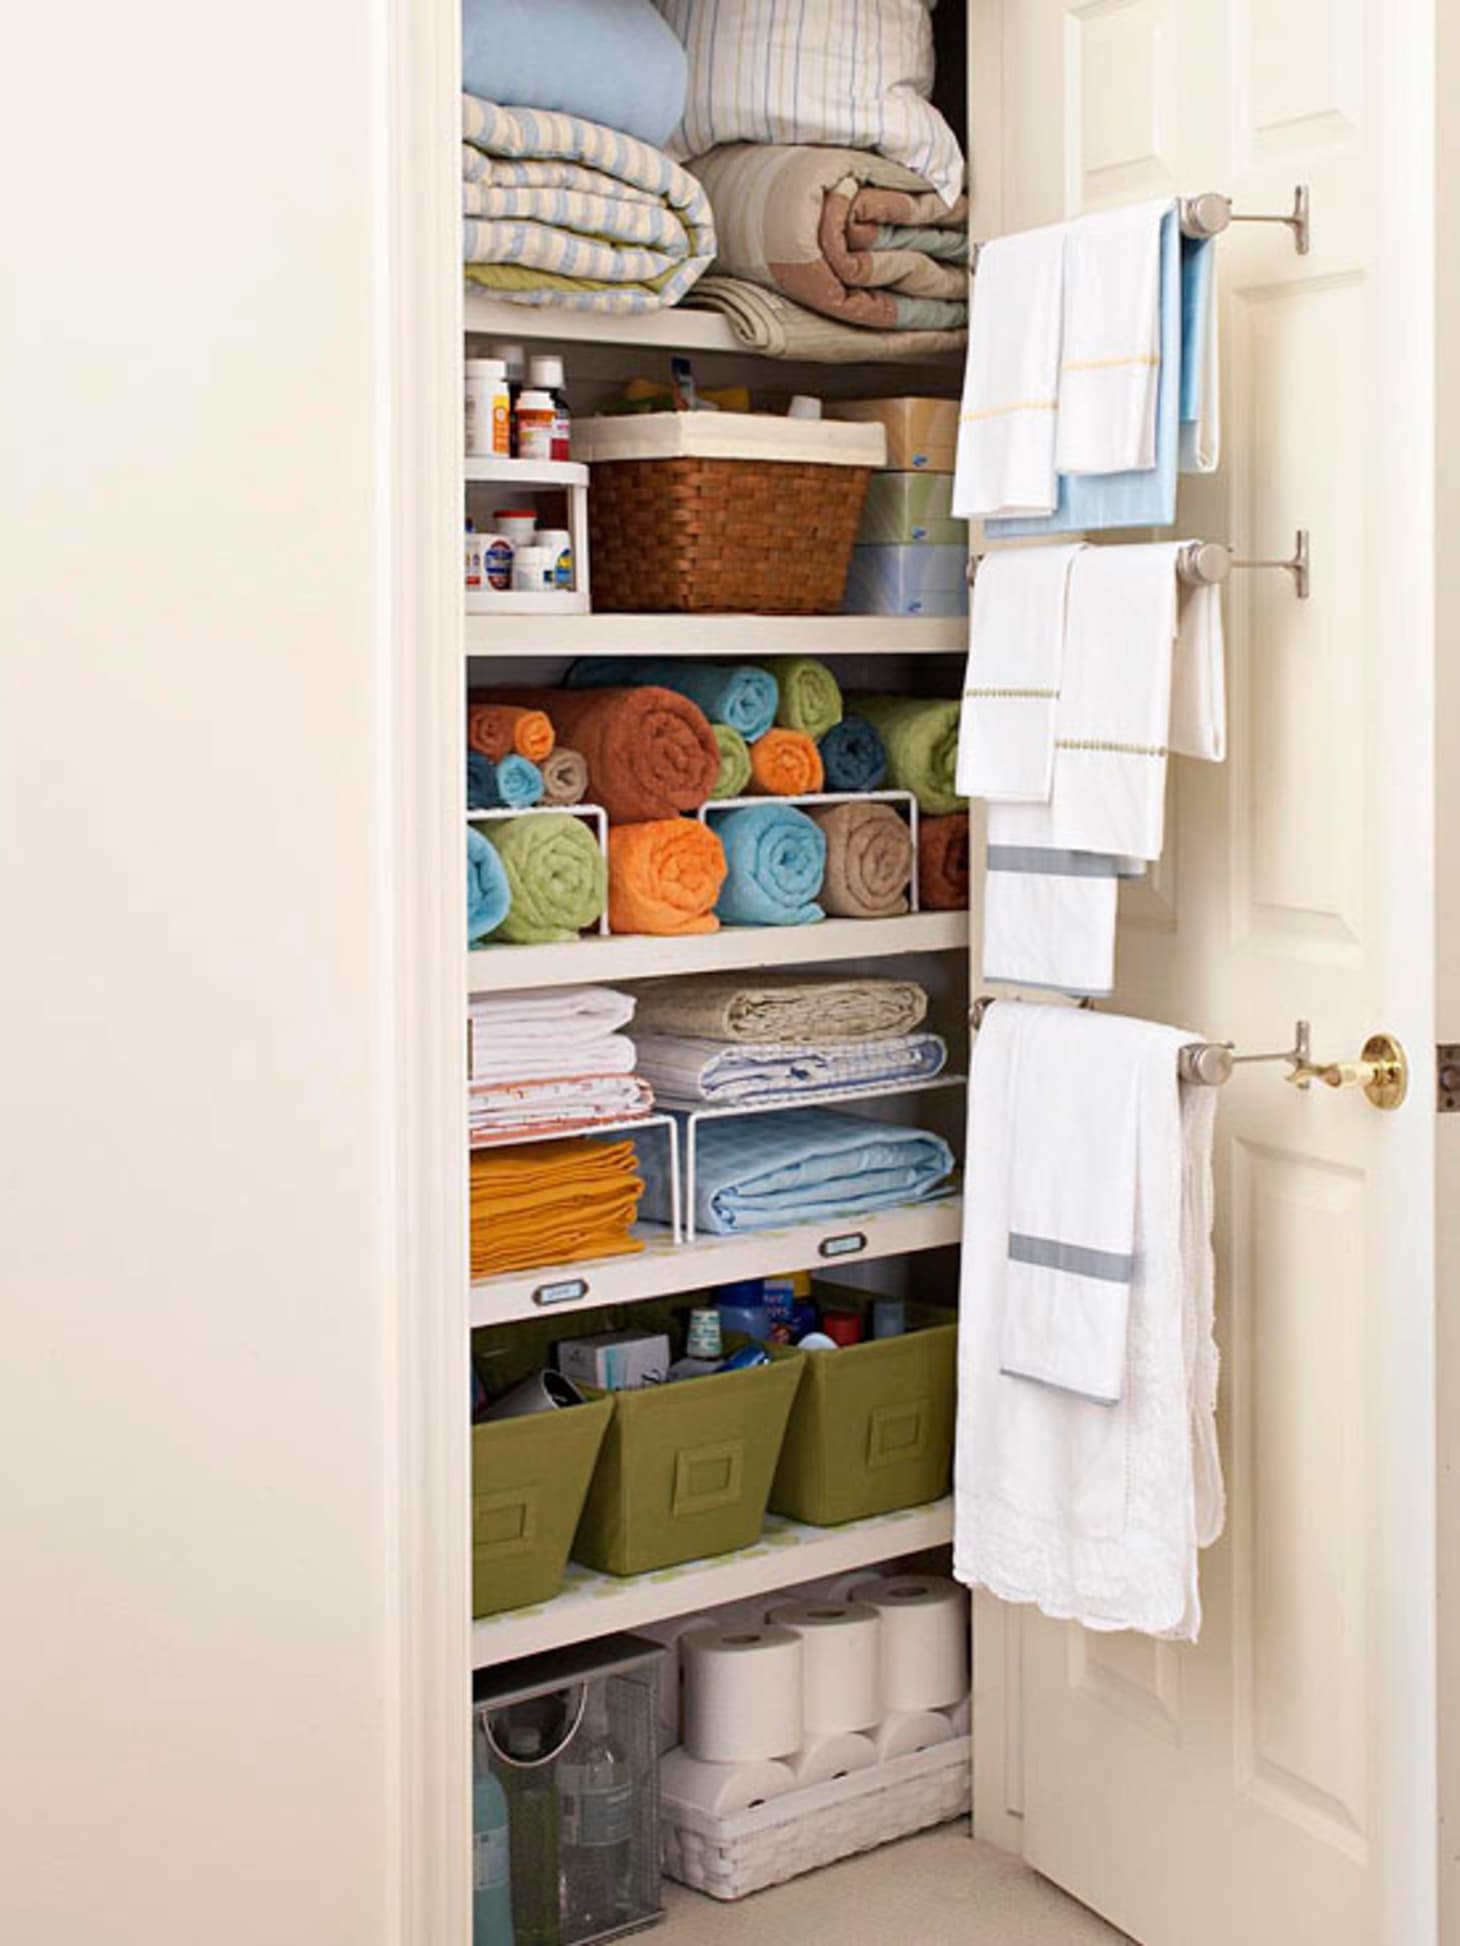 You may not use table lines in an everyday organization but leave your iron behind when the opportunity arises to pull up tablecloths and cloth napkins.
You tend to bury sheets that you rarely use in shelves or drawers, and it will cause prominent wrinkles. Hang linens on the rails of the towel rack above the door to keep them looking fresh and ready to go.
Detailed Instructions:
- Place towel rack above the door.
- Place 2-inch hooks in front of the rack.
- Screw-in 1/2-inch screws through the wood into threaded holes that are about 3 inches deep.
- Place loops on the backside of the bath towels at intervals of about 4 inches to wrap around the rail to keep them tight.
- Fold linens when you hang them on hooks
- Hang sheets over the rail to keep them neat.
Additional Idea, Clothes Hooks behind the Door
The key to keeping small closets organized is to create space that is easily accessible by hanging clothes on the back of doors.
Fold skirts, pants, shirts, and other garments to keep them from wrinkling while looking for something else.
Use at least one heavy-duty coat hanger on the back of the door to hold larger items like coats, jackets, or sweaters.
Related:
10 Bedroom Linen and Sheet Organization Ideas
5 Steps How to get Perfect Linen Closets
6. Attach Shelves behind Your Closet Door
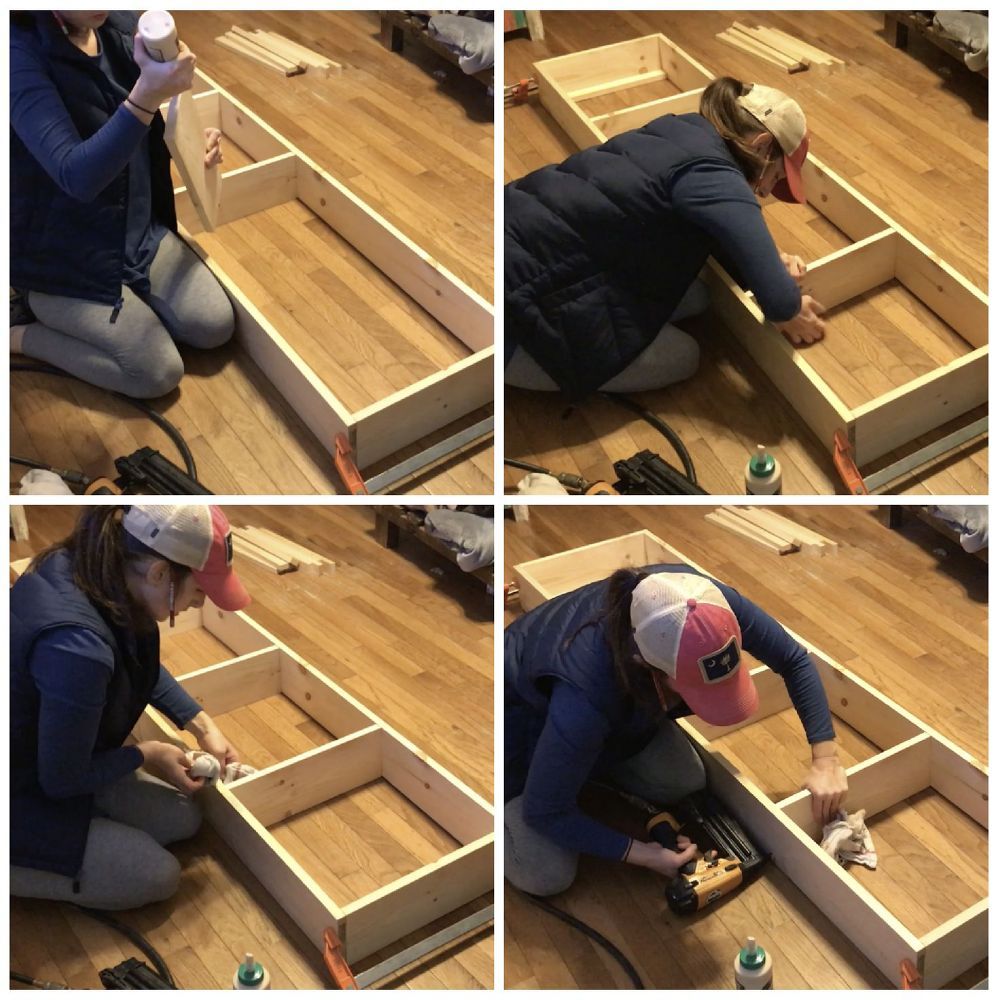
This handy shoe storage idea is ideal for small spaces, as anyone can attach it to the back of any door and can accommodate up to many pairs of shoes. It’s not too shabby, isn’t it?
Simple steps; first, make sure you have measured, cut, and sanded the boards. Assemble the shell, shelves, rail of the storage unit. The last is to mount the storage unit.
To build a shelf like this one, you can start with the top, horizontal shelf for stability, then build it up to the tallest point. Assemble the rest of the project.
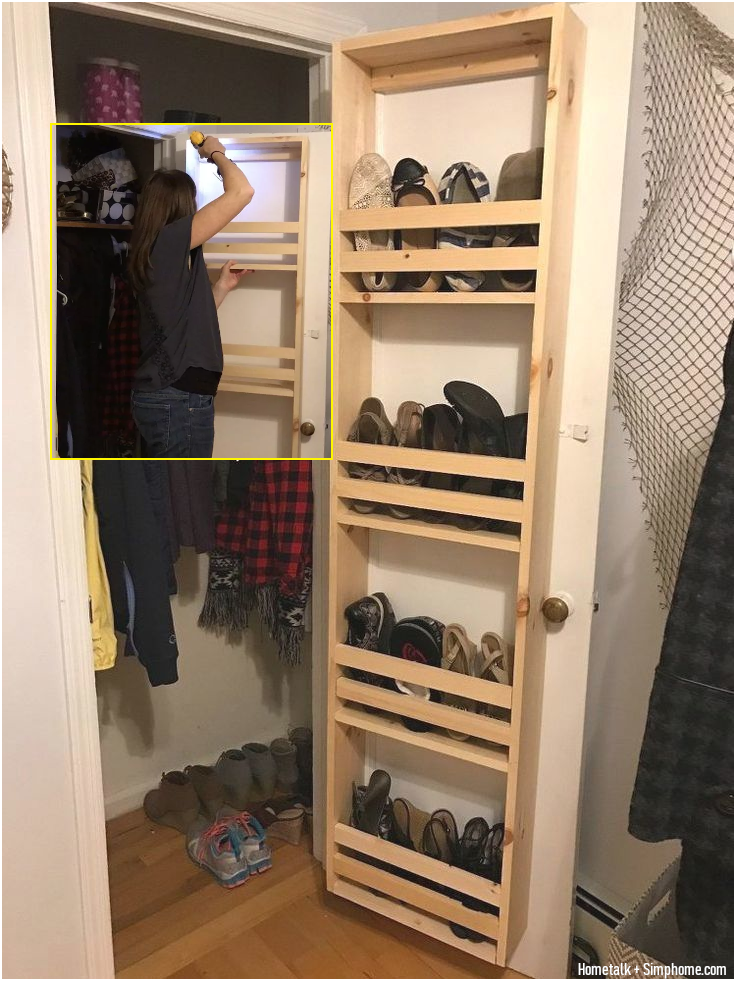 Attach a hinge to each panel’s left edge, right above one of your rails. Find the center of your door and attach the rail with two hinges that are facing each other. Place the matching rail on the opposite side of your door, ensuring it’s facing inwards, similar to its partner piece. Make sure they are evenly spaced.
Related:
12 Ideas on How to deal with a Boring Closet
12 Small Walk-in Closet Ideas for Your Bedroom
12 Closet Transformation Ideas
10 Refreshing ideas to Reorganize The Closet
How to build a Window with a Walk-in Closet Or More Storages
How to Add New Aesthetic Closet Appeal?
5. A Craft Storage Idea with Wire Mesh
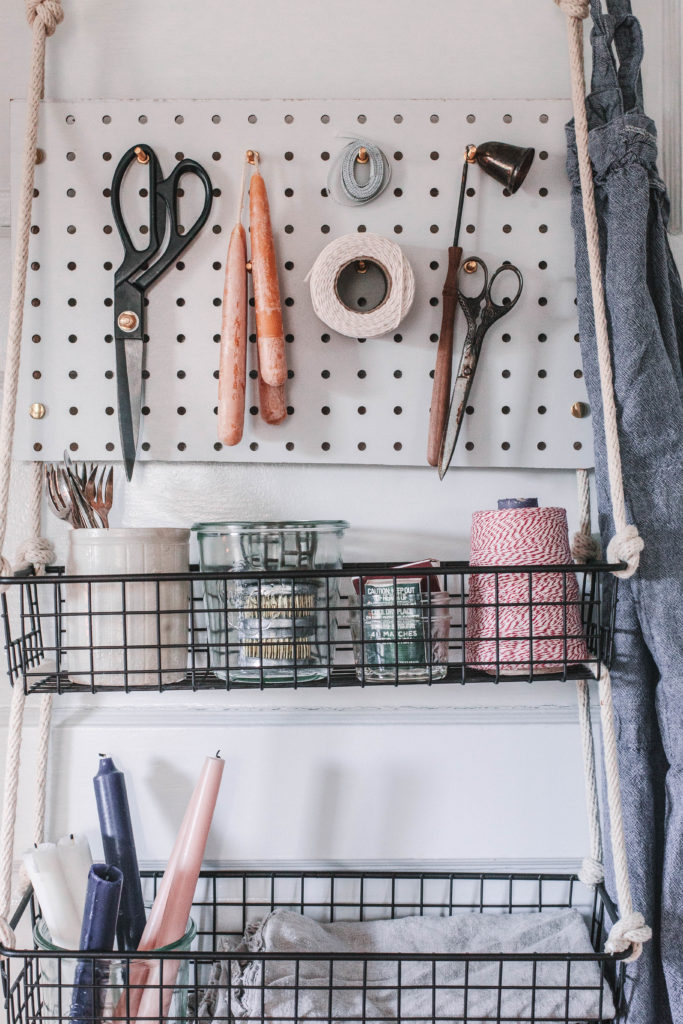 Keeping your craft tools organized can feel like a never-ending chore, especially in a house with limited space.
Here, the back of the door becomes a place to store crafts you might often use, thanks to the wire organizer behind the door. The long adjustable rope holds wire baskets of various sizes for storing craft tools.
Simple steps; cut four 5-inch long wires. Thread one wire through the buttonhole. Bend the wire so you will have a loop. Insert the loose end of the cable through the outer hole in the pegboard. The string should be right behind the hole.
Place the rope between the ends of the wire and spin the wire around it very strongly. Repeat on all corners, assure the pegboard is even.
Push your bolts through the pegboard from behind and tie up with nuts from the front.
Place the clip hook at the bottom of your bottom basket.
For more details, to replicate the project, your instructions are:
- Assemble the basket near the door.
- Set up a wooden board on top of the door. Apply some paste to fix it on the door.
- Then, hang up the cable car organizer behind the door with small hooks to make the tools of your craft organized, visible, and easier to find!
- Depending on the size of the carpentry, you may need to add another wooden board behind the door.
- You can also choose to put a shelf above the door rack to store your sewing machine, bookshelves, or other tools.
Bonus. A Rainproof Essentials Storage Solution
When you live in a rainy season, it’s vital to keep items that are frequently used outside or near an open window after getting wet out of sight. Hanging them on the back of a door can help do that while making sure they aren’t forgotten during use.
Details Instructions:
- Prepare the door frame.
- Make a door frame that includes a wire rack and other hooks on the other side of the door.
- Apply waterproof paint to the back of the door and let it dry for one day before hanging it to ensure rainproof.
- Put some items on the wire rack and hooks and hang them up with clothespins, S-hooks, etc.!
- Counting on rain, you can put the tools outside the house.
4. A Closet Door Bathroom Idea with new Storage space
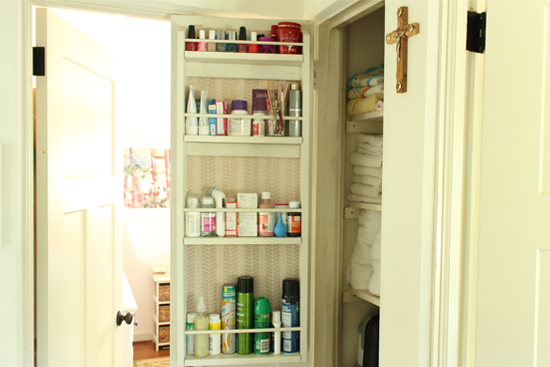 If you seek a little more storage in your bathroom closet or linen closet, this simple DIY shelf rack that mounts on behind the door is superb! You can adjust the size to fit the door and the items you want to store!
How to make it? First, cut the board to size by using a handsaw and a miter box. Next is sand and paint. Before you go painting, make sure you have sanded it first.
Add fabric background if it is necessary. Once everything is complete, you can start to assemble by using some finish nails and a hammer. Finish and enjoy.
Before copying the project, you need to pay attention to:
1. The color of the board should match your door.
2. The size of the board should fit the door.
Bonus: How To Build A Flip-Flop Sock Organizer That Mounts Behind The Door
You have a chance to organize your messy sock drawer when you build this flip flop organizer!
How to make it? First, paint the boards if necessary and add some decorative, cute trim with a staple gun. Then add a wood trim along the bottom of it using a sander and sandpaper if necessary, followed by painting it once again.
Assemble everything in place by using finish nails and a hammer after you have sanded everything smooth. Once everything is complete, you can start to decorate by adding flip-flops to the decorative brackets with some super glue.
Before copying the project, you need to pay attention to:
- Measure the size of your door.
- Know how to adjust the size of the organizer if necessary.
- Use a sander if necessary to make it smooth before painting.
- Use a staple gun to attach the trim.
- Use a hammer and finish nails to put it all together.
- If you want to improve it, you need to know that the decorative trim should match the decor of your closet or bathroom.
3. The bookshelf Idea behind the door
 The double folding door is an exciting concept and stands out from the standard linear design of a bookshelf.
The purpose of building a wardrobe with hangers and shelves behind it is not only for space-related issues but also to save time, effort, and money that would have gone into building separate cabinets. It provides you easy and faster access to everyday use items. And the good thing is you can use plywood board to copy the project
Detailed Instructions:
1. Cut your plywood boards to size with a circular saw and a level.
2. Drill pocket holes in all corners of the smaller plywood board.
3. Attach the two boards with wood glue, bolts, and washers on the back of both boards using a drill and a screwdriver.
4. Then, put an L-shaped bracket on each end of the bookshelf to hang it on the wall or door!
5. Decorate it with beautiful knobs or hooks!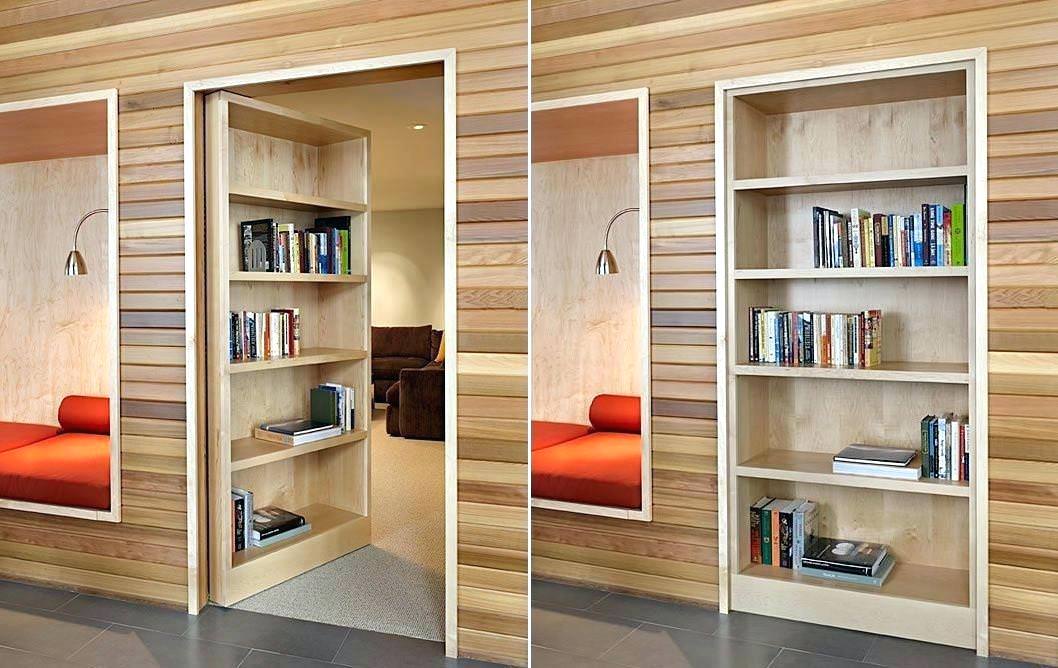
To upgrade/update projects, your instructions are:
- The two-drawer and one-door cabinet is a basic wardrobe design and space solution available.
- The hanging and folding closet: this concept offers more options for organizing your clothes and provides more storage space than the standard wardrobe.
- The double folding closet: the staircase spaces behind it can be used for other purposes such as design furniture, automotive accessories, etc.
- The double folding closet with only one door: this is a great space-saving solution to store clothes in an organized way with all your personal belongings stored in closets, drawers, or compartments in a bedroom or office space.
- The bookcase behind the door: this is another space-saving option to organize your books in an organized way.
- The double folding closet with a cupboard: this concept offers more options for organizing your clothes and provides more storage space than the standard wardrobe.
- The double folding closet with slatted slat doors: these sliding doors are used for easy access to use items around your home without taking much room.
- The folded closet, attic storage idea behind the door: these are great spaces for storing books, shoes, pants, etc., without taking up too much room throughout your home or office.
2. A Magnet Strip behind the Cabinet Door Idea
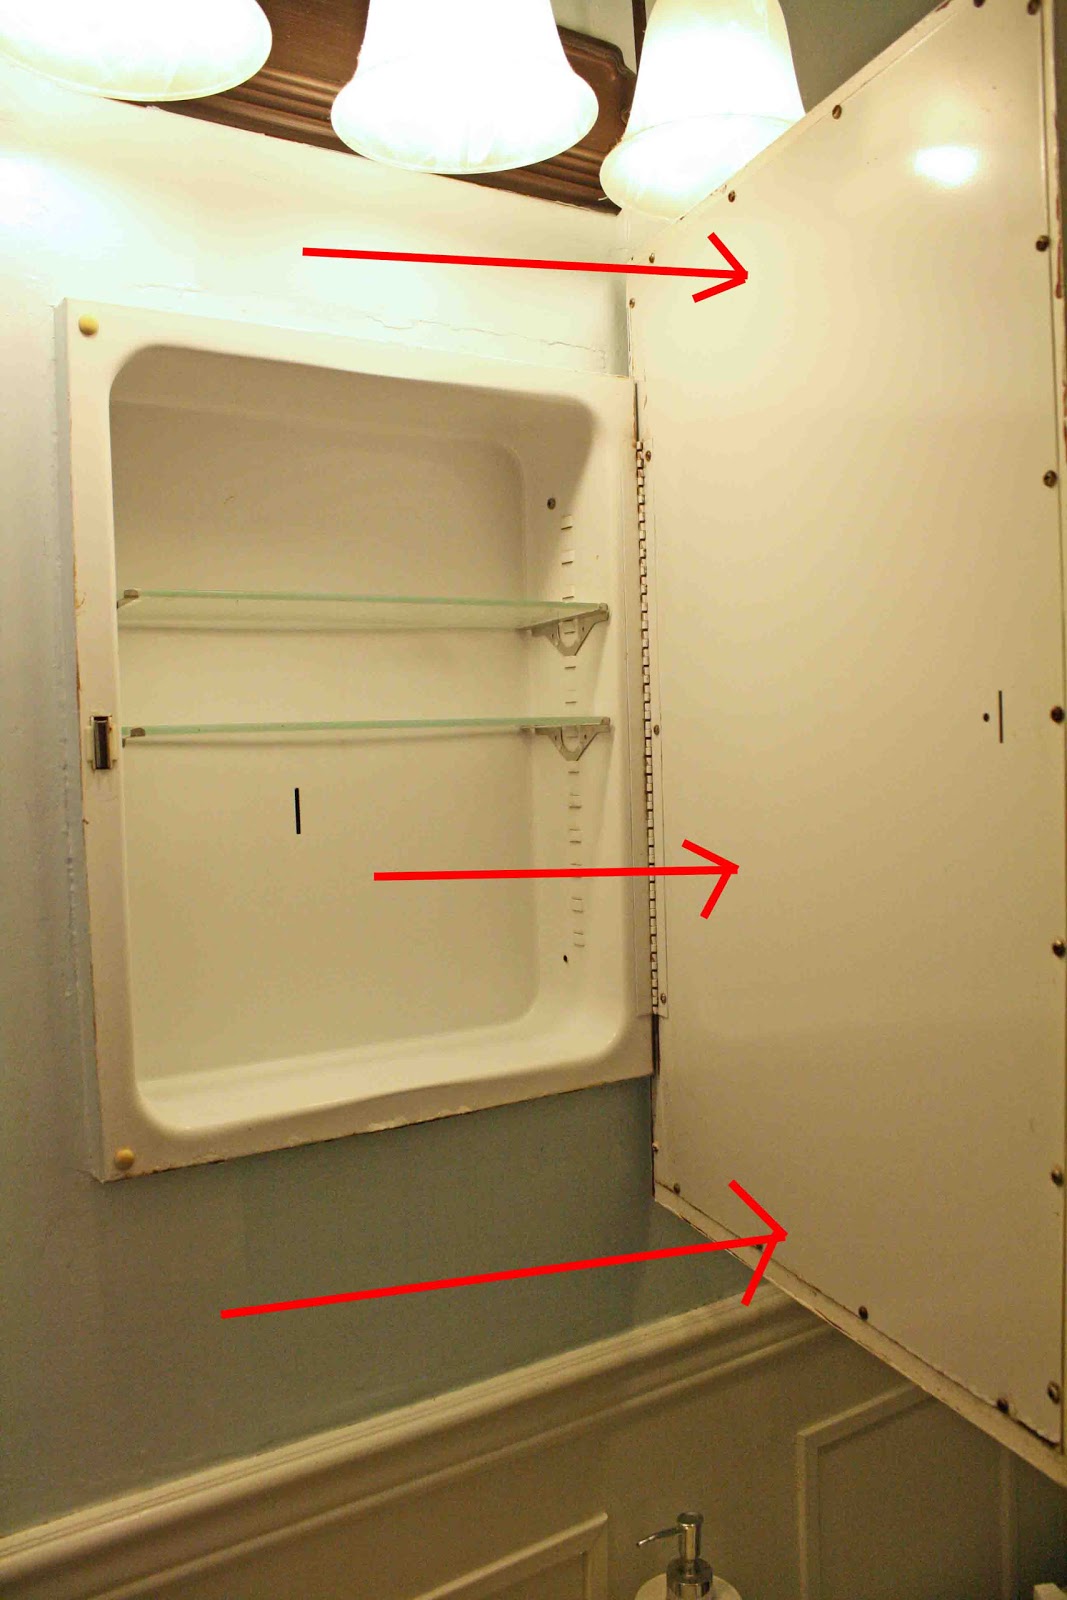 Sometimes critical organization problems are more straightforward than we think. For example, magnetic strips can help you store a lot of stuff and don’t get in the way, and all you have to do is hang the strip on a wall or in a closet door.
The magnetic stripe is also sleek and minimalistic, so it blends in with almost any decor. Cut the strips to size, then press firmly.
If you put this in the bathroom, add your bobby pins since they are one of the beauty tools you frequently use, especially for moms and daughters.
Additional details:
- Choose the strongest magnet manufactured from the finest and cleanest metal, such as iron and ferrite, to get the best magnet.
- You can add it to the inside or outside of your closet door. Depending on how much space you have and whether you want to see it or not. For instance, if your door is long, you might want to consider adding it to the inside of the door so that nobody can see what’s on there.
- The trick is to use a magnetic strip that sticks only to itself so that it doesn’t damage your valuables or get in the way of your daily routine. You can also use this idea for small cabinets where you don’t have many shelves available.
Lastly, Number 1. A Wrapping Paper Storage Idea behind the Door
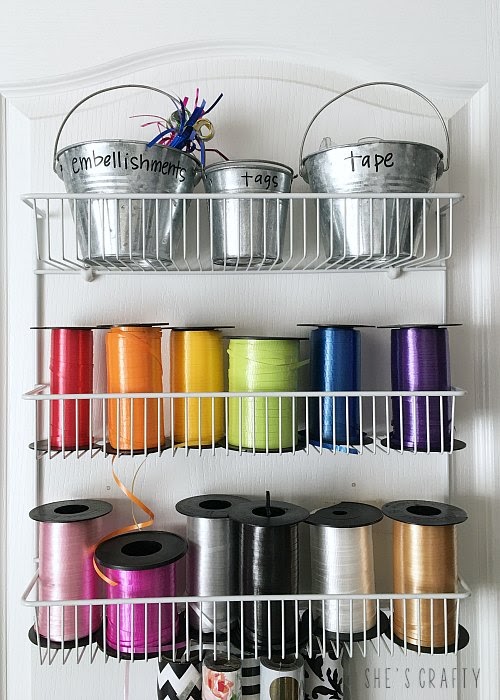 Do you still keep your gift wrap in a big box under your bed? Forget it! Let’s move innovation. You won’t need to take the big box under your bed anymore and dig through it just to find what you want.
The items you need for making this DIY storage include a can organizer, wrap organizer rack, galvanized buckets, and command hooks.
First, hold the organizer to the door by using a level. After that, mark the screw holes. Then, pre-drill holes and anchors if necessary. Attach the organizer to the door.
Fill the shelves with decorations, masking tape, ribbon, and gift wrap. The last is to use command hooks and ribbons to hold long rolls of gift wrap. The idea is perfect for wrapping gifts and other items, such as party supplies and the like. It’s undoubtedly a space-saving idea you can try to make your life easier.
You can also use this idea in the kitchen to hold cookbooks or in the bathroom to hold towels. It’s an exciting way to get creative with your space and make it work for you.
Relevant Ideas you can try to upgrade the door is:
- The magnetic closet door idea
Short instruction: All you have to do is stick a strip of magnetic tape to the door, then attach the other part to the other side. Then you can stick your hair clips, pens, and small things directly on your door. - The wrapping paper storage idea behind the door
Short instruction: Measure the hanging paper rolls first, then cut them to fit in the bucket. Measure the width of your door, then cut out a piece of wood or metal to make it fit there perfectly. The idea is simple but effective. - The wardrobe door idea on your stairs
Short instruction: All you have to do is remove the handle and attach the screw to your wall to keep it in place. Then hang the door at the top of the stairs. It’s an easy way to turn your staircase into a storage space. - The door idea in front of your window
Short instruction: All you have to do is attach the hardware to your window, open it up, and put in whatever you want. It will be great for storage when it’s closed, but when you open it up, it will be an extra shelf for whatever you need. - The fold-out closet door idea for more storage space
Short instruction: Measure the door and remove the top one-third. Then measure and mark the boards for cutting. Ultimately, you will take down the top part of your door, then add a hinge and a panel to fold it when not in use. - The shower curtain rod idea
Short instruction: You can add a shower curtain rod into any room that needs it, such as the laundry room or garage. All you have to do is hang it up and use it as a place to hold all of your different baskets and baskets for storage and organization. - A collapsible bookcase behind the door or shelves of books
Short instruction: Measure the length of your door and cut out one board for each side. Then, attach all four boards with hinges to create an easy-to-use collapsible bookcase. - A hanging basket holder behind the door
Short instruction: You have to measure your basket and cut it to the required size. After that, hang it up on your door with a hanger for each basket. It will be easy to use once you remove the basket.
Conclusion:
So, if you have a small space, you can try out some of these ideas to improve its functionality. You can also choose your favorite idea and apply it to your area. Start with the easiest and short instructions so that it’s easy to learn even if you have a simple lifestyle.
We believe that these ideas here are ideal choices for small rooms and a large area. Out of these 10 behind-the-door storage DIY projects, which one is your favorite? Let us know! And Happy trying!
References:
10. Thefrugalhomemaker.com
9. Pinterest.com
8. Thefrugalhomemaker.com
7. Thefrugalhomemaker.com
6. Hometalk.com
5. Adailysomething.com
4. Checkinginwithchelsea.com
3. Hiddenstorage.org
2. Sprwmn.blogspot.com
1. Shescraftycrafty.com