Living in a small house like a studio apartment demands creativity. It tends to lack space. Thus you need to be creative in making use of every single inch you have.
The doors also play an important role in compact space. You may be wondering how they can help you cope with small rooms. Check out these 10 space-saving door ideas and get ready to be surprised with their ingenuity.
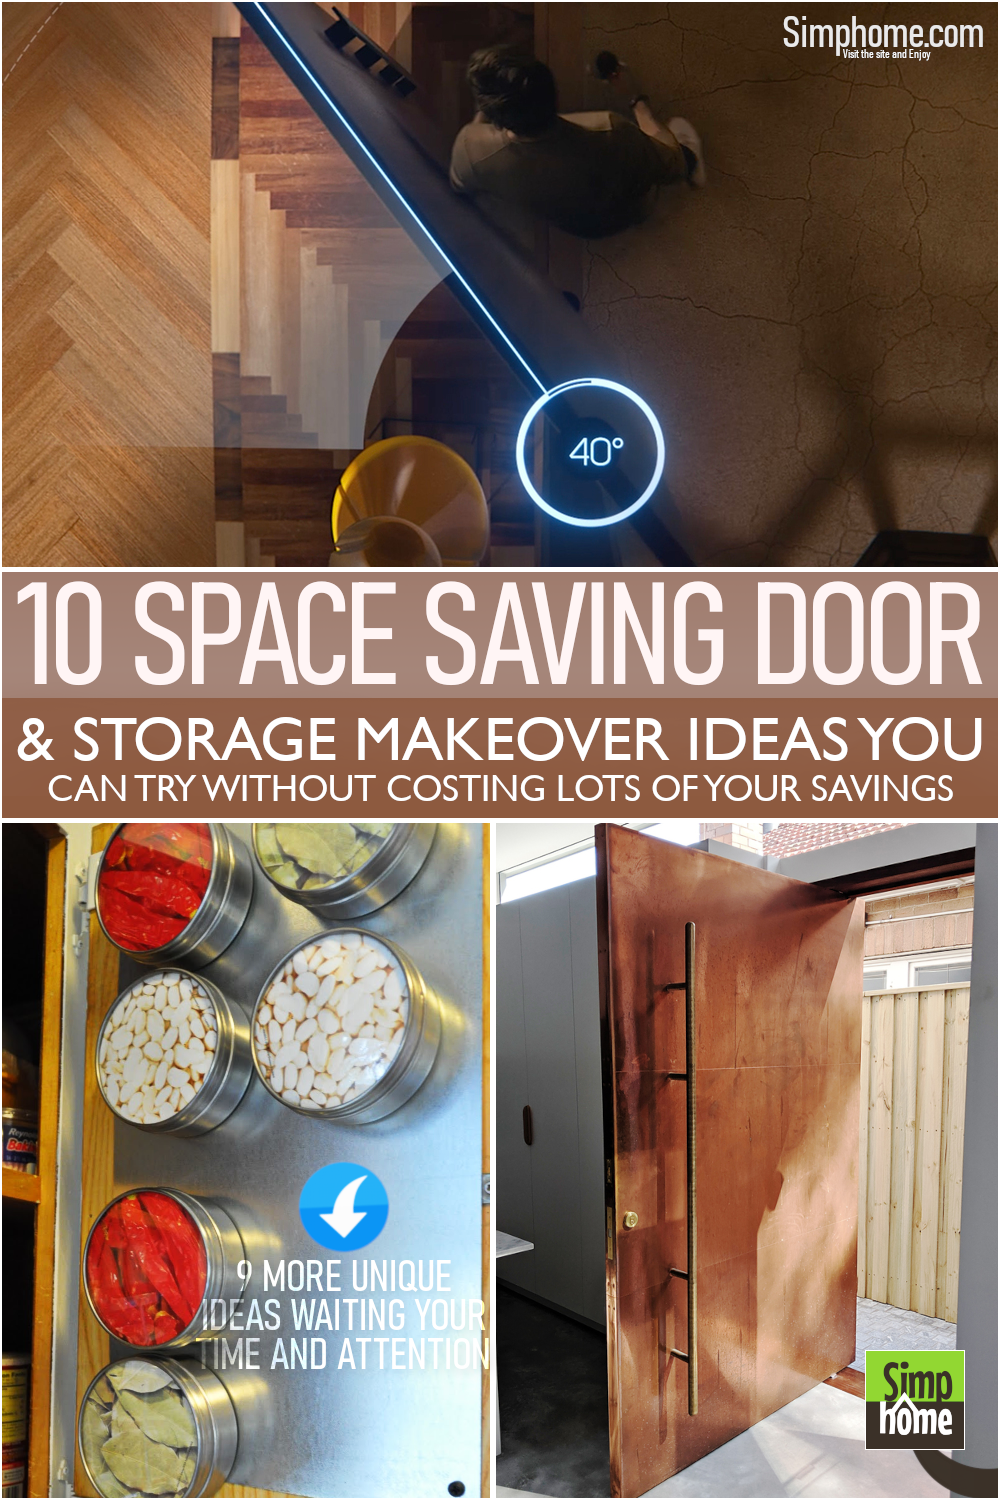
🔊10 Space Saving Door Video:
List Entries:
10. Disguise Your Door
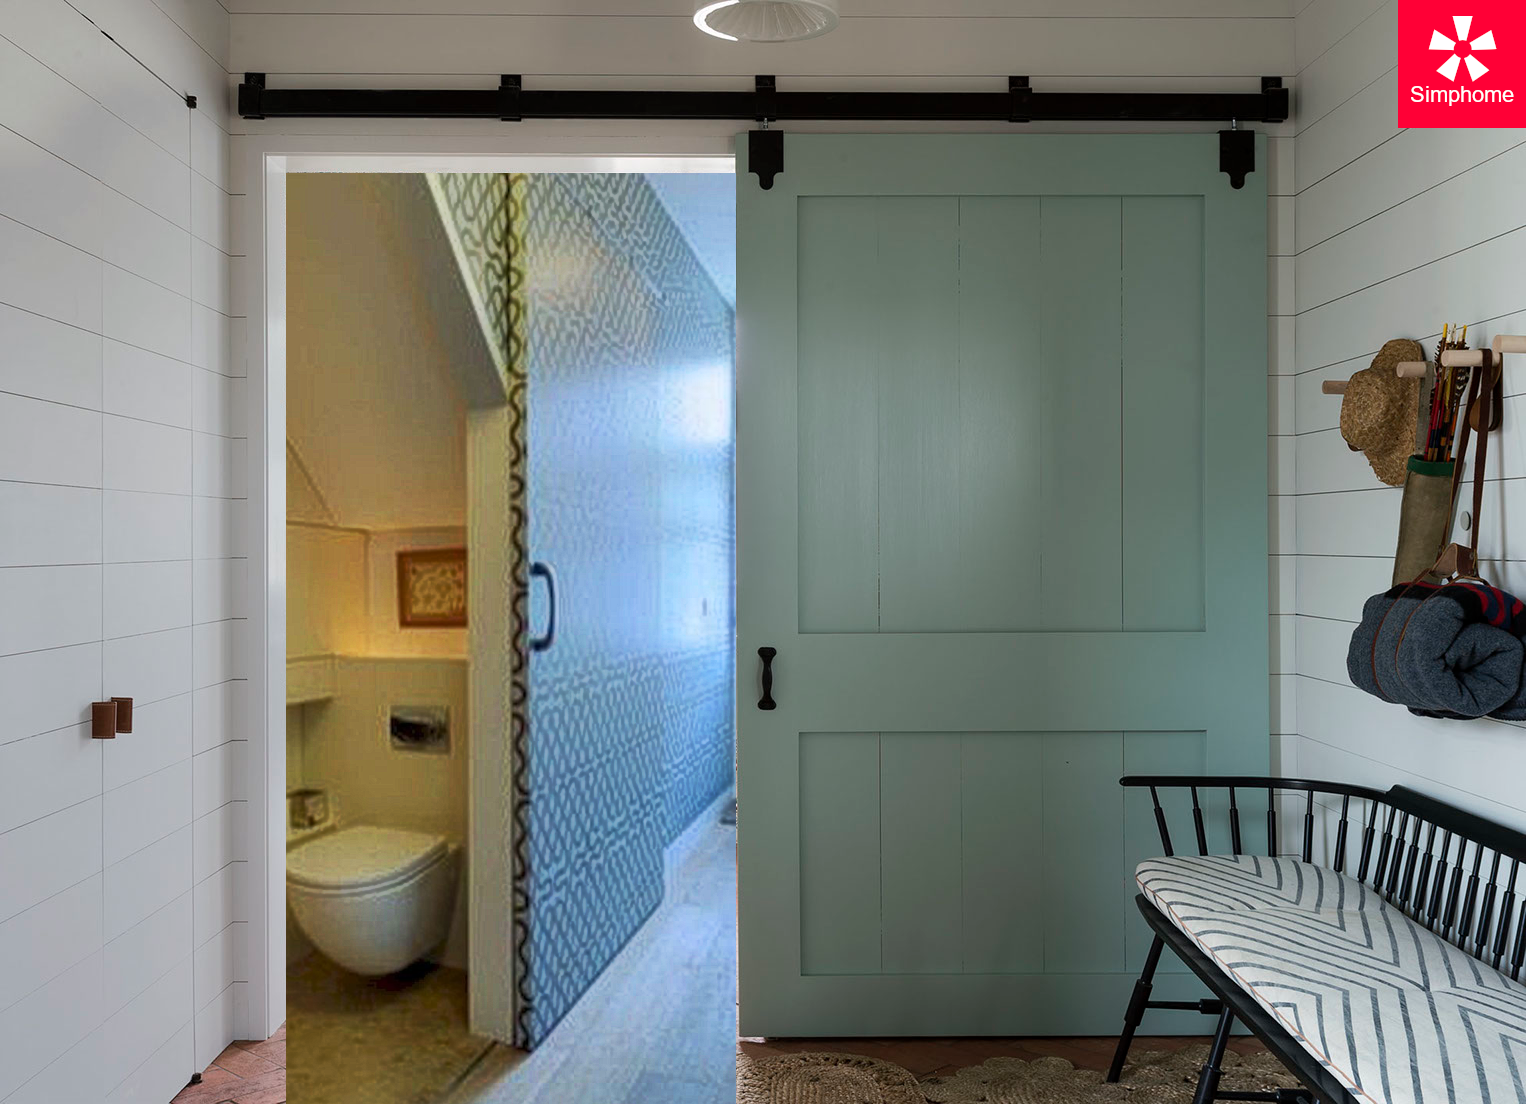 If you have limited space, installing sliding doors rather than hinged doors will be a brilliant solution. A sliding door, as the name suggests, slides sideways instead of swinging open. It moves on its track. Therefore, it does not take up more valuable space.
Sliding doors come in various designs to match the interior. Even better, you can paint them the same color as the wall to make them look united.
This sliding door, for example, features the same color and pattern as the wall, making them flow into one being. When you close the door, you may not even notice that it exists because it camouflages well. Then, you will get visually spacious home.
It also allows you to open it sideways rather than outwards, which may block the foot traffic in this narrow hallway.
The bathroom is right under the stair, creating a small and awkward room and opening. Instead of cutting the door into an angular shape, you can make it rectangular to create a sleeker finish.
To copy the project, in general, your instructions are:
- Measure the door’s width.
- Cut a rectangle of the same width.
- Cut a groove on the backside.
- Fit the door to it with hinges to adjust for opening and closing.
9. Door and Bookcase Combo
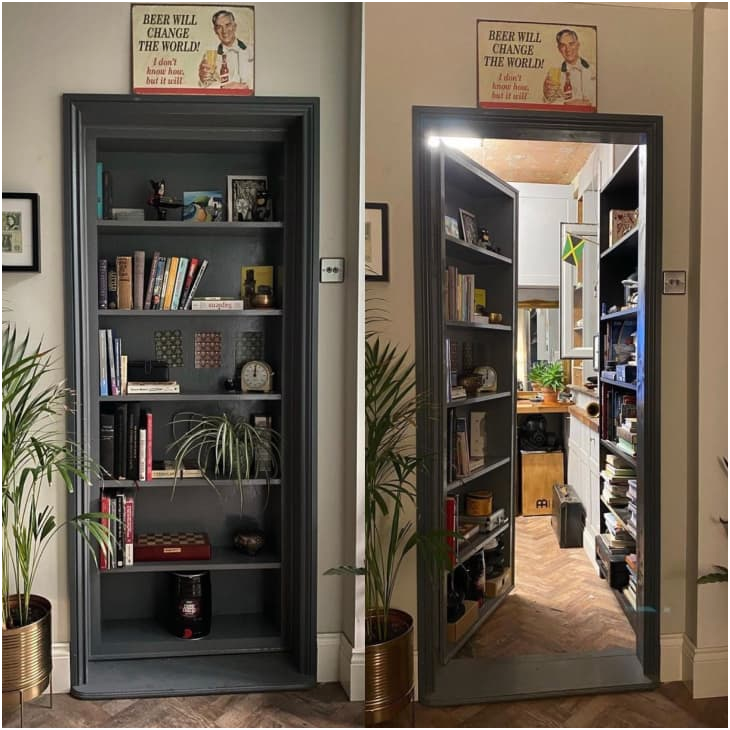 You might think it is a cute bookcase standing in the corner. It turns out it is a door that conceals a secret room behind it. Isn’t it amazing?
This hinged door not only offers you cozy access to a private home office but also provides additional storage.
If you love this ingenious idea, try putting it into your project list. You just need to make or buy a ready-made bookcase. Then, create a frame that will hold it in place. Finally, assemble them with hinges.
To replicate the project, you need to pay attention to:
- The measurements of the door and the opening.
- Think about the design and plan the dimensions that will fit into your space correctly.
- Draw a pattern of the door and cut it out with a jigsaw or a handsaw.
- Make sure nothing is blocking your vision towards it, such as the window, wall, furniture, etc., before assembling the frame to hold it firmly in place over the opening.
- Once you have completed this step, you can put another door on top of the coat rack to finish it off completely.
8. Try Pivot Doors
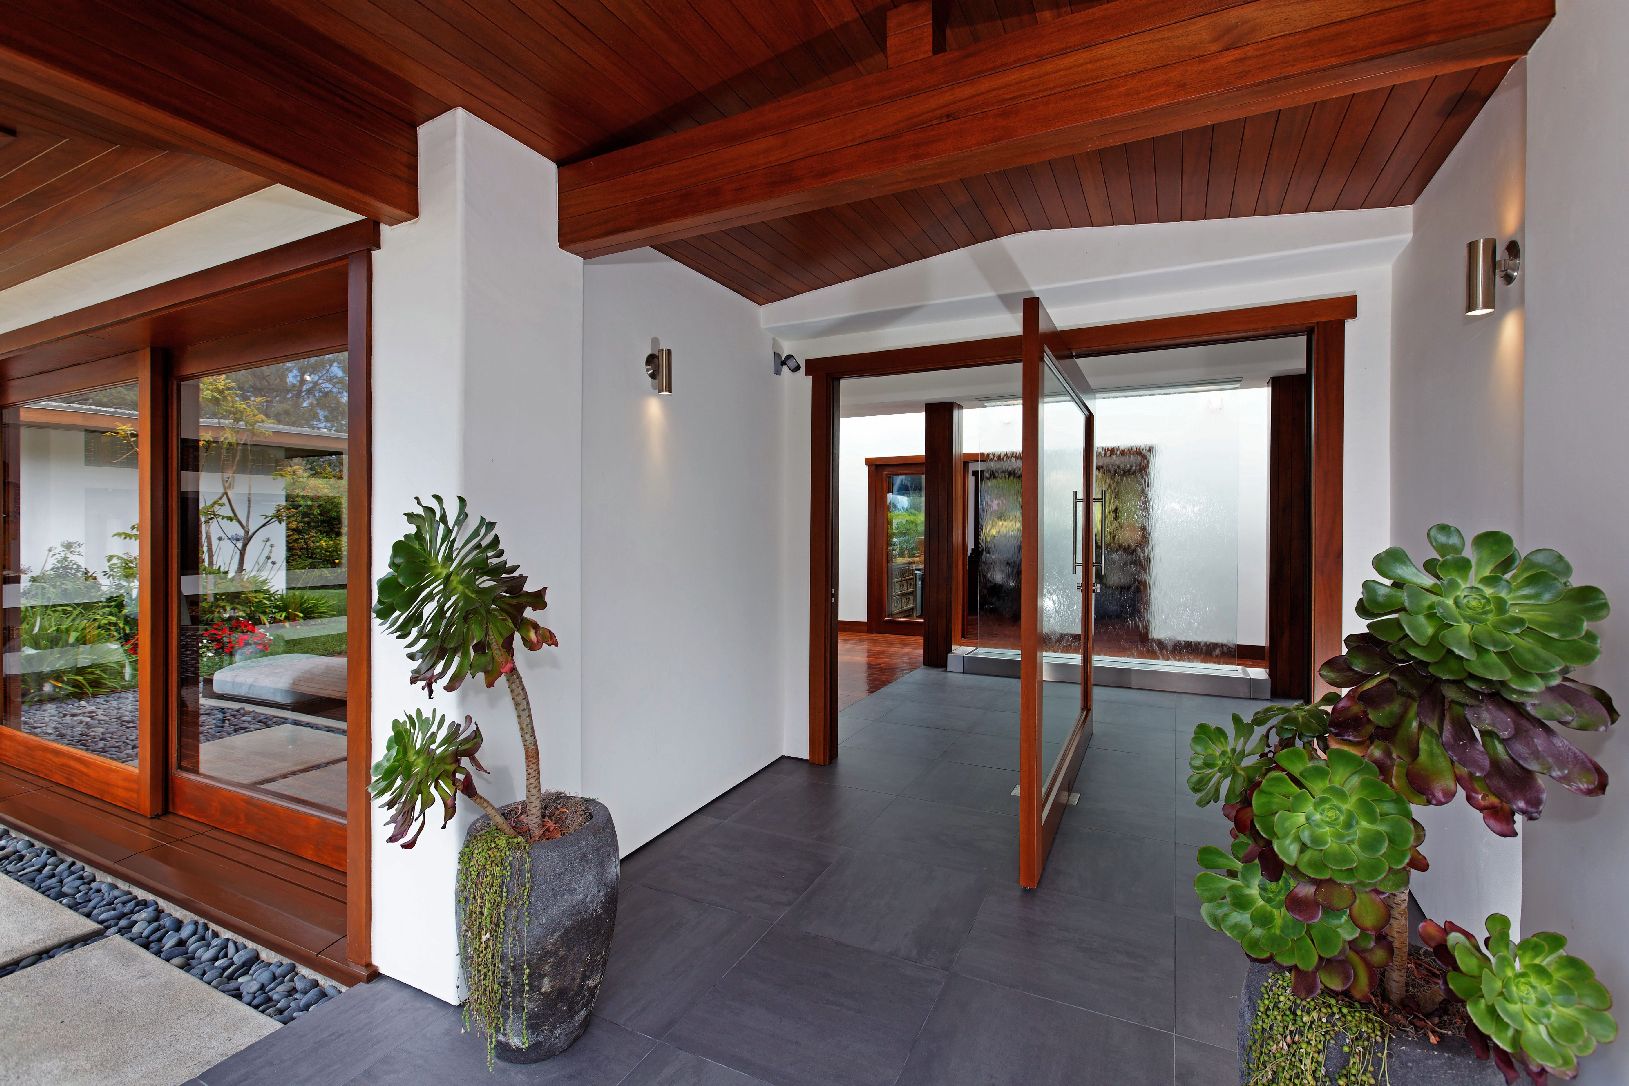 Consider splitting your door if it is too wide to swing either into or out of a room. It does not mean you have to cut it into halves, though. You just need to turn it into a pivot door.
A pivot door features a vertical axis that enables it to rotate 360 degrees. This way, your enormous door will not take up too much space when swinging outwards or inwards. As a bonus, you will get an elegant look.
Unfortunately, making a pivot door is not an easy job. It requires complicated hinges on top and bottom that create the center that enables it to rotate.
Building your pivot door come with a unique challenge btw; if you want to try it, your general instructions are:
- Assemble the hinges to make sure they are sturdy.
- Measure the width and height of your door.
- Combine these two measurements to determine the size of your vertical pivot axis.
- Once you have completed this step, frame your door in a frame that will hold it securely in place.
- Assemble the hinges with the horizontal pivot axis to form a circle on which you can fix your door when rotating it inwards or outwards when closed.
- Put handles on both sides for convenience when opening or closing it, etc.
7. A Sliding Door from a Giant Cork Board
 Corkboard is versatile. You can use it for your craft projects or turn it into a multipurpose door, like this one.
This sliding door will be suitable for a compact mudroom. It does not swing outwards, which means it will not gobble up more space and make the room feel more cramped.
Another fabulous thing about it is it uses corkboard as the primary material. It is incredible because you are likely to need a board to write or tack down some notes in the mudroom.
With this corkboard door, you will not need to hang a board on the wall anymore. You can use the vertical space to install some hooks or shelves that will incorporate more storage solutions.
To replicate the Sliding Door project from a Giant Cork Board, your instructions are:
1. Measure the width and height of your door.
2. Cut a piece of corkboard with the dimensions you have measured.
3. Make sure your piece is thick enough to support the weight of your door when it closes.
4. Assemble the hinges on top and bottom to form a circle on which you can hold your board rigidly in place when it finishes rotating outwards or inwards, etc.
5. Install handles on both sides for convenience when opening or closing, etc.
6. Hang a Curtain
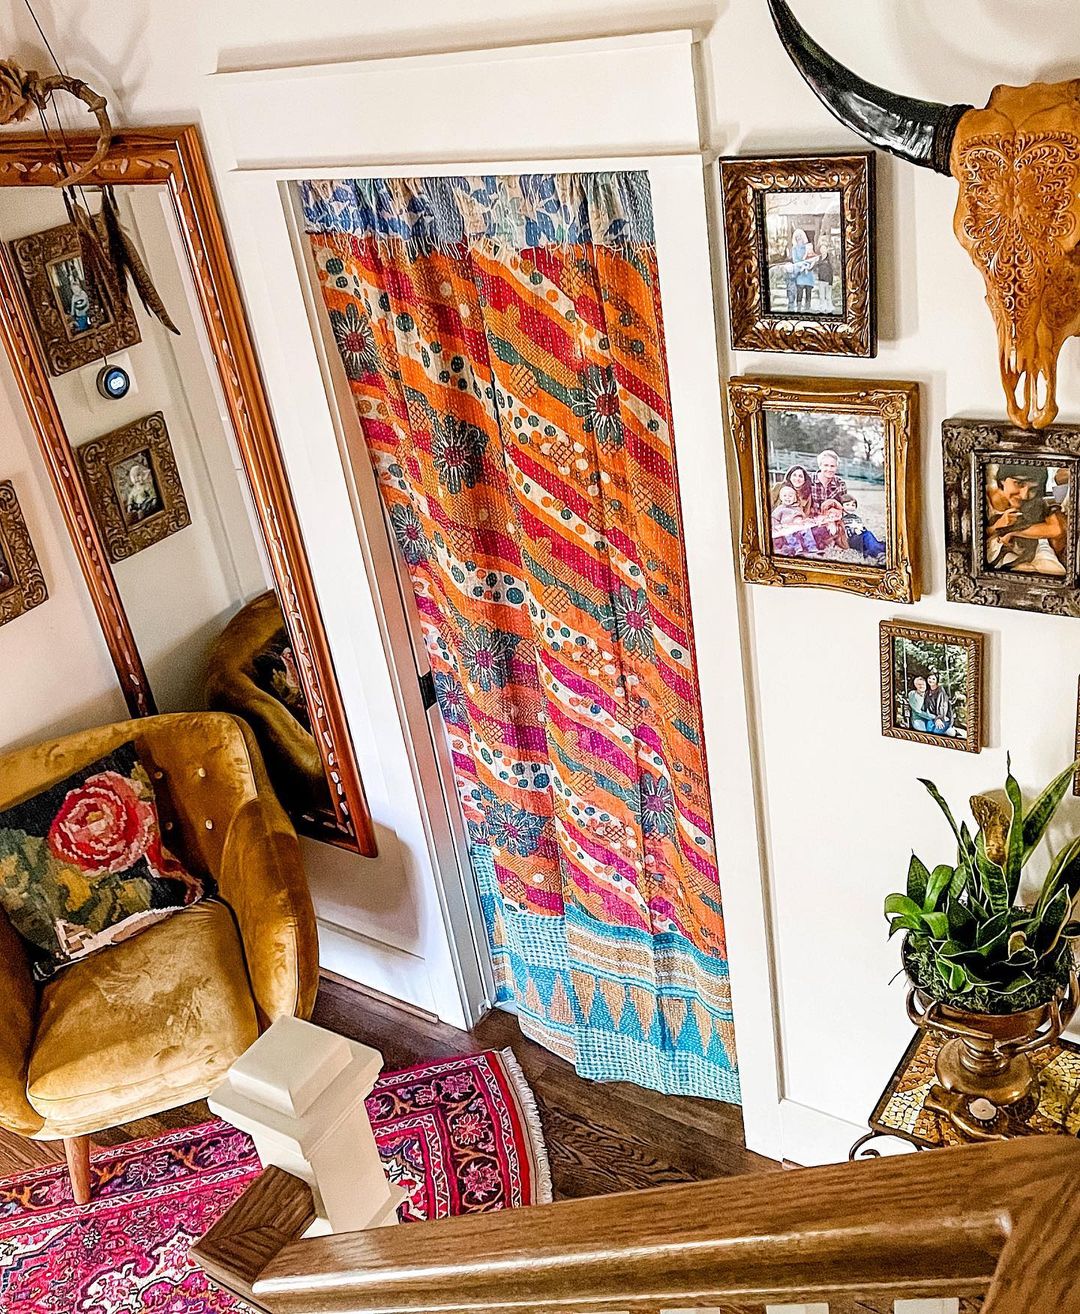
Like a sliding door, it has its own track that allows it to move sideways. It is more flexible than most standard sliding doors. Thus, you can cram a dresser or more racks into your closet without worrying that they will bump into the door. Besides, curtains come in a wide array of patterns, colors, and designs, allowing you to have limitless creativity.
The project comes with specific hanging curtain hardware, type of curtain, and unique specifications include:
1. The type of curtain you want to install.
2. The placement of your hardware.
3. Decide how long you want your curtains to hang.
4. Choose a curtain length that will fit the space limit you have set for this project, if necessary.
5. Make sure no other objects are blocking your vision towards the curtain before closing it with the hardware for hanging it securely in place over the opening of your window or door, etc. This way, you can bring them out when you need them without any obstruction.
5. Hang Your Purses on the Door
 Is your closet full already? Think again!
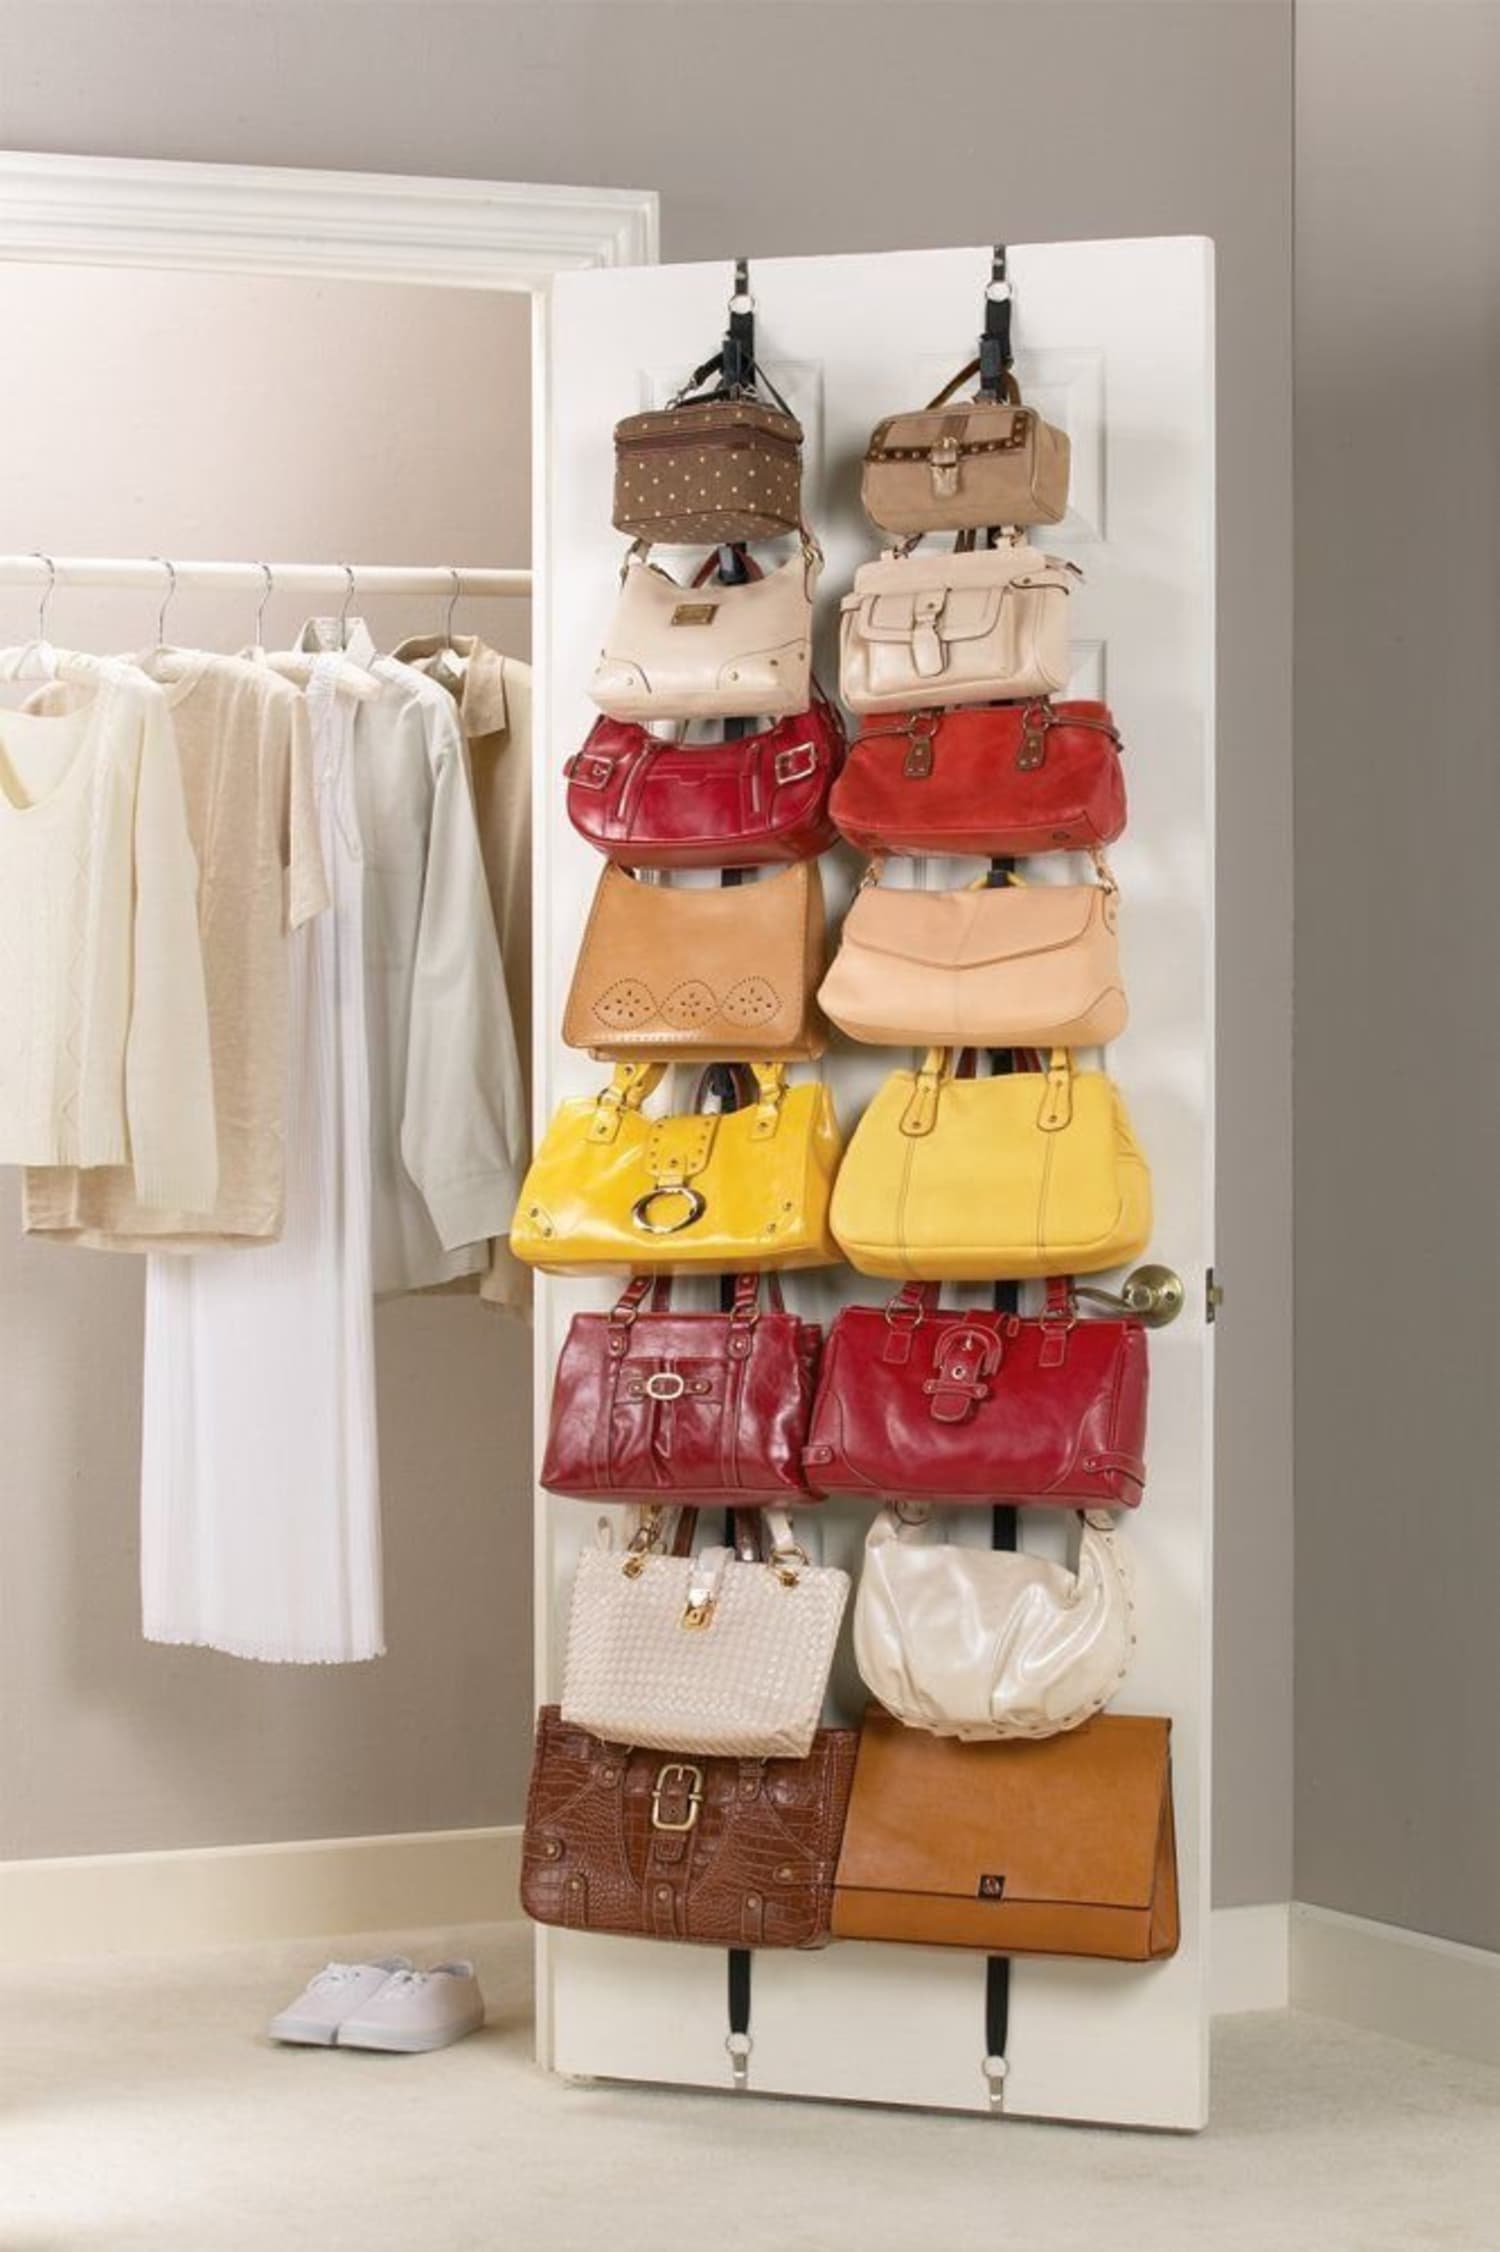
If you think your closet does not have enough space for your bags and purses, you can always tap into the door. You can make some racks and install them on your closet door.
If you cannot do that, you can just screw some hooks and hang the purses and bags on them. It will be much easier than making racks from scratch.
Hanging purses on the door require rigid hardware, and special instructions start from:
1. Measure the width and height of your door.
2. Assemble your hardware for hanging your purses on the door using screws, wood glue, etc.
3. Consider the number of shelves you need to install on your closet door. If there is enough space, you can create more hooks beside the ones you have already installed so that they will not be too close to each other or obstructing each other, etc.
The project comes with its unique challenges if you are ready to try it out:
1. Make sure the hardware is sturdy enough for hanging heavy bags and purses on it before screwing them down firmly on top of it for more support and stability when moved back and forth, etc.
2. You can easily hang them with straps that come with your purse and bag, but if you do not want the straps to be visible on your door, choose hardware so that it can hold and hold the strap covers for you with ease.
3. Place the hardware at a comfortable height for you to grab so that nothing will bump into your head when you are reaching for them.
4. Place it on your closet door so that it will not obstruct the space you need for hanging your bags and purses, etc.
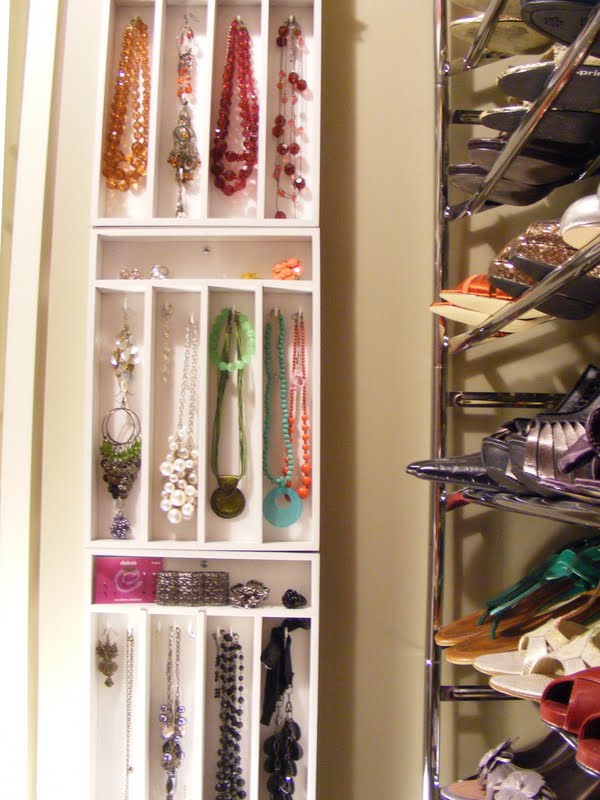
4. Make Your Door Hold Your Jewelry
 You might think that storing jewelry in a drawer is the best solution. Nothing could be further from the truth. It does not solve your problem with clutter. Instead, it just moves the mess to another place. You really need to end this.
This door, for example, can hold your jewelry well. To make it looked more organized, try investing in some cutlery trays. After that, install them on your door, along with some hooks.
To make sure that the project will not turn to be a future nightmare, your instructions are:
1. Assemble the hinges, then install them on your door.
2. Measure the length of the door.
3. Cut some wood to make a tray, about an inch thick on the sides and the bottom for stability.
4. Install it on your door, then secure it with screws or pins.
5. Attach some hooks to your cutlery trays for hanging your jewelry, etc., when needed.
3. Install Pegboard on Your Door
 The pegboard is renowned for being versatile and fruitful. You can use it in any room in your house to organize things. Have you ever thought that you could hang it on the door instead of a wall?
This door, for example, features a pegboard that provides ample storage space. Just add some racks and hooks, and you can eliminate clutter.
Detailed Instructions:
- Step 1: Assemble the hinges, then install them on your door.
- Step 2: Measure the length of your door. Cut two pieces of wood, about an inch thick, on the sides and on the bottom for stability.
- Step 3: Install one pegboard to your door with screws or pins, then secure it with hooks for hanging things.
- Step 4: Attach some hooks to your pegboard and one more on the other side of the door. Hang some racks on the hooks for holding your things such as cookware, brooms, etc.
2. Use Spice Holders to Hold Tiny Items
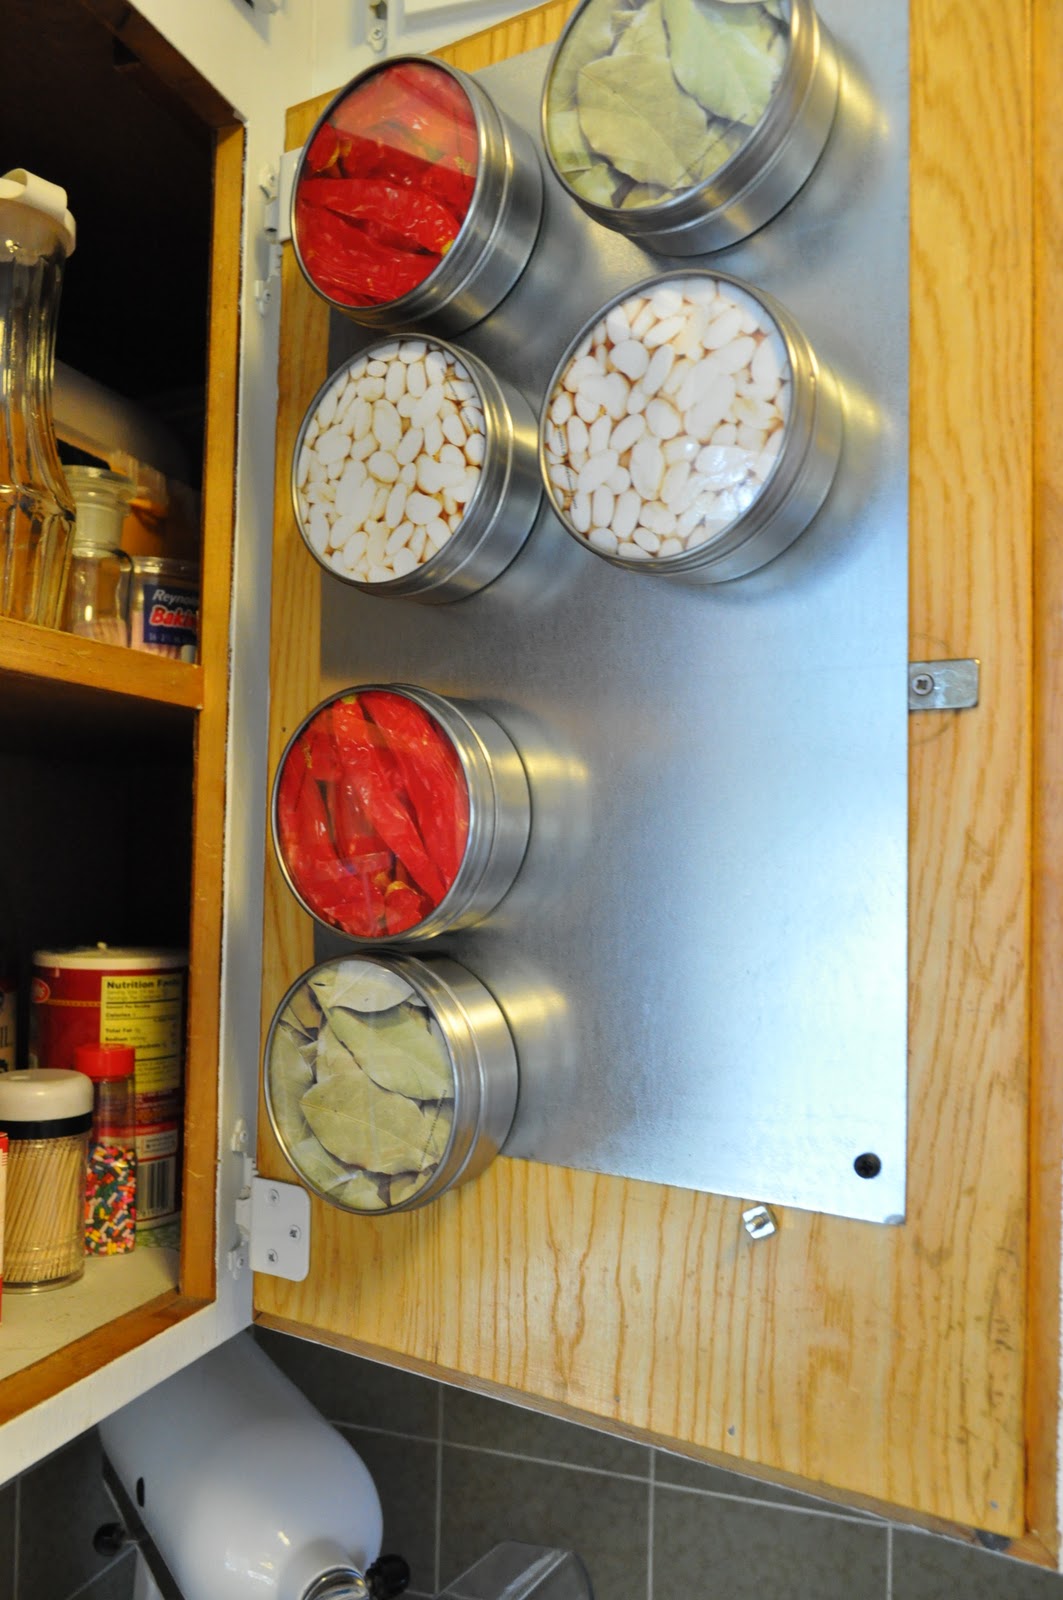 Did you know that you could use magnetic spice holders not only in the kitchen but also in any other room in your house? You just need to attach the sheet to the door, and you are good to go.
It would be useful to organize small items like threads, needles, buttons, jewelry, etc. Try adding labels so that you can find what you are looking for easily.
Details instructions:
- Choose a spice holder that is made of wood or metal, with strong adhesive on the back.
- Measure the length and width of your door, then do some measuring with the spice holder to calculate how much of an area it can cover.
- Ensure that there are no obstructions behind the door where you want to place the spice holder so that it will not be too heavy for your door to hold, etc.
- Clean your door of any dust or grime before attaching the spice holder so that it will not become a sticky mess for your things to stick on it after they have been organized properly on there for some time, etc.
- Peel off the adhesive backing of the spice holder, then place it on your door.
- You can just lock it with some double-sided tape that you have or use screws if you want to secure it further.
- That’s all there is to it!
Lastly, number 1. Repurpose Shoe Organizer
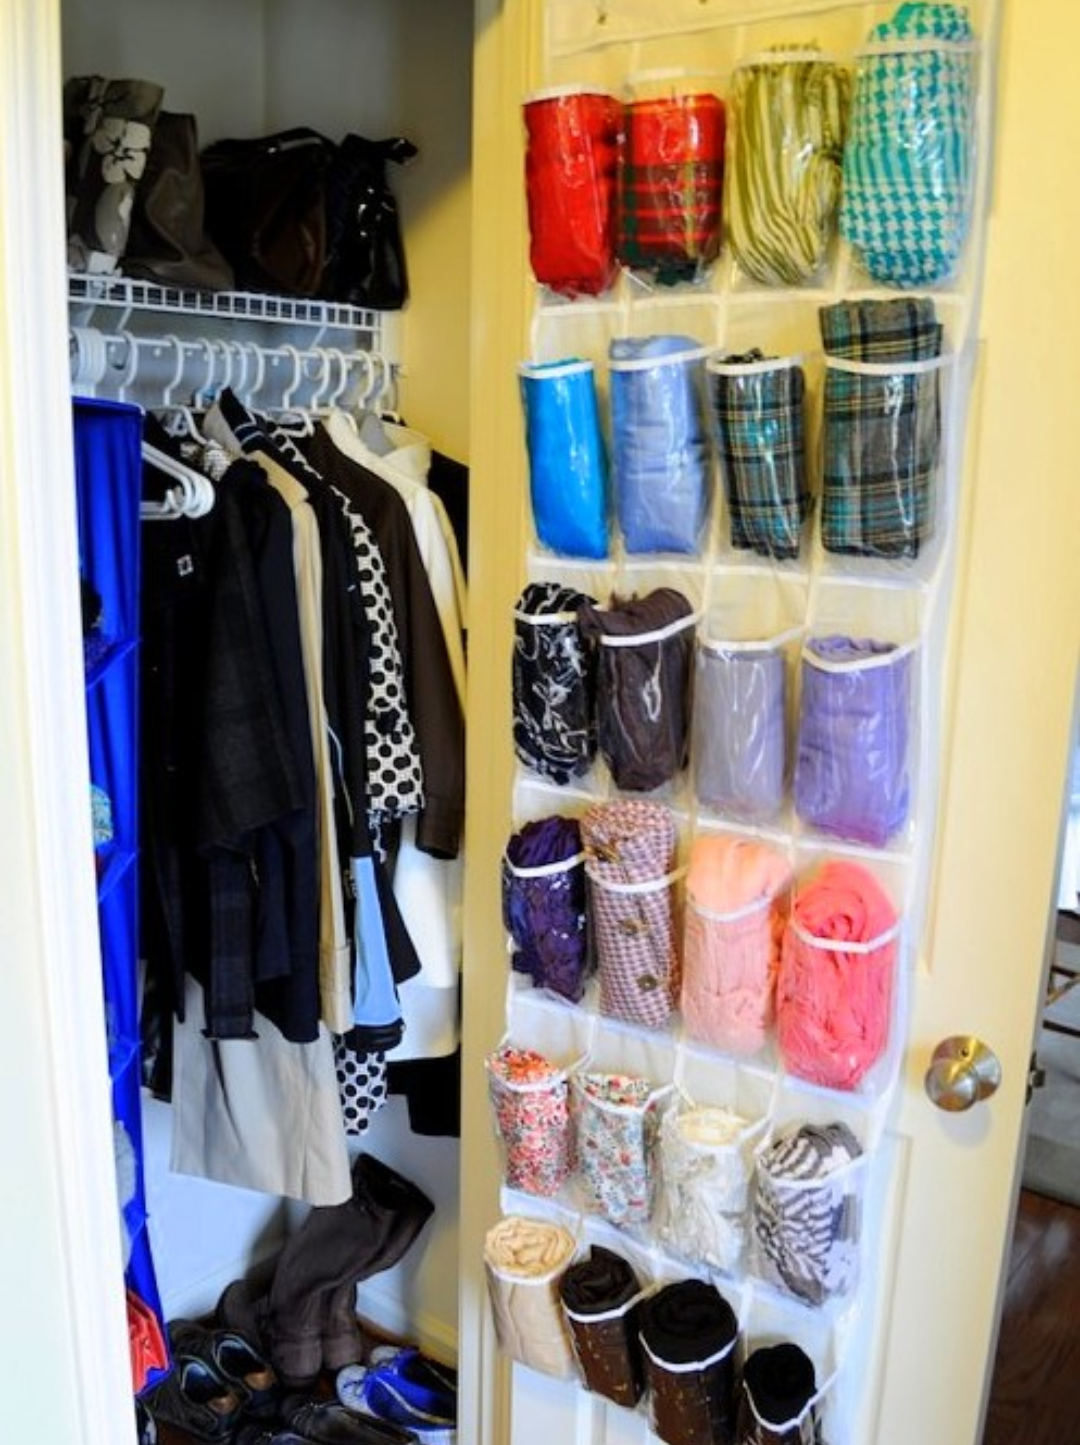 Who says that shoe organizers are only for footwear? The truth is you can explore and repurpose them so that they can help you organize your closet better.
You just need to hang a shoe organizer on the door. Then, you can use it to store your socks, scarves, or even underwear.
A shoe organizer is quite versatile. Try hanging it behind your bathroom door to organize toiletries, and you can say goodbye to clutter.
Every inch is valuable when it comes to limited space. It does not mean you can succumb, though. Harness your ingenuity to tap into these 10 space-saving door ideas and witness the significant impact you will make.
B1. A Door from PVC Pipe Wall Joists Slide Out Frame
Materials you need to prepare:
– Two pieces of PVC pipes, 45 degrees elbow joints, and others
– Two pieces of wood strips from 5 to 7.5 cm in length
– Some screws
How to do it:
- Step 1: Make a table by joining two pieces of wood strips into a straight line. Secure them together with screws. Leave a 2-inch gap between the two.
- Step 2: Cut another piece of the wood strip along its length, so it has a rectangular piece with an opening at both ends. Then place one wooden rectangle on each side of the table to form a frame for the door cover with a pair of 60-degree openings at one end each. Secure them together with nails or screws from inside the frame.
- Step 3: Attach the 45-degree PVC elbows to the wood frame, so they have a pair of openings each at both ends. The openings should be placed on any side of the frame.
- Step 4: Cut another PVC pipe into a length that is equal to the size of your door frame. Attach a piece of the glass window to its end and keep it open. Secure it with screws from inside the frame. It will serve as your glass window door.
- Step 5: Glue or screw all pipes together from inside the door frame. Make sure all joints are secured well with glue or screws from inside the pipes, too.
- Step 6: Drill some holes in the bottom of your door. Then add hinges so it can hang from the top of your door frame.
- Step 7: Once you have completed all tasks, stain or paint the wooden frame to match your walls and doors. And then, try to use it as a pocket door dividing space between your living room and kitchen.
- Step 8: Your PVC sliding door is ready for use!
Helpful tips: If you want a slide-in frame instead of a swing frame, make sure the sliding joint is based on the 45-degree angle joints. Also, use glass sliding doors for glass materials instead of glass windows if you want something transparent.
B2. Use Tiles as a Doorstop to Create Magic Doorways
Preparations:
– Tiles (any color and patterns)
– Glue
– Pencils, paintbrushes, and paint.
Instructions:
- Step 1: Make a plan for your door. You want the pattern, color, and size of each pattern to be different. Draw them on your paper.
- Step 2: Measure your doors frame to ensure it’s wide enough for all patterns. With the design you’ve chosen, draw a horizontal line on the paper along the bottom of the door frame among the patterns you’ve drawn.
- Step 3: Glue your tiles to one side of each pattern using four layers of glue between each layer of tiles. Make sure not to overlap, or there’ll be no space left between tiles for passing through or around it.
- Step 4: Place the pattern against your door and line up the patterns. Place tiles on top of them until you see gaps. Put glue on any spaces between the patterns and the tiles; make sure not to overlap. Let it dry for a half-hour or so.
- Step 5: Paint each pattern using four different colors, like one layer of paint per color (1st layer is white). Allow at least 2 hours for drying.
- Step 6: Use your door as you usually; no one will know that you’re opening up to another room since there’s no gap behind it.
- Step 7: Wipe off any white dust from the tiles before you cover them with paint. Then, repaint them.
- Step 8: Your magic doorways are ready! Enjoy!
Helpful tips: If you have a glass door, definitely use the same size as your door to look like a glass window. And if you have a glass window, remember to use clear sealant on all seams and corners when installing your door.
Extras:
A Transparent Door Project: Make a tile pattern on your wall and leave a space of 30 to 40 cm between the pattern and the wall. It will look as if there is no door.
A Twilight Zone Door: Paint the door with black color except for the space of about 30 to 40 cm where you draw your pattern on it. So, when people come closer to your door, they will only see the patterned part first.
B3. Hang Your Coat Hooks High on the Door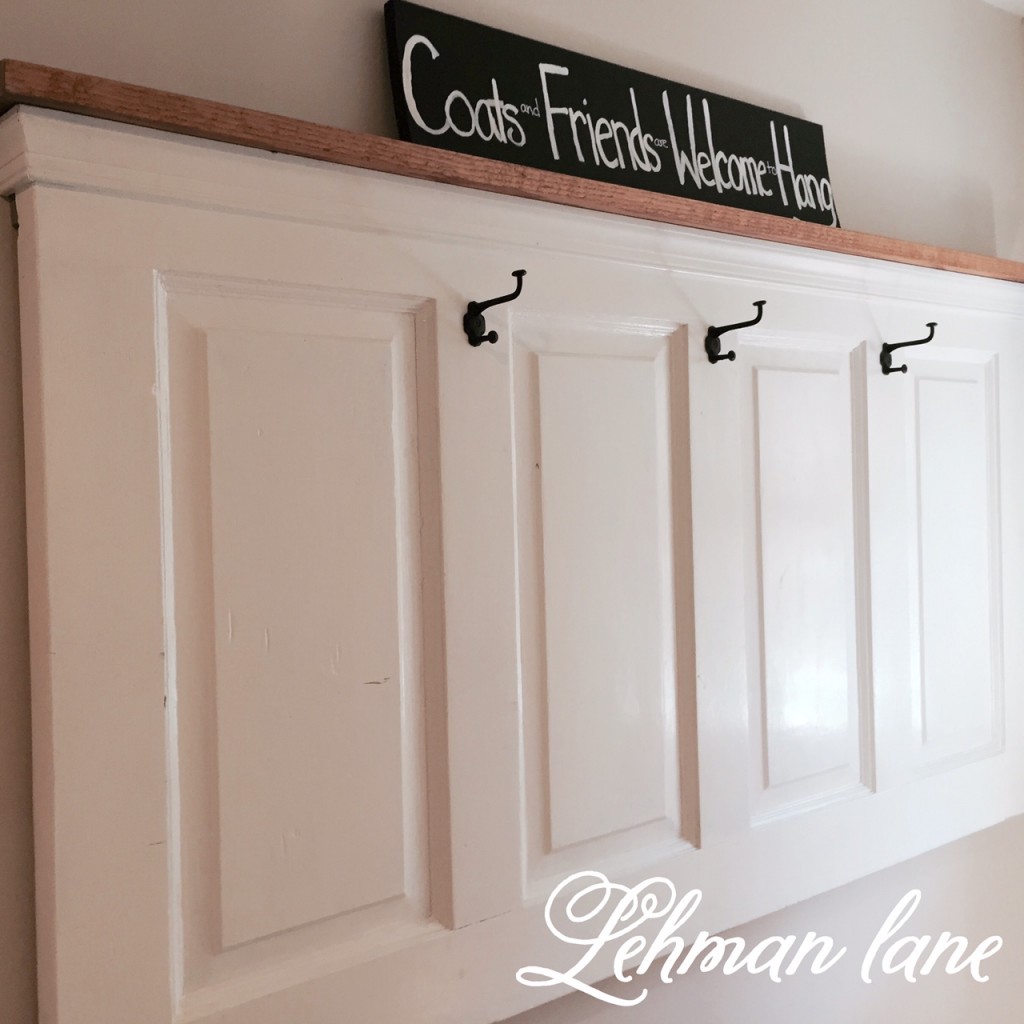
Preparations and instructions:
– Choose sturdy coat hooks that have a hook and a hole at the top.
– Choose a door with enough space for a coat hanger.
- Step 1: Choose a door with enough space for a coat hanger, so choose doors that have gaps between the top and bottom of the door.
- Step 2: Leave only the middle part of the door as your clear passage if you want to put something over it and leave room for your coat hooks.
- Step 3: Decide how much you want to cover your doorway with hooks. It depends on how many hooks you bought from stores or from stocks that you have at home. Measuring them will help determine how much space is needed for each hook to be placed on it.
- Step 4: Stick the hook and the hole of your hooks into the door and then place the hooks. And then, stick a piece of velcro on it.
- Step 5: Hang your coat hangers on them, and voila! Your doorway is covered with coat hangers!
Helpful tips: If you want to do this project, though, but you don’t have enough hooks, you can cover as much as possible with as much as you can buy or stock up with. When buying new ones, consider those with velcro so it sticks better than those without it since your door will be quite heavy even if it’s just a partial weight on the door.
B4. Install Panel Door on Your Closet Door
Preparations you need to collect:
– Panel door
– Screws
– Pliers
– Thick nails or screws with a flat head
– Bolts with wing nuts or Allen key bolts with wing nuts.
Instructions:
- Step 1: Measure the width of your door and mark it on a piece of paper. Also, use a tape measure to mark a distance from one side to the other that’s equal to the length of your door. This distance will be used as a reference before you glue your panel door onto your closet door.
- Step 2: Secure the panel door against the closet’s frame using any heavy objects like furniture pieces, plate rack, or anything heavy enough not to move when you shut the door.
- Step 3: Mark the position of the screw holes in the panel door. Make sure it’s aligned with the measurements you have made in step 1.
- Step 4: Drill into the closet door to fit the screws for your panel door. Remember to drill at an angle so when you put in your screws, it will fit perfectly.
- Step 5: Align the marked holes on your panel door to the drilled holes on your closet’s door. Screw them in using bolts or screws, depending on what you have used.
- Step 6: Hang the bolts or bolts with wing nuts on them along with any decorative items of yours like mirrors, paintings, or posters on them like you would typically do with ordinary doors that are not attached with panel doors.
- Step 7: Enjoy the new look of your door!
Helpful tips: If you don’t want to drill holes on your door, you can glue hooks onto it. So, make sure to measure the width of the door first before gluing them on. You can also screw or nail them to the side of your door if you want something different.
References:
10. Houzz.com
9. Apartmenttherapy.com
8. Archdaily.com, bobvila.com
7. Homeanddecor.com
6. Apartmenttherapy.com
5. Worthingcourtblog.com
4. Maillardvillemanor.com
3. Cubesmart.com
2. Organizingmadefun.blogspot.com
1. Worthingcourtblog.com
Additional sources:
B1. DIYFixated
Renovation-headquarters
B3. Lehmanlane
B4. Thespruce