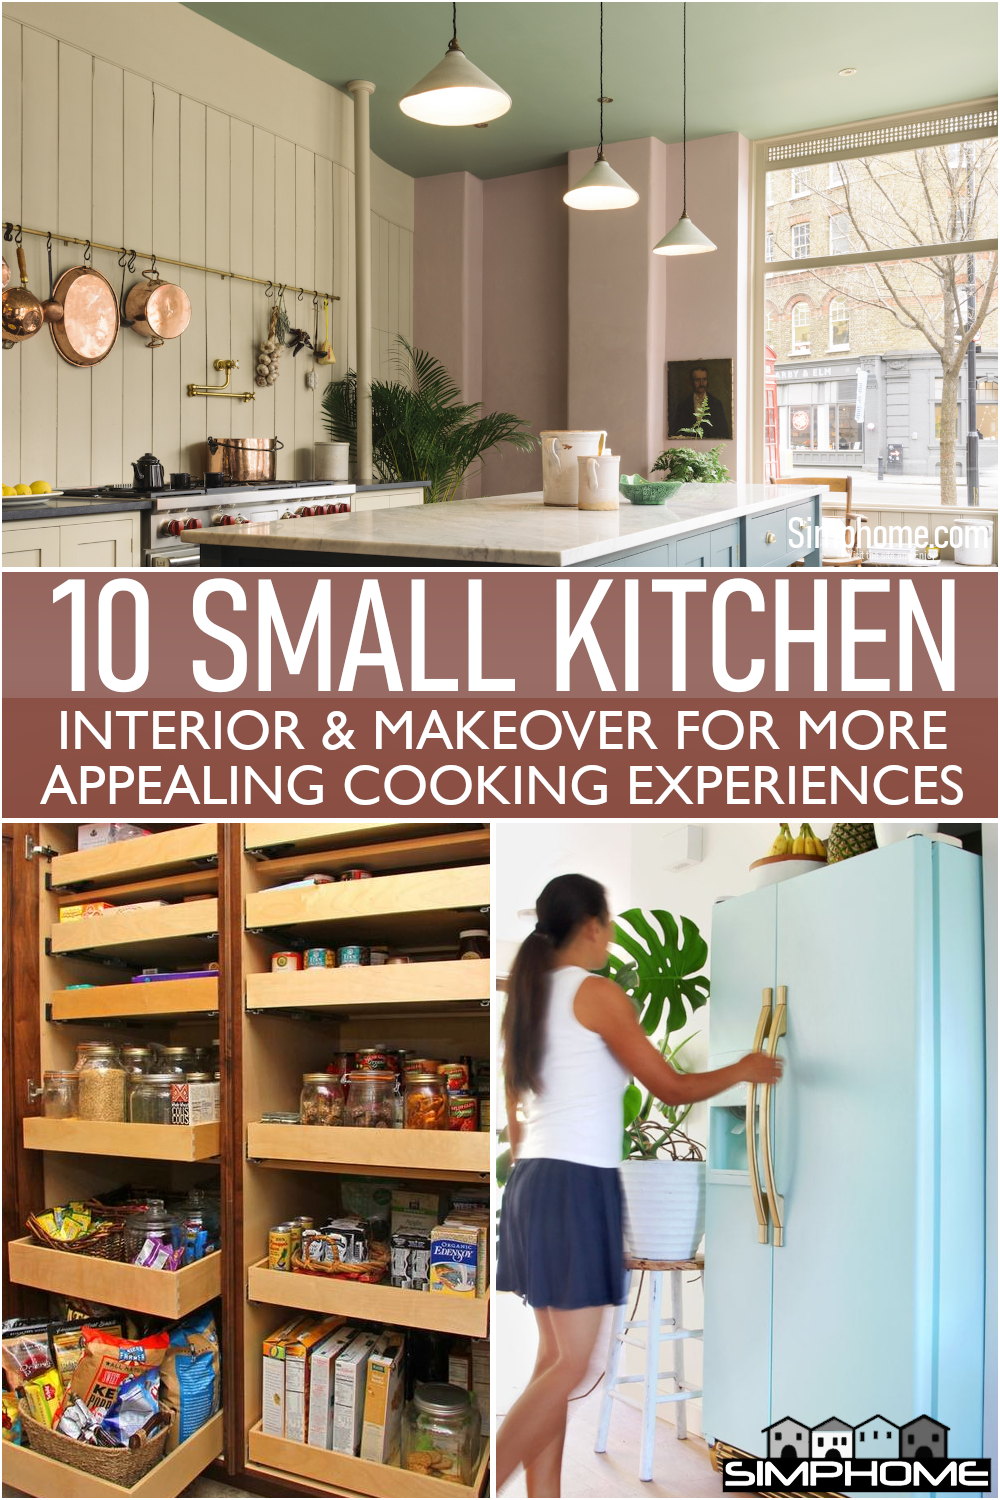
A Kitchen interior can make or break the entire room. It’s one of the most heavily used rooms in any household and, because of that, it is easy for it to get overlooked. Some people choose to do nothing more than line their floors with tile and paint their walls with a light shade of white.
However, with one of these kitchen interior ideas, you can make a statement and create a new-looking room that will have all of your friends and family talking about what a fantastic transformation you made. Next, we present you 10 simple kitchen interior lists that will give your cooking space big impacts. As always, Simphome presents you with the list.
🔊10 Simple Kitchen Interior With Big Impacts Video:
List Entries:
- 10 Laundry Hidden in Kitchen Ideas (Small and Regular Size)
- 10 Kitchen and Herb Garden Ideas
- 10 Kitchen Interior and Layout Ideas for Cheap
- 10 Minimalist Kitchen Organization and Storage
- 10 Inspiring Kitchen Layout for Small House Owners
- 10 Open Concept Kitchen Renovation Ideas
- 12 Space Saving Furniture for Kitchen Ideas
- 12 Small Kitchen Renovation Ideas On-A-Budget
- 12 Small Kitchen Decluttering Ideas
- 12 Minimalist Kitchen DIY ideas
- 333 Small Kitchen Ideas, Organization, and Kitchen Designs
10. Think about The Layout First
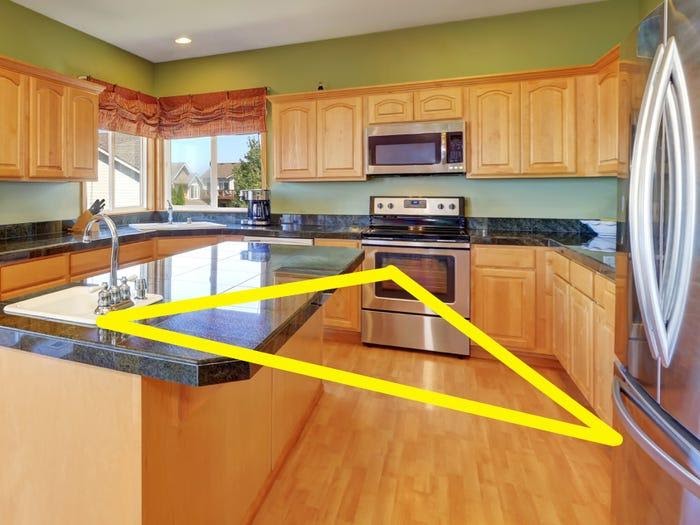 If you start from scratch, planning the layout is the first crucial step you should take. A well-thought-out design will produce an attractive appearance and a good amount of traffic. Experts say that ideally, a kitchen follows the triangle rule. It is where storage (refrigerator), cooking (stove), and washing (sink) ideally create triangle form to make prep and cook easier.
If you already have a kitchen, rearranging the layout will cost you zero cash to give the kitchen a completely new look interior. For instance, you can switch the cabinet from L-shaped to parallel or galley layout.
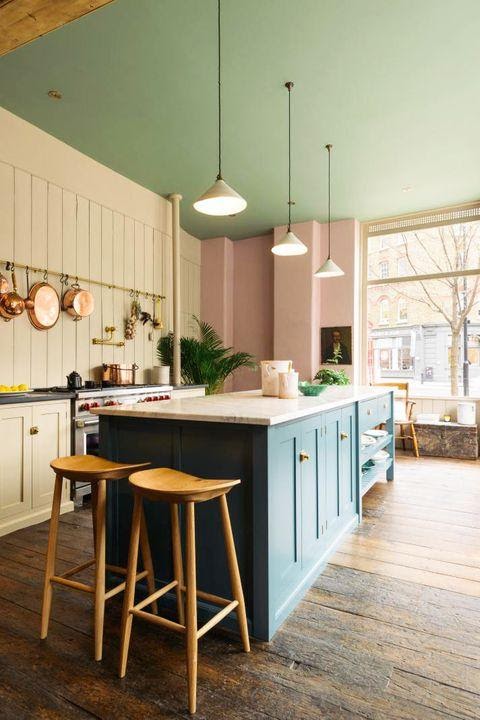
9. Paint the Ceiling and Wall
 A small change such as repainting the wall or ceiling will make a massive difference to the feel of your kitchen. If you are unsure of which color would work best, head to the paint department, ask for their help, or simply bring in a photo of your current color.
When painting the ceiling, please keep it simple by selecting one color to paint the wall and ceiling or select a darker color. When painting walls, keep them neutral by using a deeper tone than the cabinets and appliances. To brighten up dark base cabinets, paint them in either white or gray. This trick is also a great solution to cover up any old stained or chipped paint.
The general rules of thumb are:
- 1st. Do not paint the wall if it is a white or cream color.
- 2nd. Once you have chosen a color, do not buy too much at that time. It may go on sale the next day, so always have some paint left over for future projects.
- 3rd. Brick walls are notoriously difficult to paint.
- 4th. It is best to use undercoats and top coats instead of one coat of one color all over your walls and ceiling.
8. Decorate the Fridge
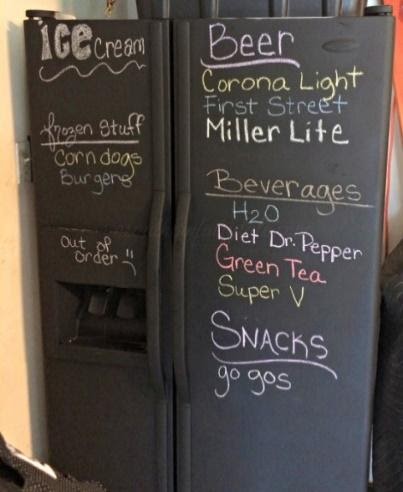 Renovating the interior can start from a small action, such as giving a facelift to the fridge. If you want a fun finishing, opt for chalkboard paint since it allows you to write and draw on the surface. However, liquid stainless paint, latex paint, and any other paint will work well too.
Before coating the fridge with paint, be sure to unplug and bring it to an open area. Then, start sanding and cleaning the surface so the liquid can attach better. Give prime if necessary and layer with paint; if you seek a more instant way to jazz up the fridge, opt for vinyl or contact paper.
To do this properly:
- 1st. Unplug the fridge from the wall and remove all the shelves.
- 2nd. Wipe it down with turpentine and water to remove any spills, dust, and debris on the surface.
- 3rd. Thin out a base coat of paint using latex paint or liquid stainless paint by dabbing it in very thin coats over the surface of the fridge so you can equally attach it to your appliance.
- 4th. Once the paint is dry, wipe off the surface with turpentine and water to get rid of dry slivers and excess paint.
- 5th. Apply chalkboard paint in thin coats over the surface of your fridge to make it more exciting or customize it when you are done.
Also, pay attention to:
- No 1. The surface of your fridge should be clean and free from stains.
- No 2. Put down a thick coat of paint over the surface before starting chalkboard paint so it dries faster to avoid streaks on the clear surface at the final time.
- No 3. Please leave it in an open area for 12 hours after completing the project so the paint can dry properly before putting it back on its fixture.
- No 4. Make sure the chalkboard is not too large nor too small; otherwise will slide off easily when you are using it.
- No 5. Please do not cover the whole surface of the fridge with chalkboard paint since it will lose its original color due to broad exposure.
- No 6. Using too many chalks may damage your fridge or cause unnecessary waste.
- No 7. The surface of a plastic or vinyl surface might need more attention than a wooden one.
7. Update your Cabinet
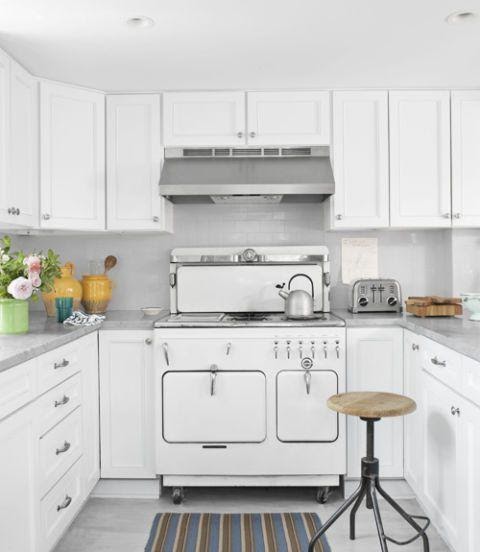 Cabinetry is the dominant furniture in the kitchen. It commonly covers the upper and lowers walls. So even a small change like repainting will have a significant impact on the interior. Crisp white is the safest choice, especially for a small kitchen. Nevertheless, the option doesn’t stop there.
Besides simply repainting it, you can also go with a new style or even a new material. You can simply add some porcelain or marble tiles for a nice touch. However, suppose you’re not into that look. In that case, there are other much more exciting options like adding a mini garden or new storage solutions by adding utensil racks, S hooks, adhesive hooks, cabinet door hooks, and many more. And return to the painting project, don’t forget to scrape off the old finish before painting it!
To upgrade your kitchen cabinet and turn it more functional or pleasing to your eyes, you can also select:
- Option 1: Paint it in a more epic color combination
You have two options for that: Pick a color that will match your kitchen appliances or create contrast so the cabinet will stand out. You can paint the cabinet doors if you want to update your whole look. Pick a dark color like black or brown and use metallic (gold or silver) spray paint for accent. You can also choose to let your old cabinets age naturally and show more wear and tear, especially on the inside corners where you often put keys, remotes, and other tools.
- Option 2: New handles
A small or big update is also possible with new handles. If you just want to change something, you can simply replace the knob. But if you want a somewhat more significant update, you can opt for changing the hardware, so it’s easier to open and close the cabinet doors. Adding pull knobs is also one of the easiest ways to update your cabinets without exerting much effort.
- Option 3: Rearrange Storage
You can even make a difference by rearranging where items are stored. This step is especially important if you have more than four cabinet doors and don’t want to open everyone to see what’s inside. By simply placing some bins at the back of a cabinet, you can solve that problem. You can also add baskets, chests, or even hidden shelves within cabinets.
- Option 4: Add Utility Drawers or Bins
If you want to have more storage for plates, utensils, and other materials needed to cook, you can also add utility drawers or bins. You can also simply slide-out shelves, so you don’t have to open your cabinet doors.
- Option 5: Add A Table
Another simple idea is adding a table inside the cabinet or even outside it for easy access. This idea is beneficial if you have a large family or are a big party planner. Alternatively, you can place a table on the wall or near the kitchen door if you have smaller family members.
- Option 6: Add Lighting
Another vital consideration for updating your cabinets is adding lighting. You can pick from traditional hanging lights or track lights to beautiful pendants and sconces with elegant designs that never go out of style. You can also add recessed lighting so you can choose how bright you want it to be.
- Option 7: Add a Center Cabinet
Many people have their pantry on the opposite wall from the kitchen. If that’s the case, you can simply add a center cabinet there and place your trolley on it. You can also create a small display unit or even an open box so you can organize all of your kitchen tools properly.
- Option 8: Add Shelves
Even if you think you don’t have any problem with space, adding more shelves will be just the ticket for making an impact on your kitchen. You can either go with full-length shelves or smaller ones ideal for organizing utensils or smaller food items.
- Option 9: Add a Pullout
You can also pick a storage cart that slides out from the side of your cabinet or even behind it. You can choose either from carts that go along the entire length or shorter ones for more utility.
- Option 10: Add a Well-Designed Island
Adding an island to your kitchen is one of the most popular designs among homeowners today. You can find many different types of islands on the market, but they all have one thing in common: They make your kitchen look bigger and brighter while providing you with more space to work on and prep your food. If this style appeals to you, don’t see it as just another option. Consider it as an essential step towards realizing your dream kitchen.
6. Layer Your Kitchen Floor
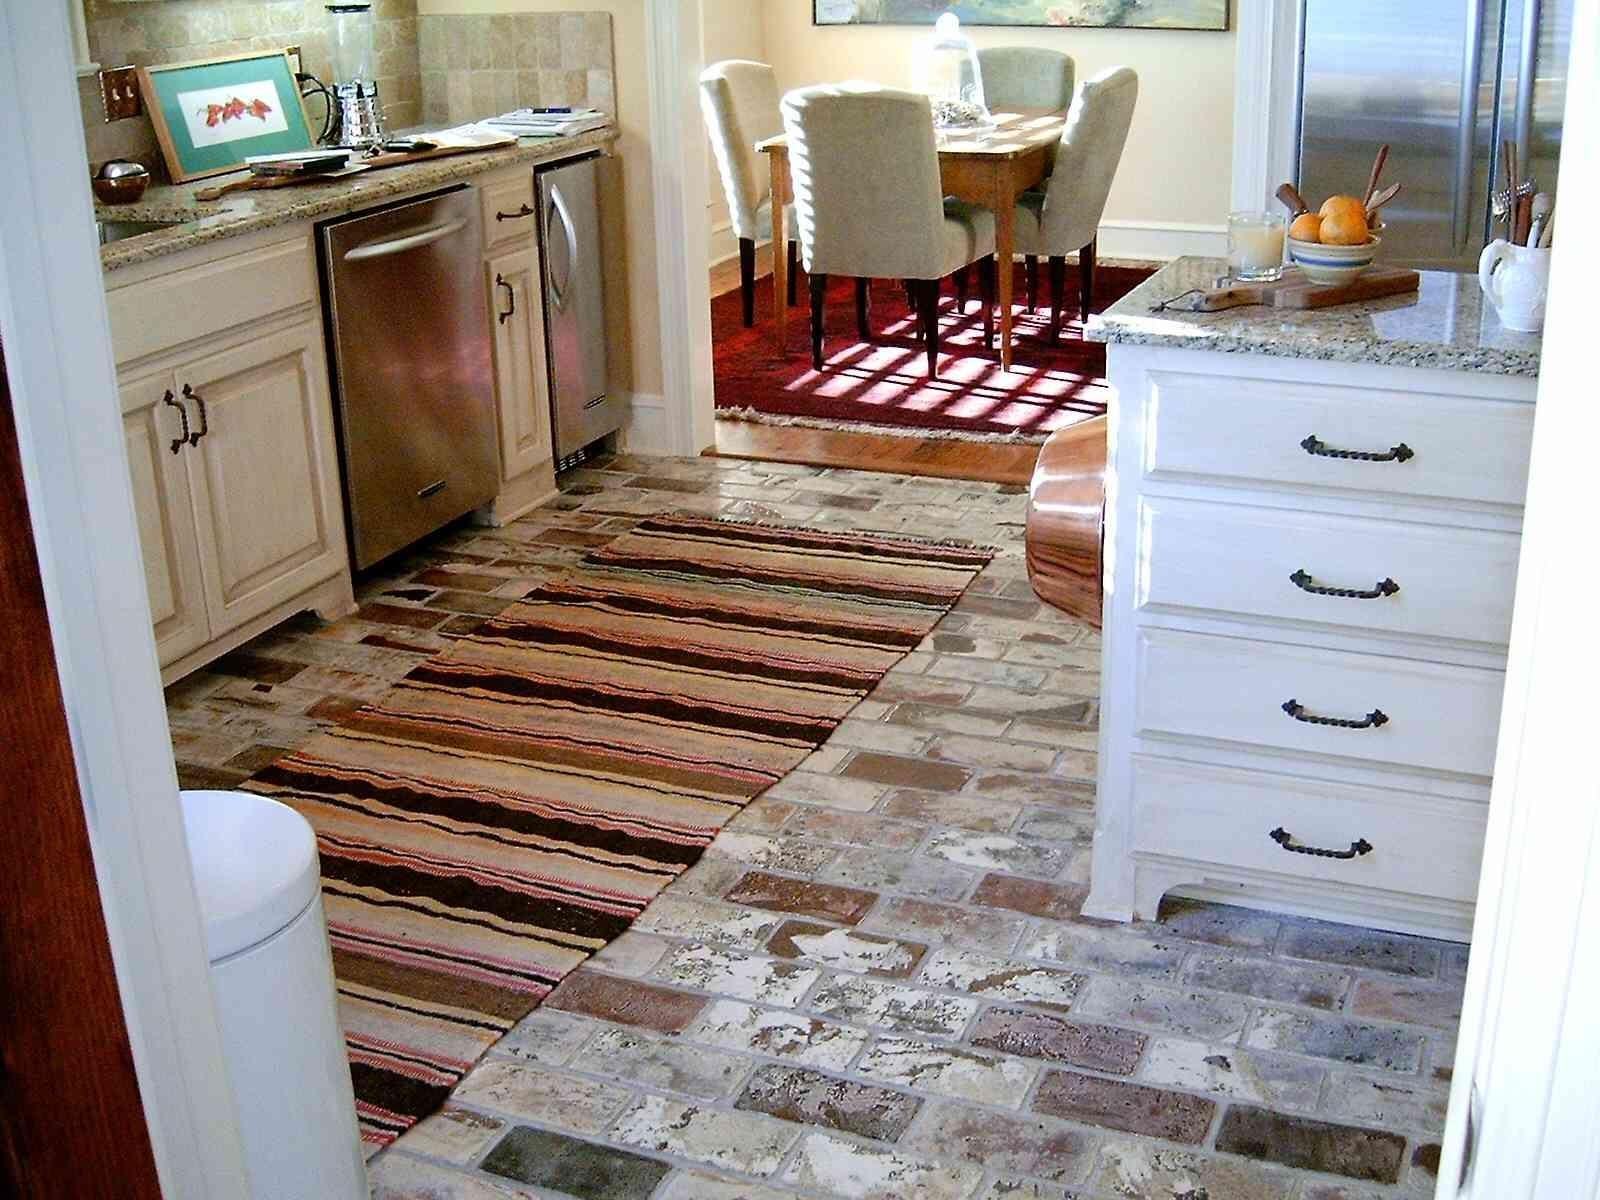
Vinyl can be your second choice to upgrade the entire look of the floor. As long as the surface is in good condition, you can layer it directly on the top. There are many types of them, but the best one for the kitchen goes to the vinyl plank. If you are interested in the floor in the picture, it is port stone-thin brick panels that work like ceramics with much easier installation.
- Types of Vinyl kitchen floor such as solid, planks, and tiles are fantastic. Some of them are rugged and not the kind of thing you can put in a bathroom, but they look amazing in the kitchen. Most of them are almost invisible once installed as well as sound insulating properties. In addition, they require no additional materials to be laid on top of the sealant and flooring surface.
- Your third choice is a natural material. You can also go to the floor with stone tiles or tile-look flooring. The surface of the tiles is not as thick as a brick one, but it is more so you can place more stuff on it. This item is a practical choice for family rooms and small living spaces, especially if you want a clean and simple look.
- Your 4th option is wood. It is the best flooring material if you want a rustic touch. You can also experiment with baluster details to add a feminine and elegant touch to your kitchen. That said, wood material requires more maintenance because water will destroy it pretty fast.
- Your 5th choice, you can layer your kitchen floor with ceramic tiles. It is an inexpensive material, but it still looks good. It is not suitable for heavy use floors because it gets dull fast even though it can be cleaned and kept in good condition.
- Another material that you can use for kitchen flooring if you have space or another surface to lay your floor is marble tiles. In fact, they are very cheap, which makes them an excellent choice for smaller areas with a limited budget.
- Another popular choice among homeowners is faux wood flooring which comes in various grades of durability and texture. The laminate has been getting popular recently as a low-cost alternative to carpeting for residential projects that may not be eligible for carpet replacement under other home improvement programs (e.g., USDA, FHA, etc.). Be aware that laminate floors do not breathe as well as carpet and are more susceptible to staining and scuffing.
- With proper maintenance, laminate flooring may last for up to five years. Maintain them or their cleanliness using a soft-bristled brush (to remove cooking grease or spills). Or at least using a damp cloth. Be careful not to include the laminate in areas where it is exposed to hot surfaces, such as in areas where the backsplash has been installed.
Another downside of this flooring is that they tend to catch stains (especially coffee or red wine) much more manageable than hardwood or softwoods.
5. The Open Concept for The Airy Décor Style
 The double cabinet is typical nowadays. The cabinetries take the floor and the wall space to double the storage and leave a gap in the middle for cooking. It can be a good solution when you lack space. But somehow, the inappropriate design will make the kitchen look odd, and a small kitchen becomes even tighter.
Therefore, opting for open shelving can be a clever choice. It makes the wall-less bulky and looks airy. At the same time, you can show off your antique plates. However, the supplies will be dusty easily, so you need to clean them more often. Another choice is to go with glass-door cabinets. Take your wooden cabinet doors off, make a large rectangular hole in the middle, then insert glass.
Another open concept kitchen decors you can consider are:
- No 1: Farmhouse-Style Open Kitchen Concept
This concept is simplifying the kitchen, not only for its design but also for its use. It doesn’t have anything except what you can see clearly. You can easily find everything you need in the kitchen, from pottery to cutlery, appliances, and surfaces.
- No 2: An Island Concept with Bar
Not only does this Big Kitchen have a separate island for cooking, but it also serves as a bar. This concept comes with a cool feature where you can keep some food there while drinking simultaneously. Although it might take up your space in the living room at first glance, having a bar in your kitchen opens up more possibilities for adding other types of furniture and decorations.
- No 3: The Eclectic Kitchen with Dark Wood Cabinets and White Countertops
This concept is for everyone who likes to keep his kitchen tidy and organized. The entire kitchen is built on dark wood. It gives coziness to the kitchen and makes it look spacious.
Also, the white wooden cabinets are combined with a white countertop. The remarkable blue detail near the wall stands out in this Big Kitchen Décor and brings some freshness to its design.
- No 4: Open Shelving concept with Exposed Brick Wall
This modern concept is designed for a wide small-sized kitchen, which is common nowadays. For a cozy, inviting space, you need to make it looks more prominent than it is by applying light colors such as blue or white on your walls and ceiling.
- No 5: Open Concept Kitchen that Inspires Design and Mood
This concept requires an open-plan kitchen that has a considerable entry and an open storage space. The light coming here makes the kitchen looks spacious. The wooden wall creates an illusion that it takes up a bigger space while making the countertops look smaller.
There is also a corner bar where you can keep your snacks, drinks, and even your food on for easy access to them whenever you want.
- No 6: The Double White Kitchen with Island in the Middle concept
If you are looking for something different than usual, then you don’t need to go far. This concept comes with an open double white kitchen with an island in the middle that the follower usually enriched with concrete counters and white cabinets. The island is constructed of concrete so that it will not warp or crack as time goes by.
- No 7: Trends in Dining Room Concept – Open Concept Kitchen with Island, Dining Room
This concept comes with a Big Kitchen area with a U-shape island serving as a dining room and the living room. What makes it different is the wood used for making cabinets and countertops. The shape of the cabinet is designed to complement the flooring and upholstery. At the same time, the countertop is made from concrete material.
- No 8: Off-the-Grid Big Kitchen Concept with Exposed Brick Wall
This concept is themed on natural colors such as brown and green. However, you can also select other designs for your decoration, such as printing patterns on wallpaper, using an abstract lamp shaped like a tree trunk, or planting some potted plants.
4. A Smart Storage Idea for A Cleaner Visual Presentation
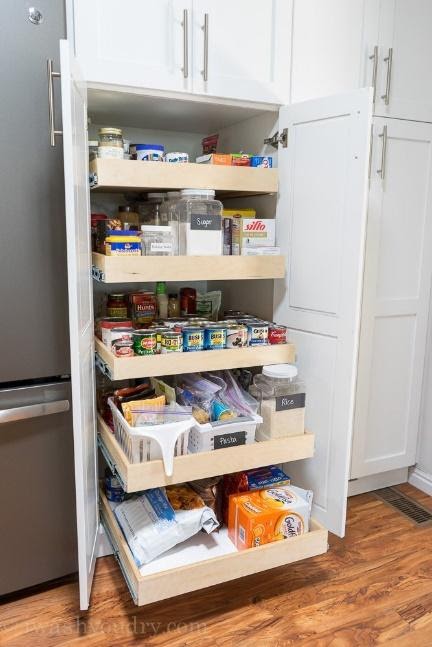 The best kitchen interior is the clutter-free visual, so be smart with the storage. Make the most of the nook and cranny to declutter the area. Utilize pull-out system and shelving by remaking the existing cabinet. Add partition to drawers and add additional shelves or drawers like this to hold more items.
With the help of sliding reels and DIY plywood drawers, you can create similar pull-out drawers in the cabinet for cans and jars. Give every group of supplies home in the cabinet if possible. For the most used supplies like pots and knives, opt for racks and magnetic stripes. It will ease you to find the size you are going to use.
Other brilliant storage ideas you can select to update your kitchen interior that would give substantial visual impact such as:
- No 1: Add a chalkboard to the wall or a pegboard with view small buckets hanging from some of the pegs
- No 2: Use a few old fish tanks on the kitchen cabinet
- No 3: Cupboard is not enough for you? Then add big storage on your kitchen window!
- No 4: Add hidden panels on the wall to show extra space.
- No 5: Add floating shelves positioned at eye level to make it easy for you when you need to reach for anything from the shelf.
- No 6: If you have high ceilings, then adding wrought-iron architectural beams as the focal point of your kitchen interior is a great idea. It would provide an impressive, exquisite look to your home.
3. Add Decorative Accent
 Skipping a decorative accent means missing the opportunity to take the kitchen to the next level. Painting, wallpapering, and shelving are parts of decorating as well, but you can do more to make the kitchen cozier.
Try adding a wall art or gallery wall as you do in the living room. It will create a homey feeling, moreover if you live in a rented house. Add greenery for a fresher atmosphere and install a chic window treatment.
Another decorative accent you can try such as:
- No 1. By using A Flower Vase on the Kitchen Table
- No 2. By using A Vintage Wooden Skillet
- No 3. By using Flourish Wall Art Collections
By adding a flower vase to the kitchen table, you can quickly transform your kitchen table into a romantic and elegant setting for your family dinners in a way that’s both stylish and functional. A vintage wooden skillet will make it even more exciting. It will look great as an accent piece that also functions as a cooking utensil from time to time when cooking in the kitchen. Furthermore, it is functional and eye-catching as it provides an attractive contrast with the colors of your walls, cabinets, and appliances. - No 4. By using Wall Arts
Flower wall art is not just for bedrooms or living rooms. You can also opt for the vintage look by selecting a framed book with exciting words, paintings, or artworks as your wall art. - No 5. By using Antique Wooden Frame Wall Art Collection
You can even go all-out and display an antique wooden frame wall art collection. This idea will add a vintage feel to your kitchen if you have antiques that match well with the color of your walls and the theme of your interior design in house decorating. When you choose one particular theme that goes with all the other surfaces in your house and complements them, you will feel more comfortable and at home in a piece of furniture that looks like an old friend to you. - No 6. Wood Paneling
To be honest, you can get a rustic look with just one single element of interior design. Ironically, wood paneling is much cheaper than a kitchen table that looks like a farmhouse. If you are going to install wood paneling in your kitchen, choose colored wood instead of stained ones. Colored woods will always look better with other colors around them than stained woods since they do not stick out and focus all your or your guest’s attention. - No 7. Black-and-White Pattern Wallpaper
You can also have black-and-white pattern wallpaper in your kitchen for a bolder design scheme than you would do in your living room or bedroom. In addition, you can have your chairs and cabinets painted in white if the rest of your kitchen is painted in black. - No 8. Greenery
Greenery will make any room look fresh and inviting no matter what the season is. If you have a balcony and porch or live in an apartment with a balcony, why not add some greenery to it? You can also do this by placing a potted plant that matches the color of your wall on the countertop. Or by placing a glass container on top of it. - No 9. Clocks
A clock will help you to organize your kitchen and to remember an important time. This idea is simple to complete and will take your kitchen from boring to beautiful. You can even simply add a clock to the kitchen cabinet, for instance. - No 10. Metal Utensils
Finally, add metal utensils, especially if you have a wooden countertop to make the room look more inviting. They also make it easier to clean up the mess that might happen when cooking in the kitchen. Moreover, they are durable and easy to maintain, which is excellent since it gives you more time to cook instead of cleaning it all up afterward.
Adding some color or pattern in your kitchen interior design can be tricky because of several reasons, such as limited space.
2. Style Up the Spices
 It is probably the most adorable and aesthetic spice rack you might have seen so far. It uses cute tiny jars arranged on beautiful DIY build-in shelves. Despite its beautiful finishing, it is pretty easy to build.
First, decide the size you want to make, then drill a frame in the wall. Measure once again and ensure everything is right. Next, create the shelves and screw them on the frame wall. Get additional scrap to secure the shelves and add molding. Finally, paint and let them dry before arranging the spice.
Other ideas to rejuvenate your spice storage area you can try:
- No 1. Build-In Spice Rack Organized by Color
To do this, you can buy a cute little starter kit. Or even you can design and make your own. It will look pretty cool to do so. After the spices are set up, put them in attractive baskets or decorative boxes. - No 2. Spice Rack with Colorful Storage Baskets
This trick is another excellent way to organize your spices – by color! All it takes is cutting out specific shapes out of big pieces of wood and sticking them together using hot glue (or nails, whichever you prefer). The result is a magnetic spice rack that looks adorable in the kitchen! - No 3. DIY Wall-Mounted Spice Rack Organized by Color
This trick is an excellent way to organize your spices, and it’s straightforward to do. All you need is a wall-mounted spice rack, wood, and paint. First, you can paint the frame in whichever color you prefer. Then, pick the spices you wish to organize by color and arrange them in the rack accordingly. They are now ready for usage! - No 4. Build-in Wall-Mounted Spice Rack
As with any other DIY project, we start with a preparation phase which involves a little bit of work but is essential to do before starting on the actual task at hand. The preparation phase contains basic trivial details that you need to know before starting on the actual project. It will prevent you from wasting time and money. Therefore, you are advised to read through it thoroughly before starting on your DIY project.
Here is a super-easy way to store all your spices at home! It doesn’t take much time or effort, and you can adapt it according to your specific needs!
First, measure the inside of the cabinet or wall where you wish to install your spice storage rack. Cut the tiny wooden sticks in order to fit into the holes in your wall (in case they’re too small). Alternatively, you can buy tiny wooden spice racks which are available for sale. (You can do it this way if you don’t have much space – otherwise, you should buy a ready-made one. - No 5. DIY Wall-Mounted Spice Rack Organized by Height
If you don’t have enough space for your spices, you should definitely consider this idea! It is perfect for small spaces and can be easily mounted on the wall with a regular drill and screws. This project will help organize all your spices into one place and get organized in the same order that they are usually stored! - No 6. DIY Wall-Mounted Spice Rack Organized by Color
This spice rack can be plain or stylish, depending on your taste. You can also leave a space where you can store lighter spices that require less space. - No 7. DIY Wall-Mounted Spice Rack Organized by Size
This idea is simple, yet the genius design is ideal for small spaces and can be easily mounted on the wall with a regular drill and screws. This project will help organize all your spices into one place and get organized in the same order that they are usually stored! - No 8. DIY Wall-Mounted Spice Rack Organized by Shape
Here are some ideas to organize your spice by shape:
Use the typical box shape to keep spices organized into one big table base with a drawer underneath. You can also have individual spice shelves where you can place and label accordingly. This trick is ideal for spices that don’t demand as much space.
Other things you should consider in organizing your spices are The durability of the system you use and the ease of adjustments to your kitchen needs. Safety also plays a vital role in that keeping all those chemicals and powders in one place without proper safety precautions is just not safe at all! - No 9. The DIY Wall-Mounted Spice Rack Organized by Aroma
Another way to organize your spices is by aroma! You can store them according to the scents or make a note of what ingredients they are made from. This idea makes it easier to find them when you are cooking.
Moreover, you can also do this by color or mix them according to the occasion (holidays or seasons) and store them accordingly. For instance, you can keep your all-purpose spices on one shelf at the bottom, then curry powders (red), chili powder (green), garam
masala (brown), to name a few. Then for herbs and dry spices, store them in small jars in the front of your cabinet so that they are easily accessible for usage when you need them. Maybe giving some orders to your spice is impossible if you are not keeping them in a particular order or container. - No 10. DIY Wall-Mounted Spice Rack Organized by Weight
To do this, you need to pay attention to the weight of the spices you buy and use. You can use a scale to weigh them and keep track of the amount you have purchased over time, never to run out when needed. - No 11. DIY Wall-Mounted Spice Rack Organized by Size
Since the spices are heavy, it’s better to store them in small containers if possible. Also, make sure they are labeled according to size or type (ground pepper vs. whole pepper flakes). And lastly, we suggest putting all your spices on a top shelf where it is easy to reach and store all your smaller accessories in the lower portions of the shelf.
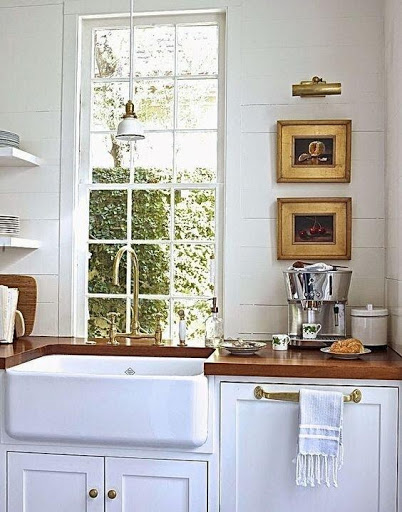
Lastly, Number 1. State the Lighting
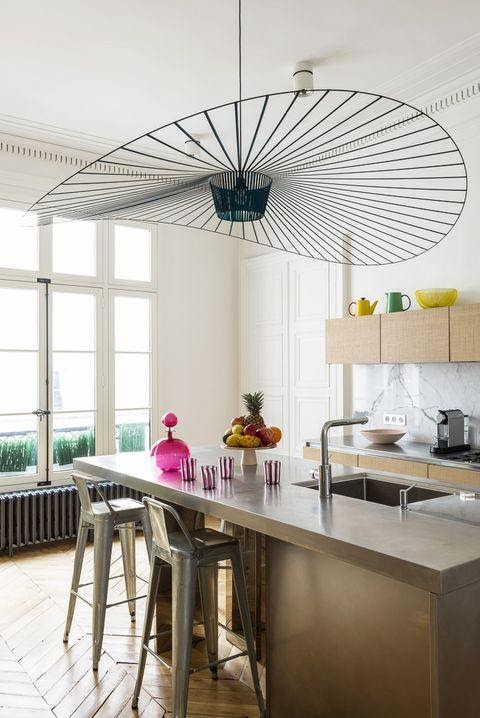 Lighting is a crucial element of the kitchen interior. Without proper illumination, cooking can lead to frustration due to visual impairment. As it serves both illuminating and decorative purposes, consider investing a bit more in statement lighting.
A unique fixture such as this huge pendant adds fun even becomes a focal point to the kitchen. It’s so hard not to pay attention to this tropical hat-look fixture. The installation above the island is also perfect for illuminating you when cooking, eating, and washing.
So,
Working with the interior is easier once you take the first step. Nevertheless, you don’t need to do a massive makeover to change the look. Instead, try one or some of the 10 simple kitchen interiors that the video or content already taught you and feel the difference. Good luck
References:
10. Insider.com
9. Housebeautiful.com
8. Asouthernfairytale.com, Apieceofrainbow.com
7. Countryliving.com
6. Thespruce.com
5. Danslelakehouse.com
4. Iwashyoudry.com
3. Simplehomesimplelife.com
2. Manditremayne.blogspot.com
1. Housebeautiful.com
I am your biggest fans