Life hack has made our lives easier in several ways, but many different things may also be hack into and make life much simpler, reduce waste and make life more enjoyable. Listed below are 30+ simple DIY furniture hacks which will cause you to need to hit the thrift shop! You won’t ever look at a classic piece of furniture exactly the same. These are so unique and smart.
The list is split to 3 sections and you’ll find 1 videos related to this list (Number 29), and if you have a destiny to see point 30th, you’ll find another list related to this topic. Hope you’ll like it and find it useful.
Part 1
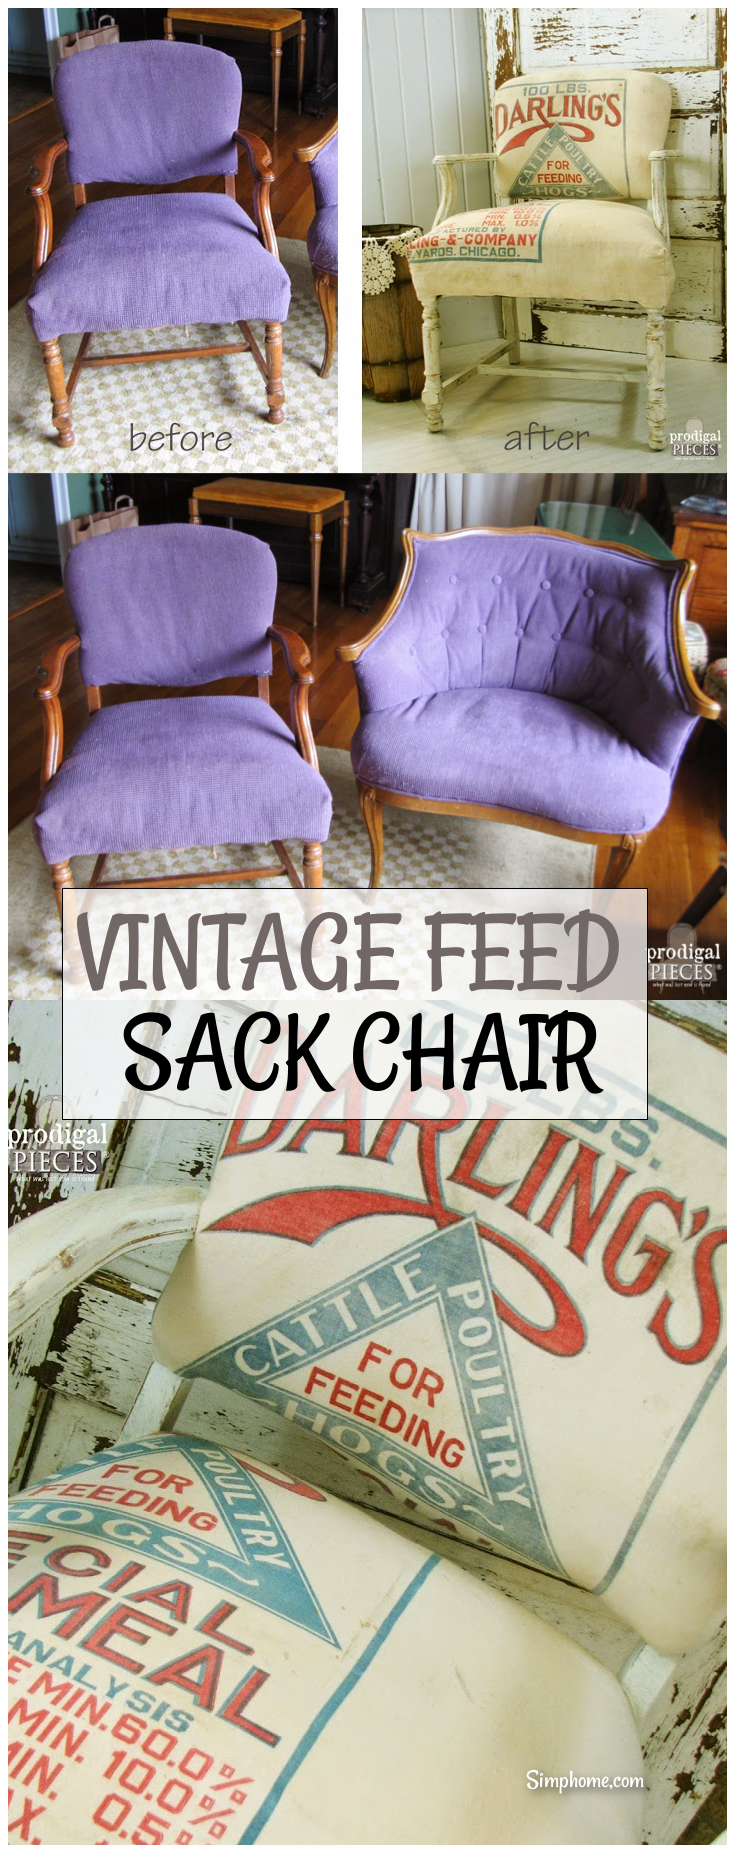
1. Vintage Feed Sack Chair
2. Up-cycled Beverage Station
 Level the location for bracket then, attach with screw to the door. Attach shelf, add glue clamp and relax, then attach a metal wine glass rack to its other side before gluing the upper shelf. It can be secured to a brick wall using a cement screw.
3. Night Stand Makeover
 Build a box from scrap pieces of plywood and pry off the bottom trim. Cut the top pieces to size, glue and screw on the bottom of the stand. For the drawer face, apply glue to the drawer front, put in place as desired and nail. 4 pieces scrap piece of flooring is required to cover the night stand. Attach them together with glue and nails, nail some scraps to the bottom and add bead board using nails and glue.
4. Farmhouse Table makeover with Home Right Sprayer
 Sand table, spray and add 4 coasts of poly to it.
5. Bathroom Magazine Rack (DIY)
 Measure out the height of your required rack, cut wood to desired length and be sure to level and straighten the rack. Nail the top and bottom measure out your desired width and place a wood at the other side. Add one 1 by 3 piece so that the top and bottom can rest on. Ensure your board is straight, then nail.
6. How to Make your own Side Table

7. Reupholstering Chair Without sewing
 Cut fabrics secure it into creases area using staple gun. Design air compression and construct staples. Cut pieces facing front on both sides, staple where visible and cover the inside of the arm chair hiding staple beneath arm.
Cut rectangular shapes leaving fabric to fold inwards, pull tight and staple each corner, do the same for top side piece.
8. Cork Board Office Wall
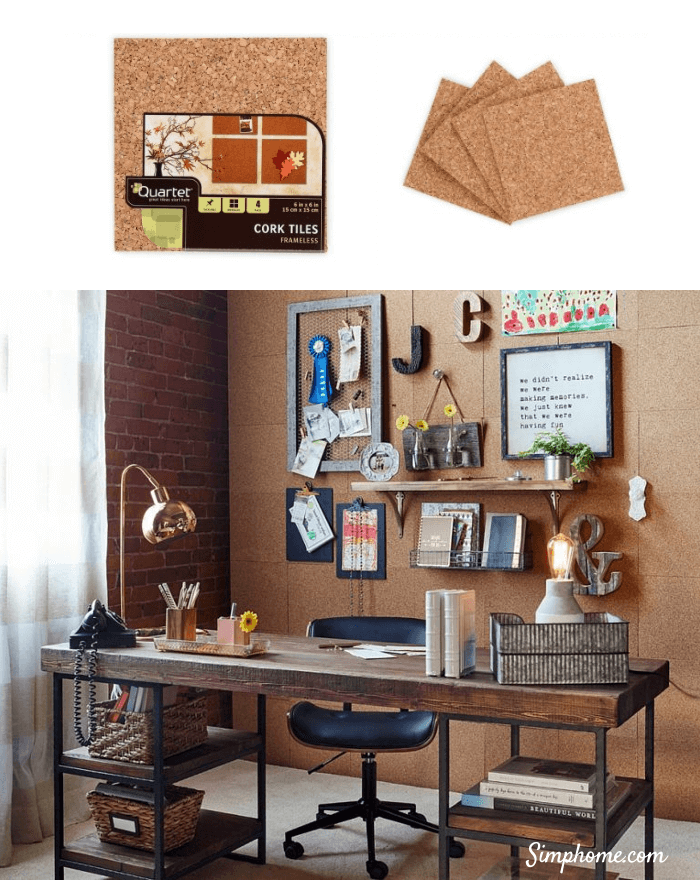 This can be found in almost all home improvement stores and they can be placed on any flat surface. Let the cork board cover wall, a floating shelf can be added to the wall so as to show picture frames.
9. Card File Drawer
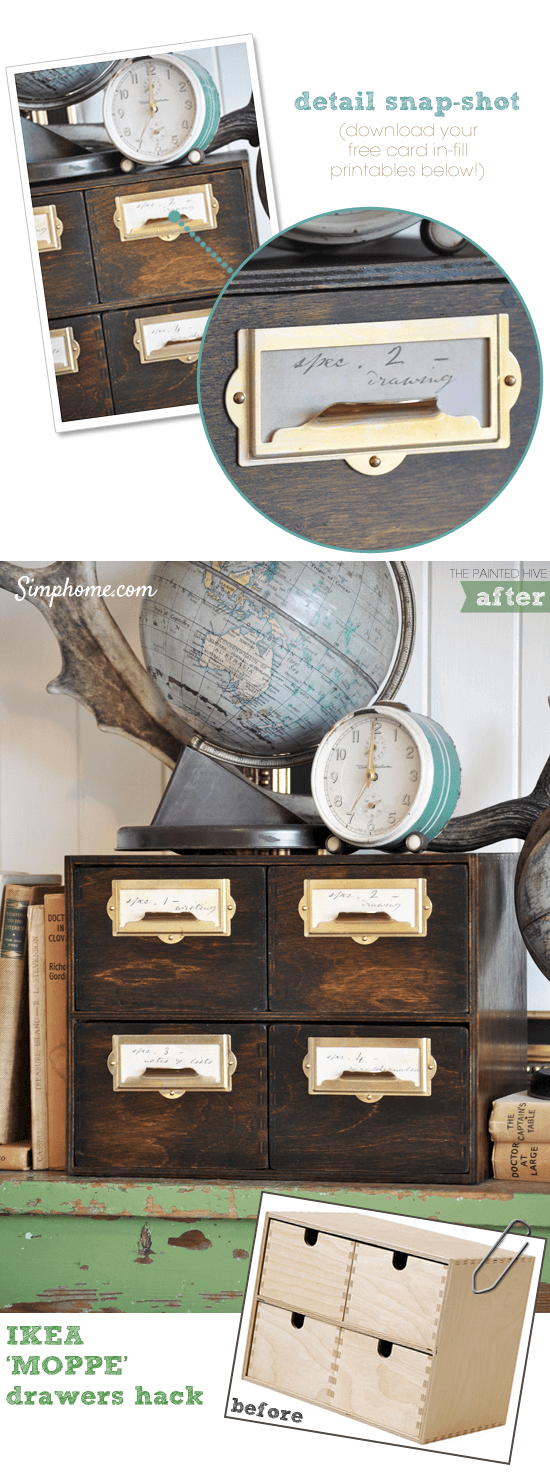 Apply 2 coasts of timber stain to the drawer, also add soft luster to enhance the quality of stain then apply 3 coasts of Danish oil. Let oil dry, then attach pulls. Ensure the nail hold the pulls is poked through the drawer front’s rear, then design simple antique for card holders.
10. Feast Watson Near Table Transformer
 Cut claddings from sheets of pine ply (it has to include all required parts for the drawer) and sand all. Apply 2 coasts of dilute color reducer Feast Watson Prooftint. Apply cladding to the tables and use square pine timber for the feet.
Attach to base using 3 screws and liquid nail, be sure to pint before applying the cladding. Each piece should be laid carefully on top of the drawer and clamped.
Let me try different perspective:
Measure bedside tables accurately by cutting all of the cladding from large sheets of pine ply. This included the faux drawer fronts (30 pieces in total), the shaker-style side trim (20 pieces in total) and the tops and bases (four pieces in total).
Stock up on Feast Watson Prooftint (Teak), Feast Watson Scandinavian Oil and Feast Watson Prooftint Colour Reducer beforehand. For the hardware, you can put some plain label holders flanked by small brass knobs. As a finishing touch you can line the drawers and use geometric patterned wrapping paper
Part 2
11. Using Stick Flooring And Peel For Faux Multi-Drawer Cabinet
 Determine the number of drawers and measure the sizes, be sure to leave about 2 mm gap between the drawers. Cut down planks as needed (be sure to use a type of guide), remove the doors and lay them flat as you cut the faux drawer.
Apply base and feet using plank of pine, cut two smaller pieces and from the pine plank and attach to each base. Cut out 1 square pine for the feet and screw to the base.
Other Point of view: Measure, trim and attach faux drawer fronts. Decide the number and sizes of drawers beforehand.
Don’t forget to take into account the width of your peel and stick planks. Obviously, you want as little wastage as possible and can save yourself some trimming. While finishing, cut down a square length of pine to create four simple little feet and screwed them to the new base. Paint the furniture, attach hardware, and fill label holders
12. Making a Bed Frame From Box Spring
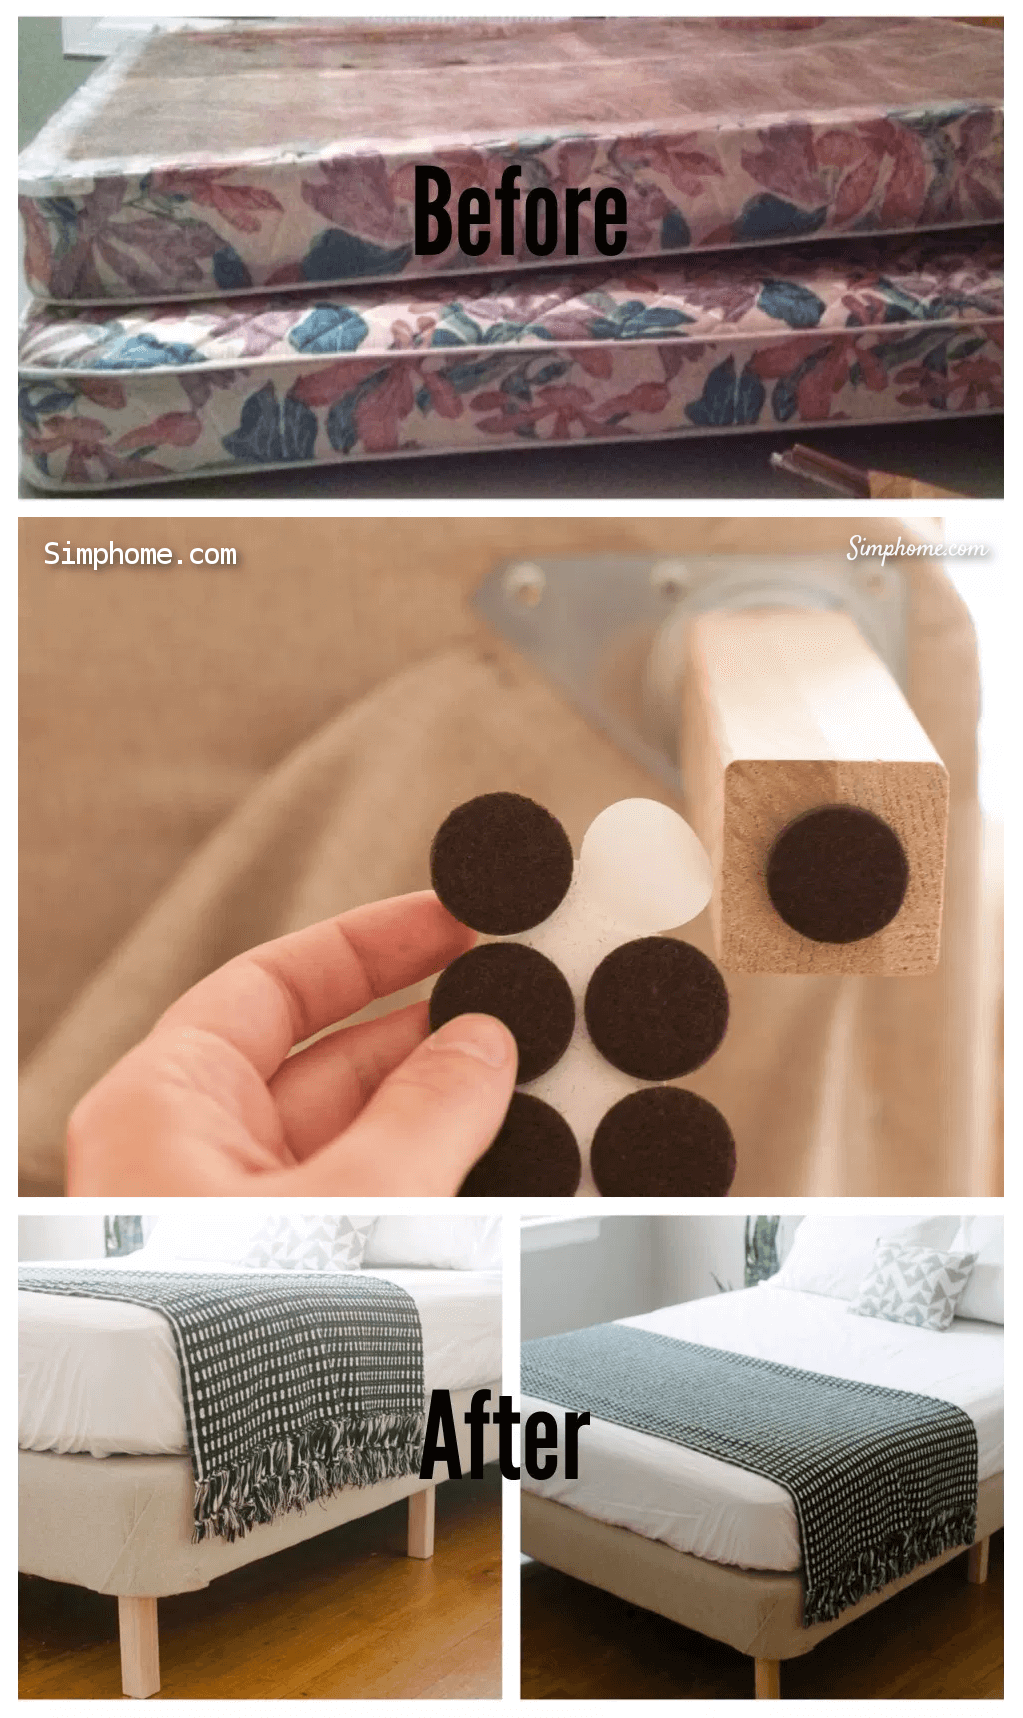 Measure fabric to ensure it is the same size as box spring, cut fabric into two and be sure it covers the box spring. Sow the two fabrics together and fit over box spring. Flip the box spring on its side and staple fabric down. Screw brackets and attach bed legs to it, then trim excess fabric on the box spring.
Or
Cut the yards of fabric into two pieces so that it would cover the box spring and sew the pieces together. After fitting the piece of fabric over the box spring, flip it on its side and start stapling the fabric down.
Screw the brackets down first, and then fix the legs on to them. Once the legs are attached, trim any excess fabric on the bottom of the box spring. For a finishing touch, add an adhesive felt pads to the bottom of the legs.
13. Antique Piano Stool
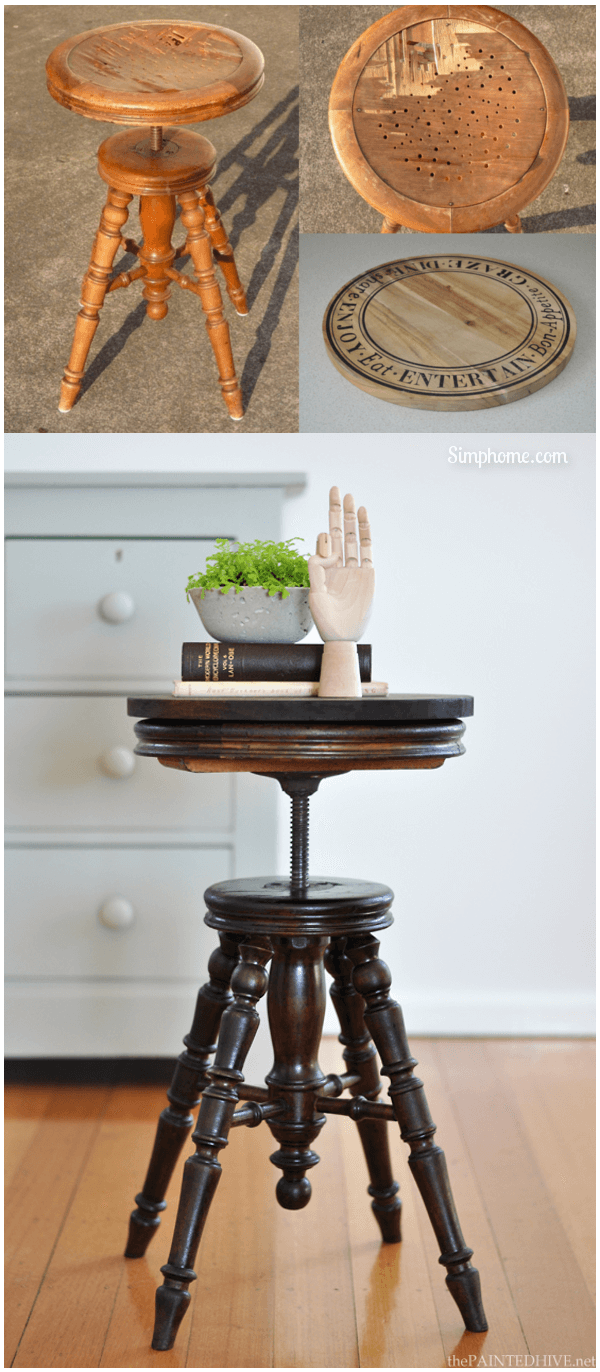 Paint stool with rich brown color, wipe on the stool with rag to apply stain be sure to give bread board the same color and finish off with linseed oil. Add few bods of clear silicon to the board of the stool to hold firmly.
in other words: Stain a stool with rich brown color. It should be consistent to stain the bread board with the same color and finish with linseed oil for some shine. To attach the board to the stool, use a few drops of clear silicone. This holds it firmly in place while allowing for easy removal
14. Cage Light Sconces
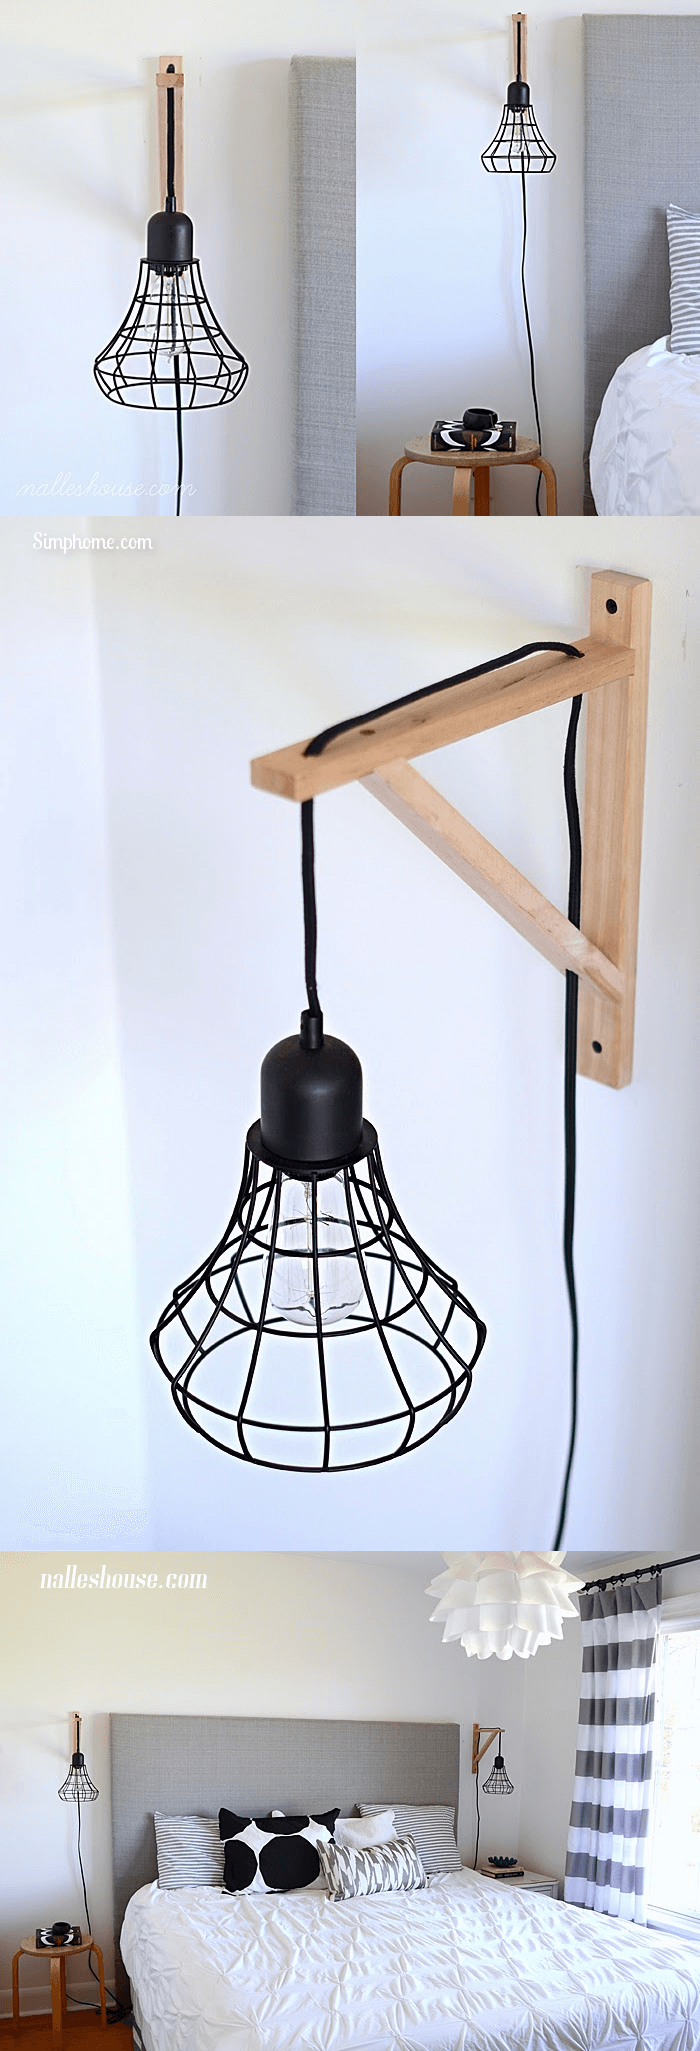 Drill a third holes in your bracket along with the two pre-drilled holes. Cut off the off switch or plug end of the pendant light. Insert the cord through the bracket from the outermost hole to the bottom.
Allow an electrician install a new plug right at the end of the light then plug and enjoy after wiring.
Let me using other words:
First, Drill three holes in your bracket. There are two pre-drilled holes at the top of the bracket so just widen them.
Cut off the plug end and the switch portion of the pendant light with wire snips so that you can thread the cord through the bracket starting at the outermost hole and going up over the top of the bracket and down through the bottom hole.
Get a professional to install a new plug at the end of your light fixture. After wiring, simply plug in, and enjoy the difference your new sconce makes to its surroundings.
15. Floating Sideboard
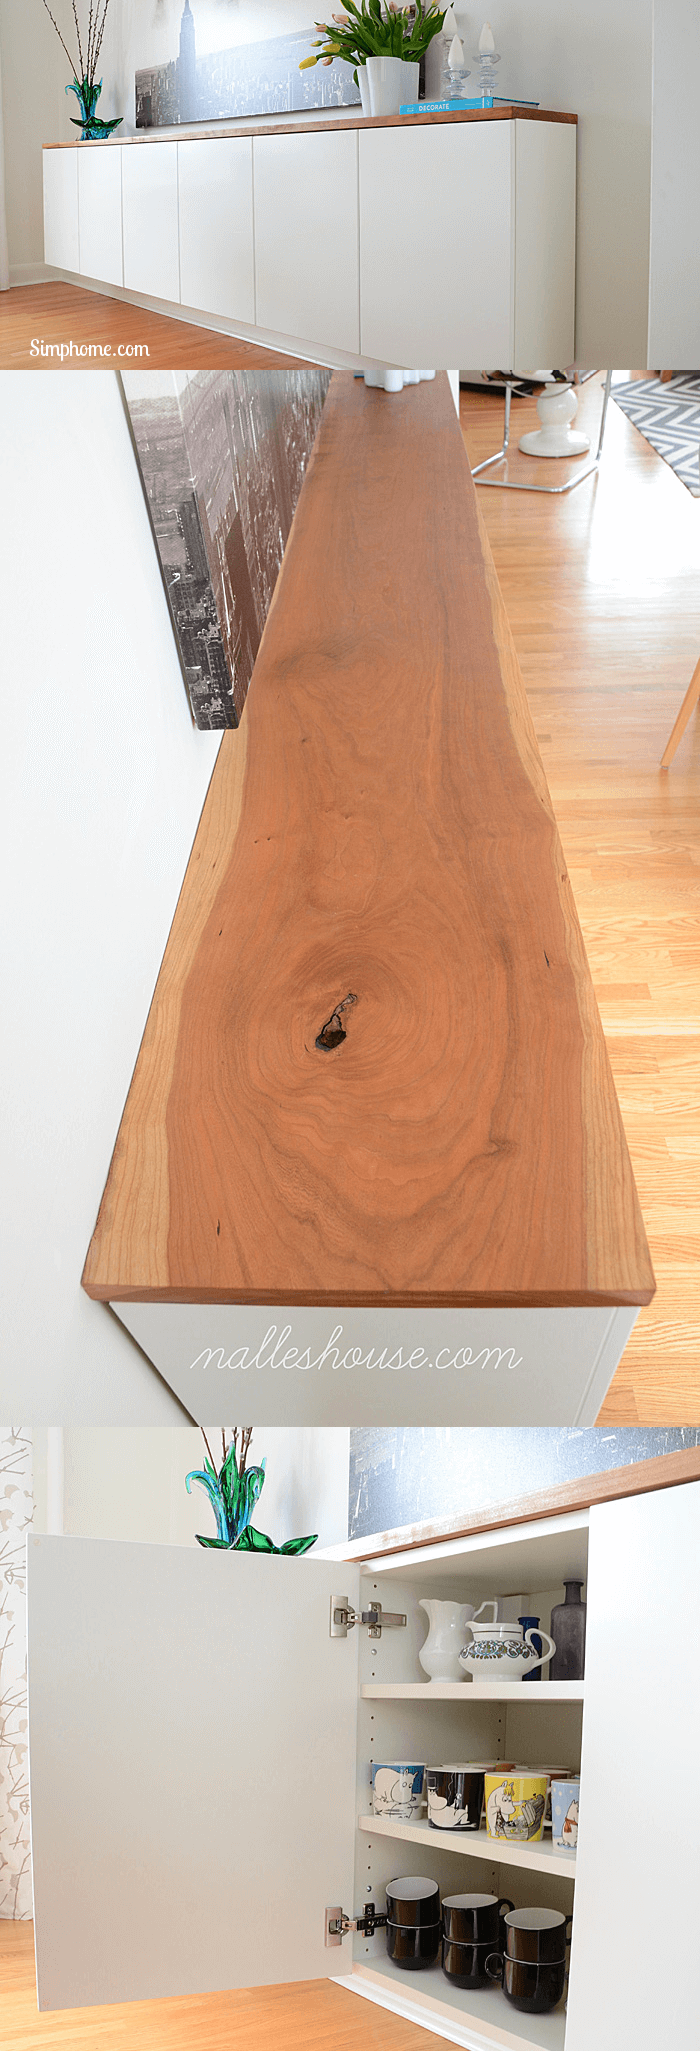 Mount 3 36″ by 24″ cabinets with kitchen mounting rails. Level the rail to ensure cupboard levels too, then attach cupboard to each other from inside.
Or, Use IKEA kitchen mounting rails for mounting 36″ x 24″ IKEA cabinets. Level the rail and the cupboards automatically become level. Fix cupboards to each other from the inside and you are done!
16. Honeycomb Armoire

Take off the doors of your melamine wardrobe pull off drawers and be sure to remove every hardware. Create new top and base by cutting two identical panel form ply sheet. Sand and spray black, sunk visible screws and fill holes of the wardrobe sides.
Sand and ensure the color paintings match. Attach new top by clamping smoothened panel in place, screw down before attaching base of wardrobe. Drill pilot hole, then screw base from inside the wardrobe.
Let me rewrite that short instruction again: You need a simple melamine wardrobe and ensure it is clean, taken off doors, with drawers pulled out, and any other hardware removed. To give the hexagons a nice frame of sorts, add a new over-hanging top and base.
Look online for wide raw ply hexagons to get the pattern right. Hand-stain them, dip your brush from color to color and coating each shape to achieve random tones. Finish by installing handles.
17. Folding Chair Makeover
 Turn the underside of the seat of a vintage wooden folding chair into a chalkboard, then mix chalkboard paint with black paint and un-sanded grout. Tape edges around underside of the seat using painter’s tape, then apply your chalkboard paint.
Add organizers to the chair’s bottom with hooks and tray.
18. Vintage Door Reincarnated as a Rustic Desk
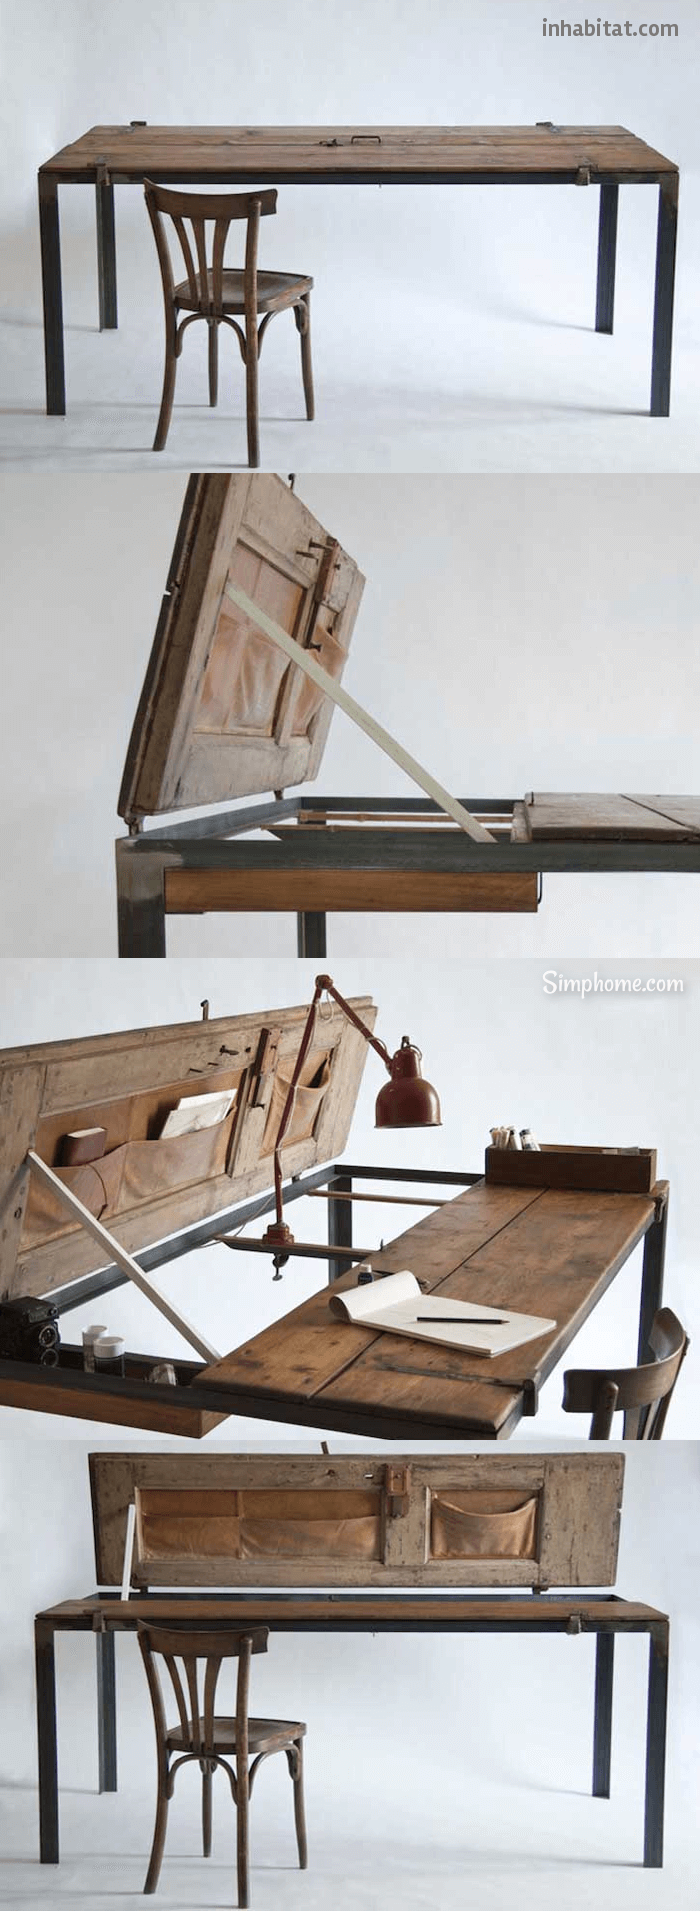 This piece of furniture measures 78” long, 31” high and 40” deep. Created by Manoteca, the furniture is perfect for multi-functional manners of works as a table or desk table. It can be filled when opened and it is designed to keep everyday materials at hand.
19. Danish Chair Redux
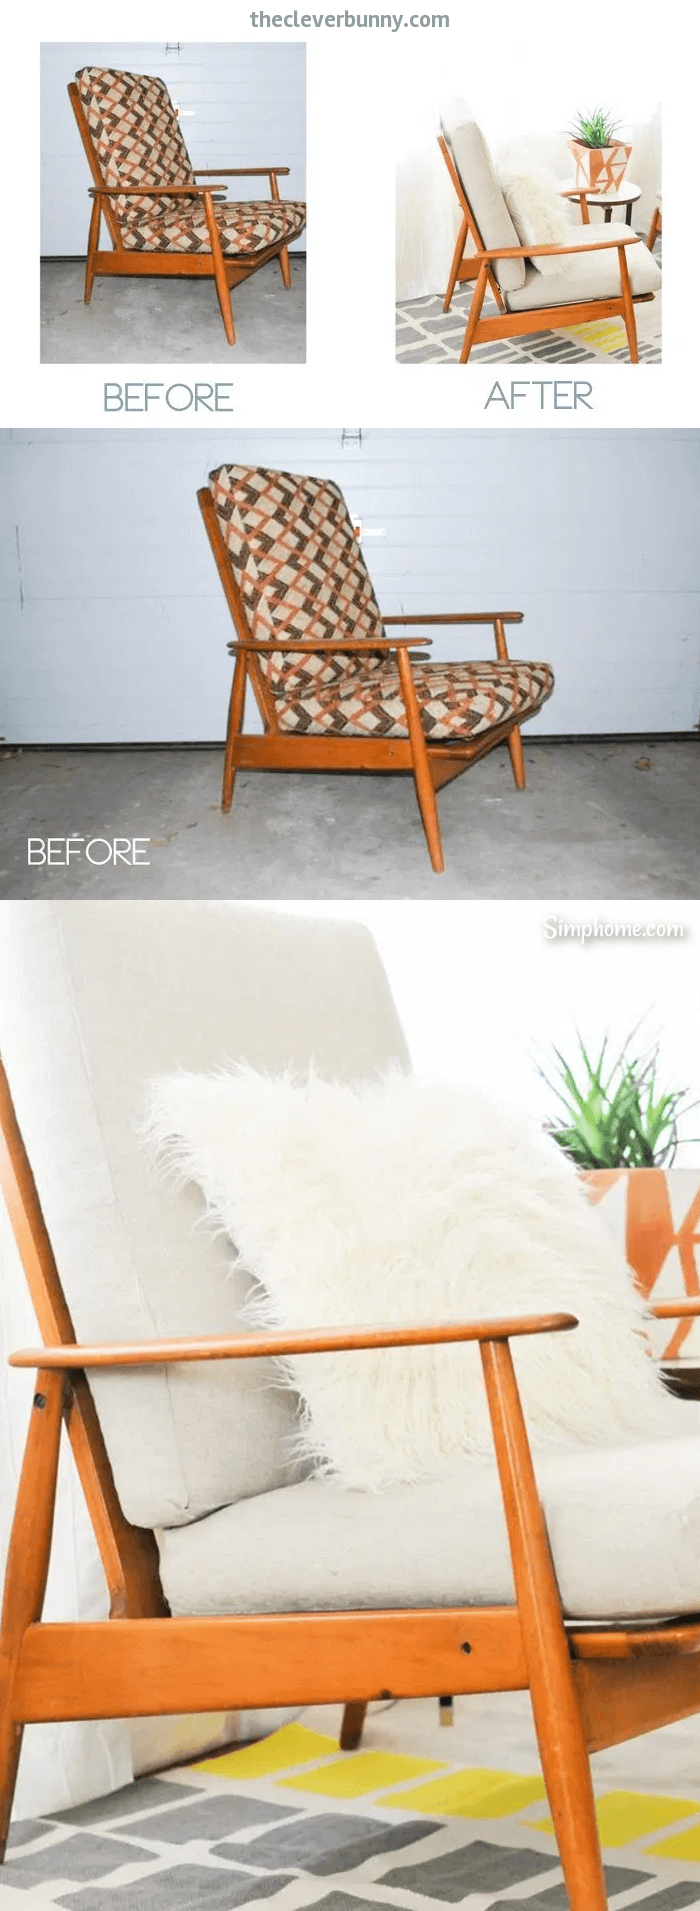 Remove each seam of you cushion covers to access the pattern piece needed. Trace pattern form the old fabric to the new, be sure to have requires pieces laid out. Pin fabrics down to piercing cushion together, pin side pieces and bottom together to get a square shape ensuring your seem only goes around the corner.
Repeat the same process for the last square you have left, sew cushion 1/3 of the way up and ensure it fits your cushion into opening. Fold bottom and top pieces together and sow lops around them.
Or let’s put it this way: Carefully take apart the original cushion covers, which means removing each seam until you have all of the pattern pieces. Once you take all of the seams out, you should have all of the pattern pieces you need.
Trace the pattern from the old fabric onto the new fabric. Pin your bottom and side pieces all together until you have a square. Your corners need to be completely unfolded, so the seam goes around the corner, not over the top of it. Sew and once you are done, repeat the same process with the last big square you have left
20. Spice Saving Laundry Organizer
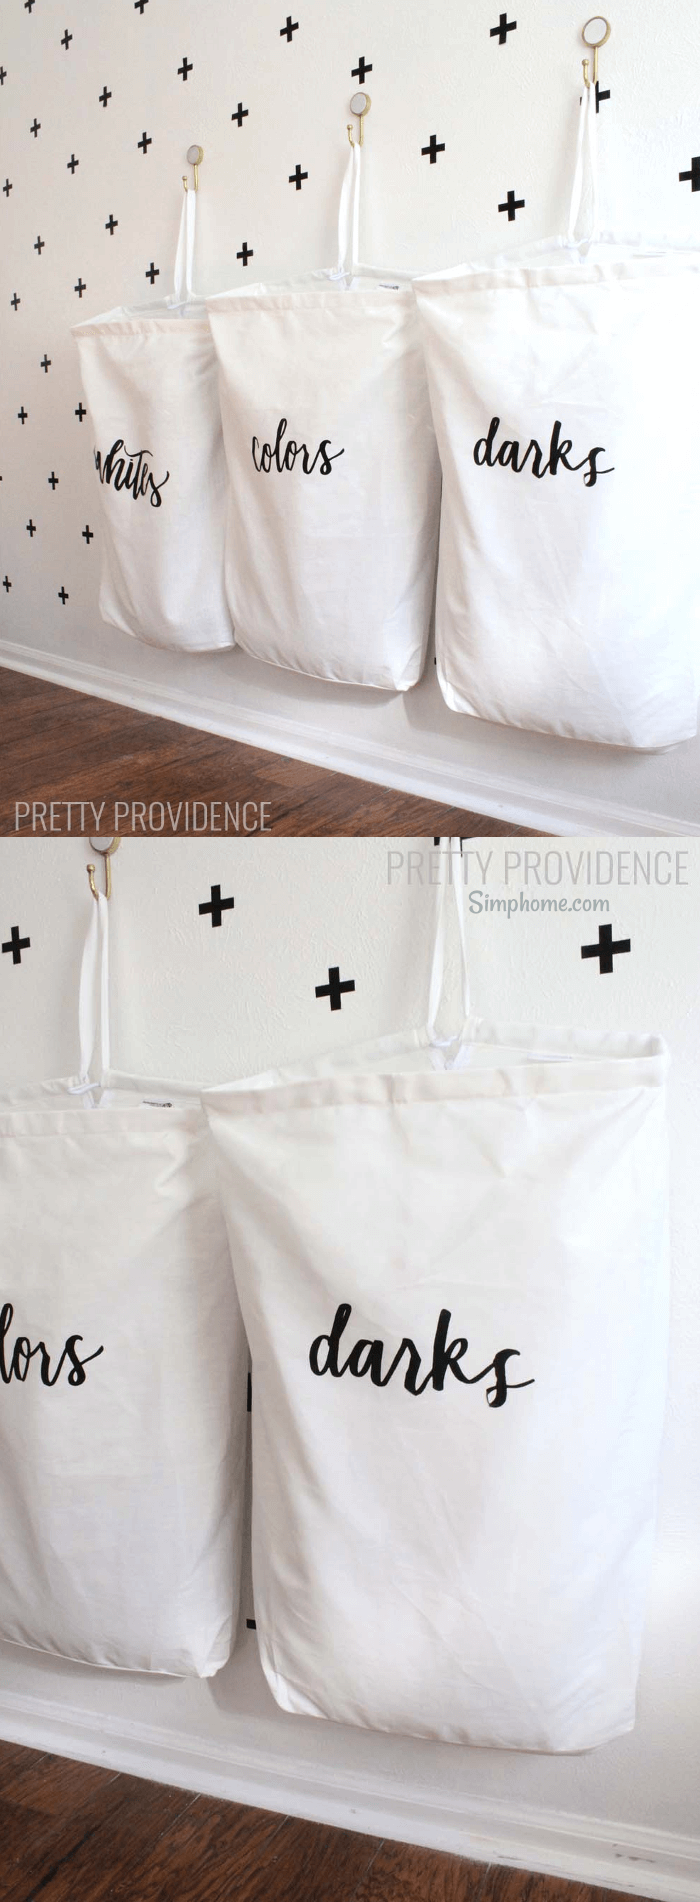 Download this design into your computer and upload to circuit design space. Choose simple image while uploading, cut only and then choose to insert. Be sure to size to fit your desired laundry bag, install wall hooks and have them hanged. Source of this idea.
Part 3
21. Salvage Drum Coffee Table
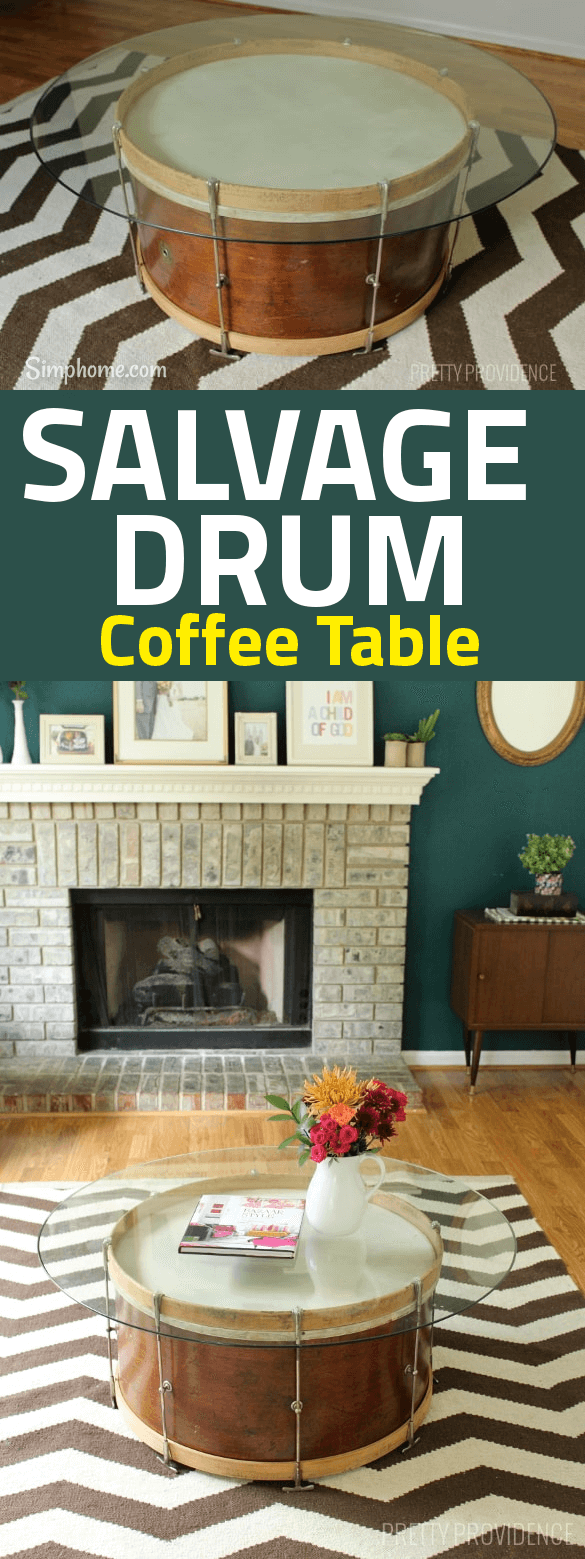 Get a clean drum and place table top on the drum’s claws and be sure to add some rubber stops as buffer to prevent scratching.
22. Cabinet Hack
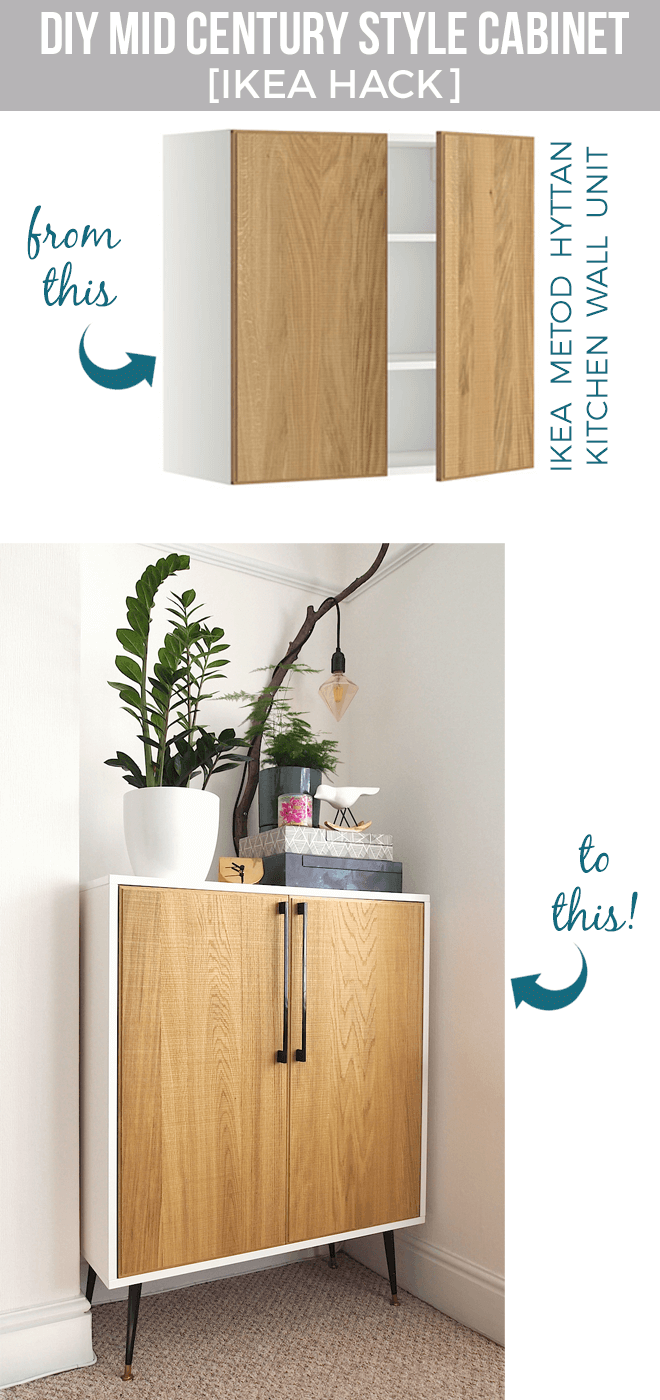 Screw the side pieces in place one after the other making sure they are lined to the exact sides of the cabinet. Attach the bottom and top ones, then attach vintage and slim black handle legs. Fix cabinet to the wall using any type of available fixing.
23. Painting Laminate Furniture Without Sanding
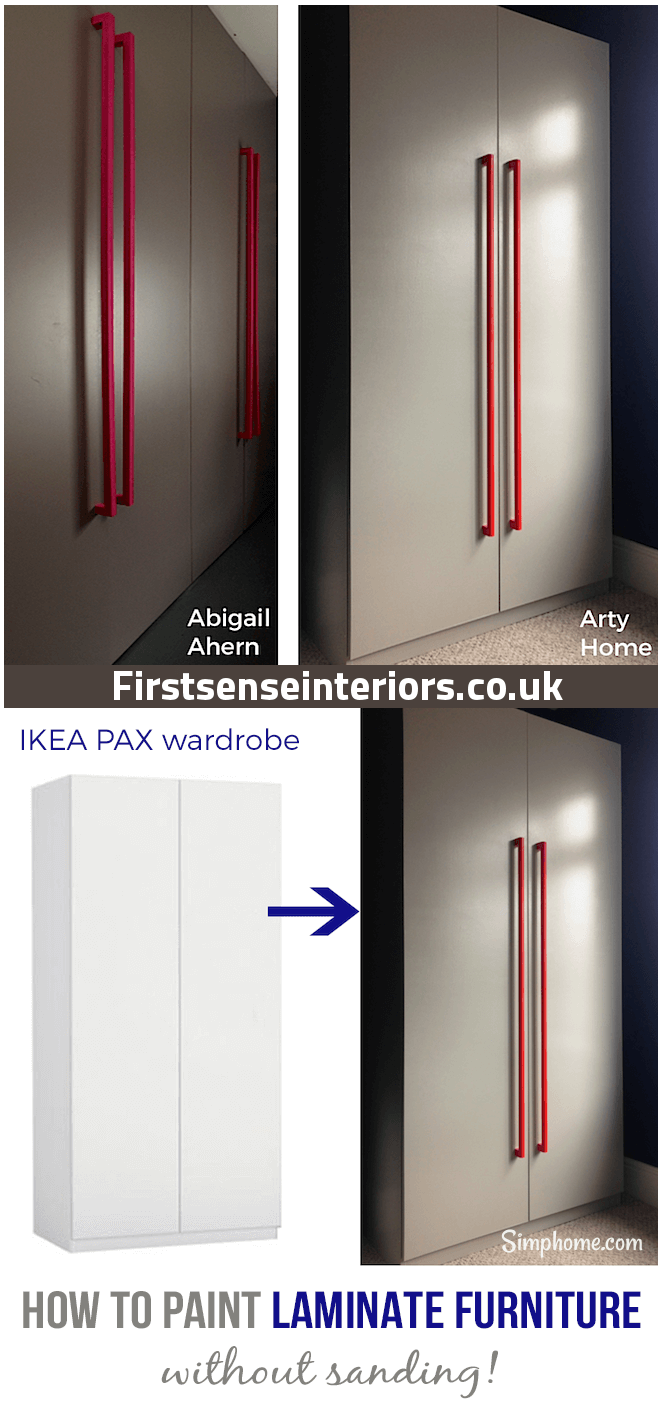 Wipe the surface required for painting with a lint free cloth and white spirit. Roll two coats of shellac based primer on, then roll another two coats of your favorite emulsion paint. Wait for the varnish or eggshell to harden or cure. Leave painted surface open for days, the longer the better.
24. Yellow Master Bedroom Console Table
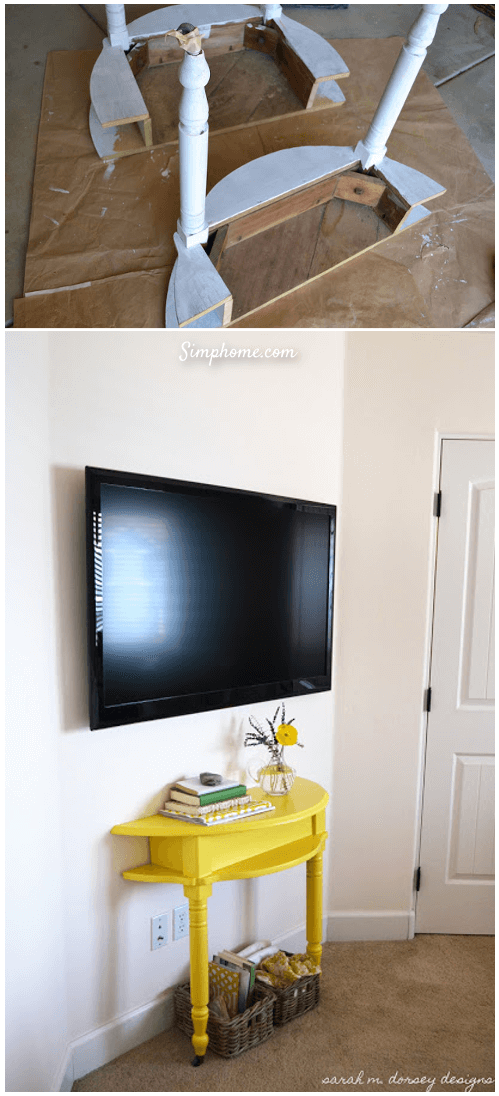 Wipe the table with microfiber cloth after sanding, then prime it- brush the legs and foam rollers on the top. Cut to about 14” Depth, paint and be sure the table is supporting itself. Then attach to the wall with angle bracket for additional support.
25. Half Table Console
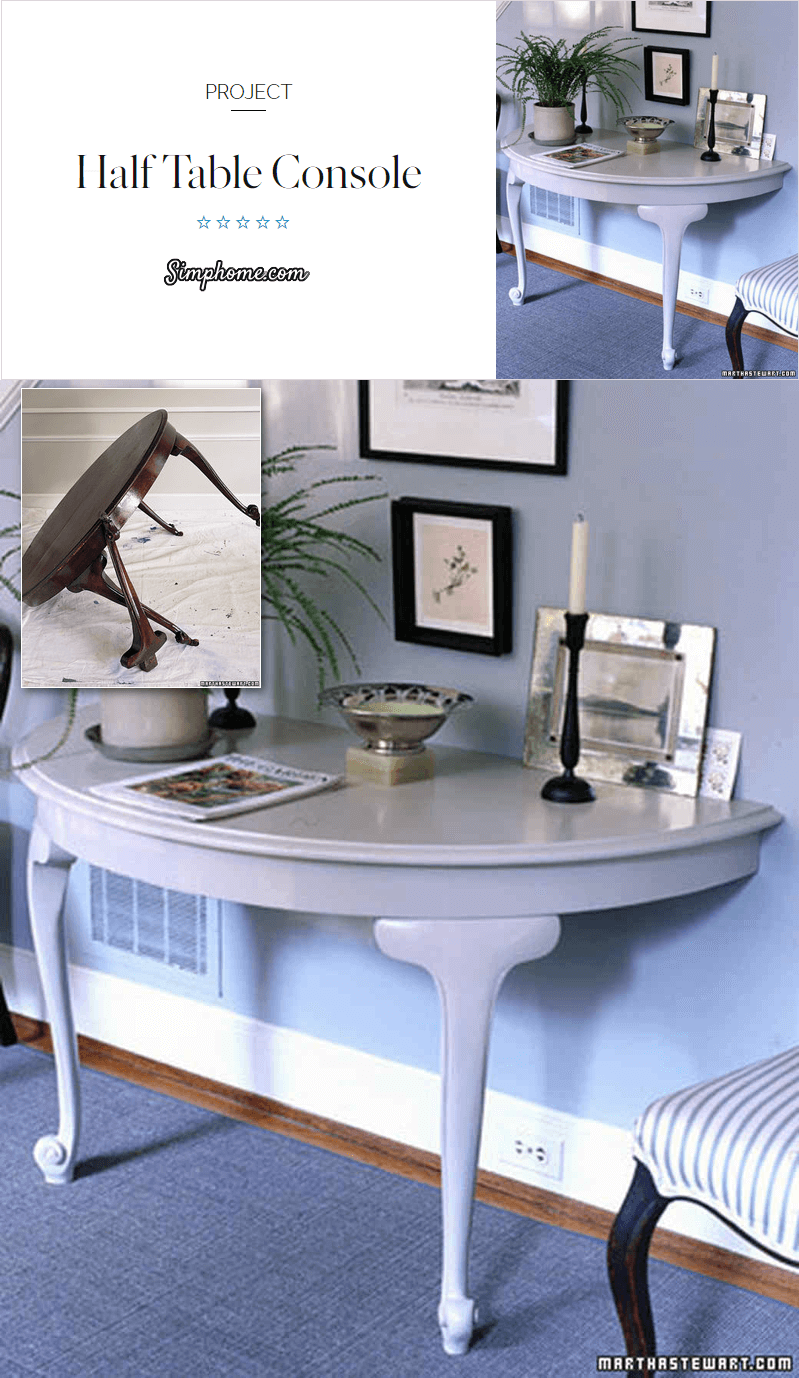 Remove extension mechanism form the bottom of the table, sand, prime and paint the table. At the height of the table, screw or nail a 2×2 inches piece of wood and let the edge of table rest using the wood as support.
You can as well screw through the top of the table to the wood support for more stability. Fill left over holes using wood fillers and paint.
26. Cutting Table to Create a New Entry Bench
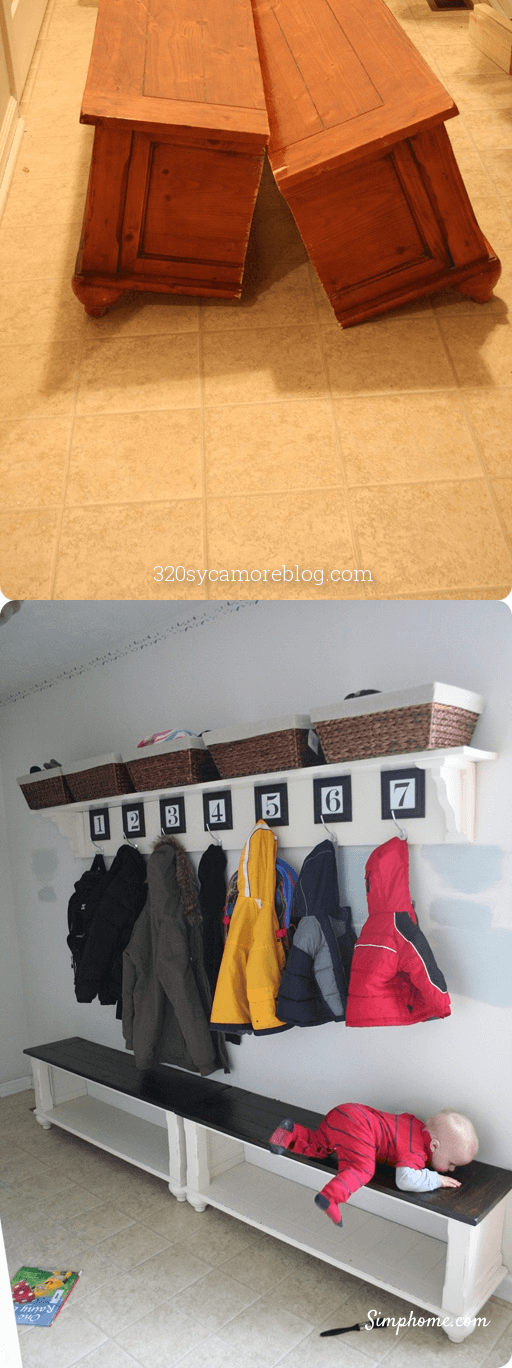 Cut your coffee table in half, then sand the top to the necked wood ensuring it is smooth and nice. Wipe through and dry, then apply gel stain with brush. Wait to absorb for about 15 minutes, then clean the excess dry till the next day. Apply coat of your desired color, then apply two coats of poly on top to protect the stains.
27. Making Two Console Table
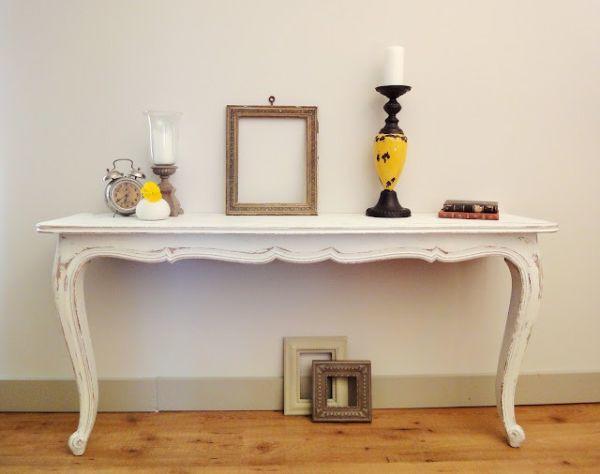
Cut a table of about 3 to 4” width and 5” length into two 13 and half or 35 cm wide console table. Paint the top of the table with your desired color, then screw or nail a 2×2 inch wood to the wall at exactly the height of the table.
28. Chic and creative DIY Stand
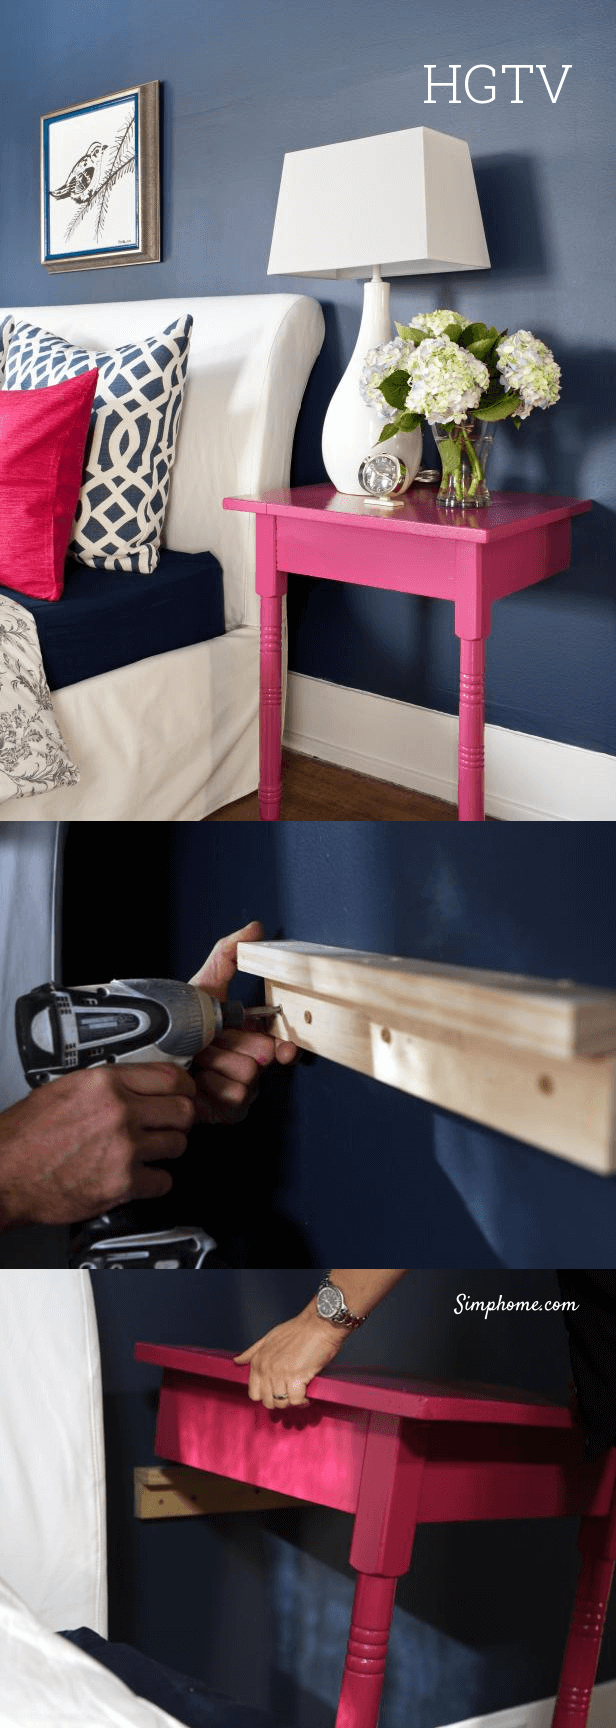 Mark table to required size, cut legs down and cut table to half. Remove rough edges, sanding residue and dust with damp cloth. Spray with porch and deck paint keeping at least 8 inches between spray and table to avoid dripping and building of paint.
Dry for one hour, apply final coat, the spray again with floor sealer. Lean table against the wall where you intend to place it, mark the height and apply cleat. Attach the table to cleat using drill and wood screws from below the table.
In other words:
Cut legs down to the proper height, saw to cut table in half, and remove existing finish and rough edges with orbital sander using medium-grit sanding pads. Use wet cloth to remove dust and sanding residue.
Finish by drilling to fasten cleat to wall with screws. Place table on top of cleat. Using a drill, attach table to cleat with wood screws from underneath. Use bright and vibrant colors if you desired.
29. 28 Furniture Haul (Include some IKEA Furniture Hacks) Ideas
Click play and you’ll repeat everything you just read in this list. Honestly, I feel better if you read less than under 10% of all words available in this list and find this video.
Play Video:
FYI,
30. 30+ Furniture makeovers (include video).
 In this list, I am glad introducing you with some of the cleverest furniture makeover ideas I have compiled that will safe your old or abandoned furniture and at the same time, reducing your restoration cost. There you’ll learn how to spray paint your metal furniture, how to convert your table into a marble top surface and many more. See you there.
31. 30+ Side table hacks (IKEA and non IKEA).
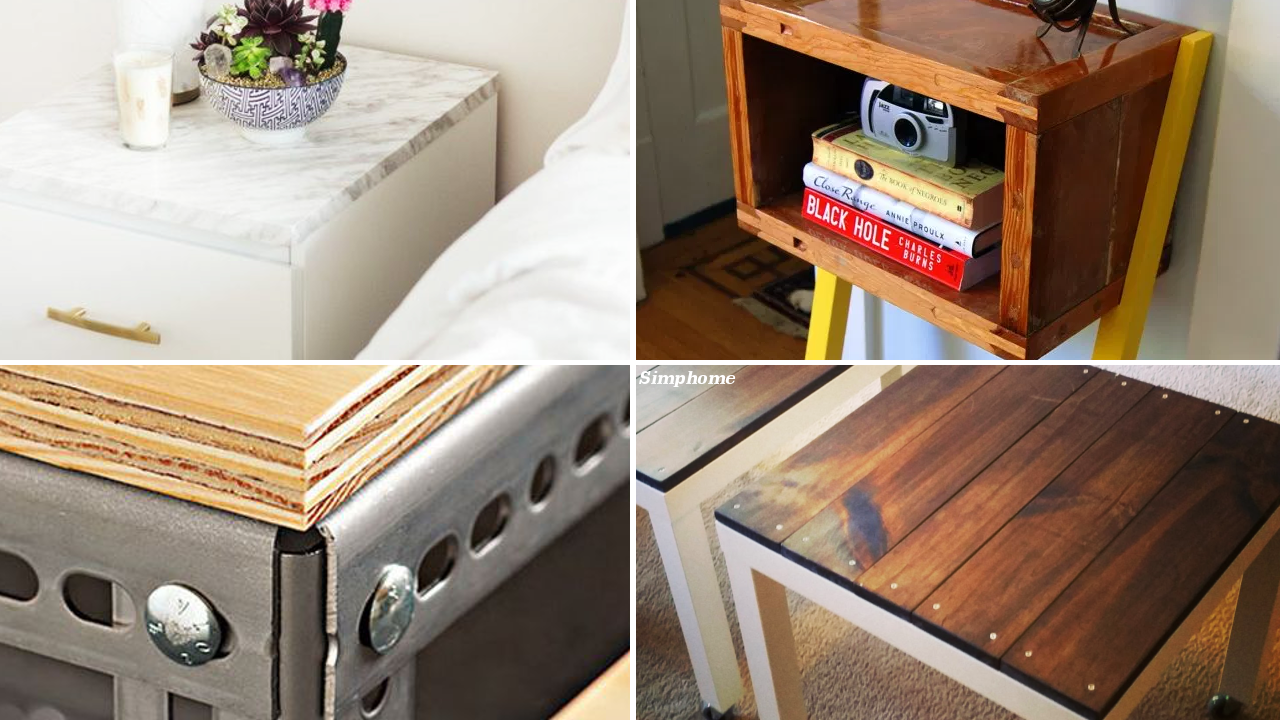 This time we are going to talk specifically about side table makeover. Whether they are originated from IKEA or non IKEA. The list comes with a video presentation too that you can enjoy and share with anyone close to you in your social media. I think I have said enough for now and that’s mean see you again later.
32. 37 IKEA furniture upgrades (include video)
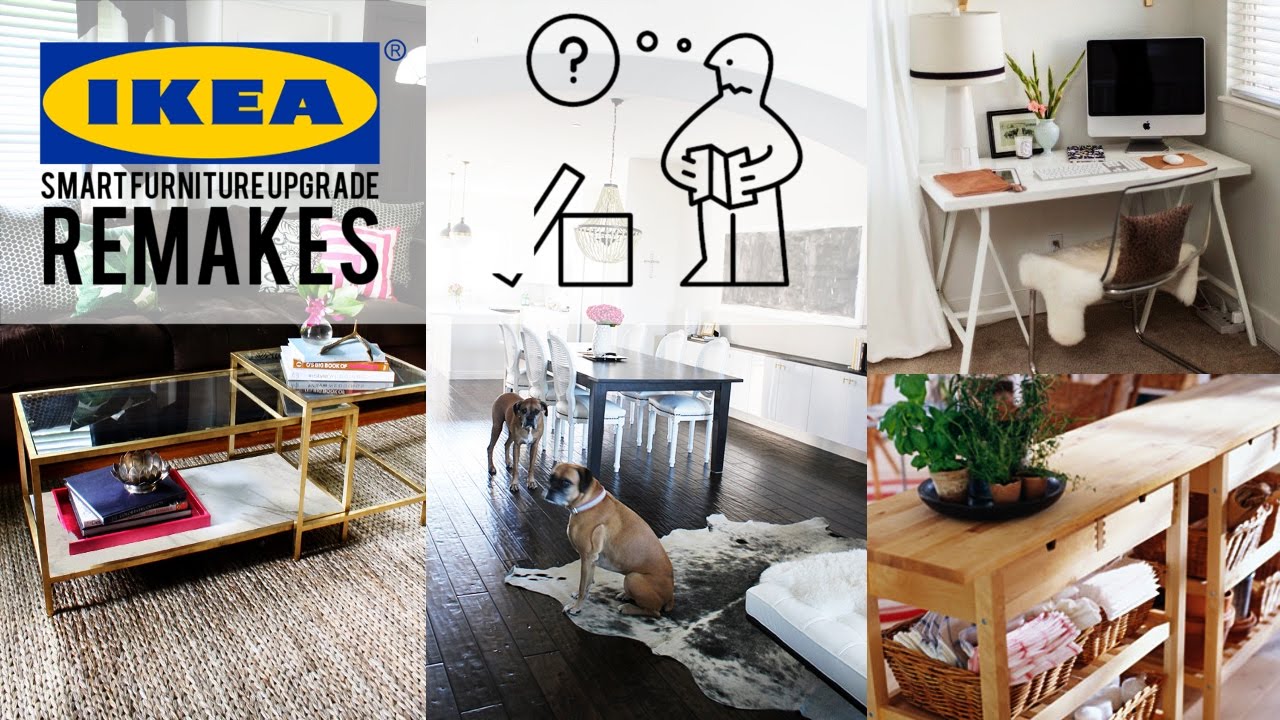
This list will bring you to some of I think the best IKEA Furniture. From IKEA chairs, IKEA tables, Cabinets and many more. If you are loyal fans of IKEA like you loyal to your current smartphone brand, I think you’re going to love it.