Hack your way to a stunningly organized life with our top 20 IKEA PAX hacks! These genius tweaks take the humble PAX and rocket it to new heights of function and flair. Whether you’re fashioning a secret doorway, carving out a cozy nook, or just elevating your storage game, these hacks will have you wielding a screwdriver with the excitement of a wizard’s wand. Join us as we unveil the best kept secrets of the PAX wardrobe, transforming every inch of your space into a showcase of efficiency and style!
20. Karen Knox’s IKEA Pax hack
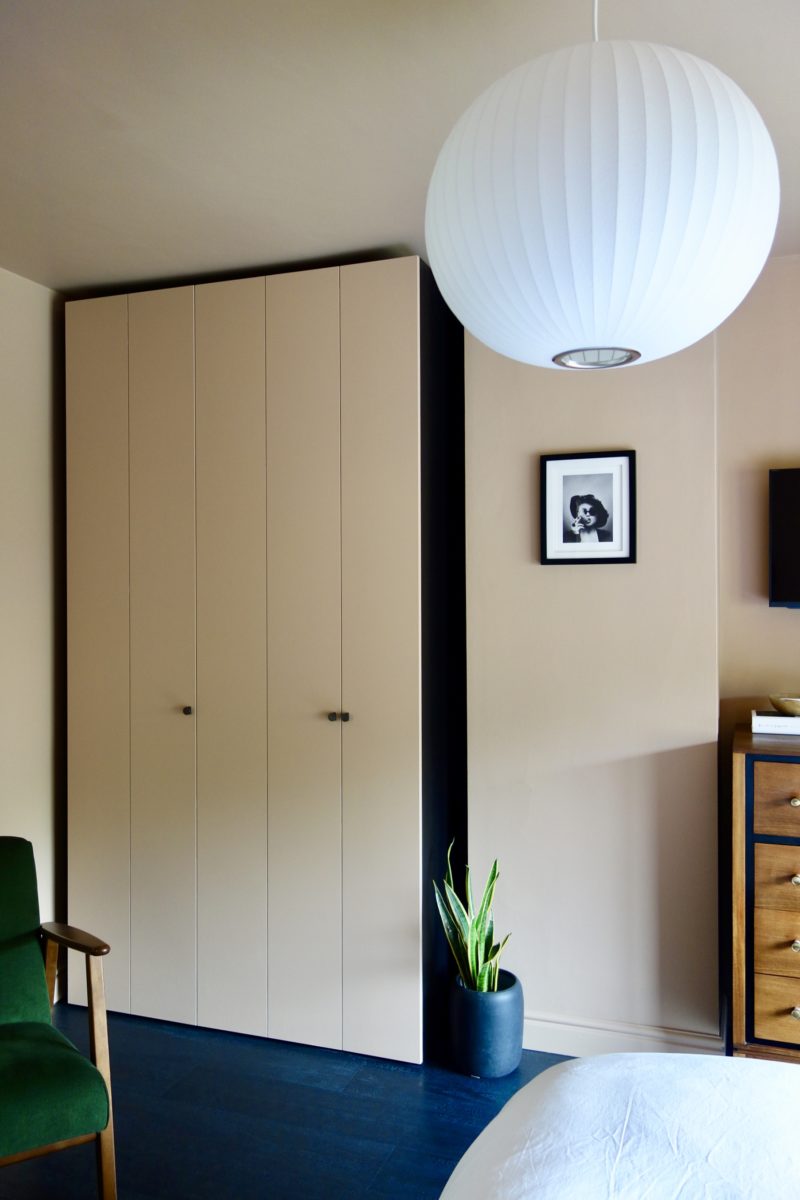
You know the struggle of wrestling with handle less drawers, especially when they’re jam-packed with your fabulous collection of clothes. Well, say no more! Those days are gone. With the funds from selling your old wardrobes on eBay, you’re about to create your dream storage space.
Visualize this: all your cherished blue jeans, oversized black tops, and boyfriend cardigans finally having a home they deserve. And with the IKEA Pax system, you’re in control. Opt for the towering 236cm frames to maximize every inch of your 242cm-high ceiling. Use the Pax planning app to play around and get your layout and costs all figured out, minus the boring bits.
But wait, where are the doors? Fear not, because you’re not settling for off-the-shelf doors that don’t fit your vision. You’re designing your own! Craft seven doors in a blend of 500mm and 250mm widths, adding grooves to create an illusion of more doors and smartly spaced vertical lines to give the room an elegant lift. Dodge any clashes with the adjacent radiator by choosing your door widths wisely.
The fantastic folks at Bare Joinery will be there to help bring your vision to life. Navigate through the quirks of hinge and drawer placement, and embrace a bit of DIY spirit when painting your bespoke MDF doors with leftover room paint.
After priming, painting, and attaching the ergonomic and understated Dowsing & Reynolds Abstract Pinched knobs, you’ll step back and admire your handiwork. Your wardrobes are now a pleasure to use, and keeping your room tidy suddenly feels like a breeze.
And now, the million-dollar question: how much does this storage paradise cost? For a total of £1265.93, you’ve transformed your space from mundane to magnificent. It’s a small price for a major upgrade, isn’t it?
19.IKEA PAX Hack with Plywood boards
Alright, DIY enthusiasts, roll up your sleeves because you’re about to transform that tiny room with an IKEA PAX wardrobe and a kitchen cabinet! Don’t fret about the size difference; you’re going to make those doors look like they were made for each other.
First things first, grab a circular saw because you’re about to do some serious carpentry! If that’s not your cup of tea, a quick trip to the local DIY store will sort you out; they can cut those doors to your needed dimensions. You’re aiming to extend the doors’ height to give your wardrobe that seamless, built-in look.
Notice how the original PAX doors shy away from the floor? Not yours! You’re making them longer, bolder, and ready to stand out. Make sure to copy the holes from the original doors and reuse those hinges. A special drill will be your best friend for this part.
Your material of choice? Plywood. Yes, it might throw a curveball at you, especially in the longitude direction. But, once you mount those doors and fix the hinges, everything straightens out like magic.
Got a big project? You might need two plywood boards for those doors. Pay attention to how they look side by side; plywood can be a bit of a diva with its varying expressions.
Now, bask in the glory of your handiwork! You haven’t treated the doors yet because, let’s be honest, they look stunning as they are. But, when the time comes, and they start to show their age, a little wood cleaner, sanding, lye, and beeswax will do the trick.
And there you have it!
Step back and admire your transformed space, all thanks to your handy skills and a bit of IKEA magic and IG/Poppelgade.
18. IKEA PAX Hack: Transform Your Pax Wardrobes into Chic Built-Ins

Hey there, DIY enthusiast! Ready to turn your IKEA Pax wardrobes into stunning built-ins? We’ve got your back! With this guide, you’ll give your space that custom, high-end look without breaking the bank.
First things first, take a look at your old closet. It’s time for a change, right? And what better way than using IKEA Pax wardrobes? They’re affordable, customizable, and perfect for both him and her. So, let’s dive in!
The Old Closet, Then and Now
Remember how the closet used to be? Just a simple space. But now, after some big renovations, including swiping space from the hallway and bedroom to add an ensuite, you’ve got more room! More room means one thing: another entire Pax wardrobe can fit. The total cost for these wardrobes and all the accessories? Just under $1000 CDN. Not bad, right?
Handling Sloped Ceilings Like a Pro
Got a sloped ceiling? No worries! Just cut a large triangle out of the back of the Pax units using a track saw. Cover the back with a white melamine board, and voilà, you’ve got yourself a wardrobe that fits perfectly.
Turning Pax into Built-Ins: The Magic Touch
Pax wardrobes are cool, but the real magic happens when you make them look built-in. It’s all about adding those finishing touches. Here’s what you need:
- DAP Products (Construction Adhesive, Spackling, Extreme Stretch Caulking)
- Tools (Cordless nail gun, Mitre saw, Caulking gun, Putty Knife set, Sander and sanding pads)
- MDF mouldings, White Melamine boards, Bullseye 1-2-3 primer, and your trim paint
First, say goodbye to those baseboards touching the wardrobes; you want them flush against the wall. If there’s any extra space around, just fill it in with white melamine board or an extra panel, cut to size. Make sure to secure everything properly – you want it sturdy!
The Final Flourish: Trims and Mouldings
Now, the real transformation begins. Add trim to the front edges of the wardrobes, a baseboard along the bottom, and a trim or crown moulding on top. Cut all the pieces with a mitre saw, attach them with construction adhesive and a nail gun, and watch your wardrobes transform!
Next, fill in any nail holes with spackling, sand everything down, and caulk the gaps for that seamless look. Finally, prime and paint all the trim. Don’t forget to use painter’s tape to protect your wardrobes from any stray paint.
And there you have it! With a total cost that won’t make your wallet cry, you’ve turned your Pax wardrobes into a chic, built-in dream. Now, step back and admire your handiwork. Your closet is not just organized; it’s a statement.
17. IKEA PAX Hack: Your Guide to a Chic Linen Closet
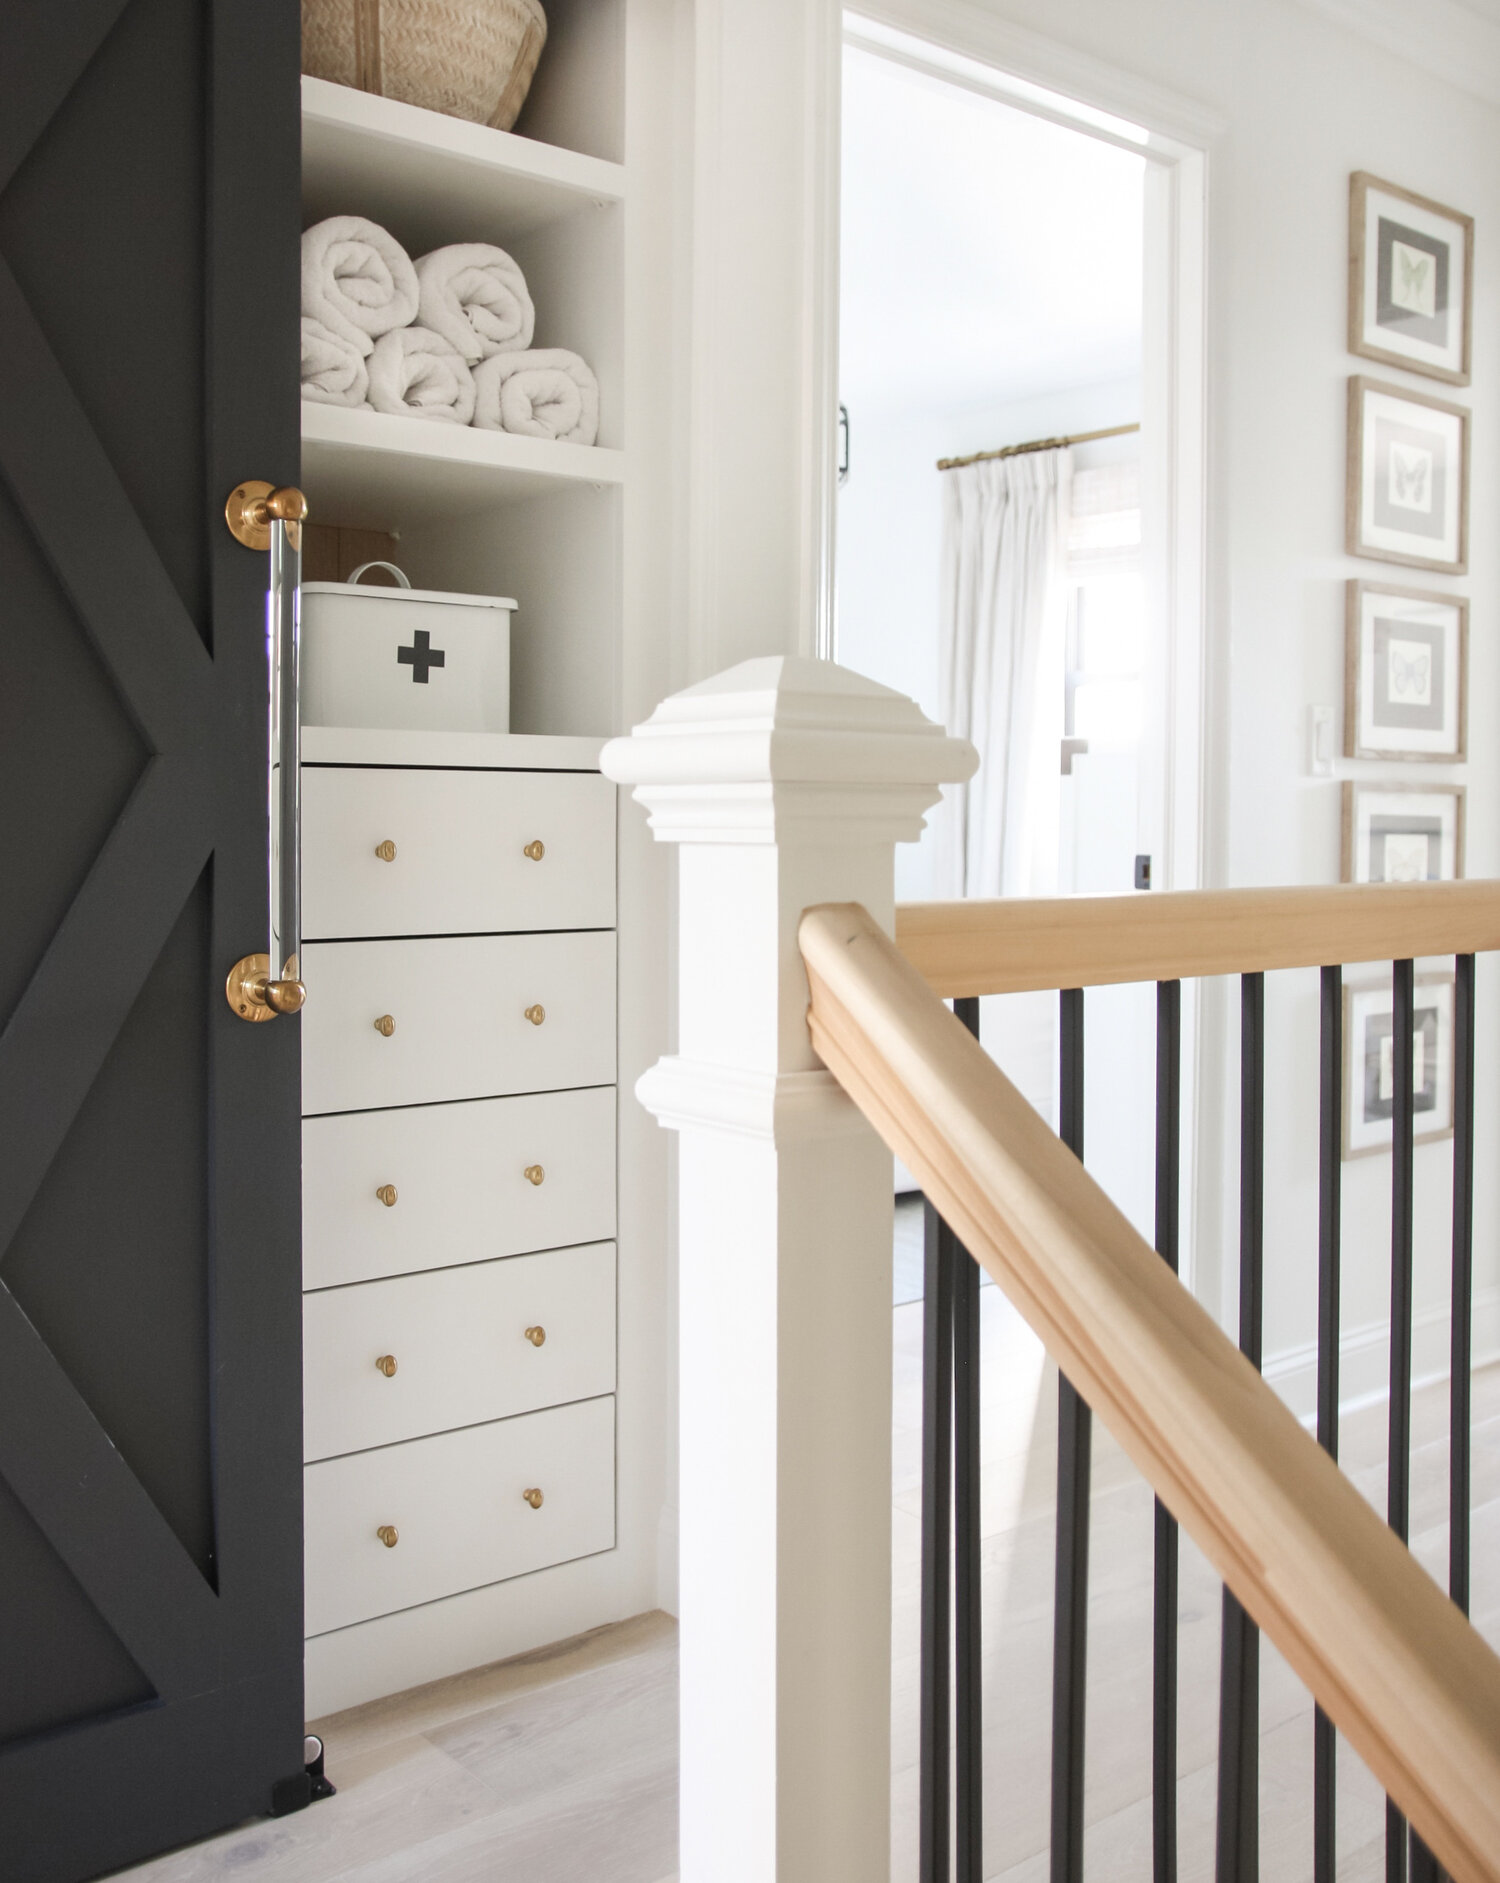
Ready to transform an IKEA Pax unit into a stunning, built-in linen closet?
Grab your tools, and let’s add some custom flair to your space.
What You’ll Need:
- IKEA Pax unit & accessories
- Miter Saw, Table Saw, Brad Nailer, Air Compressor, Circular Saw
- Basic Tools (tape measure, level, cordless drill)
- Skill Level: Got some DIY chops? You’re good to go!
Step 1: Clear and Prep
Empty your closet, making room for the Pax unit. Our closet was a snug 24”w x 26”d x 8ft h, proving building inside the closet is tricky, but doable. So, brace yourself for some DIY gymnastics!
Step 2: Assemble and Accessorize
Once your Pax unit is ready and accessories are in, it’s time for the fun part: Trimming and backing! Ditch the standard white plywood backing. Instead, create a textured white oak shiplap look with leftover flooring boards cut in half, using a nickel for even gaps.
Step 3: Face Framing and Sides
Add a poplar face frame to the front. Use a 1×2” for shelves and a trimmed 1×6” for sides, giving it that seamless, built-in vibe.
Step 4: Drawer Fronts
For inset, solid slab drawer fronts with a 3/16” gap, use spacers for positioning. Cut primed pine fronts, keeping the top four drawers uniform, and adding just 1/4” to the bottom one. Sand with 220 grit, round the edges slightly, and keep those corners sharp!
Step 5: Secure and Place
Utilize command strips for initial placement, ensuring no slipping when attaching with four 1 1/4” screws per drawer. Mind your screw placement – you don’t want clashes with drawer pulls.
Step 6: Temporary Pulls
Use painter’s tape as temporary pulls, enabling drawer access before the real pulls are attached.
Step 7: Finishing Touches
Caulk, wood fill, and paint the entire unit in ‘Extra White’ by Sherwin Williams. Attach your chosen knobs, and your chic, custom linen closet is complete!