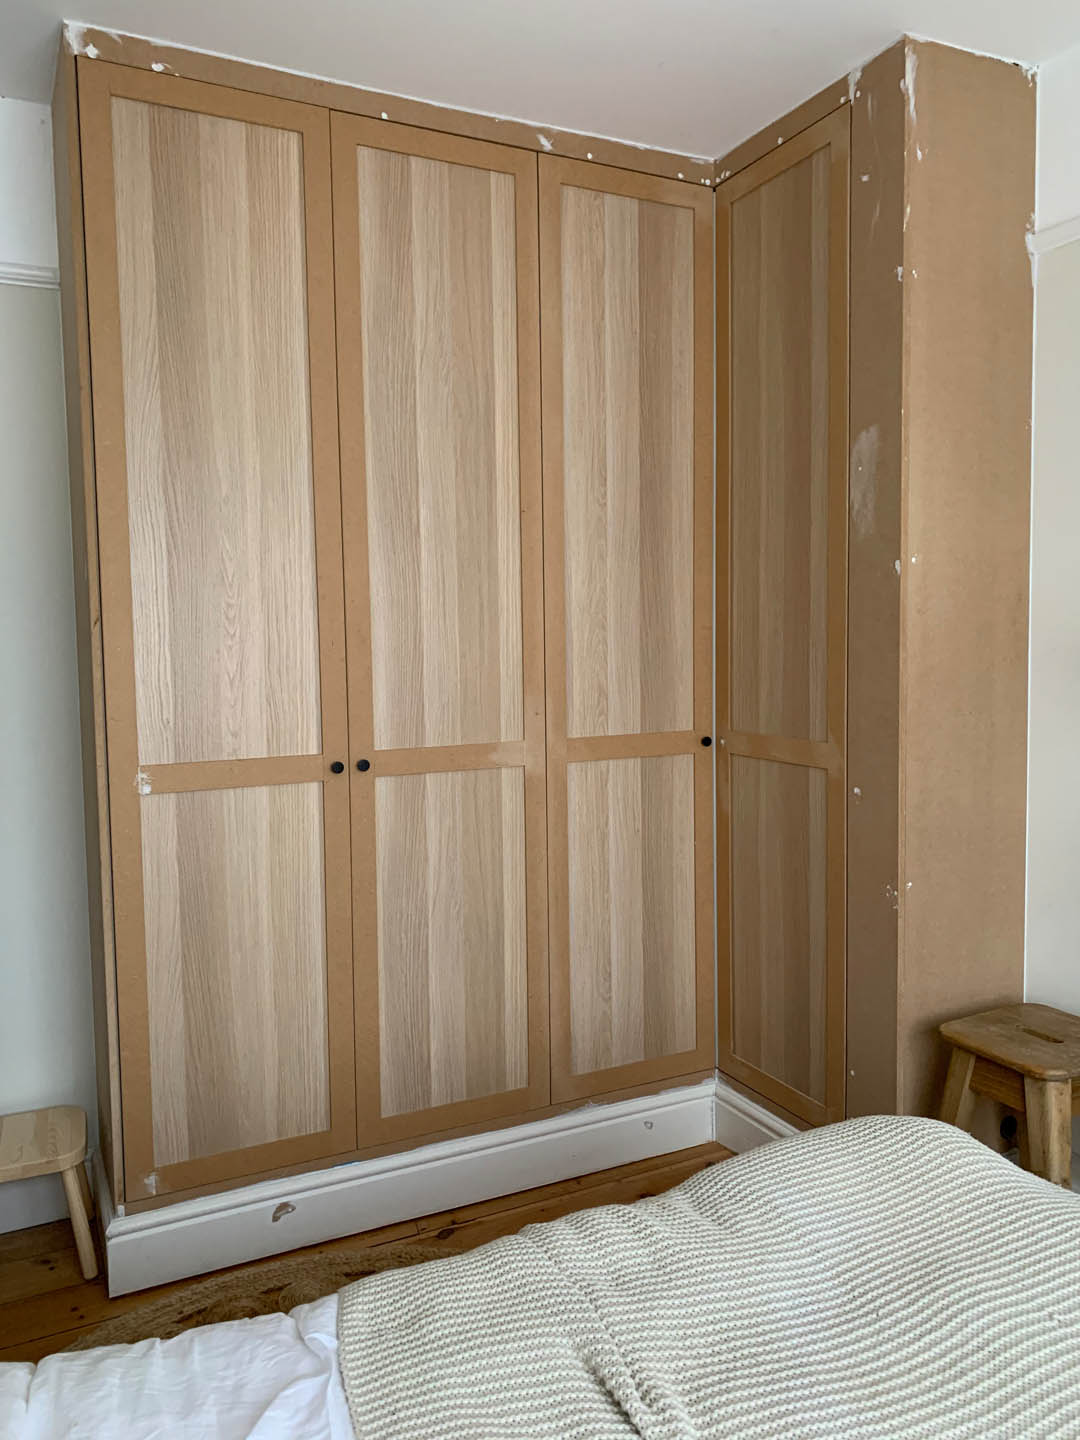
5. IKEA PAX Wardrobe Hacks
Hey there, fellow DIY hackers!
If you’ve been twiddling your thumbs during lockdown 3.0, let’s get them busy with an IKEA PAX wardrobe hack that’ll knock your socks off – and maybe save you a couple of grand (£2000 to be exact)!
Let’s break it down; for the right alcove, snatch up a 100cm width by 236cm height by 35cm depth PAX frame for a sleek fit in a snug space. The left alcove’s got a trick up its sleeve, extending around the corner with a 75cm frame connected to a spiffy corner attachment and complemented by 50cm frames – all maintaining a uniform 35cm depth for that oh-so-chic streamlined look.
Now for the shopping list you’ve been waiting for:
- Right alcove gear: 100x35x236cm frame and two fancy Forsand doors.
- Left alcove ensemble: 75x58x236cm frame, a corner add-on, a pair of 50x35x236cm frames, and a quartet of doors to match.
But wait, there’s more! You’ll need some timber for a sturdy base, MDF for that custom look (18mm for boxing in and 6mm for door panache), and, of course, tools! A track saw, drill, level, and a nail gun are your new best friends.
Kick things off by ditching the skirting board and crafting a base for the wardrobe frames. IKEA may give you the pieces, but you’re making the puzzle – secure those frames and get ready to anchor them to the wall like a pro.
Fancy doors more your style? You’ll need to jazz up those Forsand doors with MDF strips cut by your local B&Q to a swanky 55mm width. Tape, glue, and nail those babies to create a panelled masterpiece, then slap on some handles (with a bit of DIY countersinking magic).
Boxing in’s next – it’s like Tetris with wood. End panels, side panels, top panels; cut, glue, screw, repeat. Clad those gaps and bring back the skirting board to whisper sweet nothings of ‘original features’.
Before the grand reveal, fill in any woodwork gossips with filler and give it a sand down for that baby-smooth finish. And presto – you’ve got yourself a wardrobe that’s more ‘vogue’ than ‘vague’.
And hey, don’t sweat the small stuff. If my word wizardry here has you scratching your head, hit me up in the comments – I’m all ears and ready to help.
4. PAX Wardrobe Hack vs A Custom Cabinetry
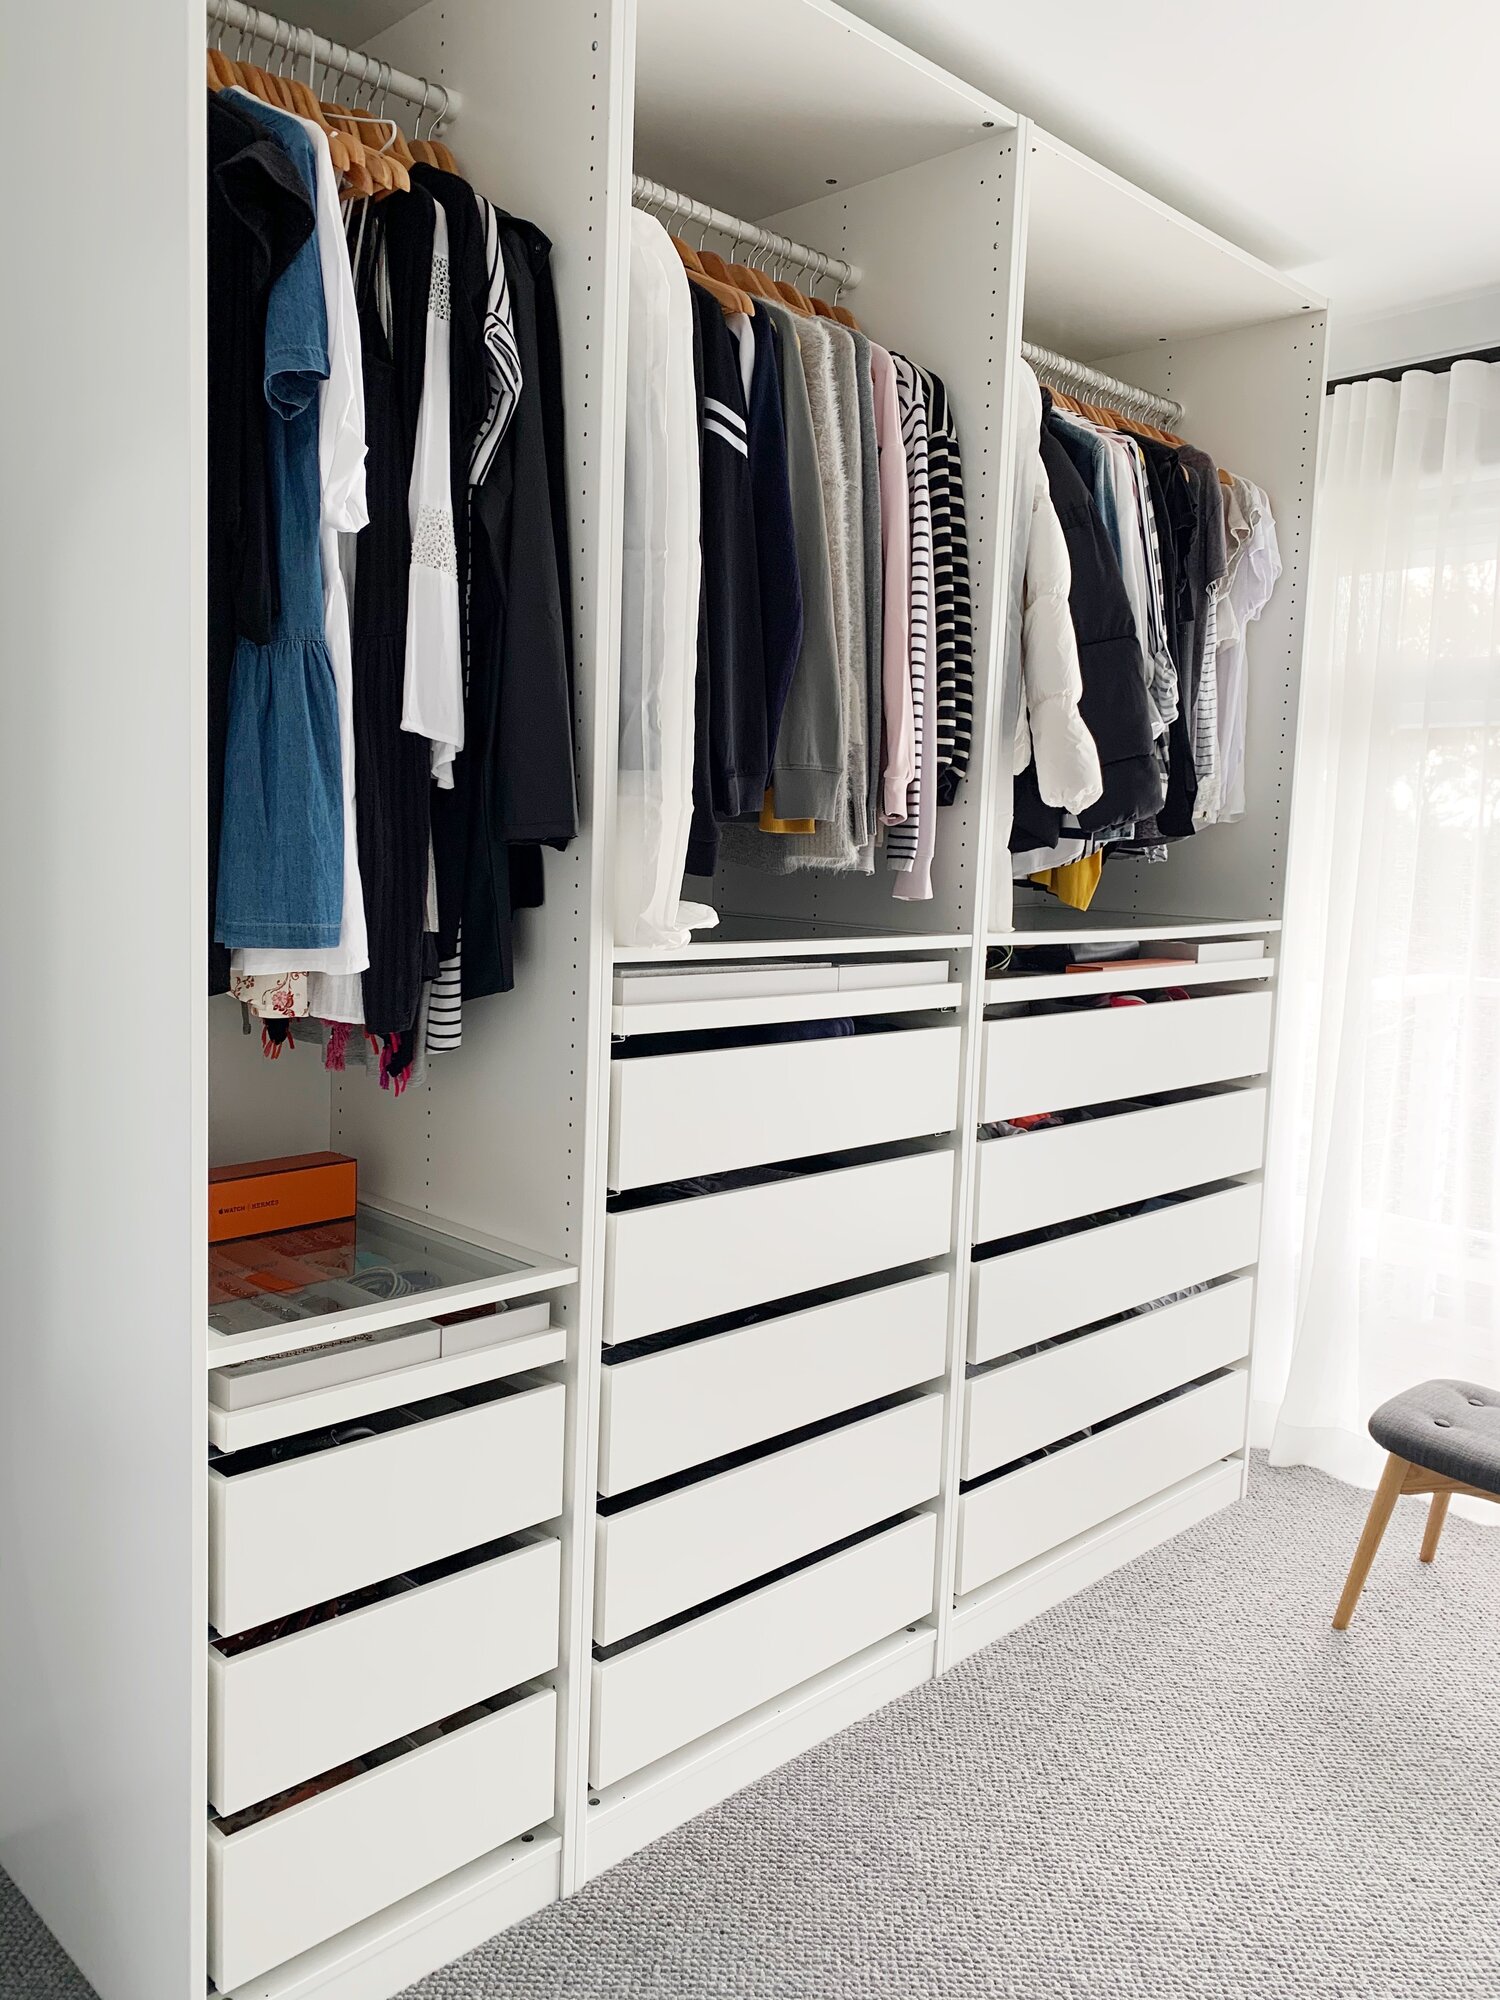
Ready for a walk-in wardrobe makeover that won’t break the bank? You, my friend, are about to become an IKEA PAX wardrobe whizz. Even interior designers like you are turning to these flat-pack fixes for a swanky yet budget-friendly closet transformation. And since we’re ditching the custom cabinetry quotes (goodbye, $18,000 quote, hello savings), let’s dive into making your place a cut above with IKEA’s wardrobe wonder.
First things first: those dreary ‘before’ shots? Say goodbye to them and hello to potential—with a view, no less! Forget the previous owner’s fashion; it’s your chic and tidy dream that’s coming to life. Now, SketchUp might be your design bae for client projects, but IKEA’s PAX Planner is about to be your new flirt. It flings all the nuts and bolts of your wardrobe design into a shopping cart faster than you can say “checkout!”
Why swing towards IKEA PAX? Well, think about the satisfaction of a D.I.Y project without the tears. You can even play boss and delegate the assembly to an AirTasker champ while you sip on something sparkly. Custom sizes? Check. Tricky nooks? PAX has your back with a saw and some savvy. Color-wise, from white to woody oak, you’re covered. Those flat-pack wonders are so sleek; they’ll pass as bespoke without wiping out your wallet.
Heads up, house flippers and renovation gurus: these wardrobes are looking luxe in homes with way heftier price tags. IKEA’s savvy secret? An arsenal of doors, including those sexy closed profiles. And the price point is pure joy—think around $3,000 for an install that looks a million bucks.
Accessorize? IKEA’s accessory game is strong. Velvet-lined trays, shoe shelves, and oh-so-organized dividers will cater to every whim of your inner Marie Kondo. Did we mention soft-close drawers? Hello, luxury feels.
But not everything is perfect in PAX-land. Custom fit? Not straight out of the box, so prepare for some hands-on tweaking to fill those gaps. Crown mouldings can be a pesky hiccup, leaving you with that little bit of space that screams “I’m not built-in!” Also, particleboard tantrums are real—if you nick it, it’s going to show. Those shelf holes? You might want to nab IKEA’s hole-hiders to clean up the Swiss cheese look. And remember, time is money—even if it’s not a lot of money, assembling these bad boys is still a time investment.
Convinced? If SketchUp is not already in your arsenal, it should be. It’s not just for client teasers—it’s for bringing the whole shebang, from electrical plans to 3D renderings, to life. And if you want to school up on SketchUp, there’s a course for that, with nearly 4,000 success stories and counting. It’s for everyone from the kitchen kings to the bathroom queens and the homestyle enthusiasts in between.
4.B. IKEA Pax Hack for Built-in Closet Look
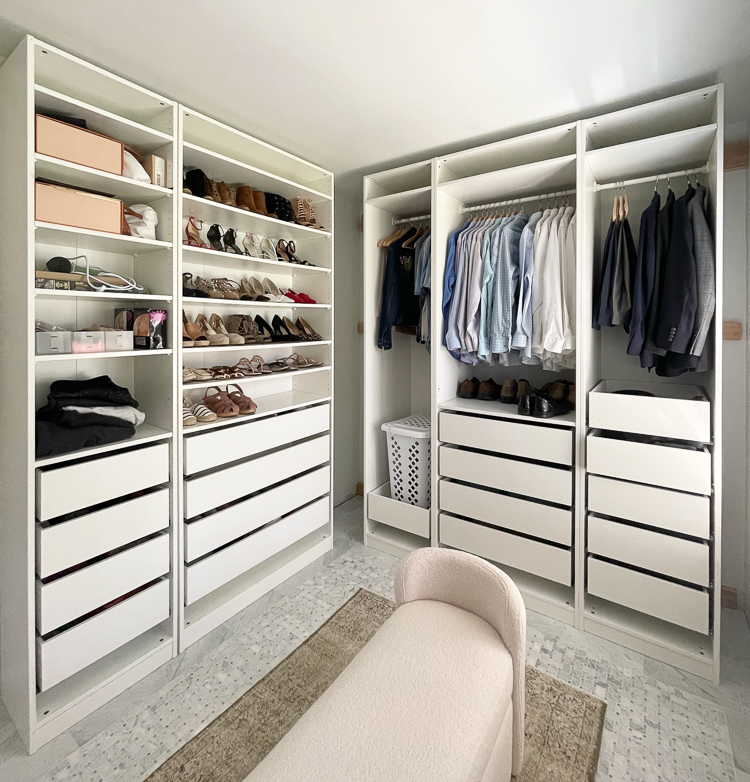
Feeling crafty? Get ready to give your closet the upscale treatment without breaking the bank. You’re about to turn a standard IKEA Pax wardrobe into a sleek, built-in masterpiece with just a bit of trim and some snazzy doors. Here’s how to get that high-end look for a fraction of the cost.
Step-by-Step Tutorial for an IKEA Pax Built-in Closet:
- Design Like a Pro: Start with a bang using Photoshop to mock-up your dream closet. Imagine replacing chaos with the calm of ‘Accessible Beige’ doors, hiding your colorful wardrobe behind a façade of organization. Keep it flexible—no need to paint inside if you’re using doors.
- Gather Your Toolkit: Grab primed pine boards in 1×2, 1×6, and 1×8 sizes for a face frame that screams custom-made. Crown molding and baseboards will add that touch of grandeur. Fast Cabinet Doors is your friend for the doors—they’re a headache-saver and worth the splurge for that perfect finish.
- The Nuts and Bolts: You’ll need caulk, wood filler, and a range of screws (2″ cabinet fasteners and 1 1/4″ cabinet screws, to be precise). Arm yourself with a miter saw, nail gun, impact driver, and sander prepped with 220-grit sandpaper to achieve smooth sailing.
- Construction Zone: Secure those PAX units to the wall and each other. Frame out the perimeter with your boards for a built-in look that fits like a glove. Baseboard and headers from 1×8 boards and stiles and rails from 1×2s will make up your chic closet outline.
- Measure Twice, Cut Once: For the drawer fronts, use 1×8 boards cut to fit between the stiles. Then play a small game of spacer Tetris with 1/8″ tile spacers before securing them in place.
- Add Some Flair: Crown and baseboard moldings are next. A bit of caulk, some wood filler, and then paint to make it all pop. Patience, grasshopper—let that paint cure for 5-10 days.
- The Final Touch: Doors can make or break your design, so measure carefully, allowing that all-important 1/8″ wiggle room around the doors. Fast Cabinet Doors can take it from here, with pre-drilled hinge holes to save your sanity.
- Hang ‘Em High: Attach hinges, use those spacers again for a uniform fit, and then—ta-da!—you’ve got doors that swing just right.
- The Perfect Paint Job: Skip the brush—spray paint those doors like a pro for a flawless finish. More on this in a separate expose on spraying versus rolling.
The Bottom Line
You’re looking at a sleek IKEA Pax hack for about $5,822, which breaks down as follows: Wardrobes for $1,005, internal bells and whistles for $1,047, trim boards and paint for $800, those swanky custom doors for $2,000, and hardware to dazzle for $970.
Who says you can’t buy style? With this guide, you’re not just purchasing flair—you’re crafting it. So, put on your DIY hat and get ready to flex those design muscles with a dash of IKEA, a sprinkle of custom carpentry, and a whole lot of personal pizzazz.
3. Turn Your IKEA PAX into a Chic Built-In Hallway Cupboard!
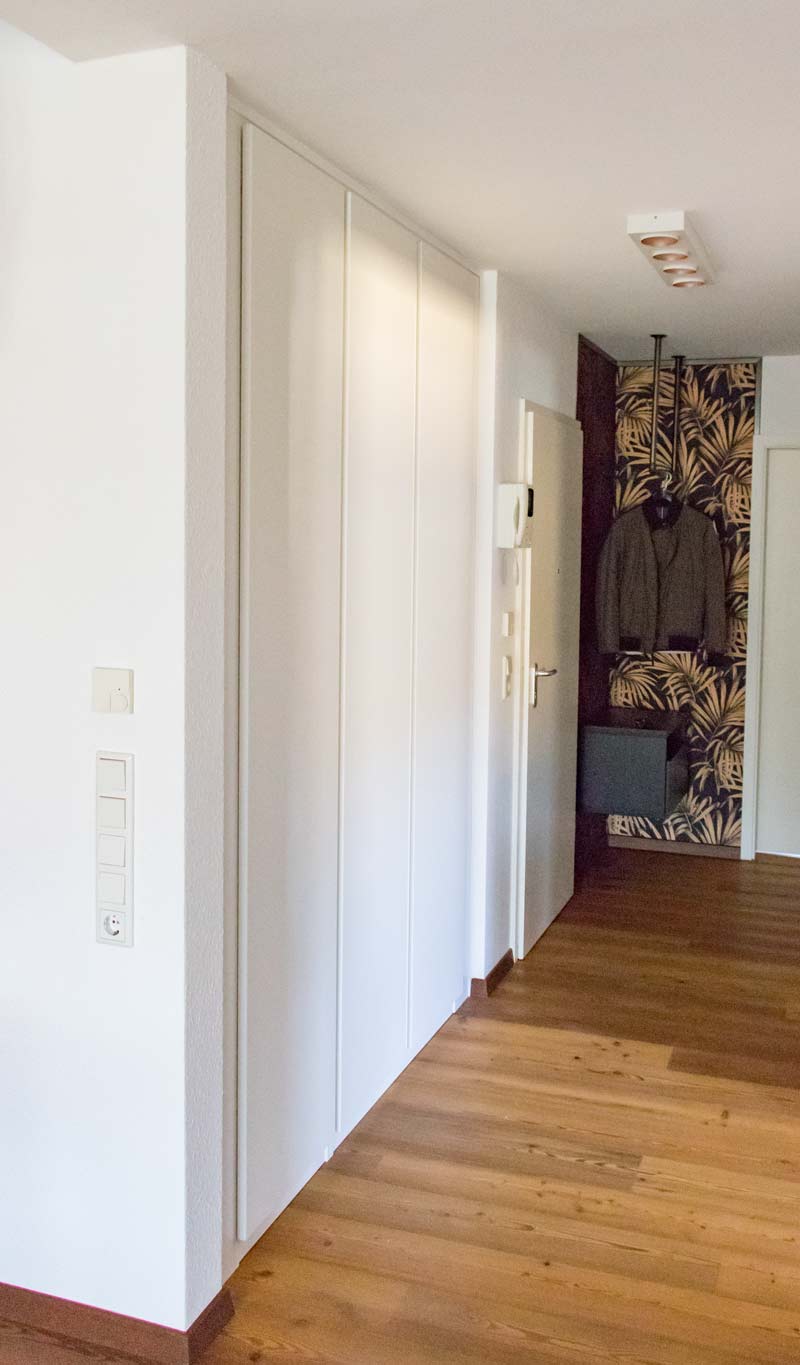
Hey, Home Improvement Enthusiast! Ready to transform your dull hallway with a snazzy built-in wardrobe using IKEA’s PAX system? Let’s rock this DIY and make that storage dream come true.
Scoping Out the Spot:
So, you’ve got an empty niche craving some style? Picture this: a space around 180cm wide by 65cm deep, stretching up to a towering height of 240cm. IKEA’s PAX units come in neat widths of 50cm and 100cm to mix and match for your perfect fit.
Cater to Quirks:
Got obstacles like a pesky control box? No sweat. Plan around it. We did by choosing a shallow-depth 100cm wide unit to coexist peacefully with an 80cm wide control box. Add a standard 50cm wide PAX to the mix, both stretching up to 236cm, and you’ve got the bones of your new closet.
The Fitting Game:
You’re crafting a snug home for your PAX that looks like it’s always been part of the wall. “Boxing in” is the carpentry lingo, and it’s simpler than you think. Wood works, but so does drywall. Your call, DIYer.
Wood-Work Wizardry:
Fetch some white laminated panels, cut to 239cm by 14.5cm, to hug the sides of your PAX, then snag another at 150cm by 3.5cm for that top gap. Attach brackets to these panels, align them with the PAX edge, and boom – you’ve extended your wardrobe’s wings.
Anchoring Your Aspiration:
Here’s where you play pretend. Imagine where your cabinet’s front will live, measure 19mm back, and mark a line for reference. Attach some sturdy squared timber at your marked spots, using angles as your trusty sidekicks to hold the timber in place. This becomes the secret anchor for your PAX.
Merging PAX with Niche:
Slide that PAX against the timber, straighten it out with adjustable feet, and secure it with screws. It’s like putting together a puzzle where you already have the picture on the box – straightforward and satisfying.
Double Up and Drive Home:
Now, bring in the second PAX unit. Adjust the back panel if needed. Repeat the side panel magic, anchor, and align before locking the two units in a PAX embrace with furniture connectors.
Crowning Your Creation:
The gap between the top of the PAX and the ceiling? That’s just a stage for your next performance. Place that panel you prepared earlier on top, align, and fasten it from beneath. The result? A flawless finish that screams “professional.”
Sleek Seams and Strips:
Not loving the tiny gap between your panels and the wall? Dress it up with wallpaper strips and seal with acrylic for a seamless chic look.
Finishing with Flair:
Don’t forget the skirting boards for that built-from-scratch flair.
2. Ikea Hack Pax Cabinet: Make A Laundry Cabinet
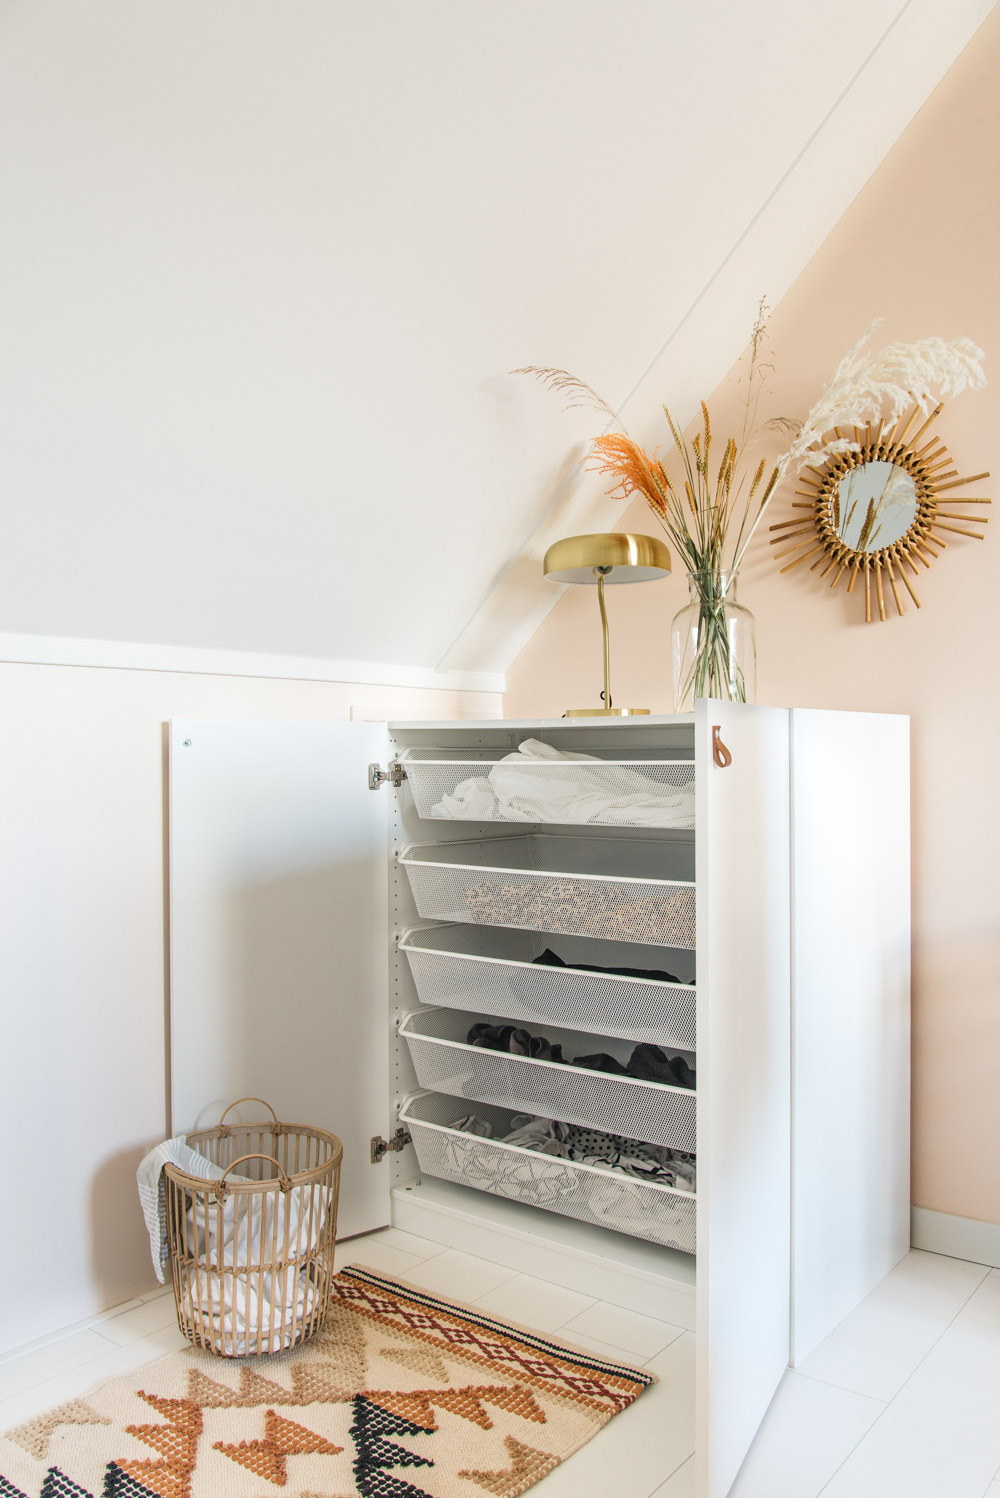
Hey, laundry warrior! Get ready to banish those pesky piles of clothes and step up your sorting game with a snazzy IKEA hack that turns a PAX cupboard into a laundry-sorting powerhouse. With this chic makeover, you’ll take “clean” to a whole new level of cool. Let’s jump right in and make that pile of clothes a thing of the past!
Getting Down to Business with Supplies
Here’s your arsenal for the ultimate laundry cabinet:
- IKEA PAX cabinet base element (100x58x201 cm—perfectly sized for magic-making)
- Double take with 2x IKEA FORSAND doors (50 x 195 cm because two doors are better than one)
- The mighty quintet: 5x IKEA KOMPLEMENT wire basket with pull-out rail (they’re 58×100 cm of organizational bliss)
- A saw that means business (sharp and fine—like your wit)
- Drill for those hinge holes (because we like our doors to swing, not sag)
- Swanky leather handles (the icing on the cake)
Step 1: Measure Twice, Cut Once
Dive into the measurements like you mean it. You’ve got five types of laundry, and you’ll need room for five wire baskets to keep those whites, bright, and not-so-rights in check. After sawing your panels to create a cabinet that’s as high as your laundry dreams, follow the IKEA manual to put it all back together—just like the Swedes intended.
Attention to detail alert: Match up those panel holes with the door hinges and basket heights. It’s like playing Tetris, but with furniture.
Step 2: Door DIY
Once your cabinet’s standing tall, bring those doors into the limelight. Saw them down to a height that won’t leave you or your towels hanging, and drill new hinge holes at the bottom for a door that opens with a purpose.
Step 3: Handle It with Style
Pull it all together by screwing on those luxe leather handles. They’re not just handles; they’re a statement about your sorting savvy.
Styling Your Laundry Cabinet Like a Pro
This isn’t just where laundry happens; it’s where style lives. In collaboration with fonQ, our source is taking you on a styling spree inspired by Scandi-boho vibes. Think light and airy with a hint of warm, earthy tones for that “I’ve got my life together” look.
Set the mood with a brass Dutchbone lamp that’s all about that up-and-down glow, and cozy up with dried flowers in a chic vase. The result? A vibe so tranquil, your laundry room might just become the envy of every other room in the house.
Lastly, No 1.The Chicest IKEA Closet Hack Guide You’ll Ever Need
Ready to up your home storage game and ditch the dorm vibe? Get your measuring tape ready and dance into the world of custom closets with IKEA’s sleek units. You’re crafting a swanky spot for your threads, and here’s how to nail it:
Step 1: Choose Your Champion
IKEA offers you two gap options: a deep one perfect for your dresses and coats to hang out, and a shallower one for those cubbies and drawers to slide in. Go deep against the back wall to max out that entrance swag and avoid feeling boxed in.
Step 2: Battle Against Blandness
Hate that cheap, college dorm look? Grab the VARIERA hole covers (yes, they’re fancy “butthole fillers”) to level up from ‘meh’ MDF to lush wood vibes. These little warriors are the secret to conquering blandness, and they’re all yours from IKEA. Type “VARIERA cover plate” into your search bar, and victory is a click away!
Step 3: Make it Flush and Fabulous
Got a gap-osis between your closet and ceiling? Seal the deal with the same trim used for board and batten, running along the top for that built-in, seamless luxe. You’re aiming for sophistication, not space to stash dust.
Wondering about the height for these sleek towers? The units strut at a statuesque 92 7/8″ tall, so check your ceiling height, and let’s get to soaring heights in style!
Inquiry Break!
– “Those neat little hole hideaways? Where?”
– “IKEA, my friend! Just search for ‘VARIERA cover plate’ and poof—no more holey nightmares!”
– “Corner unit or straight-laced regulars?”
– “Straight up regular. Corner units didn’t make the size cut for me, but if size is on your side, corner could be your crowning glory!”