9. Your Playful Guide to a Chic IKEA PAX Custom Closet Makeover
Step Right Up! Let’s transform your mom’s closet into a wonder of organization with the IKEA PAX system—a magical box of budget-friendly, time-saving DIY joy.
Choosing Your Closet Components:
- PAX Sizing Up: Remember, size matters! IKEA lets you mix and match like a closet DJ with heights of 92 ⅞” or 79 ⅛”, depths of 13 ¾” or 22 ⅞”, and widths of 19 ⅝”, 29 ½”, or 39 ⅜”.
- Inside the Box: Snag 3 drawers (1 small, 2 medium), 5 hanging rods, 8 shelves that slide out like dreams, and 4 that stand still, plus 5 fancy Norrfly lights. Total store cost: A cool $995.
Money-Saving Pro Tip: Score some IKEA pieces on OfferUp for less. My stealth mode savings were epic!
Get Building, Crafty Bees:
- Start Your Engines with a Base: Nail a 2×4 frame, and show those wall studs who’s boss with 3-inch wood screws and a Kreg Jig (or just a drill, if you’re feeling old school).
- Assembling IKEA’s Best: IKEA backs are a no-go. Play the upgrade game with sturdier utility plywood for a back that won’t quit.
- The Art of Disappearance: Fill those pesky unused holes with wood filler. Sanding them is like meditating – boring but beautiful.
- Paint Like Van Gogh: Choose your fighter: sandpaper or liquid sandpaper. Don a mask and glove up for the liquid showdown. Prime with love, sand for luck, and paint with gusto using Behr Ultra Scuff Defense for that armored wardrobe finish.
- Secure the Fort: Bolt down your units with L-brackets for a closet that won’t wobble. IKEA isn’t the boss anymore, you are.
- Insert Here: Slide in those drawers and shelves like you’re stacking the most satisfying burger ever.
- Face-Off: Time for face boards and baseboards. Pick pine or poplar to personalize those PAX pieces. Your goal: seamless, like butter on hot toast.
- Seal the Deal: Caulk and wood fill your way to smoothness. Then prime and paint to turn “meh” into “marvelous.”
And for the Grand Finale: Lights, Action! Illuminate with Norrfly lights. They’re like the sparkle on your tiara, only for clothes.
Why Shorter Units Rock: Going short height-wise means top storage heaven with easy-breezy basket space.
Recap of Your Masterpiece:
- Tallies Up: Keep that budget under $995 plus extra goodies like wood ($250), paint ($100), and flashy handles ($25).
- Tools Up: You’re the champ with a drill, some screws, and a swish of the sanding block.
- Clothes Up: Hanging space that’s lit AF.
- Stack Up: Drawers and shelves that glide out at your whim.
- Glam Up: Select Pine for style, caulk for class, and lights for luxe.
Remember, patience and elbow grease are your besties here. So crank up the tunes, get your DIY on, and watch as your closet goes from IKEA basic to boutique chic!
9.2 Rock Your Closet Space: DIY Custom Pullouts
Ready to slide into an epic closet transformation? You’re about to turn that chaotic closet of yours into a masterpiece of organization with these custom pullout storage hacks. Let’s get this closet party started!
Step 1: Plywood Prep
First up, grab that plywood and cut it down to size like you’re carving out destiny. Whip out the sander and smooth out your plywood’s rough edges – because splinters are so last season.
Step 2: Design Time
Wanna make it pretty? Snatch up some ¼-inch poplar boards and get creative with a design that screams “you.” A geometric pattern, perhaps? Something abstract? It’s your call! Slap those pieces onto the plywood with wood glue – think of it as putting icing on a cake, but stickier and less tasty.
Step 3: Spackle and Seal
Next, wield your wood filler like a magic wand to fix any boo-boos. Did the pieces leave gaps? Caulk ’em up! You’re not just building a pullout; you’re crafting a smooth canvas for your painting masterpiece.
Step 4: Prime and Paint
It’s priming time! Think of primer as the base coat to your nail polish – essential for that top-notch finish. Then bring on the color! Whether you’re channeling inner peace with pastels or boldness with a splash of bright, make it pop!
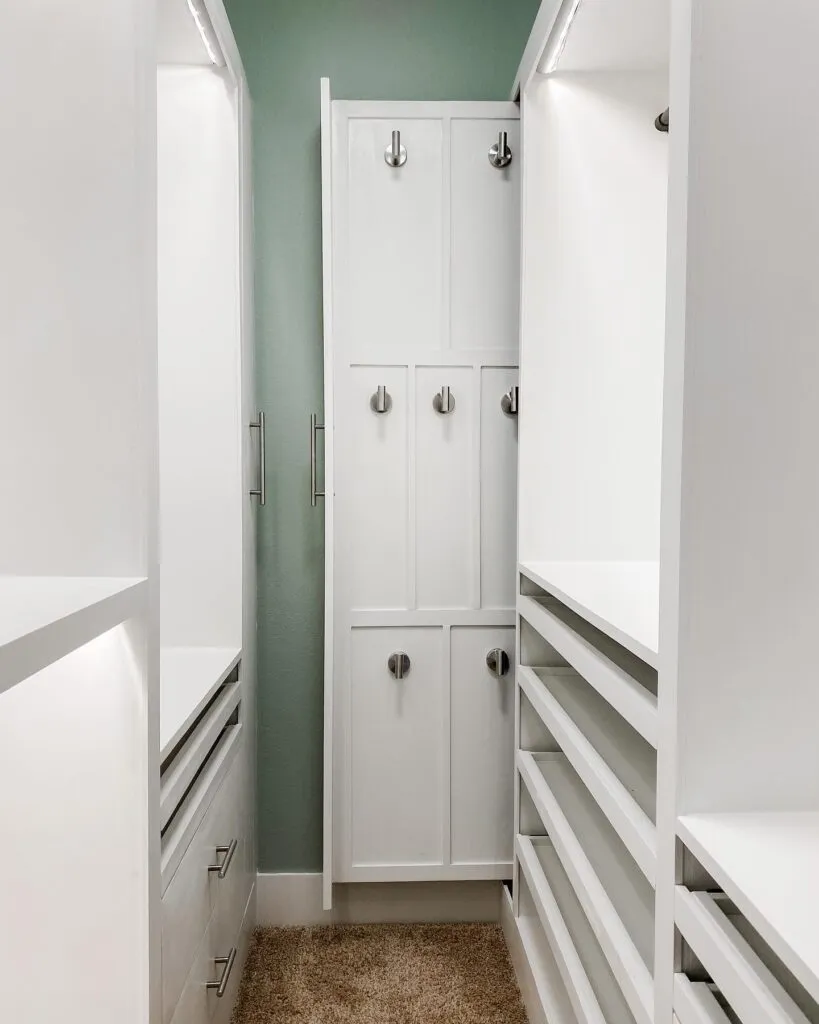
Step 5: Hook ‘Em Up
Here come the hooks! Choose your fighters – towel hooks, fancy hooks, or good ol’ classic hooks – any kind that can handle the weight of your fashion choices.
Step 6: Slide Into Place
Pull out those drawer slides and measure twice to line them up perfectly with the wood strips you’ve already mounted. This is like aligning the stars for your pullout’s pathway. A tip? Call over a buddy – one to hold, one to screw, and presto, you’ve got teamwork magic.
Step 7: Track Star
Got your buddy? Great! Now mount those tracks onto the wall strips. It’s like Tetris, but with drill bits and a dose of real-life physics.
Step 8: Front and Center
Lastly, it’s time to attach the face board to your pullout. Slather on that construction adhesive, nail it in, and watch as your pullout goes from drab slab to fab.
8. IKEA Hack – Upgrading an Old Built-in Cupboard
Ready to give that charming but slightly worse-for-wear 1932 villa cupboard a new lease on life? Get set for a home upgrade project that blends vintage love with modern practicality—all in Maya’s room!
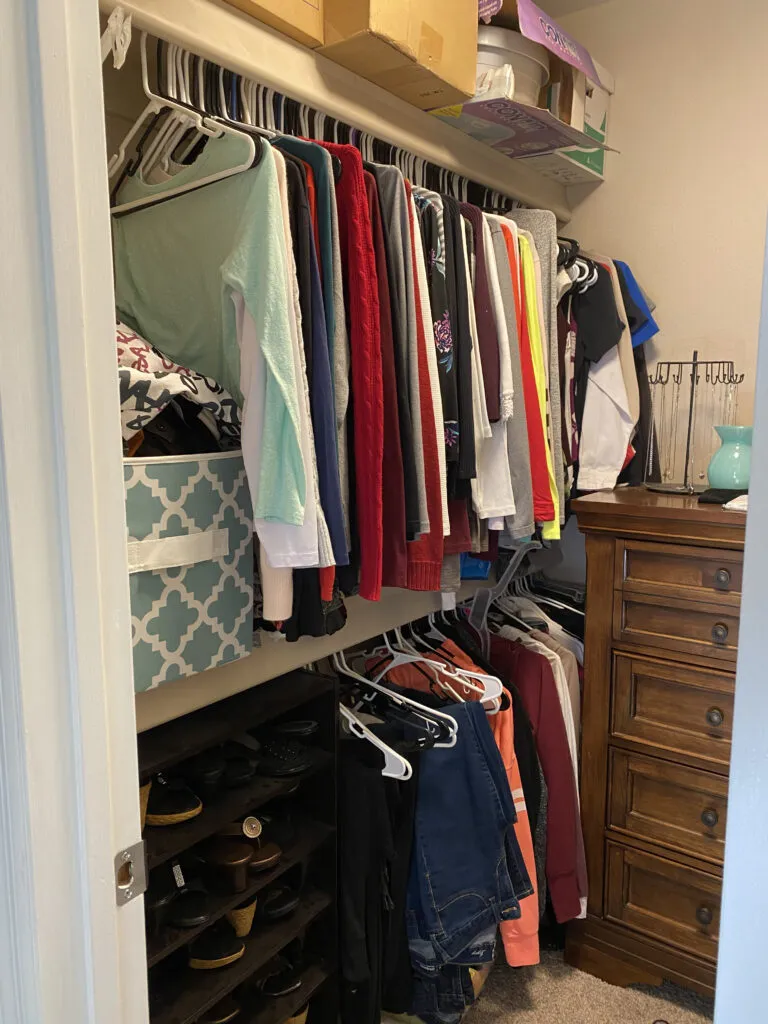
Before the Makeover Magic:
Maya’s room boasts an old cupboard survivor with crooked doors and a bare interior. It’s standing by, ready for some DIY tender care. And guess what? You’ve decided to roll up your sleeves and dive in!
First Steps to Chic:
- Whip out the tools: an orbital sander, fine sandpaper, putty, and a trusty paint sprayer.
- Sand down those surfaces to a smooth perfection, prime for a paint job that’ll stick.
- Apply wood filler to every notch and crack, then sand again to get it super smooth.
- Glam up the doors with moldings for an old-world charm—just like those stucco details you love.
Spray to Slay:
- Cover everything (that you don’t want painted) in plastic.
- Spray the cabinet insides with white to brighten things up, skipping sanding since it’s not in the spotlight.
- Give the exterior a three-coat green glam-over, but patience, Picasso! Let the paint dry before you go hinge-happy.
Details, Details:
You’ve got it right; wait three whole weeks before shutting those doors to avoid a sticky situation.
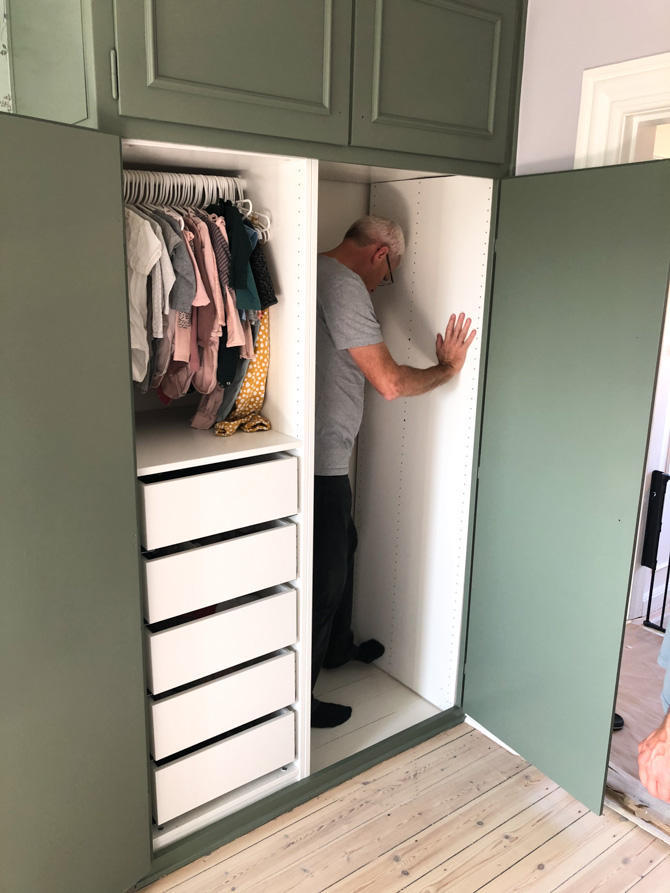
Now, the Inside Story:
Let’s IKEA-hack the guts of this old guard! A storage revolution with PAX frames and KOMPLEMENT goodies.
Choosing Your Cabinet Crusaders:
- The cupboard’s a 60 cm deep no-man’s land, so the PAX’s 58 cm depth is your perfect partner in crime.
- Mix and match a 50 cm and a 75 cm frame, and show those uncooperative dimensions who’s boss.
Sizing It Down:
Get those frames fitting snug as a bug with some sawing action. Pro tip: slap on masking tape before you saw to keep the chipboard from chipping.
The Left Side Story:
- Cut the PAX frame down to size and discard the back cover because, hey, you’ve got style (and already painted the interior white).
- Level it out (life isn’t perfect, and neither are floors), and secure that frame.
The Right Stuff:
Adjust and saw the right frame, skip the base, and install those custom-cut shelves like a jigsaw master.
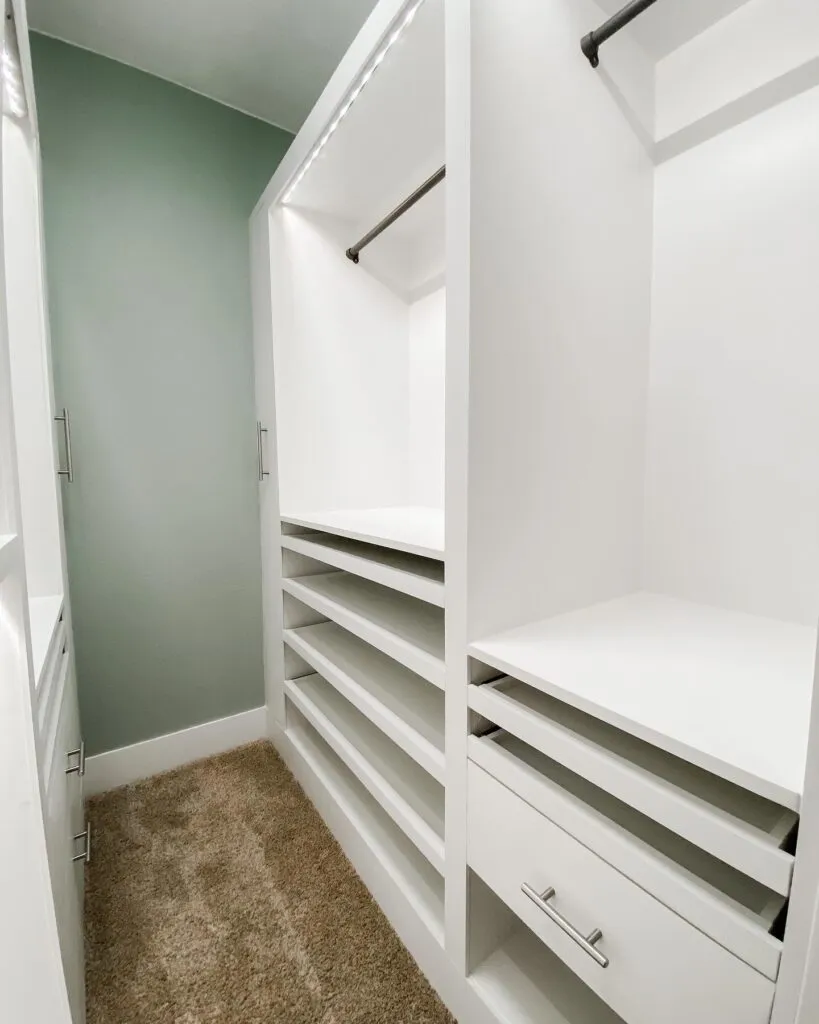
The Big Reveal:
Voilà! Admire a cabinet that’s not just a storage space but a time capsule with a 21st-century twist. Plus, it’s totally flexible for future fashionistas.
There you have it—your own built-in beauty that’s as practical as it is Instagrammable. Don’t forget to flex that DIY muscle and show off your newfound old/new harmony in home décor.
7. Sliding Doors for Large Shelving Units with PAX

Ready to give your hefty bookcase a swanky update with some sleek sliding doors? It’s easier than it sounds, and you can slam-dunk this project for about $100. Let’s keep your bank account happy and dive into this cheeky upgrade for those chunky Ikea PAX shelves.
Gear Up: What You’ll Need
- An Everbilt sliding door kit (Model 208-760 is a champ!)
- Two sheets of chic tileboard (Sizing’s crucial – check kit directions, deduct trim width)
- Plywood: 3/4 inch, roughly 16 inches wide, and equal to the shelf width (78.5″ for PAX pals)
- A 4×8-foot particle board, sliced at the store into two 8’X4″ plus 8’x2″ strips (spare change for cutting? Yes, please!)
- Polystyrene or melamine edging to jazz up those edges
- Crown molding for a regal touch – the pre-finished type saves sweat and swears
- A tube of Loctite “Power Grab” – the construction adhesive with muscle
- Finish nails (get friendly with an air nailer; your thumbs will thank you)
- Particle board screws (2 1/2″ #9s play nice with particle board)
- Miter saw (Borrow for a brew? Worth it!)
Let’s Roll: Instructions
Step 1: Track building
Secure your shelf to the wall with those hidden Ikea brackets. Got baseboard issues? A trusty 1X6 board across the top will sort it out. Marry your bookshelves to each other with screws if they’re playing neighbors.
Step 2: Frame Fame
Craft a door frame with the 3/4″x4″ and 3/4″x2″ particle board strips, giving each door a crossbar and edges. Measure twice, cut once, and get ready for some screwing fun – but hold off on getting them too cozy till after the gluing soiree.
Step 3: Glue Blues
Assemble your masterpiece, but before you screw things up (in a good way), call in the Loctite Power Grab for a sticky situation. Press firmly, say a little prayer, and leave it to dream about its new life overnight.
Step 4: Slide and Glide
Got the doors done? Add the hardware, but keep in mind that top crossmember is your door’s crown. Slide those beauties into the track like Cinderella’s foot slipping into the glass slipper.
Step 5: Trim Time
Hide the mechanics with a particle board toupee on top. Nail it, then dress it up with crown molding like it’s prom night.
Step 6: The Finishing Touches
Give your doors a dapper edge with trim, then hide the particle board’s bashful edges under the crown molding with some melamine edge banding. Nail holes? Caulk them up. Your doors are now runway-ready!
And there you have it! Your bookcase is no longer just a bookcase; it’s a statement. A testament to the weekend warrior in you that says, “I see your $600 doors, Ikea, and I raise you my savvy, saving swagger.” Take a step back, admire your handiwork
6. Turn Your Old Closet into a Chic PAX Wardrobe Space
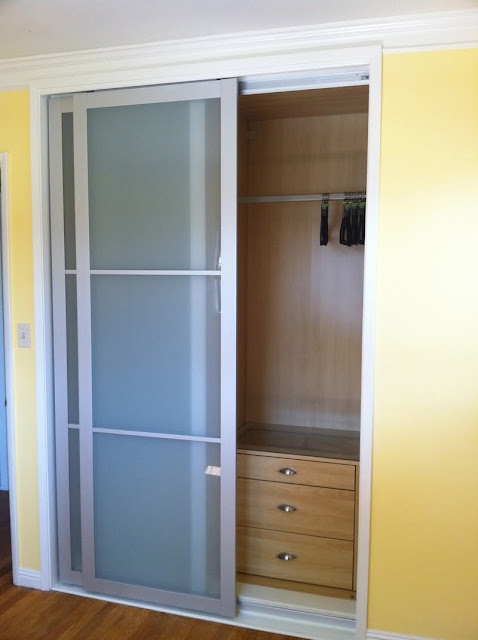
Get ready to convert your ho-hum closet into a stylish PAX wardrobe sanctuary. Here’s how to tackle the beast and emerge victorious with a posh storage solution!
- Size Up: Measure your closet opening – if it’s around 58 inches, two PAX units at 29.5 inches each will snugly fit your space. Crave height? Go for the tall ones and show that old closet no mercy by sawing through to accommodate your loftier ambitions.
- Prep Your Space: Out with the old, in with the new. Say goodbye to those plaster walls and frame the top like a pro to welcome your chic Swedish friends.
- Go Deep: Have an oddly deep nook? Trim it like a tailor to suit the PAX depth, adding a dash of finesse to the recess.
- Slide Right In: Loving the LYNGDAL’s slide-and-glide charm? Install a header, cut the rail to a precise 57.5 inches (thank you, handy hacksaw), and ditch the extra bits.
- Deck It Out: Elevate your setup with a homemade deck, keeping those wardrobes grounded and grand.
- Oops, Reassess: If the door sits a tad too high or too forward (like, say, half an inch), don’t sweat it—just adjust the trim and get back to sliding in style.
- Guest-Ready: Pop in some interior chests for those visitors to stash their gear, and voilà – you’re the host with the most, showing off storage finesse and guest room readiness.
Time to roll up your sleeves and dive into this wardrobe revamping adventure. Your guests won’t just stay; they’ll swoon!