12. How to build a Reach-in Closet with an Ikea Pax Closet System
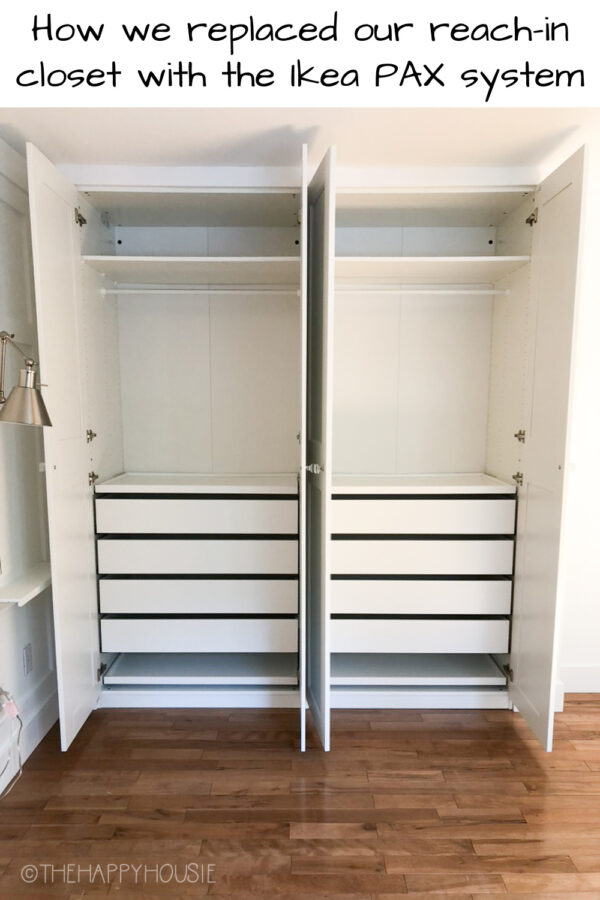
Alright, let’s talk about transforming that snug reach-in closet of yours into something magical with the almighty Ikea Pax system. It’s like a storage fairy godmother, but you know, for your clothes and shoes. So grab your measuring tape, and let’s dive in!
First off, envision that Pax wardrobe in your space.
The sizes you’ll play with are 20″, 30″, and the spacious 40″ widths, paired with 15″ or 23″ depths. In the case of the “forest house” (fancy, right?), two 40″ units were the stars, after stealing a bit of real estate from a neighboring linen closet. Remember, IKEA’s measurement tag is a smidge under the actual size, but who’s counting millimeters in a wardrobe war?
Now, for the installation waltz.
Build those bad boys following IKEA’s hieroglyphics (aka instructions), slide them into the hollow you carved out, and then – this is where it gets chic – trim those edges. The goal? Built-in vibes. You’re nailing (literally, with a nail gun) trim moulding around the top and sides. Pro tip: Match the trim paint to your walls for that seamless, “I’ve got my life together” look.
On to the doors.
Hinged doors mean you can’t have a drawer at the bottom – it’s for the door hinge, obviously. Instead, slide in a tray for shoes or your secret chocolate stash, tucked into neat boxes. Balance is key.
Personalize your Pax paradise.
Each gets a 40″ section, with drawers and rods to hang your garments like they’re in a showroom. Want double the hanging space or a mix of long and short hangs? Do it. This closet is your oyster.
But here’s the kicker:
You’ll have to sacrifice the bulky nightstands for sleek, minimalist alternatives because, well, doors need swing space. How about an upside-down Ikea picture rail for a makeshift nightstand? Genius, right? Add a sconce, and voilà, you’re living that minimalist dream with everything within arm’s reach.
The Pax transformation is more than just storage; it’s about efficiency and style, cohabiting peacefully in your bedroom. But remember, measure twice, order once, and maybe brush up on your trim installation YouTube tutorials. Once done, stand back and bask in the glory of your newly transformed, uncluttered sanctuary. Happy organizing!
11. Create Your Dream Closet with IKEA PAX: A Stylish and Affordable Solution!
So, you’ve got this empty space, and you’re thinking, “I need a killer closet!” Well, you’re in luck because we’re about to dive into the IKEA PAX closet system – a game-changer that will make your dream closet a reality! Get ready for a fun and informative tour of what you need to know to transform your space.
Step 1: Plan Your Space
Let’s start with the basics. The IKEA PAX closet system revolves around customizable wardrobe frames. You can choose from three different widths, two depths, and two heights. The first thing to figure out is your available space – measure it! Our closet was about 6.5 feet wide, so we mixed deep and shallow frames to maximize storage without sacrificing style.
Step 2: Installation Magic
Now, it’s time to get hands-on! Secure those wardrobe frames to the wall with drywall anchors and binding post screws. Tip: Be strategic with your screws to avoid interfering with your interior accessories. You don’t want to redo your hard work later, right?
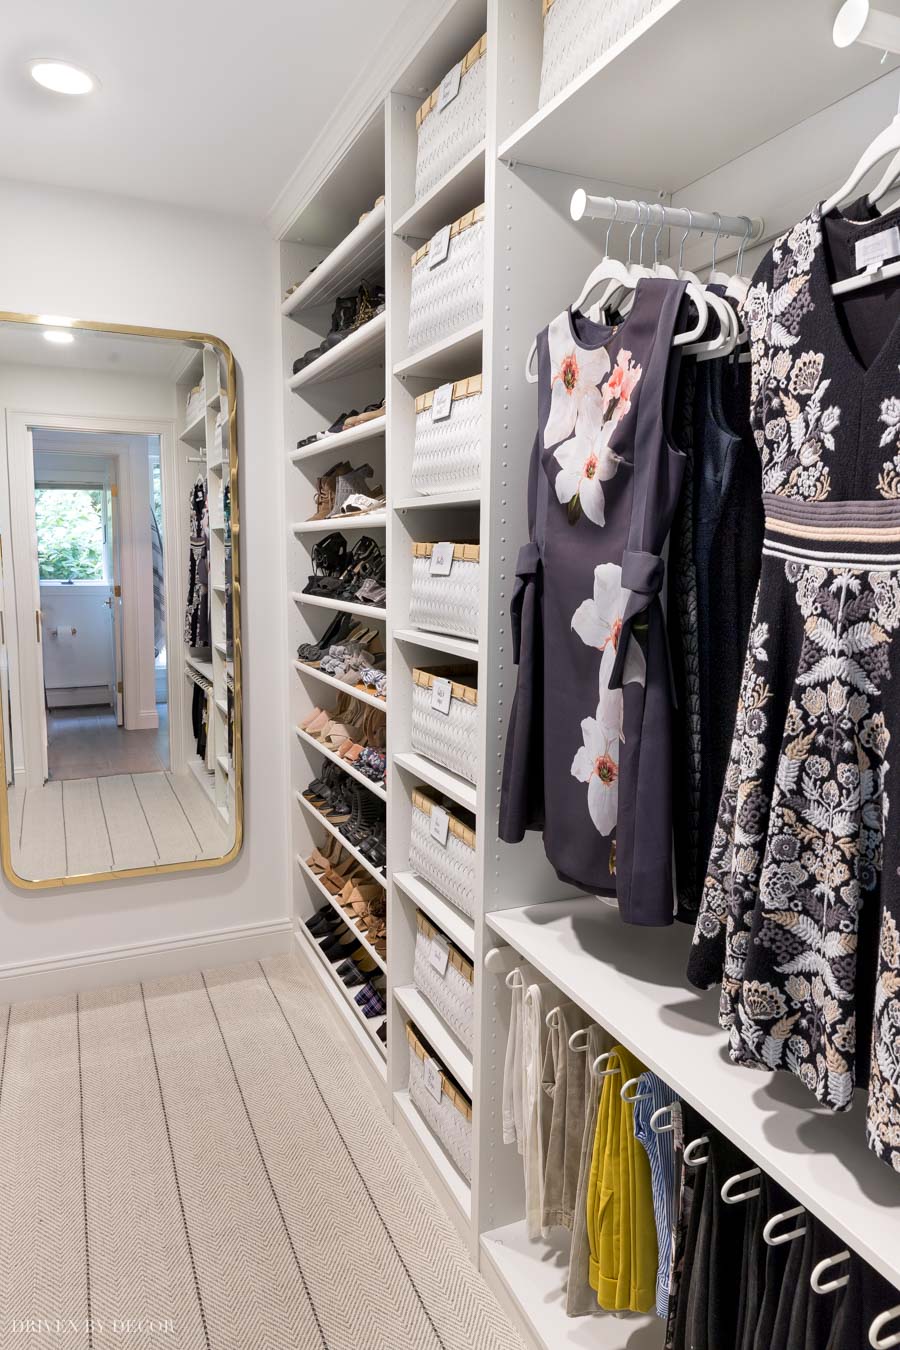
Step 3: Accessorize with KOMPLEMENT
Here’s where the real fun begins – customizing your closet with KOMPLEMENT accessories. Let’s start with the 13″ deep frames:
- Pull-Out Clothes Rail: These clever rails allow you to hang clothes facing forward. Great for those special occasion outfits and they even extend for extra hanging space.
- Pull-Out Pants Hanger: Neatly hang your pants – one pair per hanger for the 13″ deep frames or double up for the 22″ deep ones.
- Shelves: IKEA’s got shelves that match your wardrobe frames’ width and length. Perfect for keeping things dust-free or holding your travel gear, belts, and more. Don’t forget the woven bins and labels for that organized touch!
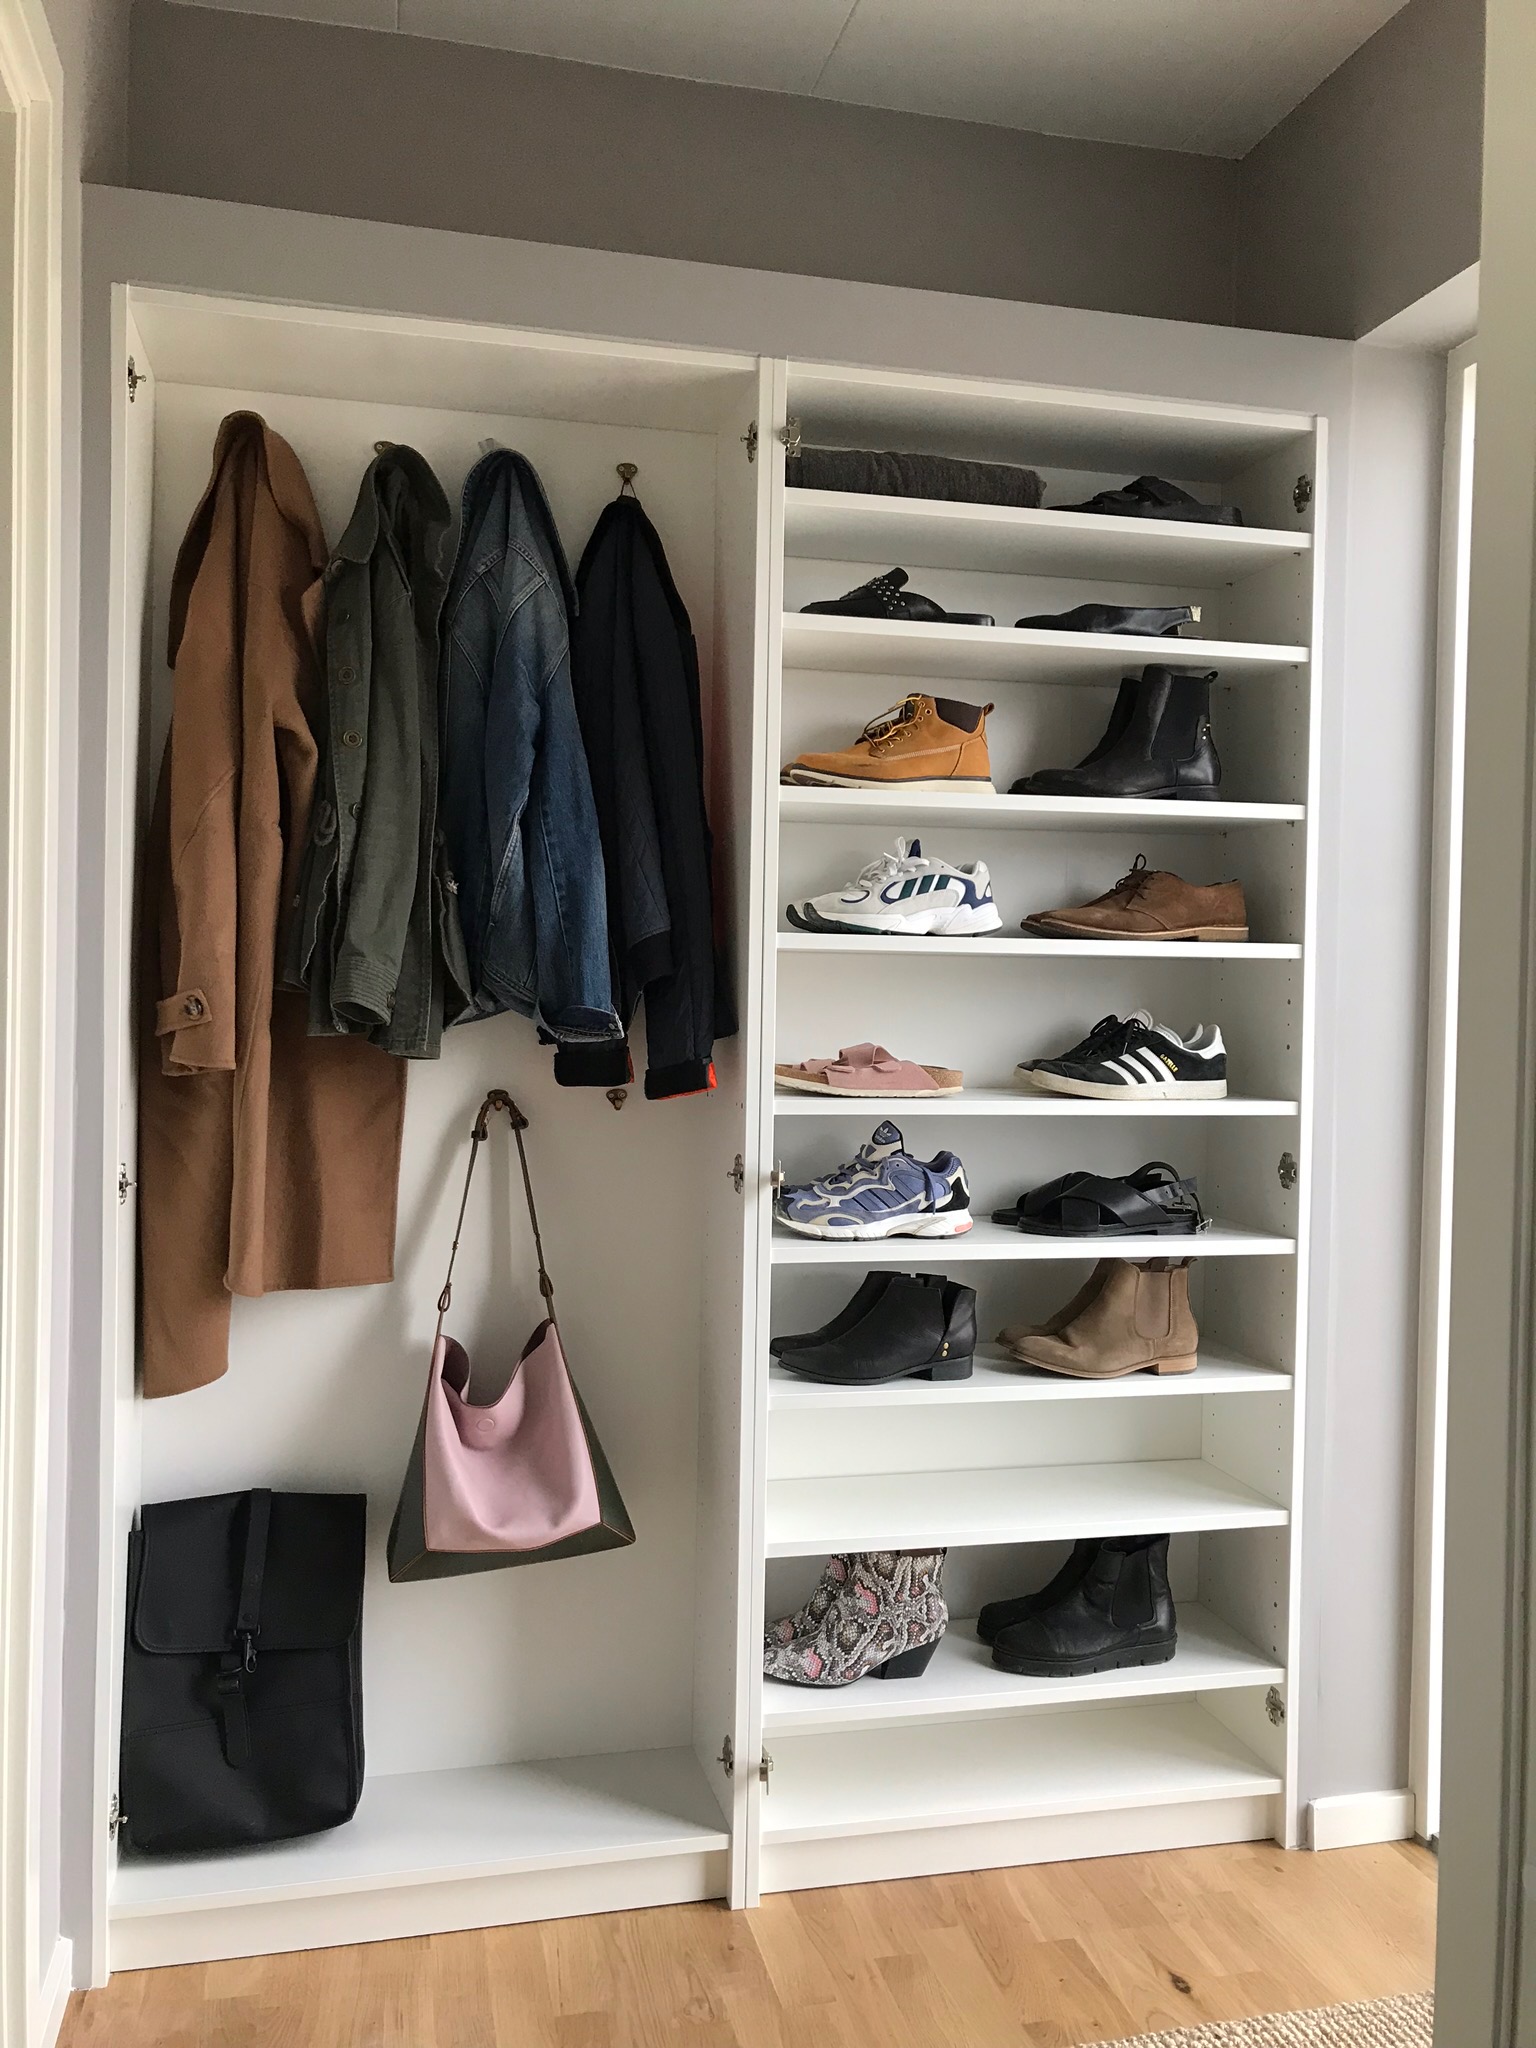
Step 4: Shoe Heaven
For shoe lovers, we’ve got you covered! Fill a 39″ wide wardrobe with KOMPLEMENT shoe shelves – they’re spacious, organized, and easy to access. But remember, IKEA offers various shoe storage options to suit your taste.
Step 5: Reflect Your Style
Don’t forget a full-length mirror! We chose a stunning brass floor mirror to elevate our space, but IKEA has great alternatives with squared-off corners.
Step 6: Organize and Conquer
Time to tackle the 22″ deep wardrobes on the other side of your closet:
- Clothes Rails: Keep your wardrobe organized with short sleeve shirts, long dresses, and long-sleeve shirts neatly hung.
- Drawers with Framed Fronts: These drawers offer a chic alternative to flat-front ones. Your clothes will thank you.
- Pull-Out Trays with Inserts: Perfect for organizing jewelry and accessories. Mix and match different inserts for a customized setup.
Step 7: The Finishing Touches
For that extra touch of class, add crown molding along the top of your wardrobes. It covers the gap beautifully. Don’t forget to fill all those holes, and your closet will look polished and complete.
The Pros and Cons
Now, let’s weigh the pros and cons:
Pros:
- Affordable: IKEA PAX won’t break the bank compared to other closet systems.
- DIY-Friendly: Assembly is straightforward, with clear instructions.
- Sturdy: These wardrobes are built to last.
- Soft Close Drawers: No slamming drawers here!
- Customizable Look: Crown molding adds that high-end finish.
Cons:
- Clunky Online Planner: Designing with IKEA’s online tool can be a bit tricky.
- Time-Consuming: It takes time to plan, assemble, and customize.
- Limited Sizing: Depending on your space, there may be gaps.
- Lack of Stylish Baskets: You might need to look elsewhere for trendy storage.
So there you have it – a stylish and budget-friendly way to create your dream closet with IKEA PAX. With a little time and effort, you’ll have a closet that’s both functional and fabulous. Happy organizing!
Relevant Idea by Realhomes
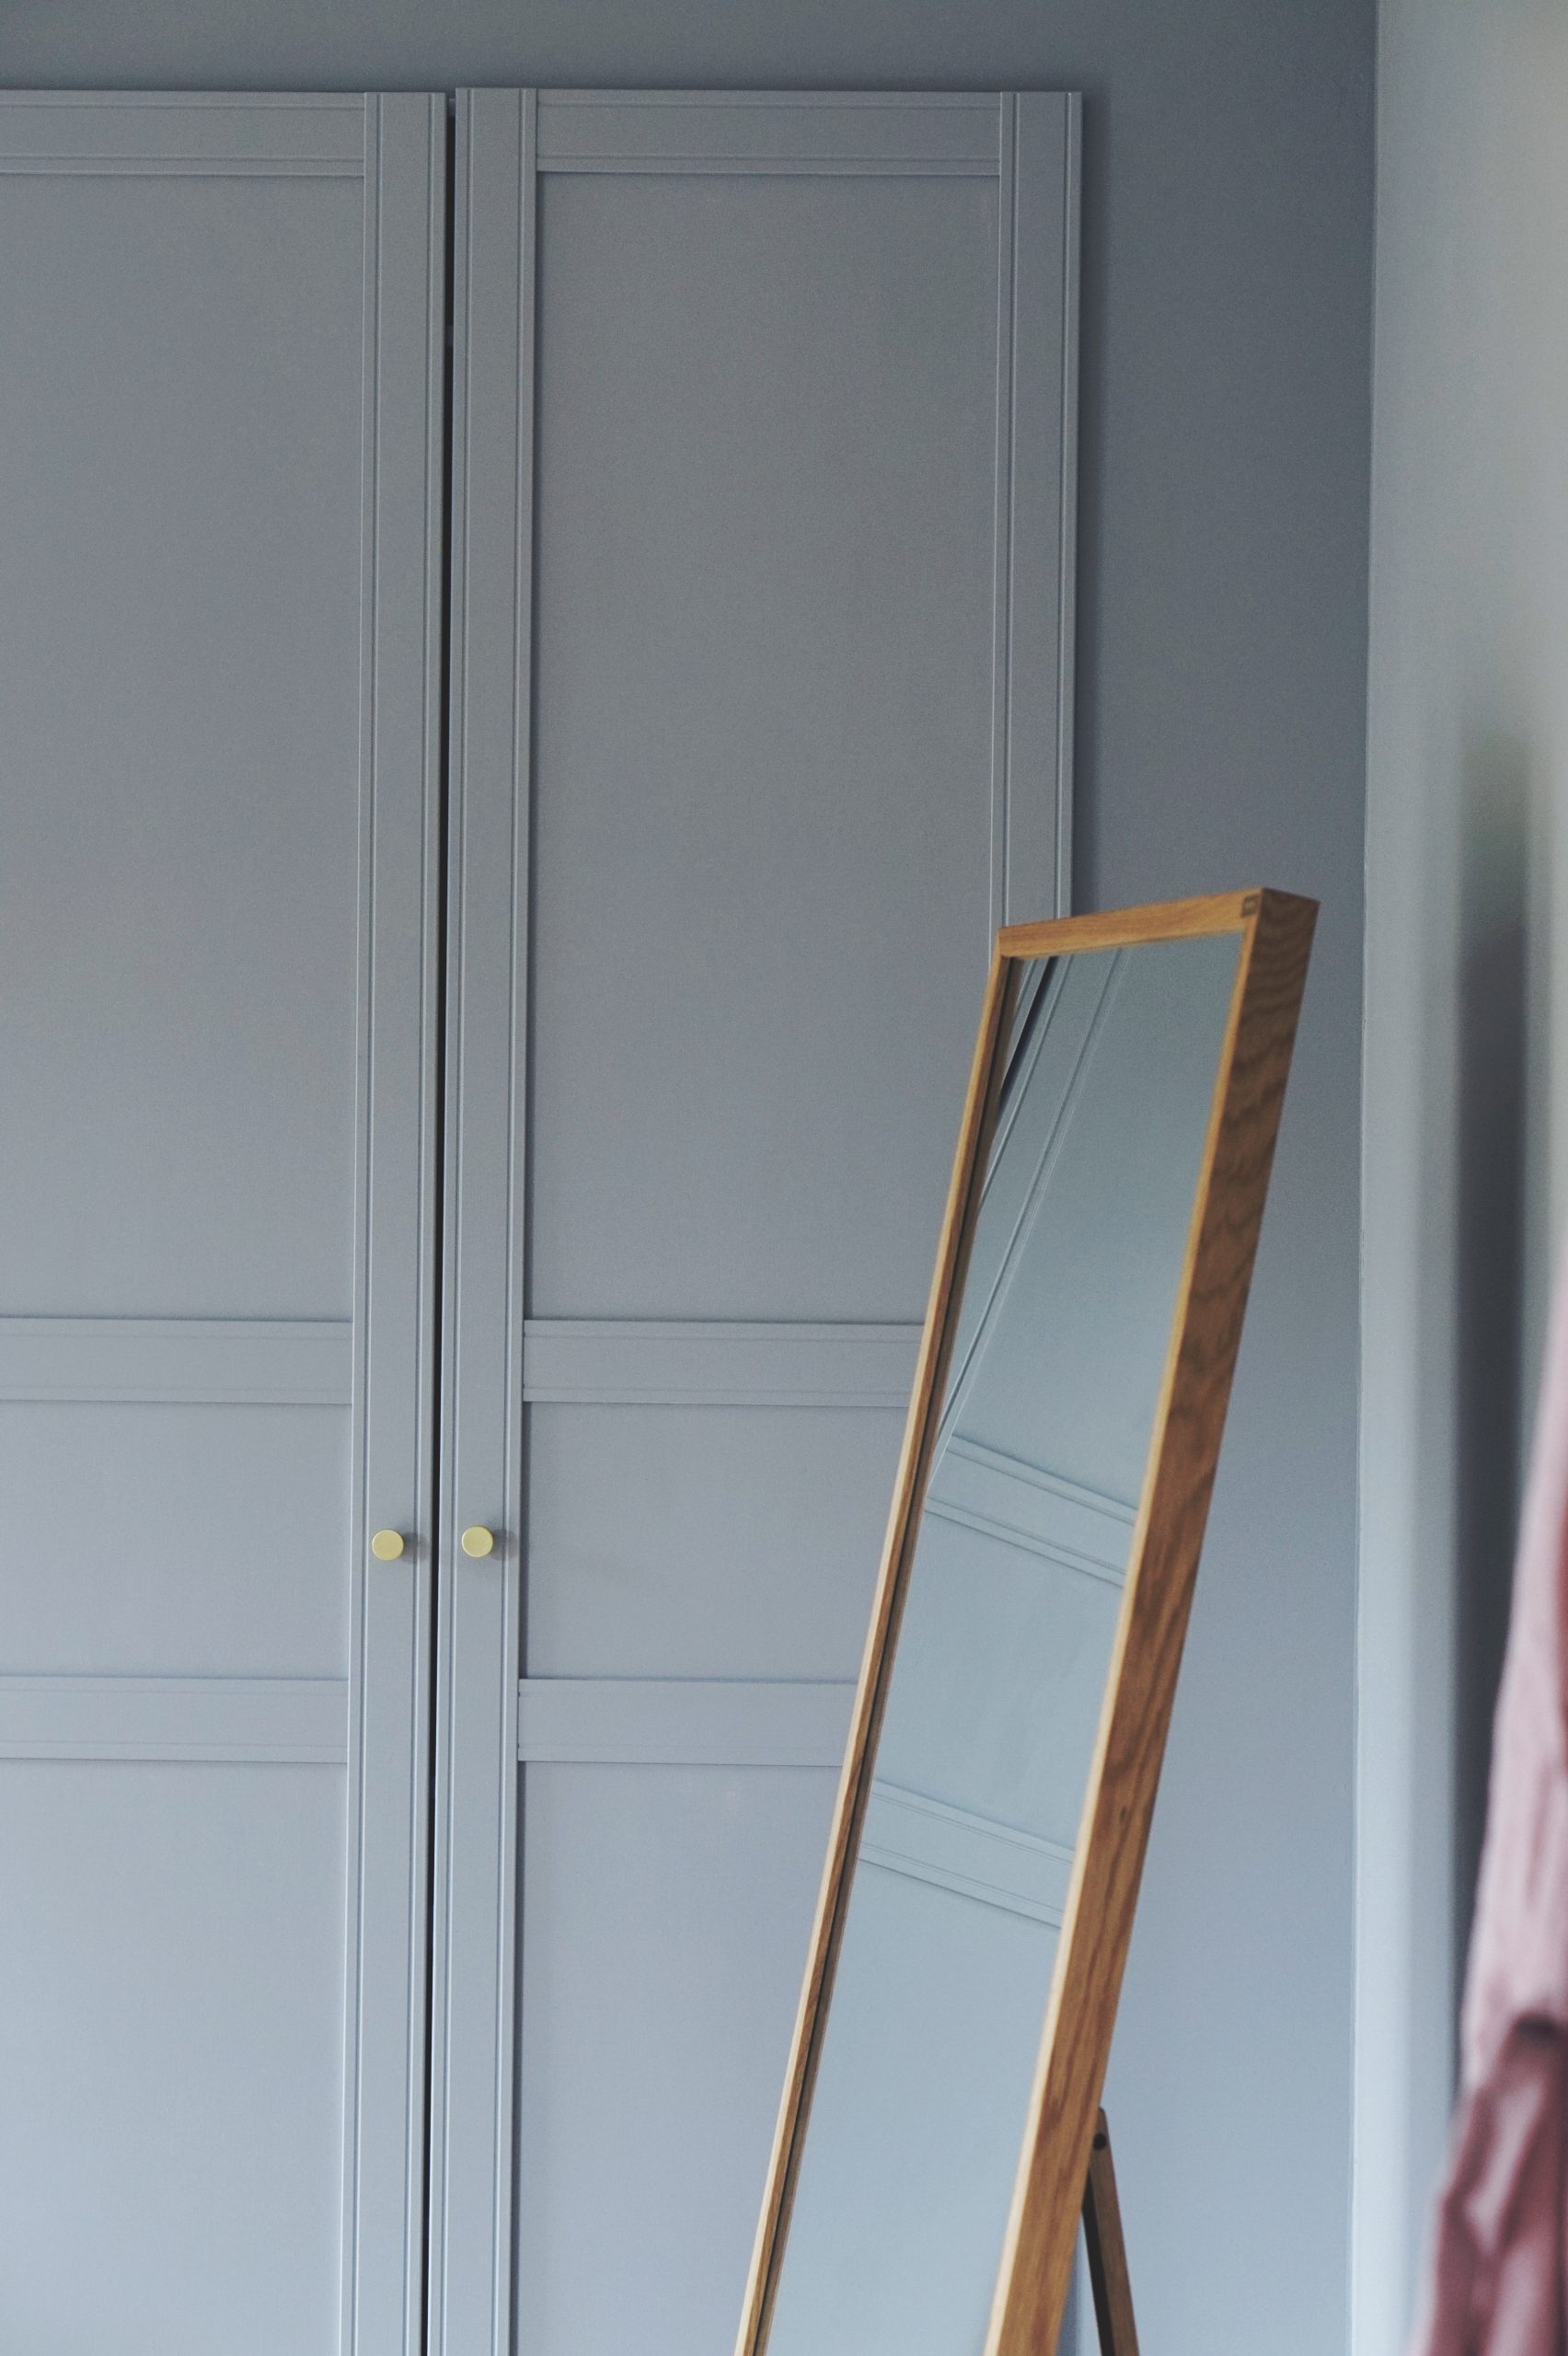
Laura Crombie reveals a savvy IKEA wardrobe hack for a built-in look using PAX units for £409, a fraction of a £1,600 carpenter’s quote. She assembles and secures three PAX wardrobes, adds IKEA Forbattra kitchen end panels with precise scribing for snug fits, caulks gaps, and finishes with stylish doors and handles. The process requires woodworking to tailor panels, attaching with adhesive, and personalizing with chosen shelves and rails. Her successful hack culminates in a stunning, bespoke bedroom feature.
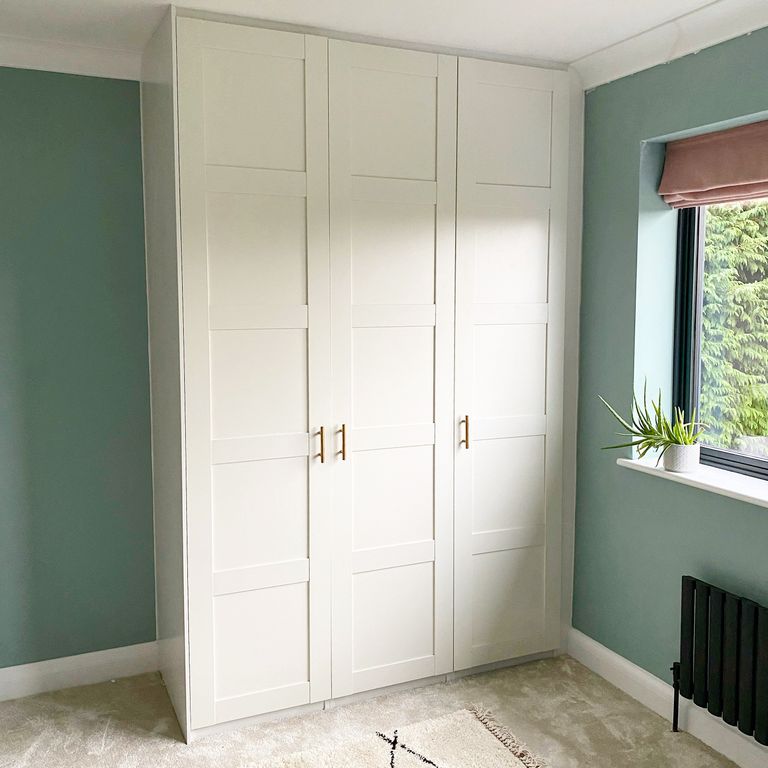
10. Ikea Hack: DIY Guide To Built-in Wardrobes With Pax And Billy
This time, you will embark on a wardrobe wizarding journey to transform your space with IKEA’s PAX and BILLY series into a swanky, built-in paradise. Get ready to save some serious cash and earn bragging rights on your next home project!
Let’s begin with your shopping list: Grab those IKEA PAX wardrobe frames (measuring your space is crucial here!) and BILLY bookcases, if you’re doubling down for the entrance. Don’t forget the doors—Flisberget for a chic bedroom or Oxberg for an inviting entryway—and stylish handles to match. You’ll need some tools of the trade, too: an electric saw (with a guide rail for those clean cuts), a trusty drill, MDF boards, wooden battens, screws, and the usual suspects for finishing—sand trowel, sandpaper, paintable caulk, and primers. Oh, and the paint—go for the durable kind in “Gray Marble” for that touch of class.
First things first: Assemble those PAX frames. If they’re standing more standoffish than a shy kid at a party—about 5cm from the back wall (hello, radiator pipes)—make sure they’re still rock solid. BILLY bookcases are a bit different; anchor those babies directly to the wall using a wood slat for stability (and future hook-hanging endeavors).
Next up, frame your structure with wooden bars—these are your MDF boards’ best friends. Measure the thickness of your MDF to match the depth of the bars, so everything sits flush and fabulous. If your MDF is playing it cool at 2cm thick, your battens should too. Cut the MDF to fit like Cinderella’s slipper, and pre-drill to avoid splitting your boards (no one likes a rough edge).
Screw the MDF into place and start the spackling showdown—filling, sanding, and repeating until those joints and screw holes are invisible to the naked eye. Coat your MDF with a primer that grips like a handshake from Hercules before you unleash the paint.
Painting time! Whether you’re wielding a brush for detailed doors or rolling for broader strokes, be meticulous for that smooth, envy-inducing finish. Mask off what you don’t need painted to keep it neat. Two coats should do the trick, plus a primer underneath for lasting strength.
Installation is the grand finale. Fit those doors on, twist those stylish handles in place (make sure they’re from HTH to keep your home’s look unified), and cap off the project with foot and ceiling panels for a sleek edge-to-edge profile.
For the entryway BILLY transformation, it’s pretty much a copy-paste of the wardrobe wizardry, just tweak the shelf situation for jacket space. Ensure stability with a strategic middle shelf and customize the battens’ position to make room for future hooks behind the cladding.