One of the most favorite storage organizers is shelves. They are relatively inexpensive and DIY-friendly. No wonder they have cornered the market for so long. And now, more and more homeowners take these storage organizers to the next level by making them look extraordinary and unique.
If you are looking for something that can make things at your home stay organized as well as decorating the interior, check out these 10 DIY shelf organizer ideas. As always this ideas are compiled for you by simphome.com
10. Put On Labels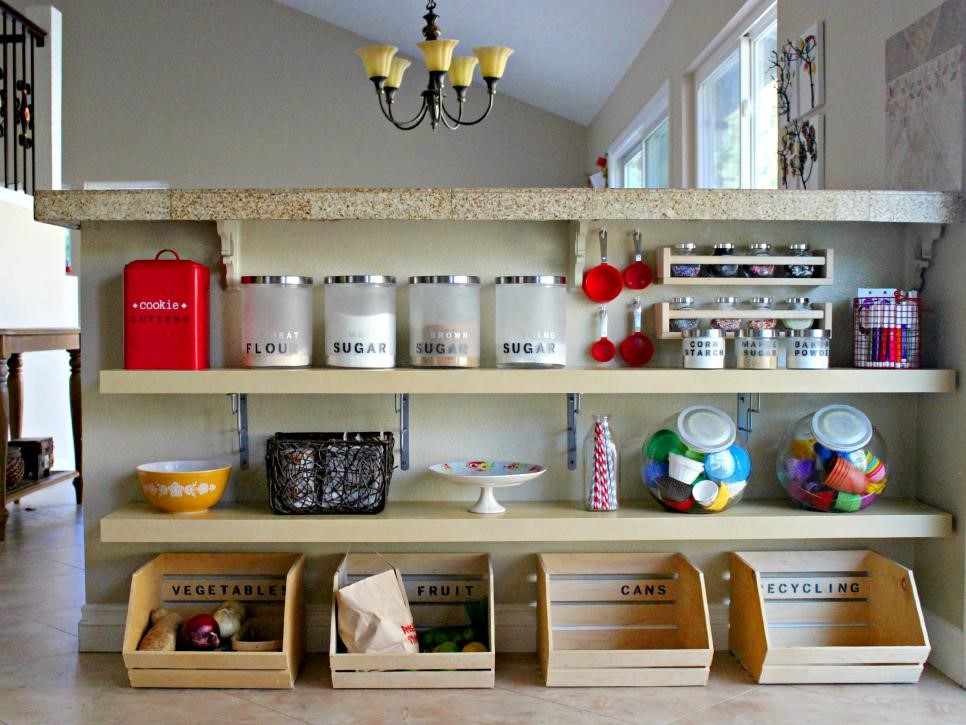 Installing open shelves in a kitchen is better than having bulky cabinets. The shelves will enable you to grab the ingredients you need when cooking and put them back more easily and quickly, which saves more time. And what makes them better is they don’t gobble up the space.
Do you often mistake sugar for flour that you put on the shelf? It seems trivial, but can lead to a big trouble. You can solve this problem by putting on a label on each jar so you won’t do the same mistake anymore. Besides, the labels can improve the look of your shelf and kitchen, making them look tidier.
9. Wooden Crate Shoe Shelf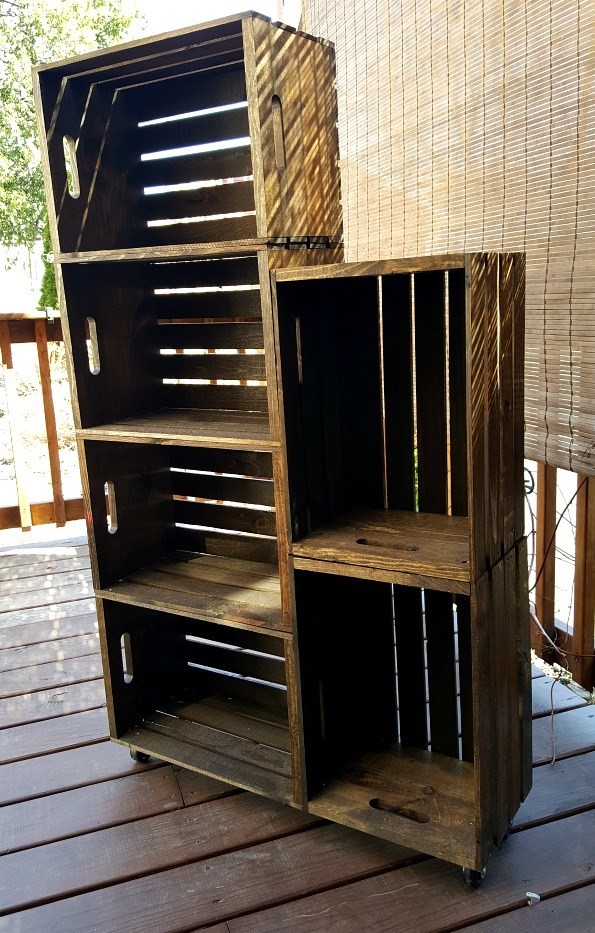 Don’t see waste as a useless thing that you need to get rid of as soon as possible. It can turn into fruitful shelves that you can use to store almost anything in your home. Now roll up your sleeves because you’re going to make the shelves this weekend.
Before making the shelves, you need to get 6 wooden crates. If you already have them, good for you! You can save more time and money.
First, get 6 wooden crates, 4 3” swivel caster rubber wheels, small wood screws, and some other tools. Then, sand the surface of the crates so you can stain or paint them more easily. After that, screw the crates together and install the casters to the bottom. If you want the shelves to look rustic, sand them using a sanding block and some steel wools.
8. Simple Shelf Dividers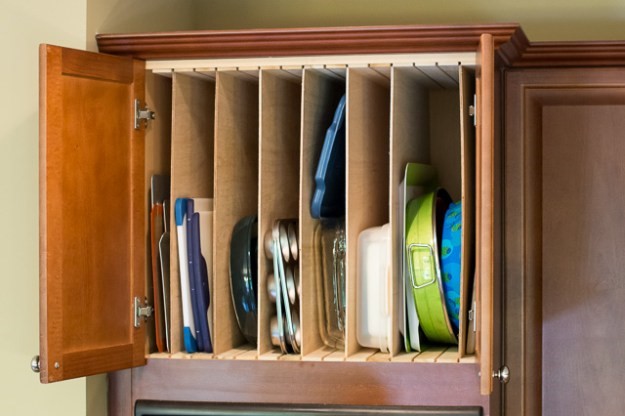 Storing trays and cookie sheets vertically can help you save more space comparing to stacking them up. Besides, it will make your shelf or cabinet look tidier. Instead of getting some shelf-dividers that might not suit your shelf and budget, try to make one yourself.
To do this easy project, get some poplar boards, lauan plywood, and brad nails. First, you’re going to need to install the poplar boards at the top and bottom of your shelf or cabinet using brad nails until it’s fully covered. Don’t forget to make a few millimeters gap between the poplar boards to insert the lauan plywood. Then, insert the lauan plywood, and you’re done!
7. Pull-Out Storage Idea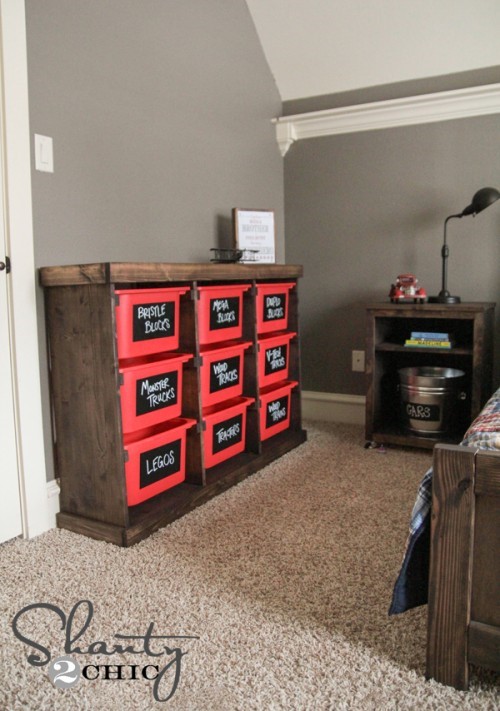 These pull-out organizers will help your kids organize their toys better. The vibrant red containers look great with the wooden shelf.
To make this cool shelf, you’re going to need 2 – 1 x 12 x 8′ pine boards, 2 – 1 x 12 x 4′ pine boards, 3 – 1 x 2 x 8′ pine boards, 2 – 1 x 3 x 8′ pine boards, 9 Ikea Trofast bins, gorilla wood glue, brad nailer, and wood stain.
6. DIY Pegboard Shelf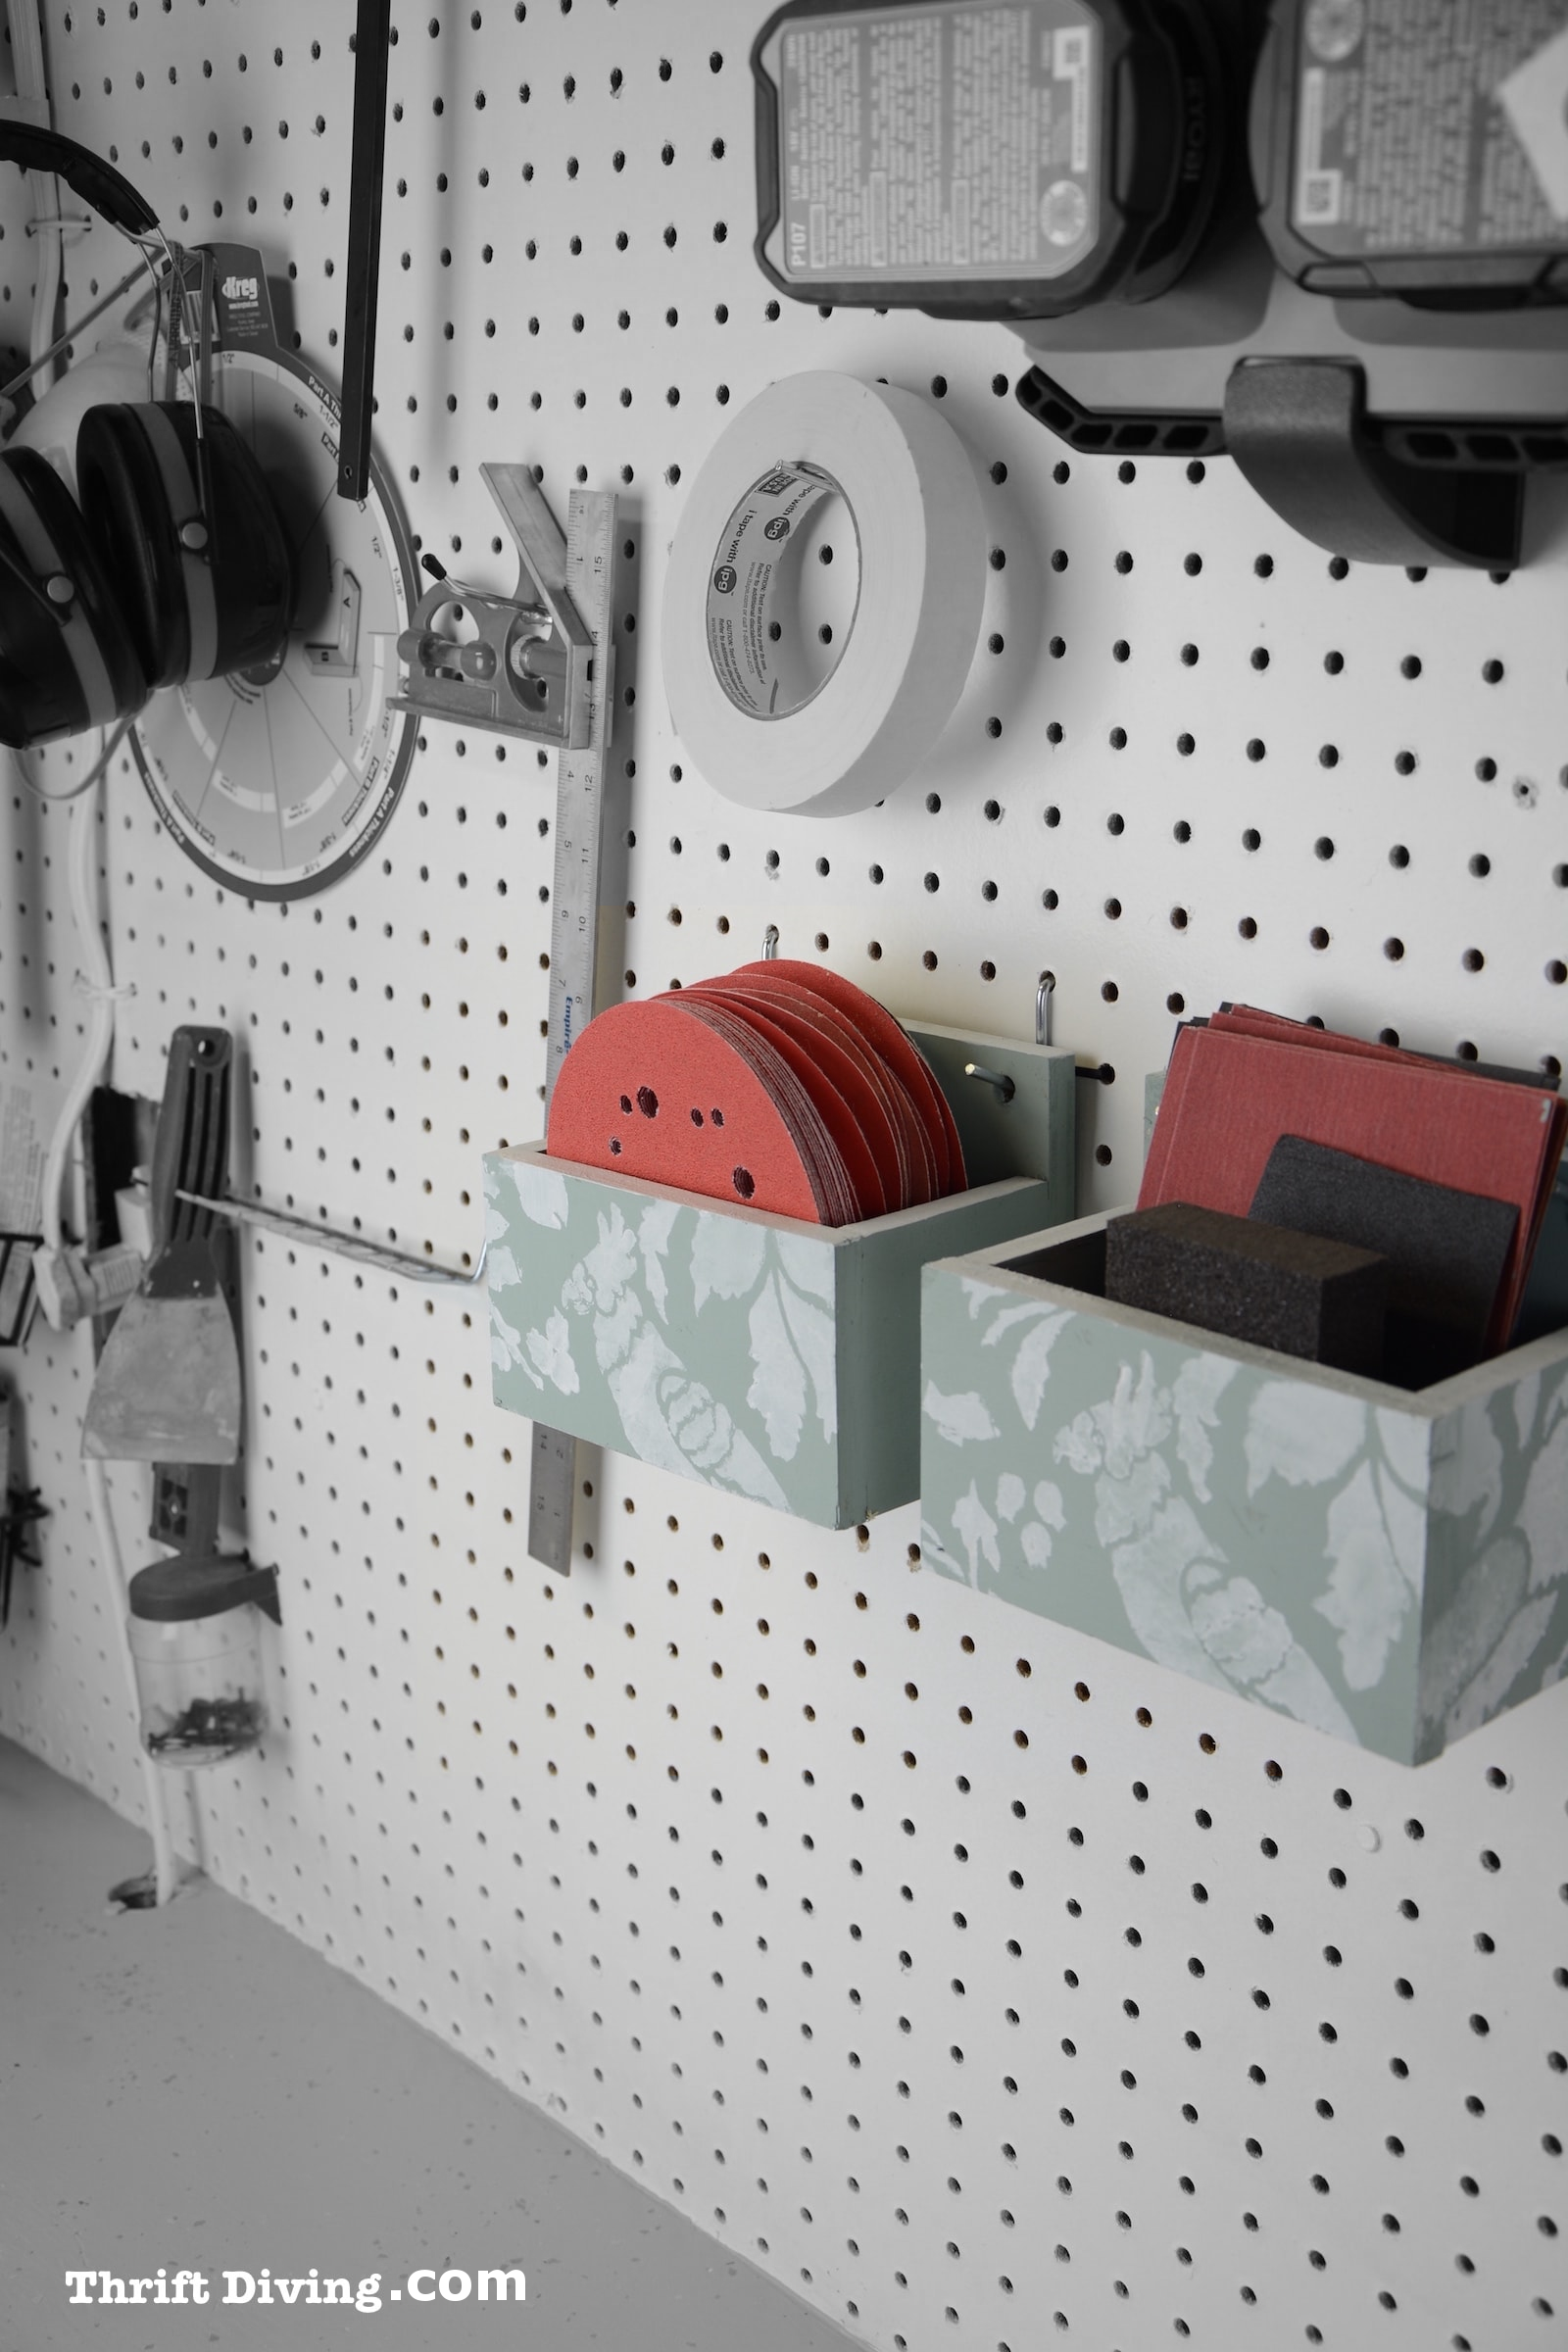 if you are looking for a multi-functional shelf that is also easy to make, try using a pegboard. Pegboards are extremely versatile. You can even hang it in any room in your house, just like this pegboard. You only need to add some pegboard organizers to hold your stuff in place.
To make these beautiful and functional pegboard organizers, you’re going to need 1/2″ thick plywood, 3/8″ drill bit, wood glue, clamps, chalked paint, and stencil.
You’re going to measure the plywood first. The size can be varied depending on how you want the organizer to be. But, make sure the back part of the organizer has to be longer because it will be hung to the pegboard. Then, cut the plywood.
Before assembling the pieces, drill two holes in the back. Then, you can now glue or nail the pieces together. Paint the organizers the color of your choice. You can also apply stencil if you like. And, finally, you can hang them on the pegboard.
5. Rustic “HOME” Wooden Shelf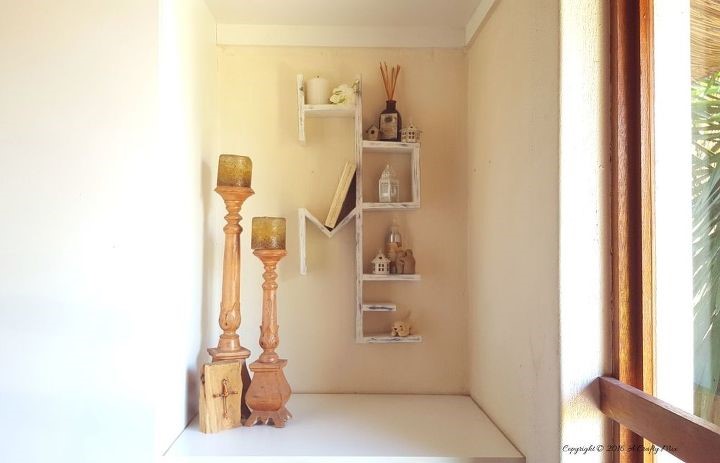 Looking for a shelf that can perk your house up in an affordable price? Try this one. Now shop around your home to find any leftover that you can use to make this cute rustic shelf.
Since you’re going to form H-O-M-E out of some pallet, you’d better draw your plan first before cutting up the pallet. Just a little tip, begin with the E. It would be easier. Assemble three pieces to the long board. The hardest part will be the M because it requires you to cut 45-degree angles. But, it’s not a big deal, though.
Once all the pieces have been assembled well, you can apply any finish you want. But whitewash it would enhance the rustic look.
4. Colorful Hexagon Shelf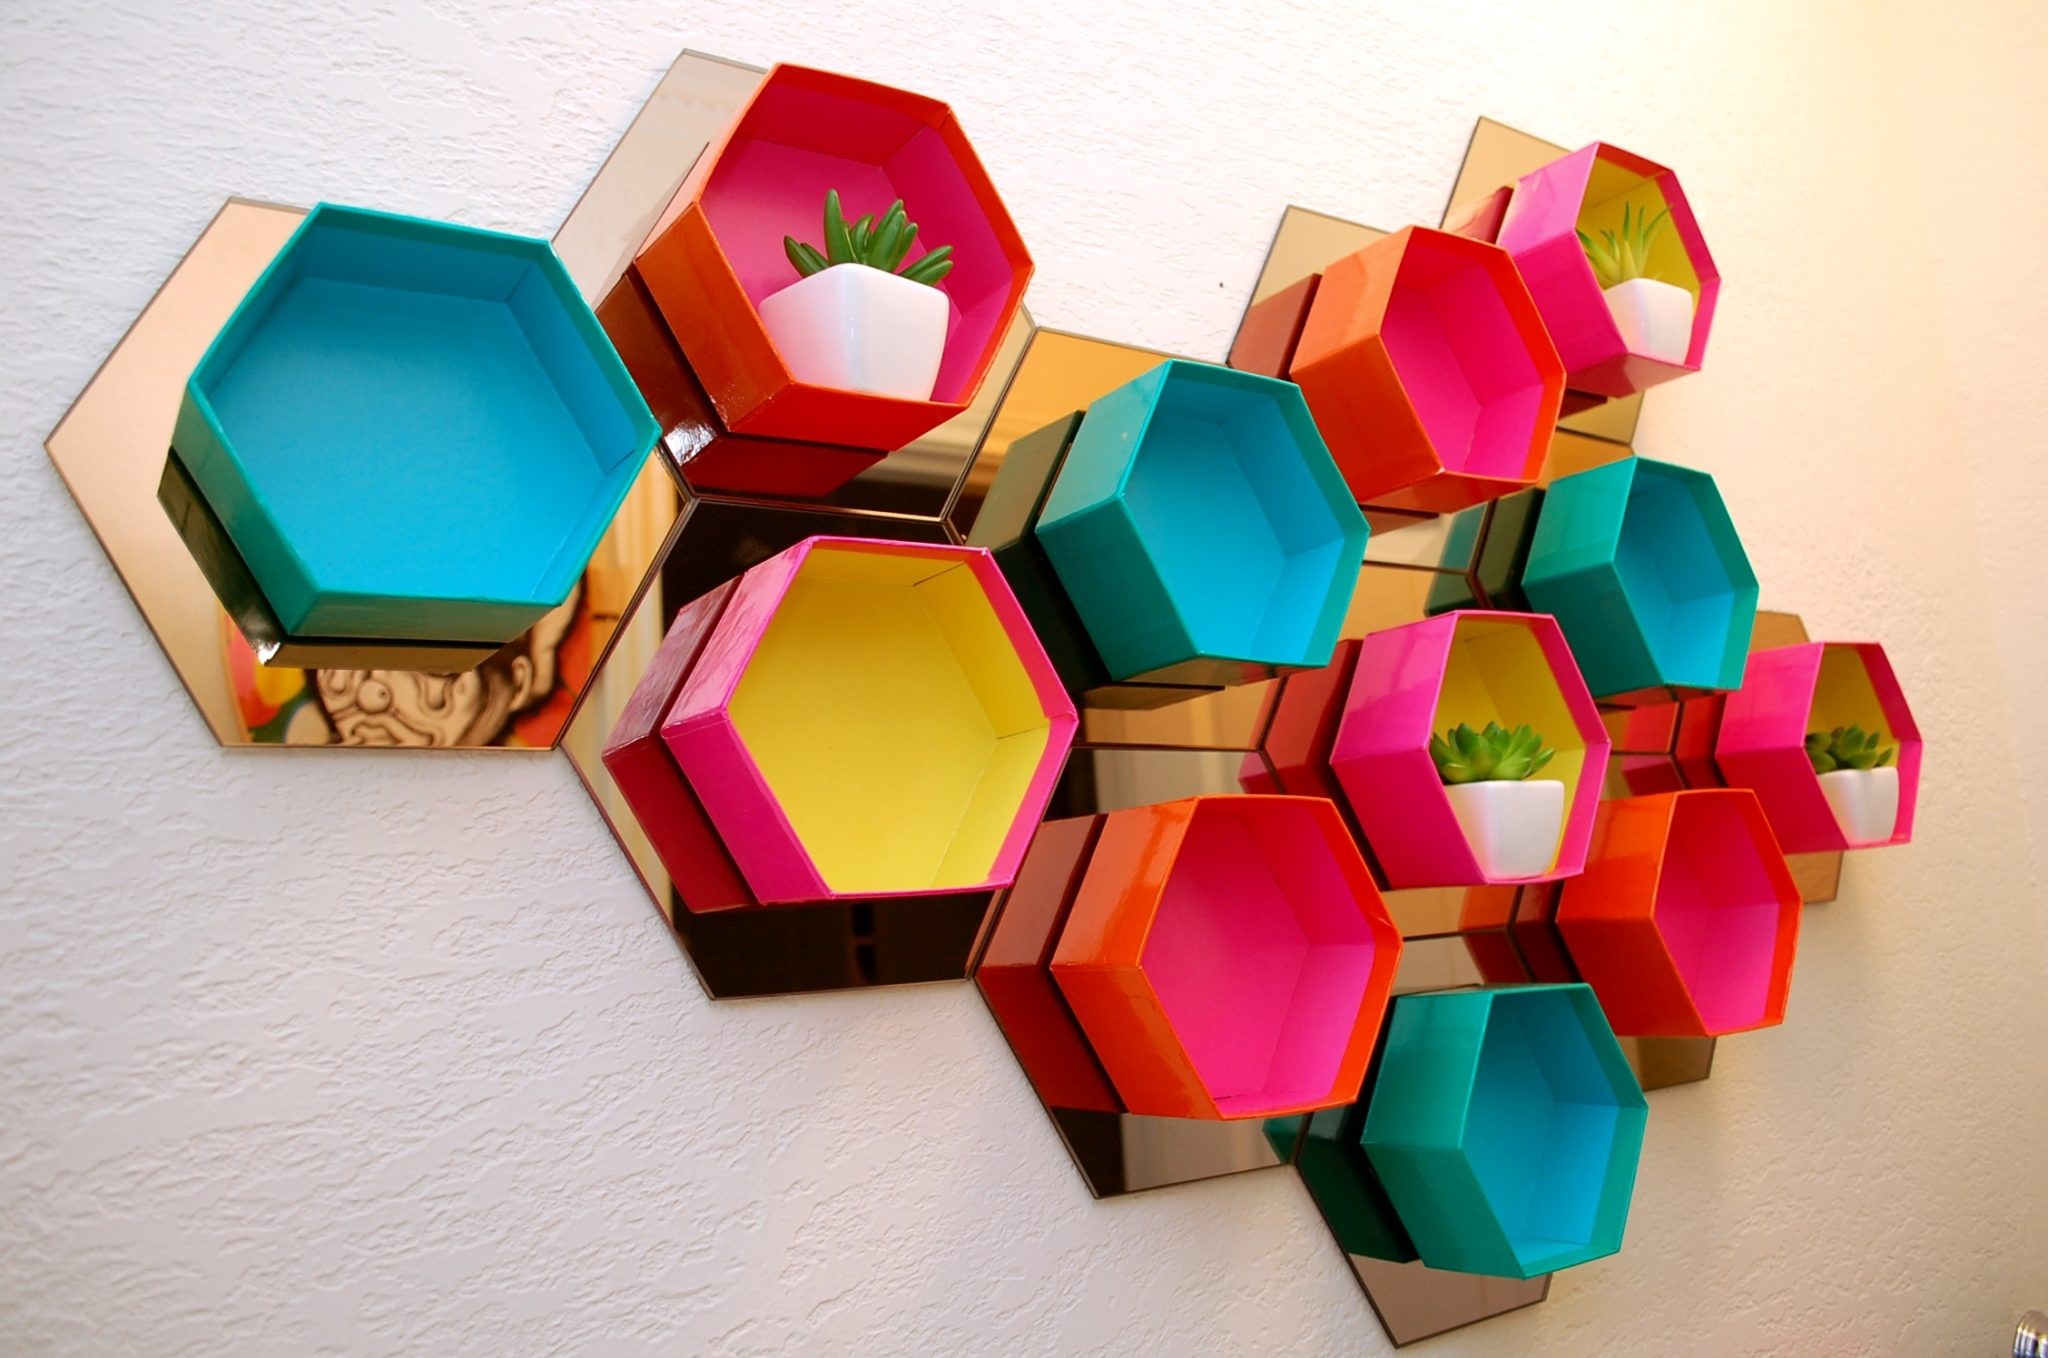 These hexagonal shapes will color up your days as well as adding pops of colors in your home. It’s a super easy DIY project that won’t waste your weekend for nothing.
You only need to get hexagonal gift boxes, hexagonal mirrored tiles, and double-sided wall mounting tape. Arrange and attach the tiles on the wall. Then, attach a gift box to the center of each mirror.
3. Floating Corner Shelves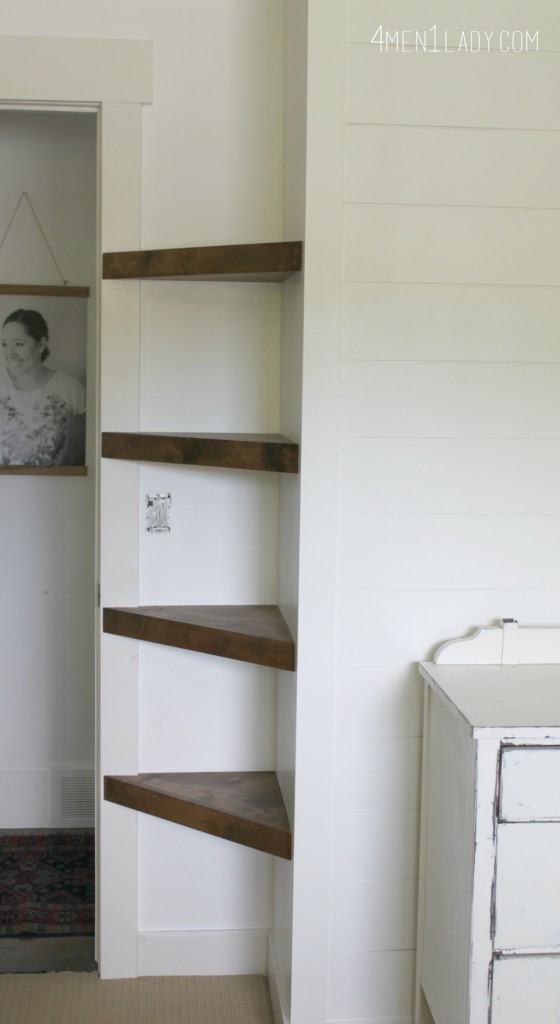 When it comes to a small bedroom, every inch and corner count. And that’s why you need to avail the corner of your bedroom by making floating corner shelves.
What you need to do is just getting some boards or leftover, cut them into triangles, and attach them at a corner of your bedroom to store your caps, sunglasses, or decorative plants.
2. Throw-and-Go Toy Storage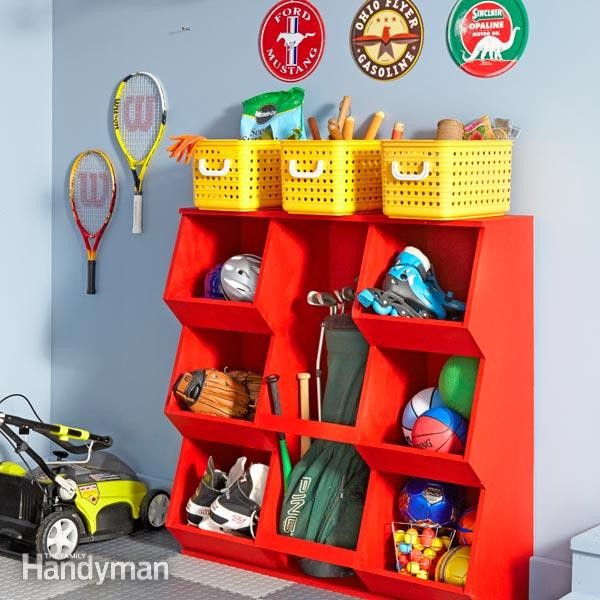 Kids are always in a hurry. They like doing things as quickly as they can including storing their toys. These throw-and-go shelves can be a great solution for this problem because they slope down inside. Once you’ve got your boards, lay out the zig-zag side profiles, cut them out, and sand before assembling them.
1. Wire Baskets and Pegboard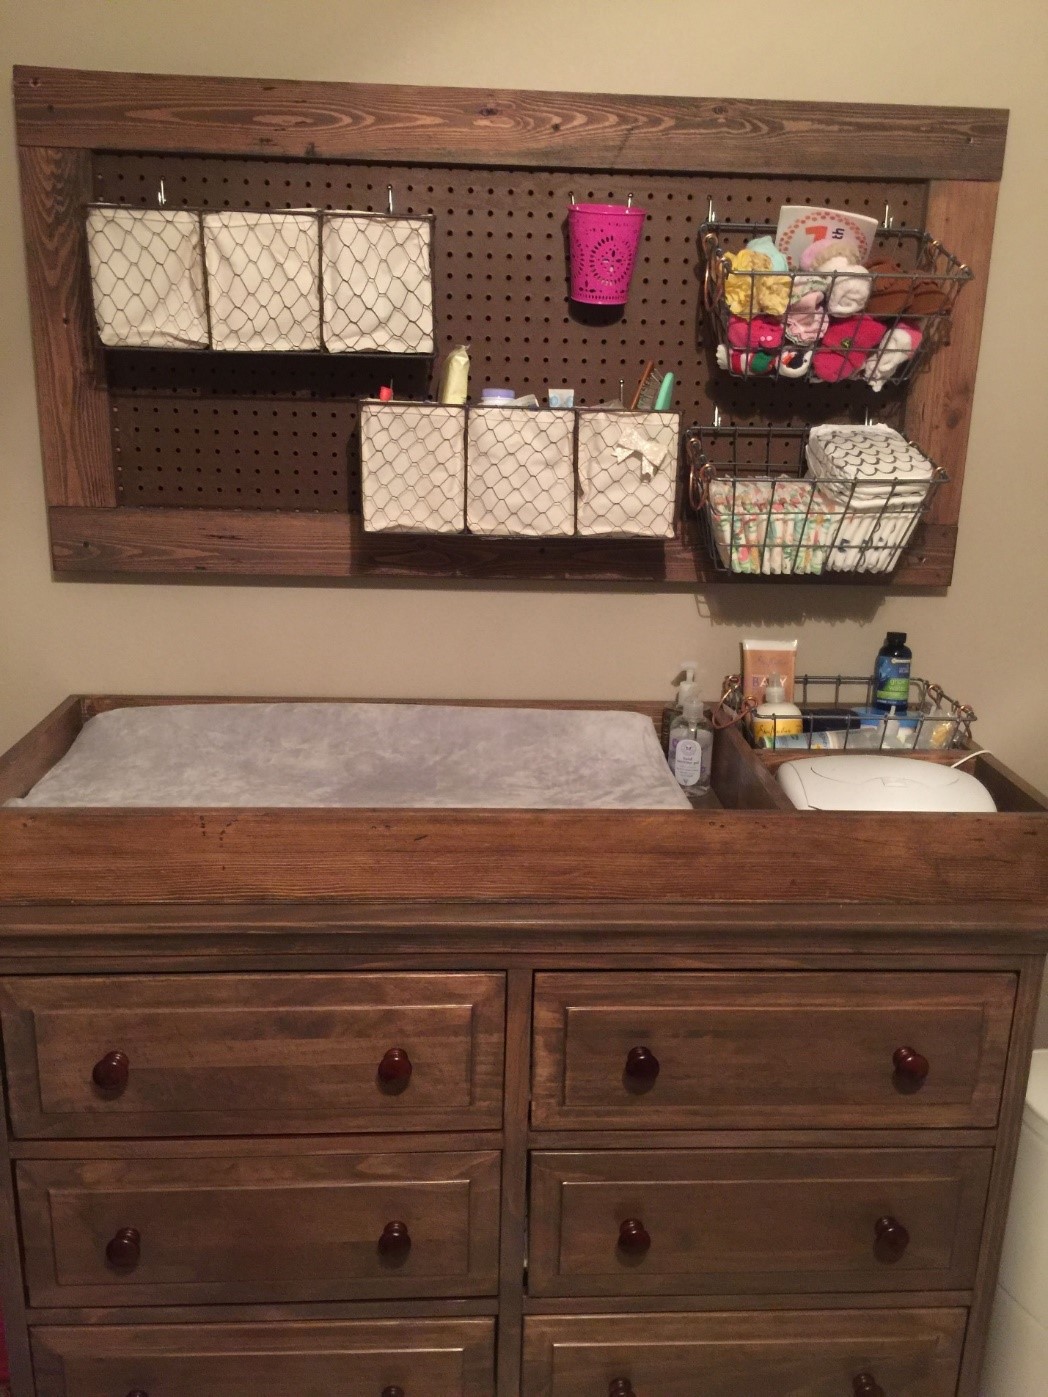 The versatility of pegboard allows you to explore your creativity, just like this changing table. A pegboard with some wire baskets hangs over the changing table, allowing you to grab diapers and powder in no time.
Now you know how to make wonderful shelves from scratch. These DIY shelf organizer ideas are super easy, yet can give you all you need. A place to store your stuff? You get it! A decorative item that can jazz your home up? It’s got you covered! Image by Pinterest.com