Are you now thinking about renewing your living room with quaint designs? You have a good luck today. Here I give you 10 Living Room Upcycling Furniture Ideas by Simphome.com that will give you some inspiration and tiny bit of encouragement. Many of these next ideas are DIY friendly and if that spoiler makes you uneasy already, I suggest you to keep reading this post and learn it.

And to complete your learning experience, I present you next super relevant video:
10. Drawers to Side table idea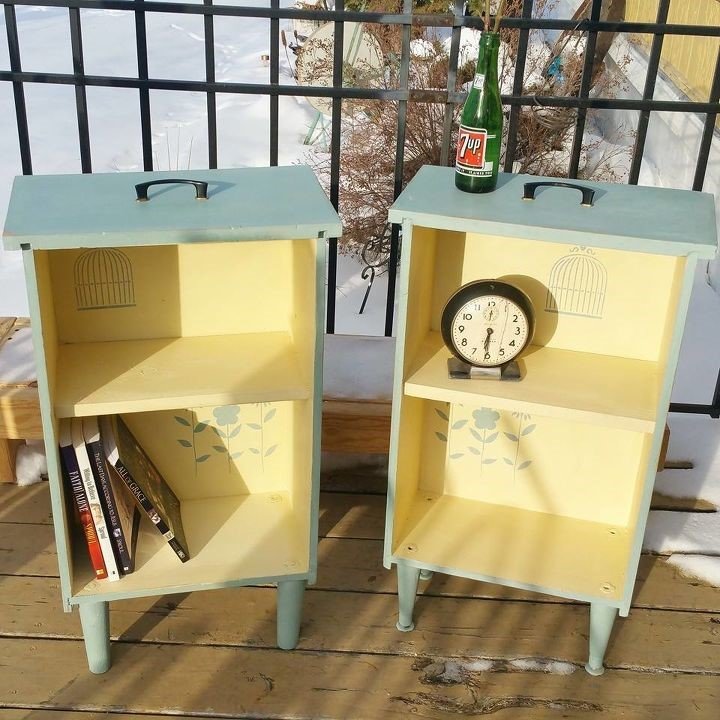 What will you do to an ancient extra large drawer? Before you consider putting it either in the storeroom or in the trash can, try to upcycle it into side tables.
You’ll need 2 extra-large drawers, 8 small furniture legs, and some scrap wood.
The part with a handle will be the top side of the side table and the other will be the bottom side. You can keep the handle in its original look if you like but if it disturbs you, you can remove it for sure.
Now, attach two sets of legs to each drawer with blind nuts. Put the scrap wood in the middle of the drawers to form a shelf. Attach it with wood glue and brads. And for the finishing, adorn them with some pastel shades.
Credit | Home Talk
9. Wooden-Crate Shelves The wooden crate may look like a wreckage (but it’s not, really, is it). With some materials and basic DIY, you can turn them into rustic shelves or new centerpiece and new storage solutions for your living room.
Some materials you need to make a wooden-crate shelves, like one in the picture, are 6 to 8 wooden crates with similar size, pine boards, 1-1/4” self-boring wood screws and matching drill bit.
Action plan:
1. Set your crates in rectangular.
2.Construct some boards into a frame for the backside of the set crates.
3.Position the frame on the backside of the crates then secure each crate by inserting 1-1/4” wood screws through the frame.
And for final touch stain or paint them with the color you wish.
Credit | HG TV
8. A DIY Corner Workspace idea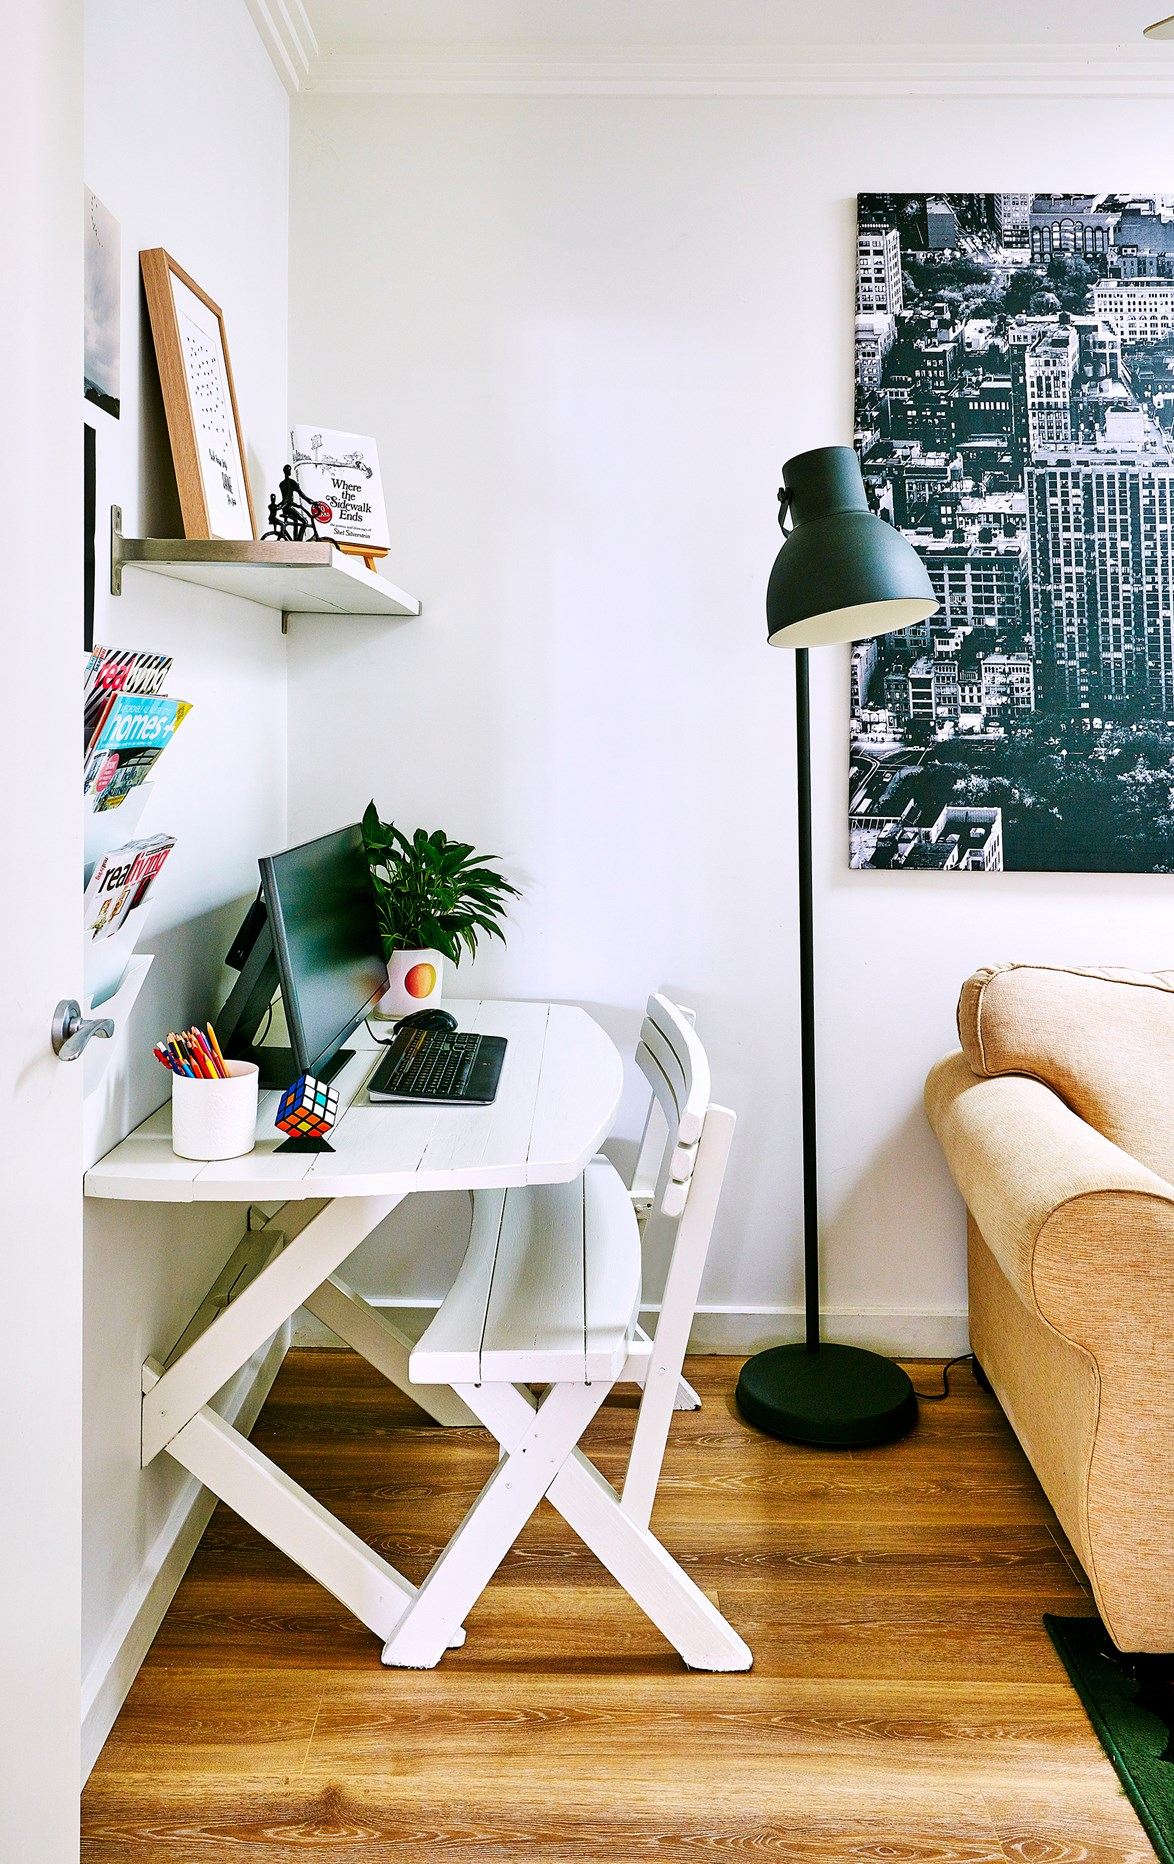 Working at home is sometime better than working alone overtime in an office cubicle in a downtown office building. However, the problem lies in the space. Mostly, you don’t have enough space for your own personal office. For that reason, consider adopting this DIY corner office idea.
It is very simple and easy to make. All you need is a picnic bench. Next, saw it in half and paint it for a new look. Let it dry, mount it on the corner of your wall and done. It is better if your corner has a window looking out open space.
Credit | Homes To Love
7. A Drawer to Ottoman makeover idea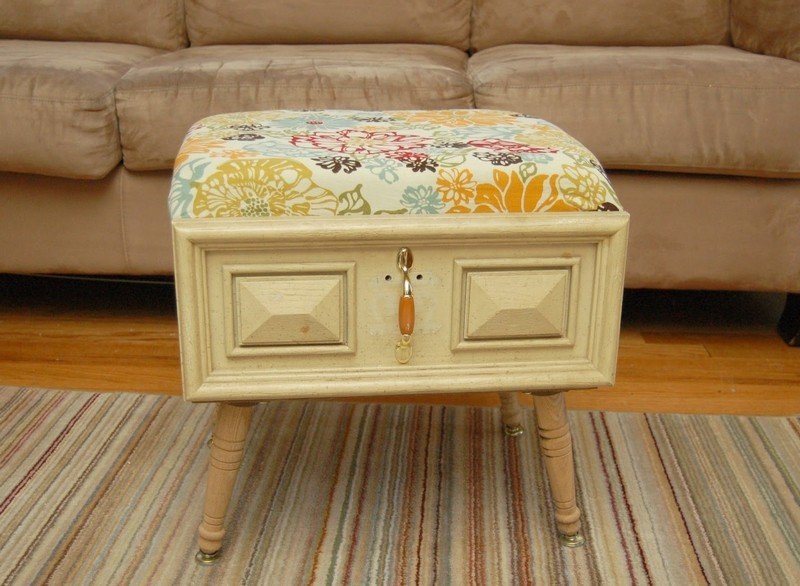 If you have an old drawer, you can turn it into a new rustic ottoman with storage solution. This idea is a clever way to keep your living room free of clutter. It gives you extra hidden storage space where you can put the things that are rarely used and to make it, you need an old drawer as the main material, MDF board, 4 legs, foam, and a fabric.
First, begin with cutting the MDF board to the exact size of the top of drawer. Take your foam and cut it the same size as your board. Cover your foam and your board neatly with your fabric then staple it down with your staple gun. Next, Nail two narrow boards below to avoid the top sliding around when someone sitting on your drawer. Make sure you give them right length and position so they fit nicely inside your drawer.
Finally, attach the legs to each edge of the bottom drawer and done.
Credit | The Owner Builder Network
6. An Ottoman with Exposed Storage idea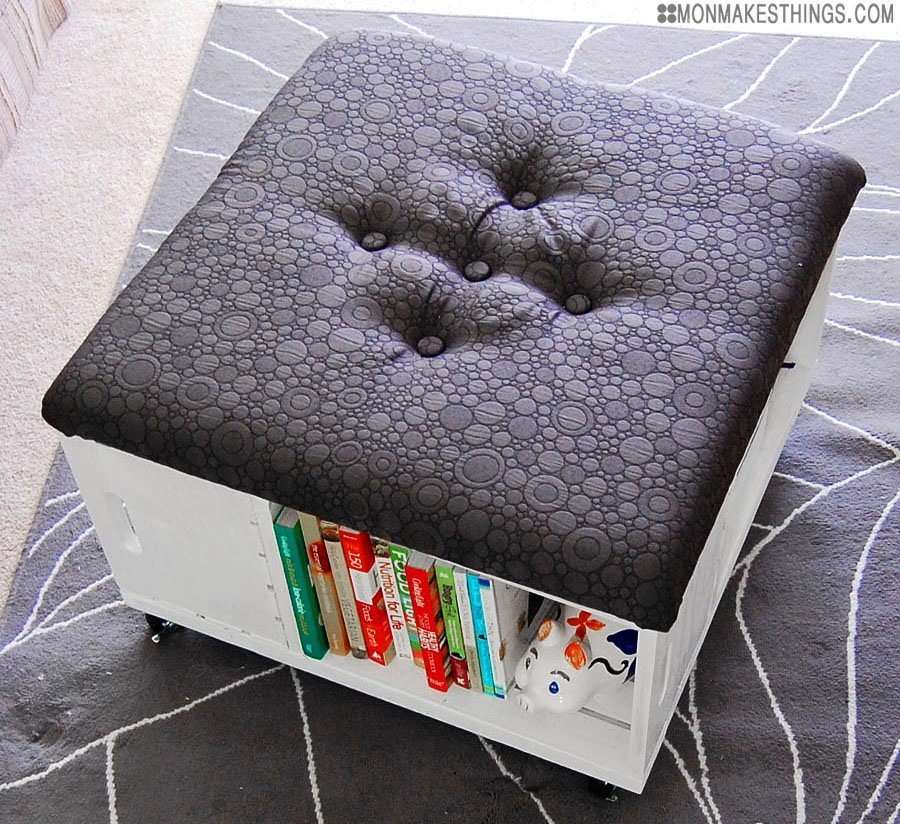
To craft your new ottoman, begin with sanding your wooden crates to get smooth surface then paint or stain them. Once they dried, put them together with screws to form a square with your crates opening facing outwards. Make sure the edges of your crates are flush each other.
After your upside-down table square is ready, align a frame with the crates. Ensure your frame is flush with each corner of your table. Secure your new furniture piece by drilling some screws through your table into your crates then attach a caster in each corner using screws. Last, attach a cushion on the top for more comfortable seating experience.
Credit | Mon Makes Things
5. A Trunk Coffee Table idea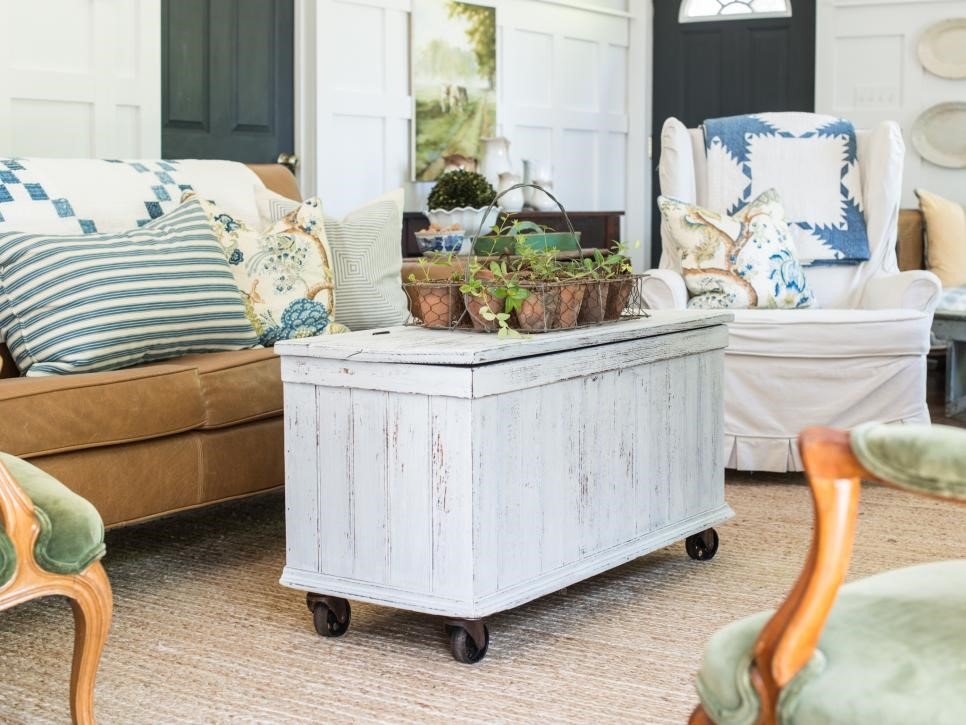 You might consider an old trunk to be impractical and tired, but hey! I have a little idea that might change your mind.
With an old trunk, 4 large casters, ¾” wood screws, and basic woodworking, you can get a revamped classic coffee table set with extra storage solutions you dreamed already.
First renew your wooden trunk with paint or stain. Once it is dry, flip it over to access the bottom. Settle the casters on the corner of your trunk and mark each screw hole. Repeat it to three other casters. Last, drill pilot holes then insert a screw in each hole to attach your casters.
DIY completed!
Credit | Great American Country and HG TV
4. Wooden-Crate Seat upcycling idea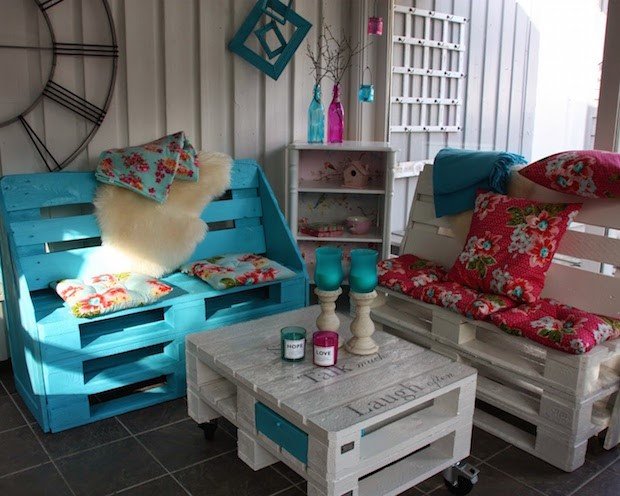 Instead of letting your crates abandoned and feed your unfriendly termites, you actually have a chance to get new wooden seats out of it.
First prepare few wooden crates and nails, then sand crates to get smooth surface. Next, you can either varnish and keep the wood color or paint it to get a new ambiance. Let them dry then pile the wooden crates one upon another with the other crate opening facing downward and attach them using nails. For the back of your new seat, flip one crate with the opening facing backward then attach them together using nails.
Credit | Upcycled Wonders
3. A Wooden-Barrel Coffee Table makeover idea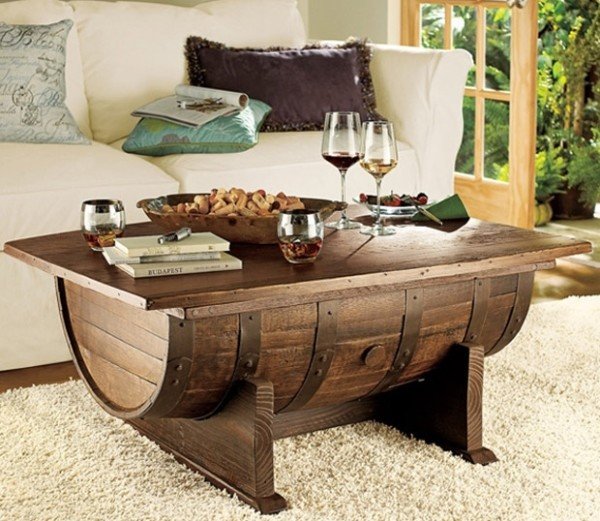 Do you wish something new and unique in your living room that will impress your guests? Consider this barrel coffee table idea.
To make the barrel table, prepare an unused wine barrel, boards, and screws, then follow next direction.
First, cut your wine barrel half then use sandpaper to smooth it out. After that, brush stain on it. Once it dried, measure the arc and construct two wooden bases where your barrel can sit on or attach them together with screws if you have to. Last, create the cover of the barrel by connecting some boards with screws. You can attach hinges and lid support so that you can open up the top and use the barrel as additional storage.
Credit | Devita
2. An Old-Suitcase Coffee Table idea There are a lot of things you can turn into an awesome custom coffee table. One of them is old leather suitcase that you might already have in your storeroom. As usual, take it out, clean it thoroughly, leather paint it if you want, or treat it with some DIY fabric and store it in your living room. In case you want your new coffee table taller, pile several suitcases on top of one another or craft a framed wooden structure underneath it.
Credit | Devita
Lastly No 1. Vinyl-Record Room Divider idea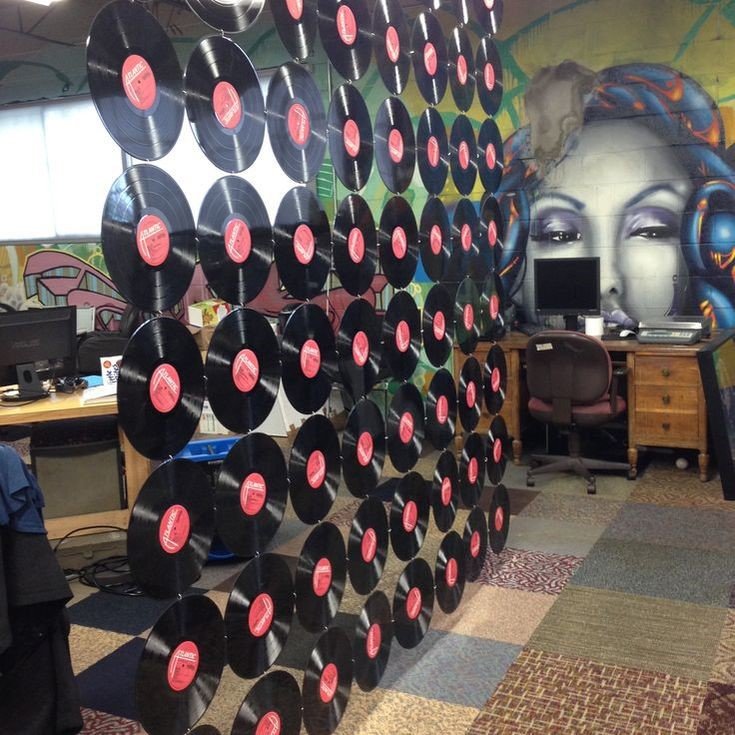 If you have a bunch of unwanted vinyl records and can’t dump it immediately, re-purpose them into a custom room divider. Surely, the larger your space is, the more records you will need.
First, drill four small holes on each record in the 12, 3, 6, and 9 o’clock position. Special for the sides and bottom records, they only need three holes. Next, Connect all records together with binder rings.
After your job is finished, screw cup hooks into your ceiling where you will hang your new room divider and then hang them there.
Credit | Home Guides
So, those are living room up-cycle furniture ideas that might inspire you to re-purpose some abandoned things in your home. Thanks for enjoying this video and see you again soon.