A Kallax Cabinet project with Veneer
Here, the classic Kallax cabinet turns into a Mid-Century design unit. Indeed, it’s easy to implement.
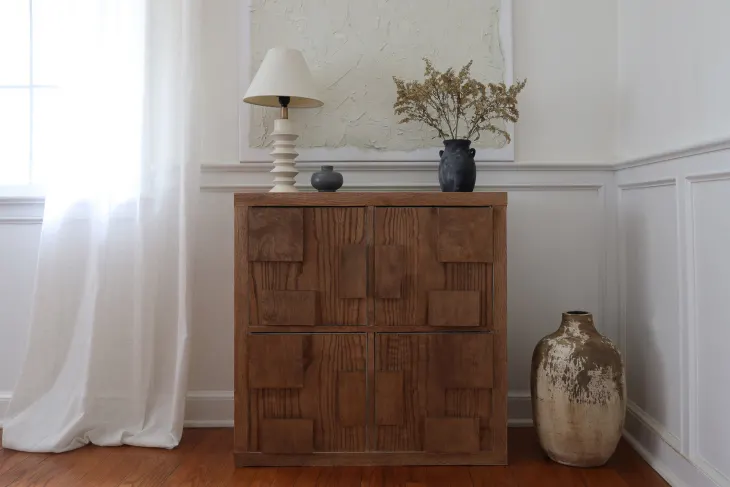
After you have assembled your IKEA Kallax according to the instructions in the packaging, you must cover all parts of the cabinet, including the doors, with wood veneer.
- Ensure the veneer is smooth on every surface and that the remaining parts are neatly trimmed.
- Next, wrap the cabinet edges with wood banding.
- Because all parts are covered in wood veneer, including the holes in the door, you don’t need to install knobs or handles anymore. Alternatively, you will use a protruding wood block to open the cabinet door.
- The next step is to cut the wood block according to the size and amount you want, preferably in squares and rectangular.
- Glue all the blocks on your four IKEA Kallax doors to give them a natural pattern, and a mid-century protruded surface look.
- After that, install the doors to the cabinet and apply stain to the unit.