3. How to hide a Wireless charging pad inside ikea bedside table like a pro?
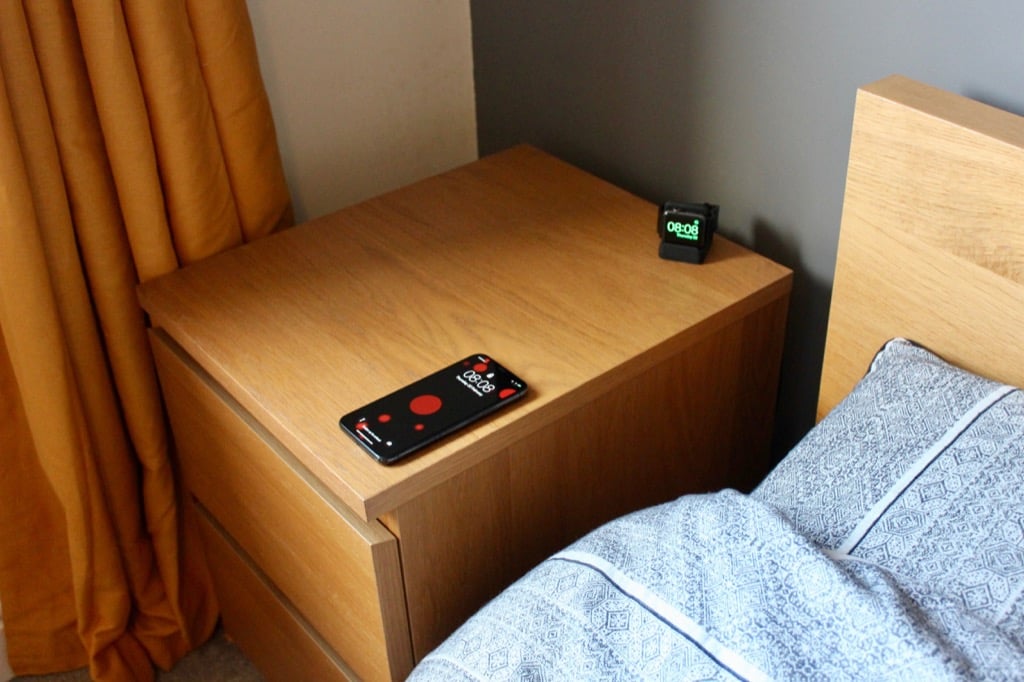 Say goodbye to annoying charging wires with this DIY IKEA hack, all under $25 in about 2 hours! Imagine charging your phone just by placing it on your nightstand, with no wires attached. Here’s how: Hide a Nokia DT-900 wireless charging pad (chosen for its wide range of compatibility and user-friendly features) inside your MALM chest of drawers.
Remove the top, carve out a little recess, and stick it in the pad. Want a nifty charging indicator? Optional steps let you move the LED to the surface. Testing everything and reassembling leads to the magic moment: wireless charging, Voilà!
2. Stories store in Rennes to inspire your next furniture and storage upgrades
![]() Step into Stories, a chic multi-brand designer boutique in Rennes that’s much more than a shop. It’s a dynamic space that changes with your needs! Crafted in robust maritime pine plywood, the shop showcases an array of ingenious storage units, a stylish bench, and a unique jewelry presentation table.
Step into Stories, a chic multi-brand designer boutique in Rennes that’s much more than a shop. It’s a dynamic space that changes with your needs! Crafted in robust maritime pine plywood, the shop showcases an array of ingenious storage units, a stylish bench, and a unique jewelry presentation table.
The cherry on top? A pegboard that can be tailored to show off different products or clothing on racks. Every piece of furniture here is modular, allowing for endless possibilities. Discover the power of versatile design and create a shopping experience that tells a story!
1. Not another DIY Murphy Bed: Transform Your Space with Style and Functionality This time with Tayler!
Unleash your inner DIY spirit with Tyler, who guides you through crafting an ingenious, space-saving Murphy bed with floating shelves. Using sturdy 3/4 inch plywood, this bed transforms into a wall feature when not in use.
In the process, Tyler unveils his affinity for edge banding, tints a clear finish with a water-based stain, and even tackles a design mishap with grace. He uses versatile tools like Kreg jigs and Rockler right-angle brackets. Grab your power drill, set your table saw, and get ready to transform your living space.
In detail:
1. Gather Your Materials:
For a healthier option, prepare for the project by gathering materials, including 3/4-inch sheets of plywood from Columbia Forest Products. These can be found at The Home Depot. Measure, rip, and cut the plywood using tools like a table saw circular saw, and miter station.
2. Craft the Bed Frame:
Using a Kreg jig, assemble the bed frame with precision. Connect the pieces using wood glue and one-and-a-quarter-inch coarse pocket hole screws. Create a solid base for the mattress and add additional support with stringers.
3. Install the Murphy Mechanism:
Ensure smooth functionality by drilling holes and placing swivel brackets in the correct locations. Use a 5/16 bolt to secure the frame to the wall and prevent tipping.
4. Create Floating Shelves:
Construct elegant floating shelves from plywood. Attach brackets and screws to provide stability. Take care to maintain continuous grain and a seamless appearance.
5. Apply the Perfect Finish:
Sand the bedframe to perfection and then apply a stunning finish. Utilize General Finishes High-Performance Top Coat, mixed with water-based stain for added depth. The Fuji Q5 Platinum HVLP spray system ensures a flawless finish.
6. Assemble and Install:
Carefully move the Murphy bed into position and secure it to the wall using L brackets. Attach the bedframe securely, allowing for smooth operation and easy storage.
7. Embrace the Functionality:
Experience the joy of versatile space. When the bed is raised, take advantage of the ample storage and beautifully crafted floating shelves. Lower the bed effortlessly when needed, providing a comfortable sleeping area with a full-size mattress.
For more detail, visit the next DIYtayler.com tutorial