12. Transform Your Kitchen Cabinet: Create Your Own DIY Hanging File Drawer
![]()
Here’s what you’ll need for the project:
- 22″ drawer slides
- 1×4 boards (scraps work fine)
- 5/8″ wooden dowel
- File Sliders or alternative PVC Trim
- Wood screws in various sizes
Let’s get started:
Step 1: Mount Blocks to Your Cabinet
Attach two 1×4 boards to the side of your cabinet at the desired height for hanging files. Use 2″ screws to secure them. Make sure the length matches your cabinet’s width.
Step 2: Add Drawer Slides to the Blocks
Install drawer slides in the center of the 1×4 boards on each side.
Step 3: Attach the Sides of the Pull-out Drawer
Pull out the slides and fix 1×4 boards along the length of the drawer slides using small 3/4″ screws.
Step 4: Add the Front of the Drawer
Slide out the drawer’s sides and attach a 1×4 board to the front using 1.25″ screws. Align the front edges with the sides or extend them slightly—your choice.
Step 5: Back of the Drawer
Attach a 1×4 board to the back of the drawer with 1.25″ screws, ensuring it doesn’t extend beyond the side edges. This completes the drawer box.
Step 6: Add Hanging Bars
Insert 5/8″ wooden dowels from the front to the back of the drawer box and secure them with 1.25″ screws. Depending on your preference, you can run the bars side to side or front to back.
Attach PVC trim or file sliders to the wooden dowels to prevent files from falling off. These provide smooth sliding and stability. Alternatively, purpose-made file sliders can be used for a few extra dollars.
Finish off your DIY Hanging File Drawer by filling the empty sides with mini storage baskets or organizers. These are perfect for keeping office supplies like scissors, pens, and envelopes within reach.
11. Unveiling Secrets: Two Captivating DIY Hidden Door Ideas
 Discover the fascinating world of hidden doors with these two DIY projects that will add an element of intrigue and functionality to your living space. Whether you’re seeking a secret passage or innovative space-saving solutions, these ideas will inspire you to embark on your hidden door adventure.
Get ready to unlock the secrets!
Idea No. 1: Creating a Jib Door
Step 1: Define the Jib Door
A jib door is a small, inconspicuous door seamlessly integrated into a wall, camouflaged to blend with its surroundings. It provides a hidden passage or concealed storage area.
Step 2: Planning and Preparation
- Identify the location for your jib door and assess the available space.
- Determine the size and design of the door based on your specific needs.
- Take accurate measurements and create a detailed plan for the project.
Step 3: Choosing the Hardware
- Select high-quality hinges, latches, and handles that align with the design and functionality of your jib door.
- Consider hidden hinges and discreet latches to maintain the seamless appearance of the door.
Step 4: Construction and Installation
- Begin by framing the door opening within the wall, ensuring it is sturdy and well-supported.
- Construct the jib door using suitable materials such as wood or composite boards.
- Attach the hinges and install the door within the frame, ensuring it opens and closes smoothly.
- Add finishing touches, such as sanding, painting, or staining, to match the surrounding wall.
Step 5: Concealment Techniques
- Explore various methods to disguise the jib door, such as wallpaper, artwork, or wall paneling.
- Ensure the door blends with the surrounding wall, maintaining its hidden nature.
Idea No. 2: Pivot Doors That Defy Expectations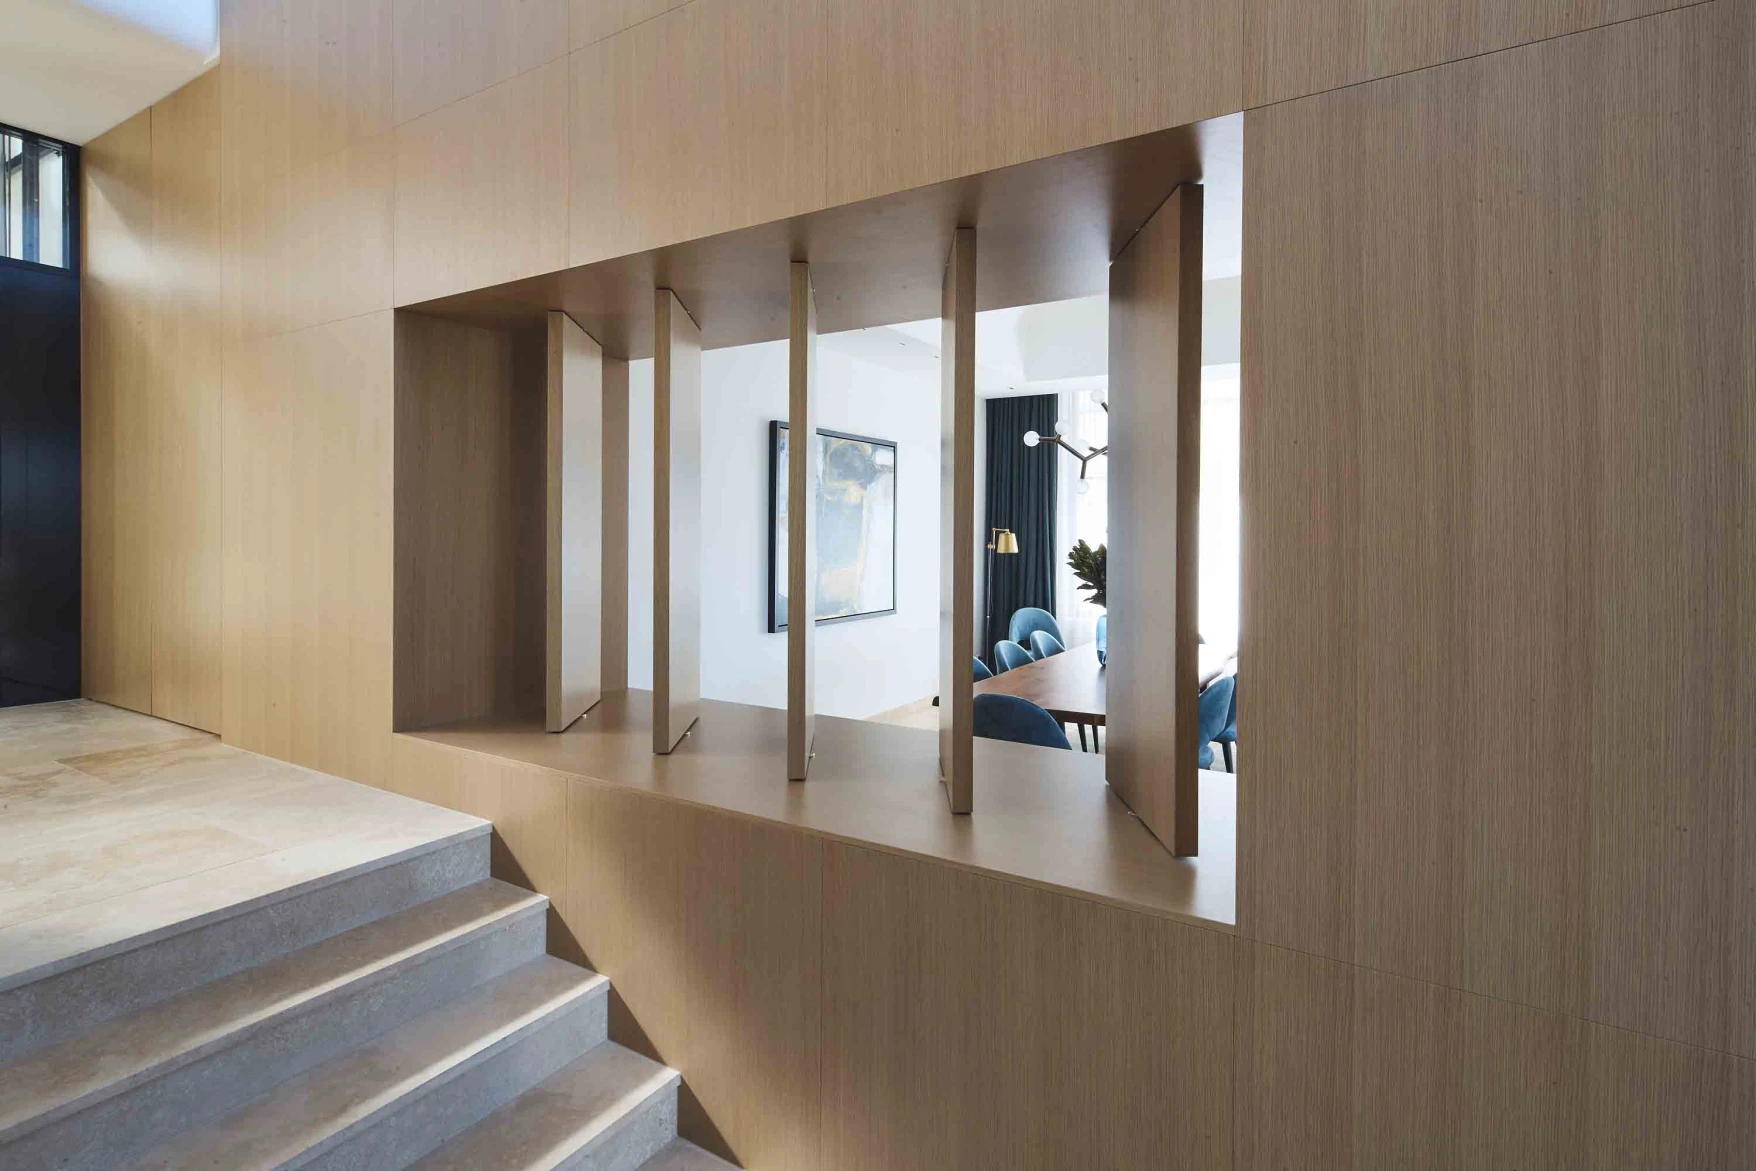
Step 1: Understanding Pivot Doors
- Pivot doors rotate on a central axis, allowing for unique design possibilities and enhanced functionality.
- Explore the versatility and aesthetics of pivot doors for your living space.
Step 2: Design Considerations
- Determine the purpose and location of your pivot door, whether it’s for room division, storage, or aesthetic appeal.
- Consider the size, materials, and style that best complement your overall interior design.
Step 3: Selecting the Right Hardware
- Choose high-quality pivot hinges specifically designed for your door’s size and weight.
- Research different hinge systems and their load-bearing capacities to ensure durability and stability.
Step 4: Construction and Installation
- Measure and mark the pivot point on the floor and ceiling, ensuring proper alignment.
- Install the pivot hinges securely, following the manufacturer’s instructions.
- Attach the door to the hinges, ensuring a smooth swinging motion.
Step 5: Finishing Touches
- Add any necessary seals or weatherstripping to enhance insulation and reduce noise transmission.
- Apply appropriate finishes, such as paint, stain, or varnish, to protect the door and enhance its visual appeal.
10. Unveiling Secrets: Discover Hidden Doors Made Easy
 Have you ever wished for a secret hiding spot or clever storage solution in your home?
Prepare to embark on an exciting journey as we reveal two captivating DIY hidden door ideas that will add mystery and functionality to your living space. With no carpentry skills required, these projects are perfect for anyone seeking a touch of enchantment. Let’s dive in!
Idea No. 1: The Magical Touch Latch Door
Step 1: Unleashing Hidden Storage
Imagine a door seamlessly blending with your wall, concealing a hidden storage area. You can create this magical door with a touch latch system from Sugan Suny. No more bulky profiles or obvious hinges—just a sleek and seamless design.
Step 2: Gather Your Tools
All you need are the Sugan Suny touch latch and hinges, available at your local hardware store. These high-quality components will bring your hidden storage dreams to life.
Step 3: Building the Door
Construct a sturdy door using your preferred materials. Plywood works well for this project. Mount the Sugan Suny hinges on the backside of the door, ensuring they align perfectly for smooth operation.
Step 4: Installing the Touch Latch
Attach the Sugan Suny touch latch to the inside of the door. This latch creates a hidden cabinet door system, allowing easy access to your secret storage. The touch latch engages with a simple push, revealing the hidden treasures within.
Step 5: Finishing Touches
Make your door look polished by sanding and painting it to match your wall seamlessly. With the Sugan Suny touch latch and hidden hinges, your door will blend flawlessly into its surroundings.
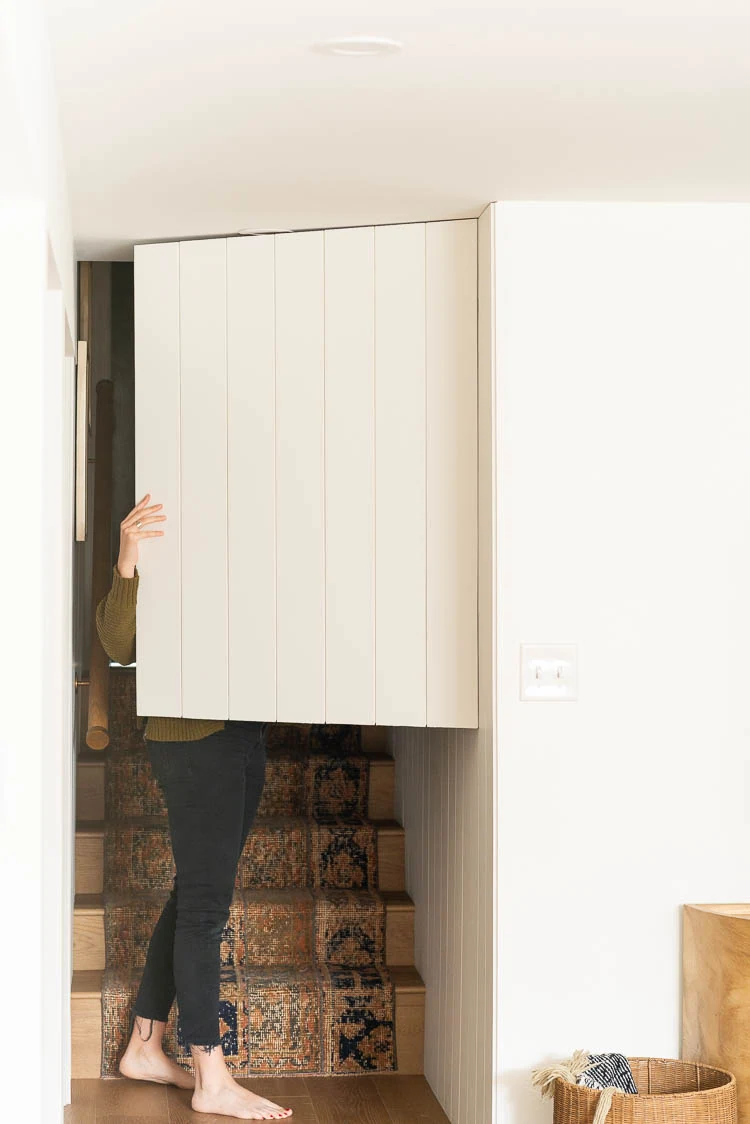
Idea No. 2: The Shiplap Door
Step 1: Embrace the Charm of Shiplap
Transform an ordinary door into a beautiful shiplap masterpiece. The Windsor One shiplap profile is perfect for this project, offering stability, knot-free surfaces, and pre-primed boards for easy finishing.
Step 2: Gather the Essentials
You’ll need Windsor One shiplap boards, a solid core door, and Sugan Suny hidden hinges. These high-quality components will ensure a seamless and secure installation.
Step 3: Constructing the Shiplap Door
Attach the Windsor One shiplap boards to the solid core door, creating a stunning shiplap design. The pre-set gaps between the boards guarantee consistent spacing throughout the project.
Step 4: Installing the Hidden Hinges
Mount the Sugan Suny hidden hinges on the backside of the door. These hinges provide adjustability and stability, ensuring your shiplap door opens and closes smoothly.
Step 5: Revel in the Beauty
Admire your masterpiece as the shiplap ceiling extends seamlessly into the door, creating a visual harmony. The hidden hinges and shiplap design create a captivating door without revealing its secrets.