15. A DIY Wall Mounted Floating Cabinet Project Idea
 Are you ready to revolutionize your space with a stylish and functional storage solution? Follow these simple steps to create your wall-mounted floating cabinet and take your organization game to new heights!
Prepare the Canvas: Start by prepping your wall. Whether you hand paint a captivating scene or opt for classic stripes, ensure it sets the stage for your floating cabinet. Check out my blog for beginner-friendly wall painting techniques.
Assemble the Shelves: If you’re dealing with a disorganized collection of vinyl record albums like I was, custom shelving is the answer. Visit my blog for a step-by-step guide on creating a storage haven for your beloved records.
The Foundation – Heavy-Duty Shelf Brackets: Invest in heavy-duty solid stainless steel shelf brackets for the floating effect. Align them with a shelf, considering the thickness of your top material. Locate the studs, screw in the brackets, and enjoy their flexibility.
Craft Your Cabinet: Customize the design and materials of your cabinet to suit your space and style. Follow my blog instructions on reverse engineering the design for installation ease and efficiency.
Stain, Seal, and Secure: Enhance the natural beauty of the wood by staining and sealing it. Once ready, place the top on the brackets and securely fasten it from below. Watch as your floating cabinet takes shape.
Door Panel and Hinges: Add elegance and functionality with a door panel attached using a piano hinge. Allow it to fold out and down for easy access. Feel free to leave the door panel unstained for a contrasting touch.
Secure and Organize: Secure the bottom of the cabinet to the top’s supports using screws. Label the underside of the bottom panel for easy identification. Utilize clamps to hold everything in place while securing the cabinet from below.
Cable Management: Drill holes to accommodate cables and speaker wires. Embrace any challenges, knowing you’ll overcome them and achieve a stunning floating cabinet.
14. Ana’s Ideas on How to Double Your Kitchen’s Cabinet Drawer
 Ready to revolutionize your space with a stylish and functional storage solution?
Follow these step-by-step instructions to create your wall-mounted floating cabinet:
1. Prepare the Canvas: Paint the wall where the cabinet will be mounted. Whether you choose a hand-painted scene or classic stripes, ensure it sets the stage for your floating cabinet.
2. Assemble the Shelves: Create custom shelving for your record albums. Visit my blog for a detailed guide on constructing the perfect storage haven for your vinyl collection.
3. The Foundation – Heavy-Duty Shelf Brackets: Invest in heavy-duty solid stainless steel shelf brackets for a secure floating effect. Align the brackets with a shelf, considering the thickness of your top material. Locate studs and securely attach the brackets. Flexibility in spacing is possible.
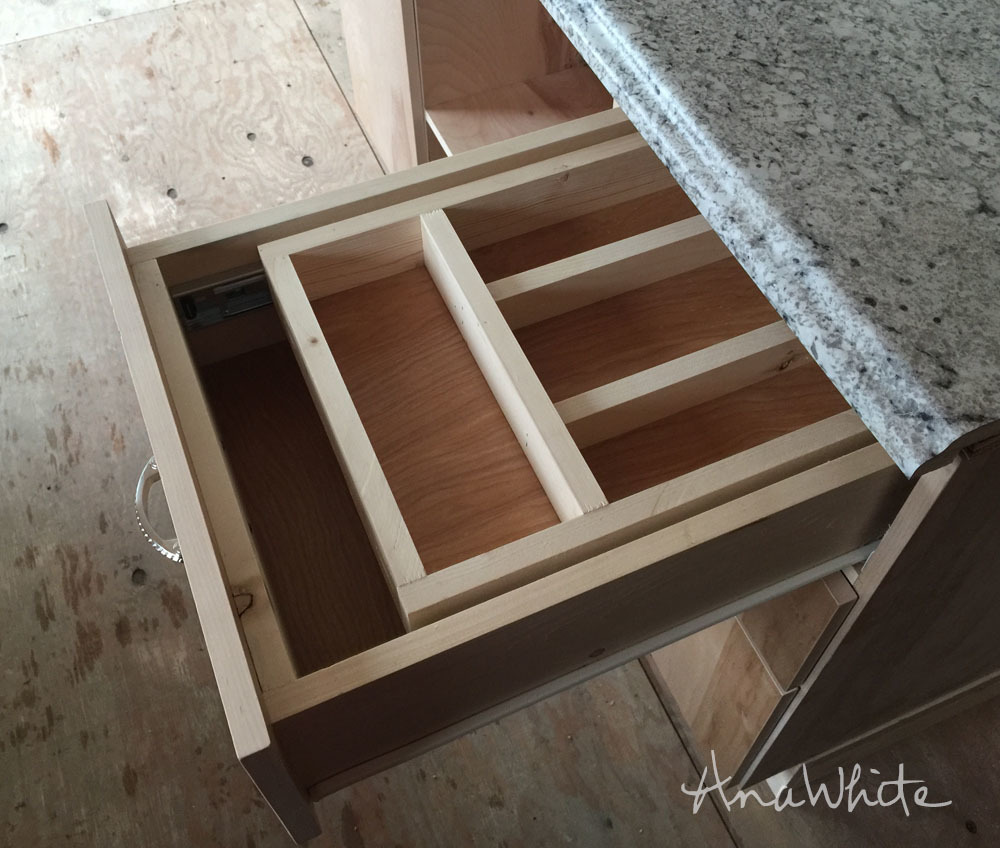
4. Craft Your Cabinet: Customize the design and materials based on your available space and desired outcome. Use 1x3s to build the cabinet, cutting the sides to match the drawer length and the width pieces 1-1/2″ smaller than the desired width. Assemble using Kreg Pocket Holes and nails.
5. Cut Back of Bigger Drawer: Use a jigsaw to cut out the back of the larger drawer, allowing the smaller drawer to pass through. Ensure the opening is large enough for passage but retains the drawer’s strength.
6. Install the Drawer Slides: Follow the instructions to install the drawer slides, ensuring they are square for smooth operation. Use a block to hold the cabinet member in place during attachment.
7. Insert Smaller Drawer Into Larger Drawer: Test the functionality of your kitchen utensil drawer. Adjust the drawer slides if needed to ensure smooth operation.
8. Finish with Varathane Triple Thick: For a durable and quick clear top coat, apply Varathane Triple Thick. This one-coat wonder dries fast and offers easy application while providing excellent protection for your wooden surfaces.
13. Reorganize Your Linen Closet with IKEA Trofast
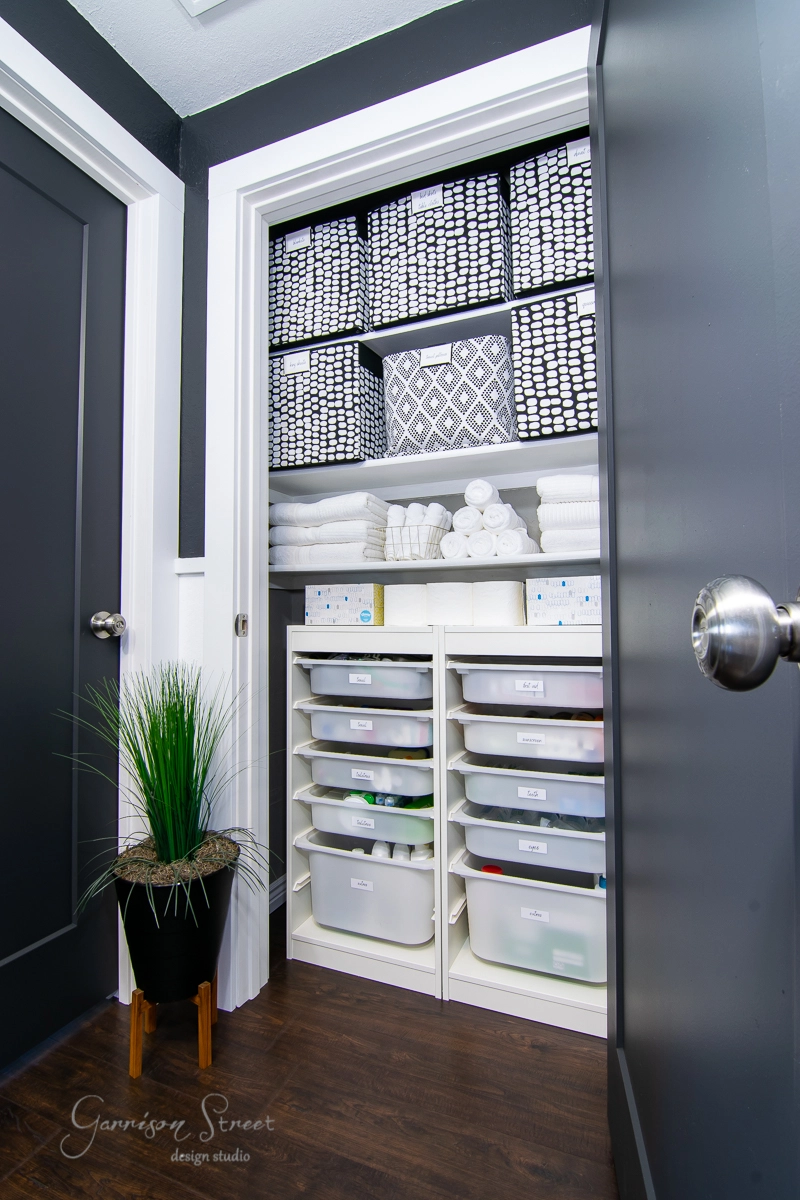 Welcome to a journey of transforming your linen closet into an organized haven. Join Lisa as we tackle the long-overdue task of linen closet organization using the versatile IKEA Trofast system. Are you ready to discover a fresh and efficient approach to storing your linens?
Assess Your Closet: Take a close look at your linen closet and acknowledge the need for organization. Clear out all items, including the carpet, for a fresh start.
Identify Challenges: Address the issues in your closet, such as long shelves without dividers and the need for excessive stacking. Recognize the importance of an organized system that is easy to maintain.
Optimize Shelving: Adjust the shelf spacing to improve organization. Paint the linen closet and shelves for a fresh and clean look. Use Sherwin Williams Dorian Gray or Iron Ore for a stylish touch.
Introducing IKEA Trofast: Visit IKEA and explore the Trofast system. Its customizable drawers will transform your linen closet. Measure the closet to determine the ideal drawer size.
Efficient Drawer Organization: Use Trofast drawers to separate and store items. Add drawers to the bottom of the closet for easy access. Keep like items together and label the drawers for quick identification.
Enhance Storage with Bins: Incorporate larger Drona bins from IKEA for storing sheets and blankets. Label the bins using clip-on label holders to ensure everything has a designated place.
Finishing Touches: Install new trim and a door that swings in the proper direction for improved functionality. Paint the door with Sherwin Williams Iron Ore to add a touch of elegance.