Turning a house into a home starts from the inside, but it shouldn’t stop there. First impressions matter and people are more likely to base them on the exterior of a house than the interior. After all, it is the first thing seen, so investing in increasing curb appeal is a great idea that will pay off in the long run.
Exterior decoration and landscaping are not everyone’s strongest suits, nor are they necessarily affordable. Fortunately, with the internet mere clicks away, there are inexpensive ideas and solutions aplenty for both beginners and home décor experts.
To start with, here are 22 ideas for increasing curb appeal include a relevant video related to this topic you can enjoy and share with anyone close to you in social media very soon.
🔊22 Ideas For Increasing Home’s Curb Appeal Video:
LIST SECTION :
10 Home Décor Ideas and Organization Hacks for Renters
10 Home Decor Furniture Ideas for Anyone Living in A Small Space
10 DIY Project Home Decorations
10 DIY Home decor ideas You can Do when You’re Bored
10 Easy and Cheap Rustic Home Decor Ideas Worth Trying for All Homeowners
1. Repaint your Door
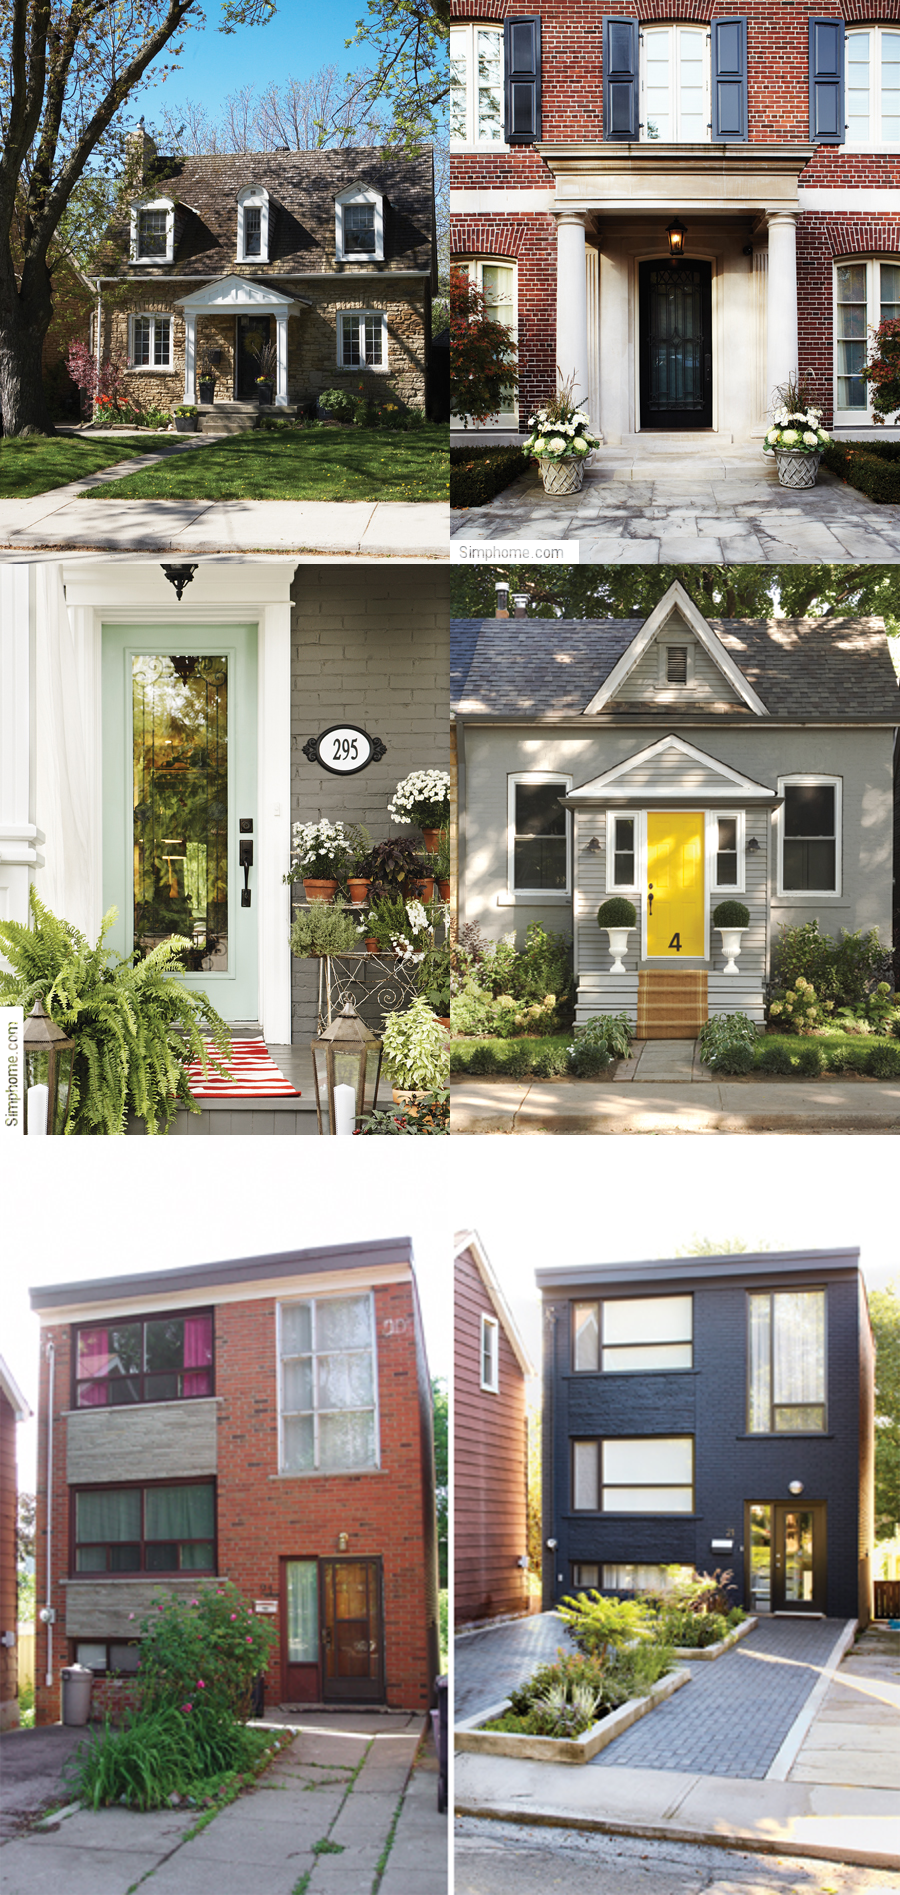
 Repainting is usually reserved for the inside and the outside walls of houses. However, a new coat of paint or a different color entirely can do marvels for entryways. Regardless of whether it’s an old, outdated door that has seen better days, or a new one that is simply a little drab, a door makeover can make or break the exterior. Choosing just the right color is no easy task, and there are many different factors to consider – from personal preferences to what actually complements the rest of the house.
One of the first things to have in mind is how the color will match the more permanent elements of the house, such as shingles or bricks. It wouldn’t go amiss to bring their samples to compare with the test swatches.
Nuances can be difficult to gauge from home décor magazines and websites alone. In magazines, colors are affected by the lighting and the shadows, the editing process, and the actual printing. In reality, it won’t be the perfect match. As for screens, each one is individual, and the mere angle can affect the way a color appears. That said, there are some useful apps that make it easier to play around with possible options.
The next logical step is to go to the store. However, it can be easy to make mistakes there, too. Color samples are usually surrounded by other colors that can distract and make them appear lighter or darker than they actually are. Furthermore, the lighting differs in commercial buildings and homes, and the difference that fluorescent and incandescent lighting can make is astounding. It’s a good idea to instead look at one color at a time in the designated painting space. Another useful thing that’s occasionally neglected is the environment. Different times of the day can impact the color and give it different shades. The same goes for weather.
In the end, there are no limitations as to the choice of color. The door can be either a simple, elegant black, or a classic, timeless white, or anywhere else on the color spectrum, so long as it matches the rest of the house.
2. Clean and Spray Paint your Door Knobs
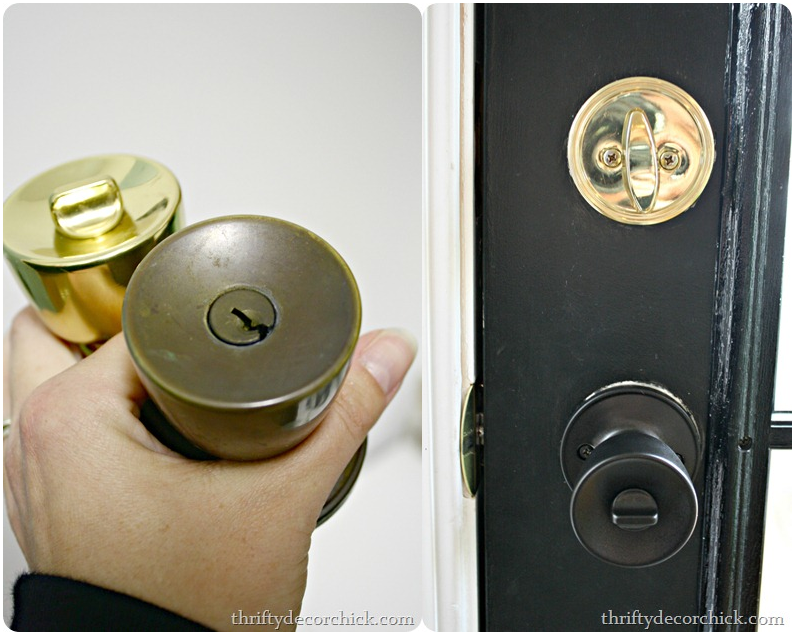 Door knobs, knockers, doormats, house numbers – they are like jewelry for doors. Door knobs are more easily removed and replaced than people think. They usually go ignored, though they too require a touch of maintenance. Metal polish is a good, easy solution to make sure the door knob never looks out of place. Using simple spray paint can replace the stale brass with a fresh burst of color.
3. Create a Custom Doormat
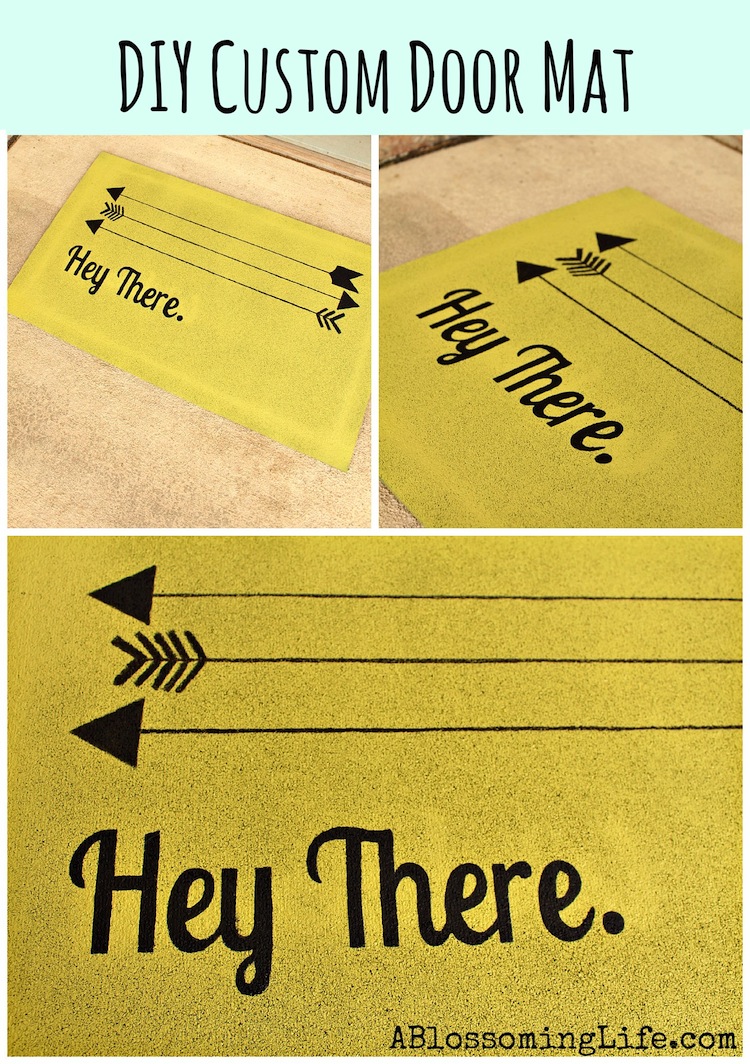 Doormats are one of the most versatile household objects. They can be customized in many ways, limited only by imagination. Blank mats are ideal for this purpose. The first step is to make sure they’re clean; soap and water will do the trick. Spray paint the base color on, in as many coats as necessary, depending on the thickness and the quality of the mat. Next up are patterns or sayings.
There’s an array of programs on the computer that make it easier to create custom sayings. The font should be legible and neat, because the next step involves printing the saying and using an X-Acto knife to cut the letters out. The final step is to paint the letters in with a precise brush, using the gaps previously made.
🔊10 Doormat Ideas, Witty, Unique, and Clever
4. Add a Fancy Door Knocker
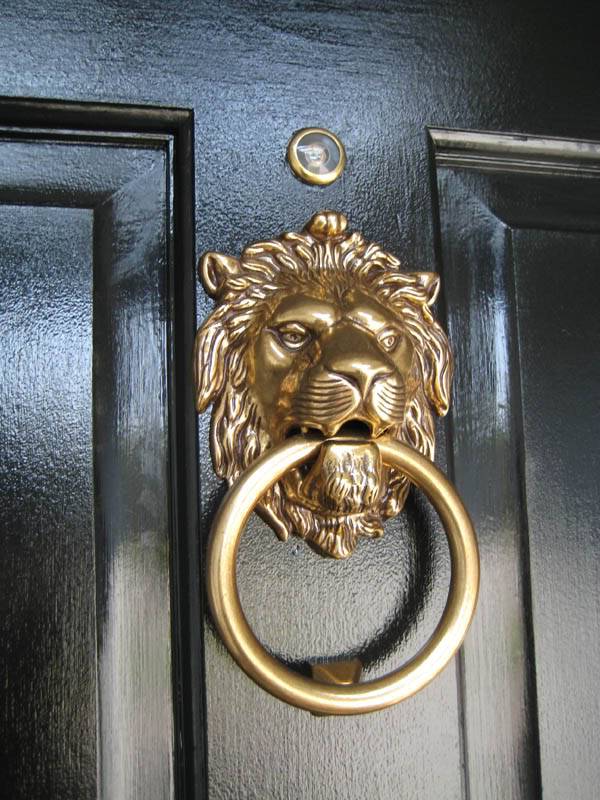 Knockers come in a huge array and are easily screwed onto the door. Why not have that classic lion head knocker after all?
5. Stylize the House Number

[amazon box=”B005JBZQDG,B07ZD4YFZJ”]
6. Shutter your Windows
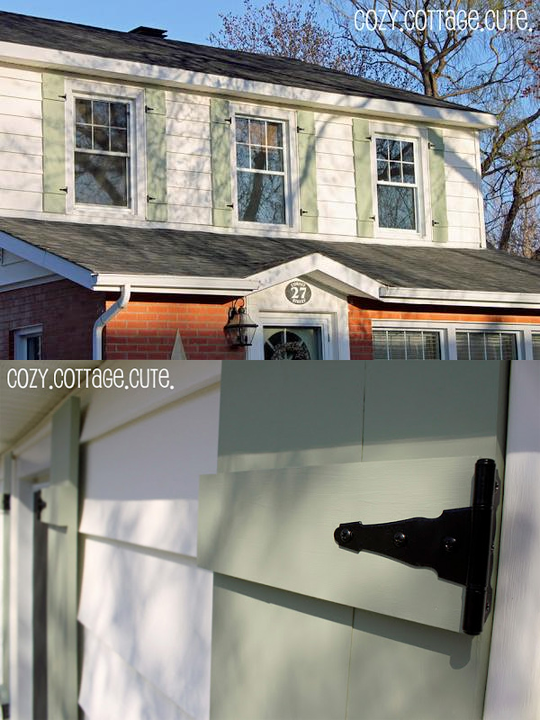 Aside from the shape, there is plenty to be done to spruce up your windows.
Shutters – working or decorative – are a good place to start. Depending on the style in question, shutters can give the house a more cozy vibe, reminiscent of cottages. In case a handyman is beyond the budget, there are easier, DIY ways that shouldn’t go beyond $250.
Pine is a good wood to work with. Each shutter should consist of three 1×4-inch boards glued together and screwed to cross pieces, 8 inches from the top and the bottom edges. Next up is sanding, priming (oil-based primers for a more rustic look), and painting, before finally fastening them to the house. Decorative hinges are a great detail.
7. Mend the Window Screens
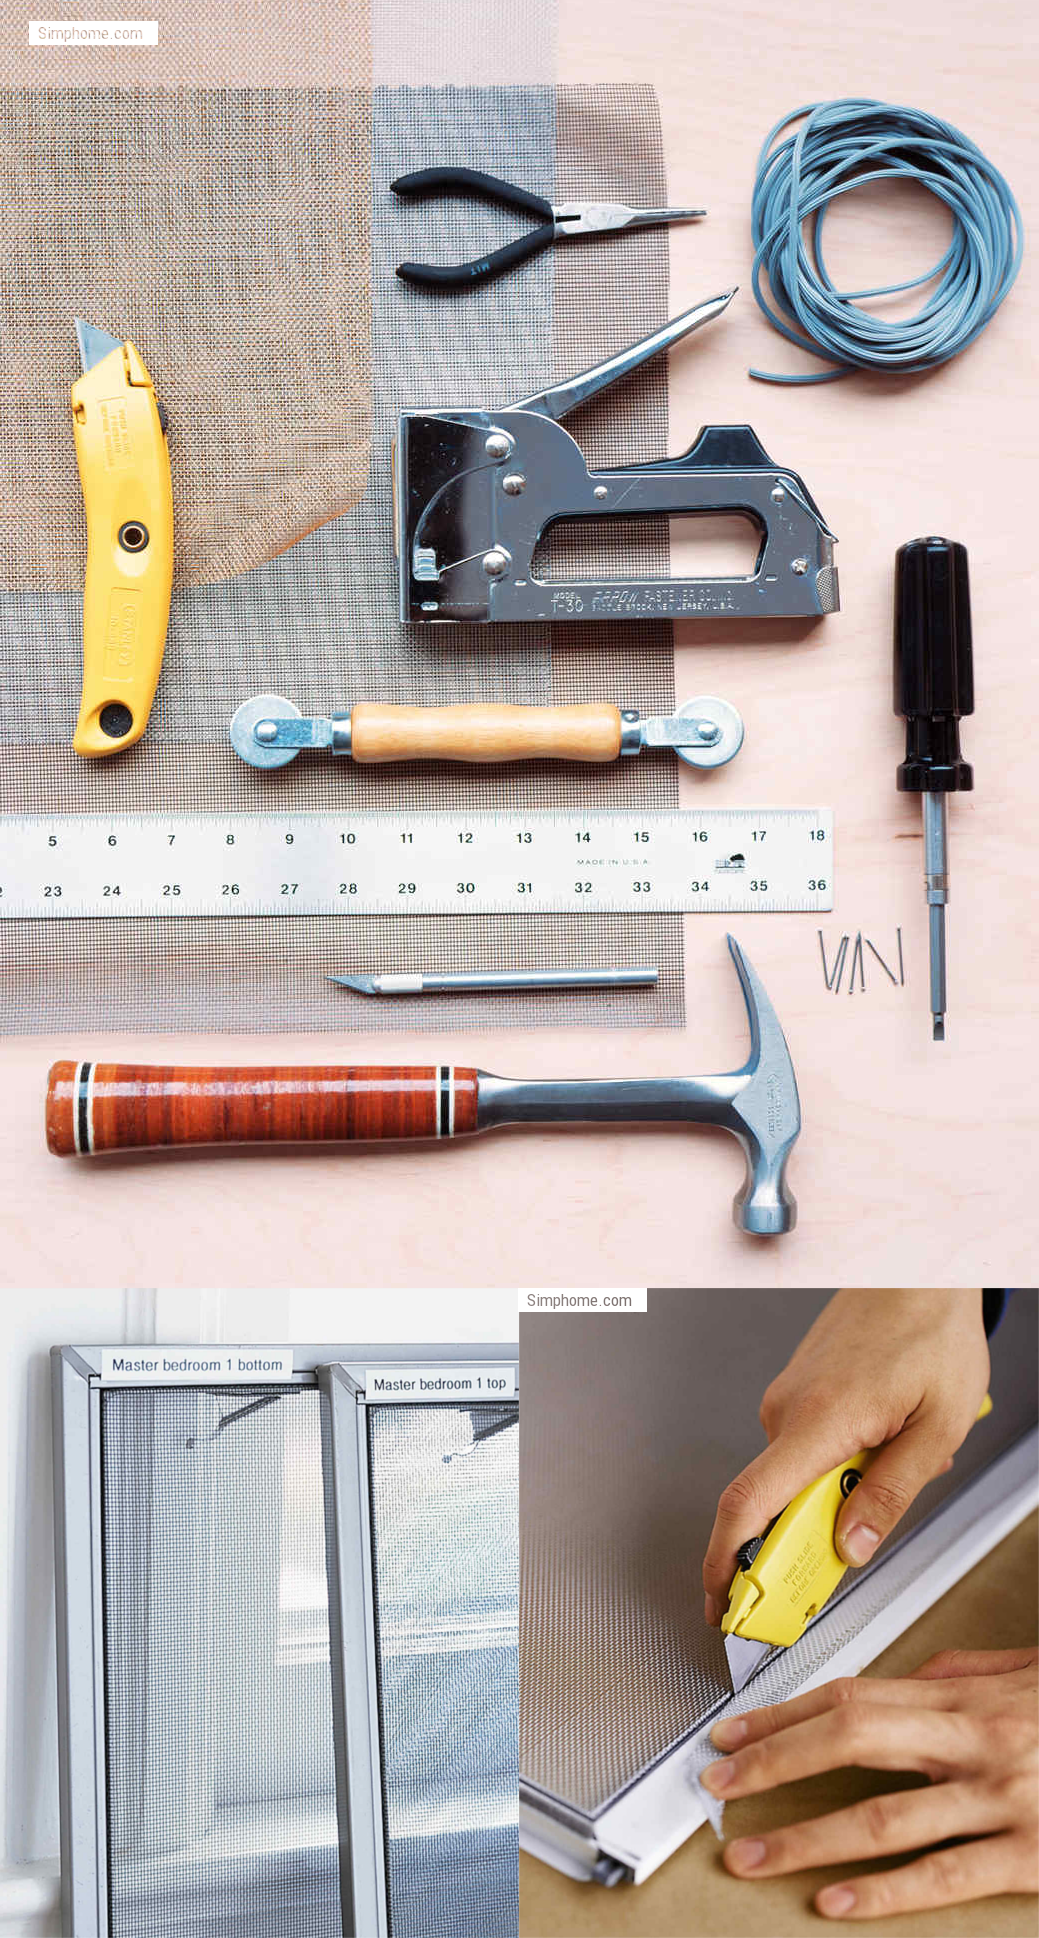 Window screens are usually unobtrusive – until they get damaged. Fortunately, fixing small tears does not require a lot of time, and most of the materials (such as patch kits) can be found at hardware and home supply stores. For nylon or fiberglass screens, a touch of instant adhesive should do the trick. For metal screens, epoxy is a better choice. Follow hyperlink for more detailed instructions and quick repair.
8. Upgrade the Windows with Window Boxes
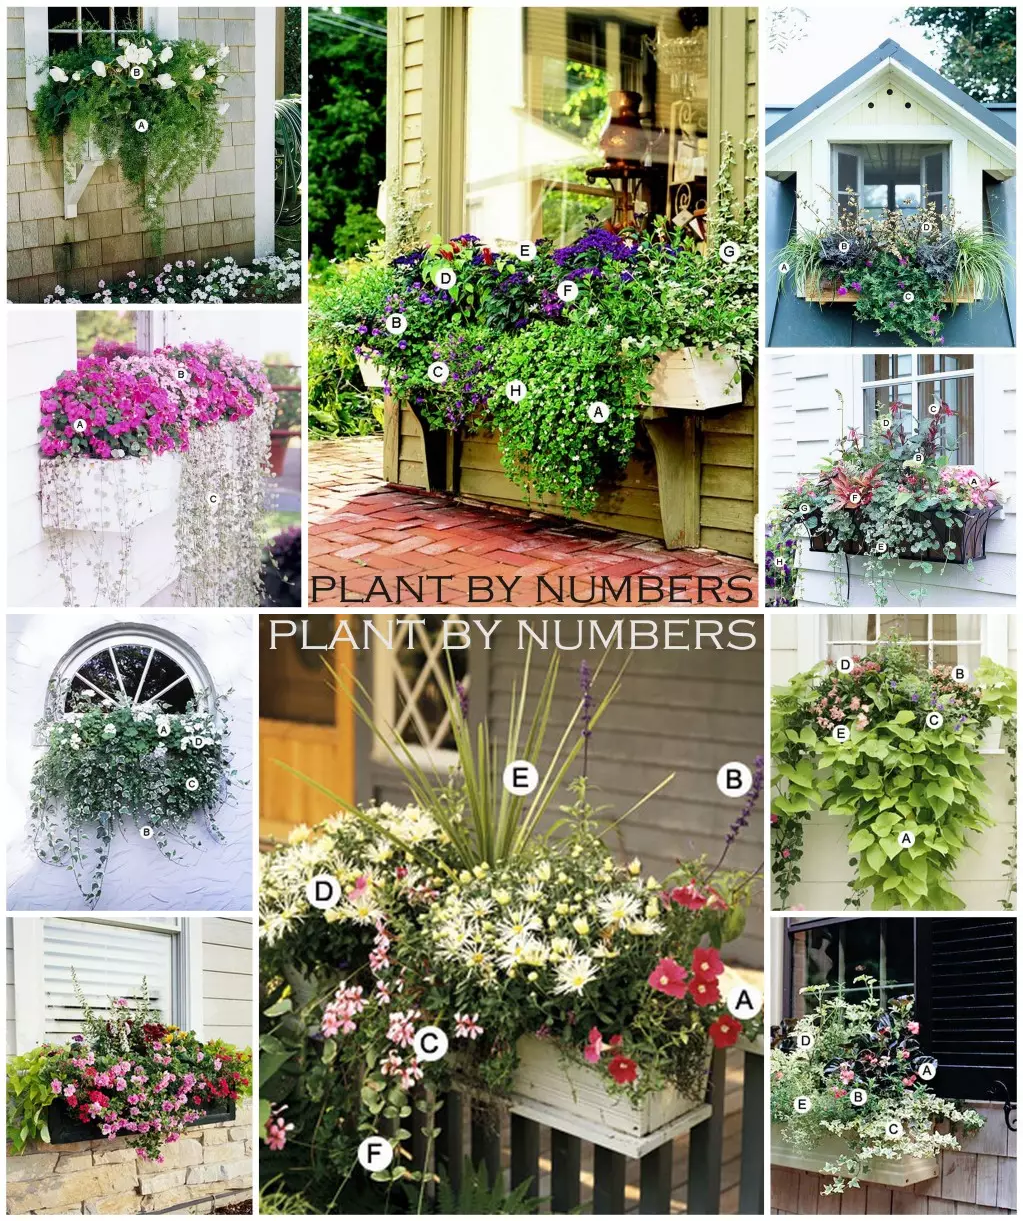 Any self-respecting homeowner will know that nothing increases curb appeal like plants. Foliage is just the thing to soften the edges, and bursts of colorful flowers will do away with the bland and spruce up the drab.
Simple window boxes can define the property and turn it from a flat surface to an inviting home. There are many ways to make them personally, or to improve store-bought ones. Cedar is among the best woods to use for this sort of project; it’s resistant to decay and affordable to boot.
To support the weight of the box, fit custom-cut brackets to the siding. If not, there is always the option of placing a simple shelf underneath the window, the sort that can be found indoors, as well.
9. Add a Flowery Trellis
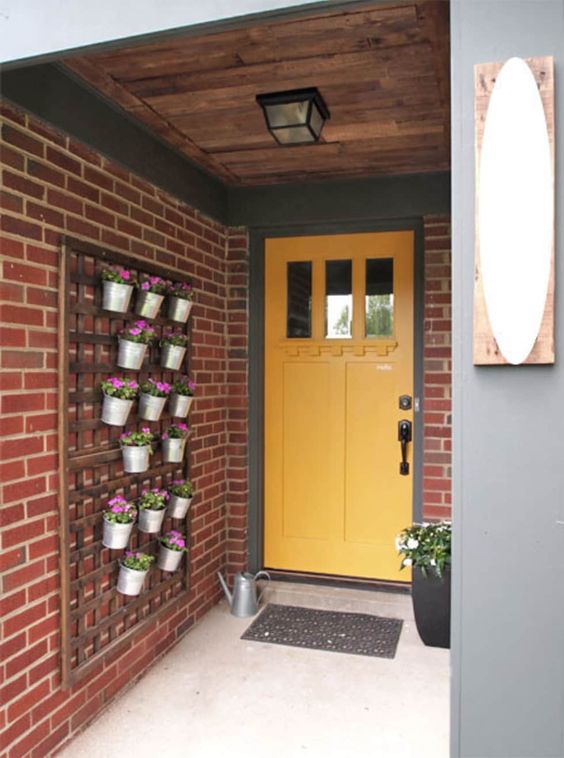 If there is room, a trellis flanking the door can be a fun project. Hang a series of small plant pots from it in a fancy pattern of choice. Via Pinterest
10. Dot Some Planters Around
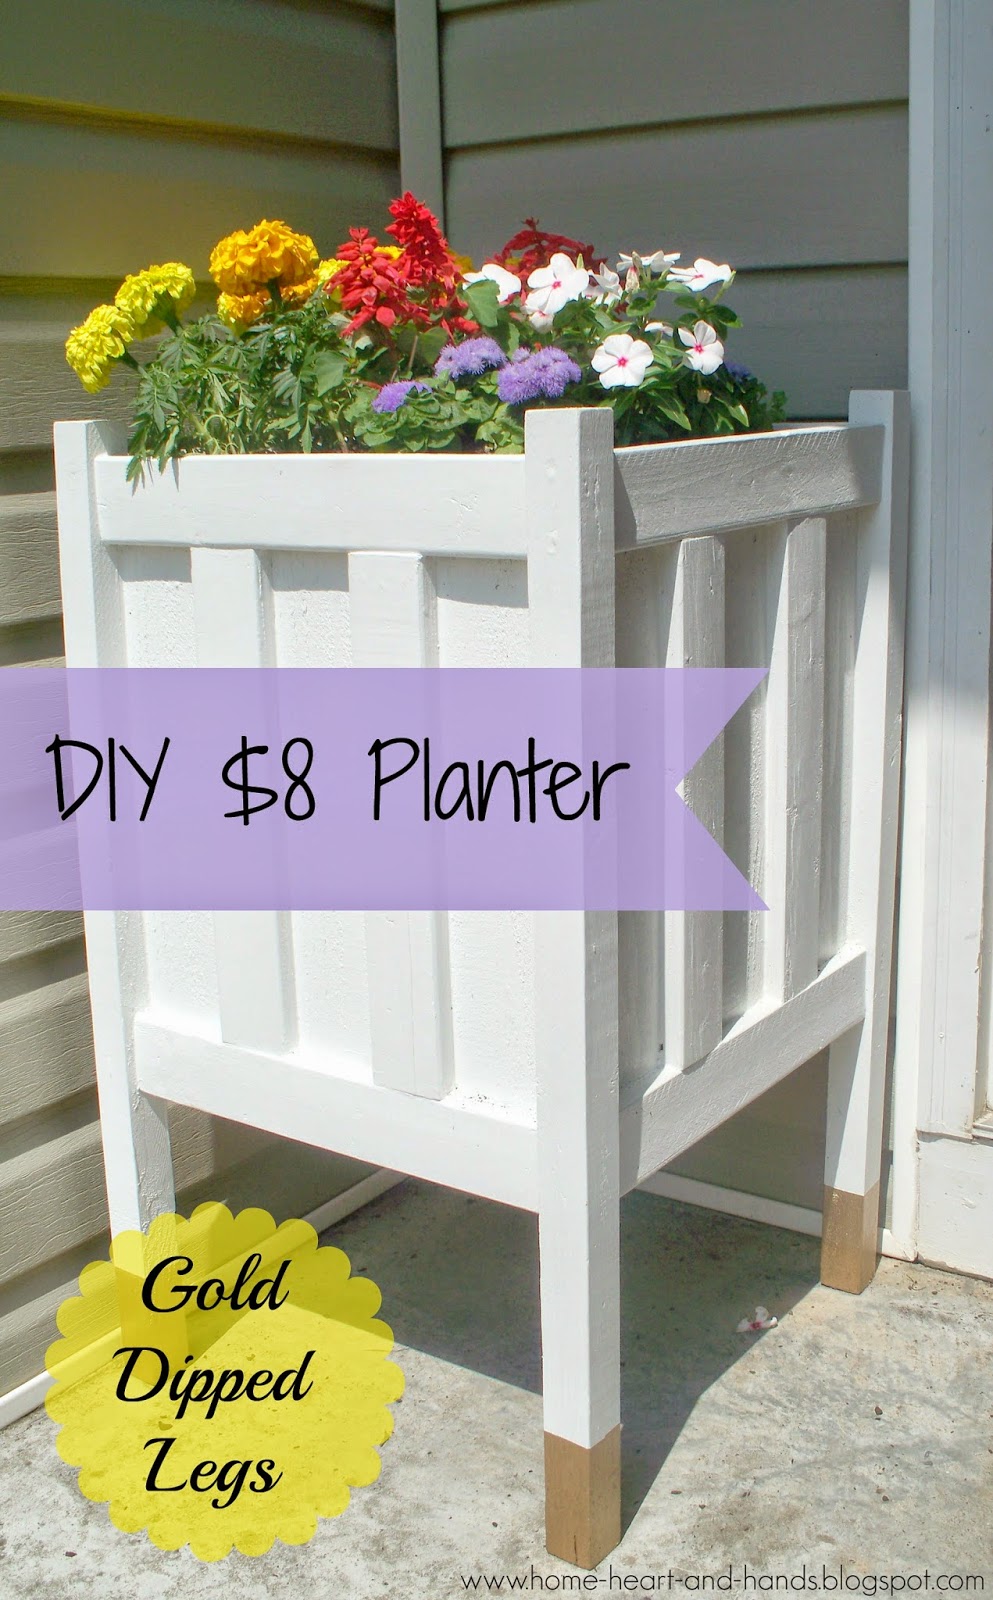
 Whether they’re store-bought or custom-made, planters have a huge say in the ambiance. That is because they are adaptable to nearly any environment, and as such, they make it what it is. They are a staple of garden design. Wood, clay, metal or stone, each have their own place and can be fashioned into almost anything – rectangular motifs, square, or round.
Wood planters are among the most popular thanks to their natural tones and flexibility. Nowadays, the choice of timbers is broader than ever. These planters come in hardwood and softwood variants. The former is popular because it’s resistant to decay and so lasts for a long time. The latter is faster to grow and lighter in weight, making it the quicker, less expensive option despite its shorter lifespan.
11. Decorate the Planters Personally
 Decorating them and giving them a touch of personality and style is an even better part. It can even be a fun project for the whole family – who doesn’t enjoy arts and crafts? A plain white planter is like a blank canvas, ready to become something more. Anyone can grab a paint brush and make the most out of it.
For a more chic look, beads and colorful pieces of tile are perfect for mosaics. Another option, in case there’s a lack of tall planters in the area, is to stack two or more and glue them together. These are perfect for right outside the front door, where they can flank it on both sides like modest pillars.
12. Cover Up Unsightly Dirt With Rocks
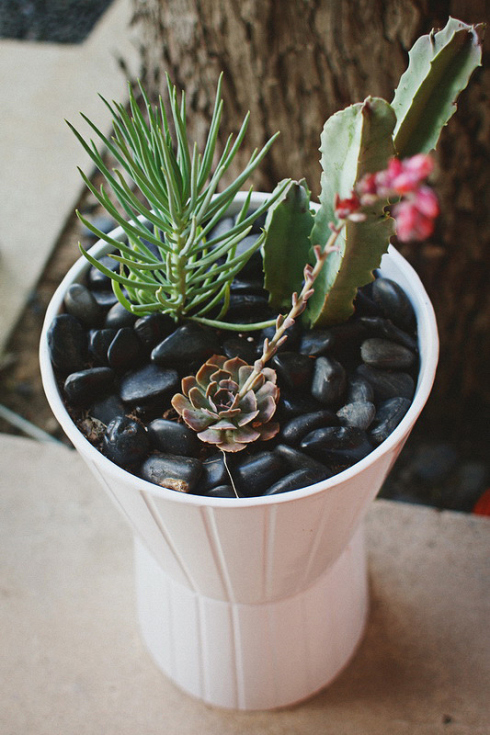 Finally, for those who may not be satisfied with dirt alone, rocks and pebbles are a great way to cover it up and add some class.
13. Add Hanging Planters
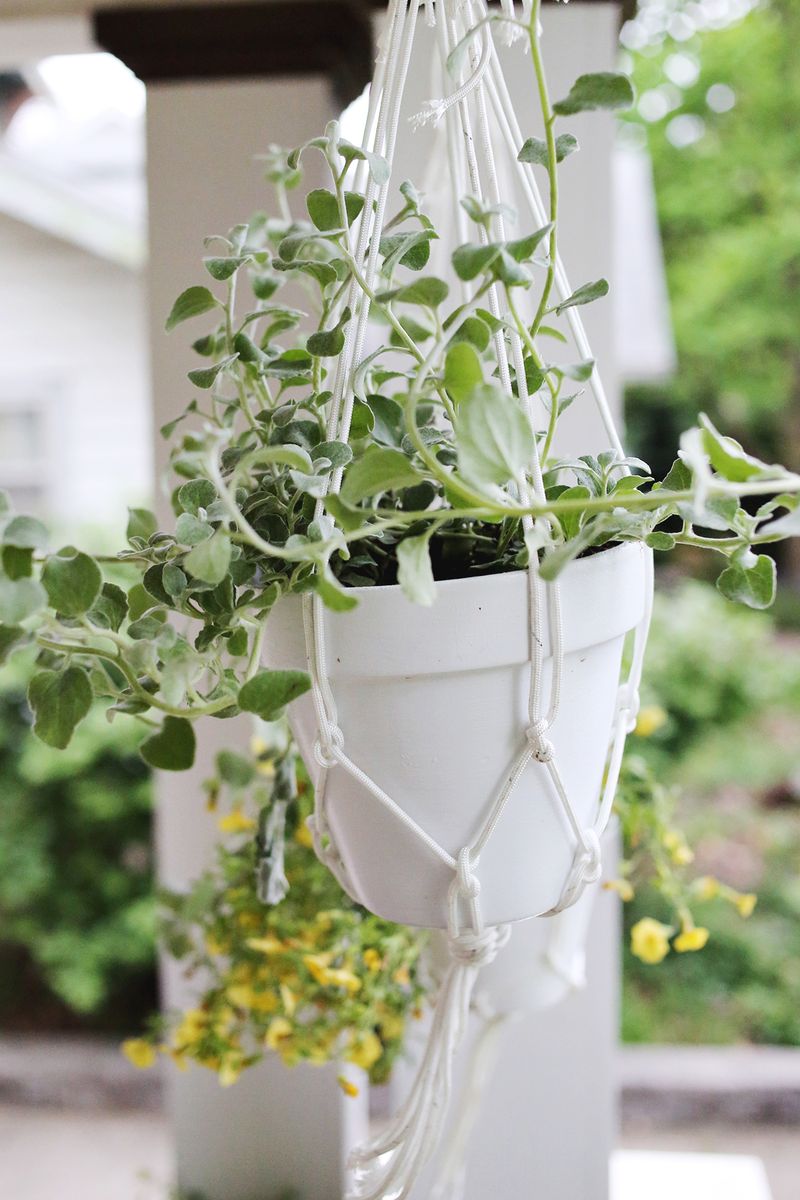 Hanging planters take decoration to a whole new level. While they’re ideal for indoors that don’t boast a lot of space, there’s no reason why they can’t be used outdoors as well. In fact, they’re perfect for porches. They also more convenient overall, allowing for a quick swap of plants or general maintenance. Here is a tutorial that transforms a planter and some rope into a stylish ornament fit for any house.
14. Invest in Climbing Vines
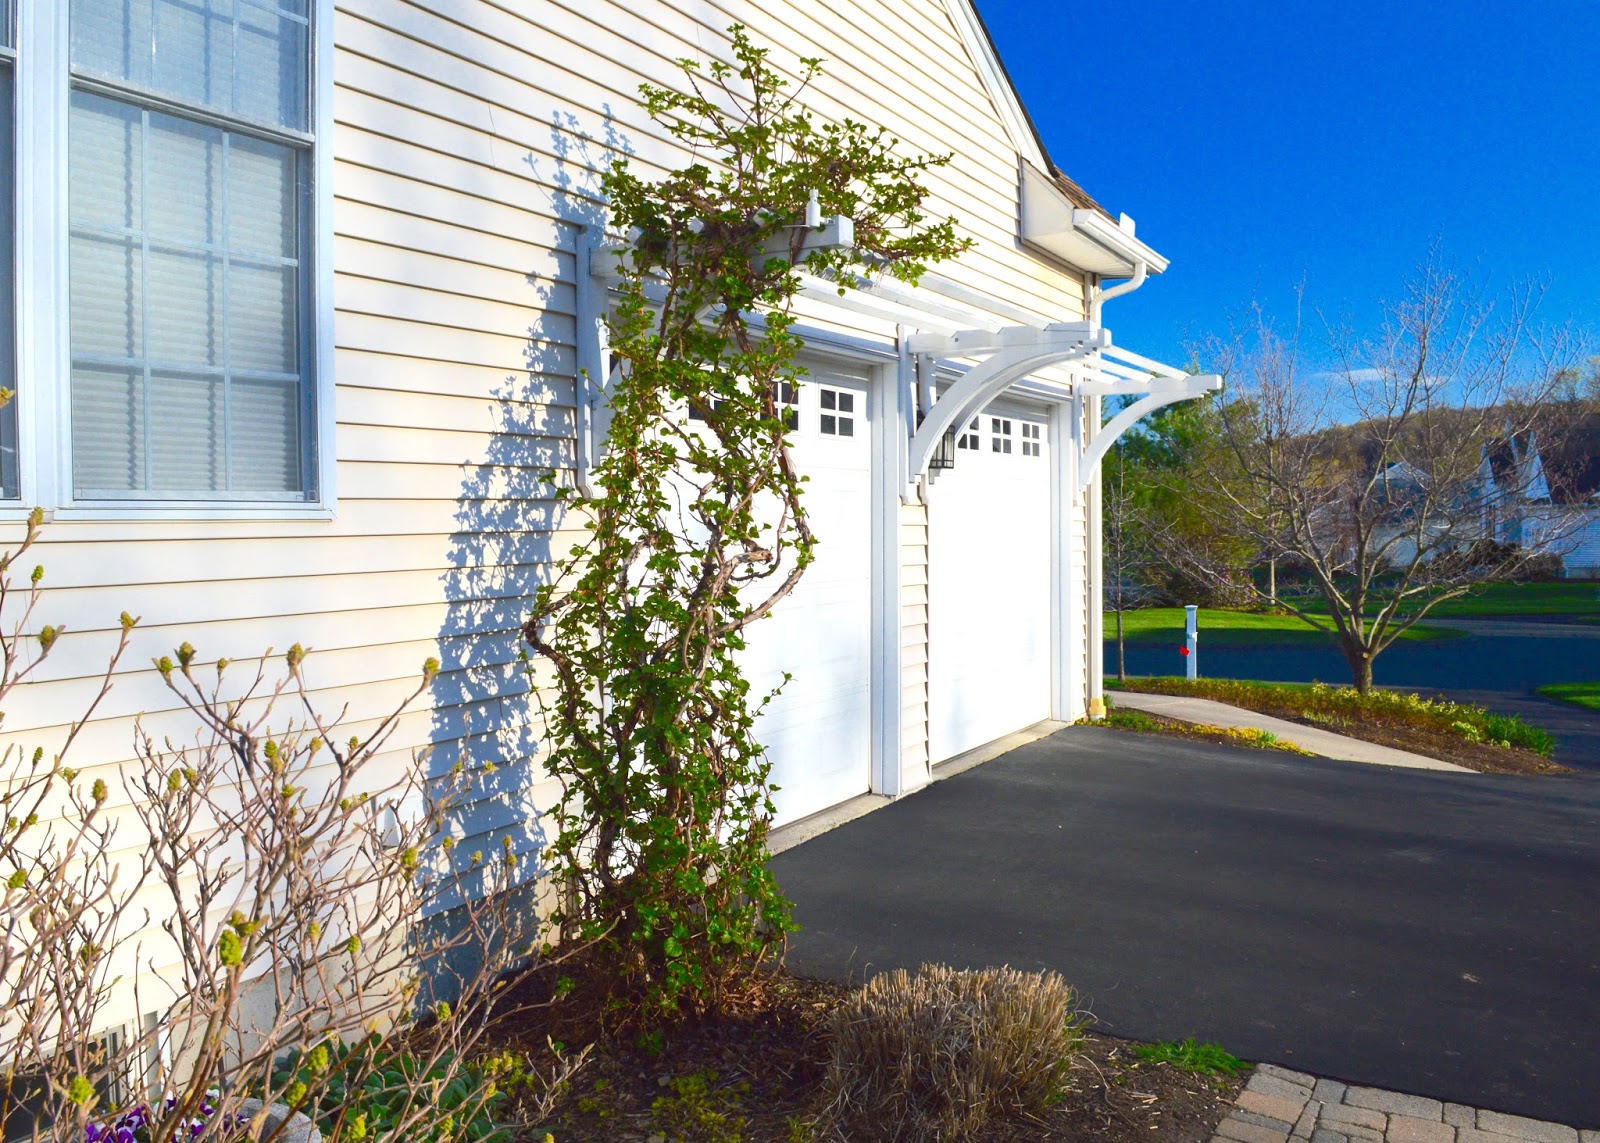 Speaking of reaching for the sky, if a house has a pergola, it would be a shame to let it go unused. This shaded passageway and its sturdy vertical posts are perfect for vines and plants such as climbing hydrangea, trumpet vines, or the good old Virginia creepers. Some of these plants prefer the shade, so placing them where there’s too much sunlight will not yield the best results. In fact, it’ll lead to more pruning than anyone’s ready for. It may take some time for them to grow, but when they do, they’re a perfect way of concealing bare or unsightly features, and adding a touch of wilderness.
15. Plant Flowers at the Bases of Trees
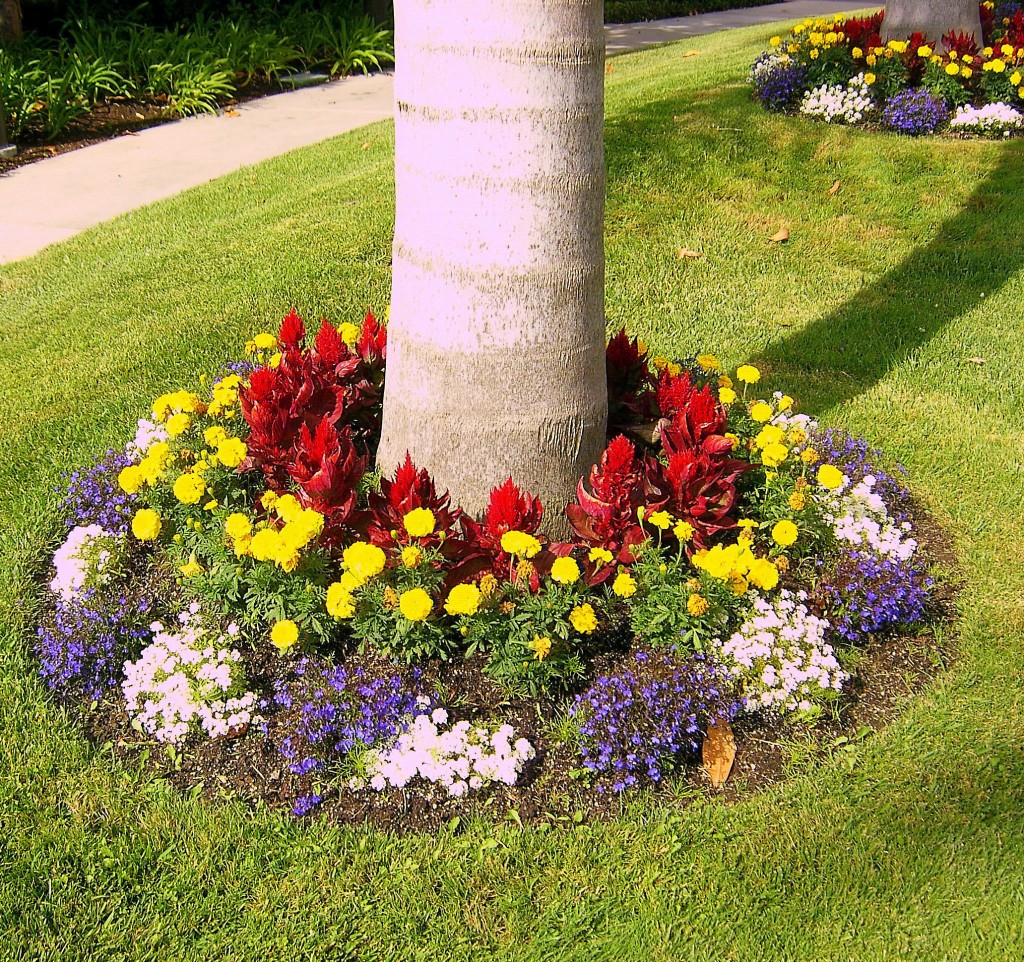 Even the trees already in the yard can become epicenters of miniature gardens. Though it’s wise to be careful when planting at the base of an already established tree, it can turn into quite a lush little spot if done right. Following this color wheel will make for an ideal mixture.
16. Eliminate Nasty Weeds
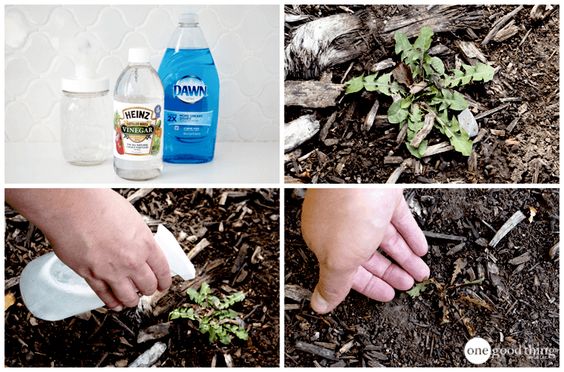 Weeding is an unfortunate necessity for everyone with a yard. Weeds are unsightly and detrimental to the health of everything around it. Luckily, there is an all-natural solution whose ingredients can be found in every home: white vinegar with a teaspoon of dish soap.
However, this is a herbicide that doesn’t discriminate, so it’s best to have care when using it near anything that’s not a weed. It works best on a dry, sunny day, giving results after only a few hours. The acetic acid burns the weed and lowers the pH of the soil for a while, making it difficult for the weeds to return.
17. Keep the Front Porch Clean
[amazon box=” B00CPGMUXW” rating=”4.5″] A neat, well-kept porch is like a welcoming invitation. First things first: keep it clean. Pressure washing is a godsend; nothing removes dirt and old paint so thoroughly. Cement and stone walkways can be a little too coarse to the eye. There are several solutions for this. Product Recommendation (Affiliate link: if you buy from this link I get commission)18. Stylize the Porch with Tiles or Cement Staining
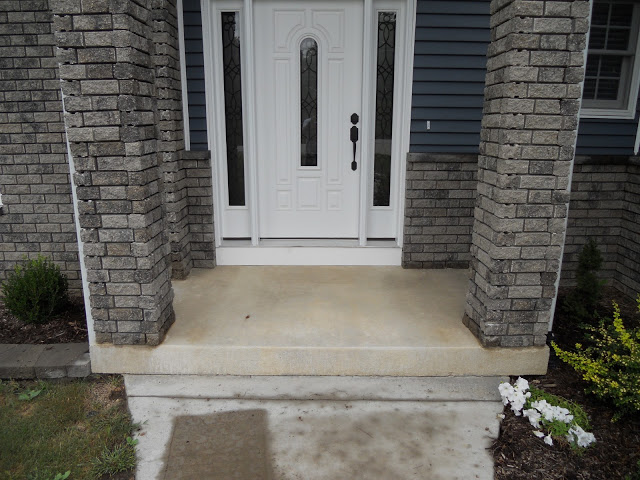 Sometimes, sprucing up the porch with slate tiles is just out of financial reach. Making it look like slate tiles? Not so much. This is where cement staining comes into play. Considering that each concrete surface is different, choosing a color is very important. Tape in one direction, then in the other, making squares.
Apply the stain with a roll brush, with up to two or three coats. Visible brush strokes might be a compliment in art, but in this case, it’s best to be smooth. Leave it to dry overnight before removing the tape. A sealer will give it a nice, glossy finish to complete that tile style. Best of all? This entire project costs time, elbow grease, and less than $100.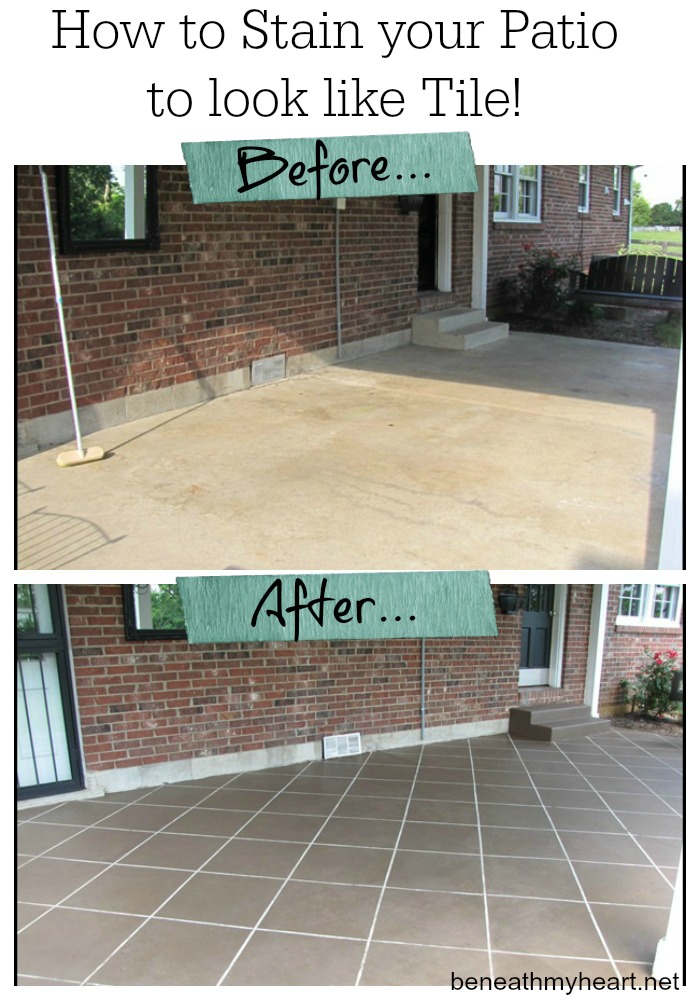 Using a similar method on the steps can give the impression of a runner. Having cleaned them, simply tape off the ends of the steps and paint either the inside or the outside. Source 1 and Source 2.
19. Conceal Unsightly Air Conditioning Units
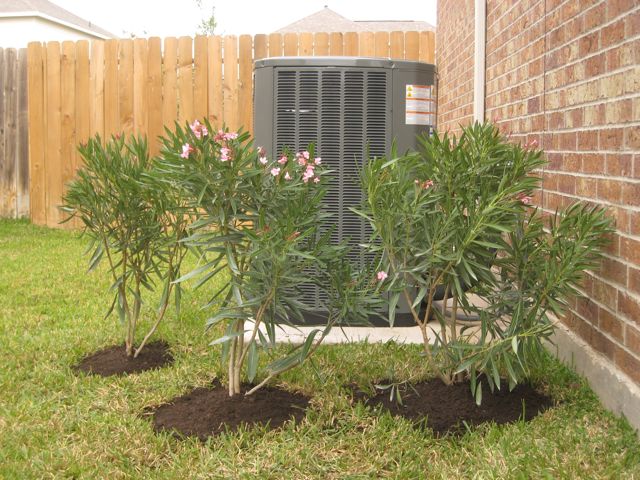 Not only is it more pleasing to the eye to camouflage elements such as AC units and electrical boxes, but in some areas, it’s even a rule. For large, unsightly AC units, consider blocking it from view with plants.
20. Blend in Electrical Boxes With the Rest of the Home
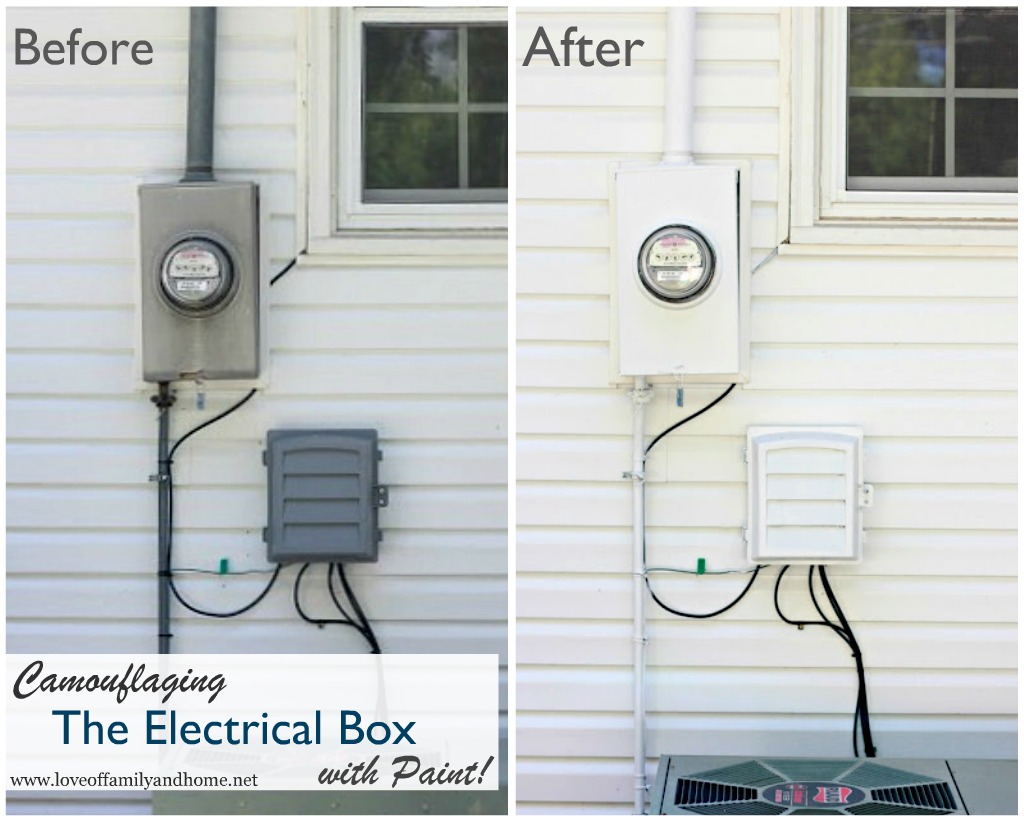 Electrical boxes can stick out like a sore thumb. Unfortunately, they can’t be removed entirely, but it can become less noticeable. With no more than a few hours, some paint and primer, electrical boxes can blend in seamlessly.
21. Replace or Upgrade Outdoor Lights
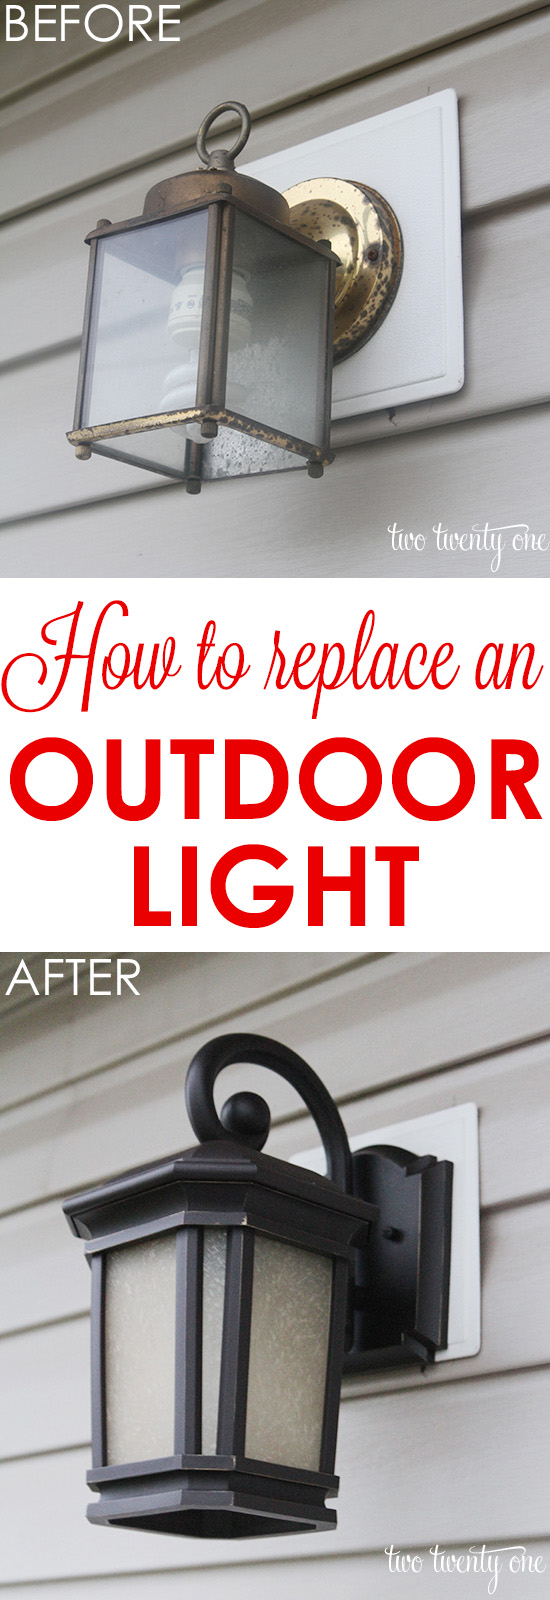 Outdoor light fixtures don’t exactly age gracefully, which is understandable, considering the amount of exposure to external elements such as storms, snow, and sweltering heat. It’s advisable to call an electrician as the safest option, to avoid risking electrocution and burning the house down. For the braver ones but not really sure about everything, visit link on how to replace light fixtures personally.
22. Customize your Mailbox
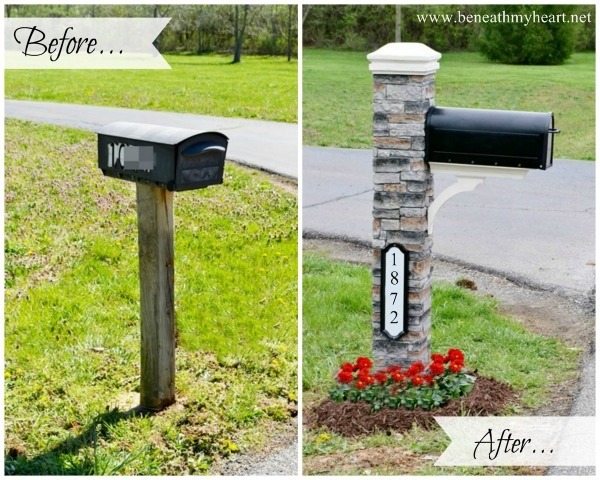 There is nothing that will make receiving bills feel any better, but at least the mailbox can be a sight for sore eyes.
Here is a short guide on how to replace that old, rinky-dink mailbox with a rustic, cast stone one:
● dig a hole in the ground based on the size of the wooden post
● insert a 4×4 wood post in the hole
● make sure it’s level, then pour Quickcrete and water
● wait for it to harden
● slide a cast stone post over the 4×4 wood post
● make sure the front of the cast stone post lays flat against the front of the wood post
● add a cap stone on top with epoxy
● drill holes in the cast stone post for the mailbox holder
● spray paint the mailbox – no limit to creativity
● fit the numbers either on the mailbox or on the post itself
● (optional) plant flowers around the mailbox for that extra domestic touch