A little organization in all your drawers would go a long way in helping reduce clutter in your bedroom. It will also make it easier to remember where you put things.
You can also try to make them if you need some extra storage but are short on cash.
Here are twelve ways to organize and declutter your bedroom using drawers brought to you by Simphome.com.
🔊12 Bedroom Drawer Organization And Makeover Video:
List Entries:
12 Bedroom Closet Organizations
12 Unique Organization For Small Bedroom Ideas
12 Bedroom Makeovers on a Budget
12. DIY Crate Cabinet With Sliding Drawers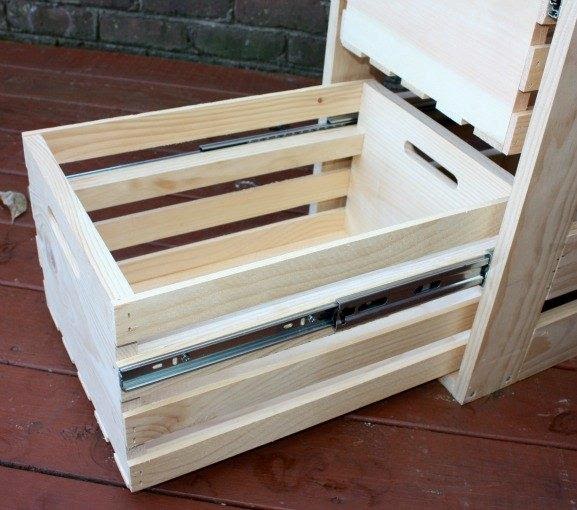
Drawers are arguably the hardest parts of a dresser or a cabinet to make.
They have to be perfectly square and aligned precisely. So why not eliminate most of the work by buying pre-made ones?
You can use very affordable readymade crates from Home Depot to build an attractive yet functional crate cabinet. It even comes with hand holes, so you don’t have to worry about handles.
You need some 1×3” boards for the frame and where you’re going to attach the drawer runners. That, plus the top and bottom frames to hold it together.
11. How to Build a Simple Drawer box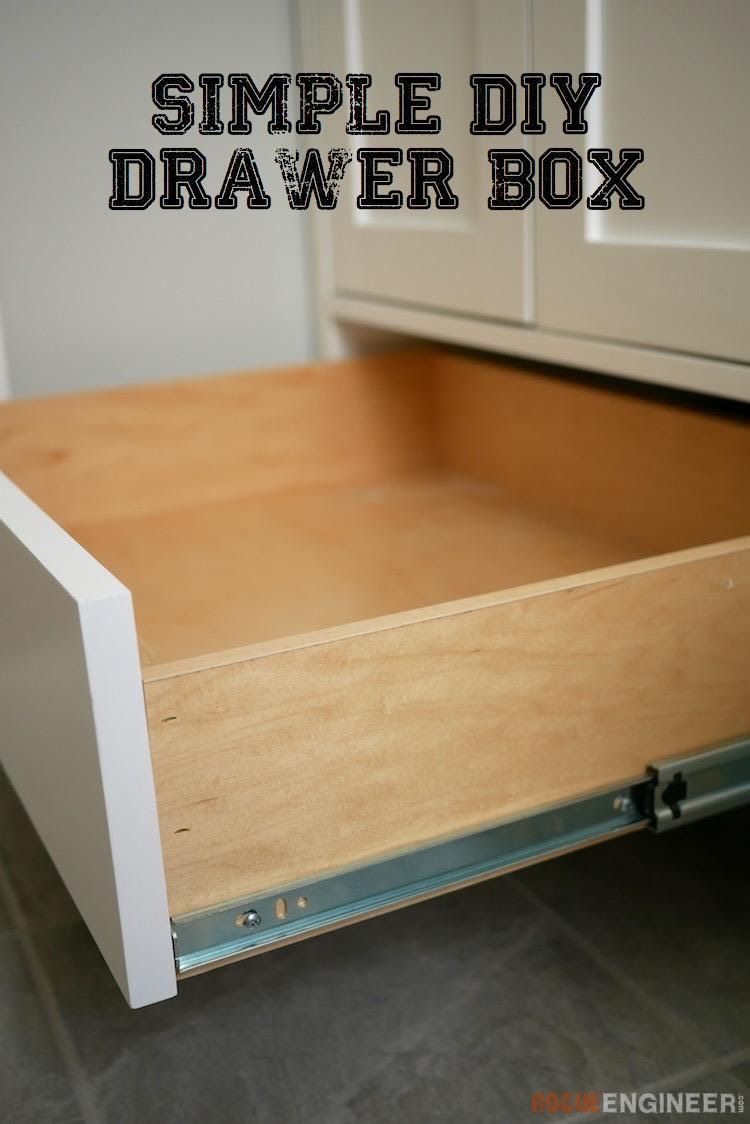
For a DIY drawer box, here’s a style that’s easy to make. It will still look terrific, cost less, and save you some time.
First, take into account the 1/2” thickness of both drawer slides for the width. Cut 3/4” plywood for all the sides and bottoms of the drawers.
Attach the front and back to the corresponding sides of the bottom using wood glue and 1-1/2” brads. Use the same method to attach the sides.
After that, you can mount the drawers to the cabinet with slides. If they’re inset drawers, they would have to be recessed to the face’s thickness.
Prefinished PureBond boards would be a top choice for the faces.
10. Good Grips Expandable Drawer Divider
Oxo Good Grips are one of the handiest dividers to use in your drawers.
Just expand them to the length needed, lock them into place, and get instant dividers. Installation is a no-brainer and completely tool-less.
There are no nails, gluing, and finishing required. Since they’re just as easily removable, they can be re-adjusted on the fly to a better position. They’re very versatile and make various organization layouts possible.
They’re about 4.4” in height, can fit drawers no less than 11.3” deep, and are expandable up to 17”. Get more info about the “Amazon Choice” product below.
[amazon box=”B077GFXBW8″]
9. A DIY Under Bed Storage Drawer Idea with Glass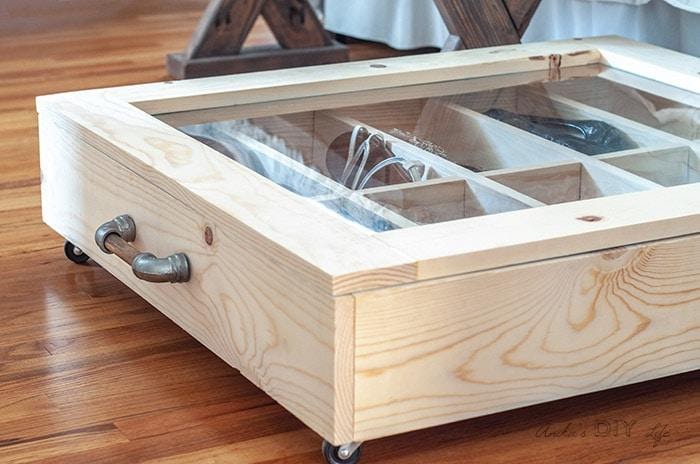
One of the most overlooked storage areas in a bedroom is located right under our noses, or more specifically, under our beds.
This one is specially designed for shoes and keeps them free from dust. The sides are 1×6” boards, the bottom is 3/4” plywood, while the lid and the dividers are 1×4” boards.
You’ll use 1-1/4” pocket hole screws and glue to join all the wooden pieces together. You attach a clear plexiglass pane to the lid frame with 3/4” screws. It lets you quickly see the contents of the drawer.
Lastly, mount it on four casters and screw in pull handle at the front for easy access from under the bed.
8. Easy Craft-able Sock Organizer Trick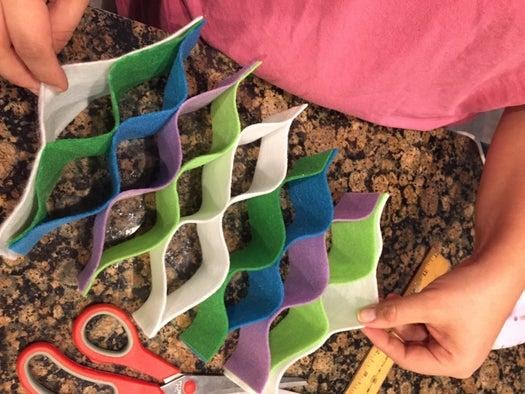
Socks tend to get moved around inside a drawer, but with this DIY drawer organizer, you’ll have fun getting them all to stay in place.
All you need are four colors of 10×10” felt, a glue gun, and a pair of scissors. First, cut the felt into three identical strips. Then glue two different color strips about 1/3 from both ends.
Next, glue another felt strip, but this time at both ends, and in the middle. Repeat the whole process, keeping in mind the 4-color felt pattern until you’ve glued them all together.
7. A Chest of Drawer Project with Euro Pallets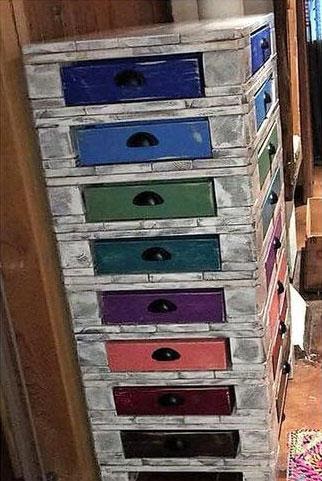
You can make a chest of drawers made of nine euro pallets stacked on top of each other to form the framework. It will have deep drawers with different colors at the front and shallow ones on both sides.
The widest side will serve as the front. However, you need to cut off the part on the right beyond each pallet’s middle block. You’ll do the same and remove the rear section on the sides.
To make the drawers, use the removed pieces. Hold all the wood together with brads and glue. Shell handles would go best with the look.
6. Build a DIY Drawer with Confidence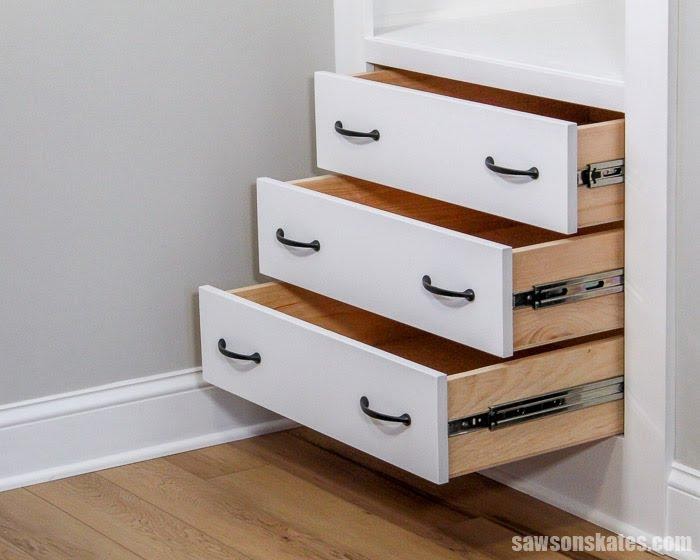
The best material for the sidings is 1” boards, although you’ll use plywood for the bottom. It’s also better to use 1” primed boards for the face because they’re straighter and more manageable to paint.
First, you’ll need a 1/2” clearance at the top and 1/4” at the bottom. The sides should have 1/2” clearance. For inset drawers, you’ll have to allow for the thickness of the face board.
Overlay drawers are more forgiving of alignment errors. Their face boards are mounted beyond the front frame and can be aligned accurately regardless of minor misalignments of the box.
The easiest way of putting all the parts together is with screws using pocket hole jigs after applying glue to the joints.
Also read: 10 Unique Chests of Drawers’ Makeover and Improvement Ideas
5. A DIY Drawer Divider For Under $5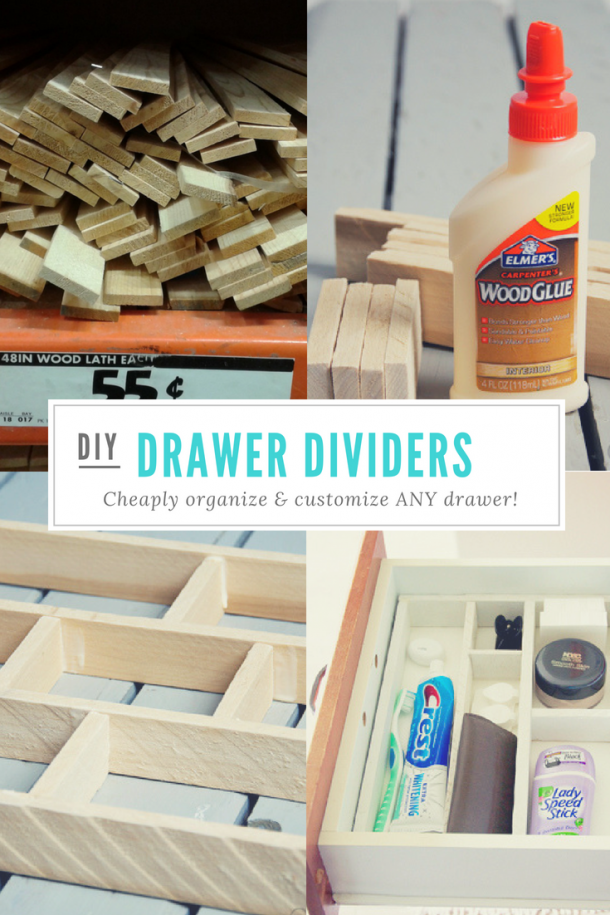
One of the cheapest ways to organize drawers is to make the custom dividers yourself.
You can use scraps of wood for around 50 cents each, so buy enough that you’ll need. I prefer to use 2×1/2” boards, but you could pick any reasonable size.
Design the compartments and cut all the pieces needed. Sand the parts thoroughly, making sure to remove all the rough surfaces and sharp edges.
Glue them all together and wipe any excess with a damp piece of cloth. Please wait for it to dry, and apply any finish that you want.
You may also want to use some drawer liners on the bottom of your drawers before you place the divider. All of these materials should cost you less than $5.
4. The Velvet Lining for Your Jewelry Idea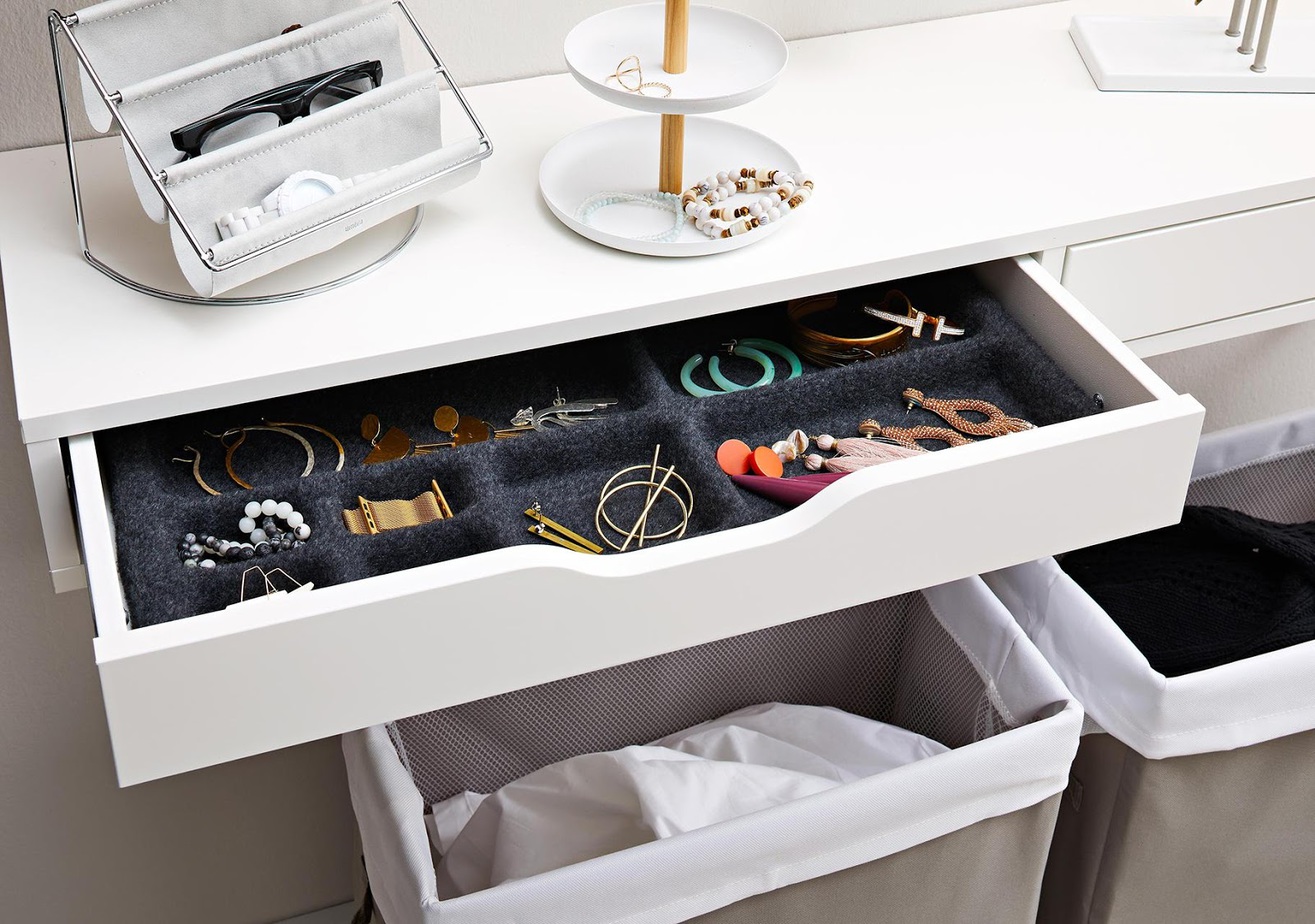
For your jewelry, you only need shallow organizers in a drawer since it’s not a good idea to pile them on top of one another. They should look more like jewelry trays.
Preferably, they should have velvet lining, which is the traditional material used in jewelry boxes. The velvet will make individual jewelry pieces pop out and less hard to see than with a bare finish.
This simple addition will also add a touch of quality to your collection.
3. The Sidney Side Table with Charging Station Idea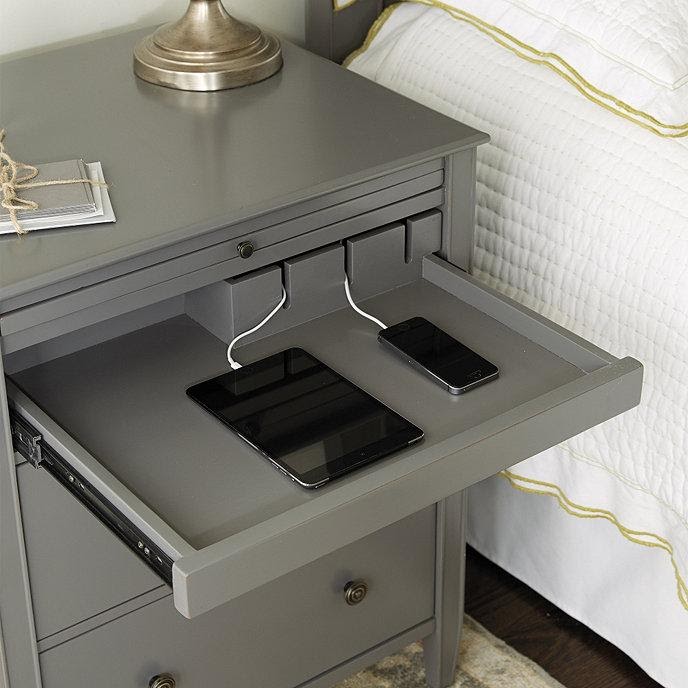
It’s an elegant looking side table that features a pullout tray to store your mobile devices and has a charging station for them.
There’s an enclosed USB charger on the upper right of the tray with slits where USB wires can pass through to connect to your devices.
Besides that, it also has two drawers below with two knobs each for more storage. There’s a pullout shelf at the top with a tiny knob where you can place your drinking glass or bottle.
These convenient storage features will keep the top surface clutter-free.
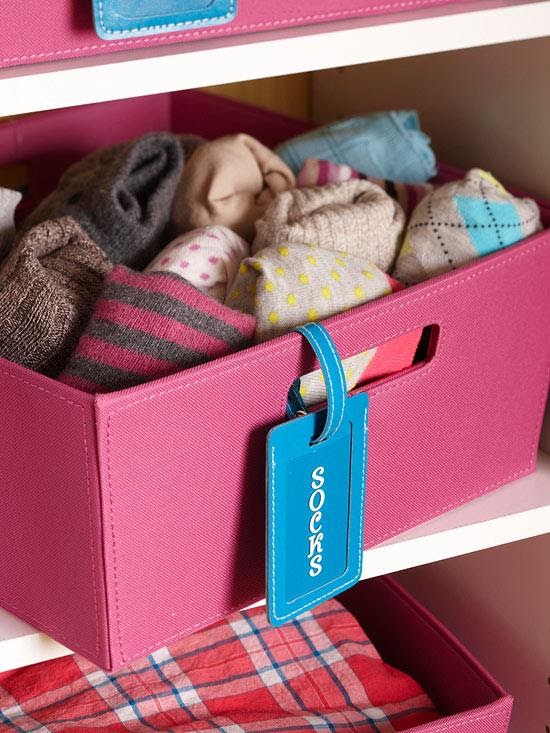
Luggage tags are a smart yet effective way of labeling your storage boxes and bins.
These tags are pretty useful, especially with boxes stored on the top shelves, so you don’t have to guess what’s in them. This simple tag will save you the effort of pulling down the wrong box and returning it.
As a labeling solution, they also add more style, are more durable, and are easy to loop around handles and hand holes. They are eye-catching and remind you at a glance of a box’s contents so you can pull down the right one straight away.
Lastly, Number 1. False Bottom Secret Compartment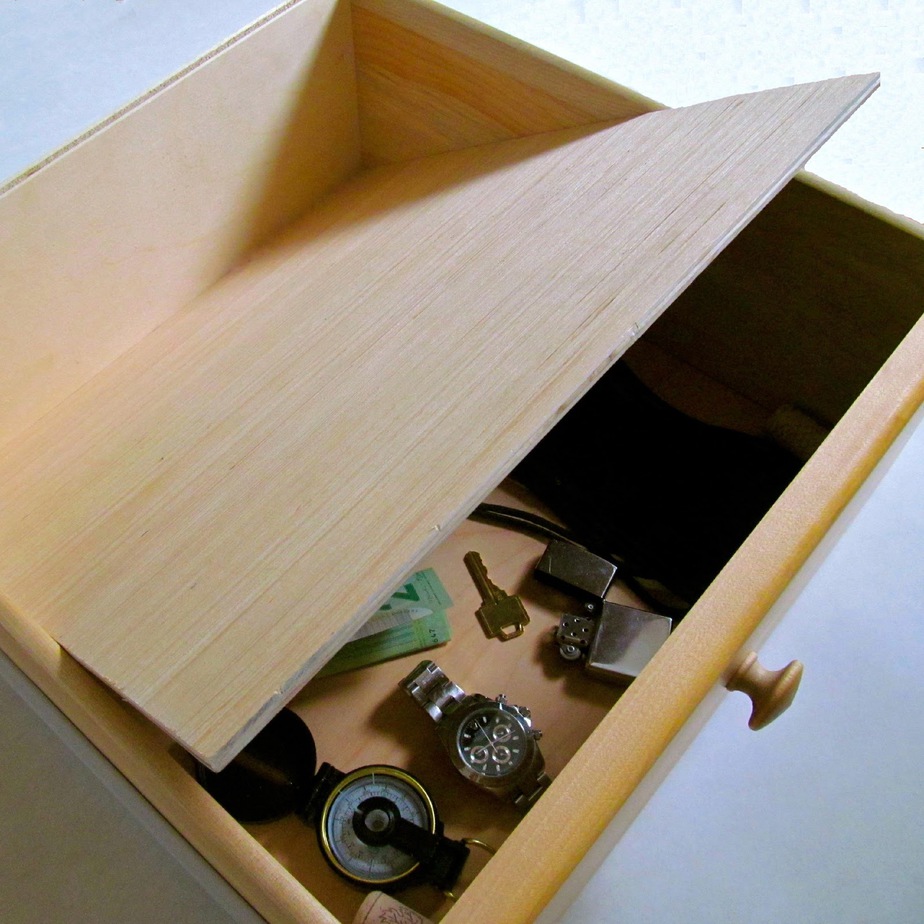
A secret compartment is a neat way of hiding essential items that you don’t want other people to touch.
It could be anything that’s usually small, like your keys, some extra cash, personal documents, or whatever that only you know about them.
Find four identical small objects about an inch or less tall for the stands. You could use small pieces of wood, corks, erasers, or even Lego bricks.
Glue them to the bottom four corners of the drawer. Cut a piece of thin plywood to the same dimensions as the inside of your drawer. You want it to fit snugly but not tightly above the stands. You can sand the edges to make sure of this.
Finally, drill a 1/8” hole at the back end where you can insert a hook and pull it out. Another way is to drill the hole on the actual bottom’s front end. That way, you can push the false one with a small rod from underneath.
Final Words:
The DIY projects I’ve presented are pretty easy to make but will contribute significantly to sort out the items in your drawers. Equally important is that all these ideas, including the commercial products featured, won’t burn a hole in your pockets.
Thanks for reading this post and watching the video too. I hope it will help or, at the very least, inspire you to come up with better drawer organization solutions.
Be sure to read the following reference area to minimize error and in case project number 11 and 12, save your searching time by following next product feed:
[amazon bestseller=”cabinet slider drawer” items=”3″]
References:
12. Hometalk.com
11. Rogueengineer.com
10. Amazon.com
9. Anikasdiylife.com
8. Instructables.com
7. Diypalletfurniture.net
6. Sawsonskates.com
5. Organizedmom.net
4. Bhg.com
3. Ballarddesigns.com
2. Bhg.com
1. Instructables.com
