5. A Sliding Spice Rack for a Very slim space without any wheels
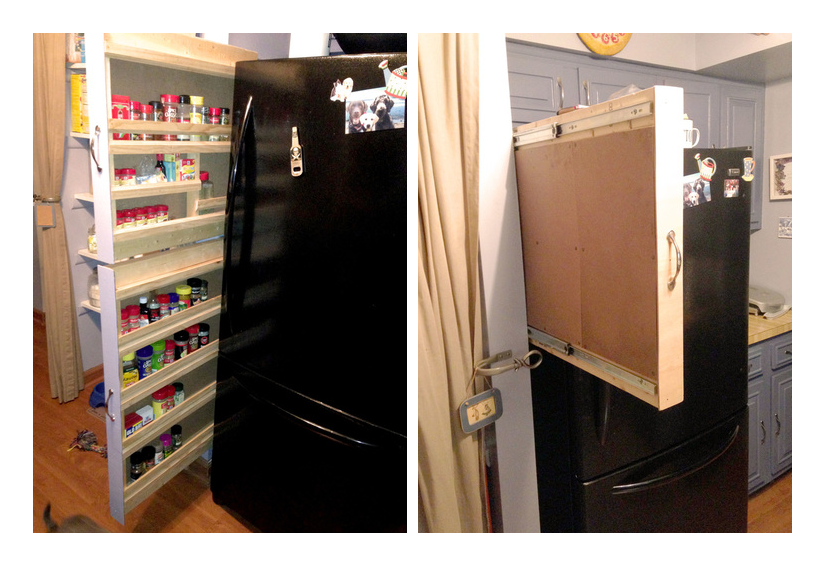 Tired of rummaging through cluttered cabinets for your spices? Discover how to build your sliding spice rack and transform your kitchen organization. Say goodbye to frustration and wasted time with this simple project.
Here’s what you’ll need:
- Plan your spice rack: Measure the available space and gather scrap wood for the project.
- Build the shelves: Construct sturdy boxes using ¾” thick boards and add a hardboard composite backing. Create compartments based on the average size of your spice jars for organized storage.
- Prevent spills: Attach wood trim as fences to keep your spices in place.
- Mounting the shelves: Due to limited width, mount the drawer slides above and below the shelves. Attach a piece of 2×4 to serve as a mount for the slides. Screw on a handle for easy access.
- Installation: Attach the drawer slides to the wall, ensuring they are level and securely fastened to studs.
- Finishing touches: Paint the front-facing plywood to match your kitchen decor.
Experience the satisfaction of a beautifully organized kitchen. Our sliding spice rack project turned out great, and we’re thrilled with the results. Don’t forget to check the source for a closer look at the completed spice rack. Say goodbye to spice chaos and hello to efficient cooking.
More detail: Justmeasuringup.com
4. A Two-level or more spinning spice rack idea
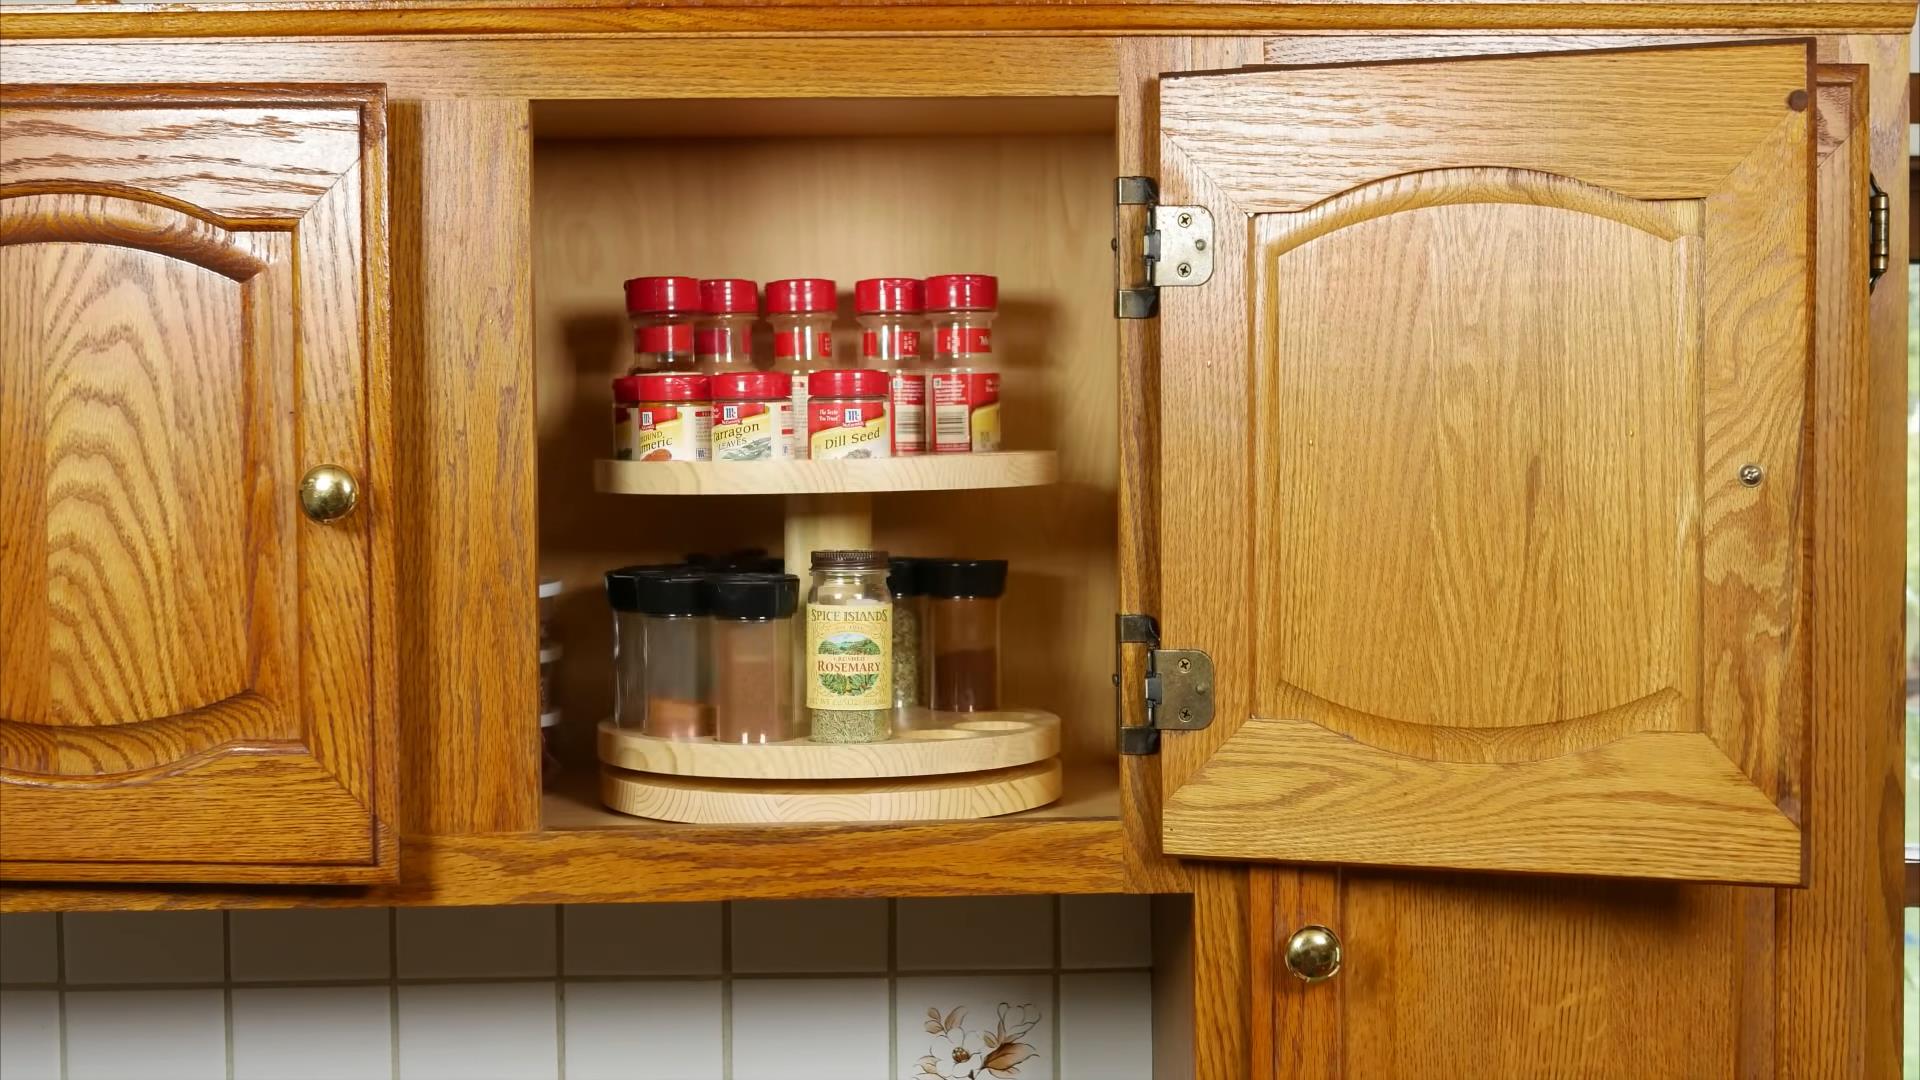 Introducing the Spinning Spice Rack: Say goodbye to digging through cluttered cabinets and hello to easy spice access! Vinny created a fun and functional spice rack, and here’s how you can make one too.
Materials:
- A 12″ wide, 36″ long, and 3/4″ thick board of spruce
- 2×4 dowel rod (6″ long, 2.5″ diameter)
- Lazy Susan bearing (4″ diameter)
- Shellac for finishing
- Rubber bumpers for stability
Building Steps:
- Cut the board into three 12″ squares and mark the center of each.
- Use a circle-cutting jig to turn the squares into circles with 10.5″ diameters.
- Drill a small hole through the center of two circles for spice jars.
- Drill a hole halfway through one circle’s bottom and halfway through the other circle’s top.
- Enlarge the spice jar holes with a sanding drum on a rotary tool and a homemade router base.
- Sand all surfaces to a smooth finish (220 grit).
- Clamp the circles together and sand the sides to ensure identical diameters.
- Glue the dowel rod to the bottom circle using a special clamp for perfect alignment.
- Glue the other end of the dowel rod to the top circle using the special clamp again.
- Center and mark the mounting holes for the lazy Susan bearing on the base circle.
- Drill pilot holes and screw in four screws to attach the bearing.
- Position the base onto the bottom circle and mark the top mounting holes.
- Drill pilot holes and screw in four screws to secure the lazy Susan to the bottom.
- Attach rubber bumpers to the base for stability.
- Apply four coats of shellac, sanding between coats with steel wool.
Now, enjoy the convenience of your spinning spice rack or the video! Easily find and access your spices while adding a touch of fun to your kitchen.
Learn more from Makify1.