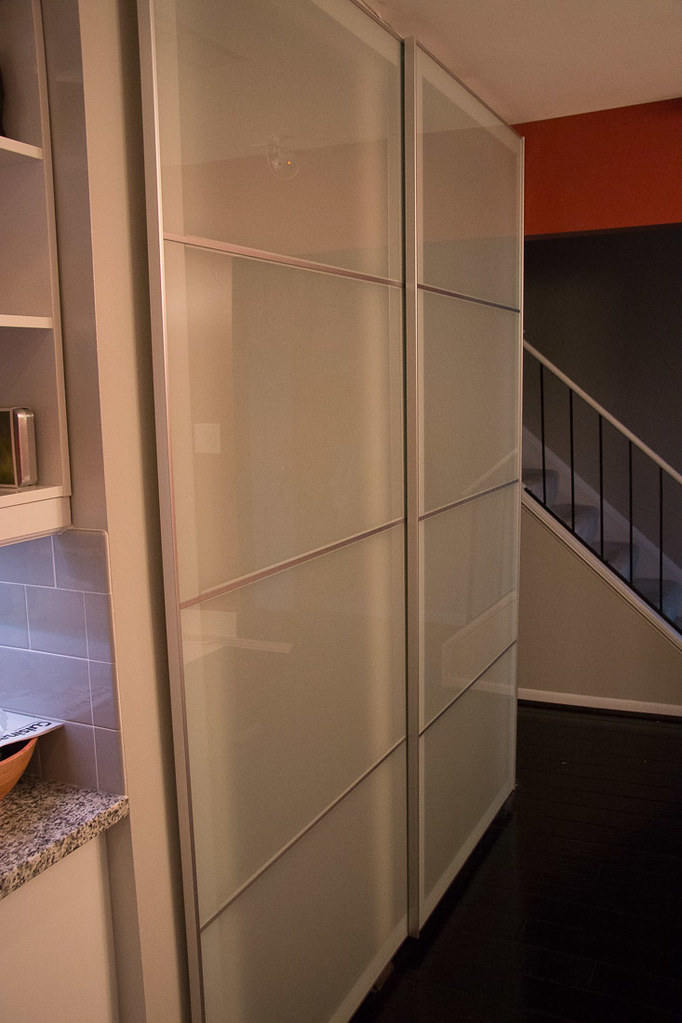
13. Introducing a Brilliant Solution for Closet Doors – The Ikea Pax Hack!
 Are you tired of struggling with your closet doors, searching for a solution that suits your small space? Look no further! Melissa from Supernovaadventures.com has an incredible hack that will transform your closet and solve all your door dilemmas. Get ready to say goodbye to cumbersome bifold doors and hello to a sleek, functional solution.
Here’s the problem: standard doors didn’t fit our closets, and sliding or barn doors weren’t an option due to the lack of overhang. After months of frustration, we decided to take matters into our own hands. Enter the Ikea Pax doors, a cost-effective and stylish alternative.
To make it work, we framed a portion of the upper closet opening, providing a sturdy structure to mount the top track. While the framing might require some assistance from a handyman, the final result is worth the effort.
Next, we customized the Pax door track by removing a lip to ensure a flush fit against the wall. Initially, using a Dremel tool, we found that a reciprocating saw made the task much easier and quicker.
With the framing and track in place, we assembled the Pax doors, which are impressively heavy and durable. We removed the glass panels during installation to maneuver them more easily. Once the frames were on the top track, they slid smoothly, allowing us to cover our pantry contents with style.
Now, it’s essential to acknowledge that this hack has its challenges. The framing and customizations require some carpentry skills, and the weight of the doors can make installation a two-person job. The finish may also be imperfect, especially when framing meets the ceiling.
However, the advantages far outweigh the difficulties. The Pax doors offer a cost-effective alternative to custom sliding doors, and their design and sturdiness make them a fantastic choice. You can achieve a functional and attractive closet solution with some perseverance and a little DIY spirit.
So, if you’re ready to bid farewell to your closet woes, why not try the Ikea Pax hack?
12. How to Build an Inner Drawer Inside Your Current Drawer?
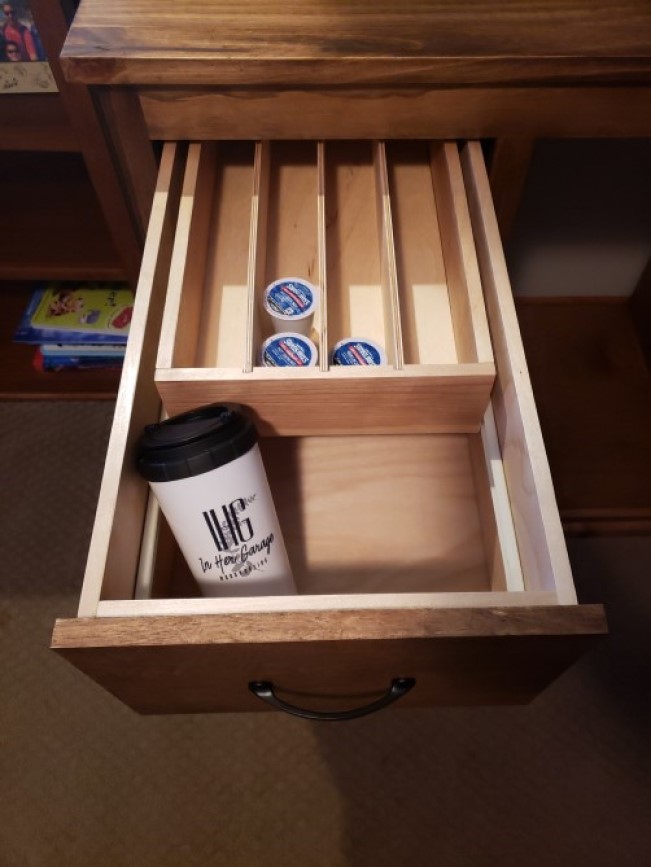 Ready to take your organization game to the next level? It’s time to build an inner drawer for your existing base drawer. Follow these simple steps from Prettyhandygirl.com to craft a functional and efficient hidden storage solution, even with limited carpentry skills.
- Determine the size of the inner drawer based on what you plan to store. For example, if it’s a K-cup organization drawer, allow at least 2 inches in height.
- Calculate the dimensions of the inner drawer, considering the instructions for the drawer slides. The front and sides of the base drawer should be cut to the same height, while the back of the drawer should be shorter to allow the inner drawer to roll away.
- Assemble the inner drawer using wood glue and brad nails, ensuring it matches the pre-determined measurements.
- Install the drawer slides for the inner drawer. Remember, this drawer operates by being pushed away from you, revealing the base drawer beneath it. Mark the height of the inner drawer on the sides of the base drawer, and determine where the “front” (now the back) of the inner drawer slide will be attached.
- Attach the inner drawer slides to the inside sides of the base drawer, aligning the marked lines. Then, attach the other piece of the drawer slide to the inner drawer bottom, aligning the back of the slide to the “front” of the drawer.
- Assemble the base drawer and cover the exposed edges of the plywood with edge banding for a polished look.
- Nest the inner drawer into the base drawer and return it to its designated cabinet space.
- Add felt pads to the front and back of the inner drawer for a finishing touch to ensure quiet closing. Note that the inner drawer can be closed separately from the base drawer if there is a back to the entire cabinet piece.
While this DIY project offers a clever storage solution, it’s important to acknowledge potential drawbacks. The construction may require some carpentry skills and attention to detail. Additionally, modifying existing drawers can have limitations and may not be suitable for all cabinet configurations.