5. Three IKEA Closet Door Hacks
Ikea Hack: High Gloss Dresser Makeover
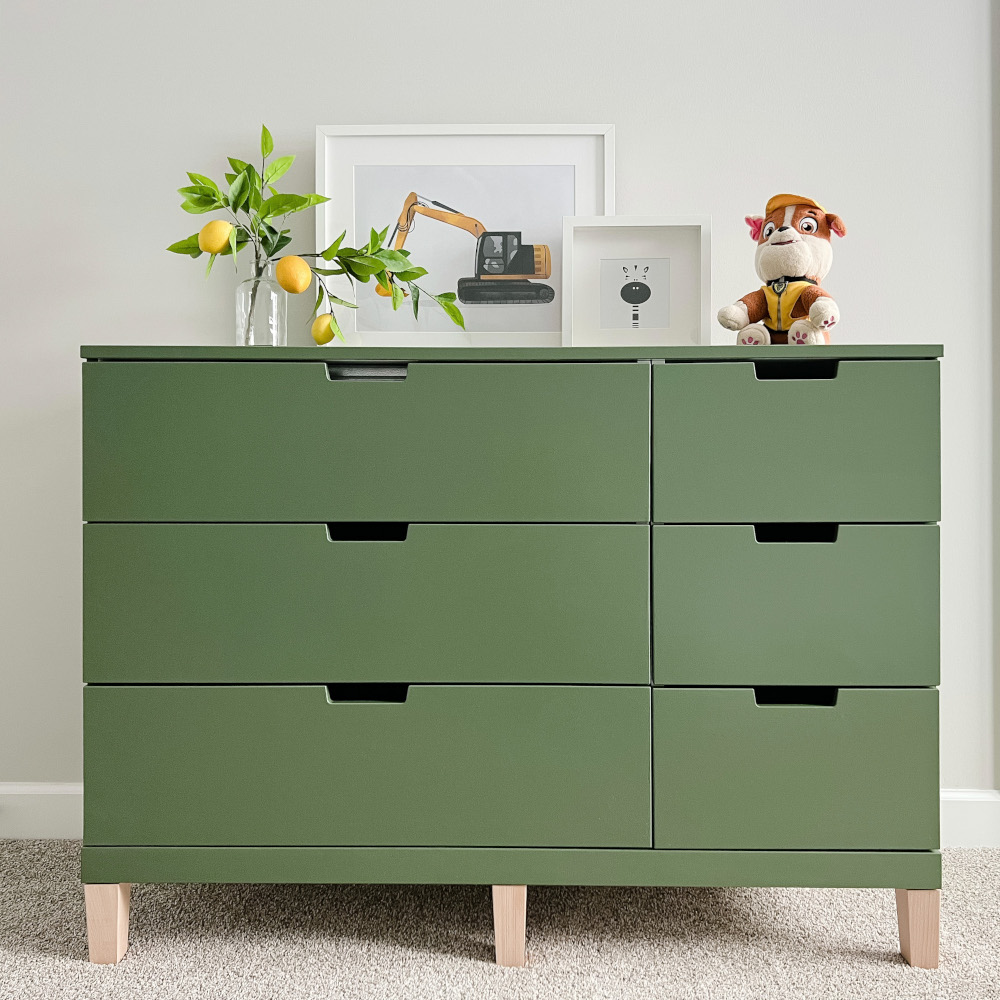
Transform a basic IKEA dresser into a high-end piece with a glossy finish.
- Begin by preparing the dresser, especially if it’s glossy like the NOLDRI model.
- Clean thoroughly and sand lightly with a 220-grit pad for about 5-10 minutes to ensure paint adherence.
- Wipe away dust with a tack cloth.
- Next, apply two coats of shellac-based primer (like Rust-Oleum® Zinsser® B-I-N), allowing quick drying and avoiding overworking the wet primer. A foam roller is recommended over a brush for an even finish. Sand lightly between coats.
- For painting, use a foam roller for large surfaces and a brush for edges, applying paint in thin, even strokes. Two coats usually suffice for full coverage.
- Optionally, add new hardware or legs for a fresh look. Drill pilot holes for new legs, using a ½” drill bit, and attach with screws.
- Finish with a water-based clear polyurethane top coat for durability, applying two coats and allowing for complete drying.
Ikea Besta Door Hack: Color Block Storage
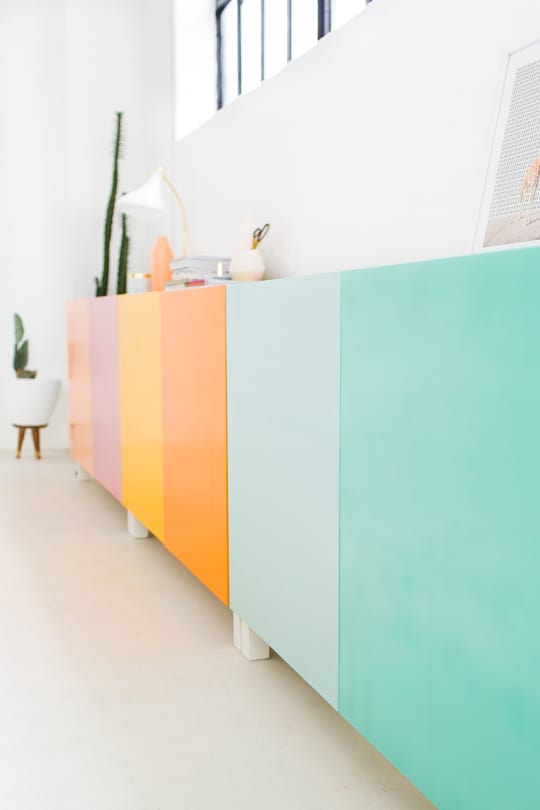
Revamp your studio storage with a DIY color block storage using IKEA Besta cabinets.
- Select cabinets and appropriate hardware. Choose your paint colors; for a smooth finish, spray paint is preferable, but regular paint works too. Examples include Montana Cans Gold Spray Paint in various shades like Classic Shrimp Pastel, Bazooka Joe, and Yellow Submarine.
- Before assembling the doors, spray each one individually with about three coats, plus a clear shellac top coat for durability and easy cleaning.
- Once dry, attach the doors to the cabinets. This approach adds a vibrant touch and effectively hides clutter behind colorful, closed doors.
Beautify Your Cabinet: Painting Glass and Chrome
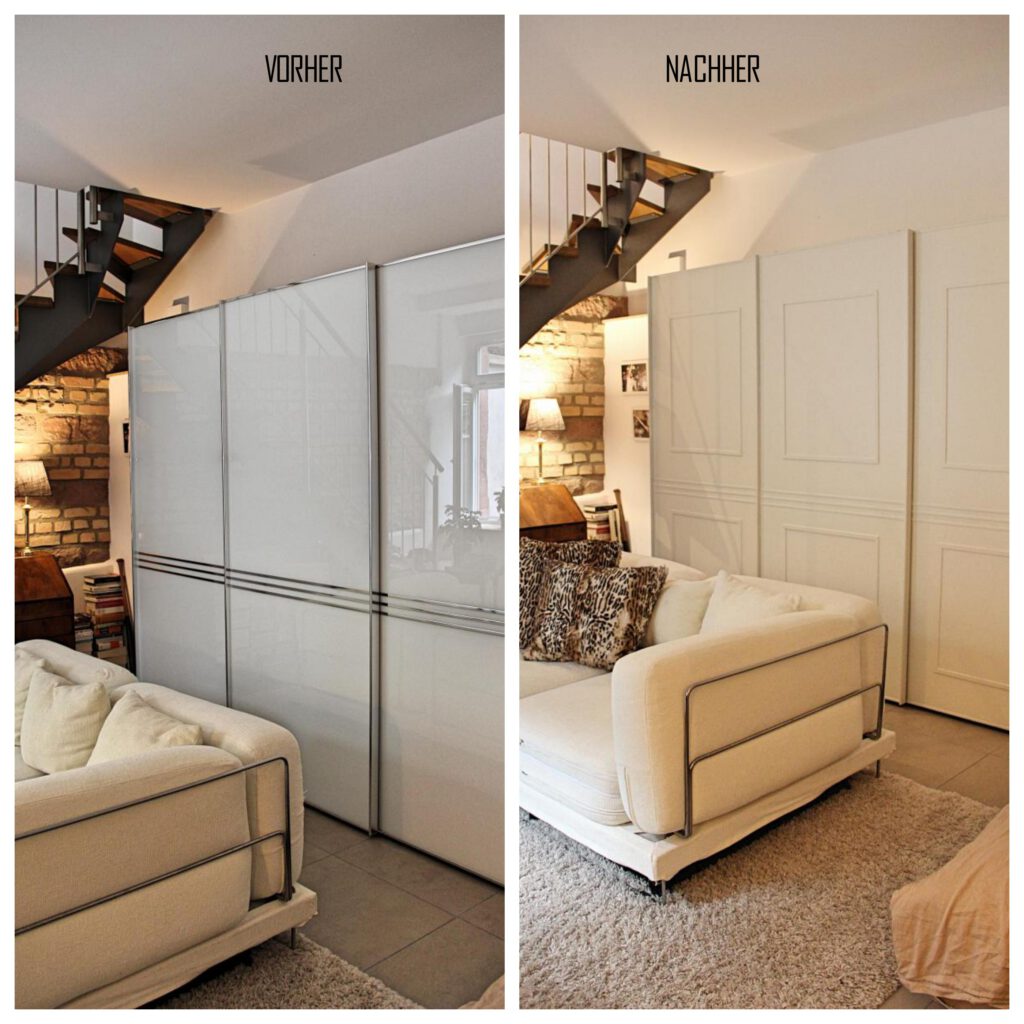
Overhaul an outdated sliding door wardrobe by painting its glass and chrome surfaces.
- Start by creating panel doors with wooden strips from a hardware store, cutting them to size and arranging them on the doors. For a sliding door wardrobe, use flat strips; for hinged doors, you have more decorative options.
- Clean the cabinet thoroughly, then thinly apply assembly adhesive to the wooden strips and press onto the doors. Use a strong glue like Pattex’s all-purpose adhesive. Let it dry for 24 hours.
- Clean the cabinet again, wear gloves, and apply two coats of Eggshell paint, allowing ample drying time between coats. This process will transform a dated piece into a classic, cozy wardrobe.
These three IKEA hacks offer creative, cost-effective ways to revitalize your furniture, enhancing both functionality and aesthetics. Whether it’s a high-gloss finish, playful color block storage, or a classic makeover for outdated pieces, these projects can significantly uplift your living spaces.
4. Open To A Closed Closet’s Drawer Concept
Ready to turn those basic shelves into sleek drawers?
Here’s your guide to a DIY drawer upgrade, making your space more functional and stylish.
Step 1: Measure Your Space
First, measure the width, depth, and height of your cabinet or bookshelf space. Don’t forget to check if the cabinet doors have enough clearance for pullout drawers.
Step 2: Cut Drawer Box Sides
Choose the height for your drawer boxes. For instance, for an 8″ front, a 5″ tall drawer box works well. Calculate the outer dimensions considering the material width and drawer slide clearance (typically 1″). Cut the pieces using a miter saw.
Optional Step: Create Channel for Drawer Bottom
Use a table saw or router to create a channel in your drawer sides for the hardboard bottom.
Step 3: Assemble Drawer Boxes
Glue and clamp the cut pieces, securing them with brad nails. Fit the hardboard bottom in the channeled inset and secure.
Step 4: Apply Edge Banding
If using plywood, sand the boxes and apply edge banding to give a solid wood appearance. Trim excess banding once cooled.
Step 5: Install Drawer Slides
Determine the placement of your drawers and mark levels for the drawer slides. Install the slides ensuring they are level and aligned with the drawer placement.
Step 6: Install Drawers
Carefully place your drawer box on the slides, aligning it with the cabinet front. Secure the slides to the drawer sides, maintaining level alignment.
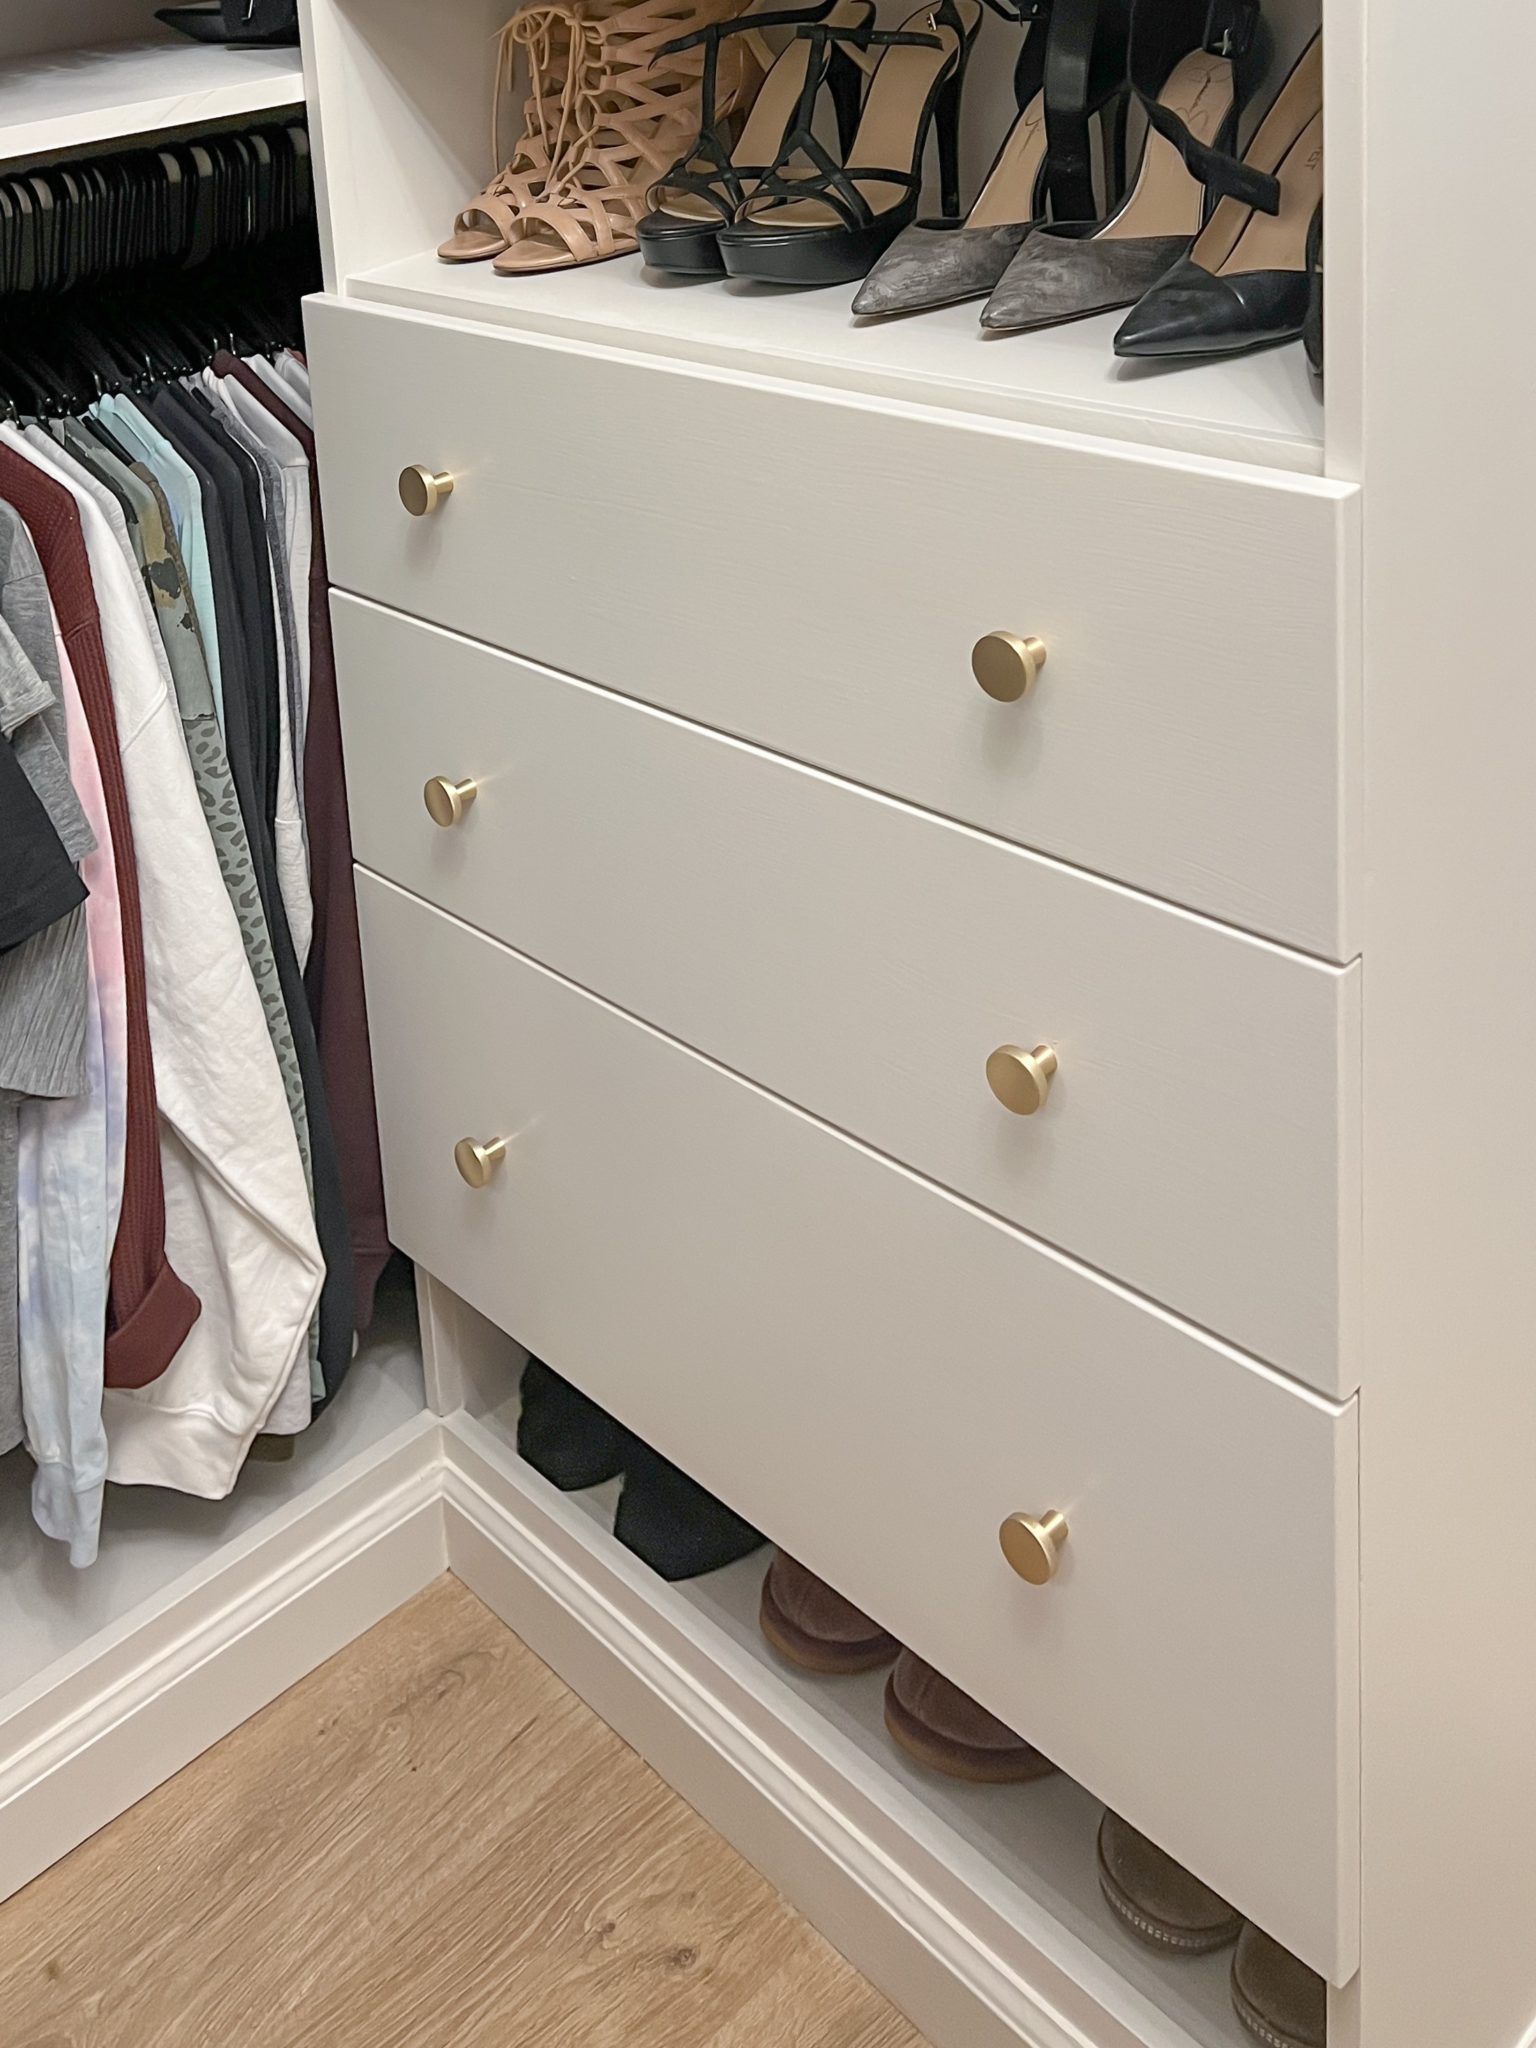
Step 7: Prepare Drawer Fronts
Either craft your own fronts or repurpose ones like IKEA’s VEDDINGE. If needed, cut to size, sand, and paint to match your closet.
Step 8: Install Drawer Fronts
Mark the hardware placement on the fronts. Temporarily attach the fronts to the drawer boxes with screws, then secure from inside with additional screws.
Step 9: Install Hardware
Drill holes for your hardware, ensuring they match the bolt size. Attach the knobs or pulls from the inside, being careful not to damage the drawer front.
3. A No Closet to PAX Hack Project
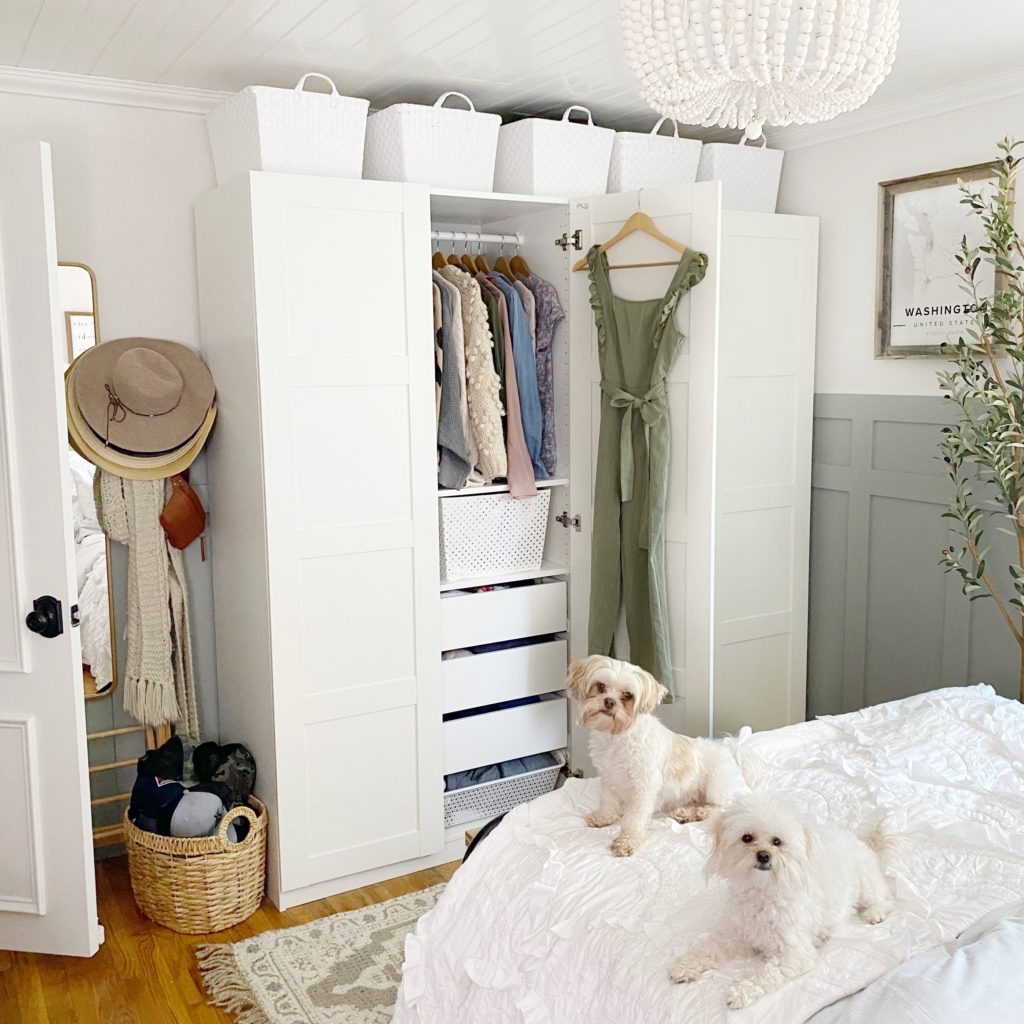
Ready to revolutionize your clothing storage? Dive into the world of IKEA’s PAX Wardrobe System! It’s a game-changer for organizing clothes, especially if you’re dealing with space constraints. Here’s a peek into how to make the most out of this system, in a fun, easy-to-follow way:
Why PAX Over Traditional Closet?
Imagine turning a closet into bunk beds and needing a sleek, space-saving solution. That’s where PAX comes in! With its incredible capacity for organization, you’ll fall in love just like we did. Picture an office that’s both functional and stylish, plus a closet that comfortably holds all your essentials.
Cost Breakdown:
Opting for two PAX systems set us back $770 plus tax. It’s customizable and budget-friendly – you can even skip the doors for a more economical version.
Specifics of Our PAX Setup:
- 6 KOMPLEMENT Drawers at $40 each
- 2 KOMPLEMENT Shelves at $15 each
- 2 PAX Wardrobes at $95 each
- 2 KOMPLEMENT Racks at $10 each
- 4 BERGSBO Doors at $50 each
- 2 KOMPLEMENT Pull Outs at $5 each
- 2 KOMPLEMENT Metal Baskets at $40 each
What’s the Size?
Our ceilings are low, so we chose the 79 1/8″ size. But if you’ve got the height, aim higher! Extra storage? Just place baskets on top.
Ease of Assembly:
Even if you’re not a DIY enthusiast, assembling a PAX is a breeze. I managed it solo, and trust me, I’m not fond of assembling furniture.
Capacity and Organization:
PAX wardrobes are surprisingly spacious. Everything from clothes to accessories finds its place, offering a neat, accessible arrangement. Let’s take a look inside and see how neatly everything fits, making daily outfit choices a walk in the park.
With PAX, you’re not just organizing; you’re upgrading your lifestyle. Say goodbye to cluttered, cramped spaces and hello to a neatly organized wardrobe system that makes life easier. Ready to transform your room? Go for PAX and never look back!
2. A Modern and Fancy Expedit hack
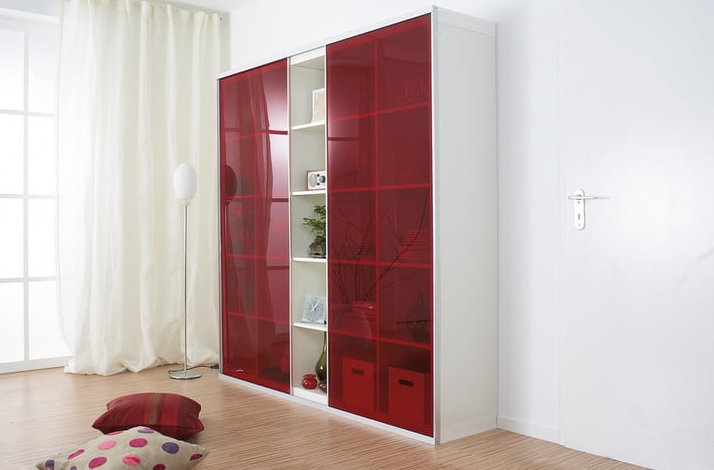
Ready to transform a plain IKEA shelf into a stylish cupboard? Grab your tools and let’s get started on this fun and creative project that’ll add flair to any room.
Step 1: Measure Your Space
Start by measuring the width, depth, and height of your shelf. This will guide you in selecting the right materials for your cupboard transformation. Remember, whether it’s a wooden or metal shelf, any variety can be turned into a chic cabinet.
Step 2: Gather Materials
You’ll need MDF boards, white-coated chipboard, or even vibrant red artificial glass panels for sliding doors. For a touch of elegance, consider aluminum profiles and wooden strips for reinforcement.
Step 3: Covering the Shelf
Whether you have an IKEA Expedit shelf (about 185 x 185 cm) or another type, you can clad it with your chosen materials. For wood shelves, you might even consider adding glass doors for a modern look.
Step 4: Create Doors
For wooden shelves, use materials like MDF to craft custom doors. If you have metal shelves, cover the sides with wooden panels and use bar hinges (piano hinges) for the doors.
Step 5: Detailing
Add rear walls for stability, ensuring there’s enough air between the doors to prevent them from hitting each other. A gap of 2-3 mm should suffice.
Step 6: Showcase Cabinet
For an extra layer, you can add a top wooden shelf as a cover plate. Screw a square piece of wood between the corner profiles at the top of the metal shelf.
Step 7: Attach Side Walls
Fasten the side walls from the inside using round-head screws. Remember to use a center punch for accurate drilling.
Step 8: Add Door Hinges
Attach bar hinges to the doors. Place a spacer between the floor and the door during installation to avoid dragging.
Step 9: Create a Display Case
You can make a showcase using materials like corrugated cardboard, coated with wood glue. Wrap it around a rectangular body to create a unique display.
Step 10: Painting and Finishing Touches
Prime and paint the door surfaces. Attach the display case to the sheet metal base with assembly adhesive. Consider adding self-adhesive LED lighting to highlight your cupboard’s contents.
This project can bring out the best in any shelf, turning it into a functional and aesthetically pleasing cupboard. With a little creativity and some DIY spirit, you can have a unique piece that’s both practical and stylish.
1. A Closet and Divider Idea
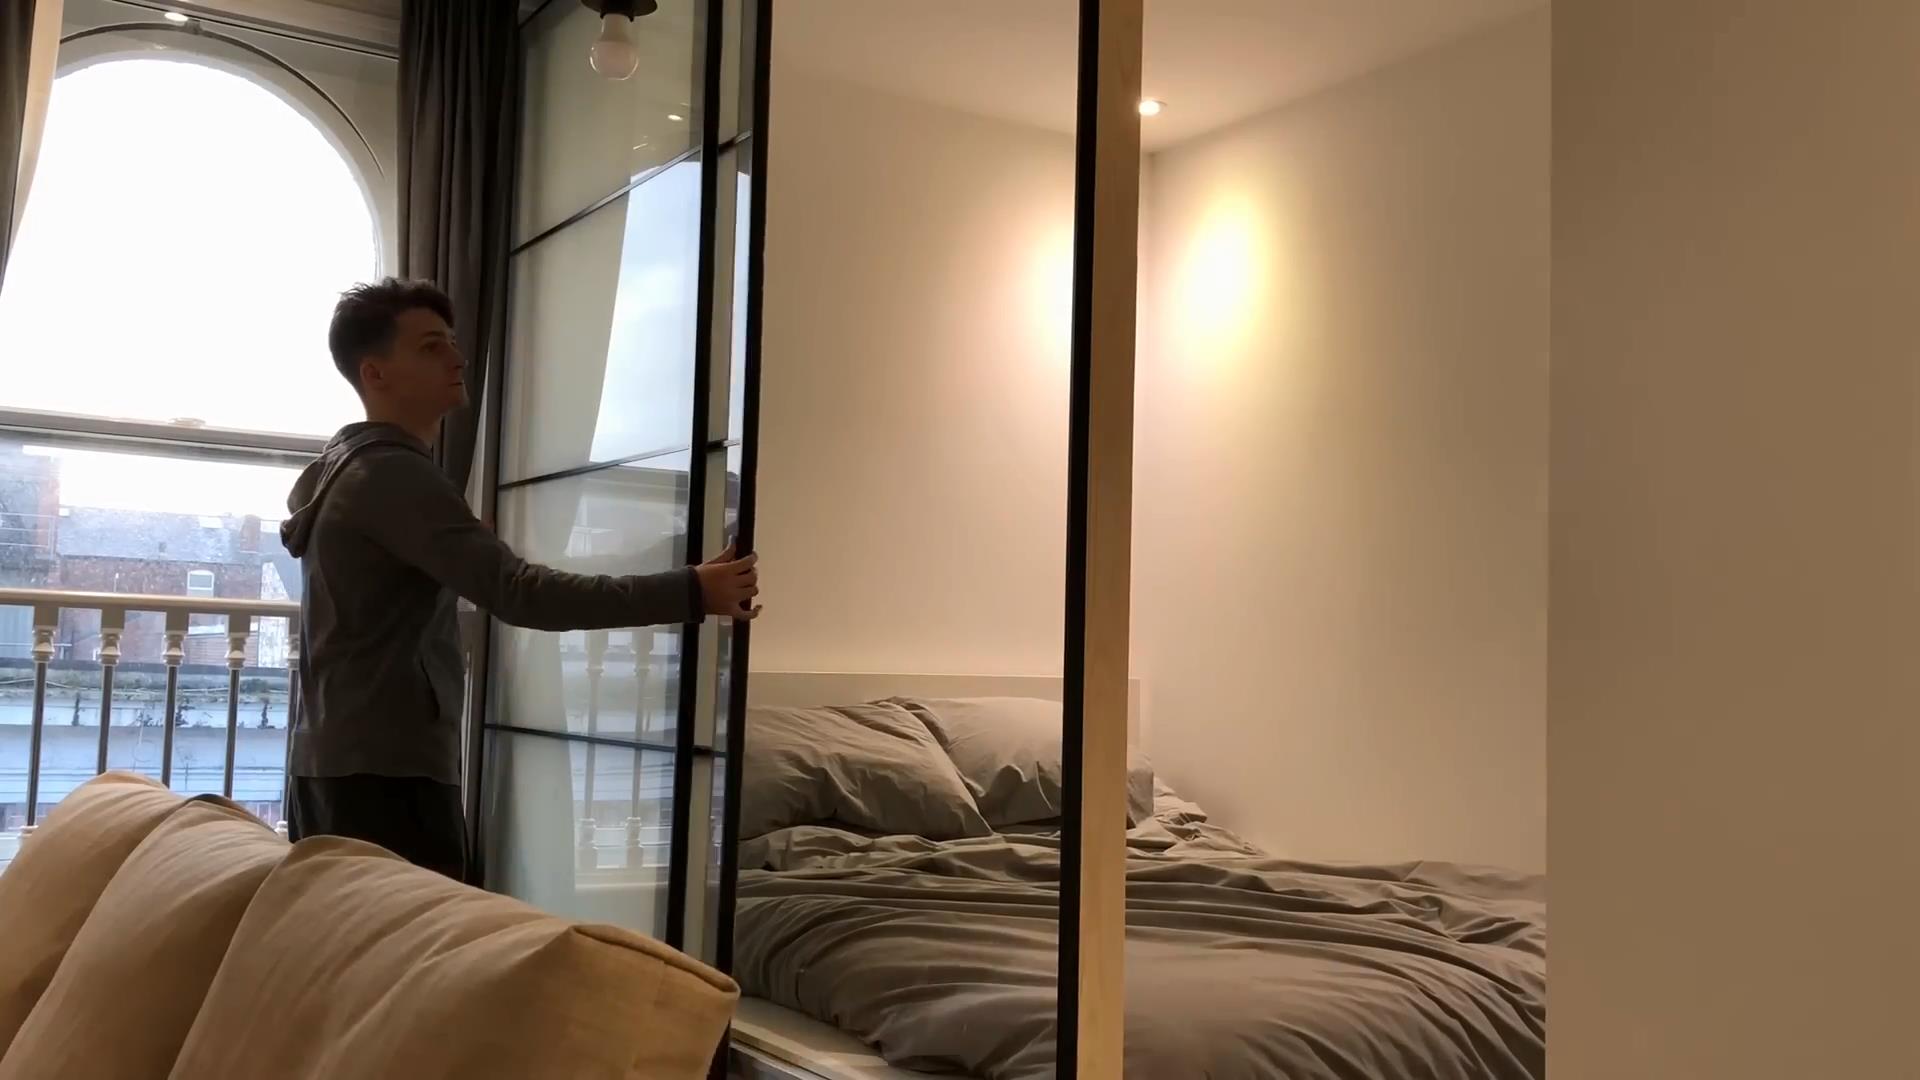
Hey there, DIY enthusiasts! Ready to elevate your studio apartment game with a cool IKEA hack? Meet Mark, your design guru from Manchester, and let him guide you through the creation of a sleek room divider that’s both functional and fabulous.
Building the Frame:
Mark kicks off by constructing a frame for the sliding wardrobe doors. This frame, measuring 2.36 meters in height and 2 meters in width, mimics the sliding mechanism of wardrobe doors, ensuring a seamless operation. The doors, standing at 2 meters in height, perfectly match the width of the frame.
Base Support and Cladding:
To support the weight of the sliding doors, a base is added to the frame. The base is cleverly clad with excess IVAR cabinet doors from a previous IKEA hack, creating a sturdy foundation. Magnetic catches are strategically placed for easy door removal, offering accessibility to the space beneath for wiring purposes.
The Stylish Ledge:
Taking advantage of the frame’s depth, Mark adds a stylish ledge using melamine board and a three by two-inch piece of wood. Attached with velcro tabs, this ledge not only serves a practical purpose but also adds a unique design element.
Choosing the Mechanism:
For the sliding doors, Mark opts for IKEA’s AULI frame in black and ‘Sekken’ frosted glass inserts. The mechanism, complete with original fixings, rails, nuts, and bolts, is designed for smooth functionality.
Consider the Weight:
Here’s a crucial tip: the glass doors are heavy, each weighing around 25 to 30 kilograms. Mark ensures the frame is robust enough to handle this weight while highlighting how the doors beautifully bounce light around the room, creating a dynamic atmosphere.
Cost Breakdown:
Mark spills the beans on the project’s cost—approximately £250 (just over $300). This includes the sliding doors, IKEA glass inserts, and the wood frame. Keep in mind, this cost excludes labor as Mark and his team did all the work themselves.
The Wow Factor:
The room divider not only adds privacy but also allows light to dance through, a rare feat in a small space. Mark is genuinely thrilled with the unexpected success of this project, and it’s evident these doors are more than just functional—they’re design magic.
What’s Next?
Mark tantalizingly hints at more exciting IKEA hacks and studio apartment projects in the pipeline. Subscribe to his channel to stay in the loop and be the first to witness the cool transformations coming your way.