15. John Shum’s Sektion Closet Makeover
Get ready to transform a bland space into a sleek, custom closet with IKEA’s Sektion system, usually reserved for kitchens. Perfect for your 60″ wide closet, Sektion offers the flexibility to customize cabinet sizes and choose modern finishes that fit your style. Let’s dive into the makeover journey!
Steps to a Chic Sektion Closet:
- Designing Your Dream Closet:
Embark on the adventure by wrestling with IKEA’s software to plan your closet system. It might be a bit of a battle, but it’s worth it for the end result. - Cabinet Collection:
Head over to IKEA and grab those Sektion cabinets. Yes, it’s like a treasure hunt in the land of flat-packs. - Assembly Time:
Roll up your sleeves and assemble those cabinet frames. It’s like adult LEGOs, but more satisfying. - Solid Foundations:
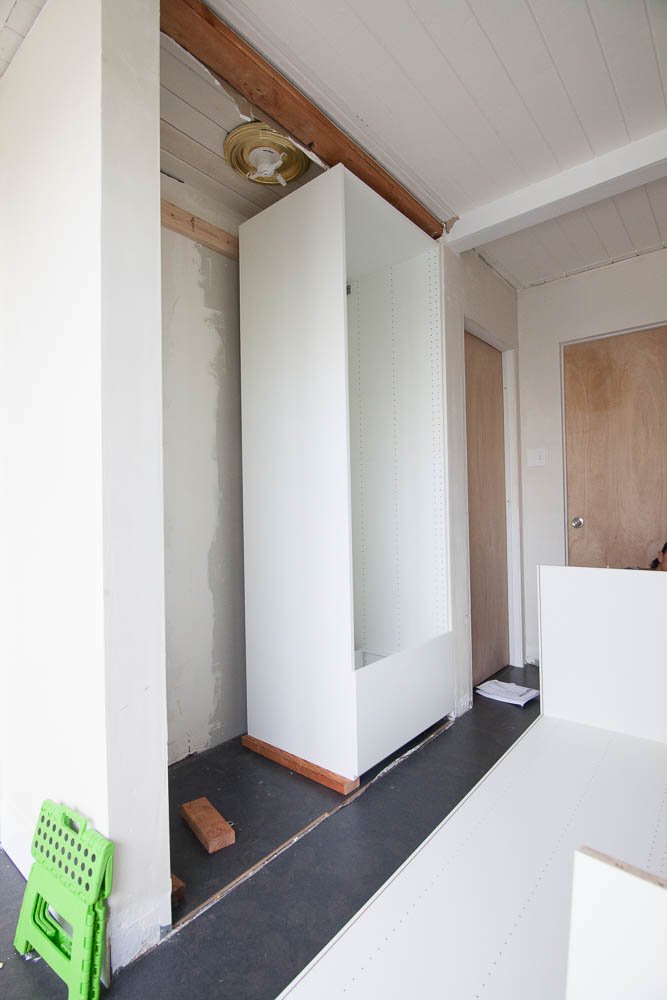
Mount a twin 2×4 ledger into the wall studs, providing a sturdy anchor for the cabinets. Ditch the standard plastic feet for 2x4s on the floor, ensuring everything sits just right. - Fitting and Finishing:
Test fit a frame with a single drawer to gauge the clearance and shim requirements. You might need to add an extra 2×4 ledger to get those cabinet faces flush with the wall. It’s all about that snug fit. - Full Installation:
After some quick drywall mending, install all the Sektion cabinets. You’re creating more than storage; you’re crafting a masterpiece. - Adding the Details:
Install the drawers, hinges, doors, and faces. Every piece brings you closer to closet nirvana. - Trim and Accents:
Repurpose the toe kicks as a trim piece at the top, adding a polished look to your closet. - Power Up:
Install an outlet for a charging station, blending functionality with style. - The Transformation:
Revel in your transformed space. Where there was once a walled-up closet, now stands a modern, functional closet, courtesy of your hard work and IKEA’s Sektion system.
14. Before and After: Transforming a Closet on a Budget with IKEA from Hope & Ted
Welcome to Hope and Ted Conner’s closet transformation journey, where a dreary, cramped space becomes a haven of organization and style. Picture their “before”: a dark, overstuffed closet with clothes jammed on wire shelving and tattered shoeboxes piled high. A place that functioned “marginally okay” at best, but was a constant source of stress and frustration.
Hope remembers, “It was extremely frustrating to get any clothes in and out of the dresser because no matter how neatly they were folded there wasn’t enough room. Things were constantly wrinkled and pushed aside, and it was difficult to find what you were looking for.” The breaking point? A shelf overloaded with clothes, crashing down and taking a chunk of drywall with it. That was the wake-up call for change.
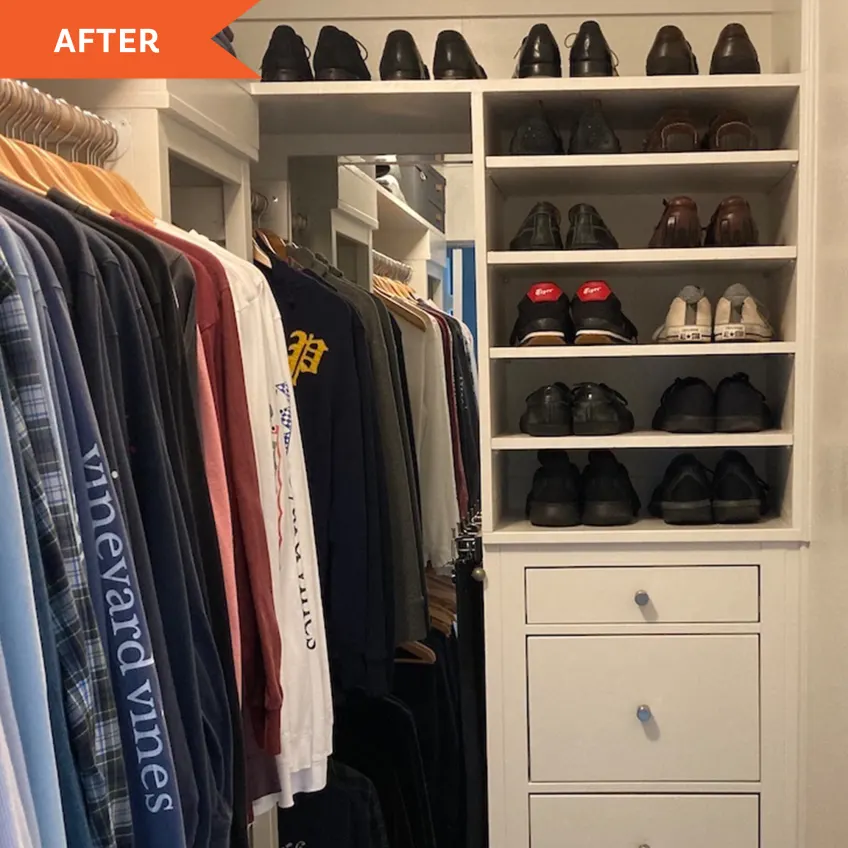
Lacking DIY prowess but armed with determination, the couple turned to IKEA Hemnes components for a solution. Their arsenal included a five-drawer Hemnes dresser and two Hemnes bookcases. The real challenge? Making these pieces fit their space, enhancing functionality, and adding a dash of custom flair. They repainted the Hemnes pieces from their original black-brown color and added new pulls for a touch of elegance.
Over seven months, Hope and Ted poured their efforts into this makeover. The total cost? A modest $1,081, covering IKEA pieces, extra wood, screws, shelf pins, and both crown and baseboard molding. They leaned on YouTube tutorials and woodworking blogs for guidance, slowly crafting a space that’s a seamless extension of their bedroom.
The result is nothing short of a peaceful retreat. The once chaotic closet is now a serene and orderly space, offering a sense of calm and luxury. It’s a testament to their perseverance and attention to detail, achieved with minimal DIY skills and tools.
And for those contemplating a similar endeavor, Hope offers words of encouragement: “Don’t give up. When you start to get overwhelmed, stop for a few days, or a week, or a month. It’s amazing what a little time off will do for you.” She shares their moments of late-night epiphanies, reminding us that if they could do it, so can you. (@Rumasafinaqi, IG)
13. Your Guide to a Dream PAX Makeover
Ready to turn your dressing room into a realm of organized bliss? Let’s dive into creating your dream closet with IKEA’s PAX system, a favorite for its customizability to fit any space and style. Here’s how to bring your vision to life, even if you’re not a DIY guru.
- Picking your PAX:
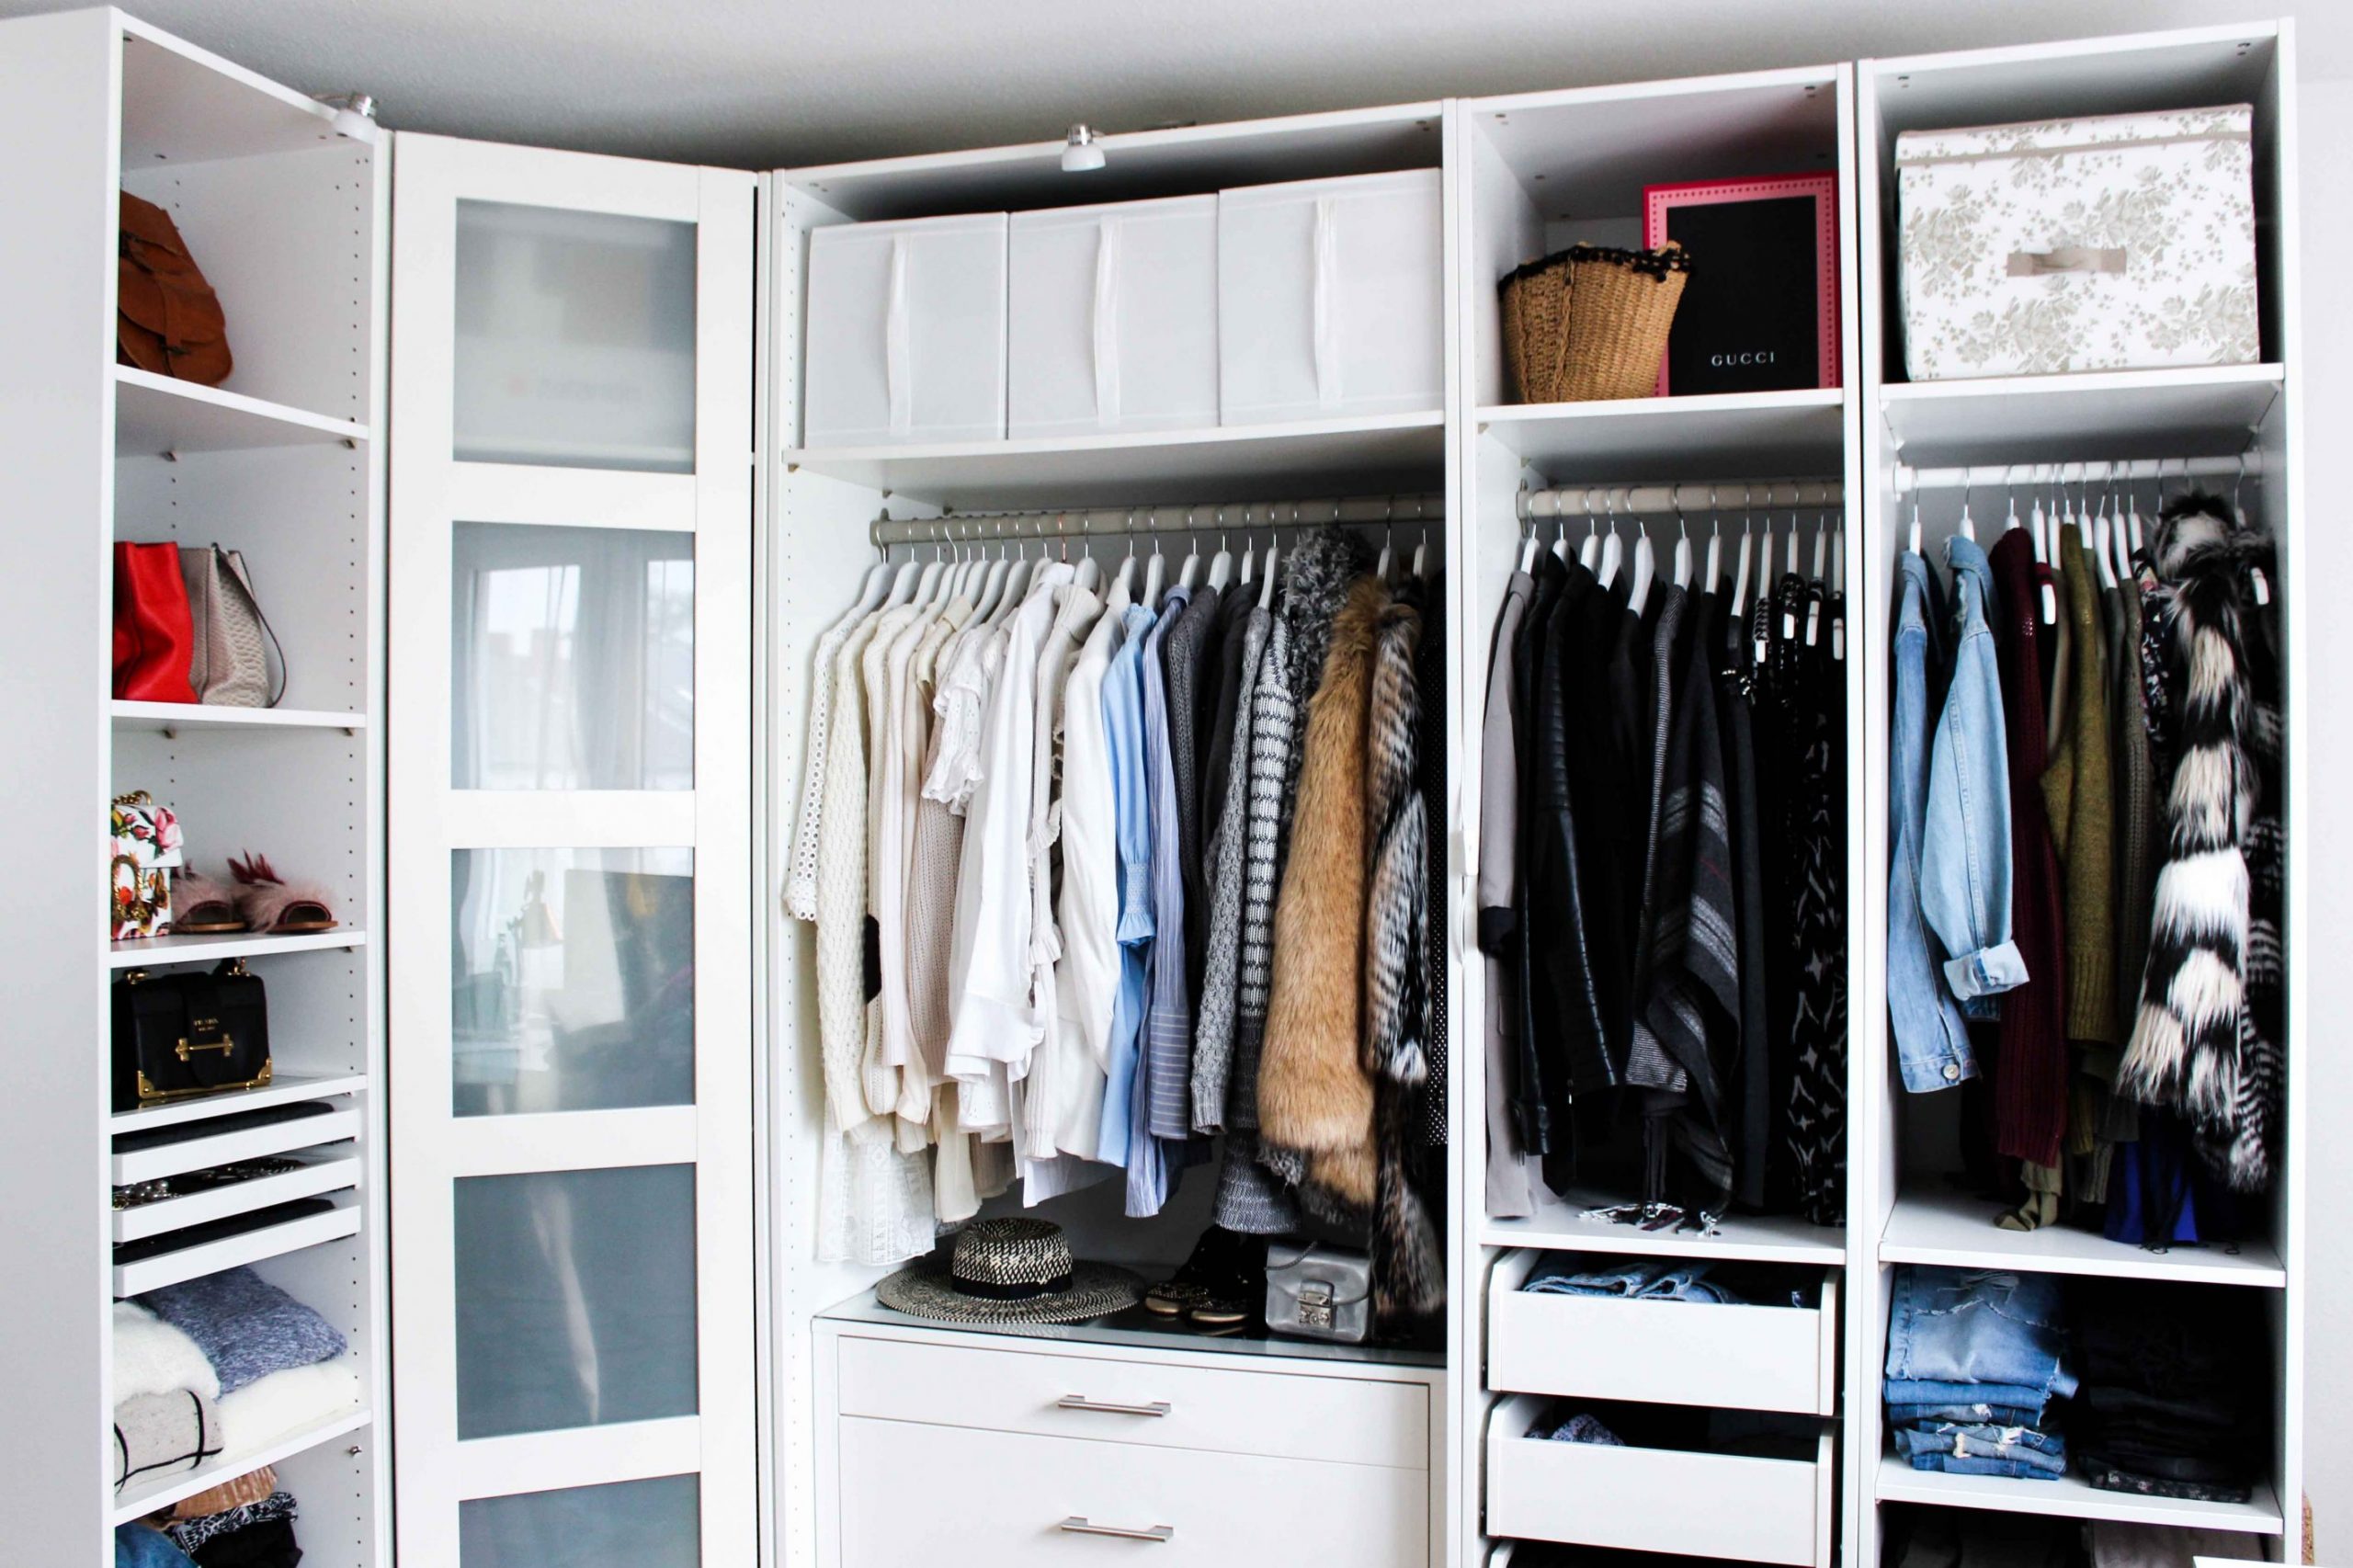
First up, size matters! For my sprawling dressing room, I chose a 2-meter long PAX wardrobe, complete with a corner element and an additional 50 cm cupboard. It’s like having a mini department store in your room. Imagine finally having all your scattered belongings in one chic spot. - Accessorize with KOMPLEMENT:
For those dazzling accessories, I installed three KOMPLEMENT pull-out shelves, topped with glass plates. They come with various inserts, perfect for neatly organizing necklaces, bracelets, and sunglasses. This little trick turns your jewelry chaos into a display of elegance. - Drawer Drama:
Messy but stylish? No problem! Use cupboard doors and drawers to masterfully hide the chaos. It’s the perfect solution for when life gets a bit untidy. Just close the drawer, and voilà, instant neatness. - Utilizing Height:
Measure up and go tall with your PAX. I recommend the 2.36m height over 2.01m. Use the top shelves for items you don’t frequently need, like seasonal decorations or those once-a-year Christmas sweaters. Store them in decorative boxes to keep things both organized and aesthetically pleasing. - Rails for Order:
Opt for clothes rails over drawers or shelves. It might seem like you’re sacrificing storage space, but clothes hung on rails always look neater than stuffed shelves. It’s a simple trick to keep your wardrobe looking orderly and open.
Imagine stepping into your dressing room where everything has its place, beautifully displayed and easily accessible. That’s the power of a well-planned PAX wardrobe. So, whether you’re a fashion blogger, a style enthusiast, or just craving some order in your life, this IKEA hack is your ticket to a dream dressing space. Happy organizing!
12. Built-in Bookshelves or A Closet with a unique twist
Ready to revolutionize your space with a unique DIY closet? Let’s jump right into transforming an ordinary nook into a custom closet, complete with an innovative twist. The secret lies in a little IKEA magic and some handy DIY skills.
Transforming Bookshelves into a Closet:
Begin by reimagining the function of standard IKEA Hemnes bookshelves. To morph this project into a new closet, consider adding a door for a closed storage look or modify the opposite bookshelf for a deeper design. Instead of using traditional shelves, opt for IKEA HJÄLPA components. This clever switch allows for neatly organized hanging clothes, turning your bookshelves into a functional wardrobe.
Step by Steps for the Built in:
- Building the Base:
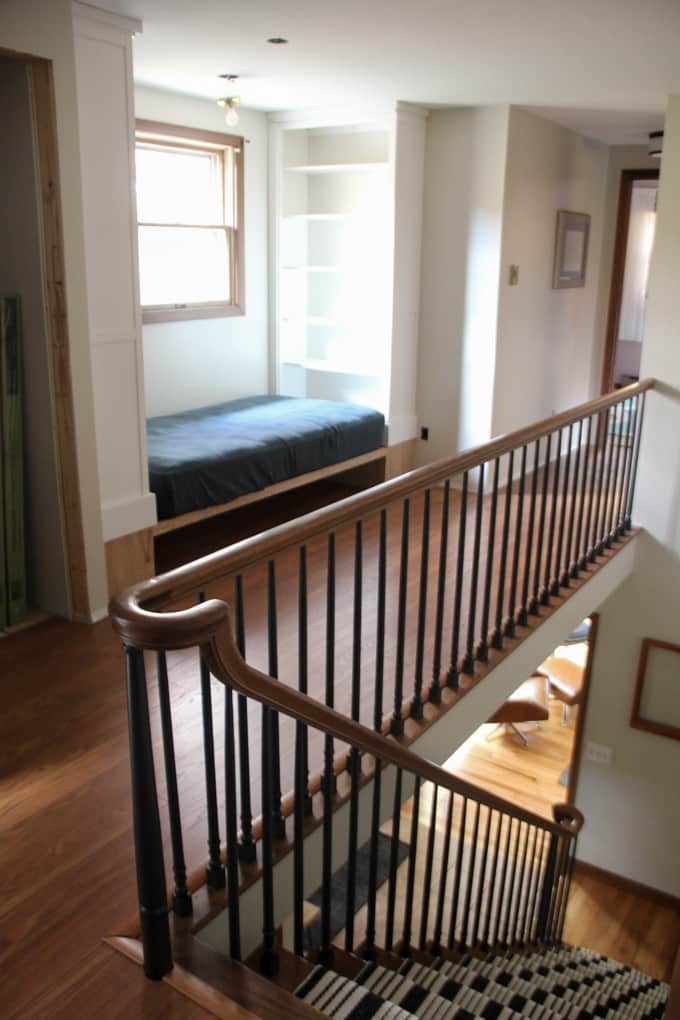
Start with a sturdy foundation. Construct a platform using 2×8″ lumber, ensuring it matches the depth of your bookshelves. This base should be securely anchored to the wall studs for stability. - Creating the Bed Platform:
Next, add a 104″ 2×8″ board across the platforms to support a bed, standing 11″ tall. This height is perfect for clearing baseboard heaters and creates an ideal mattress height. - Customizing Bookshelves:
Before placing your Hemnes bookshelves on the platform, remove any top overhang with a table saw for a flush fit against the wall. - Securing and Integrating Bookshelves:
Lift and secure the bookshelves onto the platform, fastening them firmly to the studs. If any electrical outlets are covered, seamlessly incorporate them into the bookcase design. - Finishing Touches with MDF:
Use MDF wood for trimming, giving your bookshelves a built-in, custom look. Cover the platform bottom and inside with thin plywood, which, when caulked and painted white, blends effortlessly into the design. - Fitting the Mattress:
Place your mattress on top to check the fit, ensuring it aligns just above the bottom shelf for a seamless look. - Budgeting Your Project:
Your total cost, including the bookshelves, wood materials, and IKEA HJÄLPA components, should be around $400 – a budget-friendly price for a unique and functional closet space. - Finalizing Your DIY Closet:
With the deadline of your One Room Challenge approaching, focus on the final details like painting, styling, and installing any additional fixtures. While the space might be small, the transformation is significant, proving that a bit of creativity and effort can turn a simple bookshelf into a stylish, organized closet.
11. Revamp Your IKEA Pax Wardrobe with Curtains
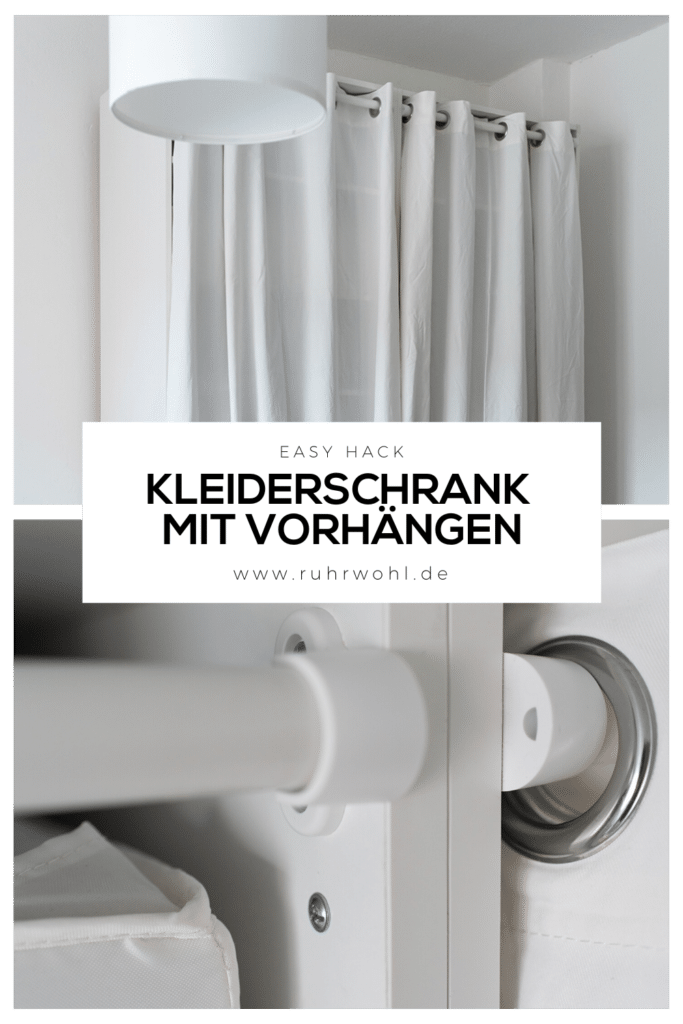
Hey there! Ready to give your old IKEA Pax wardrobe a fabulous makeover without breaking the bank? Let’s dive into transforming those large, flat doors into something more appealing and flexible – curtains!
Step 1: The Dilemma with Wardrobes
We all know wardrobes are practical, but let’s face it, they can be eyesores. Especially when they dominate your bedroom view first thing in the morning. But who says you’re stuck with those imposing doors?
Step 2: Embracing the Curtain Solution
Instead of splurging on a new wardrobe, why not remove those Pax doors and replace them with curtains? It’s easy, affordable, and quick. Plus, you get to add a personal touch to your space.
Materials You’ll Need
For this IKEA hack, you’ll need:
- 2 Komplement clothes rails (75 cm each, about 7 euros)
- Merete curtains (145×300 cm, approximately 40 euros)
- Self-adhesive cover caps (14 mm, white, around 4 euros)
- Cordless screwdriver
- Eraser sponge
Step 3: Removing the Old Doors
Start by taking out those sliding doors. If they’re warped from use, this step should be a breeze.
Step 4: Cleaning Up
Unscrew all the rails and grab an eraser sponge to wipe away any marks. Use self-adhesive cover caps to hide unsightly drill holes.
Step 5: Preparing the Curtains
Wash and shorten the curtains to ensure they fit perfectly. Aim for a length of 233 cm to match the Pax’s height of 236 cm, measuring from top to bottom. Consider having them altered by a tailor for a professional finish.
Step 6: Attaching the Rails and Curtains
Use the existing pilot holes on the outside of the Pax to attach the clothes rails. Ensure the holder juts out a bit. Thread the curtains onto the rail before securing it. If you have two curtains for two frames, make sure they’re attached identically for a cohesive look.
Additional Tips:
- Choose the 3-meter curtain length as they tend to shrink after washing.
- Opt for opaque fabric to keep your clothes hidden.
- Always wash and iron the curtains before attaching them. It’s not just about the perfect fit; it’s also about keeping your sleeping environment clean and your clothes in good condition.
Why This Hack?
This curtain transformation not only brings a cozy, homely vibe to your bedroom but also makes the wardrobe more adaptable to uneven floors or narrow spaces. Plus, you can easily switch up the curtains for a fresh look or a quick wash.
By following these simple steps, you’ll have a wardrobe that’s not just functional, but also adds character and style to your bedroom. And the best part? This whole project costs around 60 euros, a steal compared to buying a new wardrobe. So, roll up your sleeves and let’s turn that imposing Pax into a charming, curtain-clad haven of organization!