08. A Cluttered Closet hack
This easy-to-follow guide shows you how to build a customized storage solution using readily available pine boards and basic tools. Get ready for a more organized and spacious closet in just a weekend!
Materials:
- 1″ x 12″ x 6′ pine boards (quantity based on your closet size)
- 1″ x 5′ shower curtain rods (quantity based on your needs)
- 3″ drywall screws
- 2″ finish nails
- 3/8″ dowel rods (optional for adjustable shelves)
- Paint (optional)
- Tools: saw, drill, chisel (optional), hammer, tape measure, stud finder
Steps:
- Clear the space: Remove everything from your closet and relocate it temporarily.
- Plan your layout: Decide on the shelf height, spacing, and number of hanging rods you need. Make a sketch and mark stud locations on the walls.
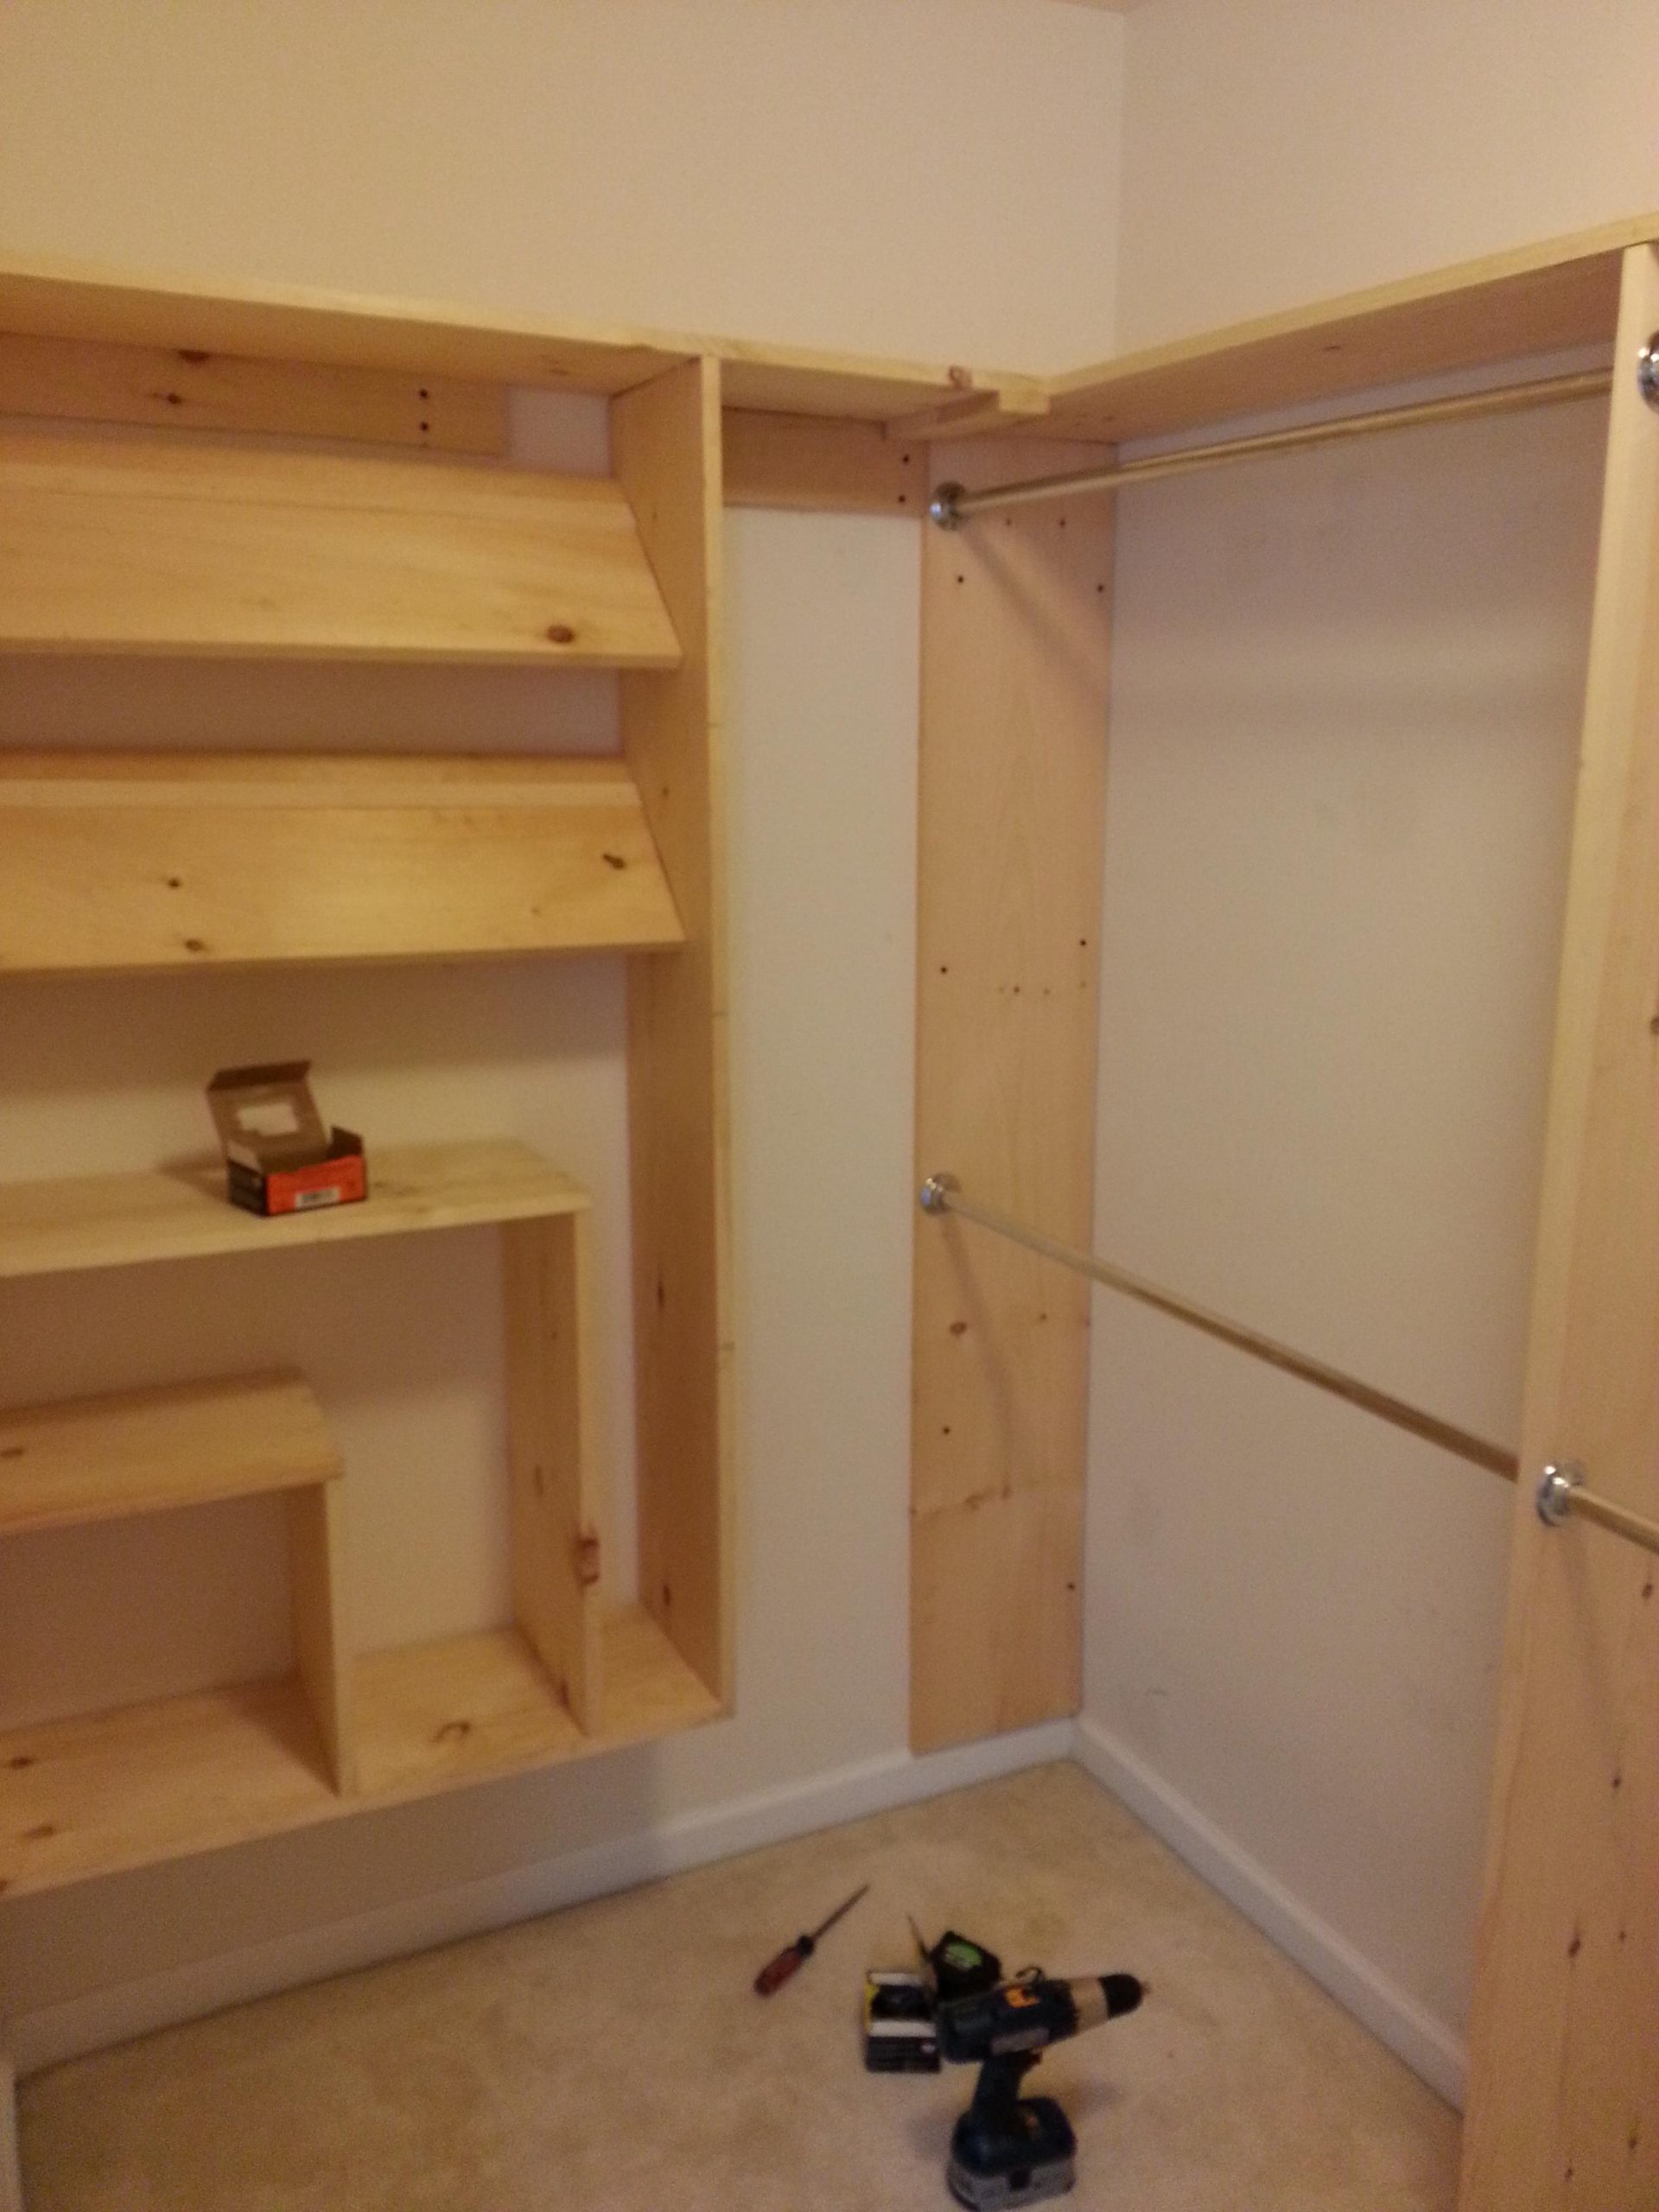
- Build the back wall: Start with the back wall. Use drywall screws to mount two 6-foot boards at each end, securing them into studs. Cut and mount a third board in the middle to create a sturdy base.
- Install the middle section: Cut two 6-foot boards in half lengthwise. Mount them horizontally, spaced evenly across the back wall. These will support vertical shelf boards. Attach vertical boards with finish nails. Top it off with a 10-foot shelf, secured with finish nails.
- Add adjustable shelves (optional): For flexible storage, create adjustable shelves. Drill holes in the side boards where you want shelves. Cut dowel rods into 1-inch pieces and chisel out small spots on the underside of each shelf for the dowels to fit. Slide shelves onto the dowel supports for easy height adjustment.
- Build and mount the shoe rack: Assemble the shoe rack in your garage. Consider leaving space underneath for baskets. Create slanted shelves at a 45-degree angle with a top molding to hold shoes in place. Secure the shoe rack to the wall using drywall screws, hitting studs.
- Paint (optional): Give your closet a fresh look by painting the shelves and shoe rack.
- Hang your clothes: Install shower curtain rods as hanging rods. Space them based on your clothing needs.
Tips:
- Use a level to ensure everything is straight.
- Pre-drill holes before using nails to avoid splitting wood.
- Label shelves for easy organization.
- Consider adding baskets or drawer organizers for additional storage.