Want to spruce up your home without breaking the bank? Look no further! Here are 12 inexpensive interior improvement ideas to refresh your living space. From reorganizing your furniture to adding a few decorative touches, these simple yet effective changes will make your home look new in no time.
Your house witnesses some evolutions and memorable moments in your life. Like your life, it needs some improvements and refreshments. Speaking of them, it might frighten us with a wide range of scary price tags. But getting interior enhancements doesn’t have to break the bank if you know how to handle them.
The key is focusing on small changes that will have a significant impact. If possible, you should also do it yourself to save money from hiring men or buying brand-new furniture. Get your dream house with these 12 cheap interior improvement ideas. As always, Simphome presents you with the list.
12 Cheap Interior ImprovementProjectsUpgrades Video
Frequently Ask Questions related to how to improve a house interior.
Q: What are some easy and inexpensive ways to improve the interior of my house?
A: There are many easy and affordable ways to improve the interior of your home without breaking the bank. Here are some ideas:
- Paint: A fresh coat of paint is one of the easiest and most affordable ways to refresh a room instantly. You can also repaint the walls, purchase cheap furniture, and add some new accessories like rugs, pillows, and plants. Additionally, you can rearrange your furniture, hang artwork, and update light fixtures.
- A Quick Clean: A thorough cleaning of your home will make it look much fresher and brighter.
- New Accessories: Adding new accessories such as throw pillows, rugs, and artwork can make a big difference in the look of a room.
- Rearrange Furniture: Moving furniture around can create a new look in your home without spending any money.
- Add Lighting: Adding lighting fixtures such as lamps or sconces can brighten up a room and make it look more inviting.
- Declutter: Removing clutter from your home will make it look more spacious and organized.
- DIY Projects: You can do many DIY projects to spruce up your home, such as making your own window treatments or painting furniture. These projects don’t require a lot of money but can make a big difference in the look of your home.
Q: How can I add personality to my house without spending much money?
Answer: Try painting an accent wall, adding colorful throw pillows and rugs, and hanging up artwork. You can also bring in some personal items like photographs or souvenirs.
Q: What are some ways to make a room look bigger?
Answer: Try using lighter colors on the walls and ceilings, adding mirrors, and keeping the furniture minimal. Additionally, you can install overhead storage and use glass furniture to make the room appear larger.
Q: How can I make my house look more modern?
Answer: Try adding modern furniture pieces, incorporating geometric patterns, and using a monochromatic color scheme. You can also use LED lighting and update your hardware.
Q: How can I make my house look more inviting?
Answer: Incorporate warm colors, add plants, and arrange furniture in a conversational layout. You can also hang up some artwork and bring in cozy accessories like pillows and throws.
Q: What are some affordable ways to increase my home’s storage?
Answer: You can use bins and baskets, install shelves and racks, and add furniture with built-in storage. Additionally, you can hang hooks and storage racks on the walls and incorporate multipurpose furniture.
Q: What are some quick home improvements I can make?
Answer: You can paint the walls, hang up artwork, update light fixtures, and add some plants. Additionally, you can rearrange the furniture, add some rugs and throw pillows, and hang some curtains.
12. Stencil Your Floor
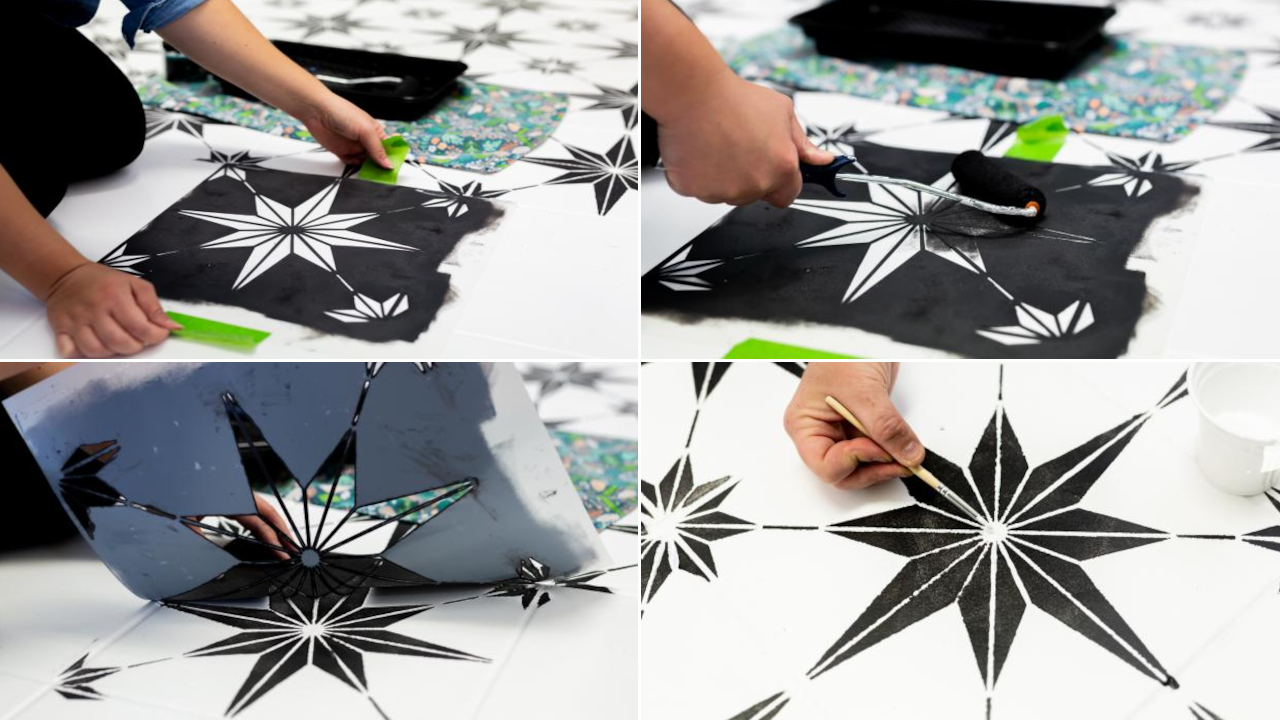 Give your outdated floors an improvement by painting and stenciling the ceramic tile for less than $75.
- First, prep and clean the floor by sanding, sweeping, and vacuuming the dirt and dust.
- Then apply a water-based primer to the entire floor. Repeat this step twice, leaving about an hour between each coat.
- Next, apply the first coat of water-based, semi-gloss exterior floor paint. Now, lay down the selected stencil onto the tile. You can secure the edges with painter’s tape and roll paint firmly and evenly onto it, a water-based, semi-gloss exterior paint in a contrasting shade. You must be careful of any excess or bled.
- Once it dries, seal it with two coats of satin Minwax Polycrylic.
11. The DIY Mudroom home office makeover project
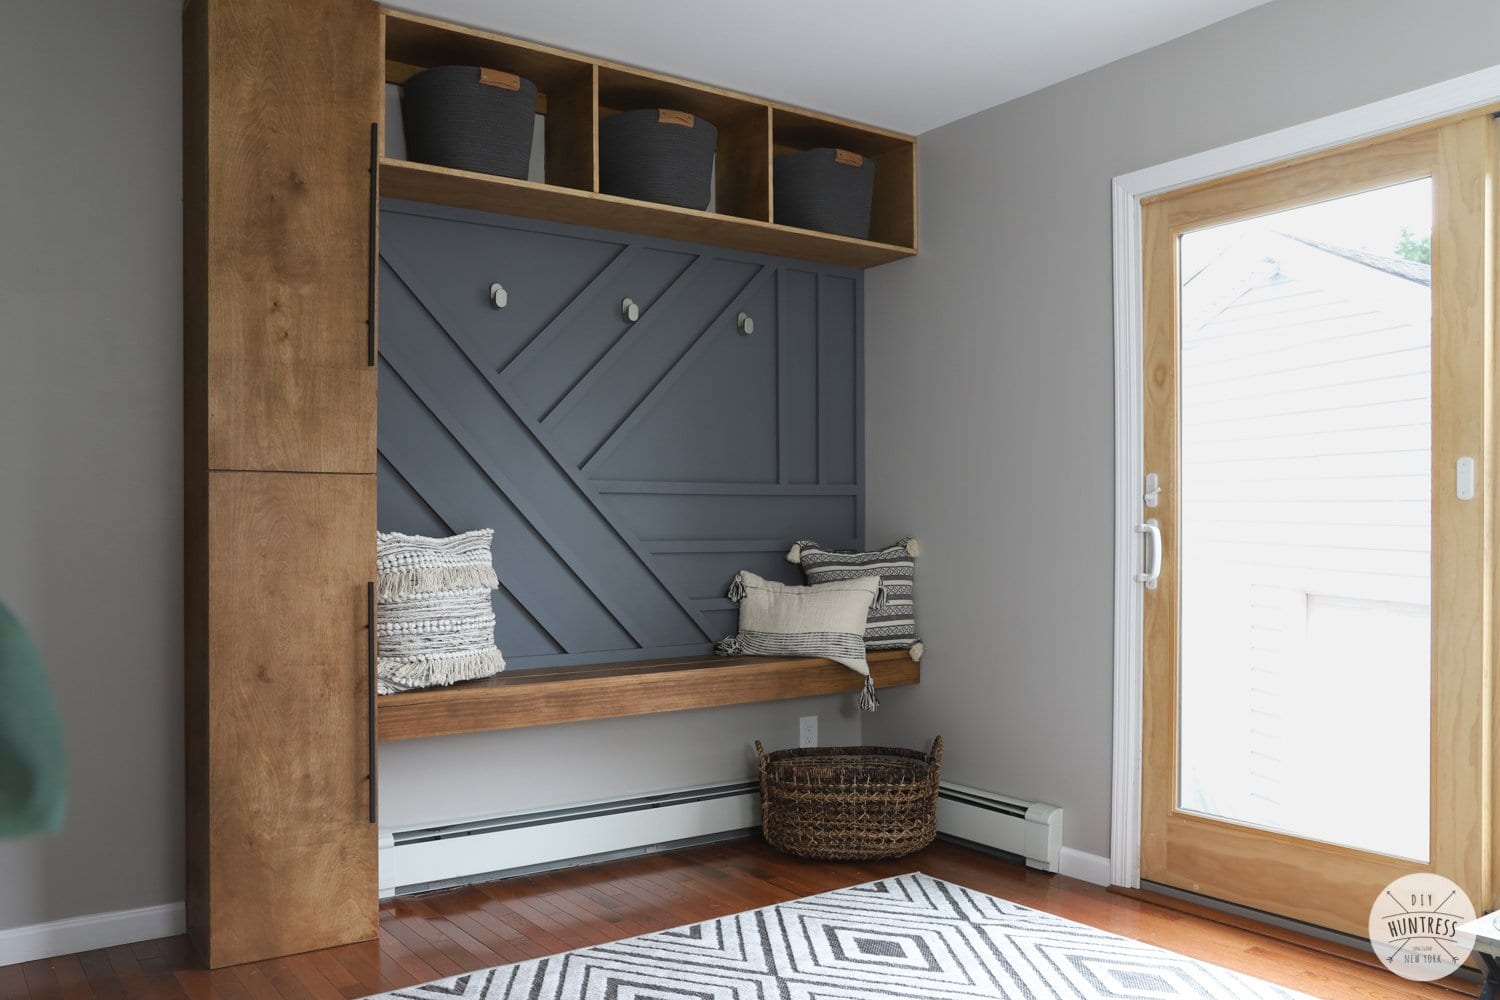 Do not let an awkward spot in your house remain unused. You can try to build this DIY mudroom to make the space look more attractive and functional.
- Begin with cutting birch plywood to length.
- After that, sand the pieces before assembling them.
- Next, assemble the cubby system by adding the end pieces.
- Then, add supports to the back of the cubby and drill them into studs.
- Once the cubby is ready, it is time to create the cabinets. To save money and energy, you can create a giant eight-foot-tall box.
- Then, add a divider in the middle to look like you are making two cabinets.
- After that, drill holes in the cabinet for shelf pin holes.
- Now, you have your cubby and cabinet. Consider rounding it out with a comfortable and space-saving bench. Therefore, you need to create a floating bench.
- To begin with, screw 2x4s to the studs to make a frame.
10. Create an Accent Wall for Less than $100
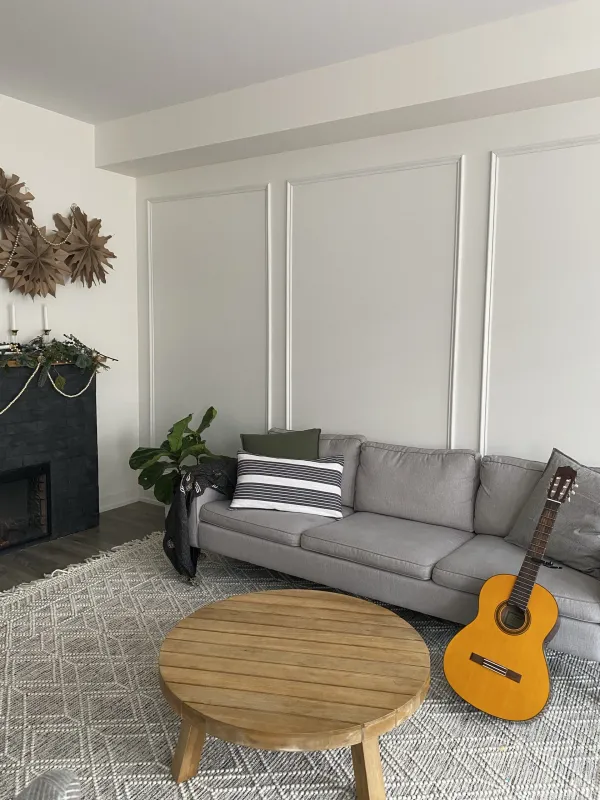 The accented wall is a great focal point in any room because it’s timeless and simple. You can get the stylish featured wall for less than 100$. After designing your project, prepare the walls by painting them and patching any holes or imperfections.
Then, cut the trim moldings to size. You can use a 45-degree miter cut for the perfect angle. Now, it’s time to attach them to the wall. Starting from one bottom corner, with the help of wood spacers, nail the vertical and the horizontal piece to make an L shape. From this, you can easily create one trim box and do the remaining.
9. A Concrete Wood Geometric Coffee Table Project idea
 This fantastic coffee table is made from concrete and wood geometry as the base. To save money, use reclaimed lumbers and mill them to 2 ¾” square. After that, cut the wood to approximate sizes.
Lay all the pieces out and ensure everything will go together as you go. Glue and clamp everything in place before assembling the table. Then, smooth all the rough surfaces and stain them if you like. Attach the concrete top. In addition, to protect the floor, you can add some sort of slider feet to the bottom.
8. The Owen Reading hub idea by @The Owen Chronicles
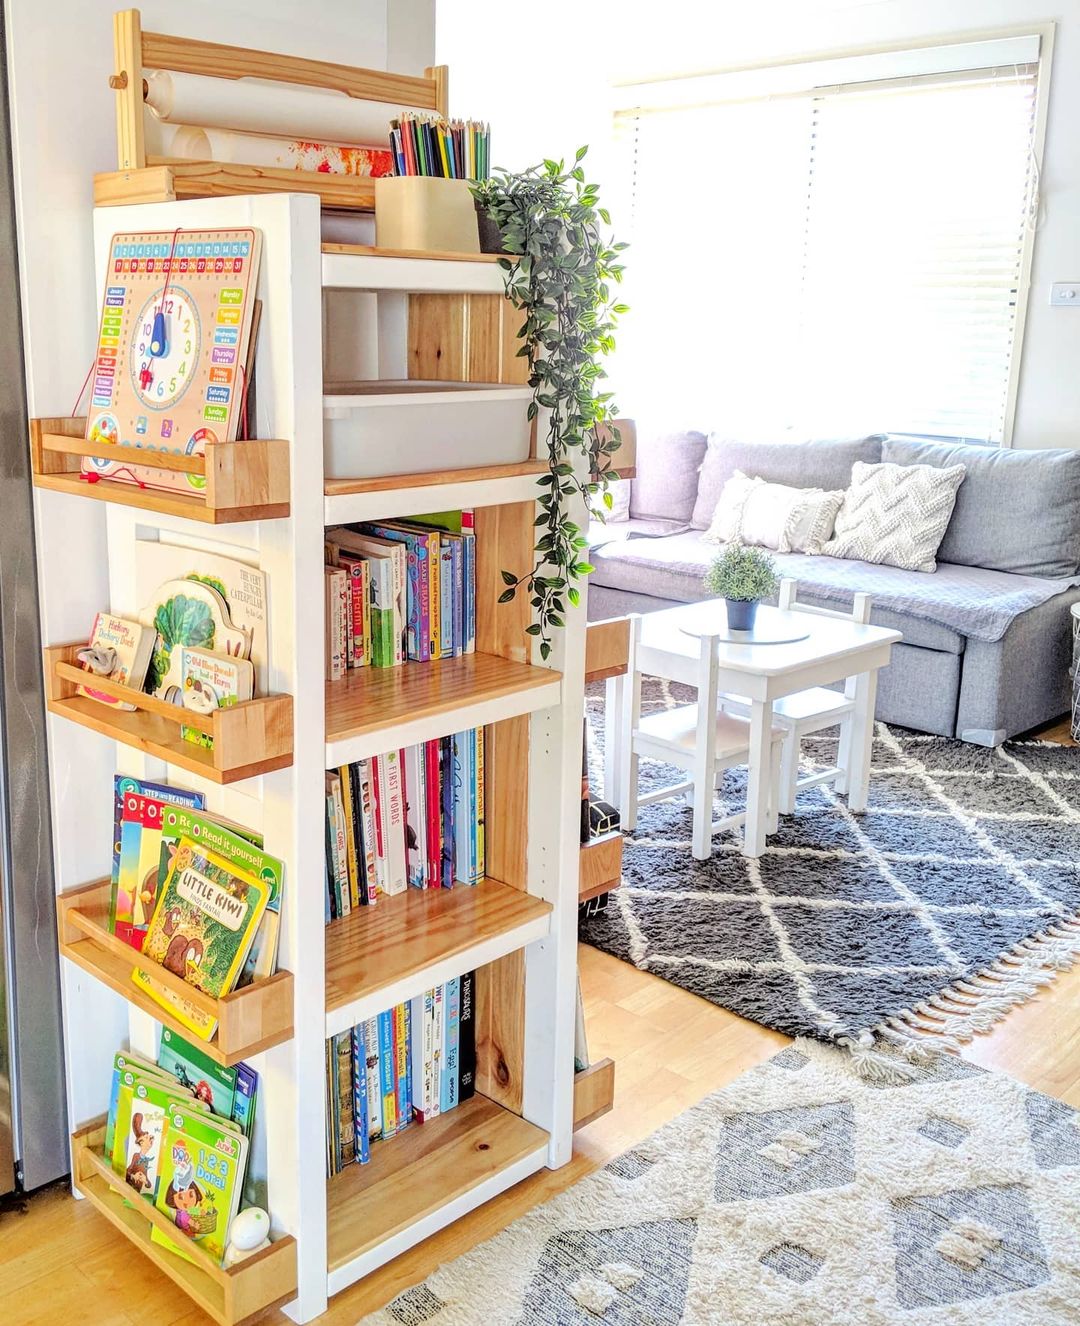
You can begin by cutting plywood or pine board to length and creating the frame. Then, add some shelves. Consider laminating the sides and shelves. Do not forget to attach the front pieces for a more finished look.
Optimize the storage by adding spice racks on both sides of the bookshelf to hold more books. You can purchase ready-made spice racks in stores or make them yourself.
If you opt for the latter, you need to get a 1″ x 3″ x 8′ piece of wood or ¾” x 2.5″. Then, cut it into three pieces. Two pieces are the sides which are 3″ high and 2.5″ wide. The other is the bottom piece which is 2.5″ wide and 11.5″ long.
You can adjust the length of the bottom piece to fit with the sides of your bookshelf. You will also need a wooden dowel or furring strip to hold the books in place. Once you have got them all, you can assemble the pieces and screw the rack to the side of your bookshelf.
7. A DIY Fluted Nightstand idea
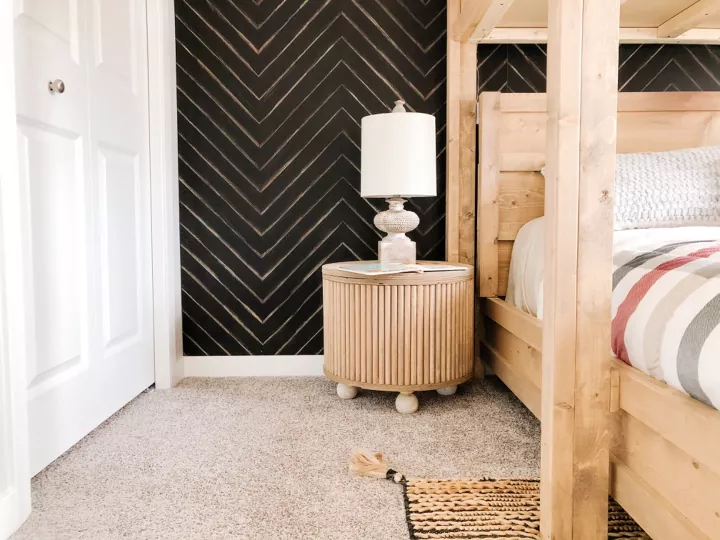 Try this DIY nightstand using a wire spool and some wooden dowels for your bedroom.
- First, measure your spool height to ensure it would fit all the way around and cut the 3/4″ dowels. For the 20″ spool, you’ll need between 75-100 cut dowels.
- After sanding both ends of all the dowels, insert and nail them to the spool one by one. It’ll be easier if you flip the spool on its side and work from top and bottom to the way around.
- Then, cut out plywood into circular and nail it onto the top of the spool for a smooth finished top.
- Later, add four feet to add some height to the nightstand.
- In the end, stain it with the color you want.
6. The DIY Anthropologie Primrose Inspired Mirror From An Old Bathroom Mirror by Lauren Jamison
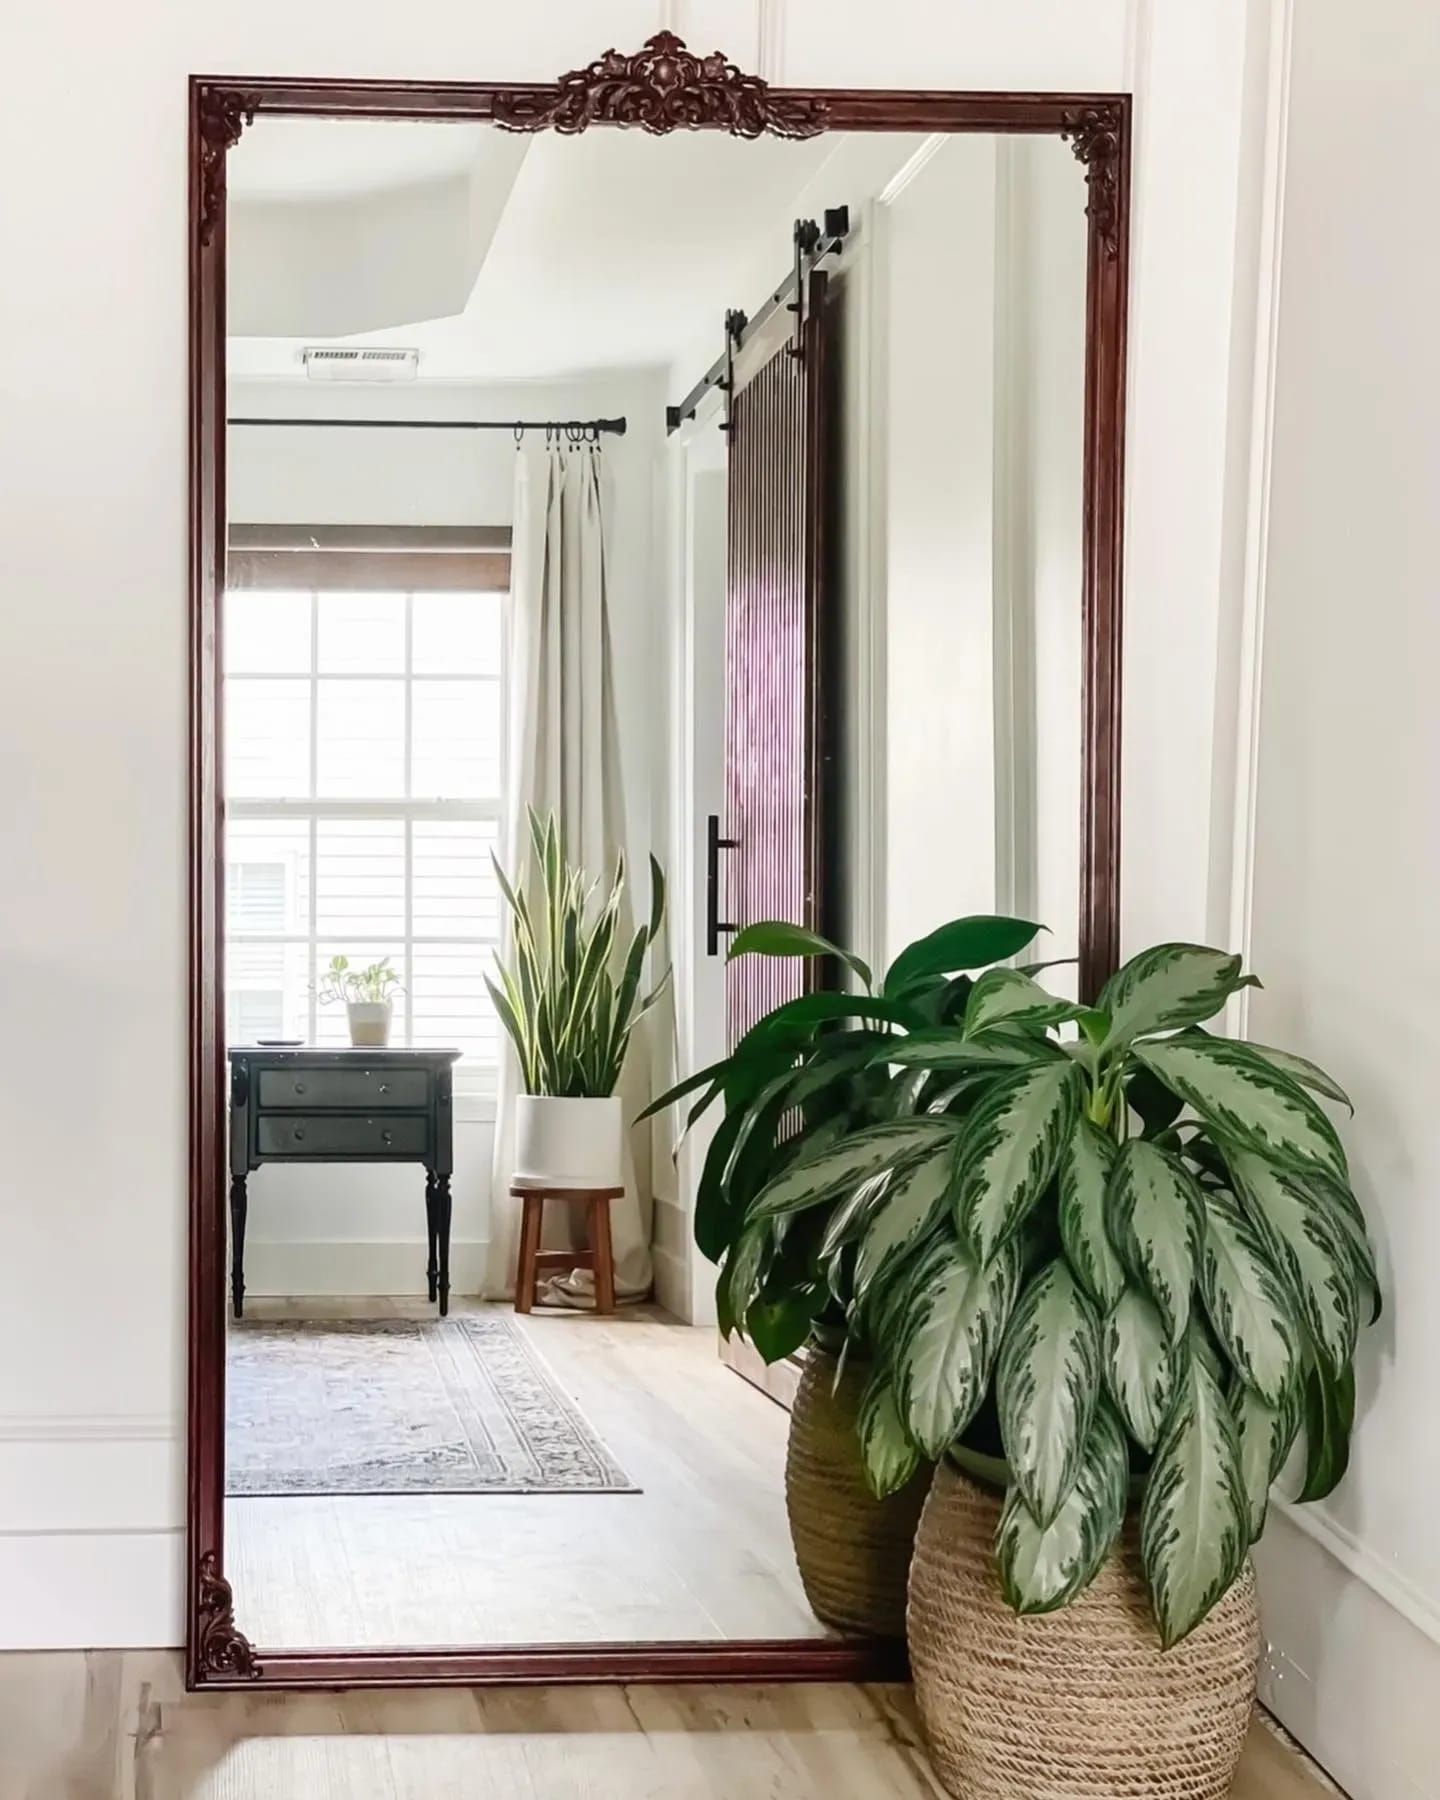 Adding a mirror to a small room will not only spruce it up but also help you make the limited space seem to be more spacious and airier. Thus, consider creating this mirror frame to level up your home interior on the cheap.
- Begin with assembling picture frame molding using wood glue and staples. You may also want to use your corner clamps to hold the pieces until the glue dries.
- After that, attach the mirror using liquid nails specially made for mirrors and metal mirror clips.
- Then, apply plastic wood filler to conceal any gaps.
- Next, sand the corners to smoothen them.
- Now, it is time to stain the frame. Make sure you attach the painter’s tape to the mirror’s edges. You do not want to ruin your beautiful mirror, do you?
- After staining the frame, you can get appliques and stain them too.
- Then, attach each applique to each corner frame using wood glue and liquid nails.
5. An Awesome Multifunctional shoe cabinet for the hall by Tanja Van Hood Dalem
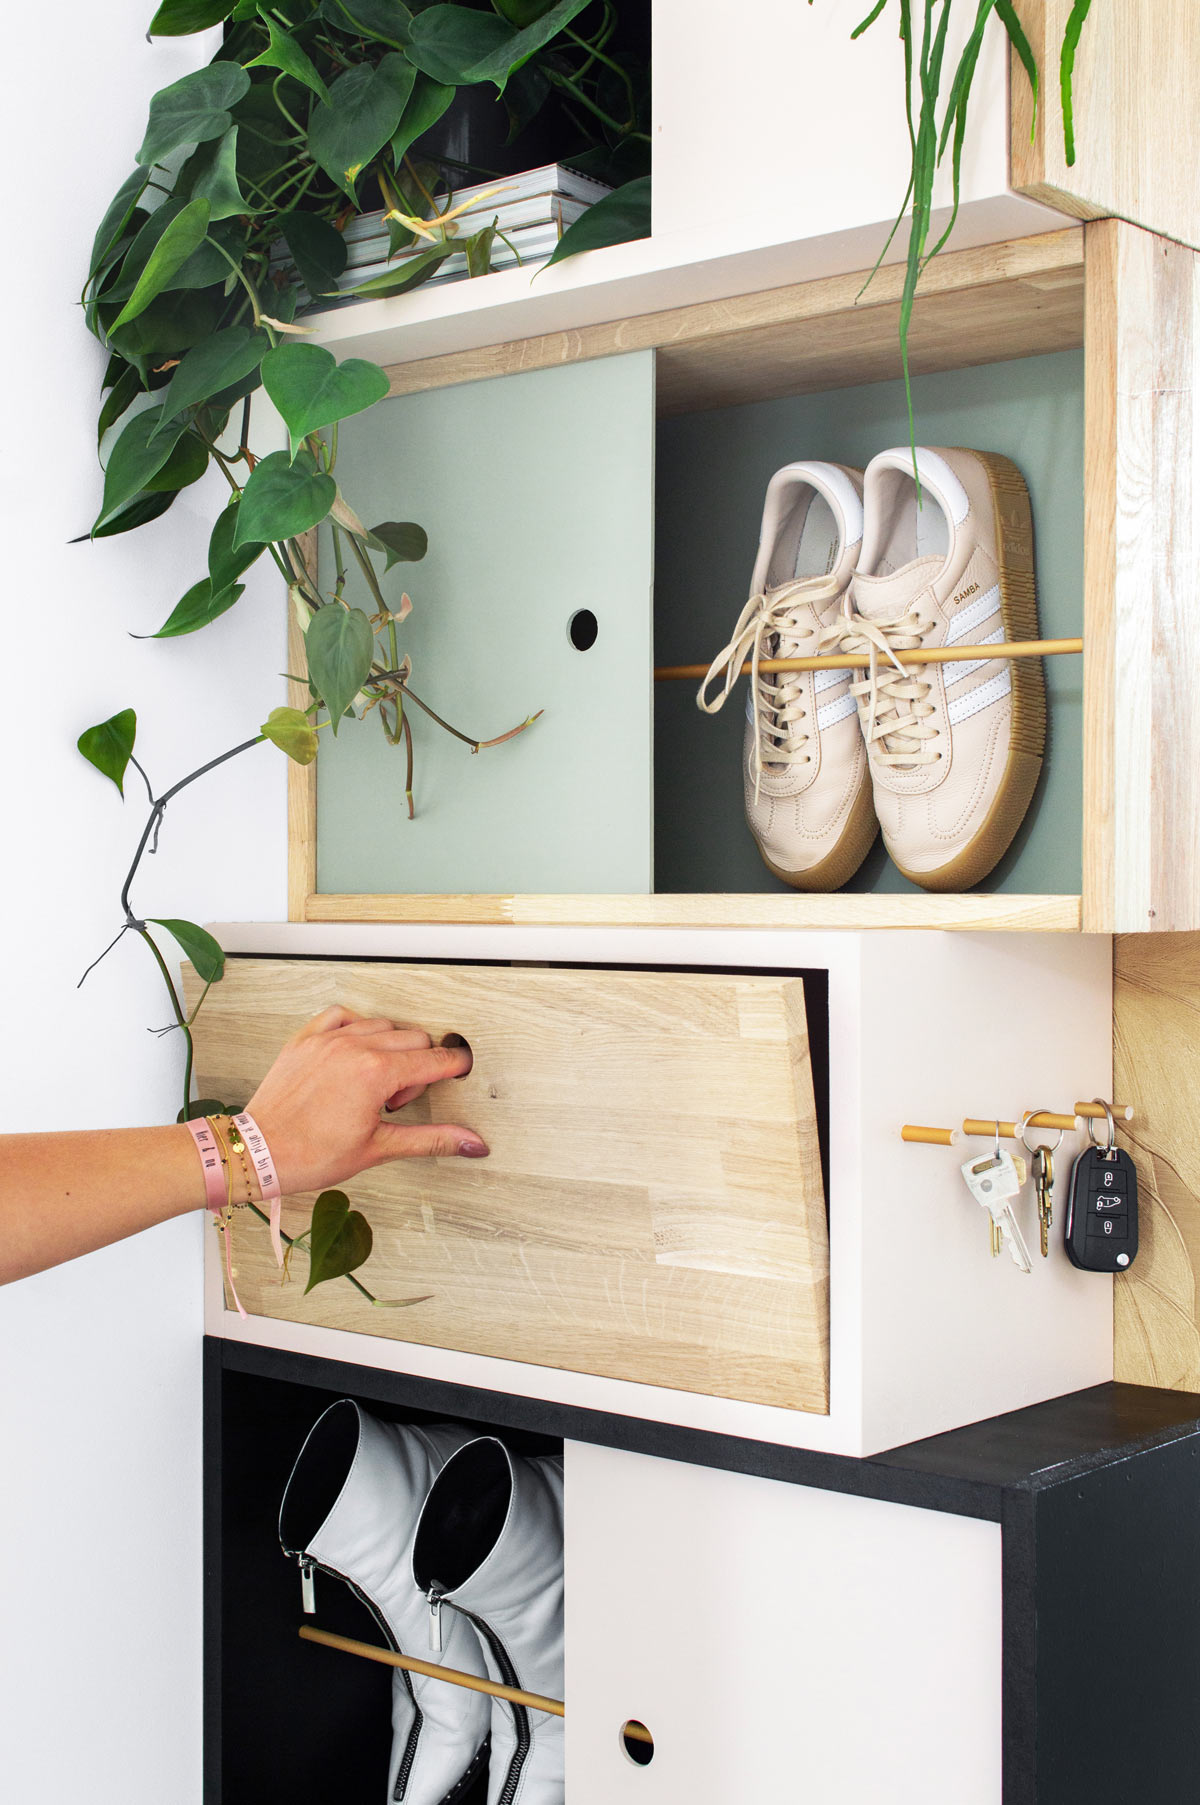 These are not just shoe cabinets. They are some sort of art that happens to be functional, too.
Before making these cabinets, you need to determine the composition you want. Depending on the space available and the style you adore, they can be lower or higher.
- Once you know what you want, get some 18mm MDF and cut it to length.
- Then, assemble them to create some boxes.
- You may want to route a groove in some bottom and top pieces. It will allow the 4mm door to fit so it can slide easily.
- You will also need to install a wooden dowel inside some cabinets. Consider screwing some tiny dowels on the side of a cabinet to create more storage for keys.
4. A DIY sofa table with a Paid plan you can easily follow by @Pine and Poplar
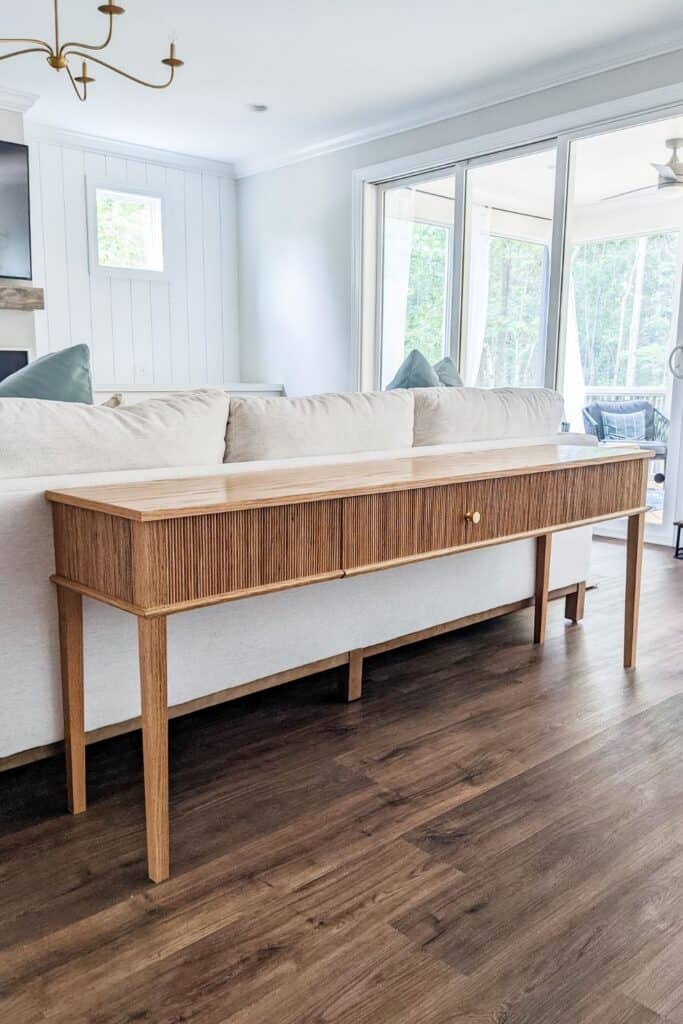 Do not let the back of your sofa remain open. You can conceal it with this table that will provide sufficient surface for a vase and ample storage to organize your living room better.
- Begin with cutting ¾” plywood into 72″ x 15″ for the top, 68″ x 12.75″ for the bottom, 68″ x 7″ for the back, and two pieces of 11.5″ x 7″ for the sides. You will also have to cut some pieces for middle dividers, a drawer box, etc.
- Next, apply edge banding to the top piece and drawer front edges.
- After that, sand all the pieces using 180 and 220-grit sandpaper.
- You may also want to sand the dowels, which will be a bit tricky. But you can tackle it by placing eight to twelve dowels side by side.
- Then, sand them all at once.
- After that, removes excess dust and stain all the pieces, including the dowels.
- Now, let’s assemble the pieces. Begin with attaching the legs to the side pieces.
It will be a bit hard because the legs are tapered. You will also need to place a few dowels between the legs because it will help you get the exact position that allows the legs to be flush with the dowels when you install them later.
- Then, attach the back, bottom, and front pieces.
- After that, create the drawer box and install the drawer slides.
- Next, attach the dowels to the sides and front of the table. Make sure they stay lined up.
- You will also need to do the same thing to the drawer front.
- Then, attach the drawer front to the drawer box.
- Attach trim to round out the look while concealing any flaws.
- Finally, attach the top.
3. A DIY Minimalist wooden sofa idea by Hedwig @Nofruit.nl
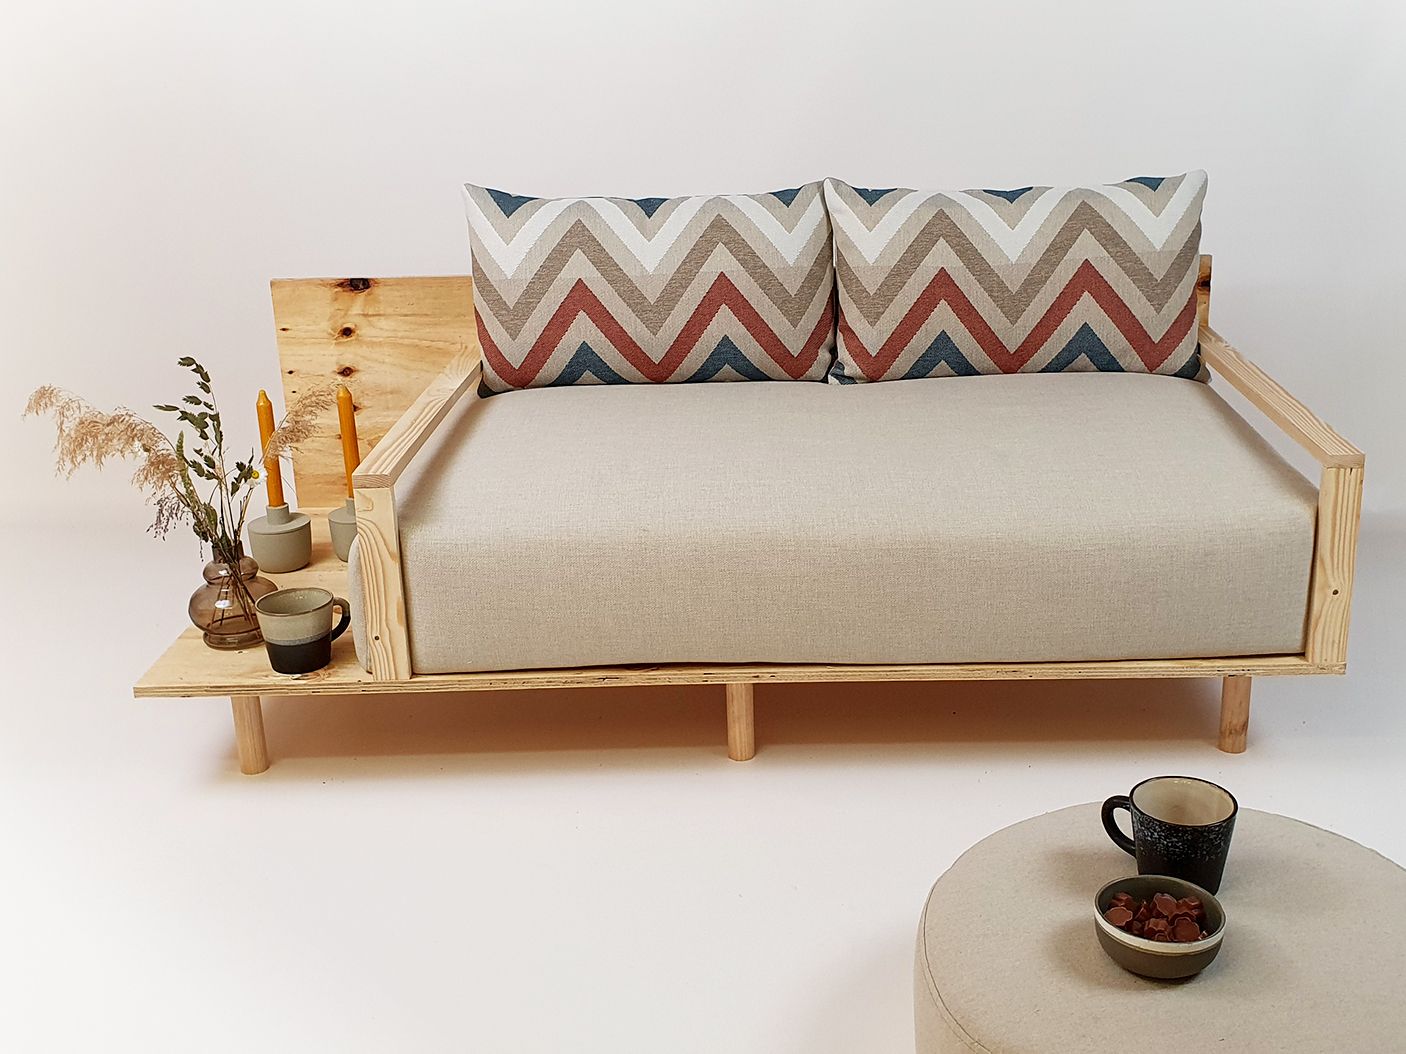 This sofa is simple yet functional because it features a built-in side table. More importantly, you can make it yourself at home.
- First, get a round wooden handle 150 cm long and 3.5 cm in diameter.
- Then, cut it into six pieces 15 cm high. These will be the legs.
- Then, measure 10cm from each edge of the seat-board corners and mark them because you will screw the legs there. You will also need to measure 10 cm from the middle for the middle legs.
- After that, attach the backrest and armrests.
- To make the armrests look sleek, you will not use screws to attach them.
- You will use 6 mm dowels instead.
- Pre-drill two holes for dowels and slide the pieces together. You will still need to screw the armrests to the seat and backrest.
- Finally, toss the seat and back cushions, and pillows.
2. A tightly curved stair retouch that can be your savior one time
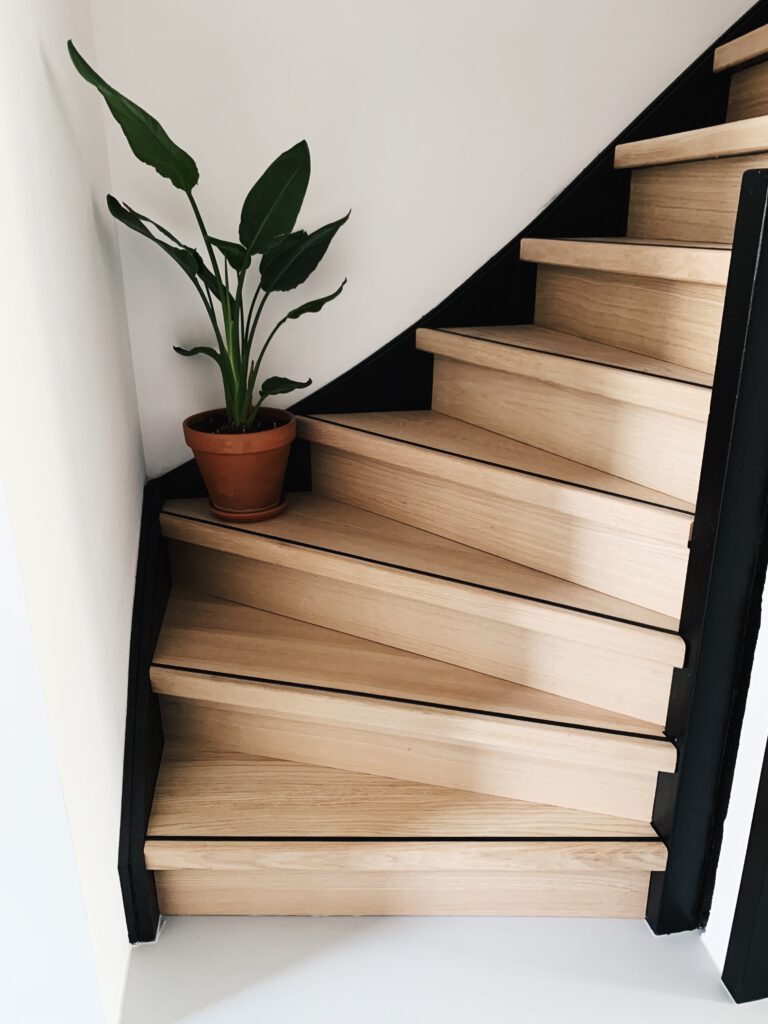 Give your stairs a brand-new look with this easy idea! Start by applying modeling tape to each stair step to recreate the desired shape. Once the shape is formed according to your plan, carefully peel off the tape and transfer it to an accompanying step. Make sure the shape is flush with the step’s end, and mark it with a pencil. Cut the strip down to size, and install it on your stairs to give them a fresh look!
The black semi-gloss lacquer finish on the sides of the stairs gives the illusion of continuous anti-slip strips. The oak steps remain untreated, so to keep them looking in pristine condition, you can do otherwise if you desire. Skylt (read:skilt) lacquer in three layers is a suitable option which is also commonly used for wooden floors.
The downside to the steps is that the bottom of the old steps may be visible when looking up. One thing, paint the staircase before covering it to make it less noticeable.
1. The Ombre Shower Tile Project Idea
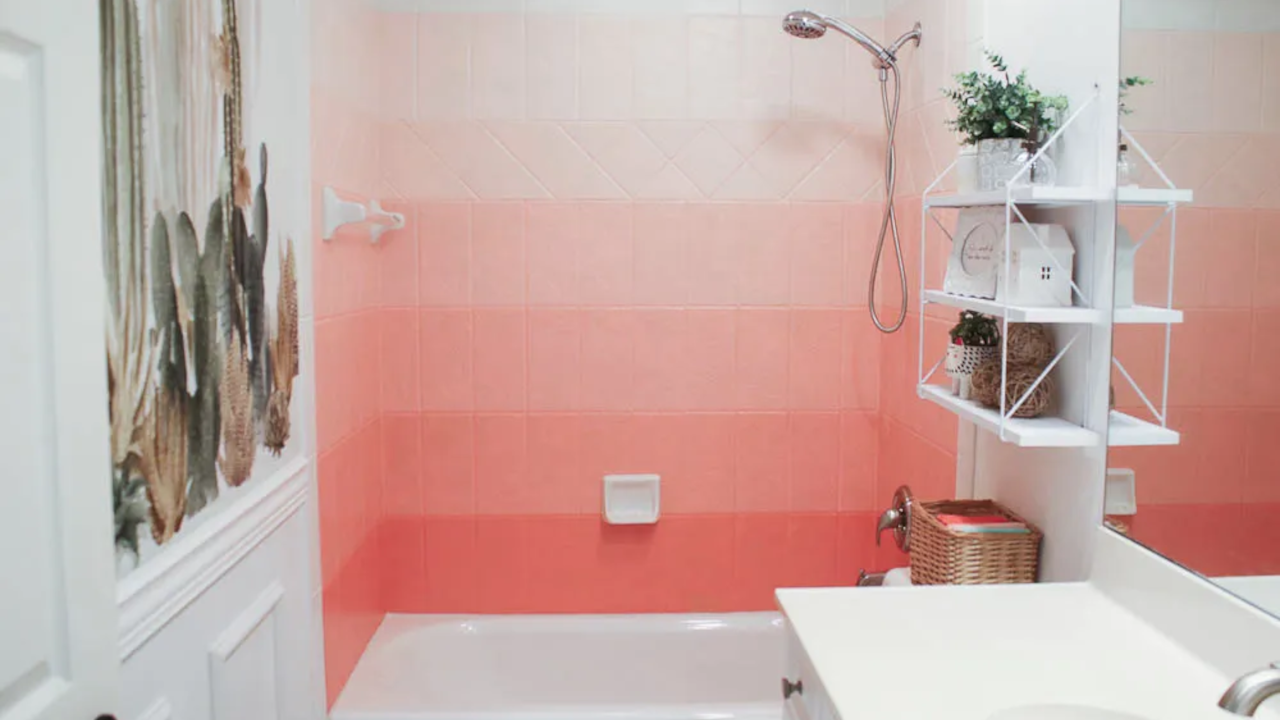 You can fix your ugly bathroom tile for about $60, in a second, by painting it with bold ombre pink. Earlier, prepare by removing old caulking, washing, sanding, and coating the tile with two thin coats of bonding primer.
Since you’ll use oil-based enamel paint, you must be careful because it is sticky and more difficult to work with. Here is how to create the six ombre colors: paint the lowest first-row coral gables straight from the can, add ¼ cup of water to the paint in a tray and paint the second row, do this for the third row too.
Then add ½ cup of water for each remaining row to get paler pink. Let them dry for a week before using the bathroom.
- Start by thinking of your memories in your house and how they have evolved over the years.
- Consider the improvements and refreshments you would like to make and their potential cost.
- Remind yourself that making small changes can have a big impact and that you can save money by doing it yourself.
- Brainstorm ideas for cheap interior improvements to help you get your dream house.
- Research DIY projects and online tutorials to inspire and learn how to do them (or follow one of the links in the reference section).
- Make a list of the projects you want to tackle and the materials you need.
- Start with the most accessible and affordable projects first.
- Take your time and enjoy making your house look better.
- Ask family and friends for help if needed.
- Take progress photos and share them with your loved ones.
- Celebrate the completion of each project and the overall transformation of your house.
- Enjoy your dream house and the memories you will make in it.
References:
12. Hgtv.com 11. Diyhuntress.com 10. Hanashappyhome.com 9. Thecreatedhome.com 8. Instagram.com/@theowenchronicles 7. Hometalk.com 6. Hometalk.com 5. Tanjavanhoogdalem.nl 4. Pineandpoplar.com 3. Magazine.nofruit.nl 2. Stylynnterior.com 1. Housemixblog.com